| Author |
Message |
|
|
| |
Post subject: |
Re: 1/200 IJN Fuso 1944 - card paper/3D print |
 |
|
pascalemod wrote: I like how in this scale, the paper model makes a lot of sense, with sharp angles hard to match in plastic. Yes, the lower hull gives away the paper origins, but most of the ship is pretty superb.
I always wonder how durable it is when made out of paper, will it stand up well to UV (neither does plastic ofc) and how much is it protected with varnish. I also think it’s those sharp angles that really make the model go from just a tiny version to a true 1/200 scale replica of the original. That’s what really sold me on this scale, even though it does take up more space on the shelves. As for UV protection, I paint my paper models with Tamiya paints, just like I would with plastic models, after giving the paper a good coat of clear varnish. So far, it works great, and I think with this kind of protection, paper models should stay looking fresh for a long time, just like plastic ones. [quote="pascalemod"]I like how in this scale, the paper model makes a lot of sense, with sharp angles hard to match in plastic. Yes, the lower hull gives away the paper origins, but most of the ship is pretty superb.
I always wonder how durable it is when made out of paper, will it stand up well to UV (neither does plastic ofc) and how much is it protected with varnish.[/quote]
I also think it’s those sharp angles that really make the model go from just a tiny version to a true 1/200 scale replica of the original. That’s what really sold me on this scale, even though it does take up more space on the shelves.
As for UV protection, I paint my paper models with Tamiya paints, just like I would with plastic models, after giving the paper a good coat of clear varnish. So far, it works great, and I think with this kind of protection, paper models should stay looking fresh for a long time, just like plastic ones.
|
|
|
 |
Posted: Mon Apr 14, 2025 2:16 pm |
|
|
 |
|
|
| |
Post subject: |
Re: 1/200 IJN Fuso 1944 - card paper/3D print |
|
|
|
I like how in this scale, the paper model makes a lot of sense, with sharp angles hard to match in plastic. Yes, the lower hull gives away the paper origins, but most of the ship is pretty superb.
I always wonder how durable it is when made out of paper, will it stand up well to UV (neither does plastic ofc) and how much is it protected with varnish.
|
|
|
|
Posted: Mon Apr 14, 2025 9:45 am |
|
|
|
|
|
| |
Post subject: |
Re: 1/200 IJN Fuso 1944 - card paper/3D print |
|
|
ModelMonkey wrote: A masterpiece in the making. Hey! I see you’re into 3D printing too — awesome stuff, BTW. I just model and print for myself, but I really gotta say, your prints and designs look amazing. Nice work! [quote="ModelMonkey"]A masterpiece in the making.[/quote]
Hey!
I see you’re into 3D printing too — awesome stuff, BTW. I just model and print for myself, but I really gotta say, your prints and designs look amazing. Nice work!
|
|
|
|
Posted: Wed Apr 09, 2025 2:50 am |
|
|
|
|
|
| |
Post subject: |
Re: 1/200 IJN Fuso 1944 - card paper/3D print |
|
|
|
A masterpiece in the making.
A masterpiece in the making.
|
|
|
|
Posted: Mon Apr 07, 2025 2:11 pm |
|
|
|
|
|
| |
Post subject: |
Re: 1/200 IJN Fuso 1944 - card paper/3D print |
|
|
pascalemod wrote: It looks very impressive, no doubt and very sharp. It will no doubt look fantastic in person.
Im thinking about the setup around the barrels near the blast bags. Are those from detail set meant to emulate gun sighting / calibration devices that were not used in combat, or they are indeed an all time installed part of the barrel? These are devices used for gun loading drills. Unfortunately, I don’t remember the caliber, but they were regularly dismounted and installed using cranes only for the duration of the loading exercises. The only permanent parts were three rings on the barrels for mounting the entire setup. On the first gun, you can see a complete set with training "guns," while on the other barrels, only the mounting rings for these setups are visible. [quote="pascalemod"]It looks very impressive, no doubt and very sharp. It will no doubt look fantastic in person.
Im thinking about the setup around the barrels near the blast bags. Are those from detail set meant to emulate gun sighting / calibration devices that were not used in combat, or they are indeed an all time installed part of the barrel?[/quote]
These are devices used for gun loading drills. Unfortunately, I don’t remember the caliber, but they were regularly dismounted and installed using cranes only for the duration of the loading exercises. The only permanent parts were three rings on the barrels for mounting the entire setup. On the first gun, you can see a complete set with training "guns," while on the other barrels, only the mounting rings for these setups are visible.
|
|
|
|
Posted: Thu Apr 03, 2025 6:35 am |
|
|
|
|
|
| |
Post subject: |
Re: 1/200 IJN Fuso 1944 - card paper/3D print |
|
|
|
It looks very impressive, no doubt and very sharp. It will no doubt look fantastic in person.
Im thinking about the setup around the barrels near the blast bags. Are those from detail set meant to emulate gun sighting / calibration devices that were not used in combat, or they are indeed an all time installed part of the barrel?
|
|
|
|
Posted: Thu Apr 03, 2025 5:23 am |
|
|
|
|
|
| |
Post subject: |
Re: 1/200 IJN Fuso 1944 - card paper/3D print |
|
|
|
Thanks, guys, for the kind words—it's always motivating me to keep going!
Thanks, guys, for the kind words—it's always motivating me to keep going!
|
|
|
|
Posted: Wed Apr 02, 2025 1:59 am |
|
|
|
|
|
| |
Post subject: |
Re: 1/200 IJN Fuso 1944 - card paper/3D print |
|
|
|
Great, great work all around.
Great, great work all around.
|
|
|
|
Posted: Tue Apr 01, 2025 4:03 pm |
|
|
|
|
|
| |
Post subject: |
Re: 1/200 IJN Fuso 1944 - card paper/3D print |
|
|
Very impressive. Love those skirts  Well done! Very impressive. Love those skirts :cool_2: Well done!
|
|
|
|
Posted: Tue Apr 01, 2025 3:50 pm |
|
|
|
|
|
| |
Post subject: |
Re: 1/200 IJN Fuso 1944 - card paper/3D print |
|
|
Hey, Since the beginning of the year, I’ve been working on the main artillery for IJN Fuso. Below is a brief summary of the past three months. In the first photo, you can see the barrels from Haliński's accessory set (I’ll talk more about the barrels later), along with additional parts that I designed based on elements from the model but printed on a 3D printer.  The next two photos show all the elements of the turret frames, plus the axes—already removed from the supports—on which I’ll mount the barrels.   I sanded down the clamps on the barrels that held the training mechanism mounts because, they would have interfered with fitting the skirts, which I wanted to print in resin.  Here’s an issues with the barrels: one of them was 0.8mm shorter, so I had to extend it to match the length. The barrels also had slight differences in diameter, which made fitting the skirts quite a challenge.   Ballast in the turrets—here, I admit I borrowed the idea from polish forum.  The next few photos show the underlayer and the assembly of the main components.      I also started assembling the rangefinder covers. To help with this, I designed and printed a small template to achieve the correct profile of the covers (probably thermal covers?).   Since the entire model was going to be painted, I wanted to add more texture, so I also printed the sheet metal joints with rivets.   AA gun platforms.   In these pictures, you can see a screenshot from a fabric simulation program (Marvelous Designer). If anyone’s interested, I can write more about it later. The advantage of this approach is the realistic-looking skirts; the downside is that the barrels can’t be elevated. You can work around this somewhat by printing skirts in different raised positions, but they’ll still be fixed in place. However, I find this solution interesting and worth considering.    Once I had added so many details to the turrets that handling them without breaking something became impossible (I think I broke the ladder railings about ten times), I finally decided to print a stand for the guns, which allowed me to continue working on them.  The guns assembled and painted.    After weathering.   and in place...     The next stage is the main superstructure—the famous pagoda. Enjoy watching! Hey,
Since the beginning of the year, I’ve been working on the main artillery for IJN Fuso. Below is a brief summary of the past three months.
In the first photo, you can see the barrels from Haliński's accessory set (I’ll talk more about the barrels later), along with additional parts that I designed based on elements from the model but printed on a 3D printer.
[img]https://lh3.googleusercontent.com/pw/AP1GczP3Zy0dfAQqdIa9HBANWHNe1VWQt-g12qtH4oEMJ5l_6VmUKjyUklP98zRsbzk3zdOxVNEIAY-gKU7yUFDzi34lLyEztUpjiBvKL9yrFg-pzZyO6_YXqtW5kscBvFQwe-5vbMWgMEpwpeCubFP4L8ZD=w1500-h800-s-no-gm?authuser=0[/img]
The next two photos show all the elements of the turret frames, plus the axes—already removed from the supports—on which I’ll mount the barrels.
[img]https://lh3.googleusercontent.com/pw/AP1GczOjoO6qtEe26i-A4sTT_FrQhQpgkbd_mLCJyvHIZsMSvobY8Vkv-rXCoA_GLCxXkzqS_KMtDyNOaBHu8zJVobvHiKPlhUuQS06_W5Mwhm9Nf_RSR86Idl7SOdmilKHdVZQmnJGNJIeUSARACnbiA91I=w1500-h800-s-no-gm?authuser=0[/img]
[img]https://lh3.googleusercontent.com/pw/AP1GczOqFI0IaDrMaqbj5HsKA4w0Ty7jSLmAmebecwdejP7HQlel76OSHFsqqMxLp1DnYilJ1uXmqHXbG3wIxCD2jX2ErQyGVQ0pHF8LRVnECYJmPDFB2BClCzuecKzYyY3BfXZ0_GBWKRVo2EmTgtQcJM6R=w1500-h800-s-no-gm?authuser=0[/img]
I sanded down the clamps on the barrels that held the training mechanism mounts because, they would have interfered with fitting the skirts, which I wanted to print in resin.
[img]https://lh3.googleusercontent.com/pw/AP1GczPl54gYH7yBSVjx4SK2EESe6oetBOwj5P6N_WNYcZr4D_PicYEKoAzFFMnyOQZWg7ZEaP_rafzQRsRCmBGk2YHAzHiWk3Wckj-RQBEN2H8hTySY3JkBmbKsY2NWTy26VyJ27Q2Zx29WfwwKTKQcfpoC=w1500-h800-s-no-gm?authuser=0[/img]
Here’s an issues with the barrels: one of them was 0.8mm shorter, so I had to extend it to match the length. The barrels also had slight differences in diameter, which made fitting the skirts quite a challenge.
[img]https://lh3.googleusercontent.com/pw/AP1GczNOvILr06kHe3CuF7GSFlJyiPOh7gkwezDxv5LKJ_KXobily3q8lE-BJR-K6wHAZu1YXJk0PvkbQdJ5ItRhGzEqtlAiZGSr_KEEp67eyeZNJ6PesFKVDOhqanchW_QZWBtU_4pJEt-fOhKw13WUczSE=w1500-h800-s-no-gm?authuser=0[/img]
[img]https://lh3.googleusercontent.com/pw/AP1GczOzVzfzBgLyAEtRY2DjoSosviJhEcT_N_rwEPf0T_YGi_bFpSJ-e2YJTdg36-zyU08K8FT0EIbMBjIHknn-TLQznIO-OeEkKIoZrUc60_VbXM0CpHhirPMp5vXbcV0P3ffM5yLMHE8rY-w9-2PuaGIZ=w1500-h800-s-no-gm?authuser=0[/img]
Ballast in the turrets—here, I admit I borrowed the idea from polish forum.
[img]https://lh3.googleusercontent.com/pw/AP1GczPAf9ROkwP2eVkT-t9g_M0AwoHg-Geu_aERqqvQsZ3xHxq5KlfFvnzQ3q3Kz08aNSGLvxLa_5gndIXcbWXZF1rrOvDZ8HCSxvWfm8LHseXKY12I6Z2j0hlRc0wdDHcRTCKcS5-NwoHeXD081LlVA8Cl=w1500-h800-s-no-gm?authuser=0[/img]
The next few photos show the underlayer and the assembly of the main components.
[img]https://lh3.googleusercontent.com/pw/AP1GczPbg7R1HaOsvxavxExgvAXdXVmYVyMz9X0f8V3yh5-XE8nknv1Bs4yyqHg3ObMsLVee8nQ3VcTJM7y_Gj_Rj6SQMaidwrcxXP_sdePhi_Etsx3qnJUdCcG9pVDSeTvrGwgNhRgAcjTtlJmVrPuUIgaV=w1500-h800-s-no-gm?authuser=0[/img]
[img]https://lh3.googleusercontent.com/pw/AP1GczM4Ph-9v3xQZI-2-5BzWelRMwI0SXDqRBOJBwONysmB4eYUS69vg47s19eI9CzHm80DGHZWG4kM6UEvnOIhRmWqINNfiola921osKdhLP_vmVMYgvwfJuCUyqqA_UIqnnVmgObYbmpogVm4pndZZ1Tz=w1500-h800-s-no-gm?authuser=0[/img]
[img]https://lh3.googleusercontent.com/pw/AP1GczOmgqgCYbYSljg9im_I9jHXhx09mfvNC3LdHcNW4ZeHaJYooZeAtOLbunyEiplTHsuvo1mInuXzjelEuGJqGm6a3DJ8wnAyKJ7YCVzv7kUYlL6Kl3OcSRXSXv2zUxyu3nefwvw5bgoilqkntq_Nv7Qw=w1500-h800-s-no-gm?authuser=0[/img]
[img]https://lh3.googleusercontent.com/pw/AP1GczOhKTpqVpcARS5VLHaLRUw49KsiXVpzlXRh_wfhfDl2U4m-qZkfLDYlYPfu2hibfOhV7LHNVBRMb6QsjLVtLzg0_G8_-K2lFoIS6HhhzRMLVu5iKtU9AMBxTBXpjKHjjwv-5YVMZJ_nTlnOWeYvHlS5=w1500-h800-s-no-gm?authuser=0[/img]
[img]https://lh3.googleusercontent.com/pw/AP1GczN1uysQVTjHNlyiED_HDB4M7ZFRyT0xdsLIM9L0ErLx4cqLqlilCOSQsYU3k2yqSvc-F2_vOSMAqlNQ9c-K8PPgeJ_hqlYOBOyk0EraMjNGqOzYDxXUuize49u3-O3w5oy5zkwBdndMtlKxtVVDJnKv=w1500-h800-s-no-gm?authuser=0[/img]
I also started assembling the rangefinder covers. To help with this, I designed and printed a small template to achieve the correct profile of the covers (probably thermal covers?).
[img]https://lh3.googleusercontent.com/pw/AP1GczNI9iDc4S9SmeeggK0JQGick_zmJ3XT7bXVnJRC_AoF5CvodaAZaF2-5_rrCdzFdiszzP6-J-TM8I0Boy5Sff1VdSTcXP-Vn7-D380ivfyqrZ6qd21gWqMe3pwwilDrlnX8uZ_uug4JVY-NYrC8fB4n=w1500-h800-s-no-gm?authuser=0[/img]
[img]https://lh3.googleusercontent.com/pw/AP1GczOpIKxvSiWJ9R7s03rqddOMg8clAEyPUrtq6U4sfDcc7h_qLUu_Nuri3V7TxOYOlh7hkI4150y-r-rwvlPQP9vzD7hpbvw6WBgq4fH_PSfHEpFOSk3Kz6EcRq4i3DXMWlOJedZ2X_XTg7r2BEmKurQJ=w1500-h800-s-no-gm?authuser=0[/img]
Since the entire model was going to be painted, I wanted to add more texture, so I also printed the sheet metal joints with rivets.
[img]https://lh3.googleusercontent.com/pw/AP1GczOGoIRavUPuHMZZYqNEEK_cKMOvQOGGc4f181OutZUjMIo1Jm2Rg9dxbjS3GrTydmRw6q2XywOgHPycCnV_srccwMtX6eBPvKjJr1ke2XwWqrDLnm_Mv4OTwOfTR_9tmbCAr51_9mgh_gJuOqZYU_om=w1500-h800-s-no-gm?authuser=0[/img]
[img]https://lh3.googleusercontent.com/pw/AP1GczMTWNX9zGgJY7UDglBfbT00kJOYoyHgGnyElUozXqGMSpRFVpOSs3_2gNzpwNQHLQwpfpi175pQyUGF5eSy0hxlwK3jeAgRo4wVeyu36fosozU-92QZEN1xtQa-CU-31co7xkshi0a4guz5Qgec4VfW=w1500-h800-s-no-gm?authuser=0[/img]
AA gun platforms.
[img]https://lh3.googleusercontent.com/pw/AP1GczN2RqT0Q4zbvqmq21bimEvZ49YV2Eda4fzH7vbdf7aFDGeThE_xinRIbh3TJm4DDKIOgoBvsjWe-xZBRGjf24FH4v714eM4mCM9j0SjIuPedlauLA23BWrC9ZMVsu-P9geeMNZxXr_Ccukd_xfABjXO=w1500-h800-s-no-gm?authuser=0[/img]
[img]https://lh3.googleusercontent.com/pw/AP1GczO61VQqDxPtZjDRFONlQ-0SackNhOWeC0VE2f5nzUFGGgSrIjLrtln5_2ZPi3DQNjJcFehCOIKZi3DOtO_F48BCnWePdEdQtelNhotdGdlBnb9X_1-Ndw3czIYRUTQMZd-U0veXeuHtZf-c7U6qCllD=w1500-h800-s-no-gm?authuser=0[/img]
In these pictures, you can see a screenshot from a fabric simulation program (Marvelous Designer). If anyone’s interested, I can write more about it later. The advantage of this approach is the realistic-looking skirts; the downside is that the barrels can’t be elevated. You can work around this somewhat by printing skirts in different raised positions, but they’ll still be fixed in place. However, I find this solution interesting and worth considering.
[img]https://lh3.googleusercontent.com/pw/AP1GczPWHrnliQDMeTw27UrLhbgBn6lWiPPg8ooHF06IbugE9aQy4kBhEQZdqKK_OOg17PYst0P48CuOzSp9holxXk_Jc727bEWRxYGDVhMu4IVMzuwjQpzSRKovURr7rO39IfBTw8aisy4j80AucM3QTL1e=w1500-h800-s-no-gm?authuser=0[/img]
[img]https://lh3.googleusercontent.com/pw/AP1GczN76zKIT274NnC6IXF0CJSJ3B157WyG6xgqE5GkrsfsPZIB0MNqHLO6Ku499yjhnDF5gSsgfGdTqISpbNmIpuYfcEmsWjGYgc5qM8ZGAxutbfVJP6hgzcidIAmHp0g4CV51pNmnei6cFNdpSi9wfYdK=w1500-h800-s-no-gm?authuser=0[/img]
[img]https://lh3.googleusercontent.com/pw/AP1GczO29Zy6SpO56X5TNi0TZuRs-a8mRxrtfpiu8UQBYeh3YQ5ze7K5J7gMhSLMkhFcZtkFXvTh_KoYYJiW8jqxskd1ReZX17FILUu5mTX6iKZZjzQl5EVMMMV6q9YPPglVwkQQv4gkQenU66lraTO2pIdb=w1500-h800-s-no-gm?authuser=0[/img]
Once I had added so many details to the turrets that handling them without breaking something became impossible (I think I broke the ladder railings about ten times), I finally decided to print a stand for the guns, which allowed me to continue working on them.
[img]https://lh3.googleusercontent.com/pw/AP1GczNATRWvKpLOZ7BnbwzPqVYRSSkfm-uH7jW5kj2yyQGPodoqqYqZYcWH1vG5nB66xIN2J_z2TEPtxmOmXssvPfWJiXzWJV4K1--xYJmns0UTBKla1KH-zkjgc2EjPePrQbgMDUwase-80tgFMw4DV0L7=w1500-h800-s-no-gm?authuser=0[/img]
The guns assembled and painted.
[img]https://lh3.googleusercontent.com/pw/AP1GczMiKGWmeEHo0gxnow0jStmLyU-dnE_Uhdvy6kmJhlDaGu5gzatw3H-Y7rYlh2gSJjRKLkdJr-F3lsPQsky62XU4LS90D5yBFYie8CAZpAC24i_Q-nWA7NKAreP7fcYODMQlVPY9ldlEi1ToBIlayzhy=w1500-h800-s-no-gm?authuser=0[/img]
[img]https://lh3.googleusercontent.com/pw/AP1GczNotTwZCoRLjfhyRlz2luvU4HNW1r4a-SlYI7rWN-tzvlPa-wn474ETpSoEGxv1BMUgLHBxyH64GJDOlp8xRKbEltE1Gf79RhwqdAhHGjWGVMRchSALpDKAoZ3VT5LmQXT_P_QoOSUnCYclTH30pJ0U=w1500-h800-s-no-gm?authuser=0[/img]
[img]https://lh3.googleusercontent.com/pw/AP1GczMo5VERdyiZNB-lP9Ehv_j_fZYiaIhDpFwmPm-zQKAwWdyxyMvH-OVJUDVjIqqVHchseIi65lwbrBU6pO4owDexcUXt11mH1FLxbcDxQQGnFhr4ywz224eCx2m0o6nsD33XiiQR5wi6jPMDB1x3oWDL=w1500-h800-s-no-gm?authuser=0[/img]
After weathering.
[img]https://lh3.googleusercontent.com/pw/AP1GczPGV74IU-COKTu8F9RSnatdggPYQ8F3-IDK2QOBrW9WvZaKSxE24SBgB_G474vODwOGEVEsWBQP3EfwnSPVxcqEvLRPfc6aY04IZ2sLMaTwbFDaVabFLFvQphBpM7i3TXiYQ1NZ25H_eFXxo0ObGbv_=w1200-h800-s-no-gm?authuser=0[/img]
[img]https://lh3.googleusercontent.com/pw/AP1GczPvSueoRfC26rizVVq4kxdKpUSEcoU0KnzRbOQblR_JLQFmsuOXHcdxtrVLRLLgoLs1l8LySxfLBj7a4MBMe9lW6oX-Koqfhp_9yQwKgkZ1MjfOHqRysucu2Wk6YHnr1MuZF24CYK00GwJUQMnhFFUa=w1200-h800-s-no-gm?authuser=0[/img]
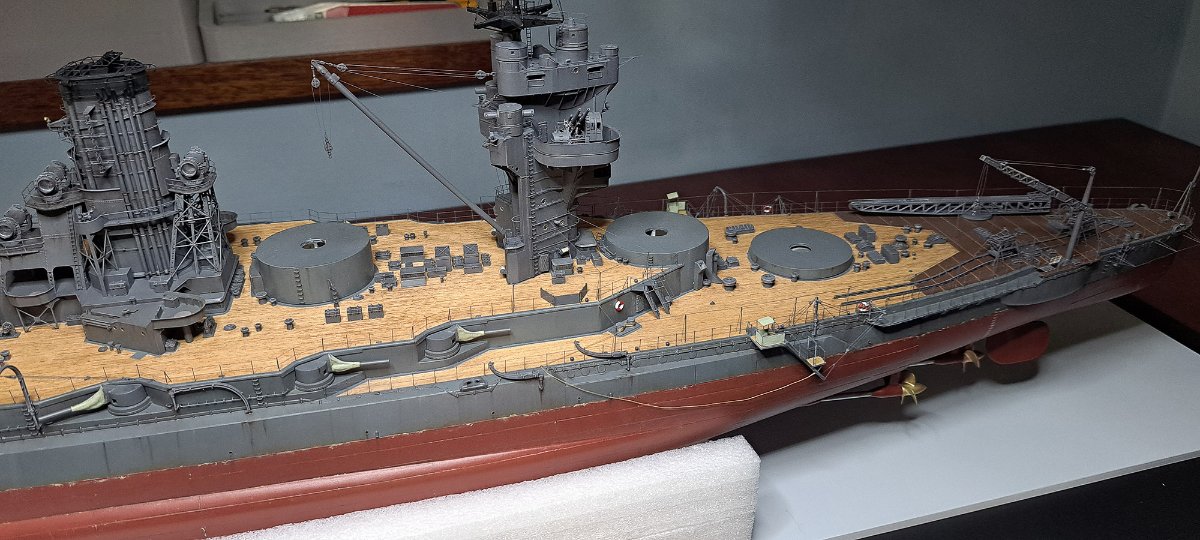
and in place...
[img]https://lh3.googleusercontent.com/pw/AP1GczOk4n9HVxbPdqZfS_ZzA-D96fH8E5w0-Q3tAnjDLoWAZWukuM5rsK-ch8FMGGSiKZ-NoyIpkVc_XkYB9mj7cTbIA3NLsWdYj66yN7ui2aJFQcy89jDH0FD2aRn-y4CgExv8PSOn6fZd-8vvCCX1e6c2=w1500-h800-s-no-gm?authuser=0[/img]
[img]https://lh3.googleusercontent.com/pw/AP1GczOBCfcQTXVMG9P0ti4lZ6q-NUpBKX_CHMLleJwarFYWymdM0ykbMay0gwoUsPmKAfmWBX8WbonAXBjI5iA1zoYJs2numRyU5JpVbO9D6PLK-E801WRsQz3FwDYNiO3RplBR_cv_oPjjPoEEN6zj0fKa=w1500-h800-s-no-gm?authuser=0[/img]
[img]https://lh3.googleusercontent.com/pw/AP1GczN2E1cJGuU_SetecFJid3FhCfbJOUs71BwbLrYR0Z8ospv2vqrvLHmu2XrnHVPyt0zWj5zGnHqjf1cuUW7LR9oHx2zroqx1-0-MGkMgq8mY50l1Yjit-0C9Q06Nz1grjjYJQYnXrjIeJH1lqTw_emFb=w1500-h800-s-no-gm?authuser=0[/img]
[img]https://lh3.googleusercontent.com/pw/AP1GczMkFtqmM_H5uS8eoMI5otuLxSgxXQx9LNMnXFSaKQrNWYW2WjhHldUalEGqpzsIbofQiVok0gcUKt7c-6LJQ3iTF22lZGR6qDex6UfyIVUw2Moy-7NkIWU1tNOAfy_hYG89BTN2Xr8AsO7RB8oWB6YB=w1700-h588-s-no-gm?authuser=0[/img]
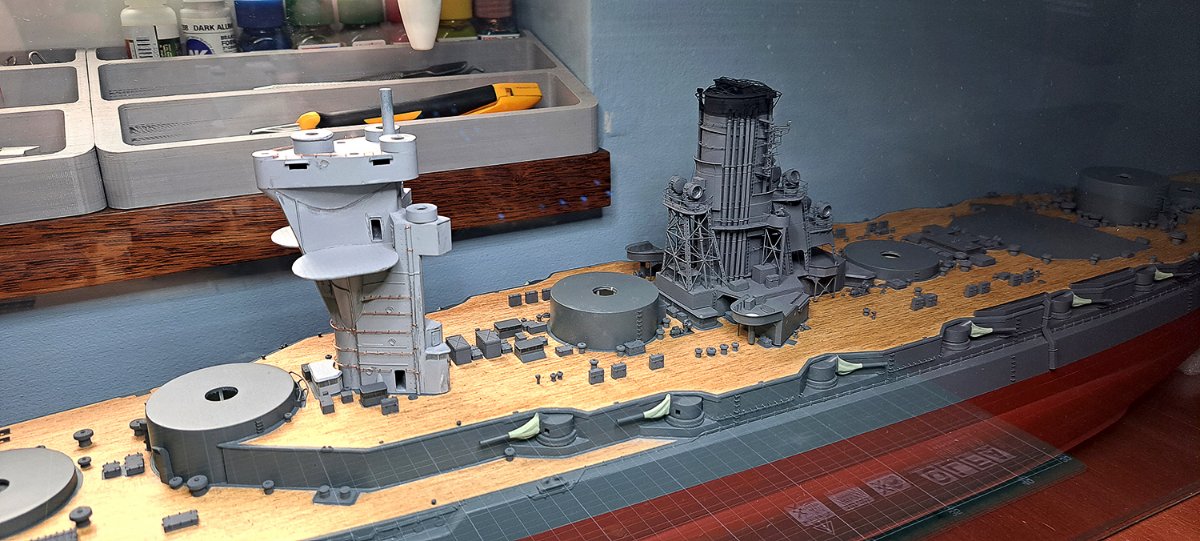
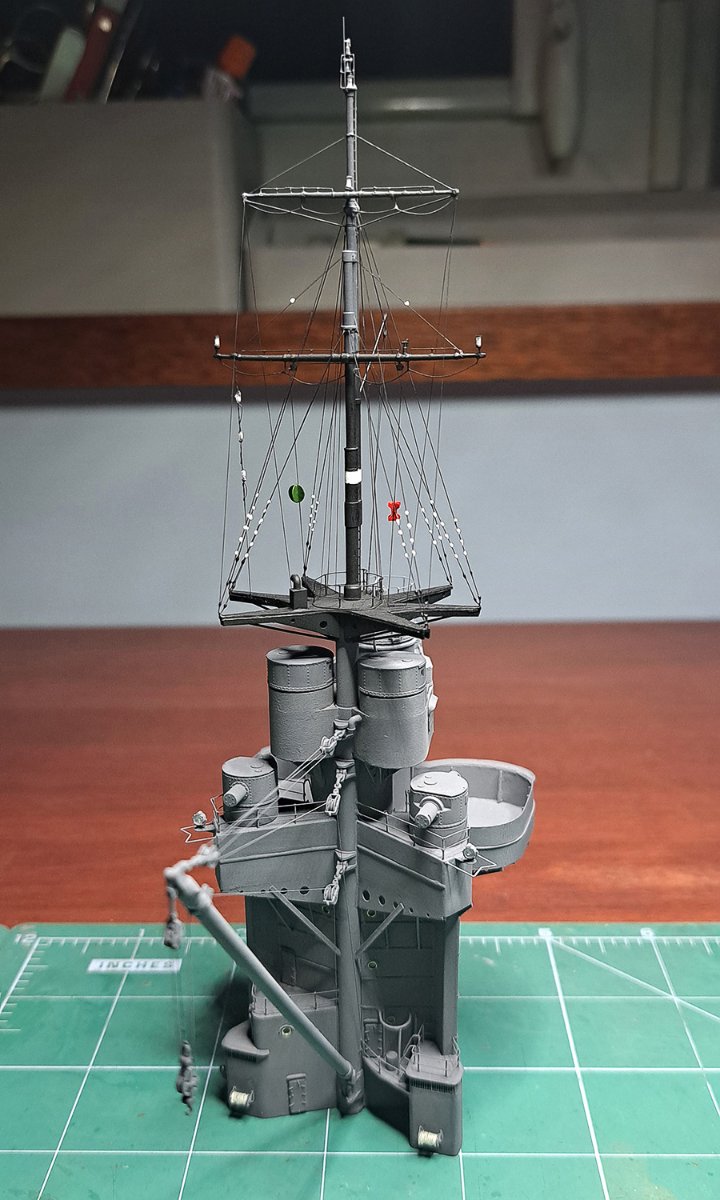
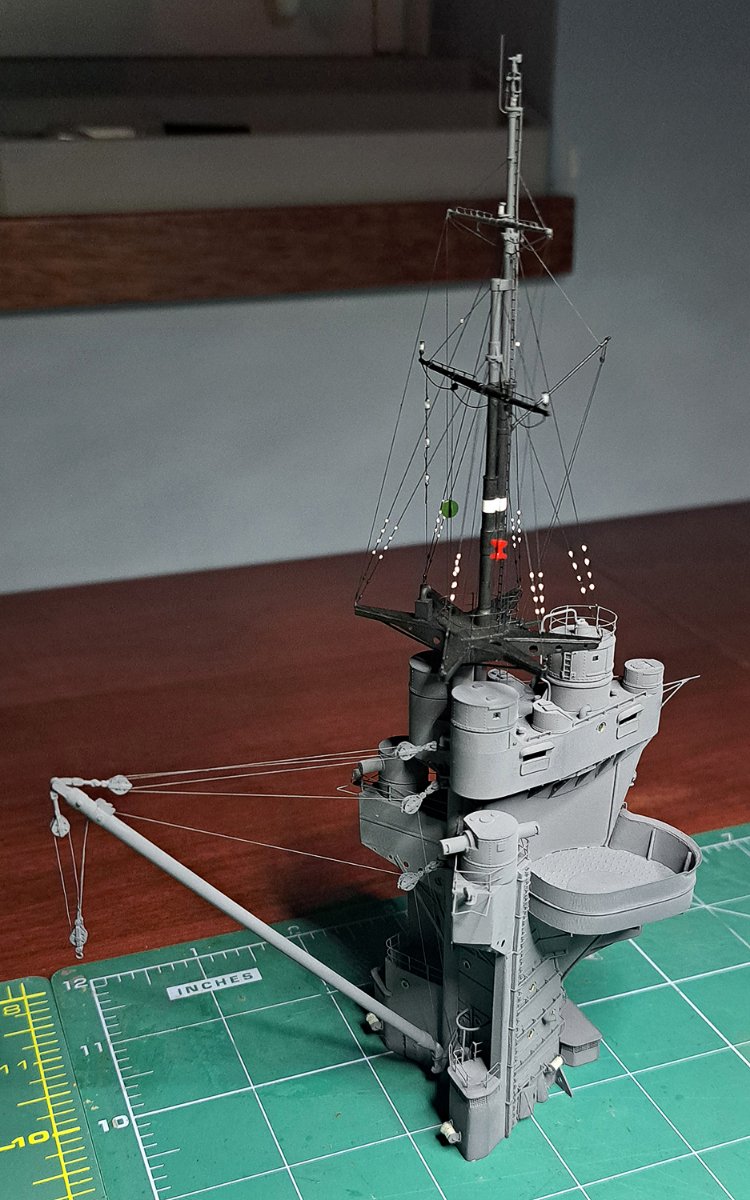
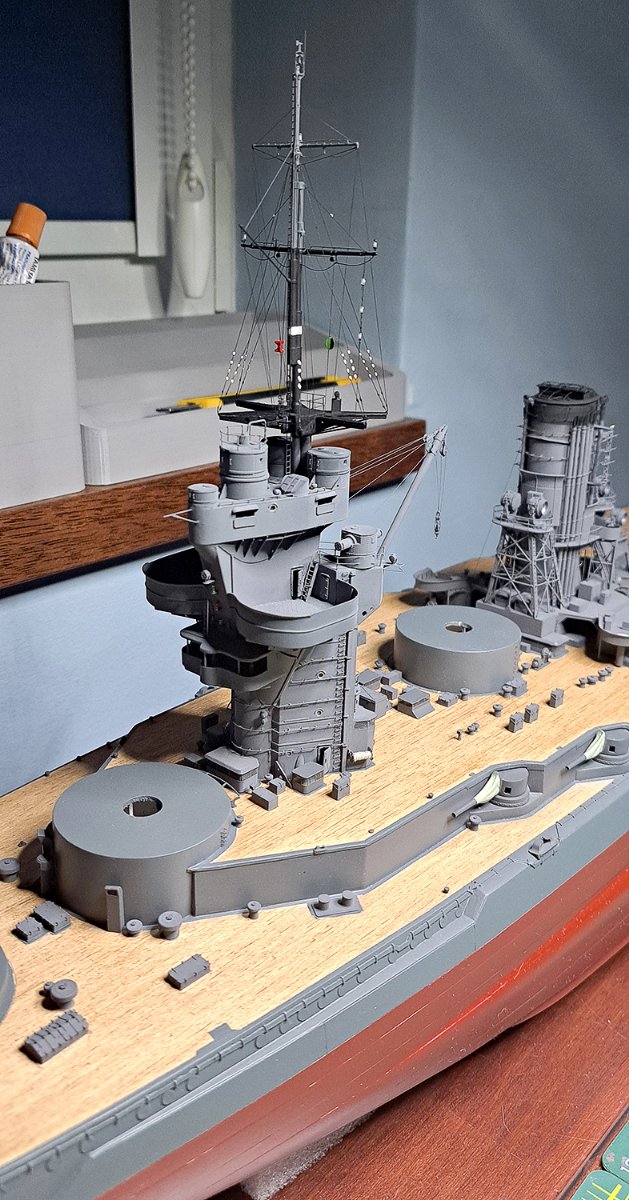
The next stage is the main superstructure—the famous pagoda. Enjoy watching!
|
|
|
|
Posted: Mon Mar 31, 2025 3:21 pm |
|
|
|
|
|
| |
Post subject: |
Re: Battleship IJN Fuso 1/200 - card paper/3D print |
|
|
|
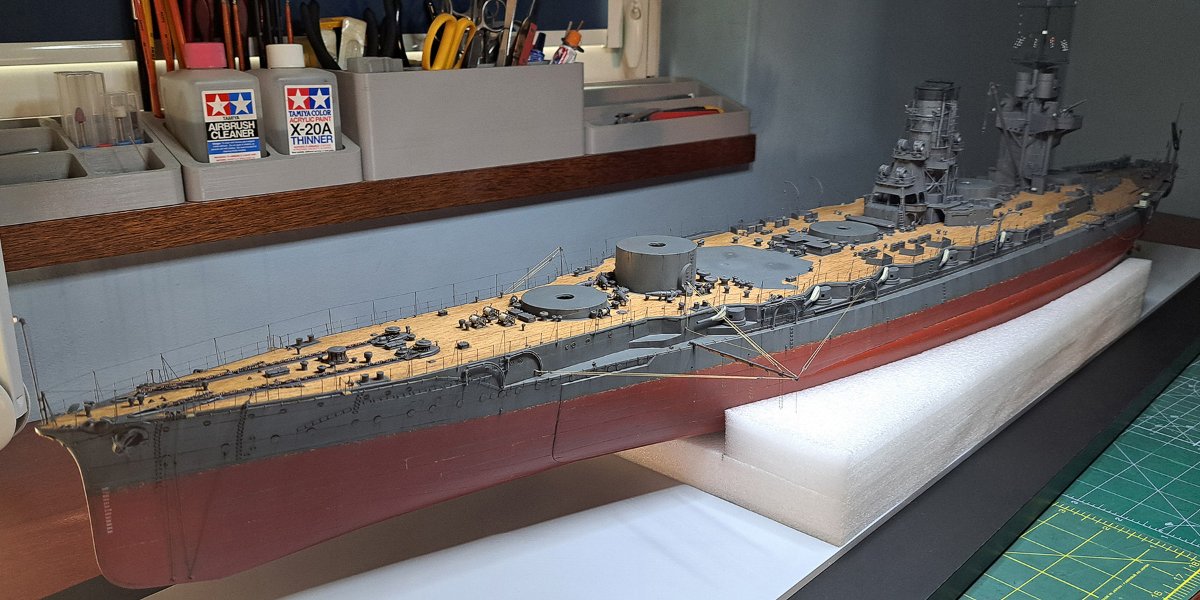
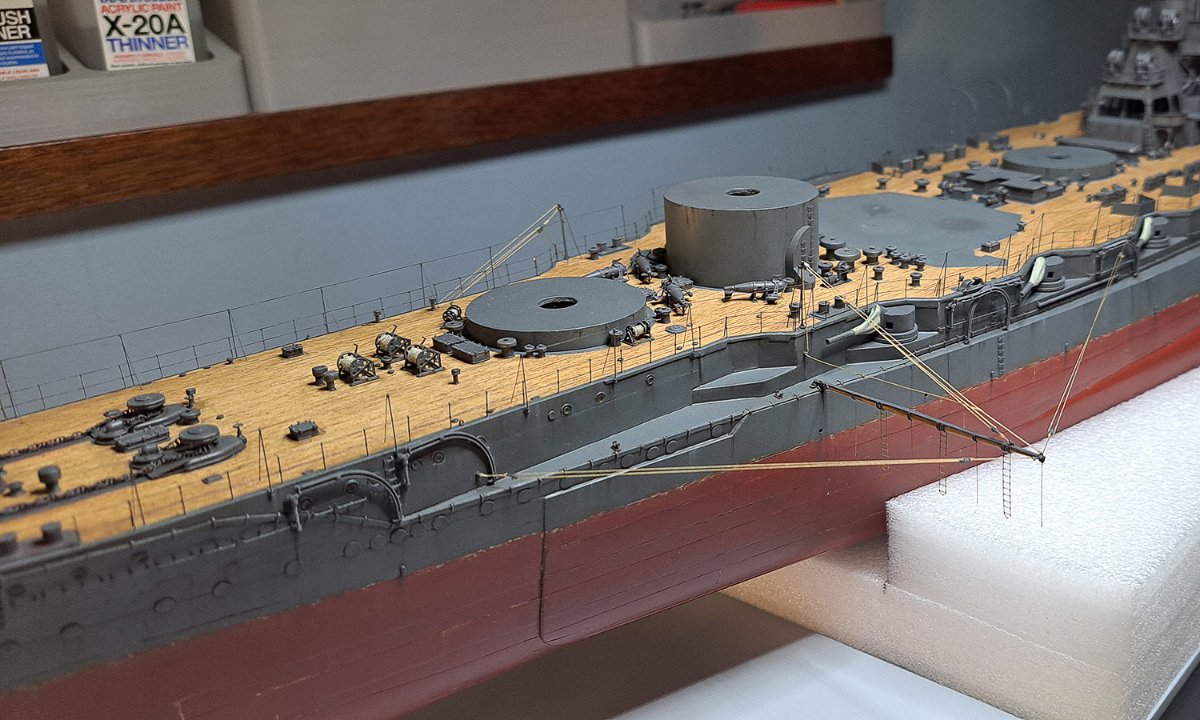
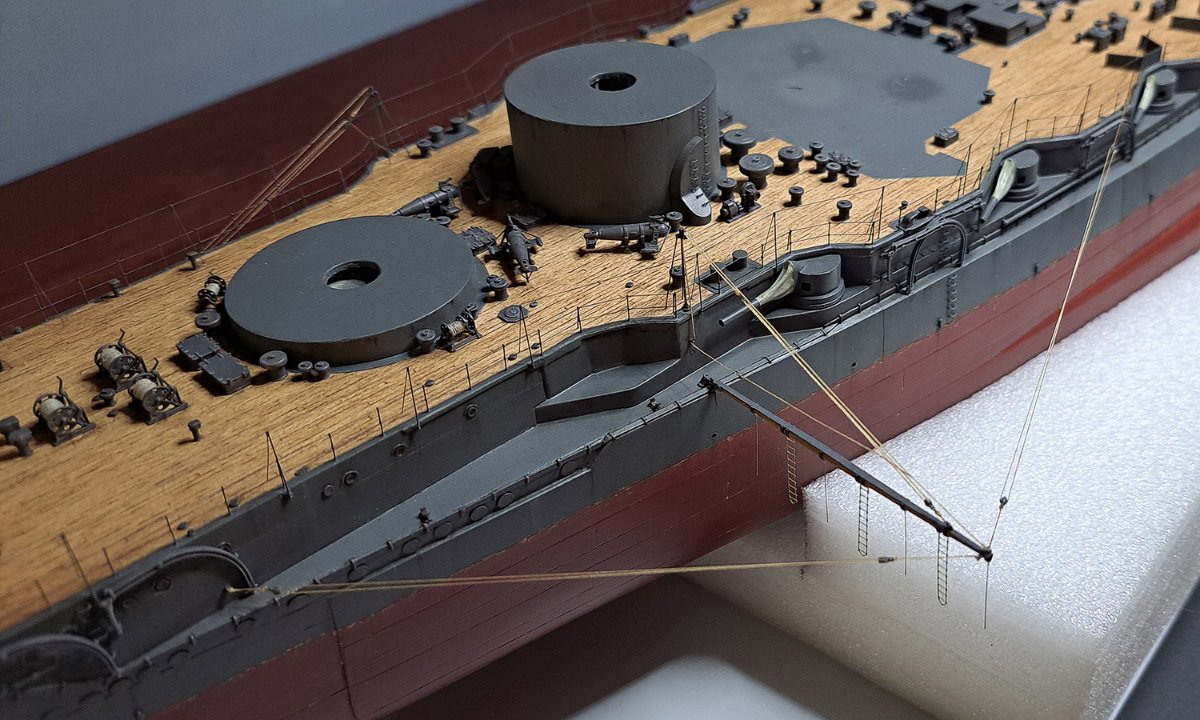
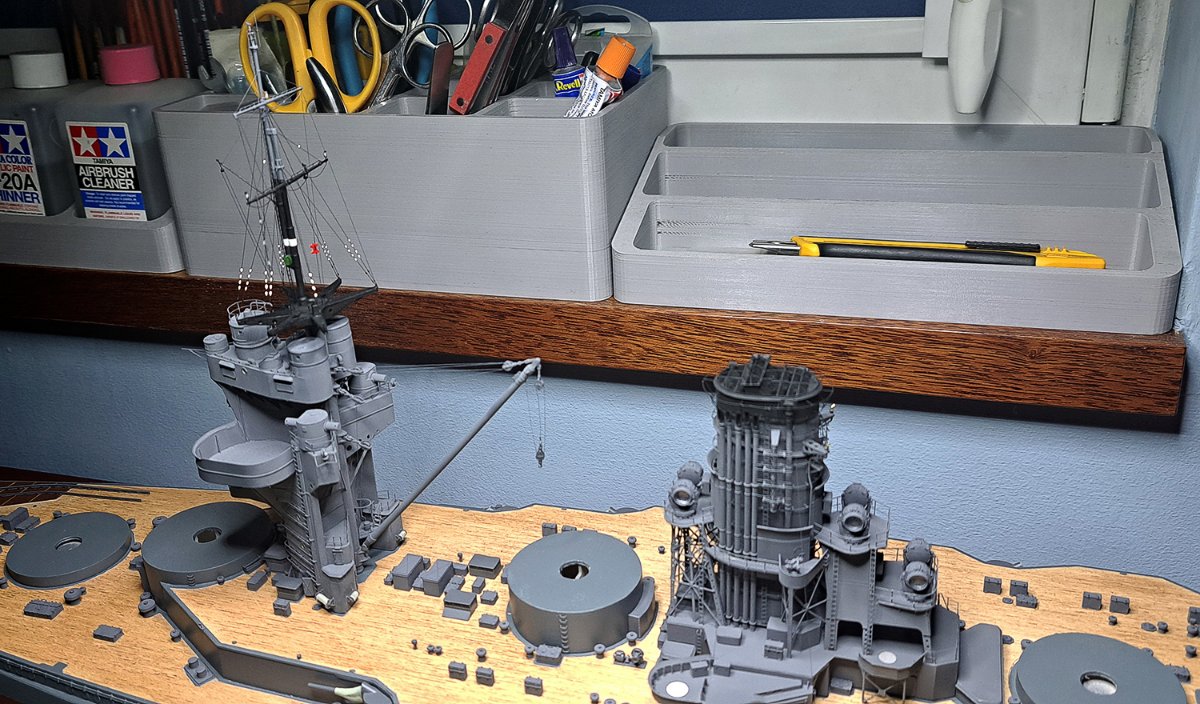
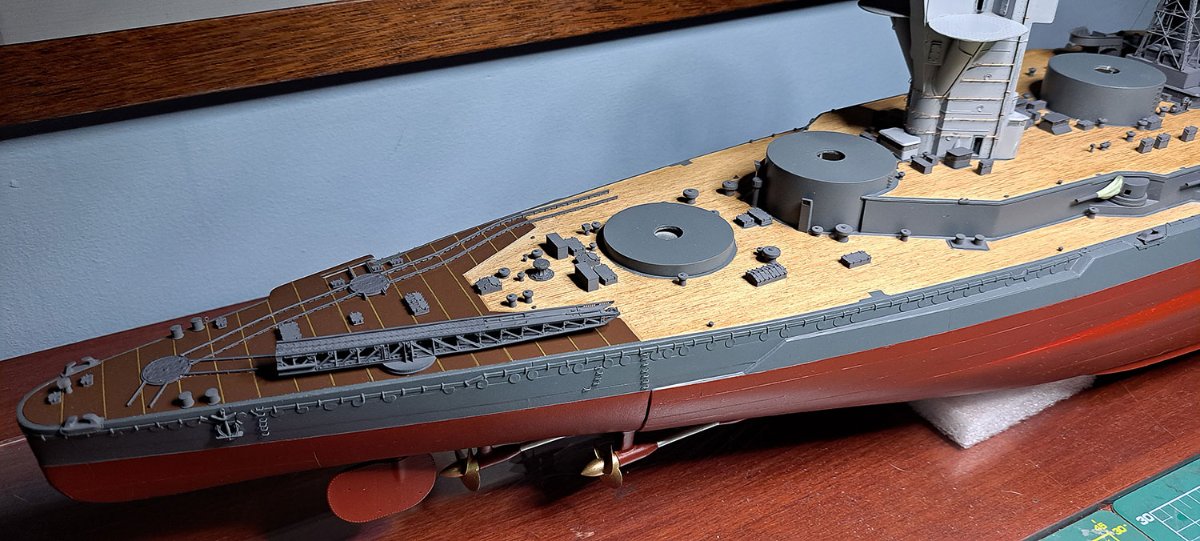
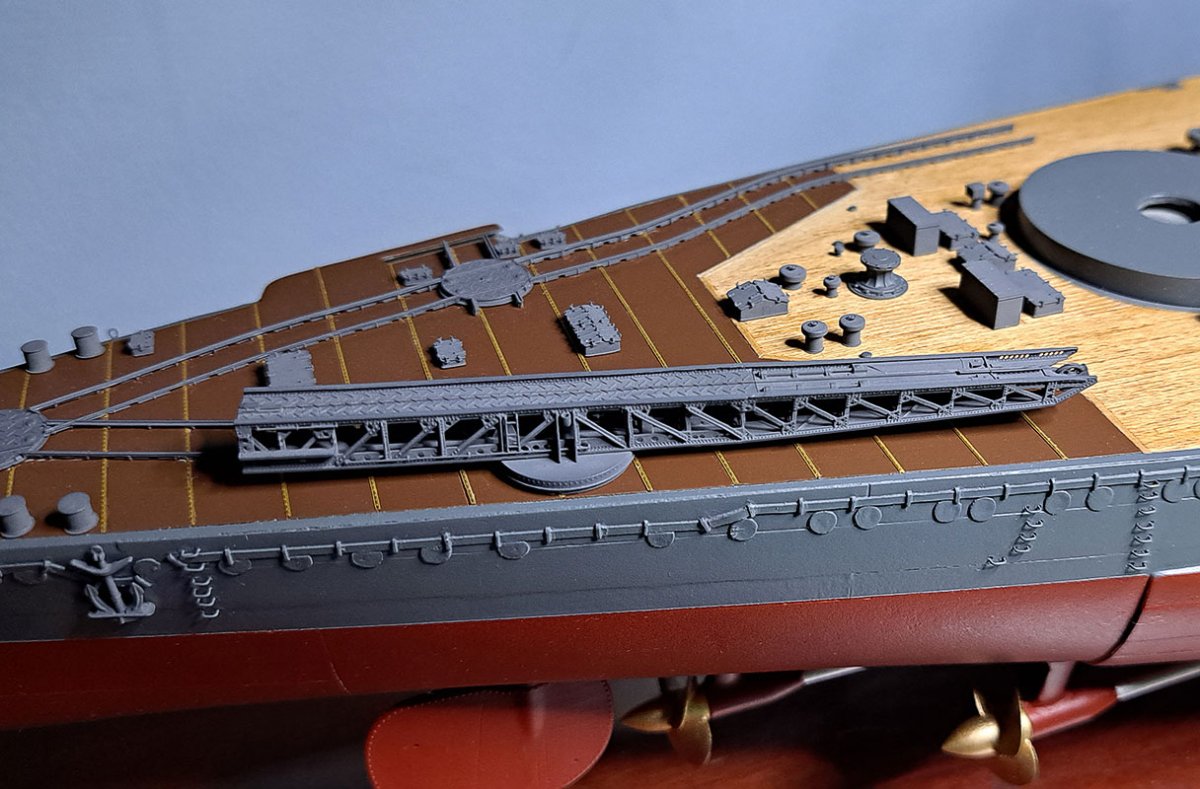
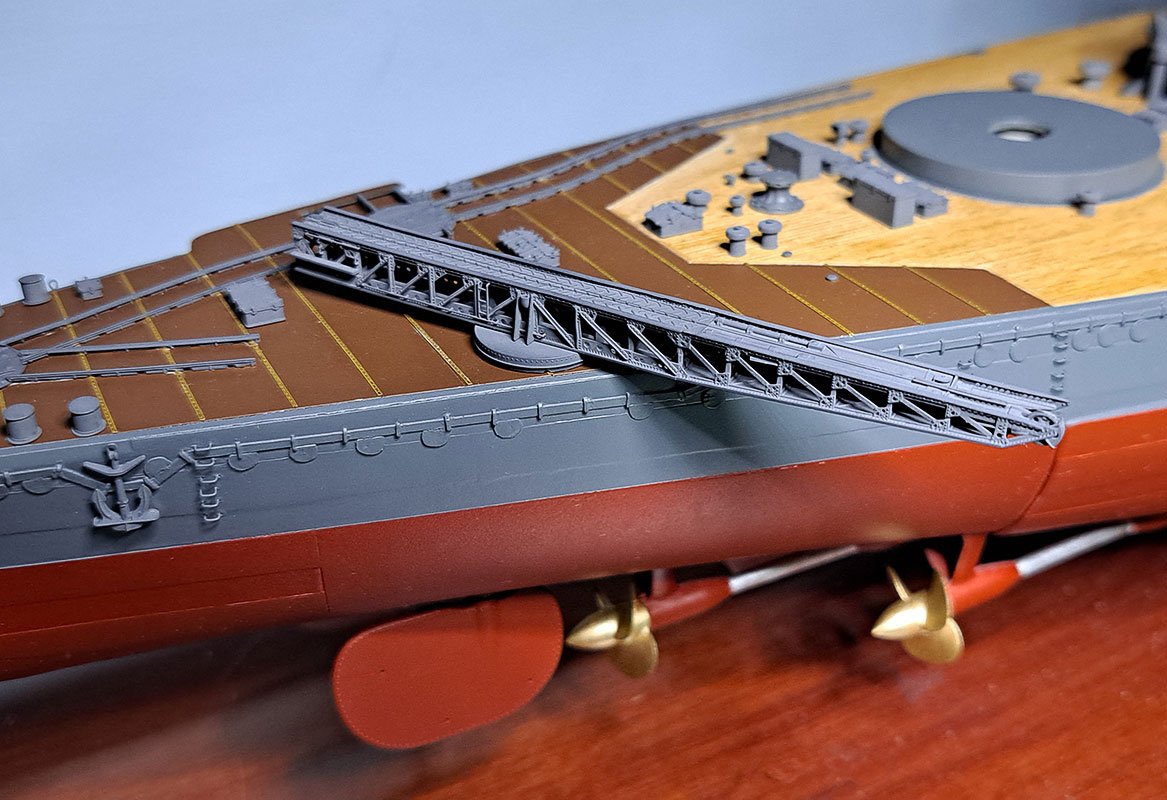
The state of the model as of early 2025: I’ve almost finished all the tiny details, and to be honest, I’ve had enough of them, so I’m looking forward to taking a break from those. The goal for the coming months will be the guns, followed by the bow superstructure — the feature that makes this battleship so distinctive (some people love it, while others turn it into memes).
[img]https://modelwork.pl/uploads/monthly_2025_01/171.jpg.bd211b68ac562378e850ff61da9a6649.jpg[/img]
[img]https://modelwork.pl/uploads/monthly_2025_01/174.jpg.db0d69e644f3f2c089461618a0e21c1c.jpg[/img]
[img]https://modelwork.pl/uploads/monthly_2025_01/175.jpg.f5760a620796f0641da9d8222481985e.jpg[/img]
[img]https://modelwork.pl/uploads/monthly_2025_01/177.jpg.9e933633f44368c92e0d4f0bd8721f3e.jpg[/img]
[img]https://modelwork.pl/uploads/monthly_2025_01/178.jpg.e6d11c9f4b6ab787041555e466c6930d.jpg[/img]
[img]https://modelwork.pl/uploads/monthly_2025_01/176.jpg.2e7fd940fec32d5ec9436c1473285f46.jpg[/img]
[img]https://modelwork.pl/uploads/monthly_2025_01/180.jpg.870e41770efdfa72dc40ff508ba0dcf5.jpg[/img]
|
|
|
|
Posted: Sat Jan 04, 2025 3:18 pm |
|
|
|
|
|
| |
Post subject: |
Re: Battleship IJN Fuso 1/200 - card paper/3D print |
|
|
|
Exquisite work, indeed.
Exquisite work, indeed.
|
|
|
|
Posted: Mon Mar 04, 2024 7:41 am |
|
|
|
|
|
| |
Post subject: |
Re: Battleship IJN Fuso 1/200 - card paper/3D print |
|
|
Thank you sir  Thank you sir :)
|
|
|
|
Posted: Mon Mar 04, 2024 3:43 am |
|
|
|
|
|
| |
Post subject: |
Re: Battleship IJN Fuso 1/200 - card paper/3D print |
|
|
Spectacular work!  I love the combination of materials and techniques. Spectacular work! :thumbs_up_1:
I love the combination of materials and techniques.
|
|
|
|
Posted: Tue Feb 27, 2024 11:44 am |
|
|
|
|
|
| |
Post subject: |
Re: Battleship IJN Fuso 1/200 - card paper/3D print |
|
|
|
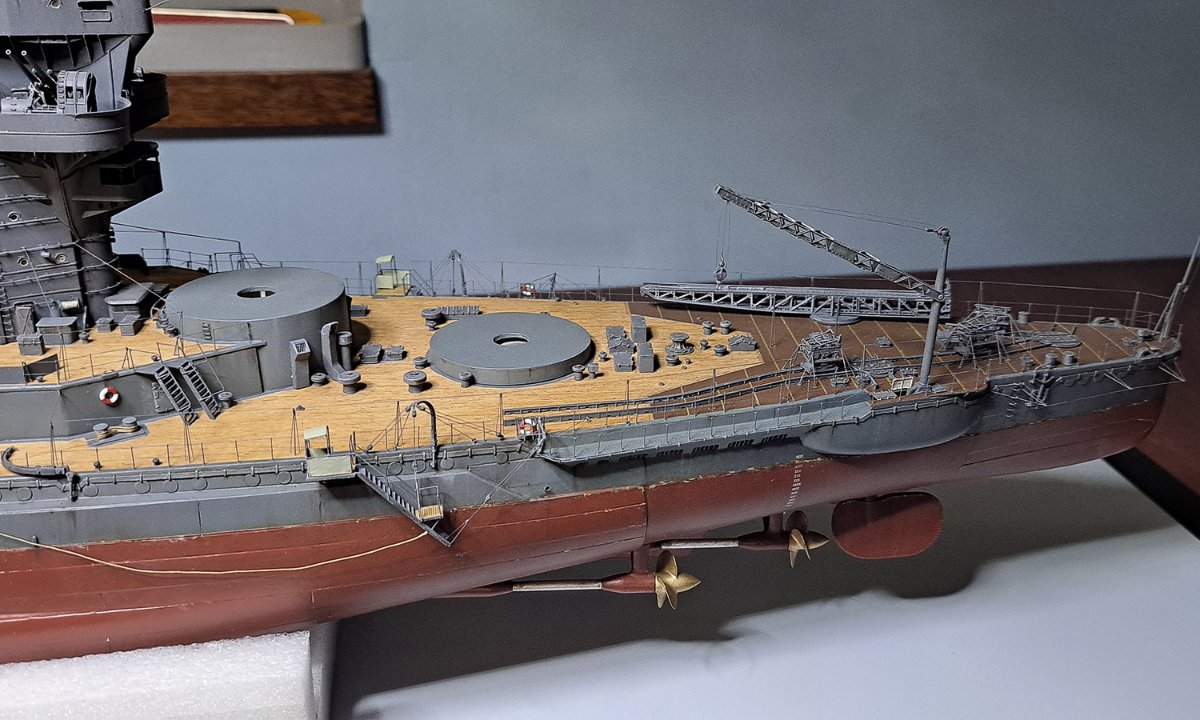
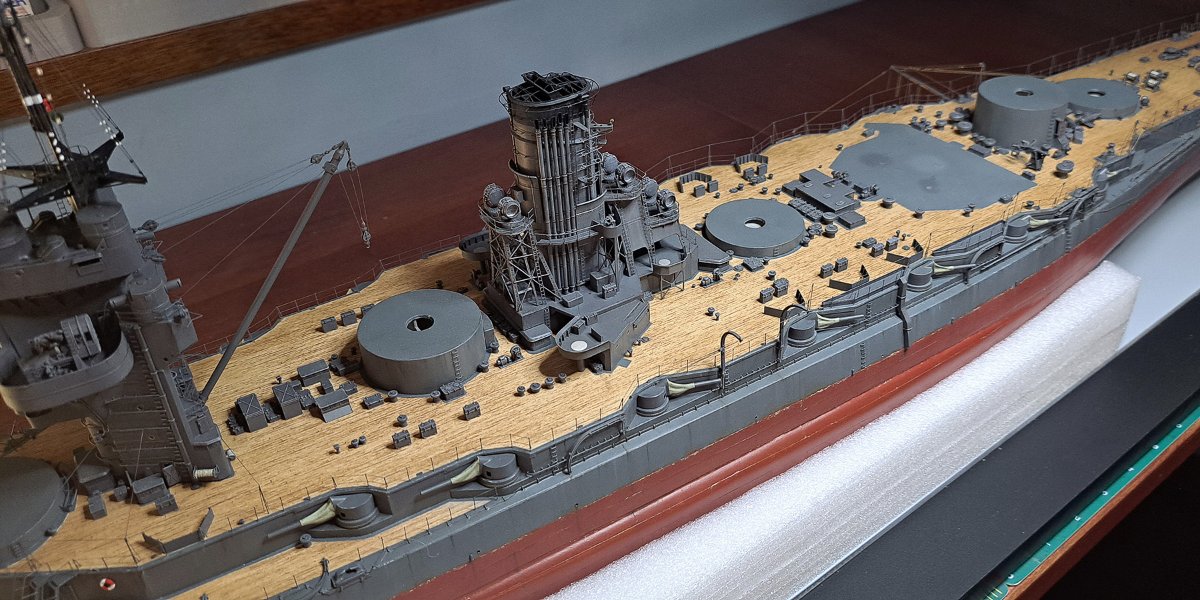
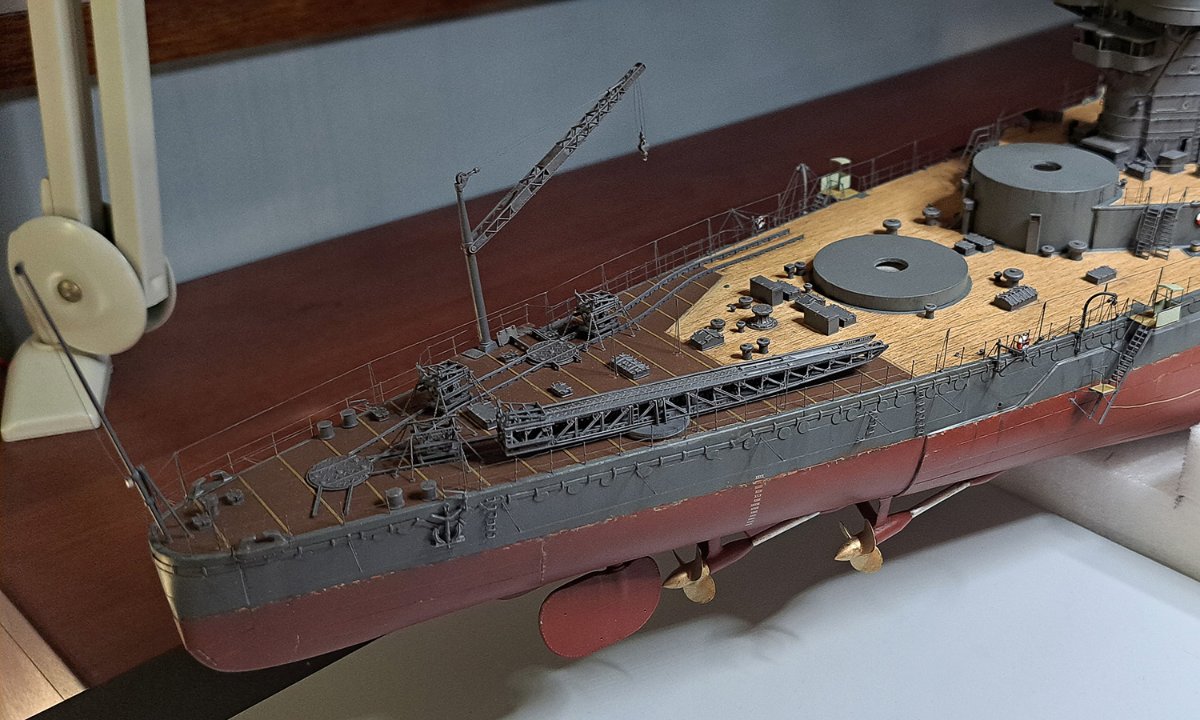
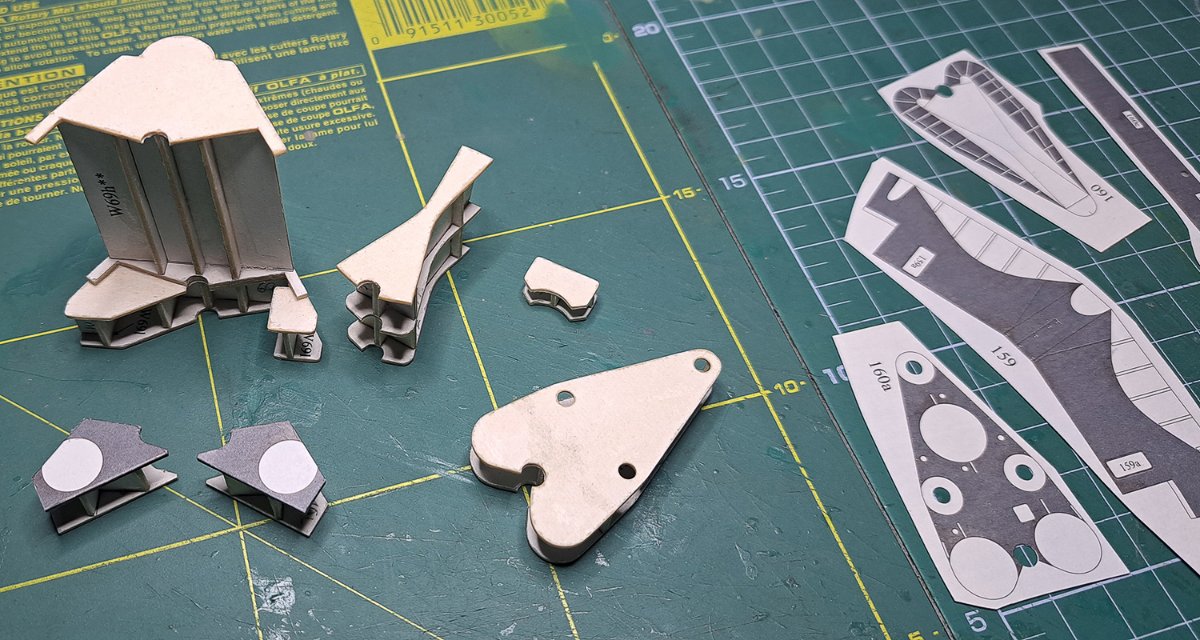
Next step in my build, for a long time it'll be my last Japan Battleship...
[img]https://modelwork.pl/uploads/monthly_2024_02/156.jpg.edc917e2563852a4abbddaa98757ebdd.jpg[/img]
[img]https://modelwork.pl/uploads/monthly_2024_02/157.jpg.6fa8e3cd01229f0f31c91a40bf25ab0b.jpg[/img]
[img]https://modelwork.pl/uploads/monthly_2024_02/158.jpg.279c897111c1a25f162ab123c8a50528.jpg[/img]
[img]https://modelwork.pl/uploads/monthly_2024_02/159.jpg.9c412deb11bf51c227205dbc85914197.jpg[/img]
[img]https://modelwork.pl/uploads/monthly_2024_02/160.jpg.5e0f10f9d50021c6f616f48ebddaf463.jpg[/img]
[img]https://modelwork.pl/uploads/monthly_2024_02/161.jpg.1027e7c671b48ea582a6b73463ebbf4d.jpg[/img]
[img]https://modelwork.pl/uploads/monthly_2024_02/162.jpg.5a7d64b3744b2a80490cbf3fae505b17.jpg[/img]
|
|
|
|
Posted: Tue Feb 27, 2024 6:01 am |
|
|
|
|
|
| |
Post subject: |
Re: Battleship IJN Fuso 1/200 - card paper/3D print |
|
|
OK, drafting will take a few hours too, but thinking of making all these parts in the traditional way by hand would take weeks and in the end may not be looking so good and may have less details. Looking forward to see the trolley printed. OK, drafting will take a few hours too, but thinking of making all these parts in the traditional way by hand would take weeks and in the end may not be looking so good and may have less details. Looking forward to see the trolley printed.
:thumbs_up_1:
|
|
|
|
Posted: Fri Sep 22, 2023 3:34 am |
|
|
|
|
|
| |
Post subject: |
Re: Battleship IJN Fuso 1/200 - card paper/3D print |
|
|
Another small step to "close" the stern deck. 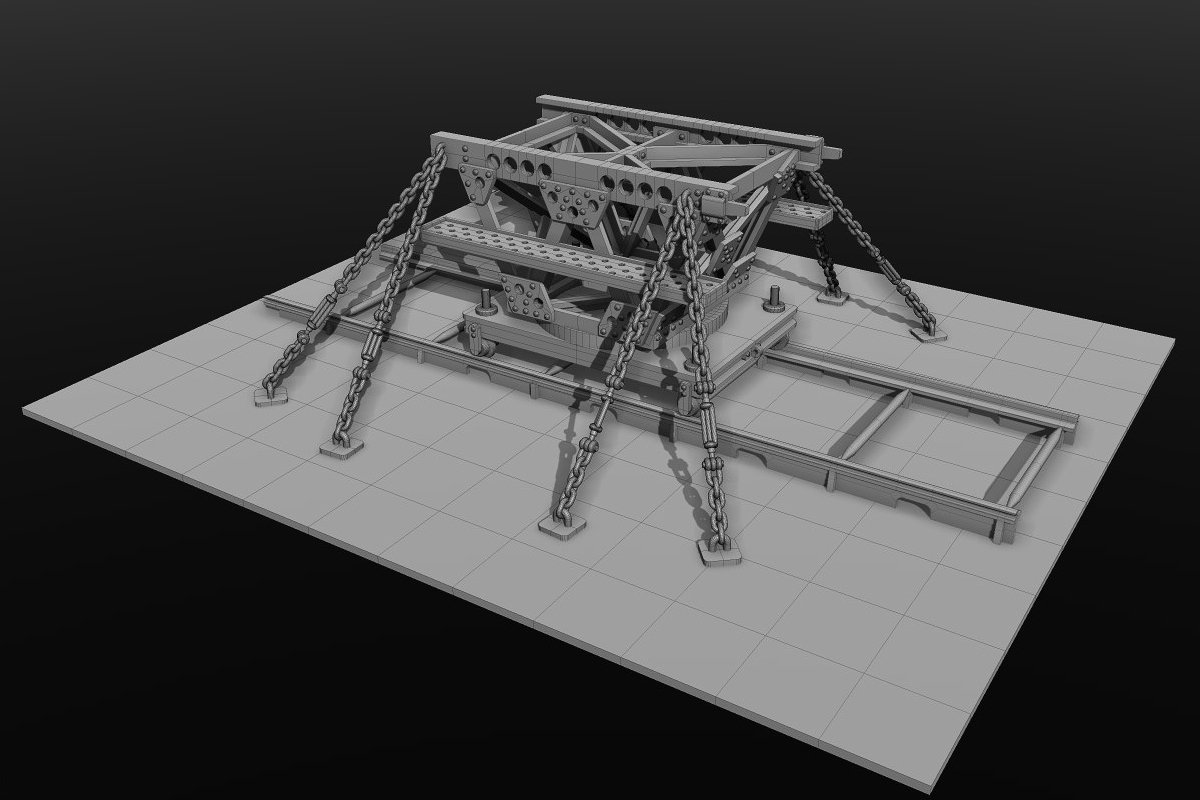 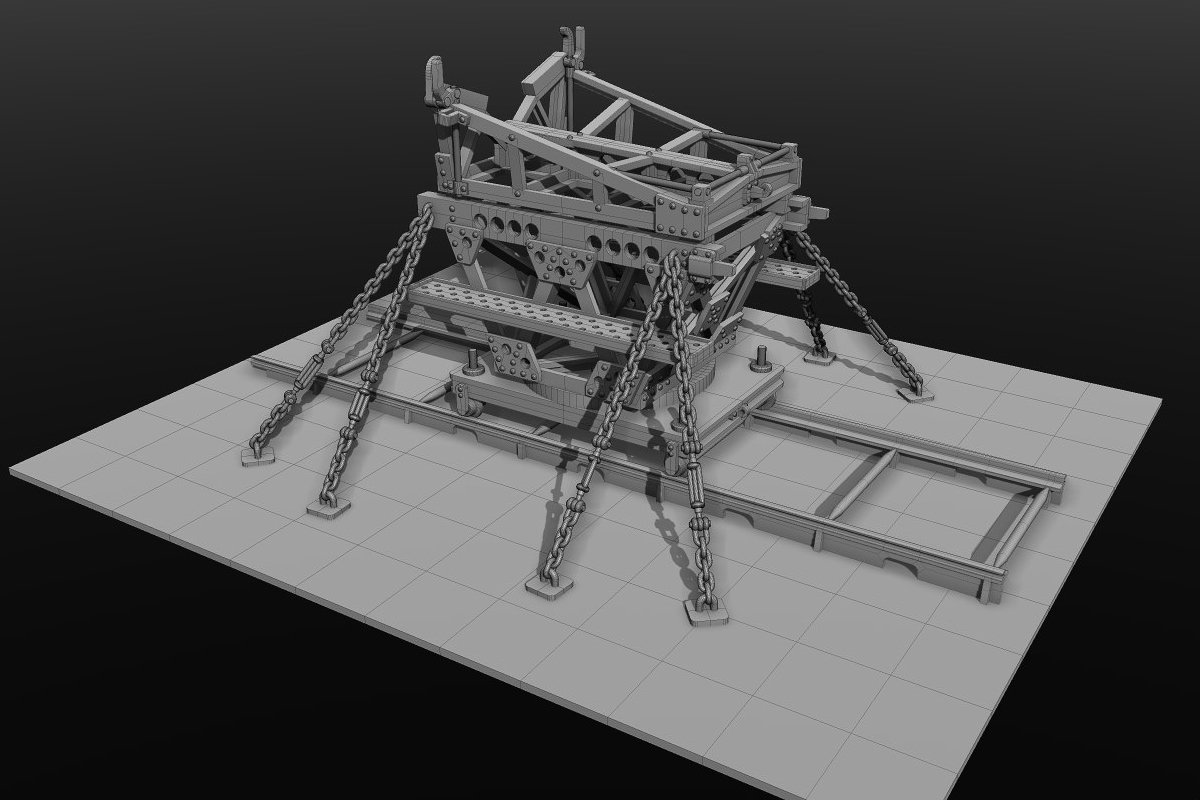 Another small step to "close" the stern deck.
[img]https://modelwork.pl/uploads/monthly_2023_09/154.jpg.4075eb92160257527832e70f09a5c801.jpg[/img]
[img]https://modelwork.pl/uploads/monthly_2023_09/155.jpg.70a2fac72035a749b6fa46801337613b.jpg[/img]
|
|
|
|
Posted: Thu Sep 21, 2023 12:16 am |
|
|
|
|
|
| |
Post subject: |
Re: Battleship IJN Fuso 1/200 - card paper/3D print |
|
|
|
Amazing work, love the 3D printing!
Amazing work, love the 3D printing!
|
|
|
|
Posted: Wed Sep 06, 2023 12:45 am |
|
|
|
|
|
| |
Post subject: |
Re: Battleship IJN Fuso 1/200 - card paper/3D print |
|
|
|
Already in place and "it's alive!!!" :)
[img]https://modelwork.pl/uploads/monthly_2023_09/150.jpg.b3df89a168132c9b582524b219c2facd.jpg[/img]
[img]https://modelwork.pl/uploads/monthly_2023_09/151.jpg.4ecc0b7d62f5fa548e1b62723868252d.jpg[/img]
[img]https://modelwork.pl/uploads/monthly_2023_09/153.jpg.4d44af120a3b59823ae7a6907e48aefd.jpg[/img]
|
|
|
|
Posted: Tue Sep 05, 2023 3:40 pm |
|
|
|
|
|
| |
Post subject: |
Re: Battleship IJN Fuso 1/200 - card paper/3D print |
|
|
|
|
|
|
Posted: Mon Sep 04, 2023 4:30 pm |
|
|
|
|