| Author |
Message |
|
|
| |
Post subject: |
Re: 1/200 Trumpeter Arizona Encore |
 |
|
|
Thanks Robn1 and Hank:
I am pretty pleased with it as well. Hope you all have a Merry Christmas this year.
Until that time
Thanks Robn1 and Hank:
I am pretty pleased with it as well. Hope you all have a Merry Christmas this year.
Until that time
|
|
|
 |
Posted: Fri Dec 23, 2016 12:40 pm |
|
|
 |
|
|
| |
Post subject: |
Re: 1/200 Trumpeter Arizona Encore |
|
|
Mark, Wow!! I wasn't sure exactly what all had been damaged, but the pix tell the story!! I'm glad I've been able to have helped in the "rebuild" - it certainly looks great. The added details and improved antennaoloy (my word  ) really set this model off. When I do return to PENNSY, your methods of doing the wiring will certainly be revisited - I've got to take a 2nd look at my "insulators", they are a bit large. I know you feel much better about this now that it's been repaired. Merry Christmas to you and Claire, Hank Mark,
Wow!! I wasn't sure exactly what all had been damaged, but the pix tell the story!! I'm glad I've been able to have helped in the "rebuild" - it certainly looks great. The added details and improved antennaoloy (my word :scratch: ) really set this model off.
When I do return to PENNSY, your methods of doing the wiring will certainly be revisited - I've got to take a 2nd look at my "insulators", they are a bit large.
I know you feel much better about this now that it's been repaired. Merry Christmas to you and Claire,
Hank
|
|
|
|
Posted: Fri Dec 23, 2016 10:19 am |
|
|
|
|
|
| |
Post subject: |
Re: 1/200 Trumpeter Arizona Encore |
|
|
|
After all that effort she has come out very nicely.....a great reward.
After all that effort she has come out very nicely.....a great reward.
|
|
|
|
Posted: Fri Dec 16, 2016 8:33 pm |
|
|
|
|
|
| |
Post subject: |
Re: 1/200 Trumpeter Arizona Encore |
|
|
|
Thanks Randy and Dan K for stopping by and your comments. Haply the model didn't sustain a lot of structural damage. I had envisioned a pile of plastic when I opened up the box. The damage was still frustrating, but it could have been worse.
Thanks for the positive comments.
Thanks Randy and Dan K for stopping by and your comments. Haply the model didn't sustain a lot of structural damage. I had envisioned a pile of plastic when I opened up the box. The damage was still frustrating, but it could have been worse.
Thanks for the positive comments.
|
|
|
|
Posted: Thu Dec 15, 2016 10:06 pm |
|
|
|
|
|
| |
Post subject: |
Re: 1/200 Trumpeter Arizona Encore |
|
|
|
I think you did a great job on the repair. Looks wonderful.
I think you did a great job on the repair. Looks wonderful.
|
|
|
|
Posted: Thu Dec 15, 2016 7:41 pm |
|
|
|
|
|
| |
Post subject: |
Re: 1/200 Trumpeter Arizona Encore |
|
|
Mark, It looks beautiful once again! You get your money's worth out of a model kit!  Kind of like me playing golf..It does look great. Repairs are hard to do; trying to get the model back to the original, if not improve it is difficult! Randy Mark,
It looks beautiful once again! You get your money's worth out of a model kit! :) Kind of like me playing golf..It does look great. Repairs are hard to do; trying to get the model back to the original, if not improve it is difficult!
Randy
|
|
|
|
Posted: Thu Dec 15, 2016 6:04 pm |
|
|
|
|
|
| |
Post subject: |
Re: 1/200 Trumpeter Arizona Encore |
|
|
Hi Mark: These pesky things can really be a pain. I put a bit of sheet plastic with just enough to fix to the bottom of the fore top. 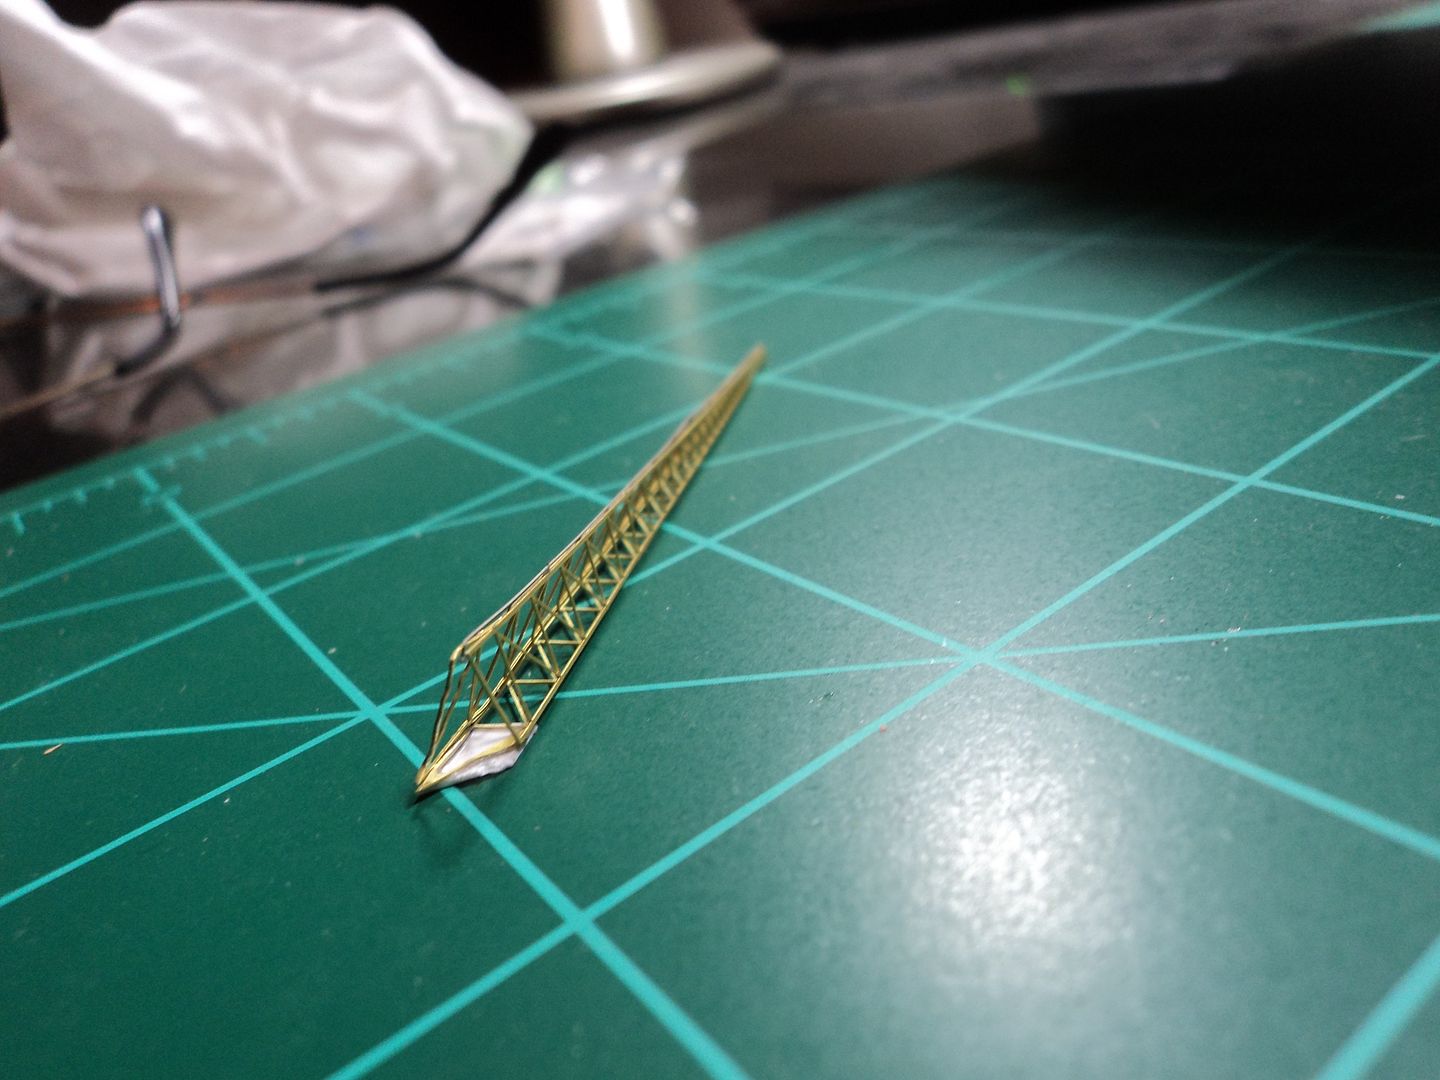 I used super glue to attach it to the yard, when painted it is practically invisible. I use MEK to secure it to the bottom of the fore top, hold it there, once set I use a bit of CA glue to secure the braces to the foretop and rig it for added support. Once it is on there I rig the halyards. I did attache the halyards to the flag bags before I put up the yards and before I put any lights or anything on the signal bridge, that way I won't bump anything and nothing is in the way. Hope this helps, Thanks for checking out the rebuild and your comments Hi Mark:
These pesky things can really be a pain. I put a bit of sheet plastic with just enough to fix to the bottom of the fore top.
[url=http://s942.photobucket.com/user/ptbarnum101/media/Arizona/Arizona%20Encore/DSC02647.jpg.html][img]http://i942.photobucket.com/albums/ad261/ptbarnum101/Arizona/Arizona%20Encore/DSC02647.jpg[/img][/url]
I used super glue to attach it to the yard, when painted it is practically invisible. I use MEK to secure it to the bottom of the fore top, hold it there, once set I use a bit of CA glue to secure the braces to the foretop and rig it for added support. Once it is on there I rig the halyards. I did attache the halyards to the flag bags before I put up the yards and before I put any lights or anything on the signal bridge, that way I won't bump anything and nothing is in the way.
Hope this helps,
Thanks for checking out the rebuild and your comments
|
|
|
|
Posted: Thu Dec 15, 2016 11:28 am |
|
|
|
|
|
| |
Post subject: |
Re: 1/200 Trumpeter Arizona Encore |
|
|
Glad to see the damage wasn't too severe and that you were able to work it out. The little details you have added look great  The lattice arms are a pain , can you post a pic showing how you attached them? The "pin" method I was going for isn't going to work. Glad to see the damage wasn't too severe and that you were able to work it out. The little details you have added look great :thumbs_up_1:
The lattice arms are a pain , can you post a pic showing how you attached them?
The "pin" method I was going for isn't going to work.
|
|
|
|
Posted: Thu Dec 15, 2016 7:34 am |
|
|
|
|
|
| |
Post subject: |
Re: 1/200 Trumpeter Arizona Encore |
|
|
Okay, another exciting installment: To caveat on my previous post regarding the yards. I had always wanted to try to install the netting on the lattice yards as Jeff Sharp did in his build. I tried different things but they never worked. I had some fine brass mess, so I cut it to shape, reinforced the edges with thin Pastruct and using Testors Canopy Cement popped then in place. I think they turned out pretty good. 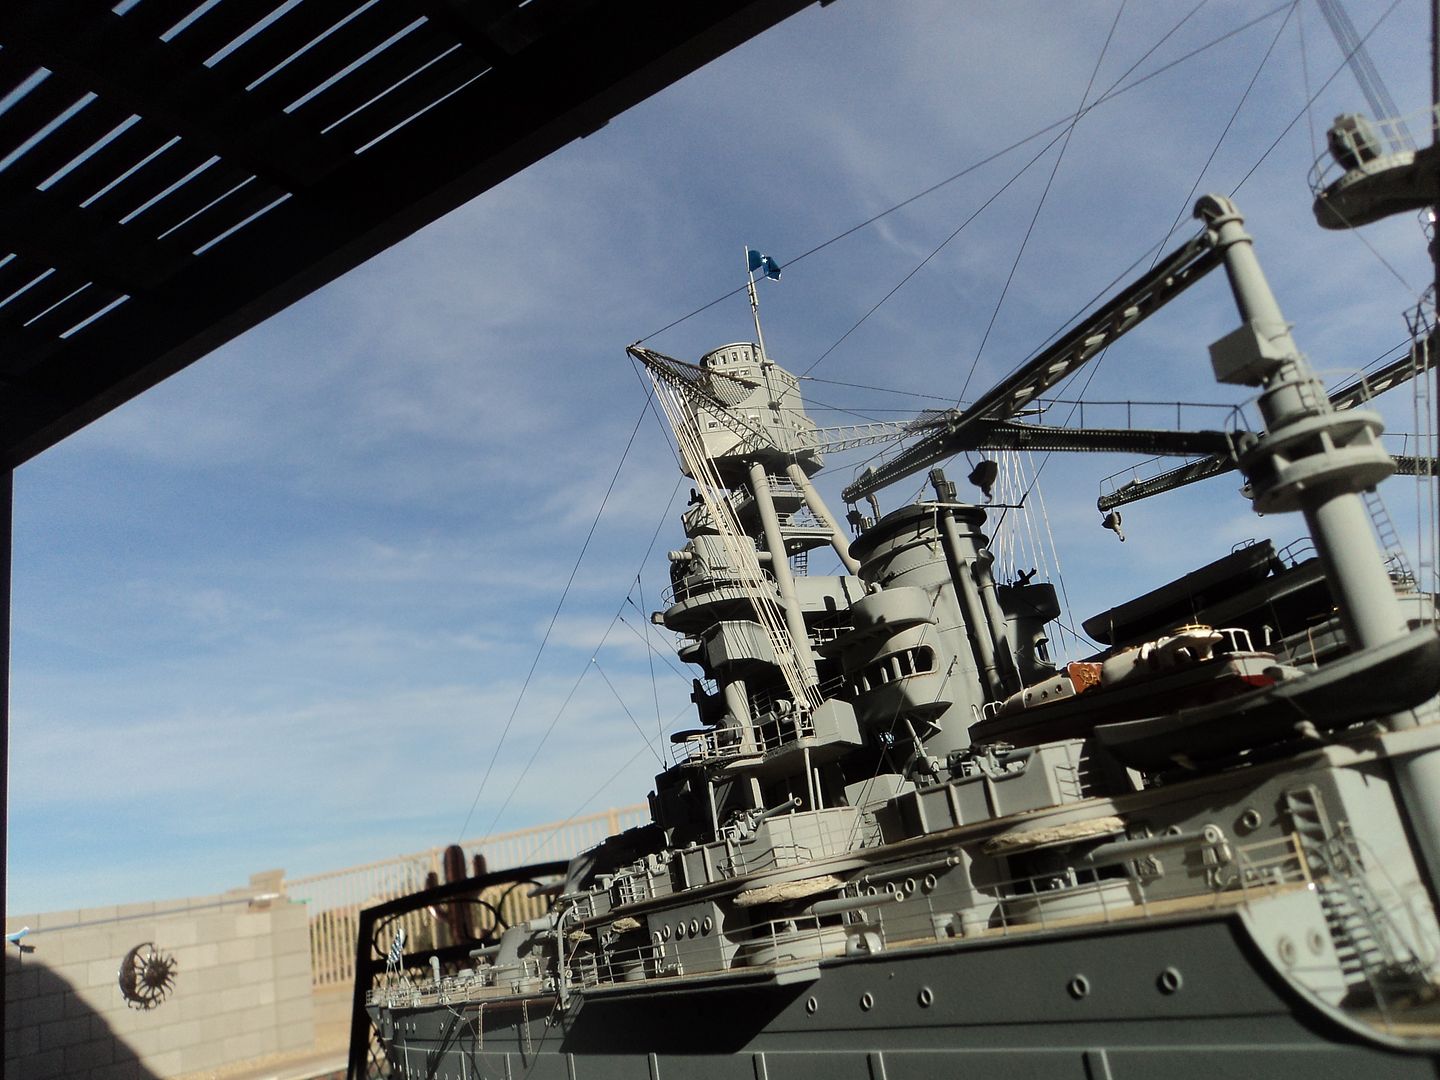 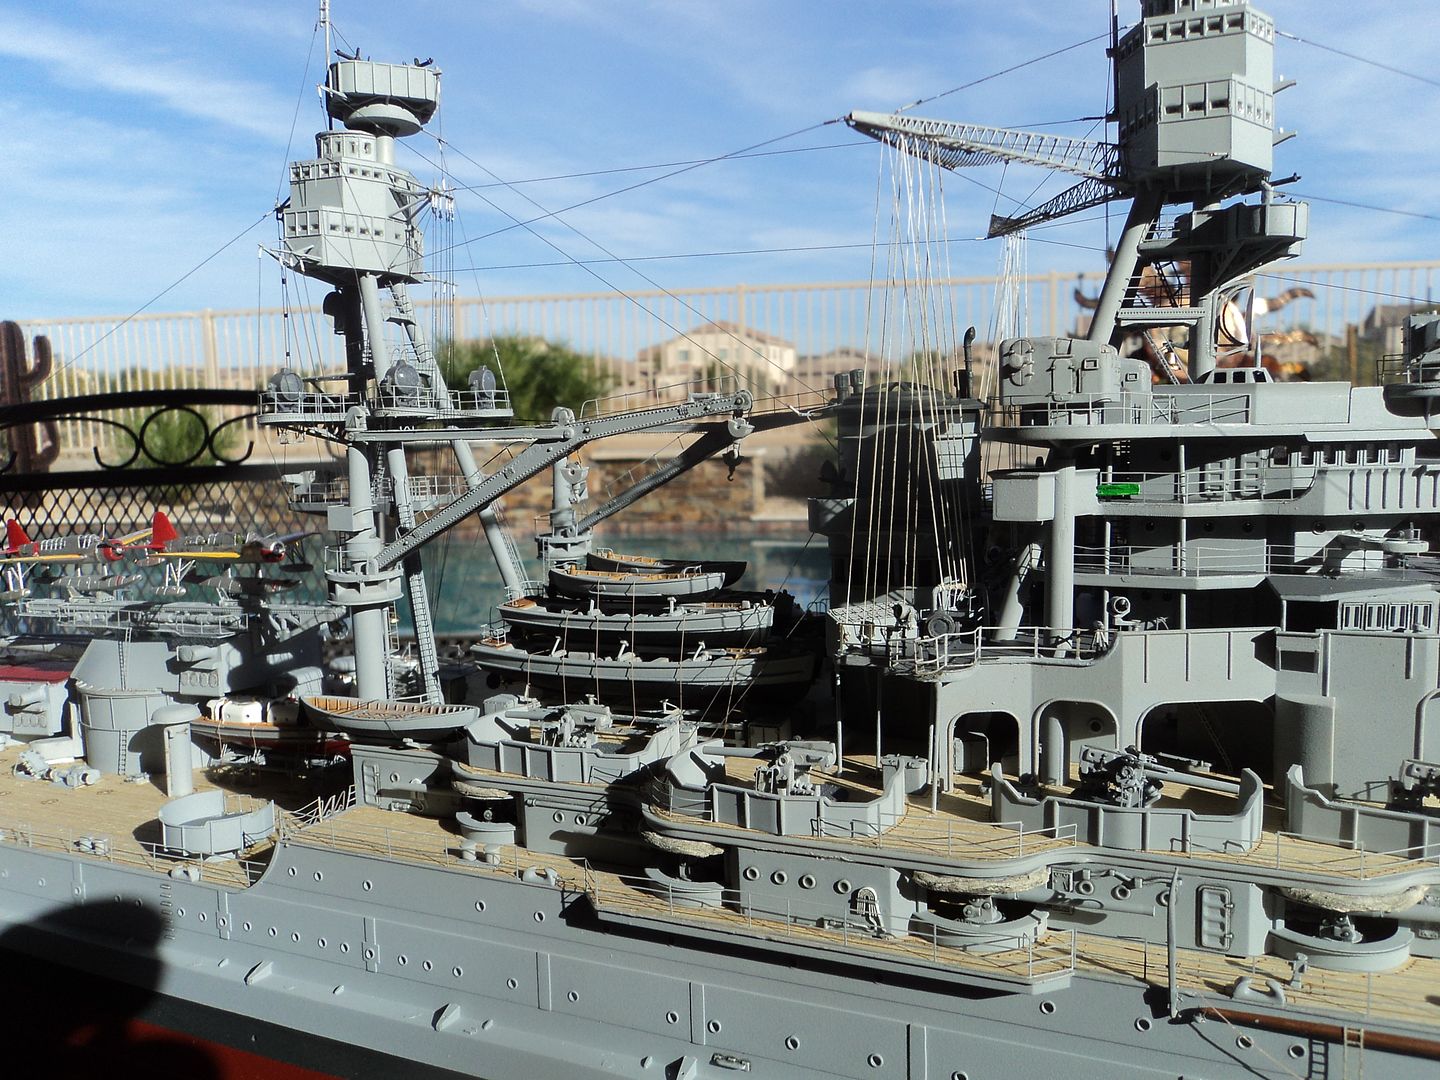 I had always admired Chuck Bauer.s 1/200 Arizona as he depicted it at Pearl Harbor in about August of '41 having seen it in person a couple of times I really noticed how he did the antenna insulators on the main top aft double antenna, leadsman platforms and the paravane davits affect and appearance. A couple of the things I added that he did was add the leadsman platforms, the paravane davits and the insulators to the double antenna on the backside of the maintop. I scratched the Leadsman platforms out of spare Eduard PE for the 1/200 AZ. 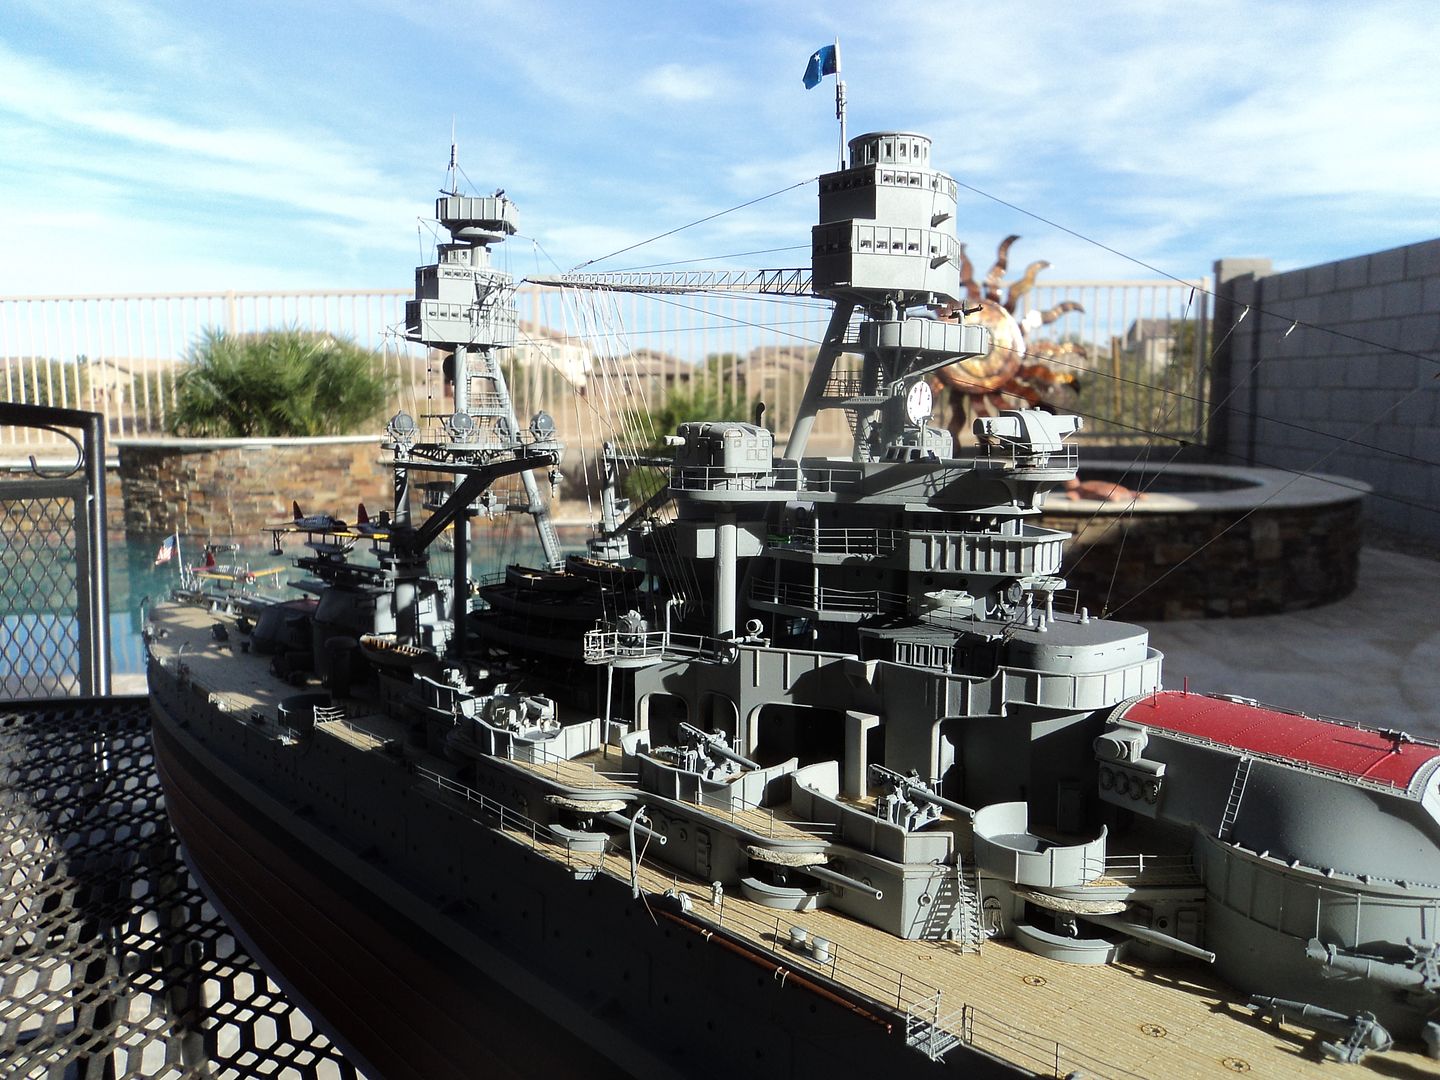  For some reason they were a bugger, but overall I am content with their appearance. I then added the davits and the antenna.  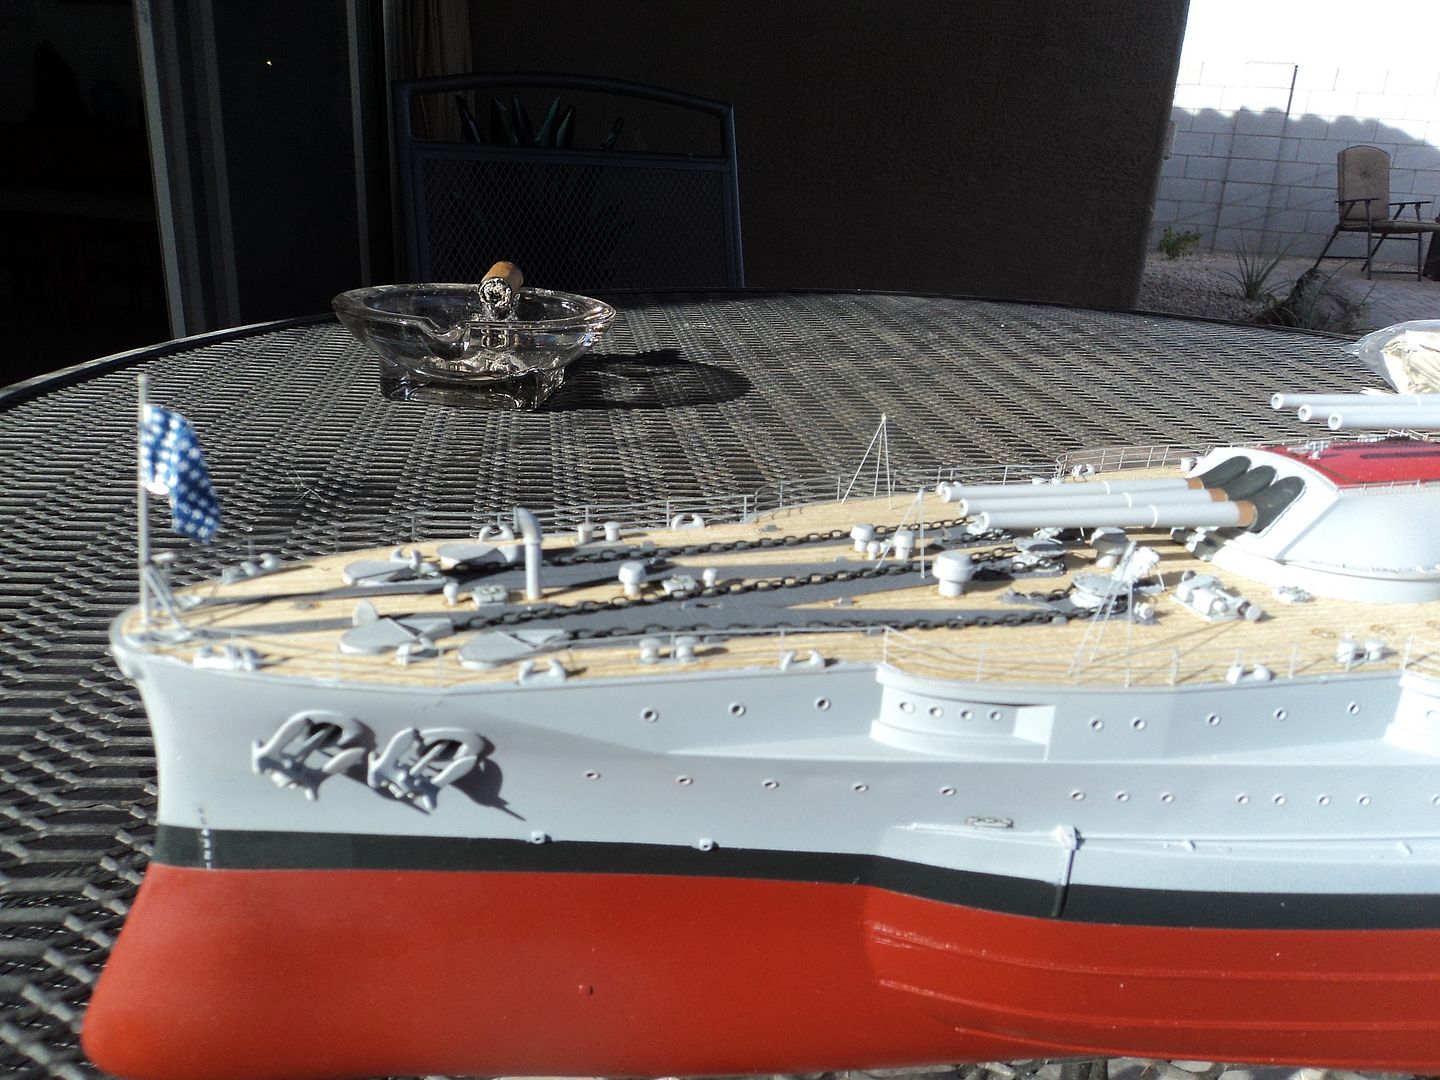 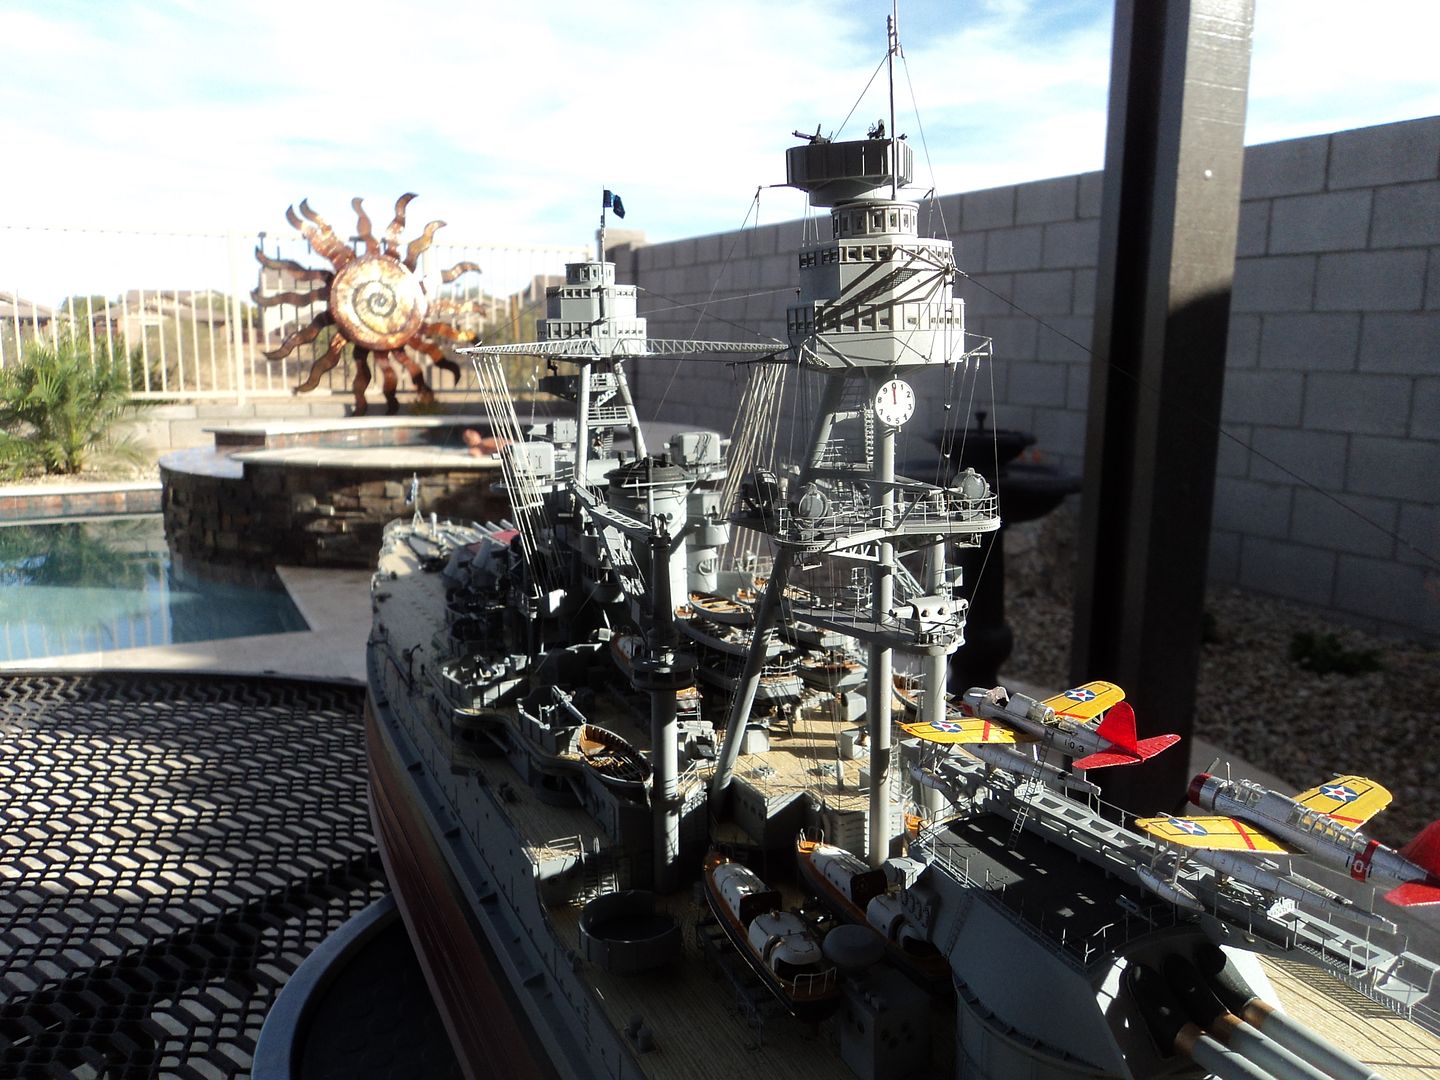 In Jeff Sharp's build he added railings and a ladder to the aft 1.1" mounts. This area is lacking any detail so I did the same. I also replaced the pair of ladders going from the main deck to the 01 level. 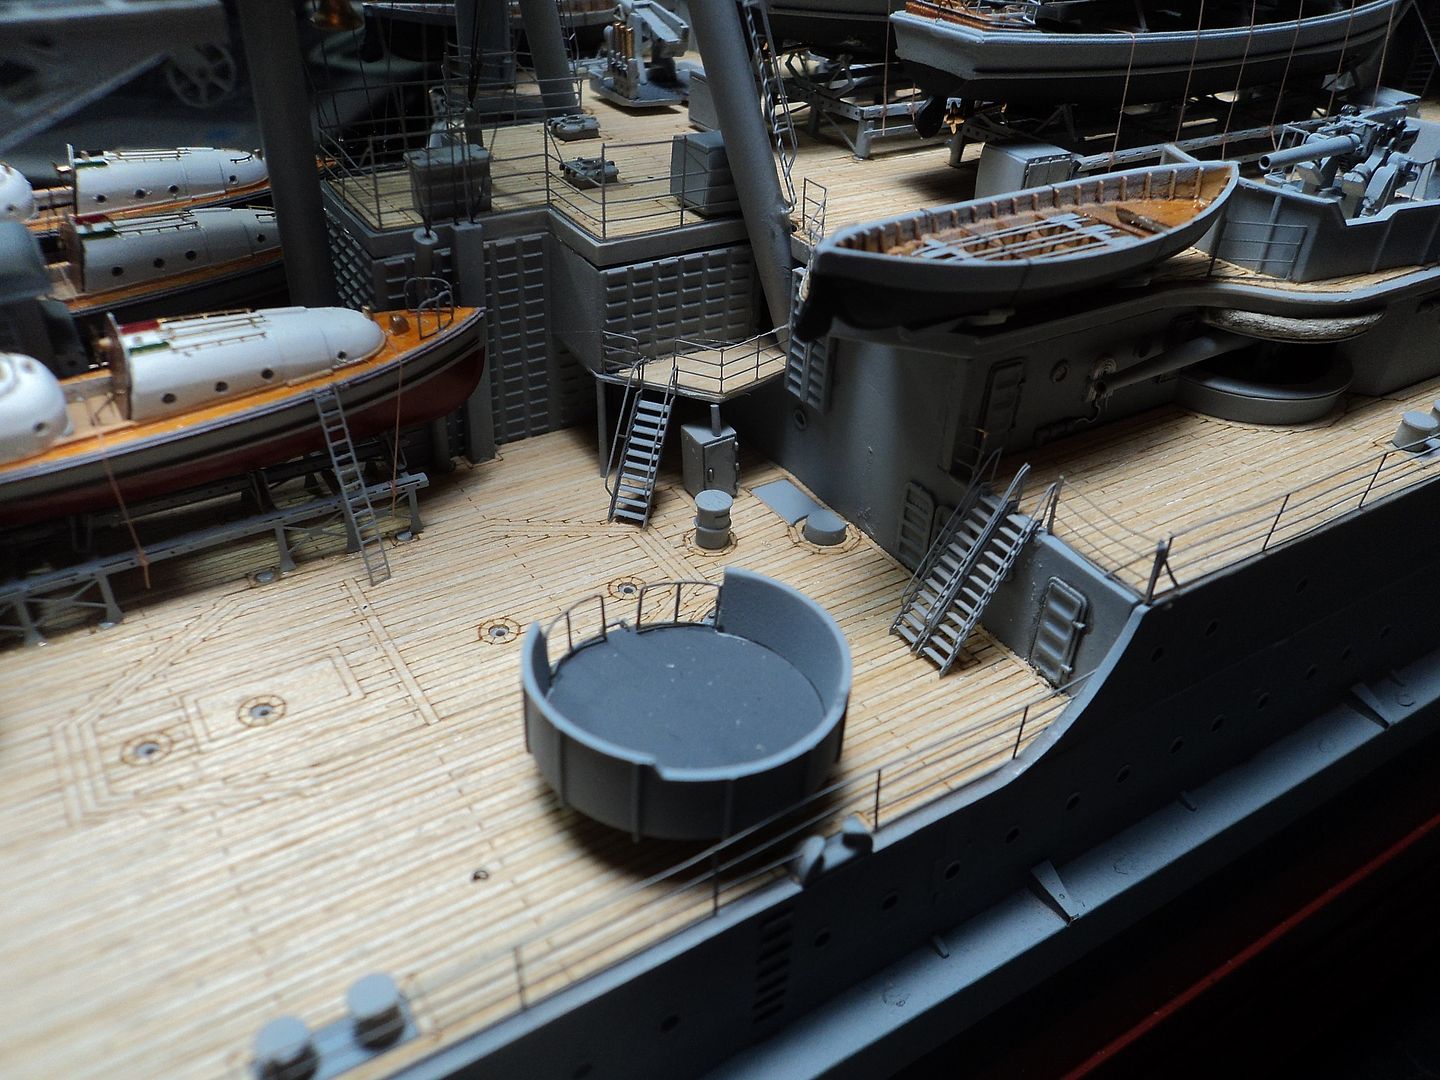 It adds a little interest to that area. Another thing I did was add the driveshafts to the cranes. I used a piece of rod and stainless tube cut to size fixed them to the inside of the crane support, once installed I added a length of rod from the 01 level to the main deck to give it continuity. 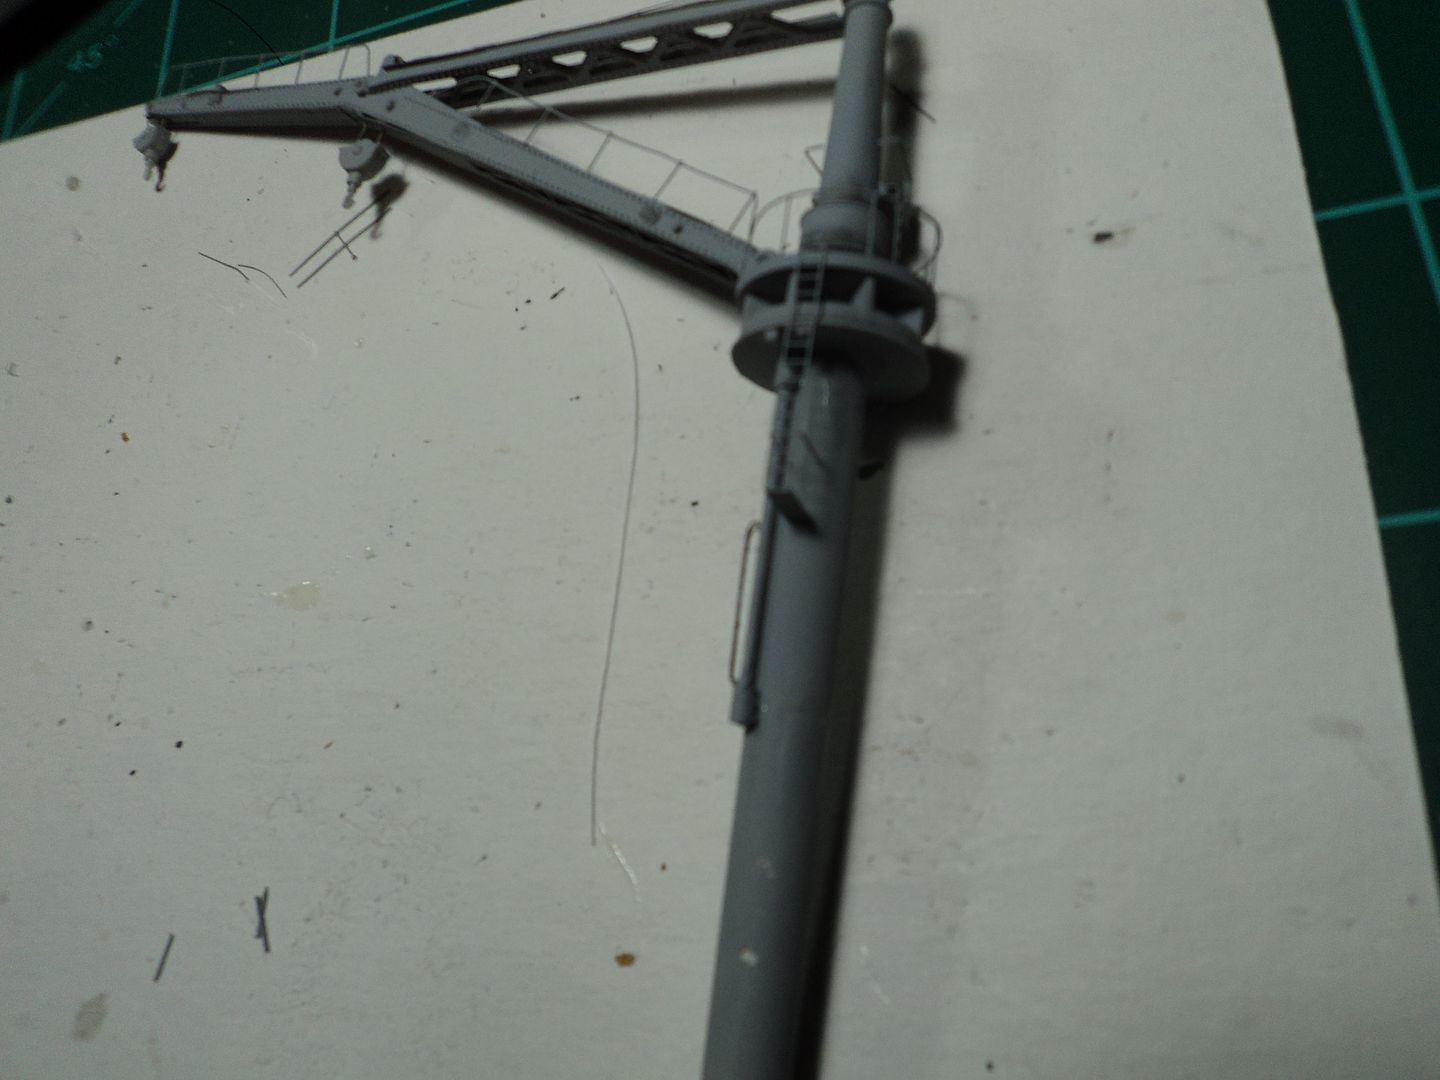 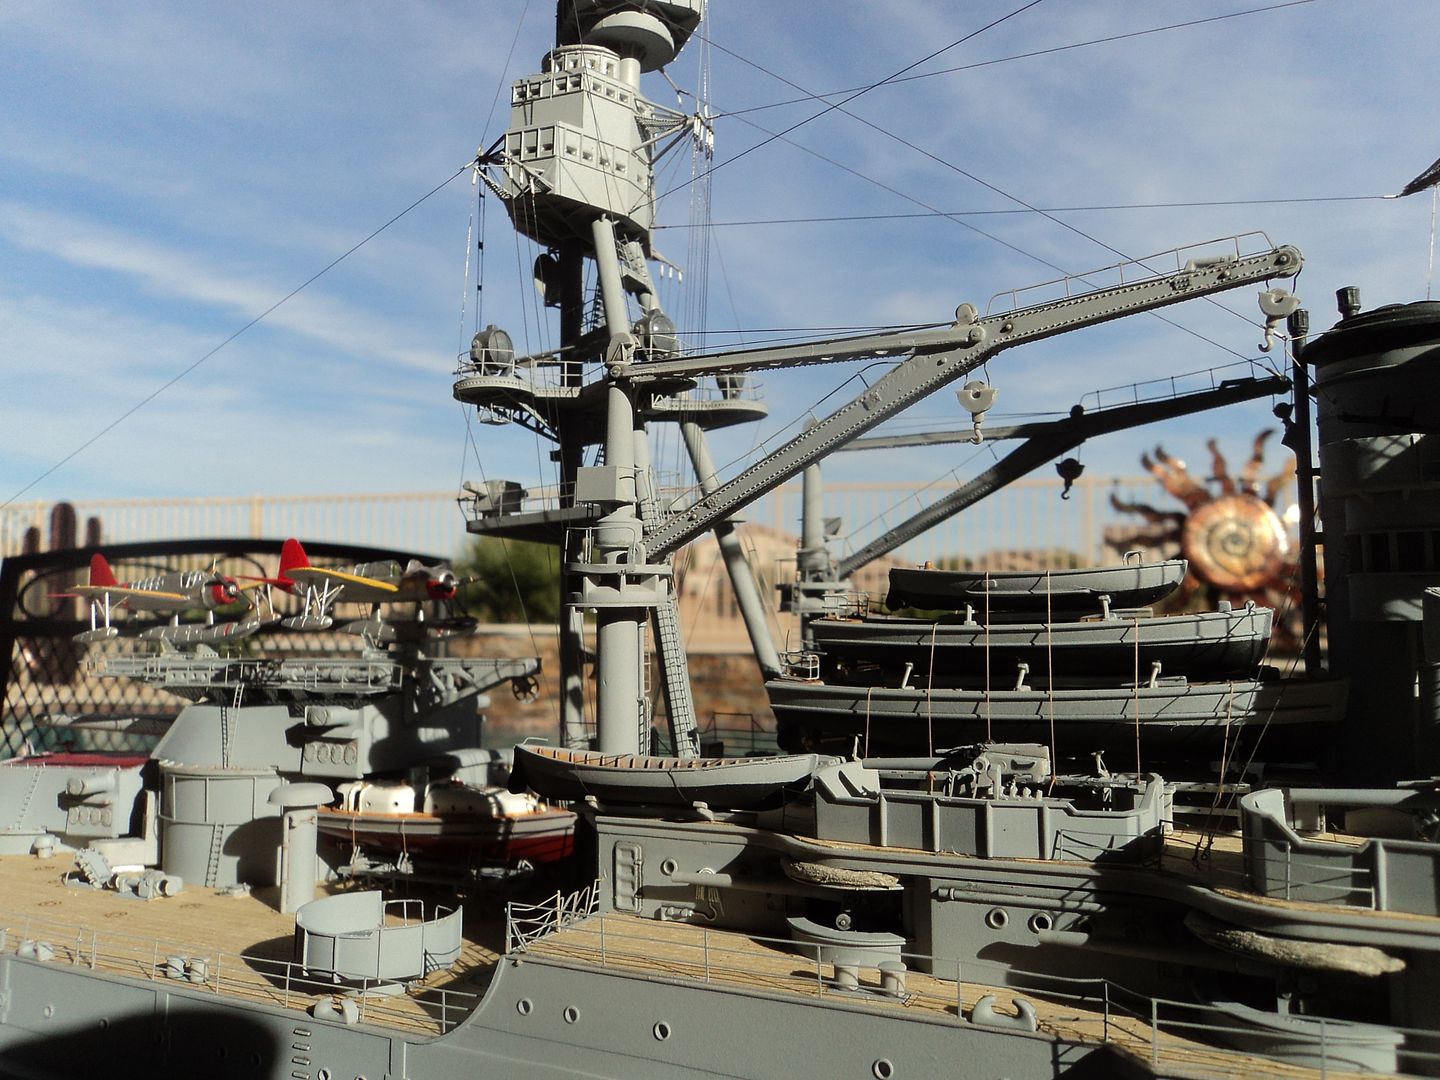 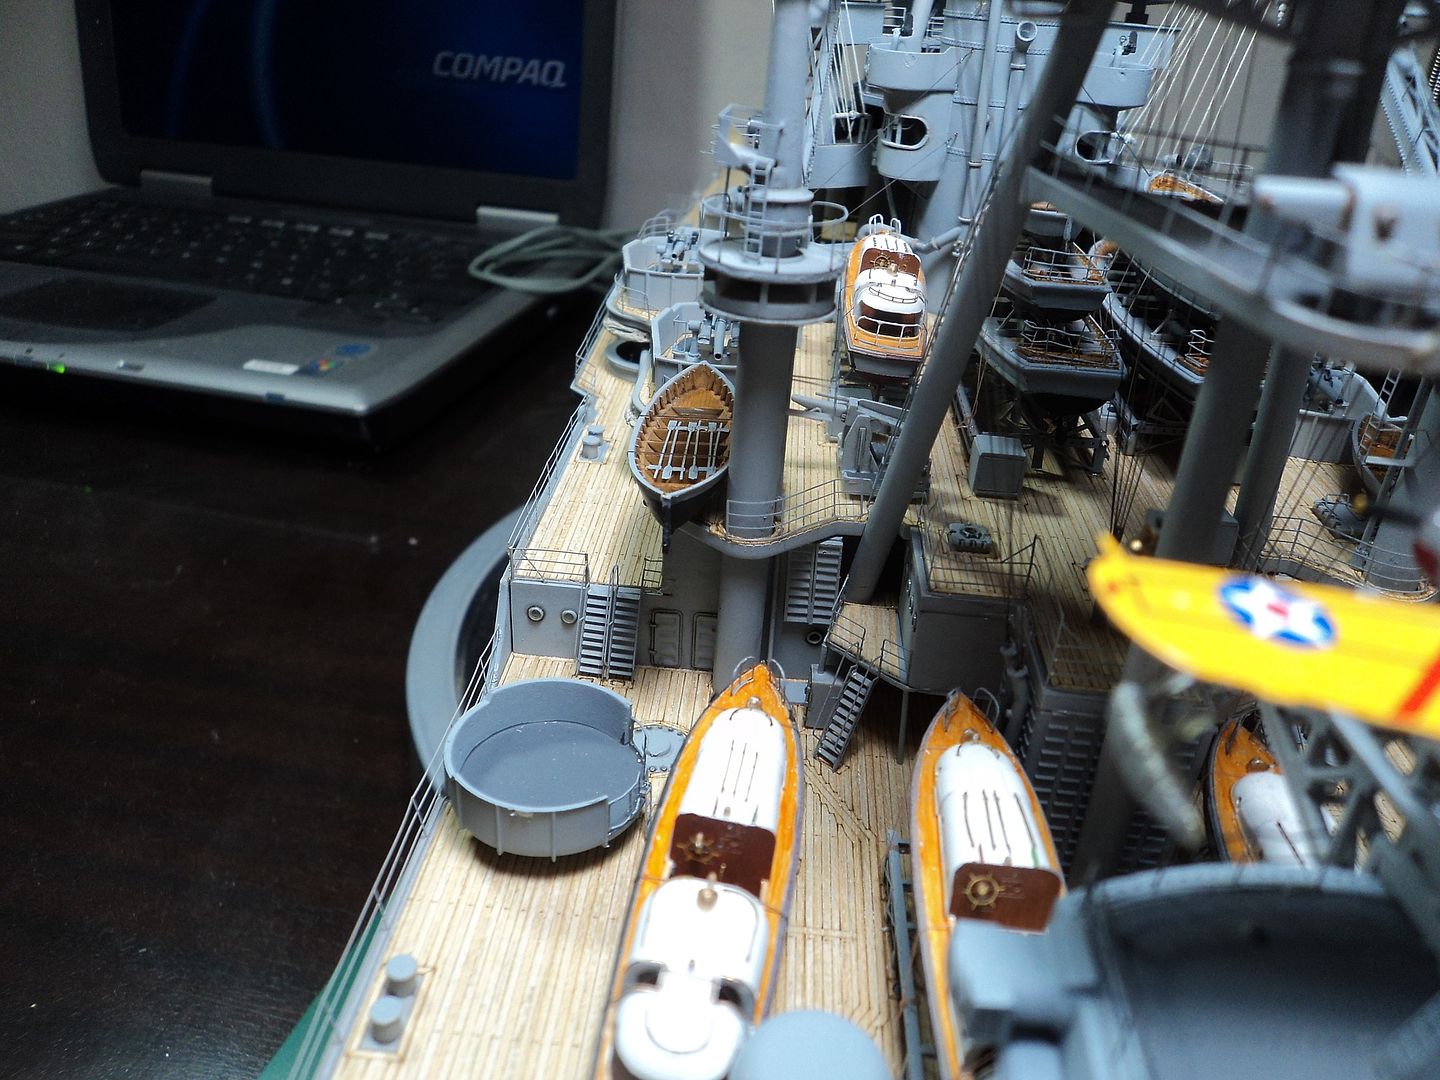 I think it is a nice touch. I also added the port and starboard running light platforms. It gives a bit of color to that area of the superstruture. 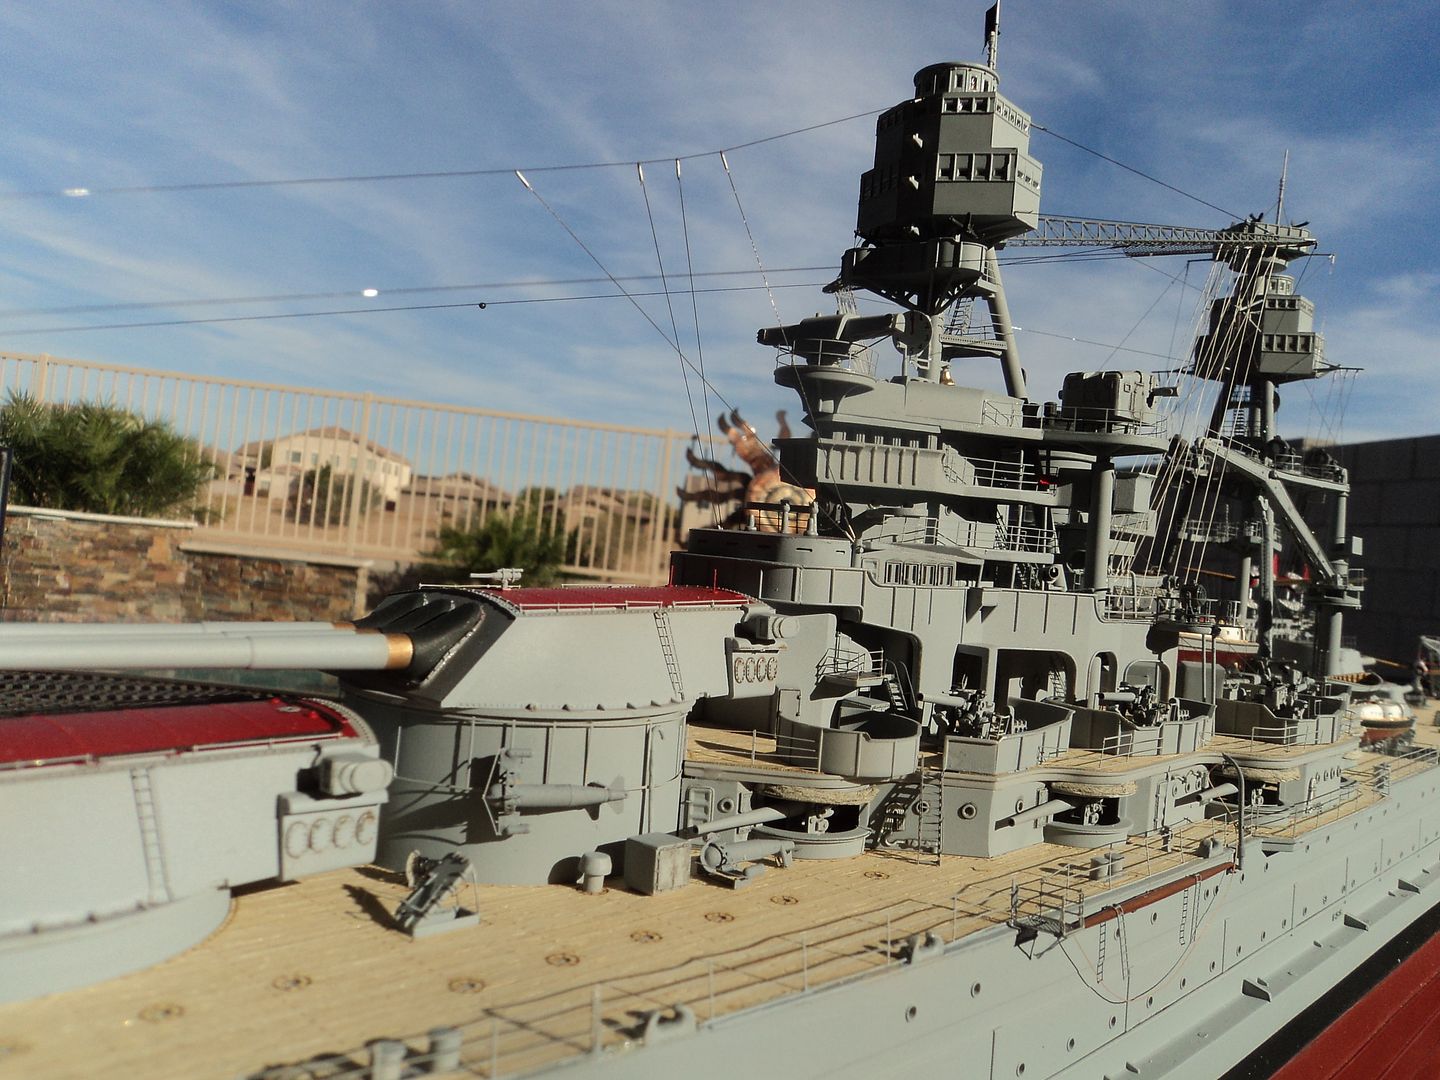 So, that's about it. I hope I can now leave it in it's case. I don't plan on entering it into any contests or shows, so hopefully no more broken pieces to fix. Now to do the same for the Pennsylvania project. That's a mess. One thing I didn't mention previously. For attachment of the lattice yards on the initial build, after knocking them off twice I switched to "Gator Grip." I would not recommend it for the lattice yards. It stretches and pulls away after a time. It is fine for railings and such, but for anything requiring strength or has tension applied to it, stick with your favorite CA glue. Until that time. Okay, another exciting installment:
To caveat on my previous post regarding the yards. I had always wanted to try to install the netting on the lattice yards as Jeff Sharp did in his build. I tried different things but they never worked. I had some fine brass mess, so I cut it to shape, reinforced the edges with thin Pastruct and using Testors Canopy Cement popped then in place. I think they turned out pretty good.
[url=http://s942.photobucket.com/user/ptbarnum101/media/Arizona/Arizona%20Encore/12_14_16_13.jpg.html][img]http://i942.photobucket.com/albums/ad261/ptbarnum101/Arizona/Arizona%20Encore/12_14_16_13.jpg[/img][/url]
[url=http://s942.photobucket.com/user/ptbarnum101/media/Arizona/Arizona%20Encore/12_14_16_6.jpg.html][img]http://i942.photobucket.com/albums/ad261/ptbarnum101/Arizona/Arizona%20Encore/12_14_16_6.jpg[/img][/url]
I had always admired Chuck Bauer.s 1/200 Arizona as he depicted it at Pearl Harbor in about August of '41 having seen it in person a couple of times I really noticed how he did the antenna insulators on the main top aft double antenna, leadsman platforms and the paravane davits affect and appearance. A couple of the things I added that he did was add the leadsman platforms, the paravane davits and the insulators to the double antenna on the backside of the maintop.
I scratched the Leadsman platforms out of spare Eduard PE for the 1/200 AZ.
[url=http://s942.photobucket.com/user/ptbarnum101/media/Arizona/Arizona%20Encore/12_14_16_5.jpg.html][img]http://i942.photobucket.com/albums/ad261/ptbarnum101/Arizona/Arizona%20Encore/12_14_16_5.jpg[/img][/url]
[url=http://s942.photobucket.com/user/ptbarnum101/media/Arizona/Arizona%20Encore/DSC02669.jpg.html][img]http://i942.photobucket.com/albums/ad261/ptbarnum101/Arizona/Arizona%20Encore/DSC02669.jpg[/img][/url]
For some reason they were a bugger, but overall I am content with their appearance.
I then added the davits and the antenna.
[url=http://s942.photobucket.com/user/ptbarnum101/media/Arizona/Arizona%20Encore/DSC02667.jpg.html][img]http://i942.photobucket.com/albums/ad261/ptbarnum101/Arizona/Arizona%20Encore/DSC02667.jpg[/img][/url]
[url=http://s942.photobucket.com/user/ptbarnum101/media/Arizona/Arizona%20Encore/12_14_16_1.jpg.html][img]http://i942.photobucket.com/albums/ad261/ptbarnum101/Arizona/Arizona%20Encore/12_14_16_1.jpg[/img][/url]
[url=http://s942.photobucket.com/user/ptbarnum101/media/Arizona/Arizona%20Encore/12_14_16_9.jpg.html][img]http://i942.photobucket.com/albums/ad261/ptbarnum101/Arizona/Arizona%20Encore/12_14_16_9.jpg[/img][/url]
In Jeff Sharp's build he added railings and a ladder to the aft 1.1" mounts. This area is lacking any detail so I did the same. I also replaced the pair of ladders going from the main deck to the 01 level.
[url=http://s942.photobucket.com/user/ptbarnum101/media/Arizona/Arizona%20Encore/DSC02668.jpg.html][img]http://i942.photobucket.com/albums/ad261/ptbarnum101/Arizona/Arizona%20Encore/DSC02668.jpg[/img][/url]
It adds a little interest to that area.
Another thing I did was add the driveshafts to the cranes.
I used a piece of rod and stainless tube cut to size fixed them to the inside of the crane support, once installed I added a length of rod from the 01 level to the main deck to give it continuity.
[url=http://s942.photobucket.com/user/ptbarnum101/media/Arizona/Arizona%20Encore/DSC02666.jpg.html][img]http://i942.photobucket.com/albums/ad261/ptbarnum101/Arizona/Arizona%20Encore/DSC02666.jpg[/img][/url]
[url=http://s942.photobucket.com/user/ptbarnum101/media/Arizona/Arizona%20Encore/12_14_16_7.jpg.html][img]http://i942.photobucket.com/albums/ad261/ptbarnum101/Arizona/Arizona%20Encore/12_14_16_7.jpg[/img][/url]
[url=http://s942.photobucket.com/user/ptbarnum101/media/Arizona/Arizona%20Encore/DSC02671.jpg.html][img]http://i942.photobucket.com/albums/ad261/ptbarnum101/Arizona/Arizona%20Encore/DSC02671.jpg[/img][/url]
I think it is a nice touch.
I also added the port and starboard running light platforms. It gives a bit of color to that area of the superstruture.
[url=http://s942.photobucket.com/user/ptbarnum101/media/Arizona/Arizona%20Encore/12_14_16_16.jpg.html][img]http://i942.photobucket.com/albums/ad261/ptbarnum101/Arizona/Arizona%20Encore/12_14_16_16.jpg[/img][/url]
[url=http://s942.photobucket.com/user/ptbarnum101/media/Arizona/Arizona%20Encore/12_14_16_6.jpg.html][img]http://i942.photobucket.com/albums/ad261/ptbarnum101/Arizona/Arizona%20Encore/12_14_16_6.jpg[/img][/url]
So, that's about it. I hope I can now leave it in it's case. I don't plan on entering it into any contests or shows, so hopefully no more broken pieces to fix.
Now to do the same for the Pennsylvania project. That's a mess.
One thing I didn't mention previously. For attachment of the lattice yards on the initial build, after knocking them off twice I switched to "Gator Grip." I would not recommend it for the lattice yards. It stretches and pulls away after a time. It is fine for railings and such, but for anything requiring strength or has tension applied to it, stick with your favorite CA glue.
Until that time.
|
|
|
|
Posted: Wed Dec 14, 2016 6:50 pm |
|
|
|
|
|
| |
Post subject: |
1/200 Trumpeter Arizona Encore |
|
|
I had built this and completed it right around this time of year in 2015. It was my second ship model in quite some time and first big ship in 1/200 scale. I was pretty pleased with it overall. There were things I could have done, but my skill level and time precluded me doing those things to it. 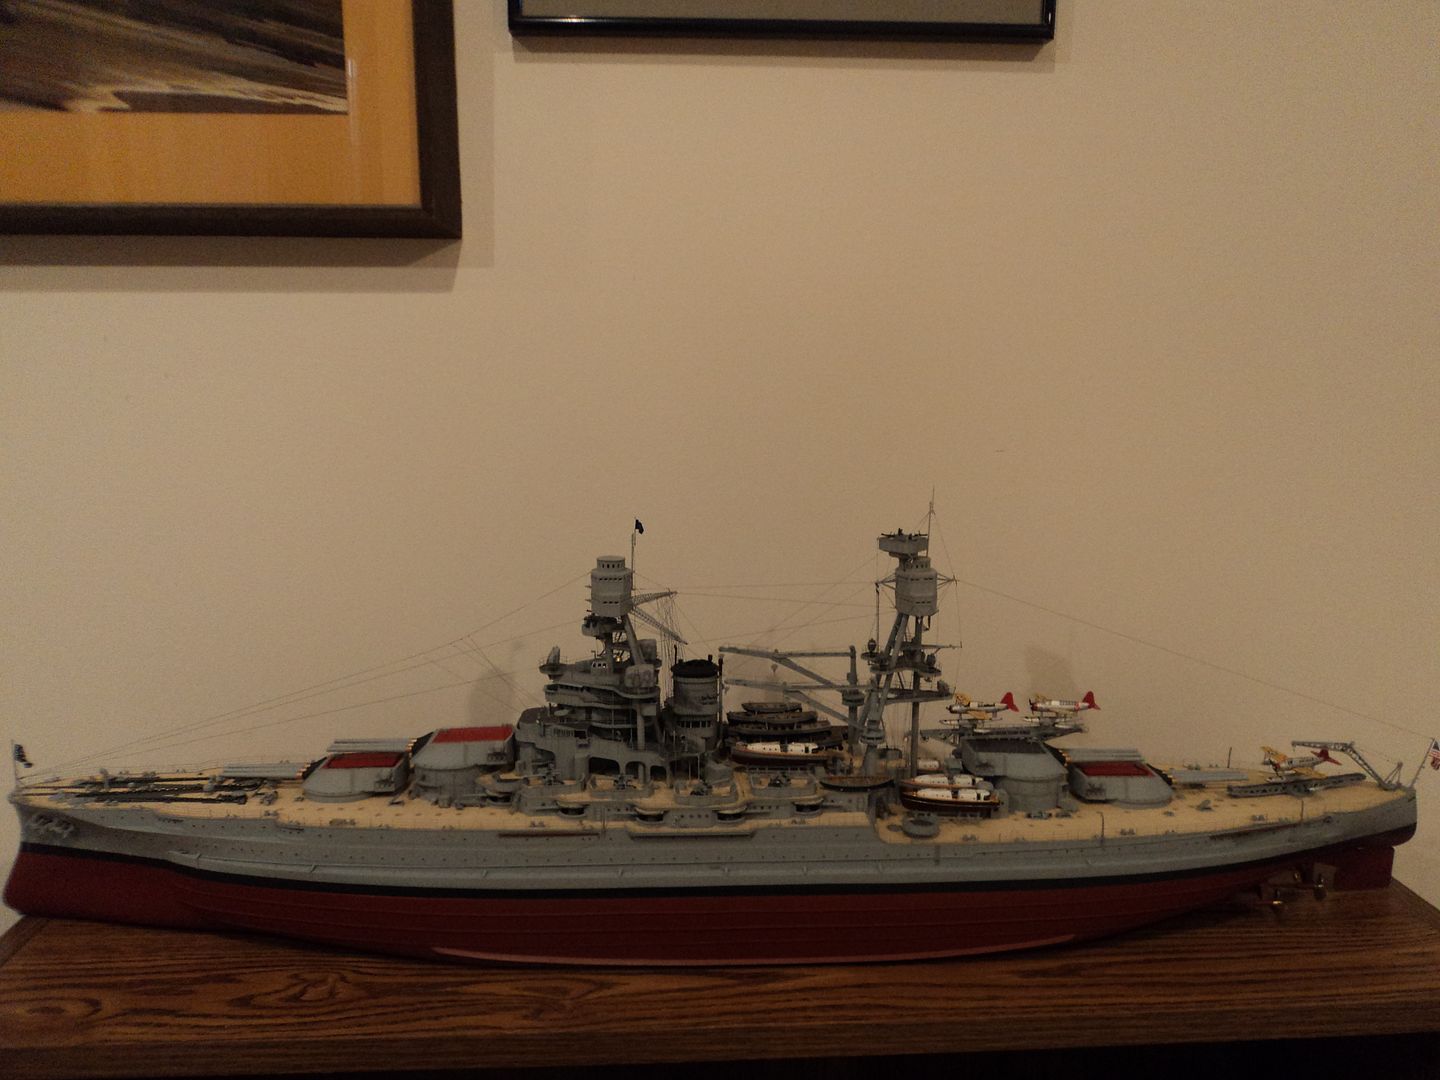 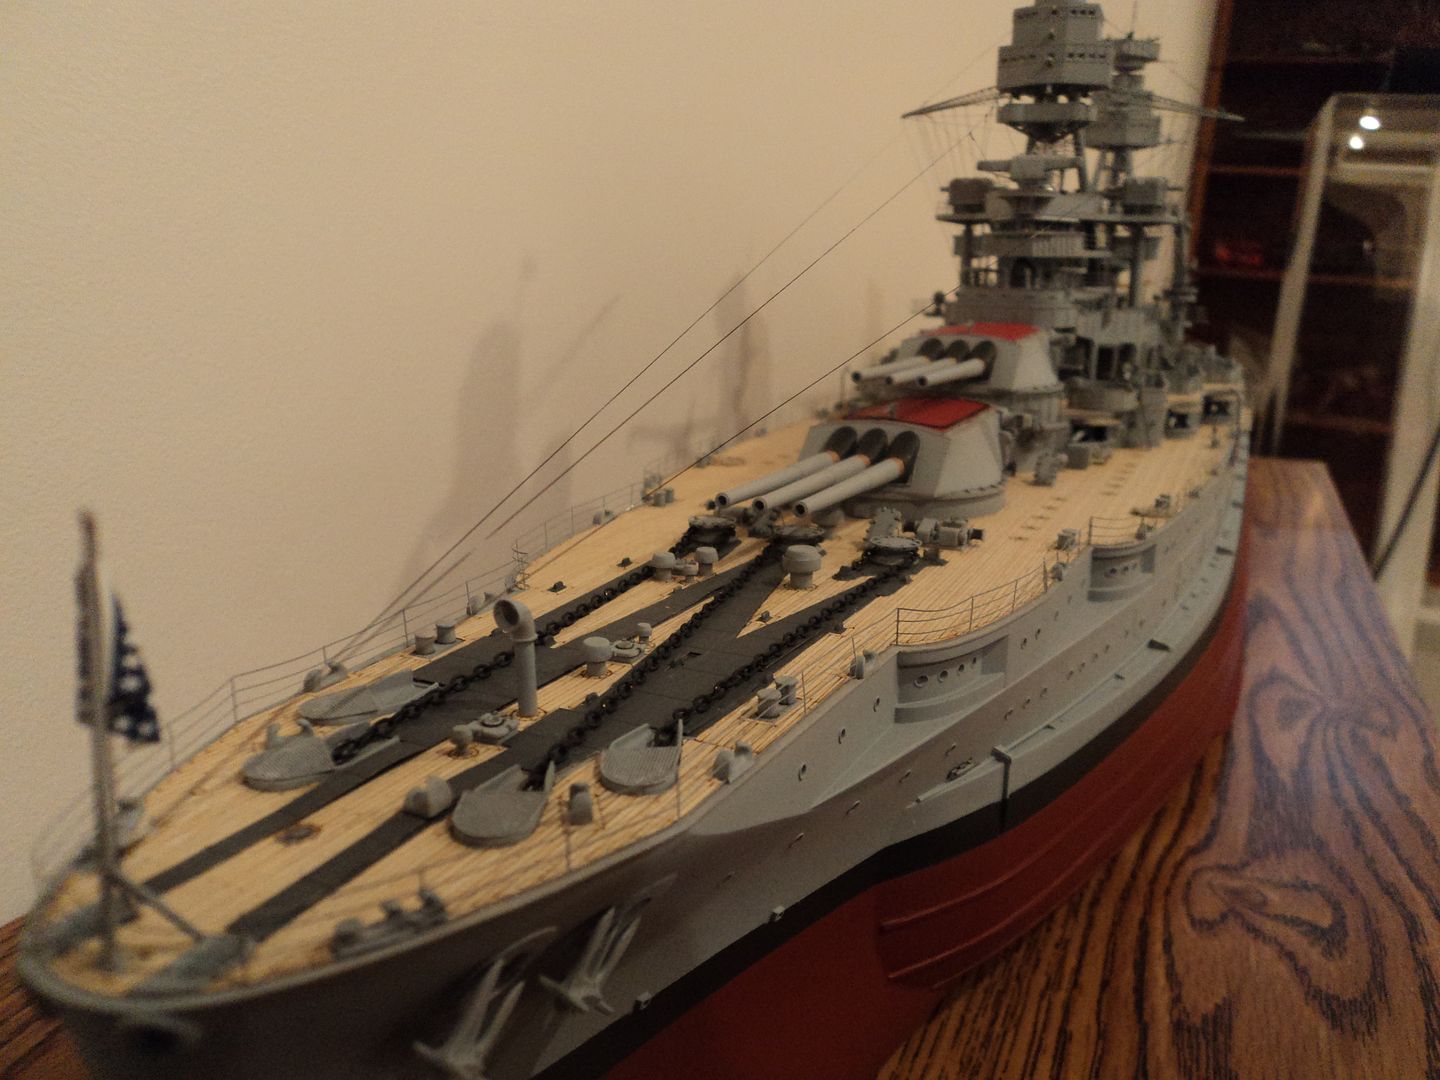 In July of 2016 we had a moving company pack most of our "High Value" items, including the Arizona, and we moved to Arizona. In September we moved into our home and the moving company brought in our stuff. When I unpacked the Arizona I was not happy. The anchor chains were wrapped around the jack staff and draped over the railings. The lattice yards, which I had a heck of a time with during intial construction as I had bumped them off twice per side and were somewhat downward justified, were now a mess. I took the pictures below through the case so they are a bit blurred, but you can see what a mess it is. I was crestfallen. Plus the rigging to the jackstaff had pulled the jackstaff back and it really looked bad. 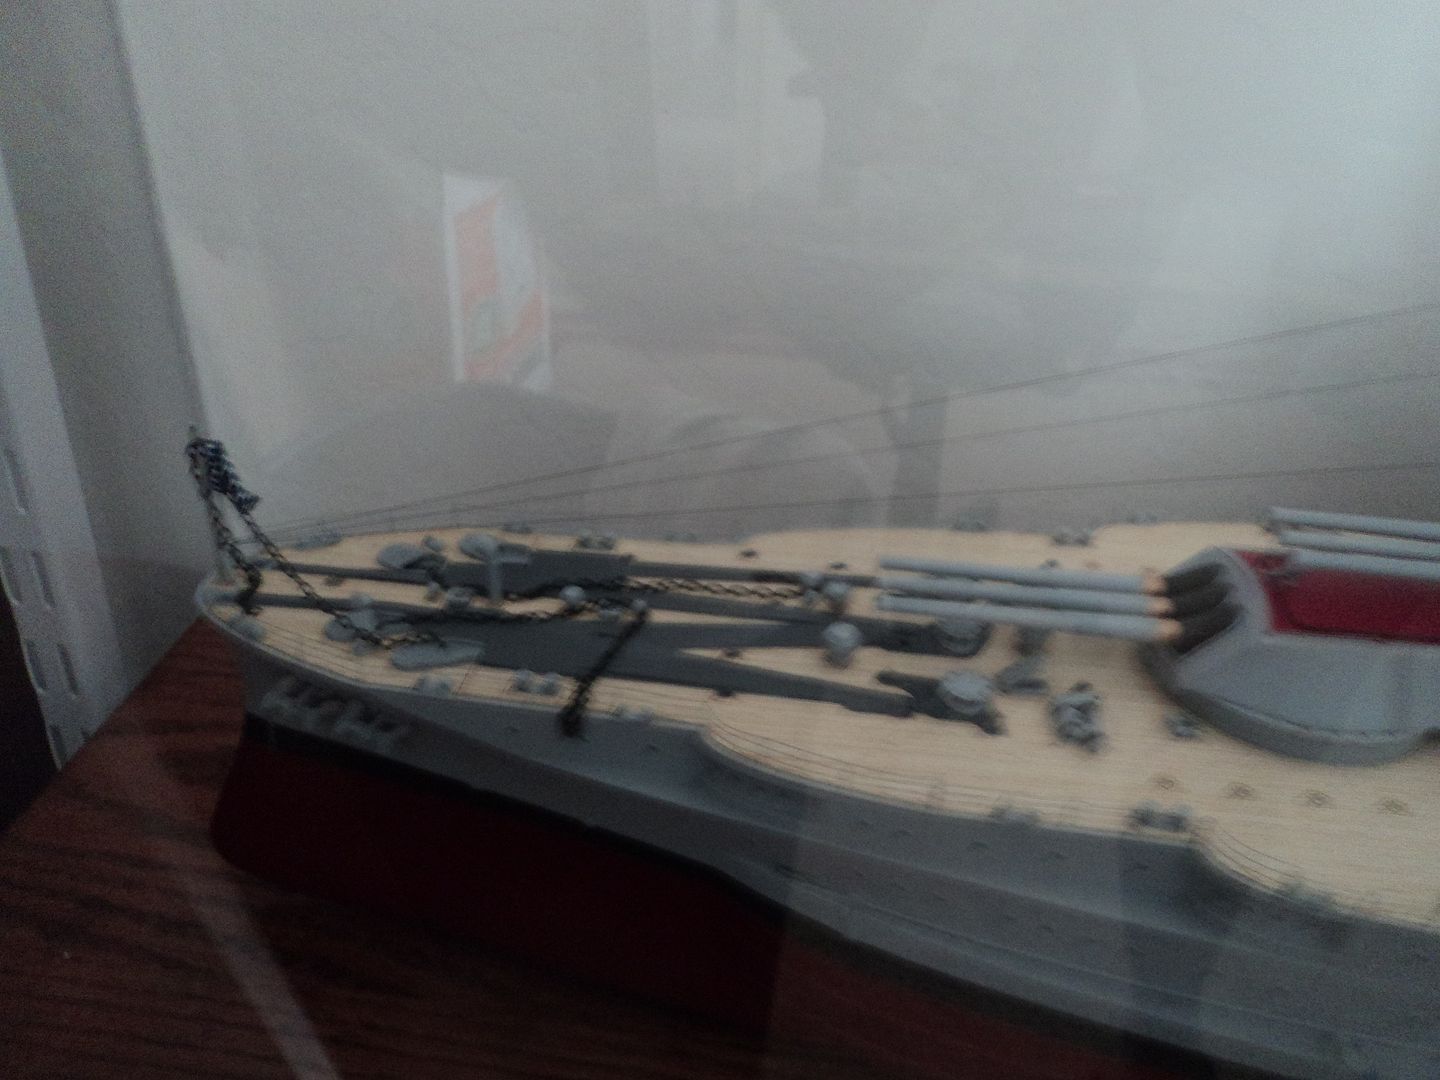 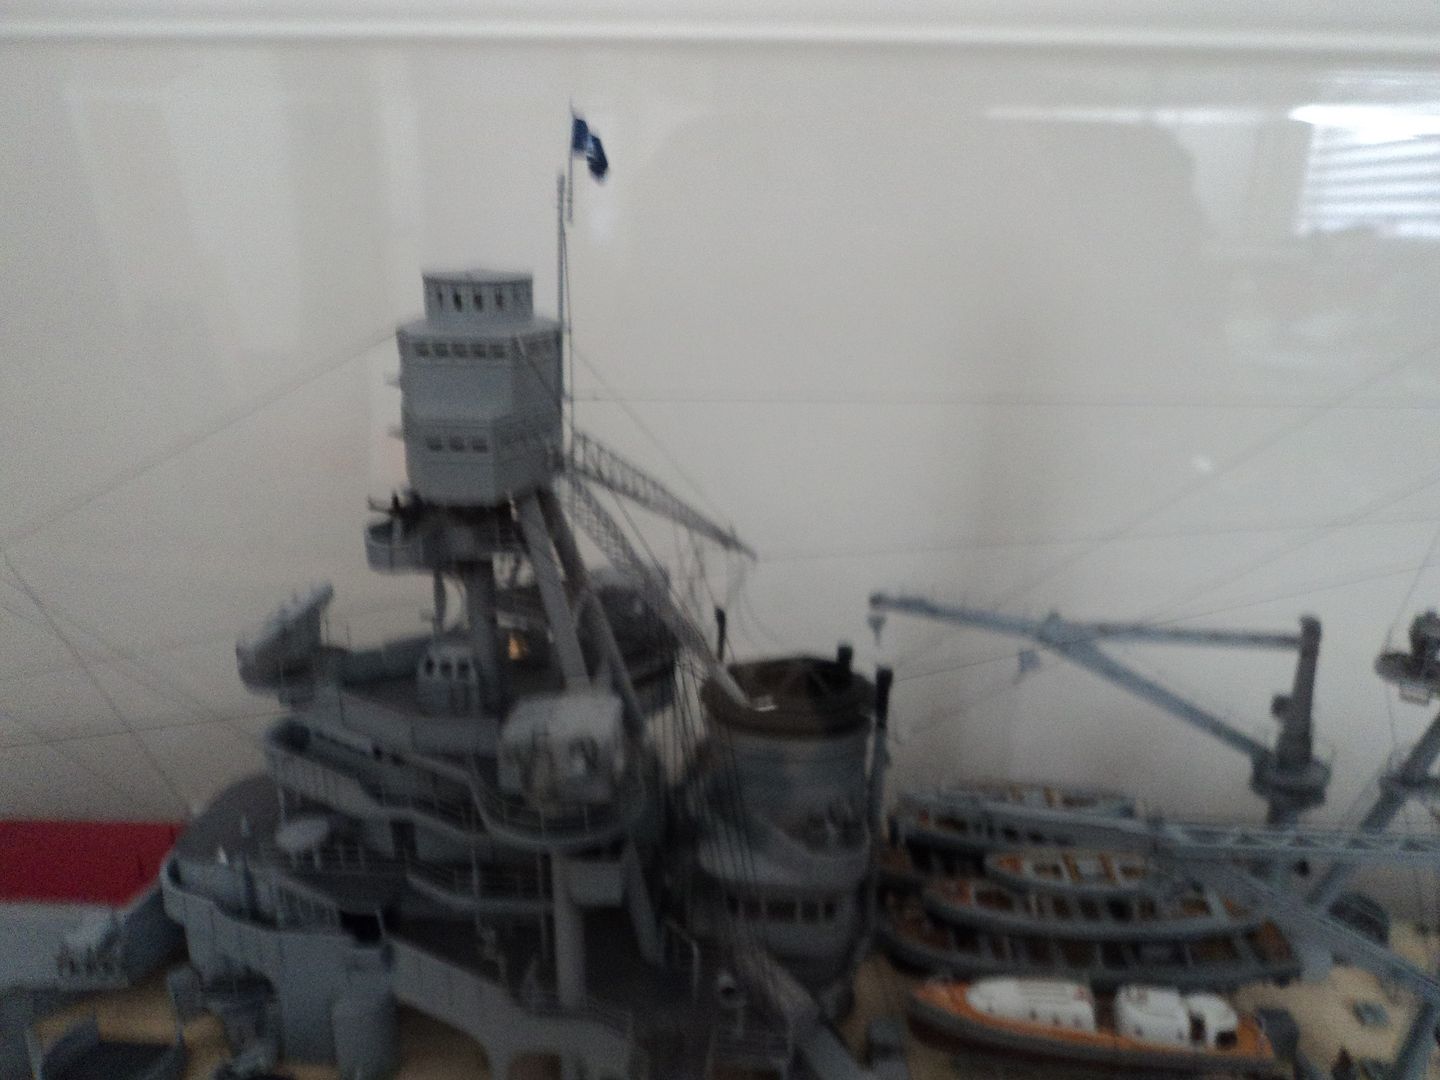 Once we got settled in to the house and life resumed a routine I decided to make the repairs. I pulled the model out of the case very carefully as I had secured in the case to prevent it from being knocked around. Once out I began the disassembly and clean up. 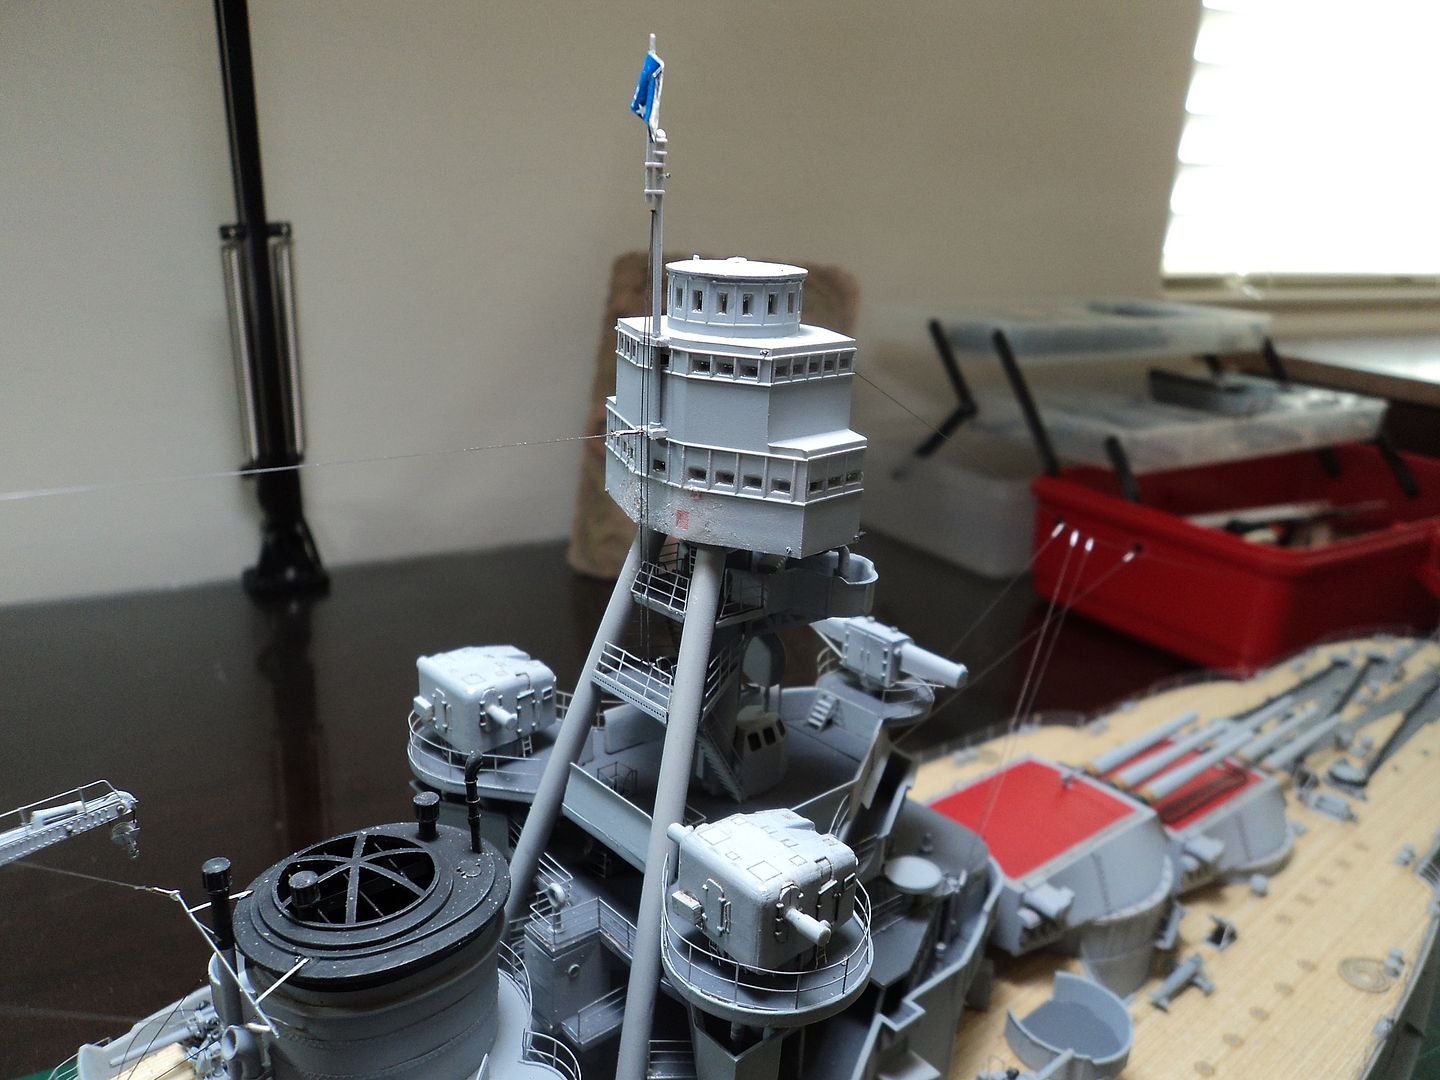 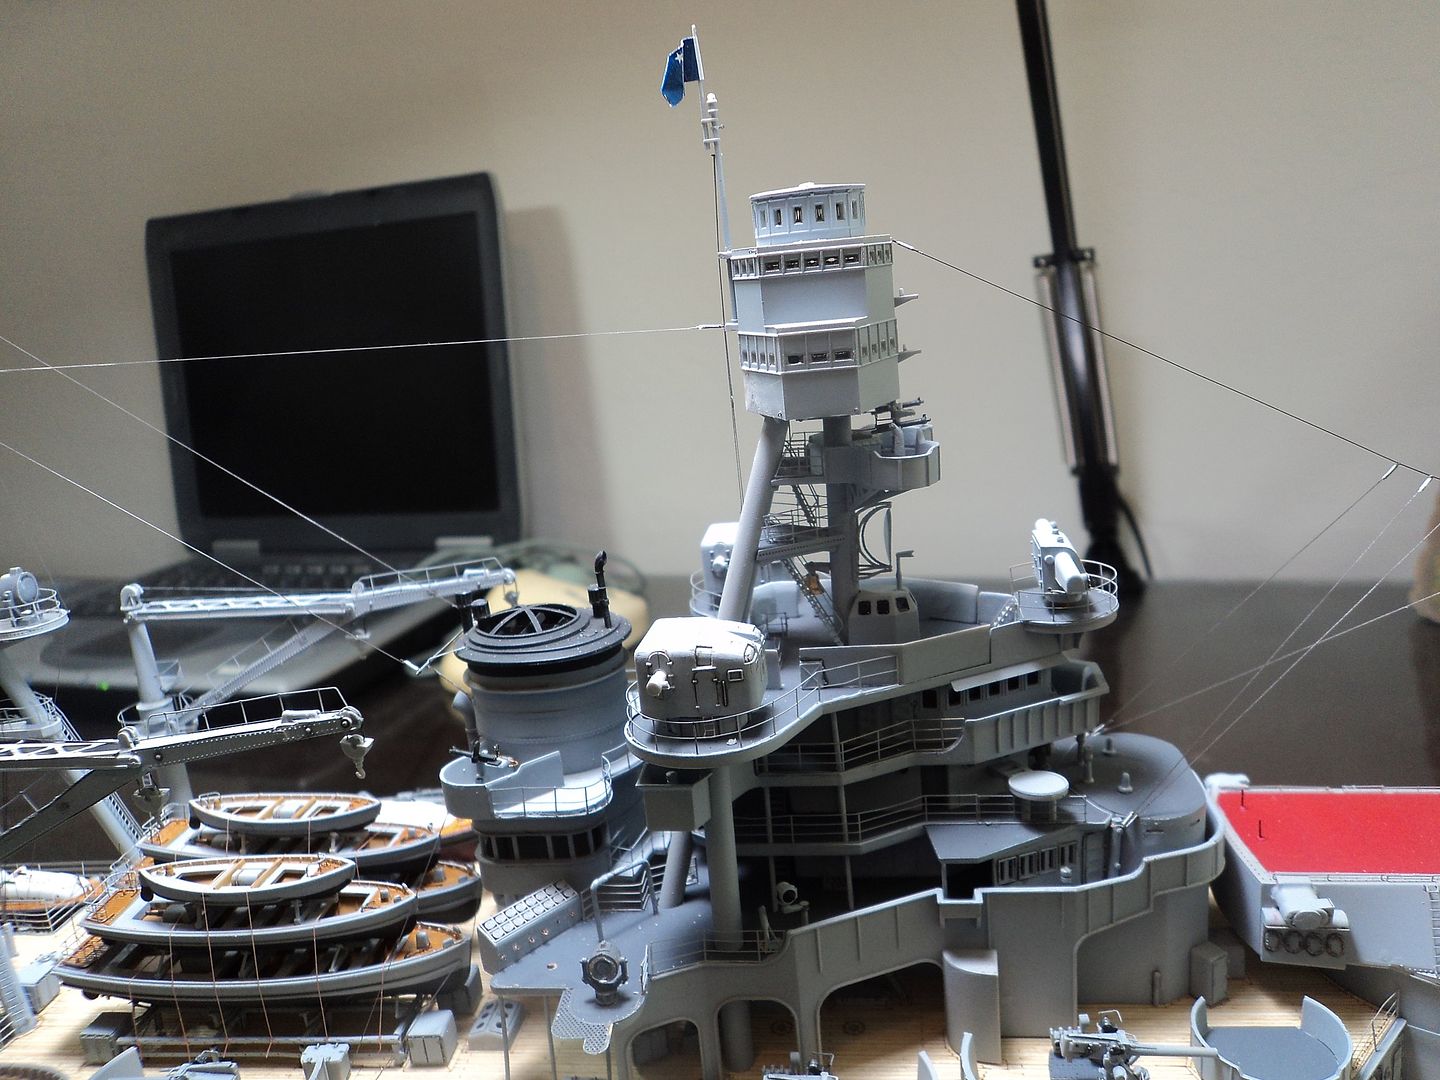 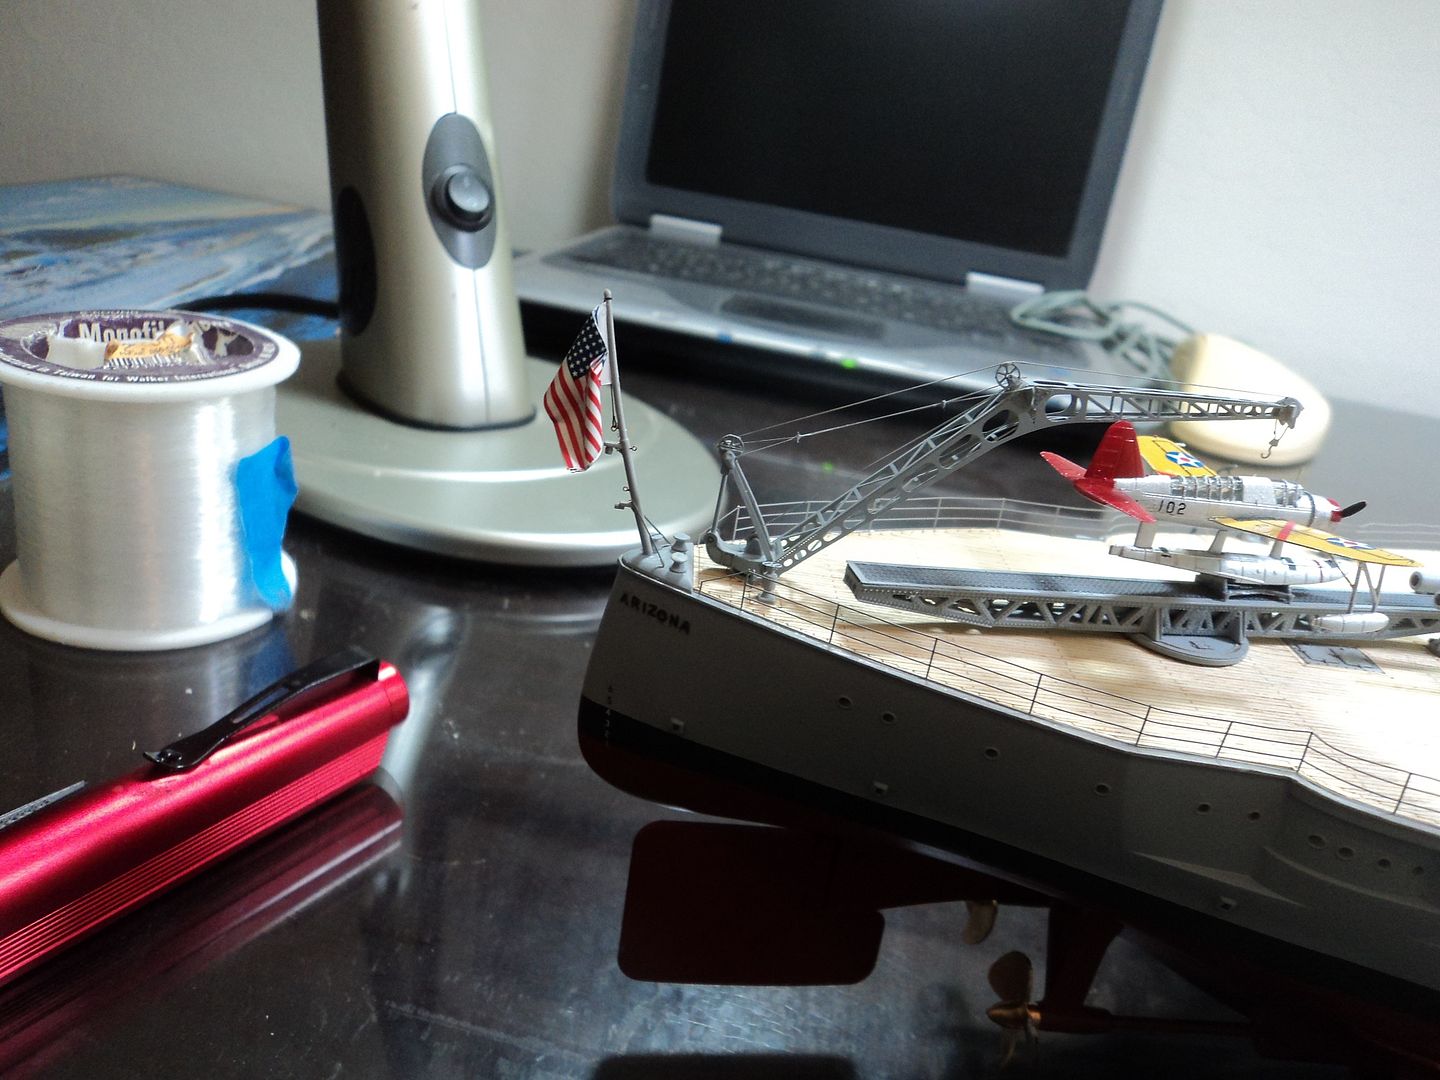 Once I had all the rigging, glue, paint, searchlights and PE Railings removed I began the reassembly. I started with the lattice yards. I had a spare set of kit Lattice yards from my Pennsylvania conversion and started to work with them. I used a third hand to put in such things as the hand rail and eyelets. I was almost done with the port yard when I bumped it. This was really frustrating as I had had such bad luck with them previously. I went to ebay to buy a complete set of the kit PE, won the auction, but then I got an email from the seller stating he couldn't find them and refunded my money. I went to the forum and managed to get a set from Mark "Gotcha" and a set from Hank Strub. I used one and am keeping a spare set for my Pennsylvania, but that's another moving horror story. To make the yards stay attached and provide some purchase I cut small pieces of sheet styrene and attached them to the bottom of the yard with a small tab to fix to the bottom of the fore top. The one in the picture is the one I bumped. I could have used it, but I used a new one. I started on the starboard side, being right handed I find working on the right side of any model difficult so I start there first.  I used a mono-filament line for the stay from the end of the yard to the top of the fore top for added stability. With the small tab fixed to the bottom of the foretop and the stay the thing is practically bullet proof. Once painted you don't notice the piece on the yard. From there I moved on to the halyards. I had used the Model Kasten stretch line previously, but knowing that the halyard lines were a lighter color I went with fine white EZ line, once finished I gave them a coat of Tamiya Deck Tan to tone them down a bit. In this picture you can see the completed foretop and lattice yards. 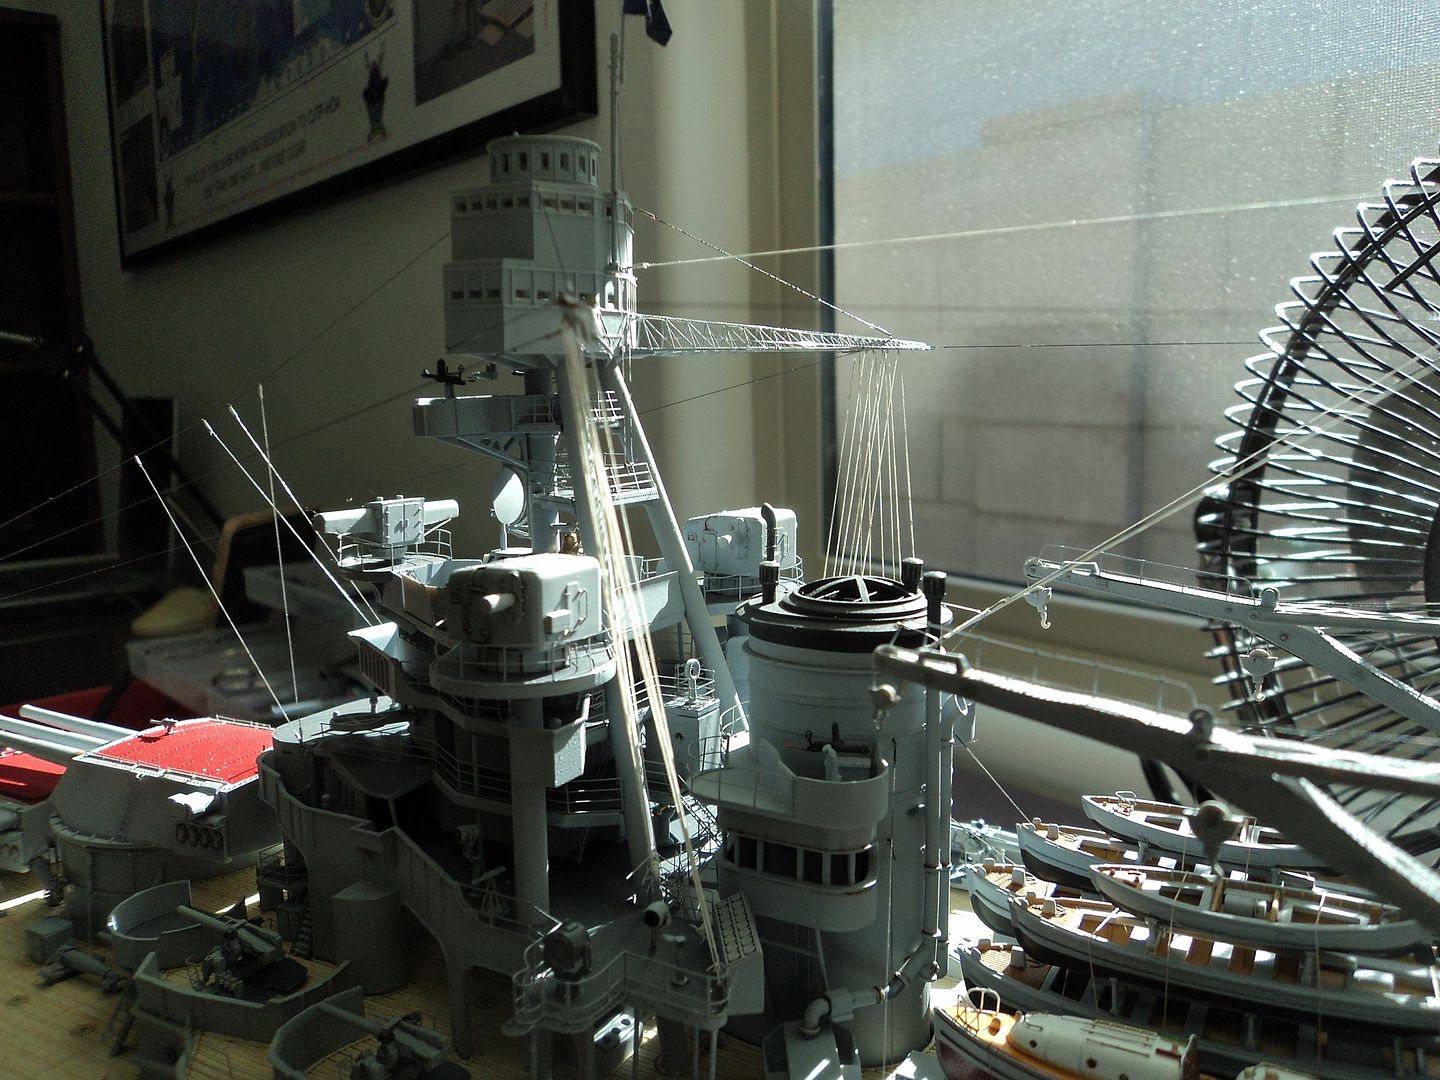 Now that I had the "Genie out of the bottle" so to speak (write) I thought: "Why not add the things I didn't the first go around?"  So I did. I was never happy with the antenna array on the main top turned out. If you look closely you can see they lean to the port side. It got worse as time moved on. 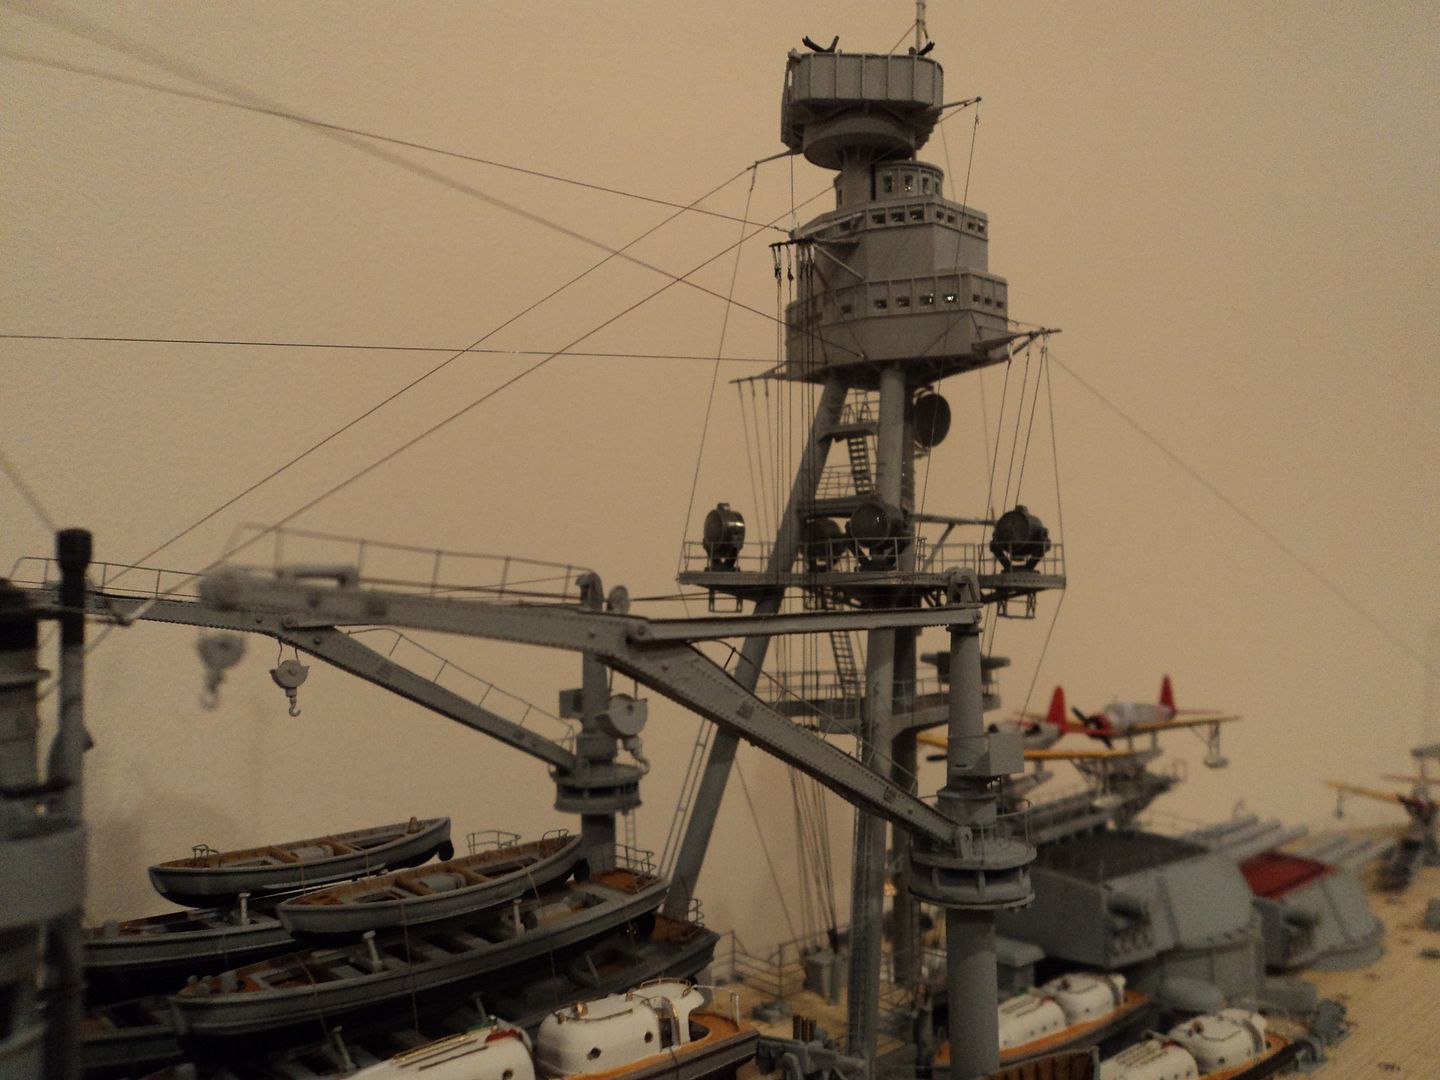 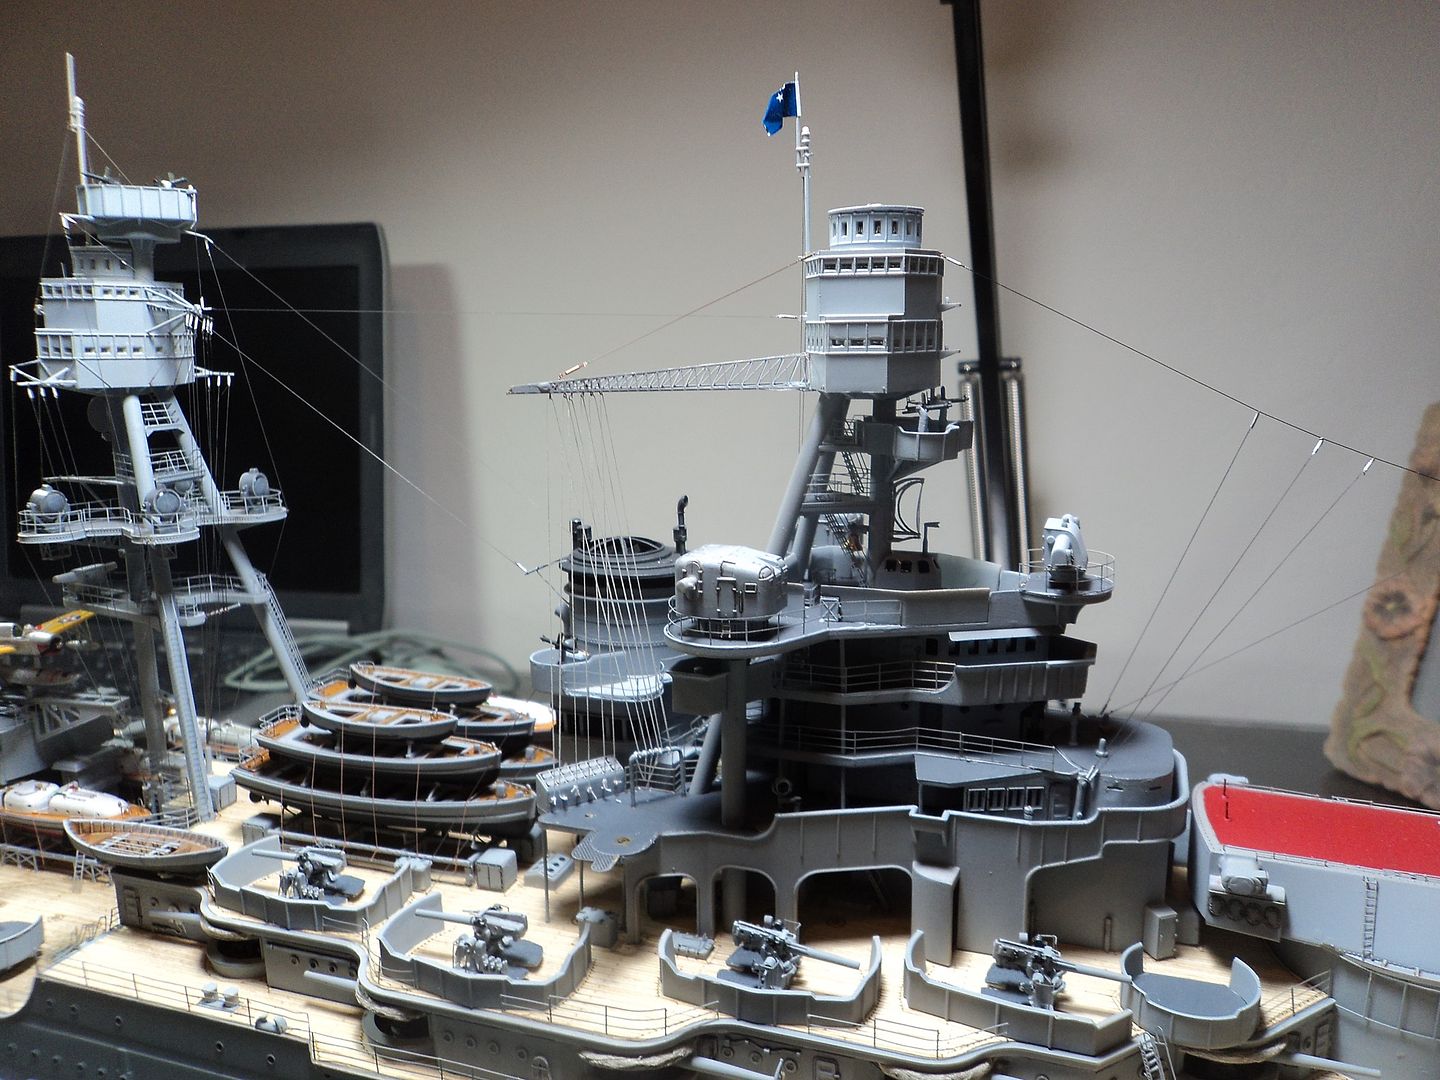 I tried to take it out but it was in there good, I would have had to take the boats out, more rigging and then remove the lines from the antenna trunk which would have meant to remove the mainmast. I wasn't prepared to do that. So, I came up with a fix. It isn't on the original, but; this is my model and to me it looks as if it could have been on the real ship. Because I had used EZ line I was able to fix a stay on the port side, run it through an eyelet that I had already attached to the top of the main top, and run it back down to the starboard side of the array and by pulling it taught I was able to straighten it out. It's hardly noticeable. What is noticeable is that the antenna array is now horizontal. See below. I then moved on to other areas of the ship. Stay tuned to the next installment. I had built this and completed it right around this time of year in 2015. It was my second ship model in quite some time and first big ship in 1/200 scale. I was pretty pleased with it overall. There were things I could have done, but my skill level and time precluded me doing those things to it.
[url=http://s942.photobucket.com/user/ptbarnum101/media/Arizona/Final_Walkaround/Final_5.jpg.html][img]http://i942.photobucket.com/albums/ad261/ptbarnum101/Arizona/Final_Walkaround/Final_5.jpg[/img][/url]
[url=http://s942.photobucket.com/user/ptbarnum101/media/Arizona/Final_Walkaround/Final_2.jpg.html][img]http://i942.photobucket.com/albums/ad261/ptbarnum101/Arizona/Final_Walkaround/Final_2.jpg[/img][/url]
In July of 2016 we had a moving company pack most of our "High Value" items, including the Arizona, and we moved to Arizona. In September we moved into our home and the moving company brought in our stuff. When I unpacked the Arizona I was not happy. The anchor chains were wrapped around the jack staff and draped over the railings. The lattice yards, which I had a heck of a time with during intial construction as I had bumped them off twice per side and were somewhat downward justified, were now a mess. I took the pictures below through the case so they are a bit blurred, but you can see what a mess it is. I was crestfallen. Plus the rigging to the jackstaff had pulled the jackstaff back and it really looked bad.
[url=http://s942.photobucket.com/user/ptbarnum101/media/Arizona/Arizona%20Encore/11_15_16_4.jpg.html][img]http://i942.photobucket.com/albums/ad261/ptbarnum101/Arizona/Arizona%20Encore/11_15_16_4.jpg[/img][/url]
[url=http://s942.photobucket.com/user/ptbarnum101/media/Arizona/Arizona%20Encore/11_15_16_3.jpg.html][img]http://i942.photobucket.com/albums/ad261/ptbarnum101/Arizona/Arizona%20Encore/11_15_16_3.jpg[/img][/url]
Once we got settled in to the house and life resumed a routine I decided to make the repairs. I pulled the model out of the case very carefully as I had secured in the case to prevent it from being knocked around. Once out I began the disassembly and clean up.
[url=http://s942.photobucket.com/user/ptbarnum101/media/Arizona/Arizona%20Encore/DSC02642.jpg.html][img]http://i942.photobucket.com/albums/ad261/ptbarnum101/Arizona/Arizona%20Encore/DSC02642.jpg[/img][/url]
[url=http://s942.photobucket.com/user/ptbarnum101/media/Arizona/Arizona%20Encore/DSC02641_1.jpg.html][img]http://i942.photobucket.com/albums/ad261/ptbarnum101/Arizona/Arizona%20Encore/DSC02641_1.jpg[/img][/url]
[url=http://s942.photobucket.com/user/ptbarnum101/media/Arizona/Arizona%20Encore/DSC02643.jpg.html][img]http://i942.photobucket.com/albums/ad261/ptbarnum101/Arizona/Arizona%20Encore/DSC02643.jpg[/img][/url]
Once I had all the rigging, glue, paint, searchlights and PE Railings removed I began the reassembly. I started with the lattice yards. I had a spare set of kit Lattice yards from my Pennsylvania conversion and started to work with them. I used a third hand to put in such things as the hand rail and eyelets. I was almost done with the port yard when I bumped it. This was really frustrating as I had had such bad luck with them previously. I went to ebay to buy a complete set of the kit PE, won the auction, but then I got an email from the seller stating he couldn't find them and refunded my money. I went to the forum and managed to get a set from Mark "Gotcha" and a set from Hank Strub. I used one and am keeping a spare set for my Pennsylvania, but that's another moving horror story. To make the yards stay attached and provide some purchase I cut small pieces of sheet styrene and attached them to the bottom of the yard with a small tab to fix to the bottom of the fore top. The one in the picture is the one I bumped. I could have used it, but I used a new one.
[url=http://s942.photobucket.com/user/ptbarnum101/media/Arizona/Arizona%20Encore/DSC02647.jpg.html][img]http://i942.photobucket.com/albums/ad261/ptbarnum101/Arizona/Arizona%20Encore/DSC02647.jpg[/img][/url]
I started on the starboard side, being right handed I find working on the right side of any model difficult so I start there first.
[url=http://s942.photobucket.com/user/ptbarnum101/media/Arizona/Arizona%20Encore/DSC02654.jpg.html][img]http://i942.photobucket.com/albums/ad261/ptbarnum101/Arizona/Arizona%20Encore/DSC02654.jpg[/img][/url]
I used a mono-filament line for the stay from the end of the yard to the top of the fore top for added stability. With the small tab fixed to the bottom of the foretop and the stay the thing is practically bullet proof. Once painted you don't notice the piece on the yard.
From there I moved on to the halyards. I had used the Model Kasten stretch line previously, but knowing that the halyard lines were a lighter color I went with fine white EZ line, once finished I gave them a coat of Tamiya Deck Tan to tone them down a bit.
In this picture you can see the completed foretop and lattice yards.
[url=http://s942.photobucket.com/user/ptbarnum101/media/Arizona/Arizona%20Encore/DSC02675.jpg.html][img]http://i942.photobucket.com/albums/ad261/ptbarnum101/Arizona/Arizona%20Encore/DSC02675.jpg[/img][/url]
Now that I had the "Genie out of the bottle" so to speak (write) I thought: "Why not add the things I didn't the first go around?" :cool_2: So I did.
I was never happy with the antenna array on the main top turned out. If you look closely you can see they lean to the port side. It got worse as time moved on.
[url=http://s942.photobucket.com/user/ptbarnum101/media/Arizona/Final_Walkaround/Final_8.jpg.html][img]http://i942.photobucket.com/albums/ad261/ptbarnum101/Arizona/Final_Walkaround/Final_8.jpg[/img][/url]
[url=http://s942.photobucket.com/user/ptbarnum101/media/Arizona/Arizona%20Encore/DSC02653.jpg.html][img]http://i942.photobucket.com/albums/ad261/ptbarnum101/Arizona/Arizona%20Encore/DSC02653.jpg[/img][/url]
I tried to take it out but it was in there good, I would have had to take the boats out, more rigging and then remove the lines from the antenna trunk which would have meant to remove the mainmast. I wasn't prepared to do that. So, I came up with a fix. It isn't on the original, but; this is my model and to me it looks as if it could have been on the real ship. Because I had used EZ line I was able to fix a stay on the port side, run it through an eyelet that I had already attached to the top of the main top, and run it back down to the starboard side of the array and by pulling it taught I was able to straighten it out. It's hardly noticeable. What is noticeable is that the antenna array is now horizontal. See below.
[url=http://s942.photobucket.com/user/ptbarnum101/media/Arizona/Arizona%20Encore/12_14_16_6.jpg.html][img]http://i942.photobucket.com/albums/ad261/ptbarnum101/Arizona/Arizona%20Encore/12_14_16_6.jpg[/img][/url]
I then moved on to other areas of the ship.
Stay tuned to the next installment.
|
|
|
|
Posted: Wed Dec 14, 2016 5:40 pm |
|
|
|
|


