Many of you are interested in knowing my way of doing water. I learned all the tricks of making water right from this site---the excellent article "Modeling Realistic Water" by Jeff Herne. After several projects I had developed a few extra procedures of my own. Besides the basic construction of sea base made of gel, I emphasis on building wake patterns made by real ship. Pay a little bit attention on painting the wakes. It will reward you handsomely on the finished product.
Here's the step-by-step process of making a water base for a 1/700 Pitroad IJN Destroyer Hatsushimo. Materials required for the sea base are
- Base. In this case it's the base plate of an IMEX 10" railroad display case.
- Acrylic gel medium. I used Liquitex brand bought at Michaels.
- Cheap acrylic paints. I used Liquitex's Blue Green color.
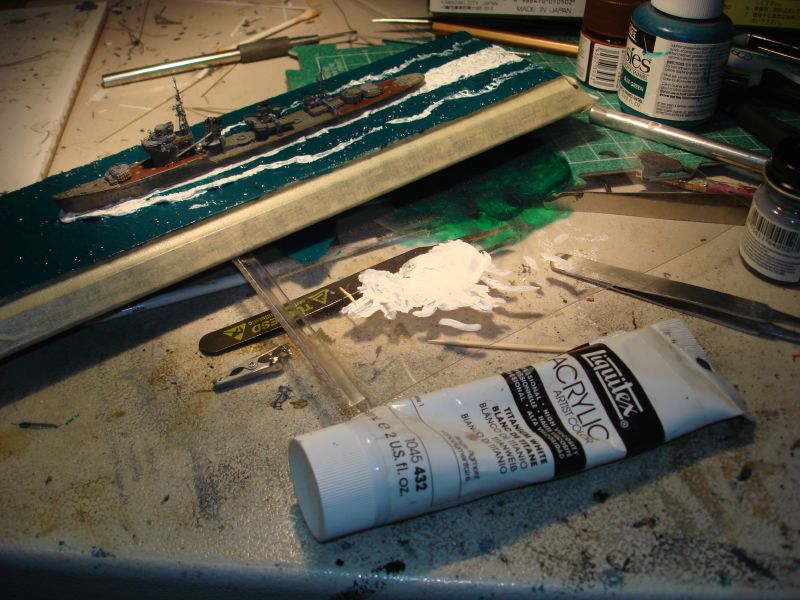
- Tamiya epoxy putty for making bow waves.
First is to find a picture of the ship underway. I want to model a ship making a high speed run. After consulting several of my references I settled on the picture below from a Japanese book.

In the picture below use the picture above as reference and sculpt bow waves with Tamiya epoxy putty.
Before gluing the ship to the base, inspect the wave and make adjustments.
In the picture below, use white color to outline the white wakes generated by the ship. The ship has been glued to the base using super glue.
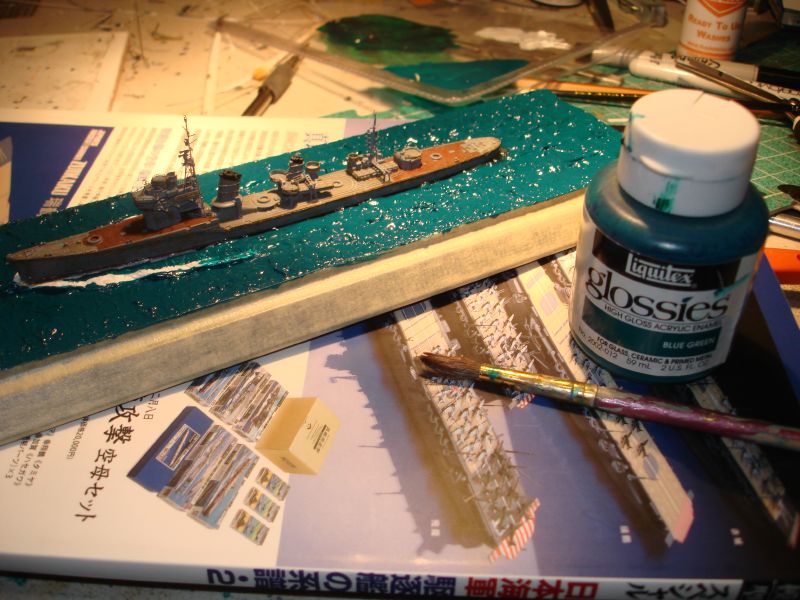
Apply gel to the base with a paint brush. I applied gels in very dense strokes.
After the first application is dry and set, apply gel along the white wake outlines prepared in one of the previous steps. You can make foams generated by wakes with gel in the step too. Another important thing is to cover up brush strokes with new gels. Brush strokes don't look nice at all on a sea base.

Paint the sea base with base color here.
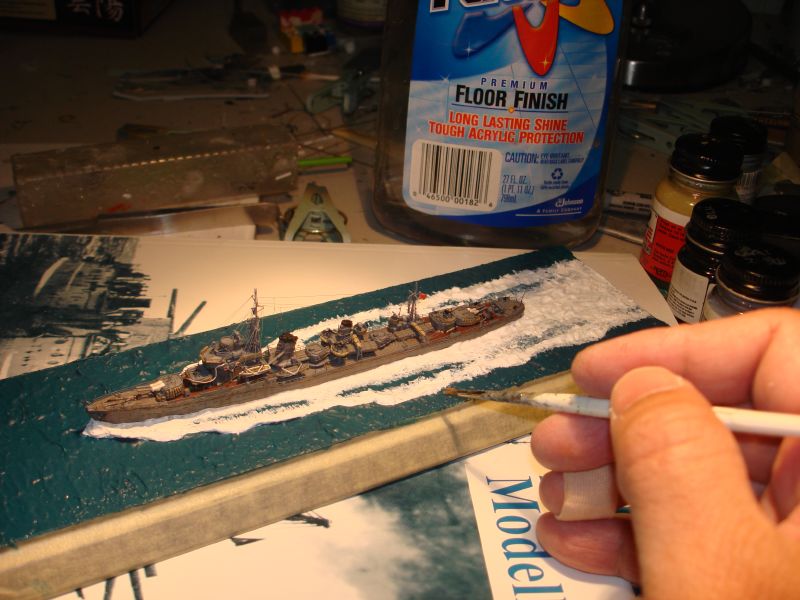
Now the tricky part that will make or break the water base--painting the wakes. At least try to stick to the photo as much as possible. Paint the wakes with white color.
Painting of the base is basically done. Now you can concentrate your efforts on finishing the ship. After the final dull coat is applied to the model, give the water base a heavy dose of Future.
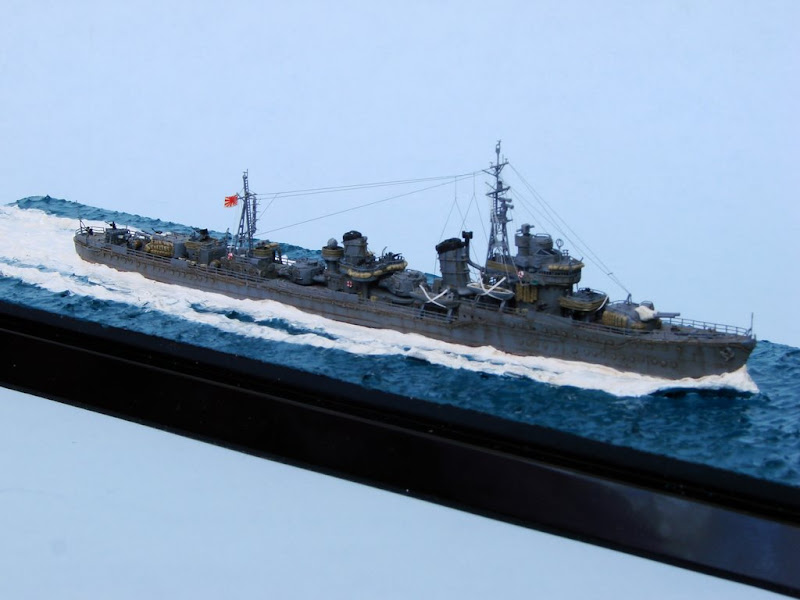
The finished product!
Many of you are interested in knowing my way of doing water. I learned all the tricks of making water right from this site---the excellent article "Modeling Realistic Water" by Jeff Herne. After several projects I had developed a few extra procedures of my own. Besides the basic construction of sea base made of gel, I emphasis on building wake patterns made by real ship. Pay a little bit attention on painting the wakes. It will reward you handsomely on the finished product.
Here's the step-by-step process of making a water base for a 1/700 Pitroad IJN Destroyer Hatsushimo. Materials required for the sea base are
- Base. In this case it's the base plate of an IMEX 10" railroad display case.
- Acrylic gel medium. I used Liquitex brand bought at Michaels.
- Cheap acrylic paints. I used Liquitex's Blue Green color.
- Tamiya epoxy putty for making bow waves.
First is to find a picture of the ship underway. I want to model a ship making a high speed run. After consulting several of my references I settled on the picture below from a Japanese book.
[img]http://farm3.static.flickr.com/2169/2292843199_75fd58d877_o.jpg[/img]
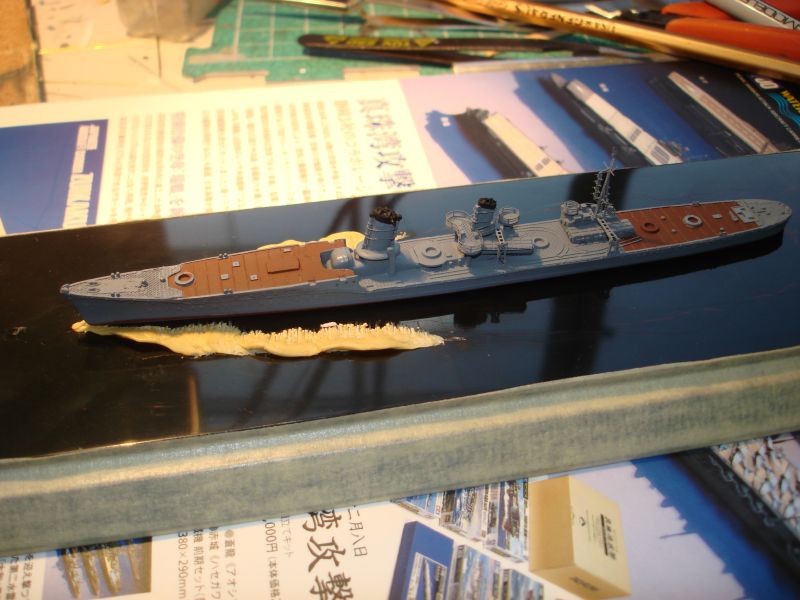
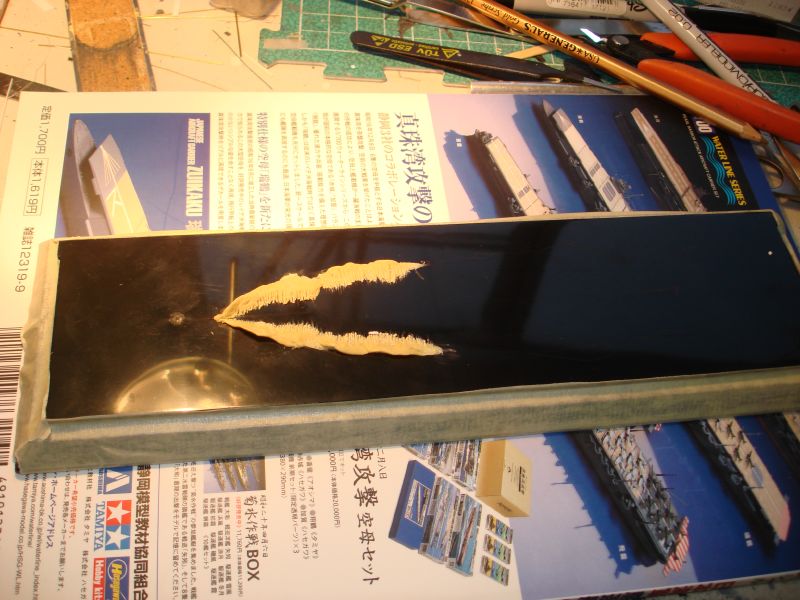
In the picture below use the picture above as reference and sculpt bow waves with Tamiya epoxy putty.
[img]http://farm4.static.flickr.com/3258/2292843141_f9cdbccf7d_o.jpg[/img]
Before gluing the ship to the base, inspect the wave and make adjustments.
[img]http://farm3.static.flickr.com/2193/2293628902_0717326998_o.jpg[/img]
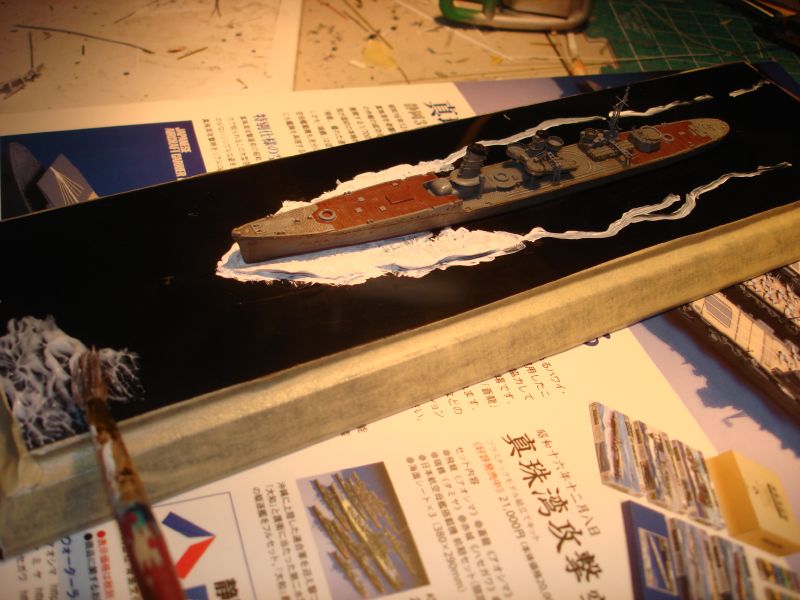
In the picture below, use white color to outline the white wakes generated by the ship. The ship has been glued to the base using super glue.
[img]http://farm3.static.flickr.com/2207/2293628952_8e29a5be69_o.jpg[/img]
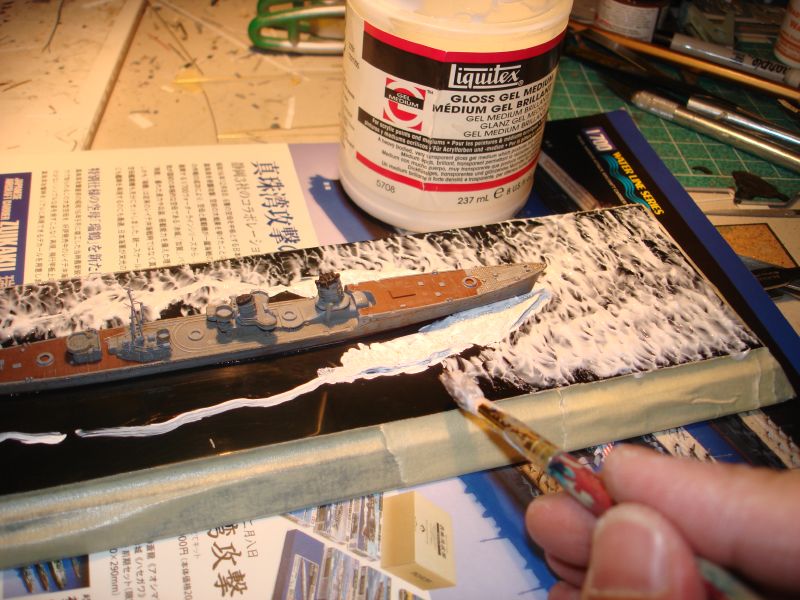
Apply gel to the base with a paint brush. I applied gels in very dense strokes.
[img]http://farm3.static.flickr.com/2254/2293628996_dee3eb5c51_o.jpg[/img]
After the first application is dry and set, apply gel along the white wake outlines prepared in one of the previous steps. You can make foams generated by wakes with gel in the step too. Another important thing is to cover up brush strokes with new gels. Brush strokes don't look nice at all on a sea base.
[img]http://farm3.static.flickr.com/2376/2293629040_2c0917fbca_o.jpg[/img]
Paint the sea base with base color here.
[img]http://farm3.static.flickr.com/2034/2292843309_e6164cc3b8_o.jpg[/img]
Now the tricky part that will make or break the water base--painting the wakes. At least try to stick to the photo as much as possible. Paint the wakes with white color.
[img]http://farm3.static.flickr.com/2178/2292843329_1901b06f70_o.jpg[/img]
Painting of the base is basically done. Now you can concentrate your efforts on finishing the ship. After the final dull coat is applied to the model, give the water base a heavy dose of Future.
[img]http://farm4.static.flickr.com/3217/2292843353_088b2985d8_o.jpg[/img]
The finished product!
[img]http://lh5.google.com.tw/leomagnus1/R8sfCHnZlpI/AAAAAAAAAEM/PTCvMDmn4gM/s800/DSC07030.JPG[/img]