By the Deep 17

Post a reply

Confirmation code
Enter the code exactly as it appears. All letters are case insensitive.
Smilies
:smallsmile: :wave_1: :big_grin: :thumbs_up_1: :heh: :cool_1: :cool_2: :woo_hoo:
View more smilies

BBCode is ON
[img] is ON
[url] is ON
Smilies are ON

Topic review
   

Expand view Topic review: By the Deep 17

Re: By the Deep 17

by aurora-7 » Fri Jul 12, 2013 10:24 am

I'm just amazed. Looks great.

Thanks for showing your process, too.

Re: By the Deep 17

by Captain pugwash » Fri Jul 12, 2013 3:09 am

Truly fasinating stuff here Daniel.

Your colouring for the side of the ship is something I am looking at in my build, makeing it worn and not to new.
Thanks for the Imput in how you have made the wood look more worn.

Cheers foxy :wave_1:

Re: By the Deep 17

by dafi » Thu Jul 11, 2013 11:14 pm

Did not have too much time lately, but today managed to do a tiny-tiny bit :-)

First lashed the guns as defined by the Navy Board ...

Image

... then tried out the hammock cranes ...

Image

Image

... and with connecting rope ...

Image

... :-)

XXXDAn

Re: By the Deep 17

by dafi » Fri May 31, 2013 11:04 am

After a hint I shortend the lead a tad and it now looks like this :-)

Image

Image

Image

Image

Enjoy, Daniel

Re: By the Deep 17

by dafi » Thu May 30, 2013 1:39 pm

Thank you Timmy and Nicolas :-)
I love the "poetic" very much, big extra thanks.

So the next quantum leap, means lot of work for shortest distance possible ;-)

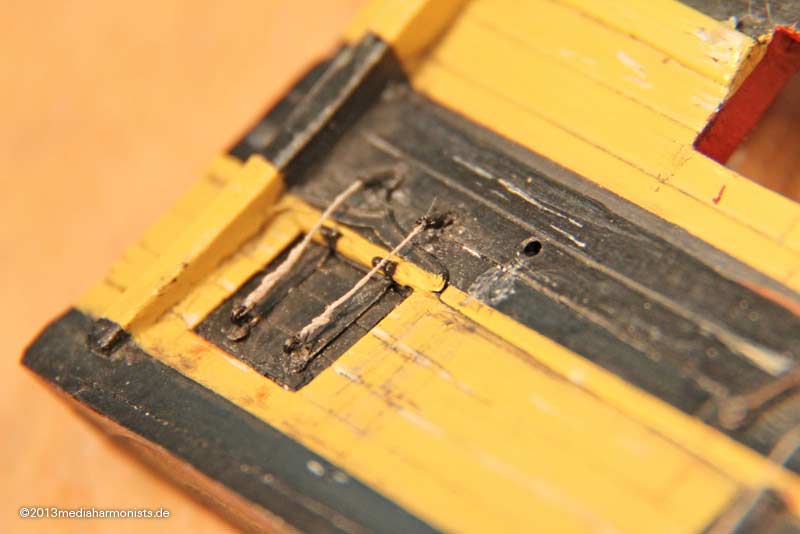
Next were the gunport lid topping lifts. A blackened 0,3 mm copper wire wound around a 1 mm needle and cut into rings.

Image

For the next steps I skipped the tweezers and used fine pliers from the electro department, thus reducing the free flights of the parts enormously !

After some tests I did like follow: As the thread was to thin to do a real splice, I held the ring with the pliers ...

Image

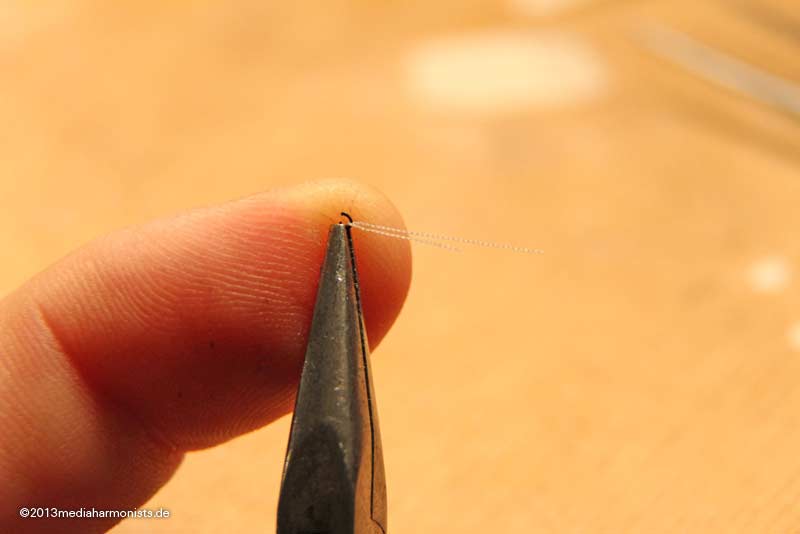
... some CA in the U-turn of the tread and twisted counter clockwise ...

Image

.. to get a well enough splice imitation.

Then positiond the ring, hooked in ...

Image

... closed with the pliers ...

Image

... and the lift is in place :-)


The original idea was to imitate the small tube that enters the hull with diluted PVA but now I wanted to try something more tricky.

Some time ago I already presented the trick, that heated and pulled sprue keeps the proportion of its section. So I prepared a 4 mm sprue by drilling a center hole of 2 mm, fixed toothpicks on its ends ...

Image

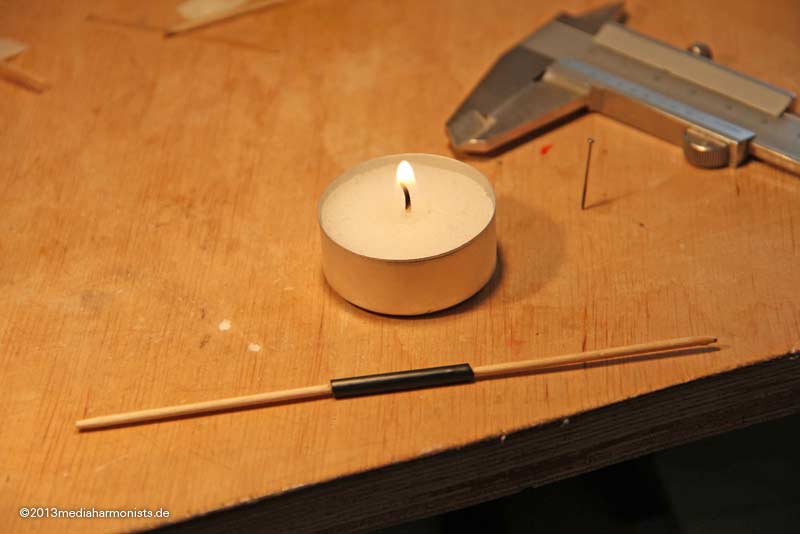
... and slowly heated it up and pulled to the wanted diameter ...

Image

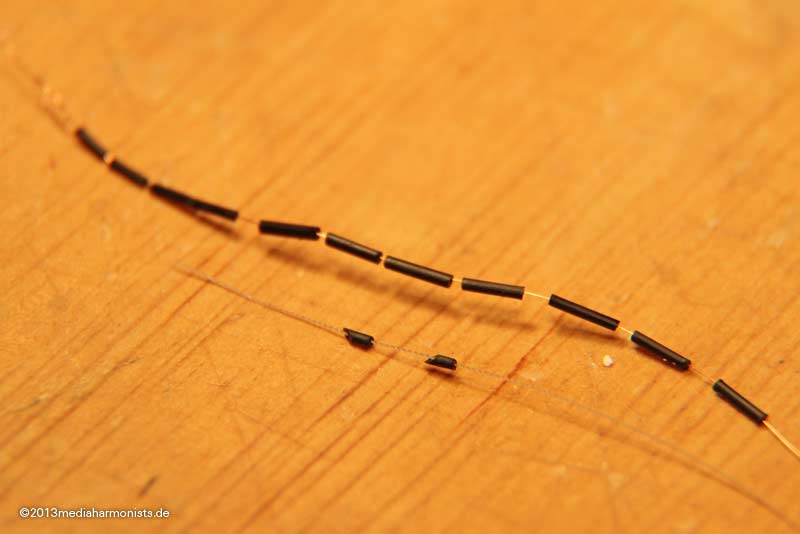
... then cut 3 mm pieces and fiddeld them on a 0,1 mm copper wire to avoid unwanted escapes. In the front the test topping lift.

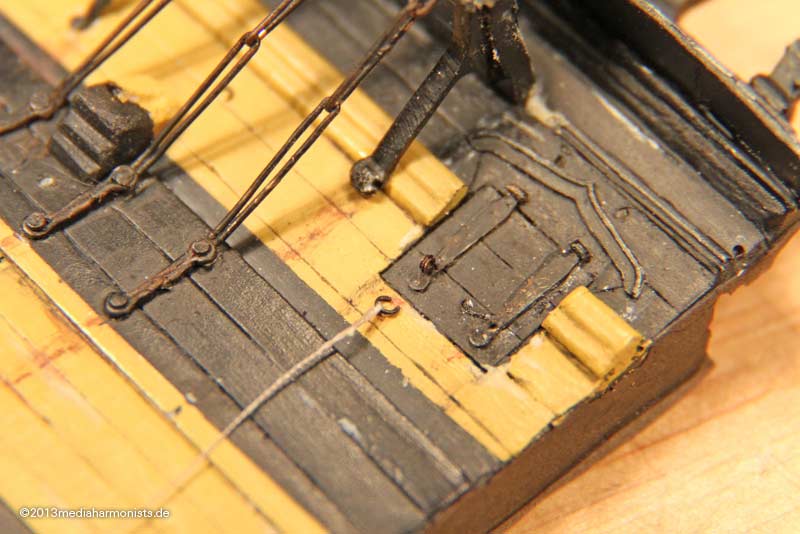
Then drilled 0,7 mm holes for the tubes pointing 45� upwards, inserted the tubes, glued them in and cut them to the necessary length ...

Image

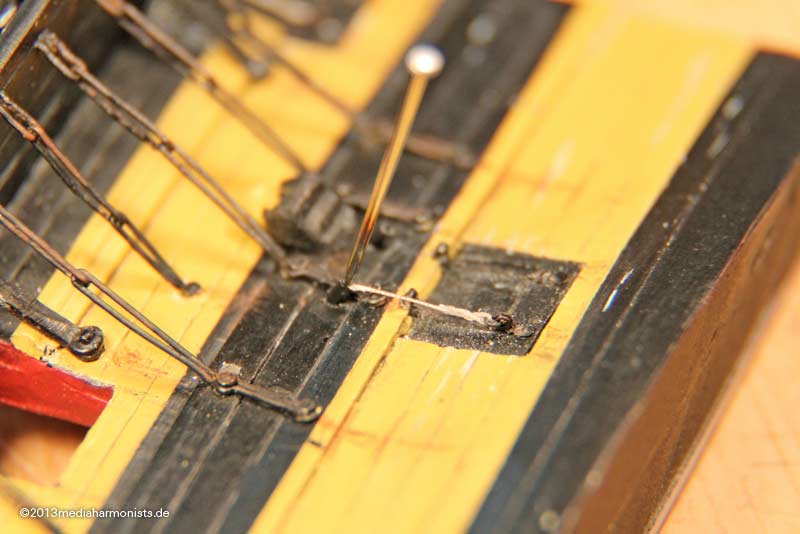
... used a needle to reopen the squeezed holes, put the lift in and glued it by fixing with the needle.

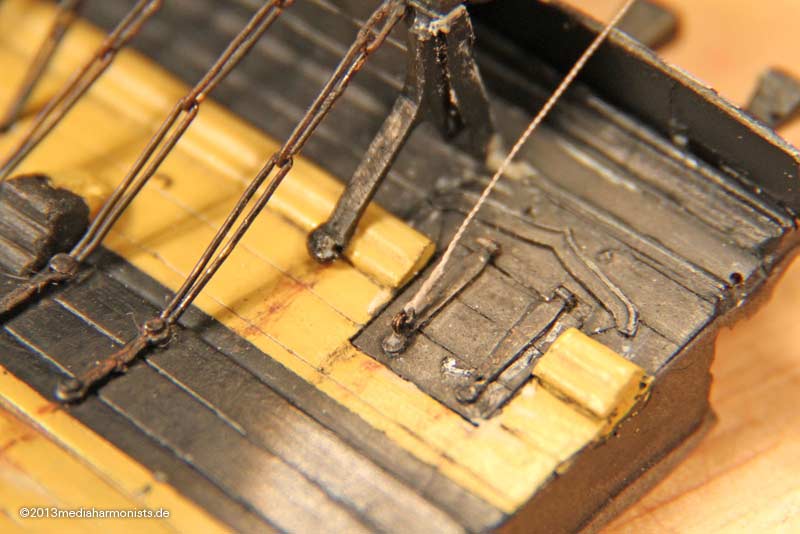
And it looks like this:

Image

Image

Image

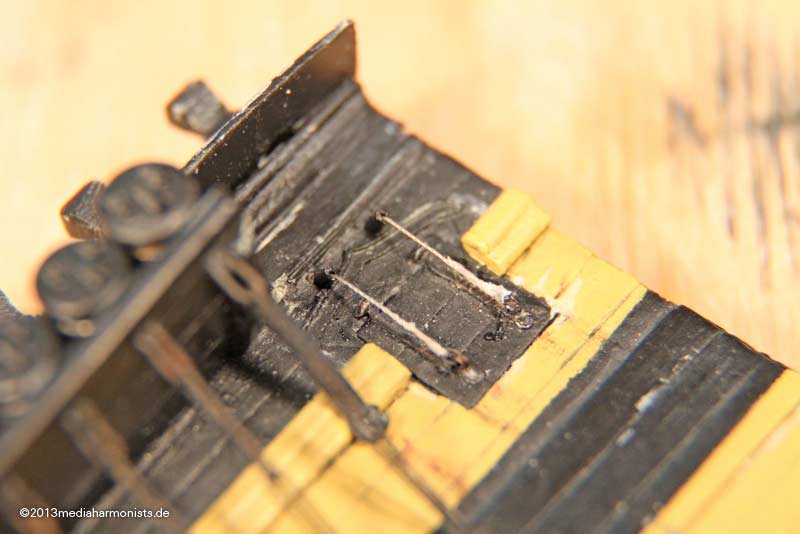
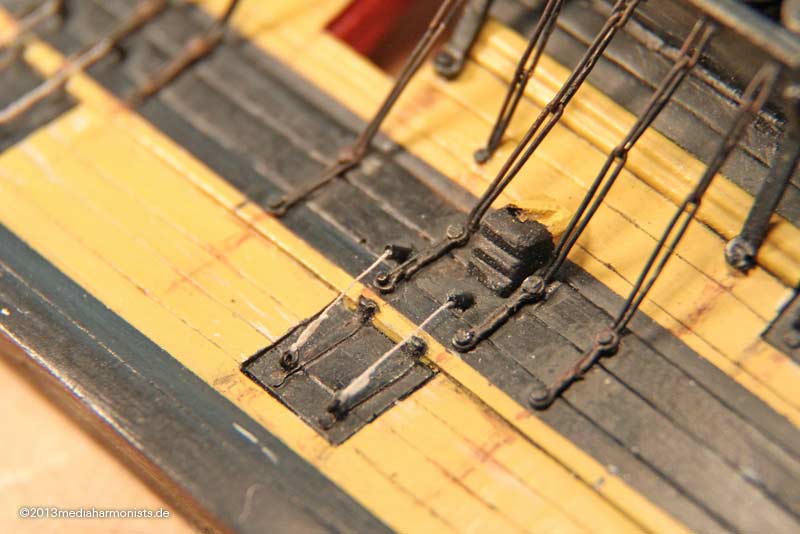
With a little more practice it will for shure look even tidier macro wise, but for the naked eye it already works :-)

Cheers, Daniel

Re: By the Deep 17

by LE BOSCO » Sun May 26, 2013 4:42 am

HI Daniel

a very original work,almost "poetic" :thumbs_up_1: :thumbs_up_1:
cheers
Nicolas

Re: By the Deep 17

by Timmy C » Fri May 24, 2013 7:11 pm

Finally, the answer revealed! :woo_hoo:

Re: By the Deep 17

by dafi » Fri May 24, 2013 7:02 pm

I am already wondering, nobody dares asking about the title of the thread ;-)

Okokok, before I have to wait too long: dafi, what strange thread title you have ?!?

Once upon a time, the shout from the channels was to be heard "By the Deep 17" meaning a little more than 17 fathoms of water were measured, roundabout 30 meters.

The line used was ca. 20 to 25 fathoms long (about 36 to 45 meters) and had marks indicating the depth measured. So the shout "By the Mark XX" meant that it was exactely on the mark and "By the Deep XX" meant it to be above the mark. The marks were at 2, 3, 5, 7, 10, 13, 15, 17 und 20 fathoms (after Nares) and had :
2 fathoms leather with 2 stripes, 3 fathoms leather with 3 stripes, 5 fathoms white, 7 fathoms red, 10 fathoms leather with hole 13 fathoms blue, 15 fathoms white, 17 fathoms red und 20 fathoms two knots.

http://en.wikipedia.org/wiki/Sounding_line


So hastily made the 20 fathom line, fitted marks and lead ...

Image

... and the sound of the falling lead could be heard :-)

Image

Image

Image

Image

Image

Image

"By the Deep ..."

XXXDAn

Re: By the Deep 17

by dafi » Sat May 18, 2013 4:17 pm

Re: By the Deep 17

by Chlo� Plattner » Sat May 18, 2013 2:56 pm

Hi Daniel,

I truly love your artistic approach to modelling. Fantastic work! Your studies are more than helpfull.
Where did you get your Kasein colours if I may ask?

Cheers Peter

Re: By the Deep 17

by dafi » Sat May 18, 2013 2:32 pm

A small jack done for thinning the deadeyes ...

Image

... and painting them with casein paint to give a better to scale wood appearance than the original wood ...

Image

... put on place ...
Image

... and painted and rusted.

Image

Image

And here the comparison: twice the same ship, just at different times :-)

Image

Cheers, Daniel

Re: By the Deep 17

by dafi » Sat May 18, 2013 2:28 pm

Thanks and guess from where I am witing ;-)

And more tempting as the 1803 chain irons are the 1765 ones: same length but two pieces more!

Testing the lengths, carefully remembering that the outer ones are longer.

Image

... homeopathic doses of solder ...

Image

... degreased the wire, first soldering the single rings, then joining them on the central part, the flux with the solder embedded, small touch with the hot iron ...

Image

... and the same game with the dead eye and the triple pack ...

Image

... adjusting over the edge of a blade ...

Image

... and comparison: bottom as cut, then solderd and on top adjusted. Inside length 4 mm :-)

Image

Re: By the Deep 17

by sgtryan13 » Mon May 06, 2013 8:38 am

Absolutely beautiful! That being said, I am now certain that you are in fact insane, and should be institutionalized for this amount of detailing!

Re: By the Deep 17

by dafi » Mon May 06, 2013 8:30 am

Thank you Sirs, my pleasure :-)

... and the weekend show, some quantum leaps - means very small and little :-)

fitted the last lid ...

Image

... and fitted with lanyards.

Image

The holes in the brass fittings were deepend into the plastic by means of a hot needle ...

Image

... so the brass is not damaged like with a drill and the deep is automatically fixed by the cones of the needle tip and the size of the hole in the fitting ...

Image

... and it looks like this.

Image

Gr��le, Daniel

Re: By the Deep 17

by LE BOSCO » Sun May 05, 2013 7:04 am

hello Daniel
as always, it is a pleasure to see your Productions :thumbs_up_1: it's really very original
cheers
Nicolas

Re: By the Deep 17

by Chlo� Plattner » Sun May 05, 2013 3:30 am

Hi Daniel,
I am deeply impressed of your colouring studies and of course the results. :worship_1: Very encouraging and simply stunning.

with best regards
Peter :wave_1:

Re: By the Deep 17

by JIM BAUMANN » Sat May 04, 2013 3:35 am


.....fascinating, as a good friend of mine would say....


so that is today's complete UNDER-statement!!!!!!!

Truly stunning dedication

I like the twin plane grinder!!!

JB :wave_1: :wave_1: :wave_1: :wave_1:

Re: By the Deep 17

by dafi » Sat May 04, 2013 2:08 am

Here both versions side by side, same ship, only 40 years of difference in between ...

Image

Image

... fascinating, as a good friend of mine would say ;-)

Got the gun carriages messed and gave a brownisch oil coat to the barrels as some of the ingredients - rust and tar - suggest ...

Image

... and the tompions plain without color, sticking out and not todays fancy thread in the middle, as the artifacts in NMM and museums suggest. Just one try with a line that goes around, but it does not look to convincing.

The shoe for the anchor was fixed in the appropriate place and that is the thing for the moment :-)

Image

Cheers, Daniel

Re: By the Deep 17

by dafi » Wed May 01, 2013 4:10 pm

Sooooooo after some time finally managed to do some new bricotage ...

... fitted the deadeyes ...

Image

... used the revolutionairy Double-Twin-Super-Drive-Technology for grinding the needle heads ...

Image

... put the batten ...

Image

... and it looks even neater than the bits on my Vic :-)

Image

Too take this back added some paint and rust ...

Image

Image

Image

Image

... and tomorrow once the paint is well dried, I can take it back a tad and do the finetuning :-)

Lieber Gru�, Daniel

Re: By the Deep 17

by dafi » Thu Apr 25, 2013 2:46 pm

So what would be a dafithread without Dafinism?

Already I wondered that nobody did moan, as I did not bolt the channel onto the gunwale but on top of it instead ?!?

...

...

... so dafi does what dafi knows best ...

... DESTRUCTION!!! ...

Image

Positively seen, this gave a nice test, if the technic is dafiproof - If I mange to cover up the damages caused by this little action, I am on the right way :-)

So fixed the channels on the right hight ...

Image

... coverd the holes with the basic color, first layers with three different shades of brown ...

Image

... and drying washing of, adding more and it goes the right direction :-)

Image

Close enough to the original version, so I am quite happy ;-)

XXXDAn

Top