1/350 Micro-MIR USS Nautilus

Post a reply

Confirmation code
Enter the code exactly as it appears. All letters are case insensitive.
Smilies
:smallsmile: :wave_1: :big_grin: :thumbs_up_1: :heh: :cool_1: :cool_2: :woo_hoo:
View more smilies

BBCode is ON
[img] is ON
[url] is ON
Smilies are ON

Topic review
   

Expand view Topic review: 1/350 Micro-MIR USS Nautilus

Re: 1/350 Micro-MIR USS Nautilus

by Guest » Mon Oct 24, 2016 9:19 am

Hello Pappy!
I was just admiring the wonderful build you did on the 1/350 Micro-MIR USS Nautilus!
I know it was a while ago, but do recall where you found the figures that you added? They are a really nive touch to show the scale!
Thank you, Sir!
Cheers,
Bill Bell

Re: 1/350 Micro-MIR USS Nautilus

by Pappy » Thu Mar 06, 2014 7:23 pm

G'day people,

This one is nearly done.

Image

Image

Image

I have built her almost straight out of the box, the only additions that I have made were the three crew members (two in the sail, one on the deck) to give a sense of scale.

Image

The final push to add the tiny PE details supplied was frustrating due to their small size but greatly adds a lot of interest to the finished kit. I found the PE cleats especially annoying. The kit instructions were a bit vague as the exact position of these so I have done my best. I am not 100% certain that they are in the correct positions but I am not going to move them now. Similarly, the position of the two comms antennas on the sail are also a little ambiguous. I looked at some pics and this is what I came up with.

Image

I still need to make some sort of display base. Micro-Mir supply a round base with one column, which I don't particularly like. I don't want to do a slipway style display so I still need to come up with something before I can call it done.

Re: 1/350 Micro-MIR USS Nautilus

by Pappy » Sun Feb 23, 2014 4:36 am

taskforce48 wrote:Looking good so far :thumbs_up_1:

Matt
G'day Matt,

Thanks very much.

I have shot a coat of black all over.

Image

The upper sections of the hull (beneath the limber holes) were then progressively lightened with several shades of black to which varying amounts of white, brown and yellow paint was added. The effect is very subtle and is only just visible in the pictures.

Image

Image

My next task will be to mask off the lower hull beneath the limber holes and the non skid deck in preparation for the light grey upper hull section and sail. I am not sure what I will be using for the grey pain, the instructions suggest "Ocean Gey",but do not relate this to any particular paint brand which is not exactly helpful!

Re: 1/350 Micro-MIR USS Nautilus

by taskforce48 » Mon Feb 17, 2014 12:01 am

Looking good so far :thumbs_up_1:

Matt

1/350 Micro-MIR USS Nautilus

by Pappy » Sat Feb 15, 2014 5:11 am

G'day people,

This is my next sub, the 1/350 USS Nautilus by Micro-MIR. I want to paint her up in the polar crossing scheme, so a grey sail, upper sonar housing and upper hull, with a black lower hull with international orange over /around the fore and aft rescue hatches.

Does that sound correct?
That is my understanding from reading the posts in the CASF- subs- USS Nautilus sub (pun!) folder.

I had already assembled some of the kit before I started taking pics.

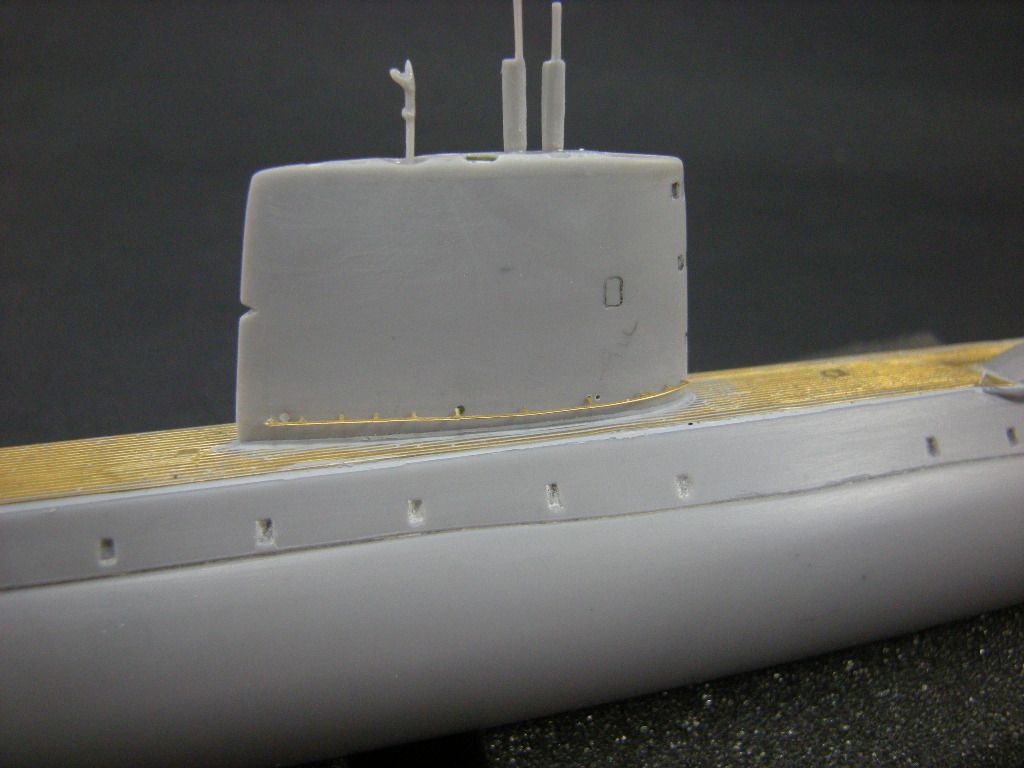
The kit is a relatively simple affair. The hull is comprised of two vertically split halves onto which the three part sail is added. The sail is also split vertically, but it has a horizontal cap added so as to avoid an ugly seam passing through the sensor arrays.

A small PE fret is included, and the major item on this is the representation of the anti-slip walkway. Once the hull seams had been cleaned up, this was attached and the sail added.It should be flush to be 100% correct, but life is too short.

Image

I drilled locating holes for the grab rails at the base of the sail.

Image

It was a bit of a guess as the instructions are a little vague in this respect. The two grab rails are identical, however if the port rail is fitted without modification, the access door at the base of the sail could not be opened. After the port rail was attached and the glue had dried, I very carefully snipped away the portion directly in front of the door.

Image

Additional items were now glued to the hull including the forward bow planes

Image

The anchor

Image

and the rear dive planes, rudder units and propeller (sorry screw I am mainly a jet guy) fairings. The screw fairings did not fit that great. I flooded the joint with sprue glue and once set, sanded to shape. I am pretty happy with how it turned out.

Image

The rescue hatches were added to the hull at this point

Image

Image

I have decided to only have the attach and search periscopes extended, as well as the radar unit.

Image

The radar unit has a very delicate little PE antenna which I will add after the painting and weathering is complete.

Nearly ready for paint!

cheers,

Pappy

Top