A silk purse from a sow's ear - Building Lindberg's LCI-78

Post a reply

Confirmation code
Enter the code exactly as it appears. All letters are case insensitive.
Smilies
:smallsmile: :wave_1: :big_grin: :thumbs_up_1: :heh: :cool_1: :cool_2: :woo_hoo:
View more smilies

BBCode is ON
[img] is ON
[url] is ON
Smilies are ON

Topic review
   

Expand view Topic review: A silk purse from a sow's ear - Building Lindberg's LCI-78

Re: A silk purse from a sow's ear - Building Lindberg's LCI-

by Goodwood » Sun Nov 15, 2015 4:59 am

Excellent work, John! I'm glad that you were able to put those few bits of advice was able to pass along to good use. :cool_2:

Re: A silk purse from a sow's ear - Building Lindberg's LCI-

by dhenning » Sat Nov 14, 2015 11:24 pm

Have enjoyed your build. Fantastic work on the old kit. I have two in the stash for future work, but getting burned out on turning these kits into something that looks real. Looking forward to see what you do with the Revell LSM!

Re: A silk purse from a sow's ear - Building Lindberg's LCI-

by steinerman » Sat Nov 14, 2015 11:05 am

To think that what you started out with could ever end up looking like this blows me away! What a fantastic job!

Well done!

Closing the books on the LCI-30

by jcmackay » Sat Nov 14, 2015 2:50 am

Hi everyone,

This will probably be my last posting for this thread � as Sean ('Goodwood') observed, this model is just about done. There are a few minor things I might add, such as figures, but I doubt I'll post another update after this. Today, I'll show you some of the finishing touches I've applied to the model in the past couple days. But you know, there is always a �...but first...� So here goes: but first, I want to thank Sean ('Goodwood'), Nicolas ('LE BOSCO'), and Jim Baumann for their kind words since the last update. Your words of encouragement and those of the numerous modelers who've posted to this thread during the past year have never failed to provide a great boost, especially at times when my interest in the project started to wane. I take your comments and suggestions very seriously; I've seen examples of your work and it is obvious you know of what you speak! :thanks: :thanks: :thanks: I also want to thank those who have merely stopped in to check out the progress, but haven't posted. The view counter tells me you're there and your consistent interest in this project has been a great encouragement as well! :thanks:

Without further delay, let's get into today's update. In the previous post, I briefly mentioned hull numbers. Here's a better look at the conn numbers:
As you recall, I applied the bow numbers long ago.  I'd been dragging my feet with the other hull numbers because I wasn't sure where I was going to get them from.  One day, I stumbled across the idea of using Woodland Scenics dry transfer numbers for the remaining markings.  The photo of the actual ship shows that the conn numbers appear to have been applied to a plate mounted to the conn, vice painted directly onto the conn.  That made the job easier: I cut out a square section of .010 inch styrene, painted it Graugrun RLM 74 and applied the numbers, which are Woodland Scenics 45� Gothic White.  Then, I affixed it to the conn.
As you recall, I applied the bow numbers long ago. I'd been dragging my feet with the other hull numbers because I wasn't sure where I was going to get them from. One day, I stumbled across the idea of using Woodland Scenics dry transfer numbers for the remaining markings. The photo of the actual ship shows that the conn numbers appear to have been applied to a plate mounted to the conn, vice painted directly onto the conn. That made the job easier: I cut out a square section of .010 inch styrene, painted it Graugrun RLM 74 and applied the numbers, which are Woodland Scenics 45� Gothic White. Then, I affixed it to the conn.
This shot shows the fantail numbers.  I found from examination of photos that there was a wide variety of methods for displaying ship's numbers on LCIs.  Some displayed numbers and a 'US' on the aft of the conn, while others had 'LCI' on the port fantail with the hull number starboard.  Still others had a mixture of those methods while others had only the hull number to starboard on the fantail.  The more fastidious markings appeared early in the war.  Lacking a photo of the LCI-30 from astern, I decided to apply only the hull number to the starboard side of the fantail.  Also visible in this photo is the fuel tank for the anchor windlass on the fantail.
This shot shows the fantail numbers. I found from examination of photos that there was a wide variety of methods for displaying ship's numbers on LCIs. Some displayed numbers and a 'US' on the aft of the conn, while others had 'LCI' on the port fantail with the hull number starboard. Still others had a mixture of those methods while others had only the hull number to starboard on the fantail. The more fastidious markings appeared early in the war. Lacking a photo of the LCI-30 from astern, I decided to apply only the hull number to the starboard side of the fantail. Also visible in this photo is the fuel tank for the anchor windlass on the fantail.
This shot shows the fuel tank again.  This began as 5/32nd inch styrene tubing, which I placed in my 'lathe' (3/8ths inch electric drill) and filed down to replicate the ridges found on 55-gallon drums.  The storage rack was made from various bits of styrene and stretched sprue was used for the tie-downs.  You can also see that I've reinstalled the masthead light.  I got really lucky there: I found it on the floor right before I would have stepped on it!
This shot shows the fuel tank again. This began as 5/32nd inch styrene tubing, which I placed in my 'lathe' (3/8ths inch electric drill) and filed down to replicate the ridges found on 55-gallon drums. The storage rack was made from various bits of styrene and stretched sprue was used for the tie-downs. You can also see that I've reinstalled the masthead light. I got really lucky there: I found it on the floor right before I would have stepped on it!
In addition to the fuel tank, this photo shows the falls added to the davits.  These were constructed of .025 inch styrene rod for the blocks with stretched black sprue for the chains.
In addition to the fuel tank, this photo shows the falls added to the davits. These were constructed of .025 inch styrene rod for the blocks with stretched black sprue for the chains.
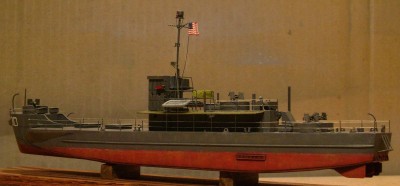
Here's another shot showing the ship as she appears overall.
In this shot from port, you can see the fire hose reel on the forward bulkhead of the conn.  I coated heavy thread with white glue and once dry, flattened it and wrapped it around a piece of brass tube.  Then, I added the inner spokes of a handwheel and some pieces of stretched black sprue.  I finished by painting it ModelMaster Italian Sand Brown and dry-brushed it with Tamiya Buff.
In this shot from port, you can see the fire hose reel on the forward bulkhead of the conn. I coated heavy thread with white glue and once dry, flattened it and wrapped it around a piece of brass tube. Then, I added the inner spokes of a handwheel and some pieces of stretched black sprue. I finished by painting it ModelMaster Italian Sand Brown and dry-brushed it with Tamiya Buff.
Well, that about does it. I have to admit that this ugly duckling of a kit has grown on me and I hope you've enjoyed reading about this project as much as I have enjoyed building it.

Thank you all for checking in! I look forward to hearing from you again when I begin the thread for my next project!

John :wave_1:

Re: A silk purse from a sow's ear - Building Lindberg's LCI-

by JIM BAUMANN » Thu Nov 12, 2015 5:03 pm

Your scratchbuilt winch is a model in itself :thumbs_up_1:


most note-worthy!

Best wishes

Jim B :wave_1:

Re: A silk purse from a sow's ear - Building Lindberg's LCI-

by LE BOSCO » Wed Nov 11, 2015 6:40 am

very nice work John :thumbs_up_1:
cheers
Nicolas

Re: A silk purse from a sow's ear - Building Lindberg's LCI-

by Goodwood » Wed Nov 11, 2015 12:24 am

Light at the end of the tunnel at long last? Either way, she's looking quite spiffy, John! :thumbs_up_1:

Conn details

by jcmackay » Tue Nov 10, 2015 10:08 pm

Hi everyone,

In today's update, I'll show you some conn details. Here's a look:
The conn subfloor is of .060 inch styrene.  The wood deck grate was replicated with  K&S 3/64th inch square brass screen.  The raised pedestal for the compass is of .25 inch styrene tubing.  Styrene stub tubes port and starboard will help to correctly mount the peloruses after the subfloor goes in.
The conn subfloor is of .060 inch styrene. The wood deck grate was replicated with K&S 3/64th inch square brass screen. The raised pedestal for the compass is of .25 inch styrene tubing. Styrene stub tubes port and starboard will help to correctly mount the peloruses after the subfloor goes in.
The hole on the aft starboard corner of the deck is for the Captain's chair.  The subfloor was painted Tamiya German Grey. The wood deck grate was painted buff and then dry-brushed with khaki and yellow.
The hole on the aft starboard corner of the deck is for the Captain's chair. The subfloor was painted Tamiya German Grey. The wood deck grate was painted buff and then dry-brushed with khaki and yellow.
Here's the subfloor installed along with peloruses, compass, and captain's chair.  The compass and peloruses were made from various sizes of styrene rod and tubing.  The captain's chair was made of .020 inch styrene on a section of .020 inch styrene rod.
Here's the subfloor installed along with peloruses, compass, and captain's chair. The compass and peloruses were made from various sizes of styrene rod and tubing. The captain's chair was made of .020 inch styrene on a section of .020 inch styrene rod.
Another view from a higher perspective.  You can see I've added the ship's number on the conn superstructure.  I also noticed after looking at this photo that the masthead light had disappeared.  Oh crap!
Another view from a higher perspective. You can see I've added the ship's number on the conn superstructure. I also noticed after looking at this photo that the masthead light had disappeared. Oh crap!
John :wave_1:

Stern Anchor

by jcmackay » Mon Oct 26, 2015 4:21 pm

Hi everyone,
First, a note of thanks to Sean (Goodwood) and Mark (Mgunns) for posting their words of encouragement. :thanks: It's great to hear from you!

The topic of today's post is the stern Danforth anchor. Here's a look:
Here's a shot of the anchor with a coat of paint.  It is very small; less than 1/2 inch tall. The shank began as a piece of .060 X .040 inch styrene.  The flukes were formed from .015 X .080 inch styrene.  The stock is stretched sprue with white glue drops on the ends.  The clevis is also stretched sprue.
Here's a shot of the anchor with a coat of paint. It is very small; less than 1/2 inch tall. The shank began as a piece of .060 X .040 inch styrene. The flukes were formed from .015 X .080 inch styrene. The stock is stretched sprue with white glue drops on the ends. The clevis is also stretched sprue.
After weathering and adding some rust, the anchor was attached to the anchor rope and affixed to the anchor stand with CA.
John :wave_1:

Re: A silk purse from a sow's ear - Building Lindberg's LCI-

by Mgunns » Fri Oct 23, 2015 7:58 pm

Hello John:

I concur, it looks much better. It really adds a look of busyness to the aft end of the model. I like it and you did a great job on it. Bravo Zulu.

Re: A silk purse from a sow's ear - Building Lindberg's LCI-

by Goodwood » Thu Oct 22, 2015 11:59 pm

Looks much better, John, and don't sweat it�we all make mistakes!

You say winch, I say windlass...

by jcmackay » Thu Oct 22, 2015 10:23 pm

Hi everyone,

Great question from Sean ('Goodwood')
Goodwood wrote:One question, though: did you mean to paint it a lighter color than the rest of the ship?
Thanks for keeping me honest, Sean! :thanks: I have to admit, I didn't think the paint on the windlass was going to stand out so starkly. But later, I looked at some photos of LCIs and saw that I was going to have to repaint the windlass. :Mad_6: Here's a look:
The windlass has been given a coat of Tamiya German Grey and weathered, yet again!
And another shot of the ship, with the windlass in its new appearance.
John :wave_1:

Re: A silk purse from a sow's ear - Building Lindberg's LCI-

by Goodwood » Wed Oct 21, 2015 10:30 pm

Definitely a radical improvement over the amorphous blob that the kit part more closely resembles, John! One question, though: did you mean to paint it a lighter color than the rest of the ship?

Installing the stern winch (windlass)

by jcmackay » Wed Oct 21, 2015 7:32 pm

Hi everyone,
Thank you Nicolas ('LE BOSCO') for your kind words! :thanks: I enjoy hearing that you're stopping in to check out the progress - your post also reminds me that I've gotten too busy lately and haven't checked out the great work you're doing on your Richelieu project recently!

Before I get to my update, I guess I have to correct my terminology: I've been calling this a 'winch' when the actual nautical name is 'windlass,' since the working axis is horizontal. :doh_1:

Here's today's status of the winch/windlass; I hope you enjoy it!
A shot of the two windlasses together.  I've also built the two drum ends and temporarily installed them.
A shot of the two windlasses together. I've also built the two drum ends and temporarily installed them.
Another shot.  Painting is complete and light weathering done on the windlass; I still have to weather the drum ends.
Another shot. Painting is complete and light weathering done on the windlass; I still have to weather the drum ends.
Here's the windlass installed:  Notice the two drum ends are now painted, weathered, and installed.  I also installed a piece of thread for the anchor rope.  As I said in last week's update, there's not much room on the fantail for the windlass!
Here's the windlass installed: Notice the two drum ends are now painted, weathered, and installed. I also installed a piece of thread for the anchor rope. As I said in last week's update, there's not much room on the fantail for the windlass!
Here's an overall view of the ship as she appears now.

John :wave_1:

Re: A silk purse from a sow's ear - Building Lindberg's LCI-

by LE BOSCO » Wed Oct 14, 2015 11:23 pm

hello John

I particularly like the version of your winch :thumbs_up_1: ... nothing to do with the kit version
congrat's
cheers
nicolas

Building the stern winch

by jcmackay » Wed Oct 14, 2015 10:59 pm

Hi everyone,
Today, I'll show you some work on one of the final details: the stern winch. Before I get into that, I want to send a big thank you to Mark (mgunns) for his words of encouragement! :thanks: I hope you enjoy today's post, Mark!

The kit winch is oversize and has a bizarre representation of enormous gears. The first step was to cut the wire rope spool off of the winch.
On the right is a winch from the kit; on the left, is the wire rope spool cut off and cleaned up.
I built a base frame for the winch using various pieces of styrene.  The spool was cut down to a width of 1/8th inch and installed in the base.
I built a base frame for the winch using various pieces of styrene. The spool was cut down to a width of 1/8th inch and installed in the base.
A view from the side of the two winches
A view showing the near-complete winch
In this view, the size difference is apparent.  The kit's winch takes up about 25% more deck space.  The fantail deck is oversize on the kit, but even so, the kit's winch takes up a lot of real estate.
In this view, the size difference is apparent. The kit's winch takes up about 25% more deck space. The fantail deck is oversize on the kit, but even so, the kit's winch takes up a lot of real estate.
Another comparison shot of the winches
First coat of paint on the winch; ModelMaster Neutral Gray.  I'll leave the major machinery in that color and paint the frame with the Tamiya Dark Sea Gray.
First coat of paint on the winch; ModelMaster Neutral Gray. I'll leave the major machinery in that color and paint the frame with the Tamiya Dark Sea Gray.
John :wave_1:

Re: A silk purse from a sow's ear - Building Lindberg's LCI-

by Mgunns » Wed Oct 07, 2015 10:17 am

Hello John:

Good progress and updates. The lifelines look great and really add a special touch of realism and detail to the model, nicely done. From my eyes it looks complete, but like you say, some small details and gear to finish it up. It's been a long road but well worth the effort. Looking forward to the next update.

Almost done with the lifelines

by jcmackay » Thu Oct 01, 2015 10:10 pm

Hi everyone,

Today, I'll show you the progress on the lifelines. The lifelines are just about done, with the exception of a few short runs here and there.

But first, I want to thank Sean ("Goodwood") for stopping in and posting comments, and a question:
Goodwood wrote:Are you planning to include additions similar to what the builder of the model you showed earlier did?
Thank you very much, Sean, for your comments and for being one of the regular contributors here! :thanks: :thanks: :thanks: The answer to your question is kinda complicated: the model I showed earlier was built to represent an LCI-350 Class ship, which is a bit different from the LCI-30. A significant difference is that the side ramps on the LCI-30 had been removed by the end of the war. As I mentioned earlier, the LCI-30 was also a 'square conn' ship. The modeler did a nice job of working with the base kit and detailing it out and weathering it. In answer to your question, I still have a few details to install on the model, but it is very near completion. Some of the details include adding additional hull numbers, building the stern anchor winch and anchor, and fabricating a hose reel for the conn. But, as you can tell, there isn't much detailing left, if I want to try to be true to what is visible in the sole post-war photo of the LCI-30. I hope I've answered your question.

Let's take a look at how she looks today:
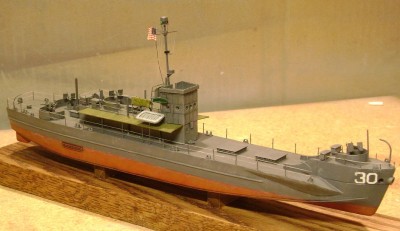
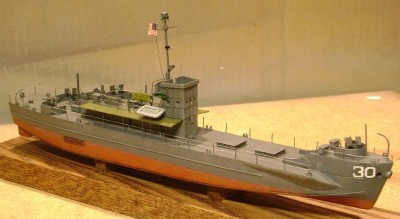
In this photo, you can see that I've installed most of the lifelines and the halyards.
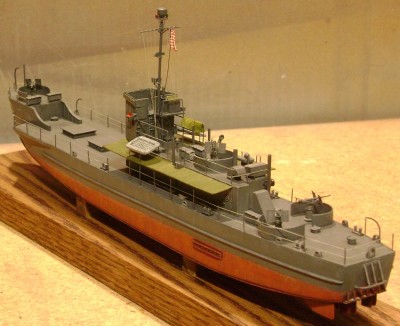
The signal flag halyards are made from the same thread as the lifelines.  They are kinda light, so I'll probably try to use some water color paints to darken them.
The signal flag halyards are made from the same thread as the lifelines. They are kinda light, so I'll probably try to use some water color paints to darken them.
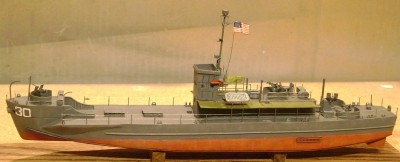
The signal halyards fade out, depending on the background.
A little darker photo
Since I was done with the lifelines, I re-installed the 20mm guns!
Thanks to everyone for stopping in to have a look!

John :wave_1:

Re: A silk purse from a sow's ear - Building Lindberg's LCI-

by Goodwood » Sun Sep 27, 2015 4:49 am

Looks good, John, keep it up!

Are you planning to include additions similar to what the builder of the model you showed earlier did?

Beginning the lifelines

by jcmackay » Sat Sep 26, 2015 6:05 pm

Hi everyone,

Lots of distractions during the past month, but I'm finally able to get back to LCI-30. Today's update concerns the beginnings of installing lifelines. Here's a couple shots of lifelines going on the main deck:
I used 70 Denier thread for the lifelines, which I picked up from the local sportsman's store.  This thread is used for making flies for fishing. The thread is nylon, so it has little fuzziness, but I also applied white glue to help keep the thread from unraveling.
I used 70 Denier thread for the lifelines, which I picked up from the local sportsman's store. This thread is used for making flies for fishing. The thread is nylon, so it has little fuzziness, but I also applied white glue to help keep the thread from unraveling.
The thread is attached to the stanchions with CA and drawn tight.  I temporarily removed the 20mm guns because they kept getting snagged by the lifelines!
The thread is attached to the stanchions with CA and drawn tight. I temporarily removed the 20mm guns because they kept getting snagged by the lifelines!
The main deck lifelines are almost done. Next, will come the superstructure lines and the lines on the foc's'le.

John :wave_1:

Top