I had encountered a problem with a resin kit, I had sanded the base of the super structure flat and smooth but there where still areas that did not sit flat against the hull surface, knowing various tricks to fix this problem, using "white glue, putty, CA" just about all the normal tricks. Well putting thought into how to approach the issue I was remembering an old carpentry tip my dad showed me,
1. Locate the areas that need attention and mark them with pencil.
2. Put the filler putty on the bottom of the piece to be joined to one another.
(Tamiya putty works best as its more liquid then most)
3. Place thick CA where needed, as it allows a bit of working time for you.
4. Place the parts together and clamp them hard to force the putty out the edges, and remove the excess before it completely sets.
This trick allows for the most minor clean up without a bunch of sanding and distorting any fine details.
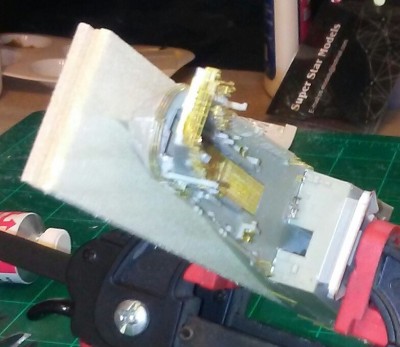
- Example of the clamping process.
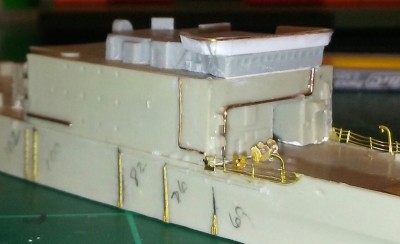
- Note the fine filler putty line between the bridge and the flying bridge top.
I had encountered a problem with a resin kit, I had sanded the base of the super structure flat and smooth but there where still areas that did not sit flat against the hull surface, knowing various tricks to fix this problem, using "white glue, putty, CA" just about all the normal tricks. Well putting thought into how to approach the issue I was remembering an old carpentry tip my dad showed me,
1. Locate the areas that need attention and mark them with pencil.
2. Put the filler putty on the bottom of the piece to be joined to one another.
(Tamiya putty works best as its more liquid then most)
3. Place thick CA where needed, as it allows a bit of working time for you.
4. Place the parts together and clamp them hard to force the putty out the edges, and remove the excess before it completely sets.
This trick allows for the most minor clean up without a bunch of sanding and distorting any fine details.
[attachment=2]LST1191A.jpg[/attachment]
[attachment=1]LST1191B.jpg[/attachment]