by EJFoeth » Sat Jun 13, 2026 10:27 am
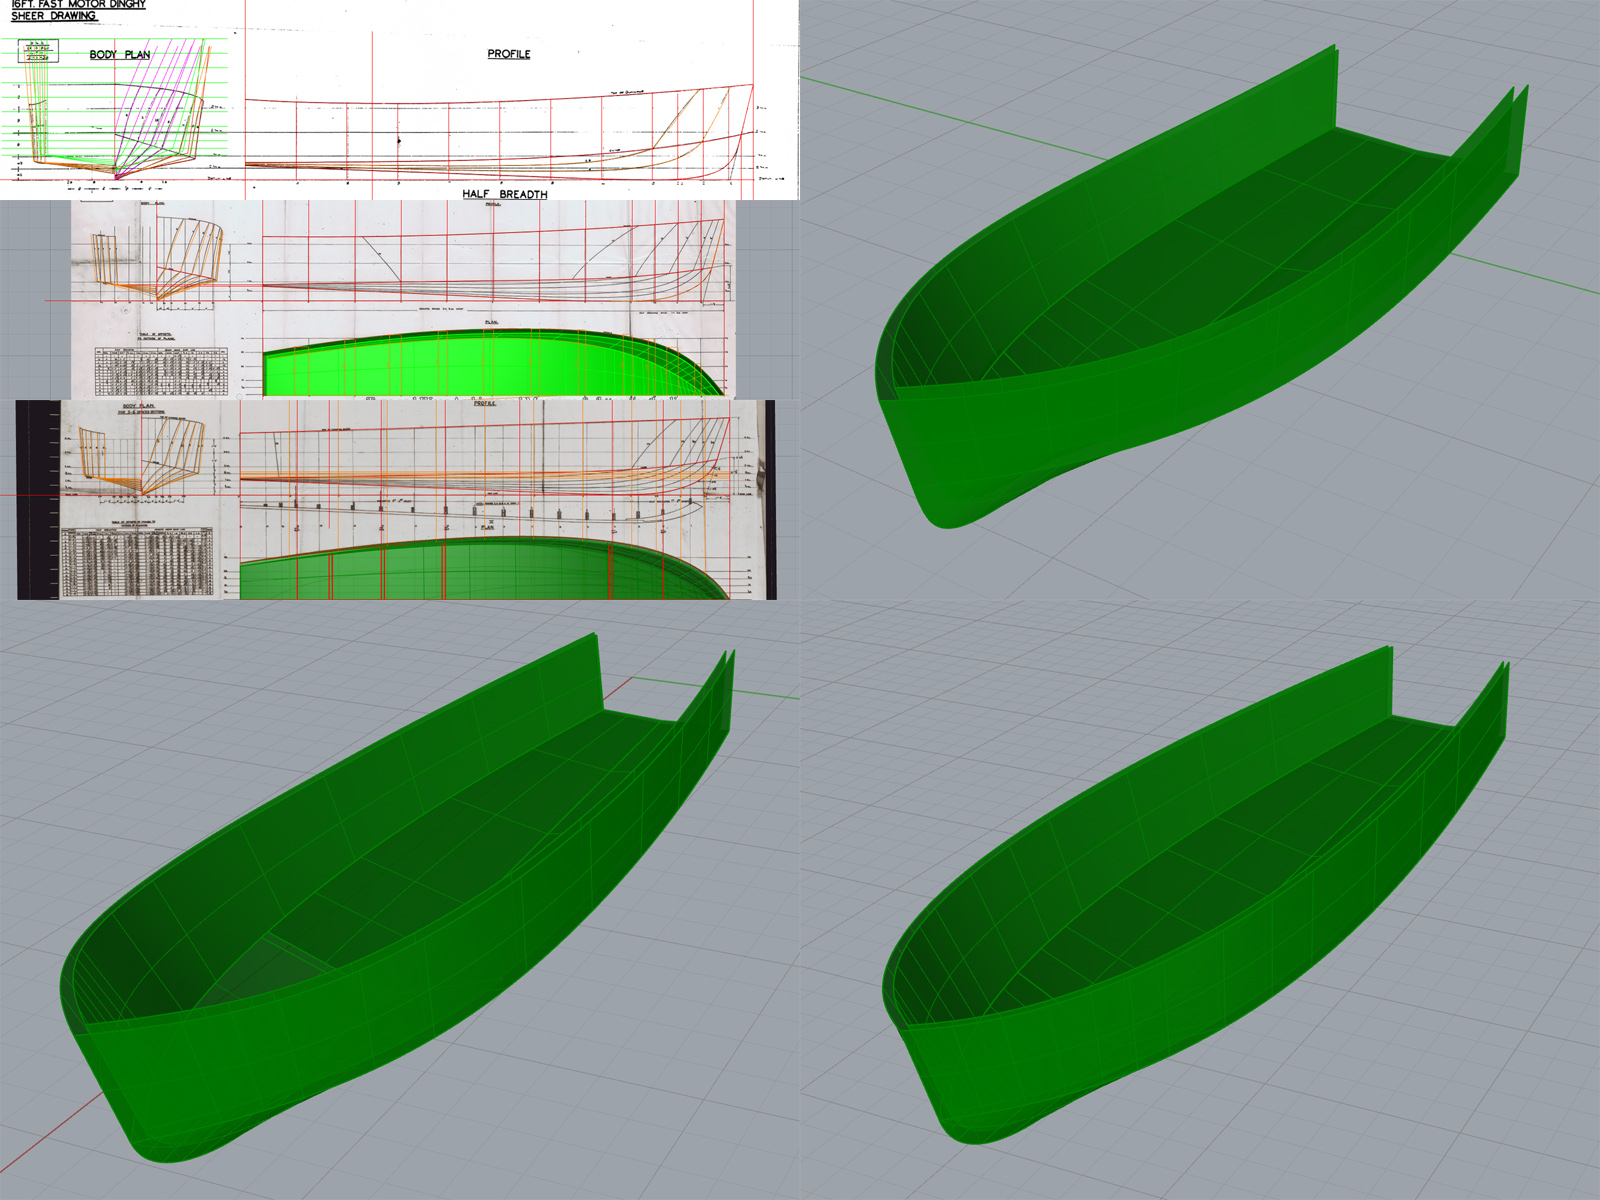
The skimming dish is very well covered. I have a general arrangement, excellent lines, there is a real one aboard HMS Belfast which I photographed and there is one in boathouse #4 in Portsmouth. This museum I have inconceivably not visited <em>once</em>, where probably all the information needed for my boat work is present. This small craft is a hard-chine boat but like the 25ft and 30ft fast motor boats it has a clinker (like) hull, at least on the sides. I made a 3d hull based on the lines (
this page). I traced the top outline and knuckle line in both top and side views using a spline of only four control points (the simpler the better), massaging their location to match the drawing which went well. These curves-extended-into-surfaces intersect to get the 3D framework, and a simple straight transom line between them and the keel outline was run through Rhino’s rail command to get the hull. The picture shows intersections at waterlines, frames and transverse (vertical) intersections in orange indicating all is quite well, more an indication of the draftsmanship of the original plan than anything else of course. The actual lines show that the sides are not really flat, but for a vacuum forming plug that may be sanded into submission this is ok. It went so efficiently that I drew the hulls of the 25ft and 35ft barges immediately afterwards within an hour and decided to make these as well to get more hulls out of a single vacuum forming session.
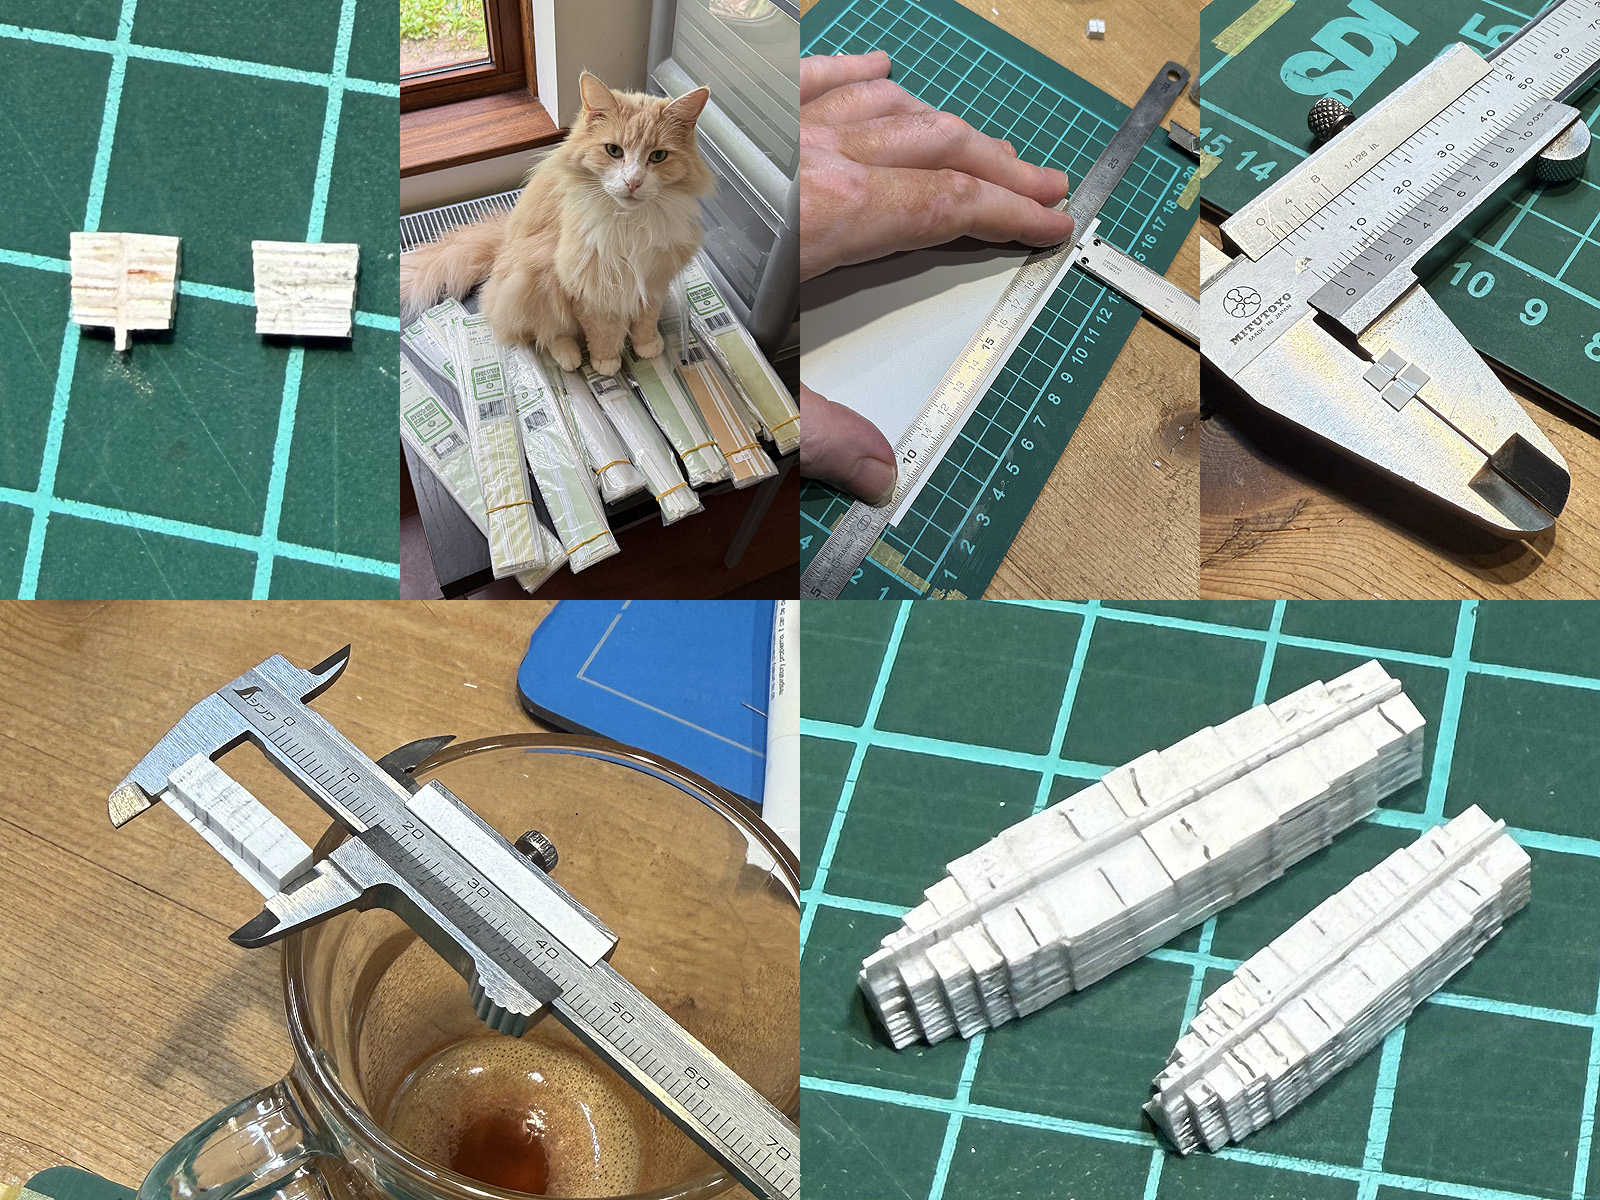
For the hull plugs I updated my recipe again; the flanks of the hull are nearly vertical and eyeballing the strips into a centre position for the skimming dish proved tricky, so I used a centre strip with equal demistrips to each side. Twice the parts and starting a T takes a bit more time but should improve symmetry and defines the centre line better. Plus, with a centre plate the stack has no risk of buckling when squeezing them flush with the calipers. The spreadsheet for the parts was updated that uses (per section), the local width, side angle and cumulative strip thickness (0.4mm first, then 0.2mm in the lowest stack of 1 mm). A height above base table was used to used automatically hide values the table to get the rising of the knuckle line (side view) and to outline when two 0.2mm strips could be replaced by a single 0.4mm strip. These hulls do not have(per so) a single widest main frame that the rounded hulls have, so each strip is the max width between contiguous frames. Fortunately, a double-section center appeared where variations were within 0.05mm, small enough to ignore. Quite a bit of work to get the plug ‘digitized’ and spreadsheet debugged. The strips were cut from Evergreens 0.4mm plate, rather than using from their strips collection---not because they were otherwise engaged---as these show some variation in thickness between widths and if you stack 10 of them you'll note the difference. With the calipers you can cut accurate and repeatable strips just as well, though they need more cleanup afterwards.
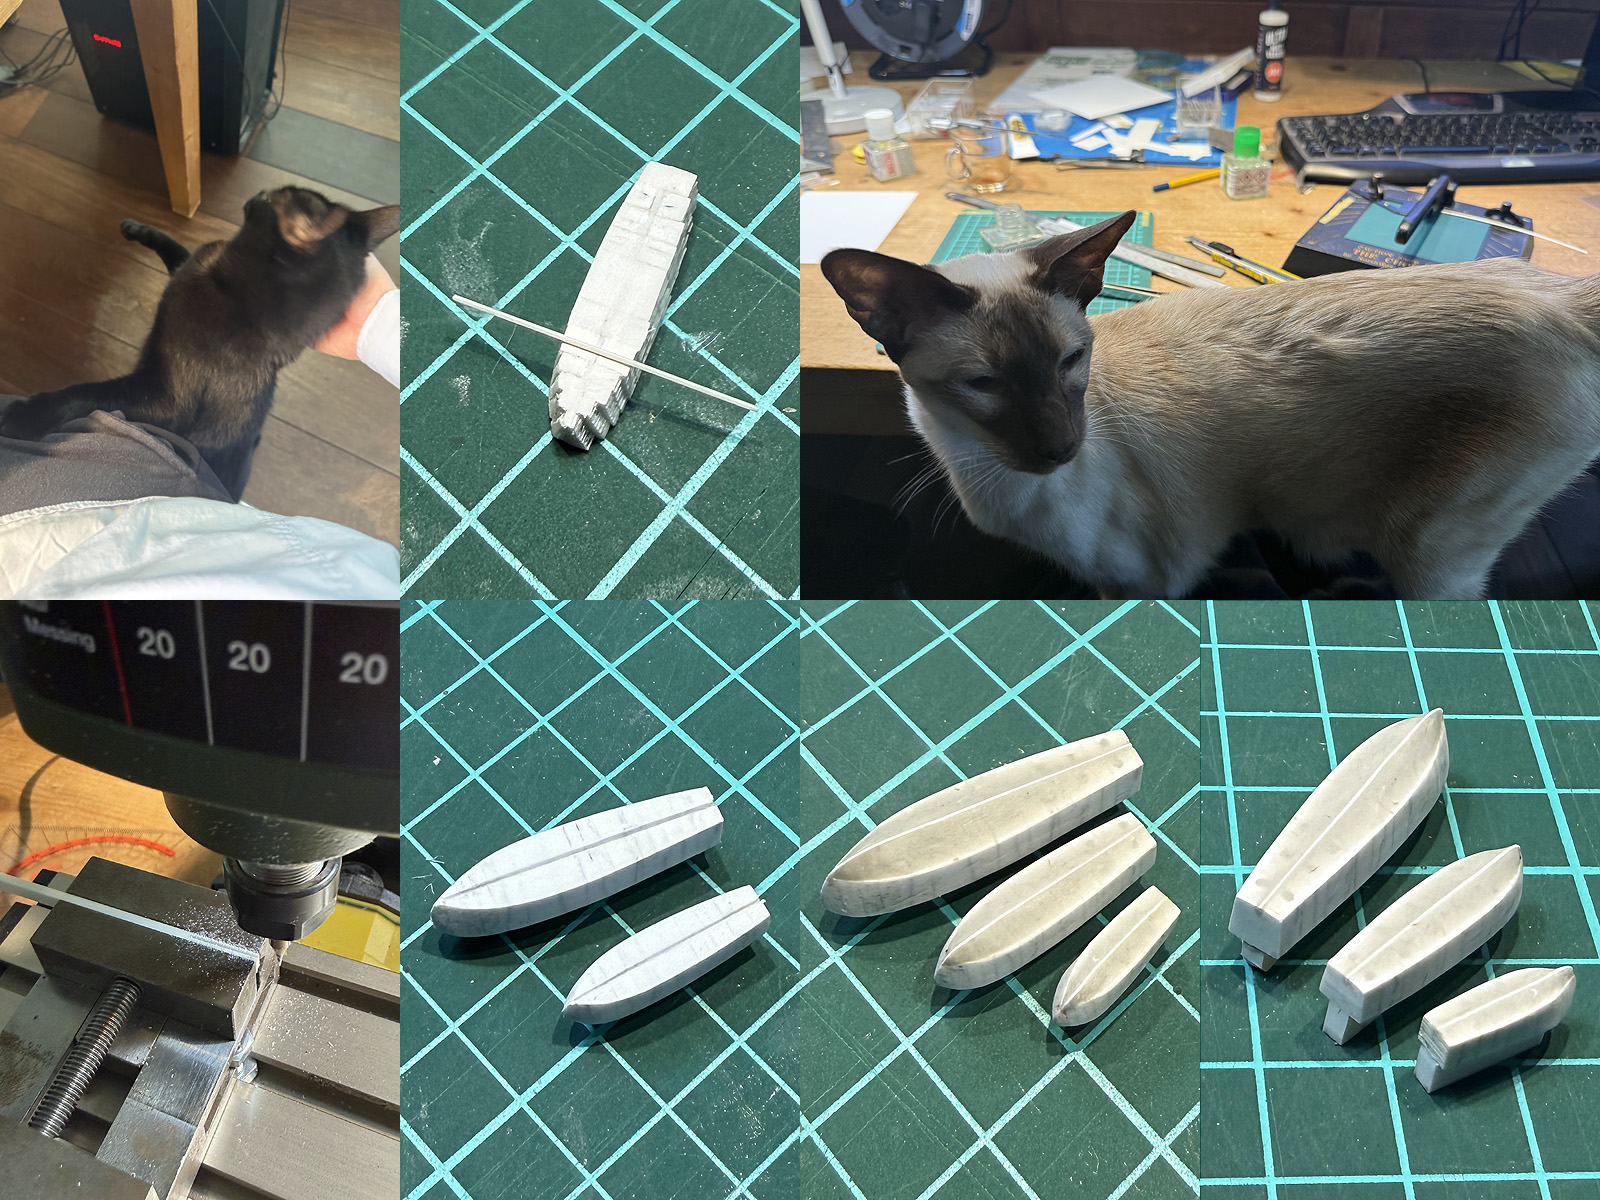
The bottom of the plug is the knuckle line that has a mild sheer that needed to be sanded into shape and tested for being level by eyeballing a rod rolling over the plug. Because why not I used my milling machine to first carve a 0.2mm slot to place a keel insert. As the hull has no flat sides to clamp them I first added this slot to a strip, glued that to the hull giving it a handle and hoped for the position to transfer nicely. It did not (mild shift during gluing?) and then in a lapse of attention I even carved a channel in the dinghy! It was easily repaired though. Afterwards the stern was milled too by 0.2mm; I actually forgot about the transom thickness but in the end decided this step is probably for the best; you get a nice flat transom and you cut off the edges rounded by sanding. The keel strip was added and the planing hull finalized using magic sculpt added in two sessions (thin layers are quite difficult to add and needed some repair). I find it quite amusing that after ten plugs I'm still finding ways to refine building process but I am glad all small boat plugs are now done. It took a four days to build these three plugs, so I put on Brautigam's 15-SACD Beethoven recital on his piano forte, interrupted by the occasional cat attack. Surely, the recipe is now perfect?
[img]https://ontheslipway.com/wp-content/uploads/2026/06/16ftDinghy_03.jpg[/img]
The skimming dish is very well covered. I have a general arrangement, excellent lines, there is a real one aboard HMS Belfast which I photographed and there is one in boathouse #4 in Portsmouth. This museum I have inconceivably not visited <em>once</em>, where probably all the information needed for my boat work is present. This small craft is a hard-chine boat but like the 25ft and 30ft fast motor boats it has a clinker (like) hull, at least on the sides. I made a 3d hull based on the lines ([url=https://ontheslipway.com/16-ft-fast-motor-boat/]this page[/url]). I traced the top outline and knuckle line in both top and side views using a spline of only four control points (the simpler the better), massaging their location to match the drawing which went well. These curves-extended-into-surfaces intersect to get the 3D framework, and a simple straight transom line between them and the keel outline was run through Rhino’s rail command to get the hull. The picture shows intersections at waterlines, frames and transverse (vertical) intersections in orange indicating all is quite well, more an indication of the draftsmanship of the original plan than anything else of course. The actual lines show that the sides are not really flat, but for a vacuum forming plug that may be sanded into submission this is ok. It went so efficiently that I drew the hulls of the 25ft and 35ft barges immediately afterwards within an hour and decided to make these as well to get more hulls out of a single vacuum forming session.
[img]https://ontheslipway.com/wp-content/uploads/2026/06/16ftDinghy_04.jpg[/img]
For the hull plugs I updated my recipe again; the flanks of the hull are nearly vertical and eyeballing the strips into a centre position for the skimming dish proved tricky, so I used a centre strip with equal demistrips to each side. Twice the parts and starting a T takes a bit more time but should improve symmetry and defines the centre line better. Plus, with a centre plate the stack has no risk of buckling when squeezing them flush with the calipers. The spreadsheet for the parts was updated that uses (per section), the local width, side angle and cumulative strip thickness (0.4mm first, then 0.2mm in the lowest stack of 1 mm). A height above base table was used to used automatically hide values the table to get the rising of the knuckle line (side view) and to outline when two 0.2mm strips could be replaced by a single 0.4mm strip. These hulls do not have(per so) a single widest main frame that the rounded hulls have, so each strip is the max width between contiguous frames. Fortunately, a double-section center appeared where variations were within 0.05mm, small enough to ignore. Quite a bit of work to get the plug ‘digitized’ and spreadsheet debugged. The strips were cut from Evergreens 0.4mm plate, rather than using from their strips collection---not because they were otherwise engaged---as these show some variation in thickness between widths and if you stack 10 of them you'll note the difference. With the calipers you can cut accurate and repeatable strips just as well, though they need more cleanup afterwards.
[img]https://ontheslipway.com/wp-content/uploads/2026/06/16ftDinghy_05.jpg[/img]
The bottom of the plug is the knuckle line that has a mild sheer that needed to be sanded into shape and tested for being level by eyeballing a rod rolling over the plug. Because why not I used my milling machine to first carve a 0.2mm slot to place a keel insert. As the hull has no flat sides to clamp them I first added this slot to a strip, glued that to the hull giving it a handle and hoped for the position to transfer nicely. It did not (mild shift during gluing?) and then in a lapse of attention I even carved a channel in the dinghy! It was easily repaired though. Afterwards the stern was milled too by 0.2mm; I actually forgot about the transom thickness but in the end decided this step is probably for the best; you get a nice flat transom and you cut off the edges rounded by sanding. The keel strip was added and the planing hull finalized using magic sculpt added in two sessions (thin layers are quite difficult to add and needed some repair). I find it quite amusing that after ten plugs I'm still finding ways to refine building process but I am glad all small boat plugs are now done. It took a four days to build these three plugs, so I put on Brautigam's 15-SACD Beethoven recital on his piano forte, interrupted by the occasional cat attack. Surely, the recipe is now perfect?