The Ship Model Forum

The Ship Modelers Source
It is currently Wed Apr 24, 2024 7:37 pm

All times are UTC - 6 hours [ DST ]


Post new topic Reply to topic  [ 72 posts ]  Go to page Previous  1, 2, 3, 4  Next
Author Message
PostPosted: Thu Jan 10, 2013 10:42 am 
Offline
User avatar

Joined: Fri Nov 23, 2012 4:39 pm
Posts: 72
Before I continue, I would like to visualize the overall progress of superstructures building...

There is still a lot of work on bloc n°2; some wall aren't places yet and there is a lot of minors surfaces correction to do. However thos bloc will gather some electronics part like camera and I need a little more reflexion before proceed...
Image

The bloc n°3 are the funnel, those part is a nightmare because she needs to have some parts bend with heat, and it's sucks a bit >_<
Image

Bloc n°4 has not start yet, because it's very complex assembly and I need more time to think about procedure of building before starting...
Image

AK-130 is just temporary place, there is a lot of work to do, details and cinematics...
Image

I started this morning to build Shtil Missile Battery who take place above the bloc n°1 on the bow. There is a lot of details to add, she isn't definitively fixe yet. I will preceed later...
Image

The tactical periscope was also place, there is some detail to add too ;)
Image

This building is very complexe and I like take my time to do superstructure because after that part of the job there is a very long task of fince scale detailling. that's means to know perfectly where geometry of superstructure are connected to each other. Ark model dosn't help very much and instructions are very limited. However overall proportion are relatively correct...

_________________
"Give me a ping Vassily, One ping only !"
Image


Report this post
Top
 Profile  
Reply with quote  
PostPosted: Thu Jan 10, 2013 12:10 pm 
Offline
User avatar

Joined: Sat Jan 22, 2005 10:18 am
Posts: 4131
Location: Liverpool
Hi Wis good progress . :thumbs_up_1: :thumbs_up_1: :thumbs_up_1:
Dave Wooley


Report this post
Top
 Profile  
Reply with quote  
PostPosted: Sun Jan 13, 2013 2:15 am 
Offline
User avatar

Joined: Fri Nov 23, 2012 4:39 pm
Posts: 72
After a long time of reflexion and after a cautious look of a batch of photos, I've noticed some structural errors on this kit. I've passed also a long time to think about how I will do the modifications it needs to have a proper architecture of all structures I will modify.

Between bloc n°2 and bloc n°3, there is some kind of "communication island", I call it bloc 2.5. Only one thing connect those 3 blocs is the floor (purple line).
Image

I've started to cut the floor, that allow me to disconnect bloc 3 and 2.5 for further modifications and assembly process. I've mark the floor in blue were the top of communication structure will raise, Ark model version is incorrecte for hull number 610.
Image

After cutting the shaded part, I get the base of the central bloc...
Image

On the floor, there was a trap door, which from now is too large ...
Image

I'm used to reduce the access door for complete the modification...
Image

A small putty party allow me to correct the floor surface...
Image

Now, there is still a wall to add to complete the bloc, and a cautious sending to abtain some good and smooth surfaces...
Image

_________________
"Give me a ping Vassily, One ping only !"
Image


Report this post
Top
 Profile  
Reply with quote  
PostPosted: Sun Jan 13, 2013 11:08 am 
Offline
User avatar

Joined: Sun Mar 13, 2005 11:51 am
Posts: 2407
Location: Belgium
Hello Wis,

well that doesn't really come as a surprise does it? Anyway an advice which I also mentioned in my Udaloy topic: if you build a (Russian) warship of a certain class, then first select the unit, gather pics of that one and see where it differs from the others. This way you can avoid a lot of unnecesary (conversion)work later on. 610 is not necessarily the same as the others and I remember the Baltic units, Bespokoiny and Nastoychiviy had some additional changes on that connection between the two main blocks, some extra structure with special antennas on it. Haven't done any further investigation in this class, but I can imagine there are quite a few more differences.

They also have two retractable azimuth thrusters, one of which is located just aft of the bulbous bow sonar, the other at the very end below the stern (pretty much on the flat bar you inserted), it is visible on the outside/bottom by a round hatch (which is connected to the bottom of the thruster tunnel). I think you can find pictures and some drawings on this in the "Calling all Sovremenny and Udaloy class" topic in that part of the forum.
These thrusters certainly came in handy when mooring (they didn't quite use tugs in those days for destroyer sized ships) and of course, since Sovremenny class was intended to be used as a bombardment ship with its two twin 130mm, the thrusters could be helpful to hold them in place for a better aim.

_________________
The merchant shipyard


Report this post
Top
 Profile  
Reply with quote  
PostPosted: Wed Jan 16, 2013 12:33 pm 
Offline
User avatar

Joined: Fri Nov 23, 2012 4:39 pm
Posts: 72
Hello Neptune ;)

You perfectly right, I've choose to do the N°610 Настойчивый because I've grab a lot of photos from Airbase.ru. This model has a modifiy structure between the funnel and the command bridge (Structure i've called 2.5). There is also some changes about positions of fittings like guns and shaft. Concerning retractable azimuth thruster, I will do not make it, because I've already a lot of stuff inside the hull ;)

_________________
"Give me a ping Vassily, One ping only !"
Image


Report this post
Top
 Profile  
Reply with quote  
PostPosted: Thu Jan 17, 2013 4:13 am 
Offline
User avatar

Joined: Fri Nov 23, 2012 4:39 pm
Posts: 72
There is still some wall to place on the bloc n°2, now there is windows who will be put in place later. There is a lot of correction with putty to me done.
I will stat to place FPV components after that...
Image

The "roof" of Bloc n°2 need some modifications, it is not glue yet.
Image

There are here, the most nightmarish parts of the bloc n°4, Red arrows marks places who needs to be heat bend, I will proceed to do that task later...
Image

the top floor of bloc n°4 is far more easier, but corrections need to be done to have proper assembly...
Image

I've added some beam to add a better transverse rigidity...
Image

Then, I've placed the wall, at last they was too thine, only 1mm...
Image

A new wall took place on the corridor..
Image

Without glue, I've placed the roof to test modifications....
Image

As I'm feared, this part might bend, I need to put some beam to assure rigidity...
Image

Why Arkmodel use 1mm ABS plate ? this is too thin ! That why I marked location to put some beams
Image

All the process for the assembly of the bloc n°4 design by Arkmodel is complety crappy, this part could be easyly assembly with more easier process.

For better comprehension, this is the elevation of the ship. I put some colors to differentiate blocks. Block n°2.5 (green color) does not exist in Arkmodel's kit, I voluntarily separated it because it is the only one who will be permanently connect to the bridge. That is the reason why I call Block No. 2.5. The entire FPV's components will take place in block n°2 (purple), On bloc n°3 there is a steam generator, Block No. 1 (orange) receive regulators and Bloc n°4 (pink) The Marine I (Elmod) modules and receiver (I will use the mast to hide the receiver antenna 35MHz).

Image

Inside the hull, There is motors, servos (turret and rudder), batteries, steam generator and pump, pitch controller (retractable plane? i don't know yet), Sound modules and some leads

_________________
"Give me a ping Vassily, One ping only !"
Image


Report this post
Top
 Profile  
Reply with quote  
PostPosted: Sat Apr 06, 2013 4:05 pm 
Offline
User avatar

Joined: Fri Nov 23, 2012 4:39 pm
Posts: 72
Well, I've done a little things since the last post and I think it's a good idea to keep you posted :)

This assembly is about to be placed and finalize and provide sealing for the shafts...
Image

On the other side, we can see where the sealing ring will take place...
Image

The base of AK-130 turrets are finalized and they are ready to be detailed...
Image

Those parts are the servo mounting support for the animatics of AK-130 gun barrel...
Image

Here is in situ with a mini-servo. The other extremity of this items will received weight to obtain a proper balancing of this assembly. The 3mm axis will be connect on a motor with microswith or a servo...
Image

_________________
"Give me a ping Vassily, One ping only !"
Image


Report this post
Top
 Profile  
Reply with quote  
PostPosted: Wed Apr 10, 2013 12:38 pm 
Offline
User avatar

Joined: Fri Nov 23, 2012 4:39 pm
Posts: 72
There was a problem on the bow of the ship, the hull didn't have the proper shape to fit correctly to the master form of the hull. I decided to cut the hull on the edge of the bow for de-stressed her and obtain the correct pattern. As you can see on the first picture, reinforcement was add and fiber glass was put to add rigidity of this part. Two pieces of PVC were add and then I placed the first beam of the bow.

Image

Now, the pattern is more correct, I need too add some beams for structural rigidity of the deck. The place of AK-130 is temporarily marked...
Image

I've placed (temporarily) the bloc n°1 and some parts to see if I need to do more improvements...
Image

That start to look good, but there is e lot of work to do on this part of the boat. I will proceed on it later...
Image

On the aft, the deck now size perfectly, now I need to add some beams (again) and to improve some hull details below waterline...
Image

Most of the works now will take place on the hull, because I still have a lot of glitch to correct. I wish to add some details like portholes, water exhaust. I also need to finish all the propulsion stuff and stabilizer, pitch rudders and other mecanism like that !

_________________
"Give me a ping Vassily, One ping only !"
Image


Report this post
Top
 Profile  
Reply with quote  
PostPosted: Tue Apr 16, 2013 2:05 am 
Offline
User avatar

Joined: Fri Nov 23, 2012 4:39 pm
Posts: 72
Yeah ! Putty-party ! :cool_2:

In fact, there is a lot of work to do to enhance the looking of thoses parts but there is a lot of glitch who need my attention below waterline !
Image


Seriously, here and actually the look is pretty sinful. So as you can imagine, I need to do some fix to enhance the result :D
Image

Damned, this hull is a piece of .... rhaaa shut up Wis !
Image

A lot of putty was apply here; I know there is a lot...
Image

Aaah, much better !
Image

_________________
"Give me a ping Vassily, One ping only !"
Image


Report this post
Top
 Profile  
Reply with quote  
PostPosted: Tue Apr 30, 2013 12:38 am 
Offline
User avatar

Joined: Fri Nov 23, 2012 4:39 pm
Posts: 72
Before I continue on the hull, I've decided to start to build the main mecanism for the steam generator inside the funnel.
There is a lot of work to do on this visible part...
Image

you can see here all the main parts, the casing, the fan and the generator...
Image

All is set temporarily, I need to build an holder for the fan and then, put all electronics on the free space of this housing...
Image

The funnel and the new part in place for first testing...
Image

A tiny schematics to explain how it works, sorry it's in french but I think you might easily understand :)...
Image

_________________
"Give me a ping Vassily, One ping only !"
Image


Report this post
Top
 Profile  
Reply with quote  
PostPosted: Tue Apr 30, 2013 5:12 am 
Offline
User avatar

Joined: Mon Jun 12, 2006 1:46 pm
Posts: 1012
Lots of good model work here . :smallsmile:

_________________
If you are not living on the edge then you are taking up to much space


Report this post
Top
 Profile  
Reply with quote  
PostPosted: Tue Apr 30, 2013 2:56 pm 
Offline
User avatar

Joined: Fri Nov 23, 2012 4:39 pm
Posts: 72
Well, I've start to work on the last block of the superstructure : the bloc n°4

It's important to remember that it will be the place where all electronics for drive the ship will be set. I will use an ELMOD Marine I module.

This is quite complex because some parts are on several story high and all piece must be adjust carefully...
Image

I've add some structural beams to add more rigidity...
Image

Wall after wall, the structure looks familiar...
Image

I will need to add more beam...
Image

I've temporarily place the second floor...
Image

Still a lot of work to do here...
Image

_________________
"Give me a ping Vassily, One ping only !"
Image


Report this post
Top
 Profile  
Reply with quote  
PostPosted: Wed May 01, 2013 3:43 am 
Offline
User avatar

Joined: Sat Jan 22, 2005 10:18 am
Posts: 4131
Location: Liverpool
Hello Wis nice clean work on the superstructure .
Dave Wooley :thumbs_up_1: :thumbs_up_1: :thumbs_up_1:


Report this post
Top
 Profile  
Reply with quote  
PostPosted: Wed May 01, 2013 7:57 am 
Offline
User avatar

Joined: Fri Nov 23, 2012 4:39 pm
Posts: 72
Hello Dave,
Thank you for your comments, I try to do my best :)

Well, I return to the funnel to add more details inside. After a primer paint on all I've done; I can see were I need to do more stuff like put putty ect...

Image
Image
Image
Image

_________________
"Give me a ping Vassily, One ping only !"
Image


Report this post
Top
 Profile  
Reply with quote  
PostPosted: Fri May 31, 2013 1:14 am 
Offline
User avatar

Joined: Fri Nov 23, 2012 4:39 pm
Posts: 72
Ok, now I return to the bloc n°1 to start fitting on superstructure. Now start a big part of the job, enhance look and also correct the flaws of this kit.
As you might see, I've drawn some lines on the lower roof. That shapes will determine the position of two parts build from scratch. However, I need also to modify slightly the shape of the junction between roof and walls. These junction are more rounded and I will use the tips gave me by Neptune.

Image

Two doors are in place and i'm quite satisfy about rendering but this is not enough of course, real model are far more detailled and i will need to enhanced a bit those doors...
Image

You can see the new items build from scrach in position, I need to build another one !
Image

This picture will help me as reference for place fittings and props the superstructure...
Image

_________________
"Give me a ping Vassily, One ping only !"
Image


Report this post
Top
 Profile  
Reply with quote  
PostPosted: Fri May 31, 2013 7:23 am 
Offline

Joined: Sun Jan 04, 2009 1:31 pm
Posts: 1780
..


Last edited by carr on Wed Feb 19, 2020 5:51 pm, edited 1 time in total.

Report this post
Top
 Profile  
Reply with quote  
PostPosted: Tue Aug 13, 2013 11:37 pm 
Offline
User avatar

Joined: Fri Nov 23, 2012 4:39 pm
Posts: 72
Hello,

Here some news about this project :)

Carr> I'm well aware of that and I try to compensate. This kit need some improvement and I do as much as I can to improve looking. A lot of informations are missing on the notice especially details about were to place some brass parts.

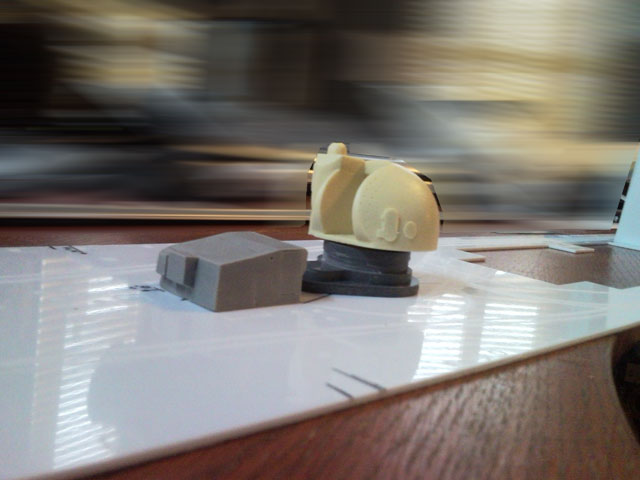
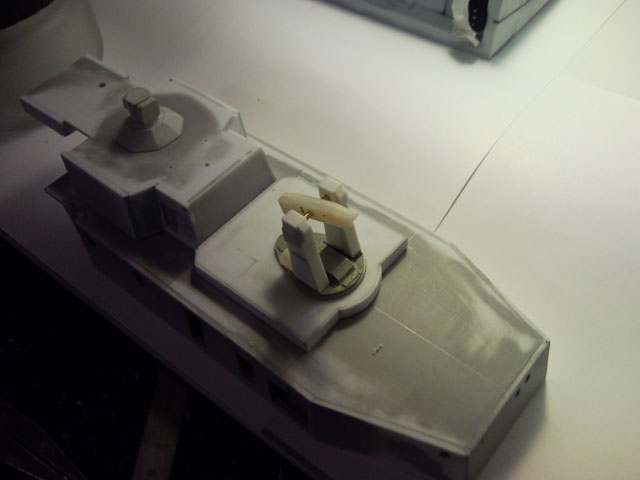
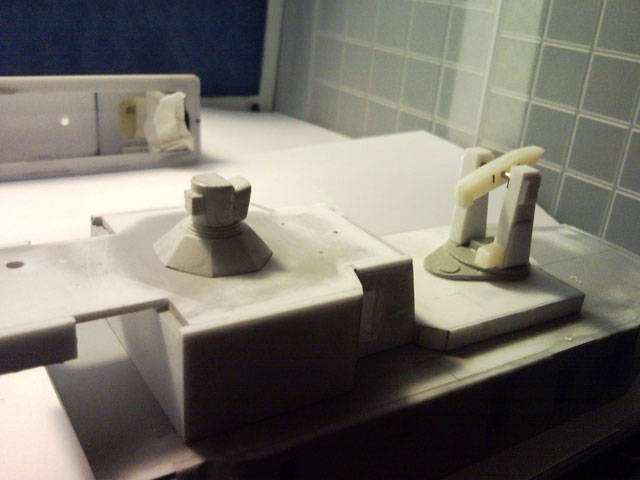
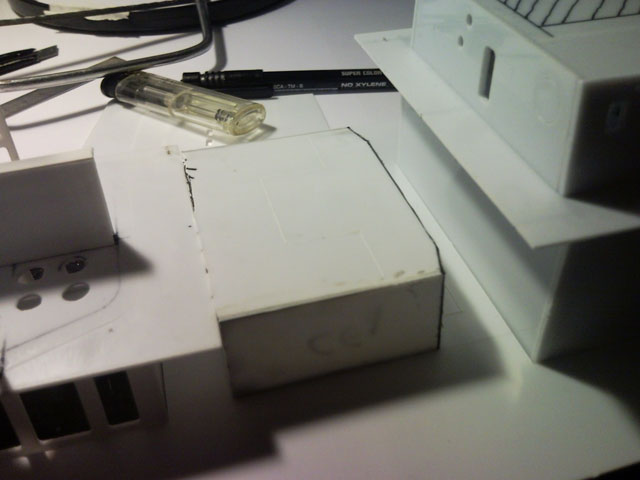
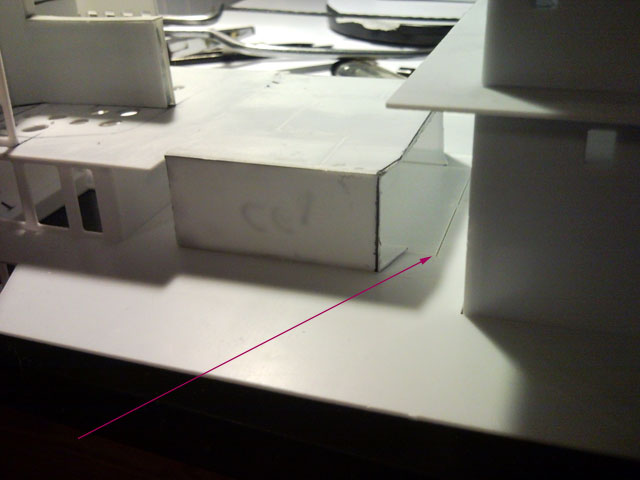
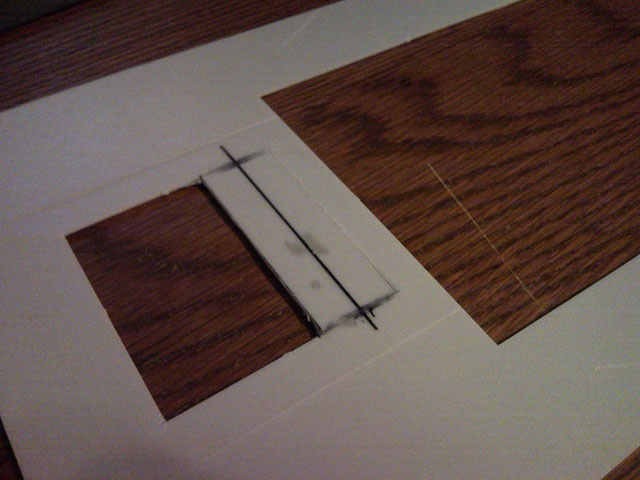
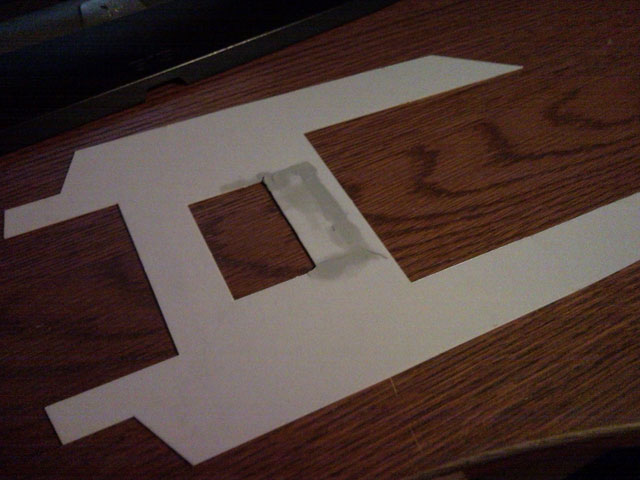
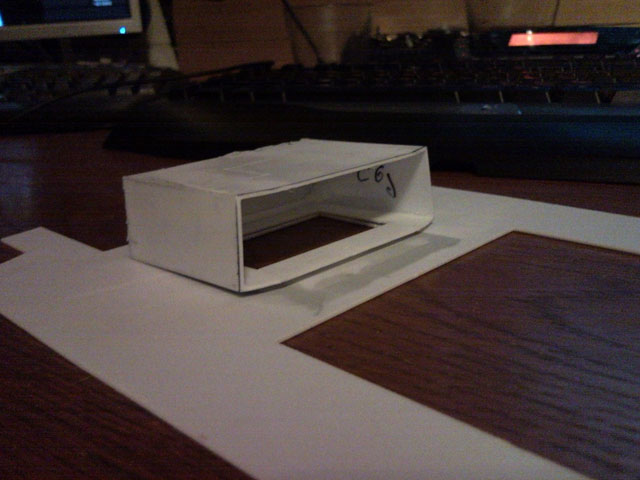
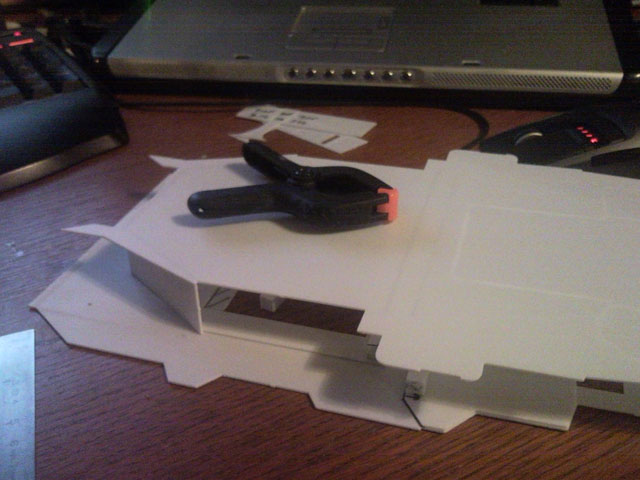
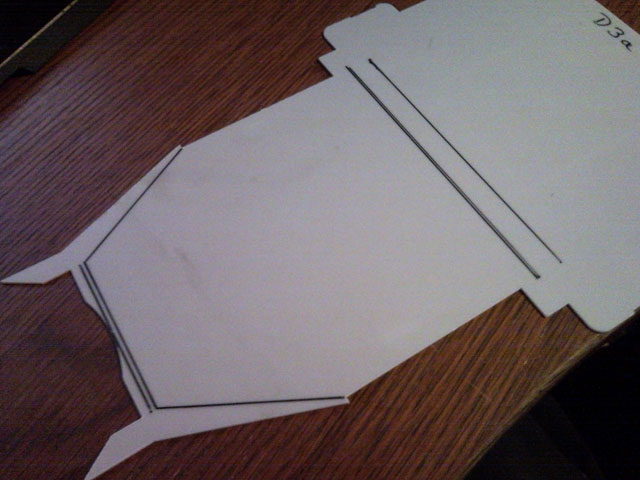
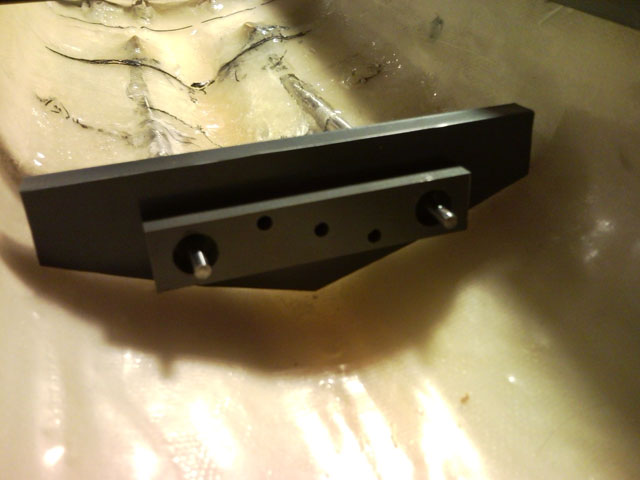
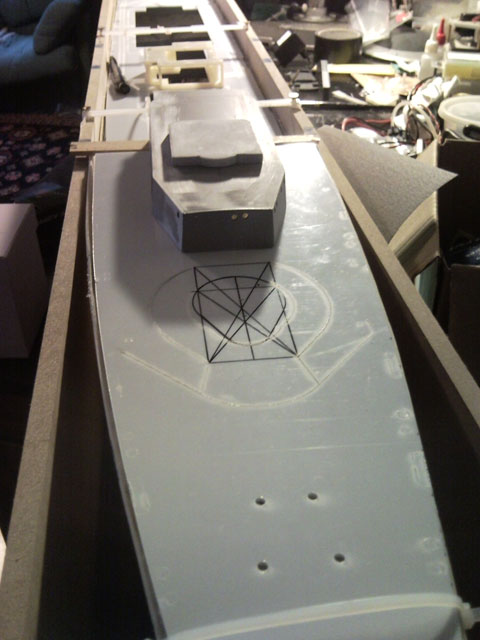
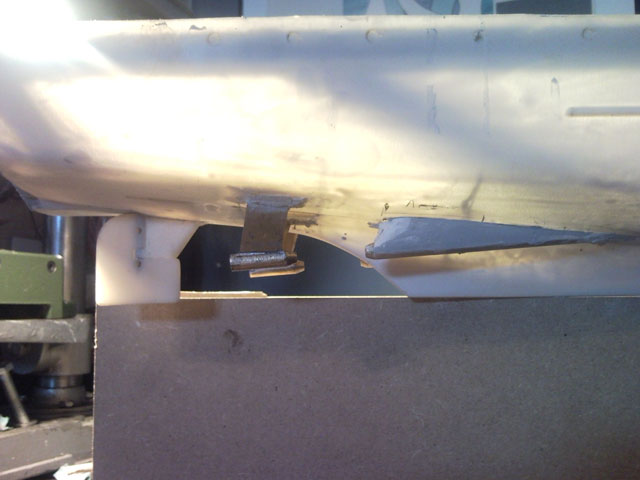
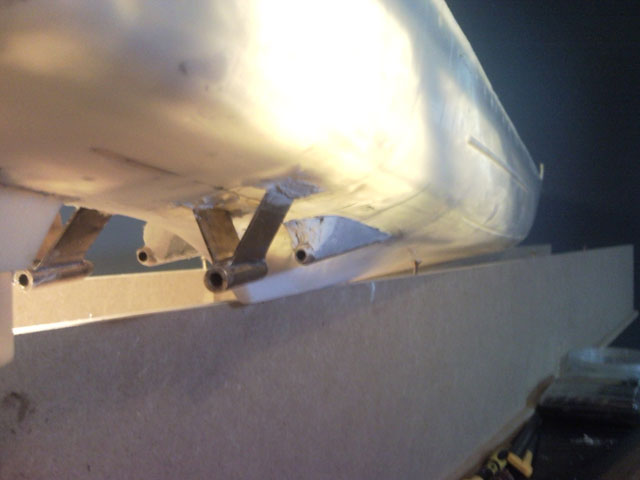
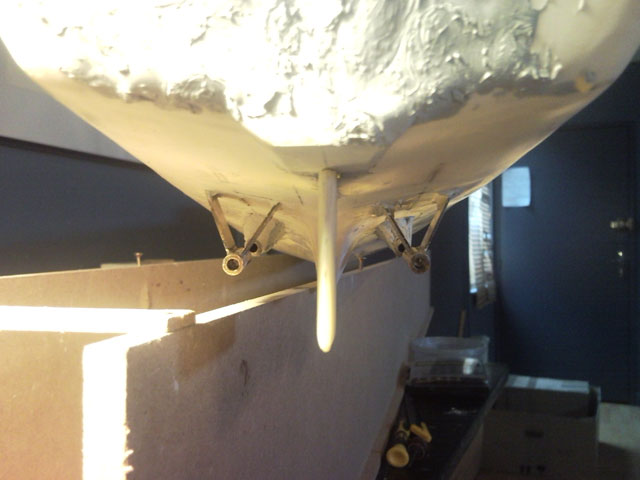
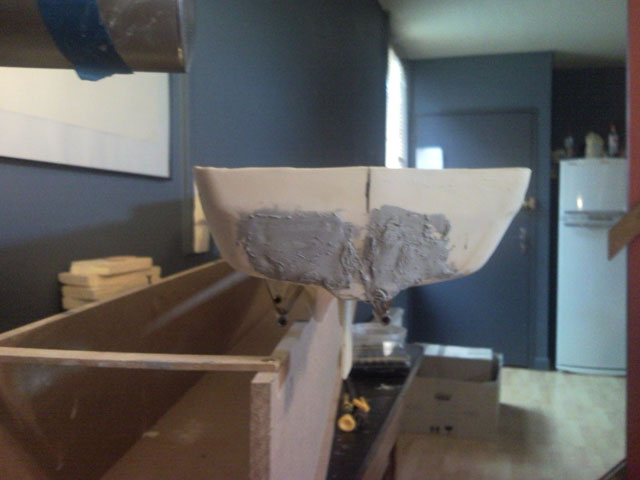
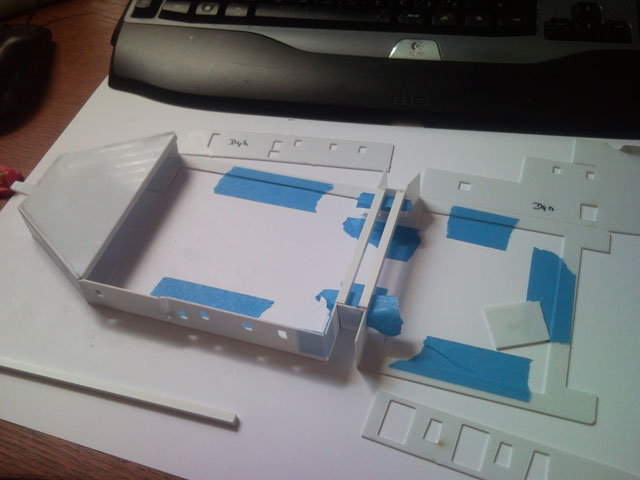
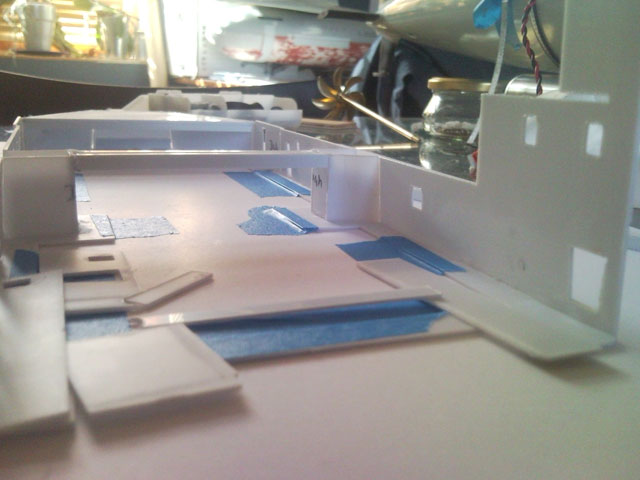
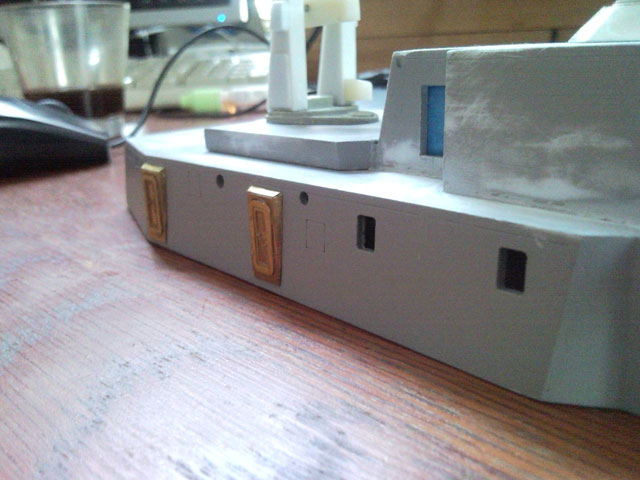
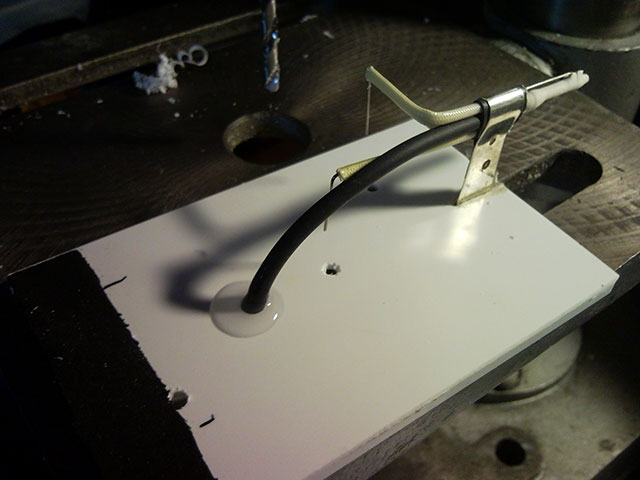
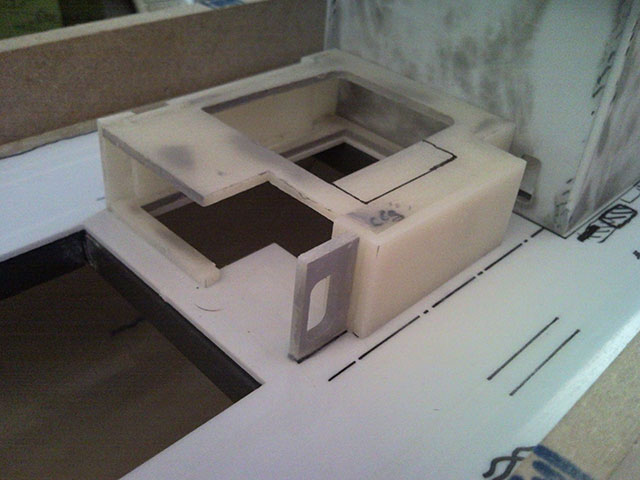
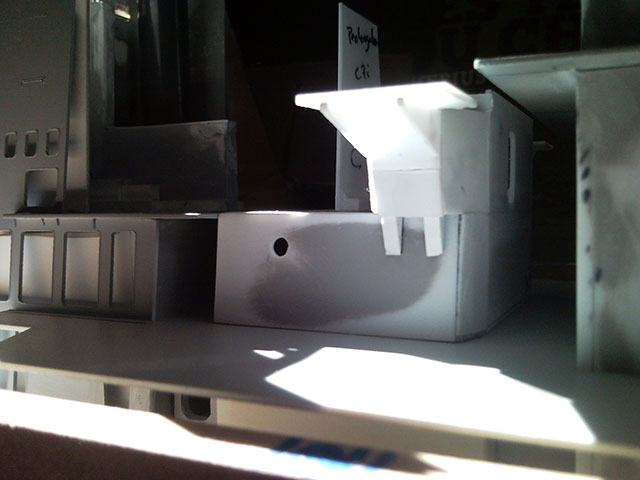
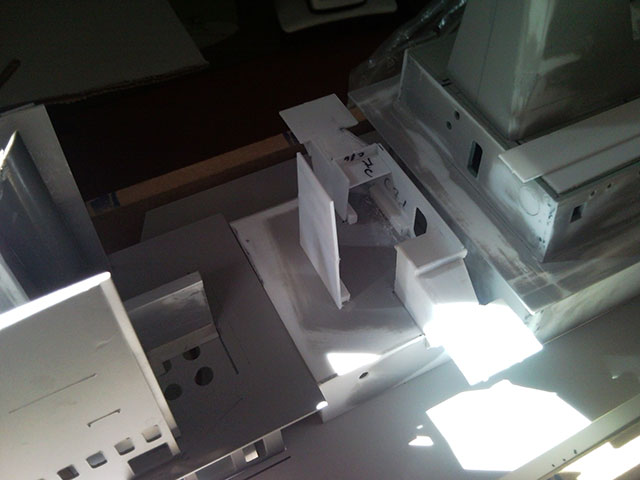
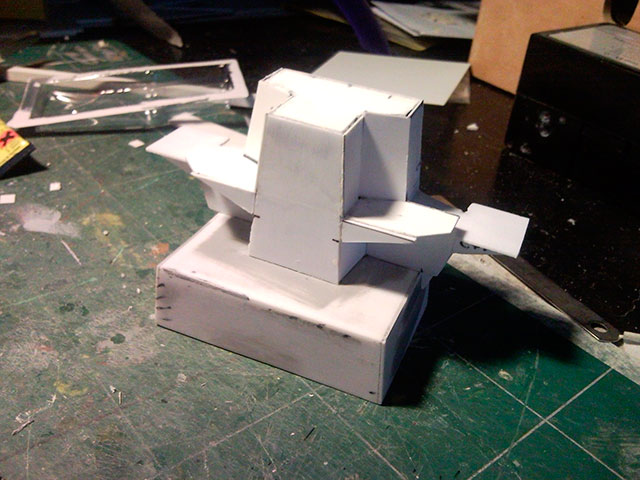
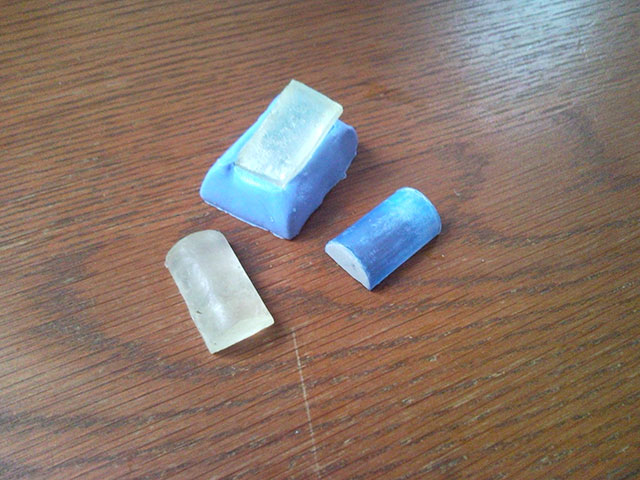
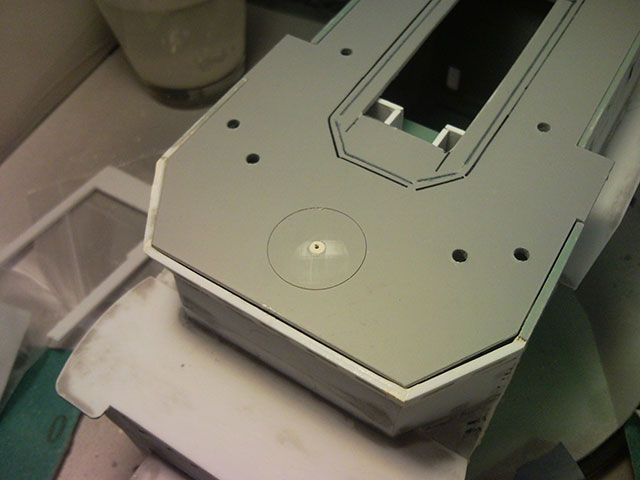
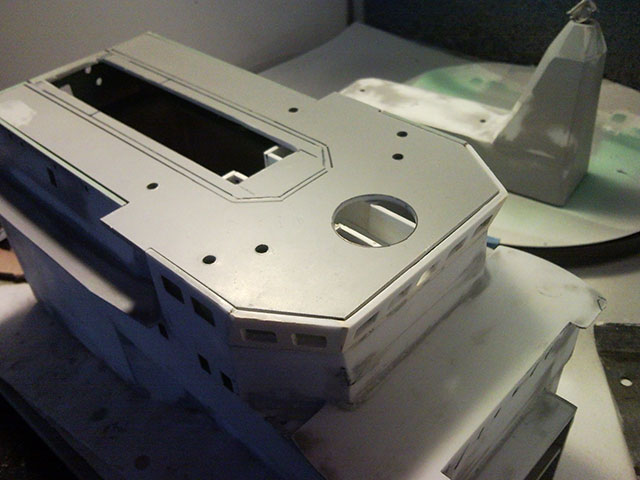
Here is the mold and the piece I've created to place on the roof of bloc n°1...
Image

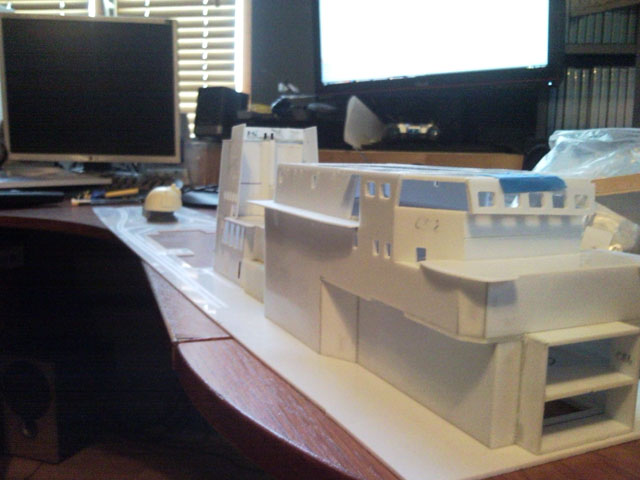
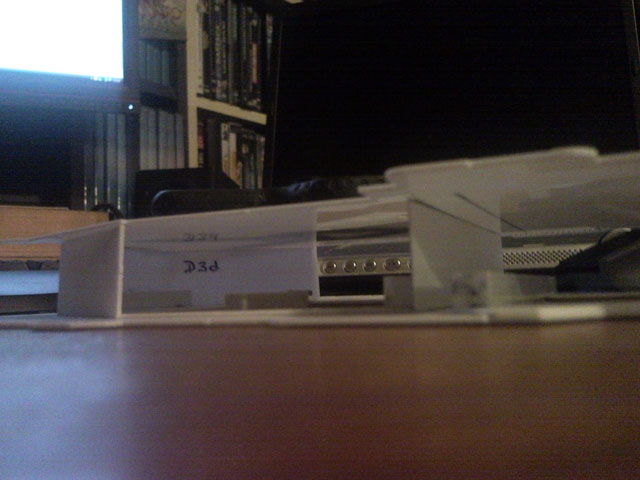
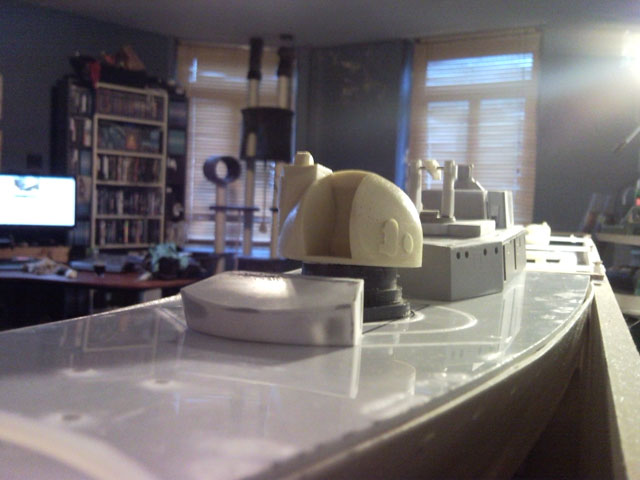
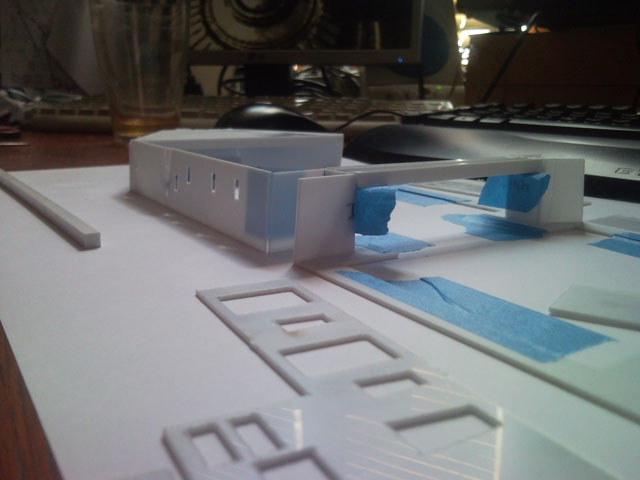
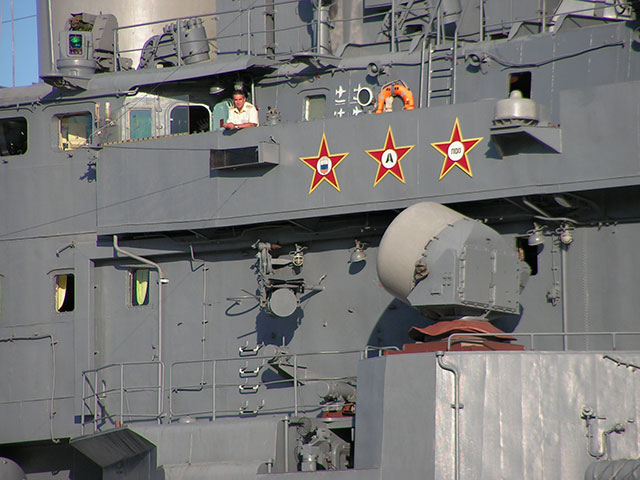
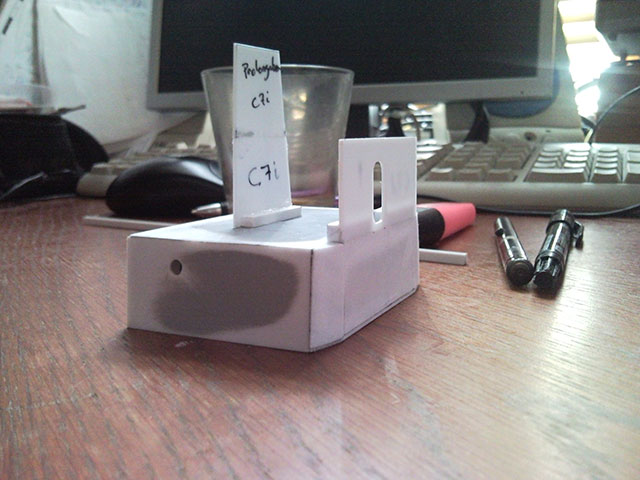
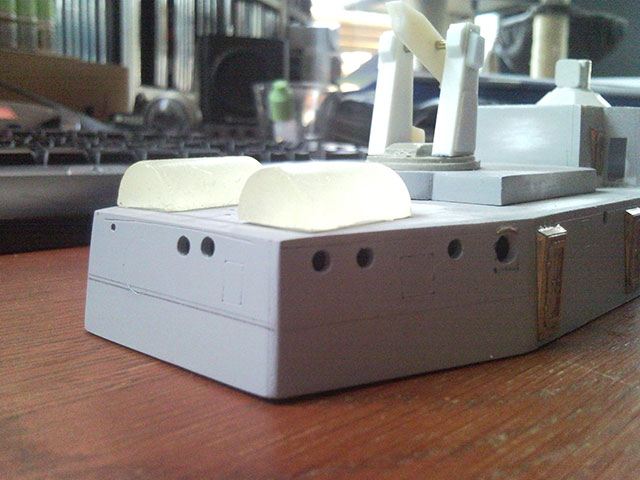
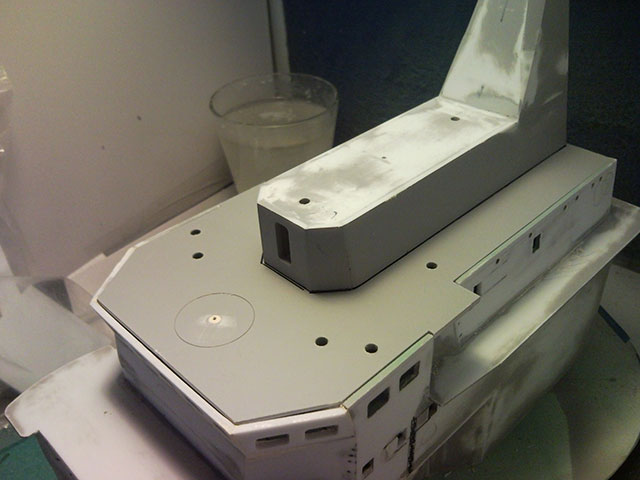
Now, I've placed her temporarilly to see the overall looking of the front part of the bloc n°1. Of course, I need to continue to work on it but I'm quite satisfied of the result...
Image

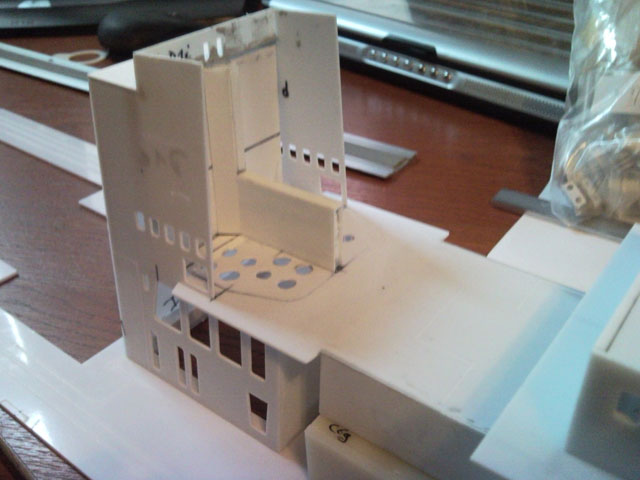
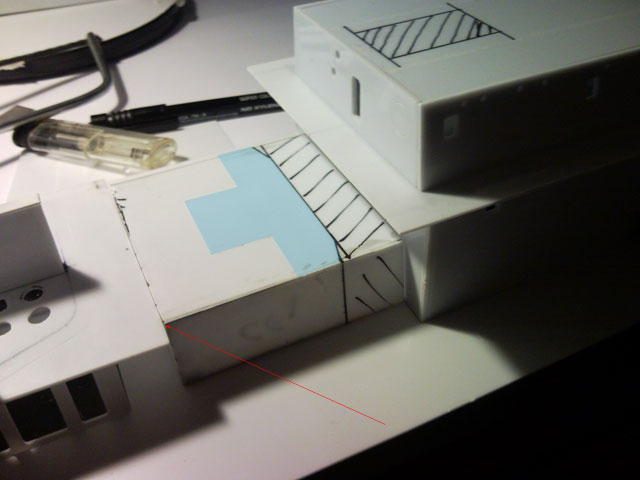
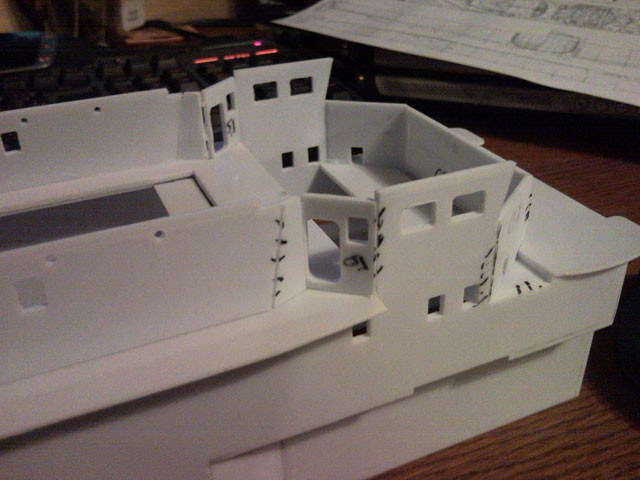
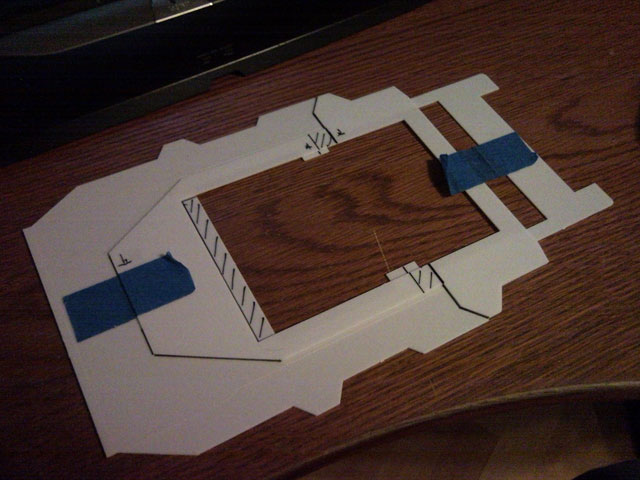
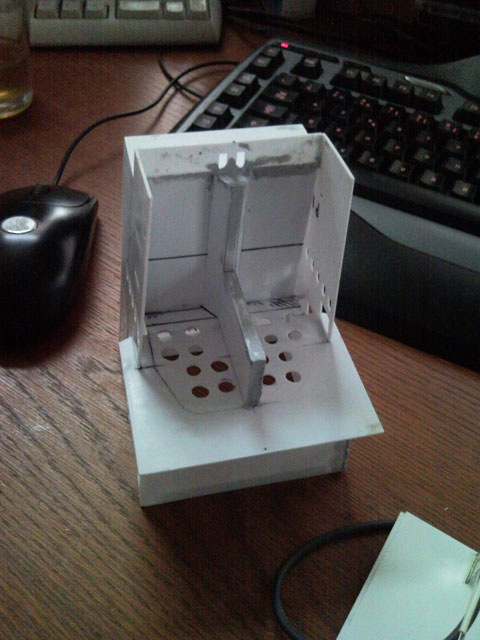
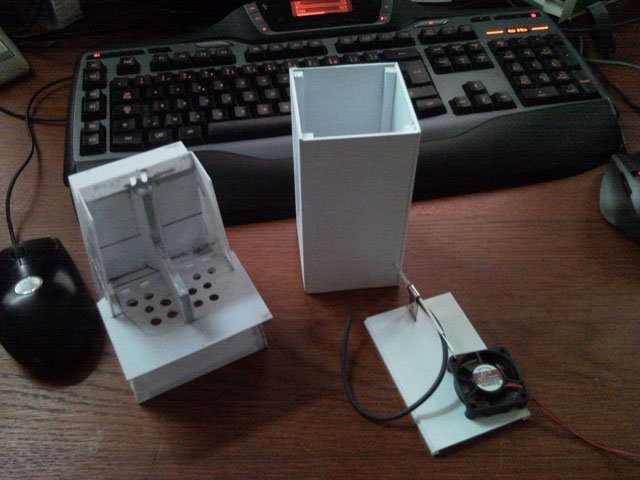
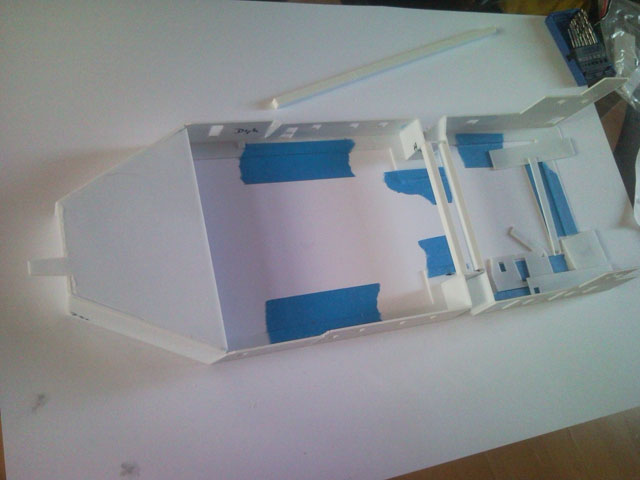
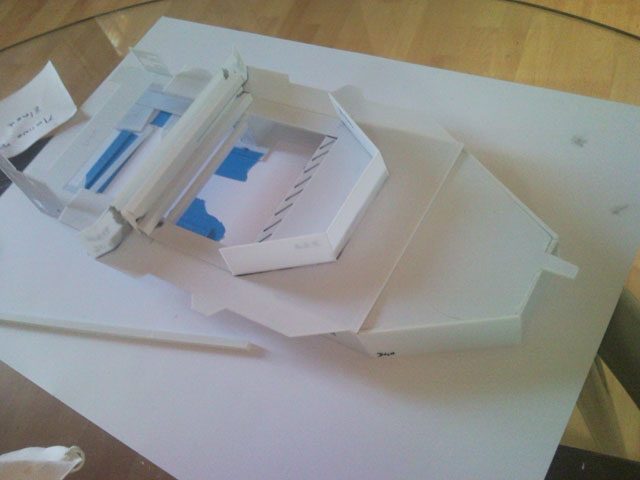
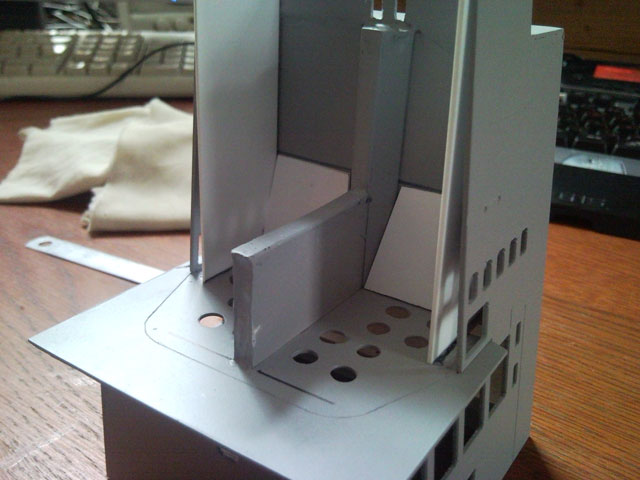
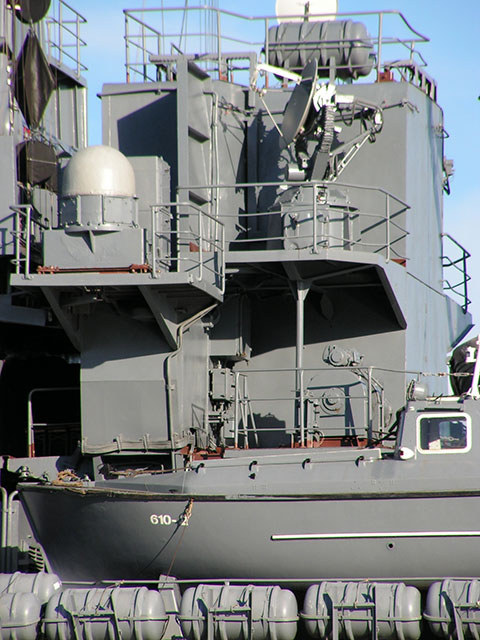
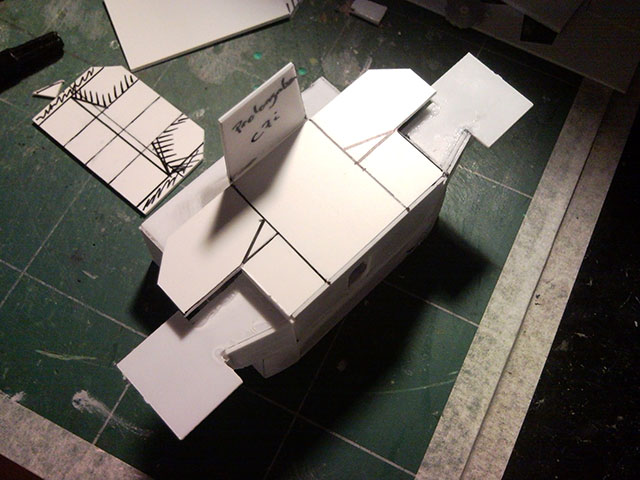
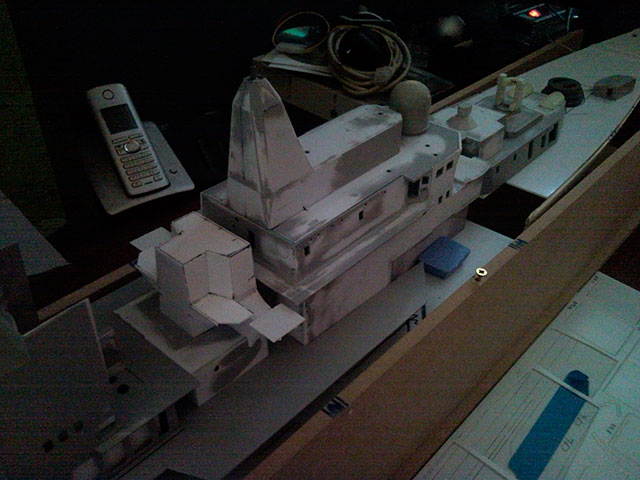
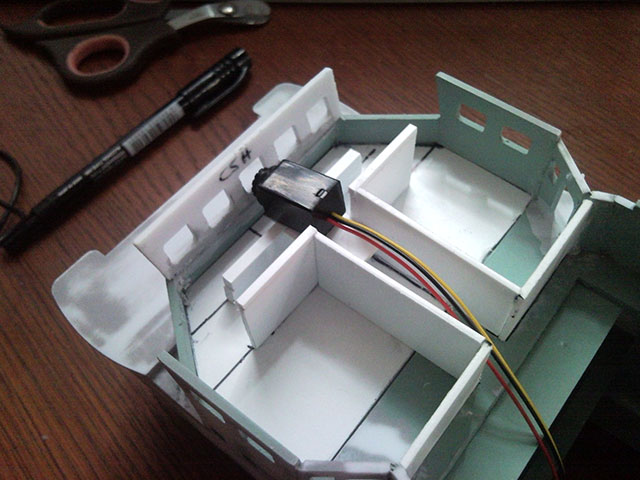
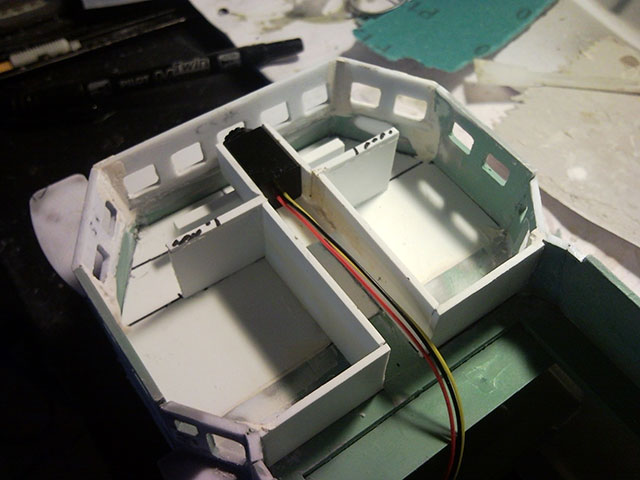
Jump to the bloc n°2 to continue my work on a very important part of this bloc ; the command bridge. Here, I need some improvisation because I must to conciliate realism and technics. As you will see below, a camera will take place inside the command bridge (for FPV option) and I need some room to put hide technics and in a same time put enough details to stay credible...
Image

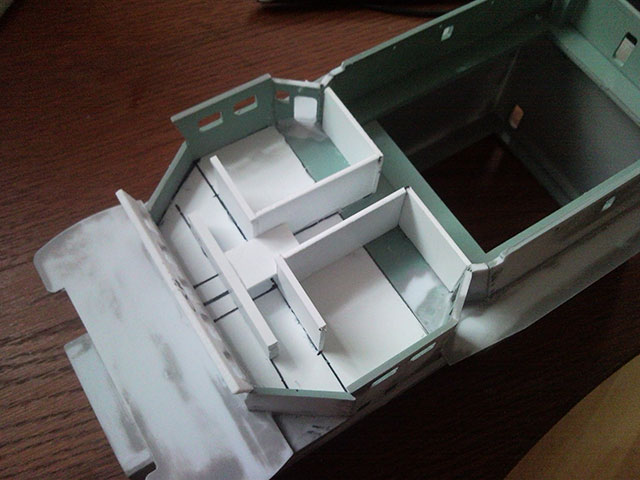
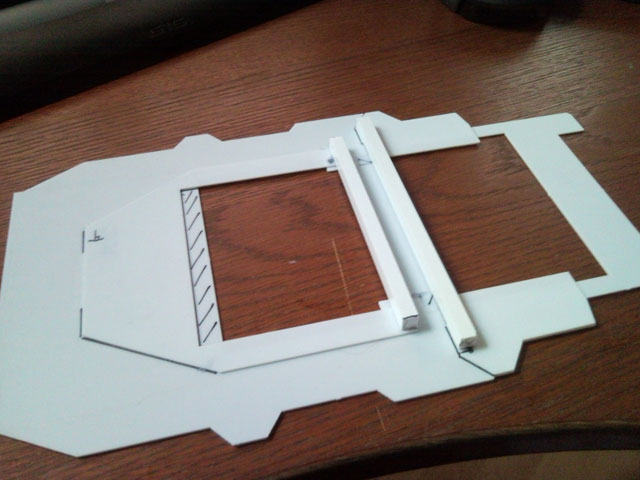
I create a corridor who didn't exist in real model to allow me to have the possibility to remove the camera and to hide some electronics behind...
Image

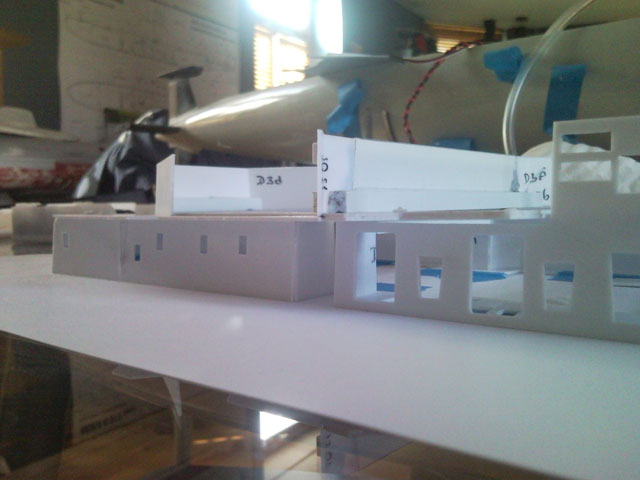
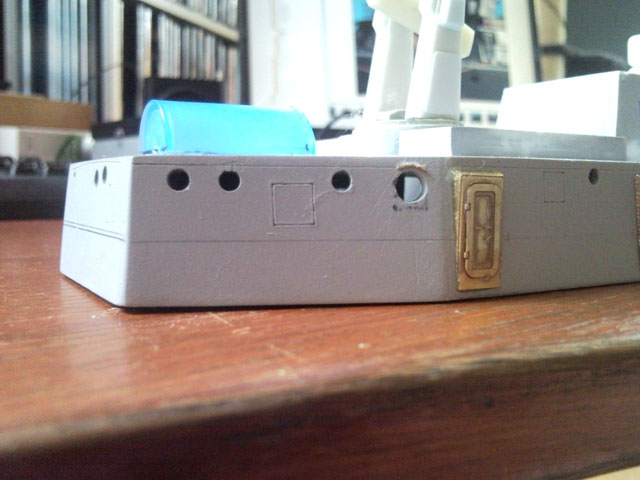
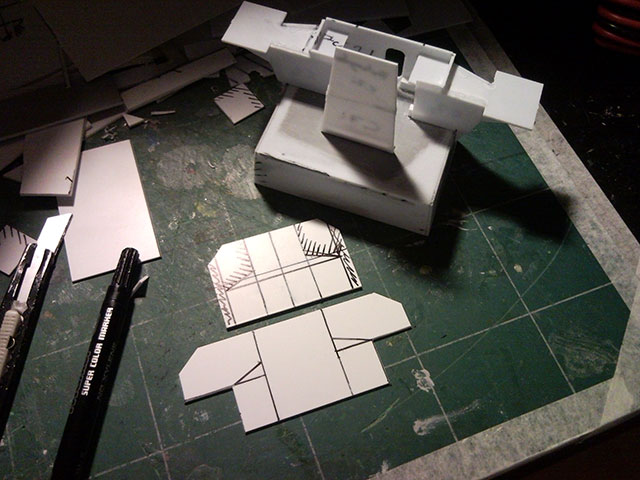
Some of windows are misplaced, I need to fixe that to improve looking of the structure (an place correctly some fitting)...
Image

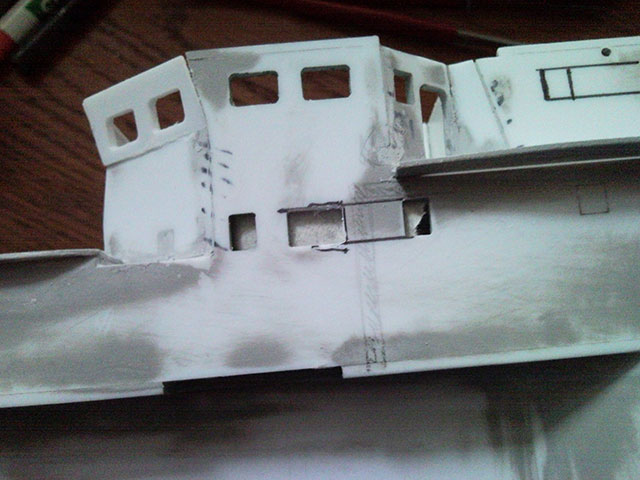
This windows is now at the correct place... of course, putty will be add to correct the surface...
Image

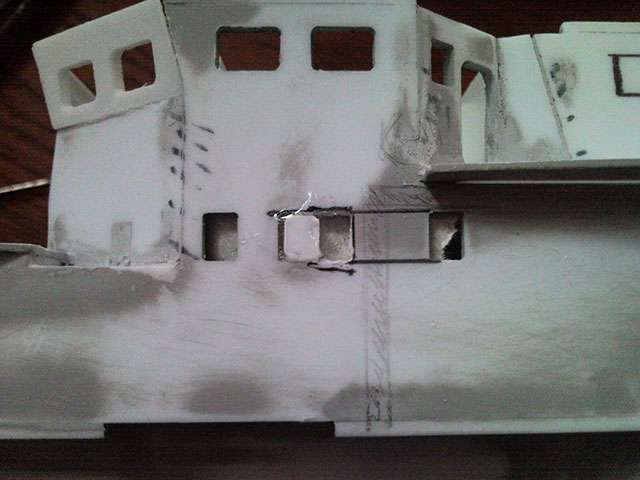
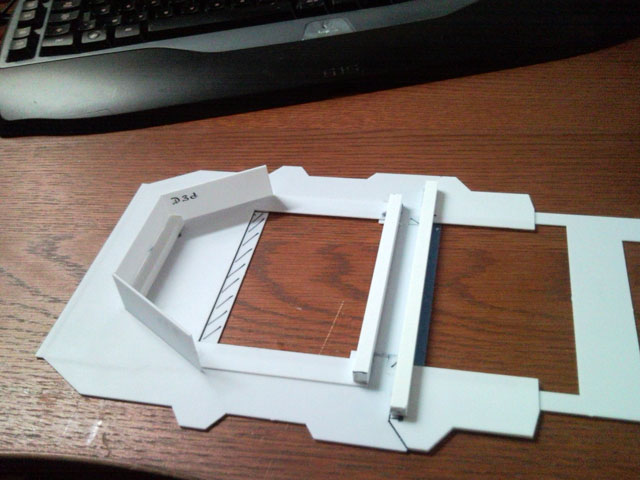
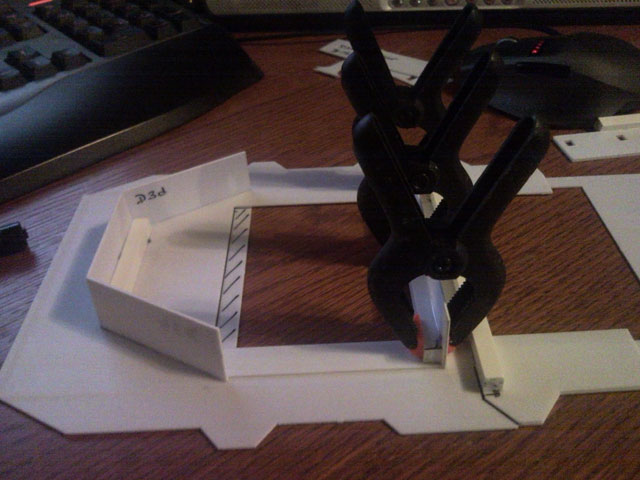
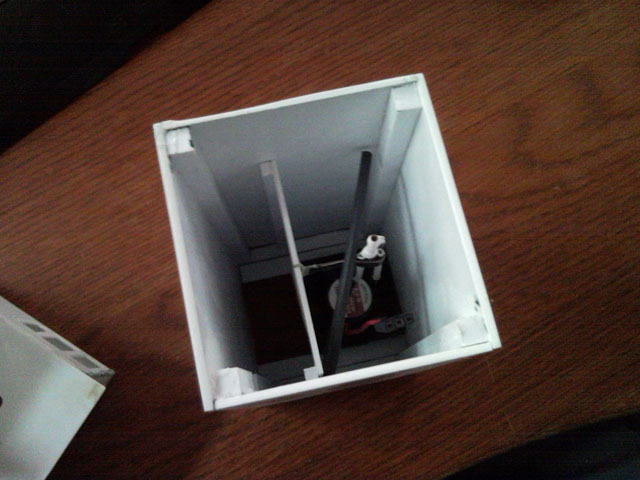
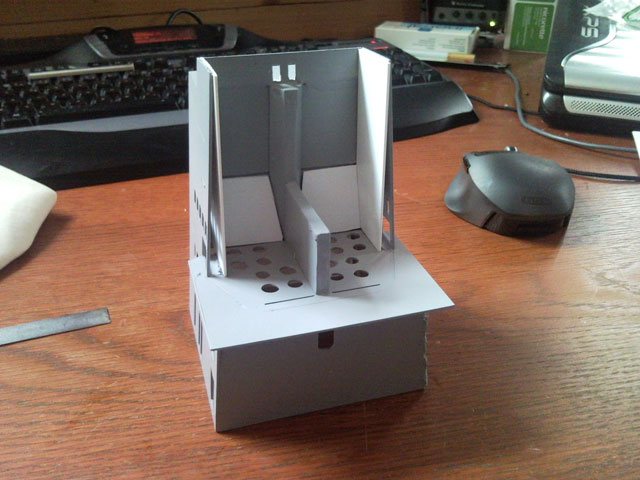
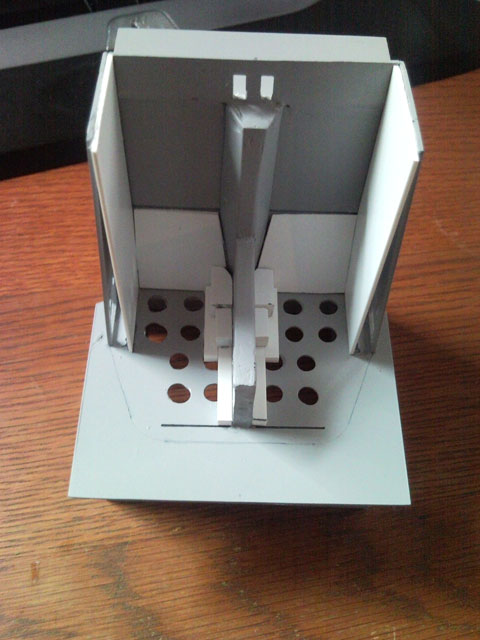
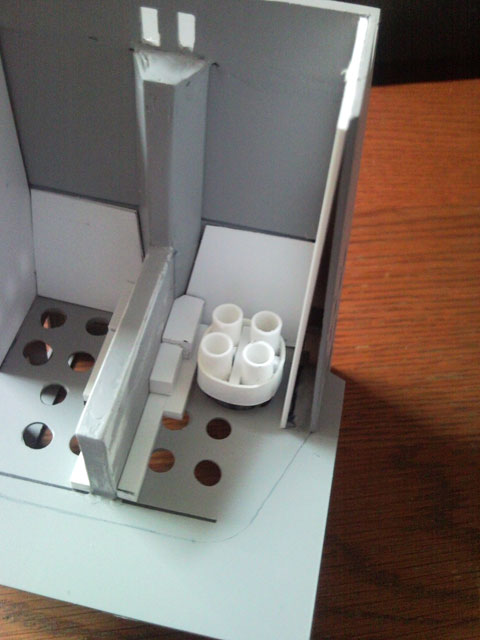
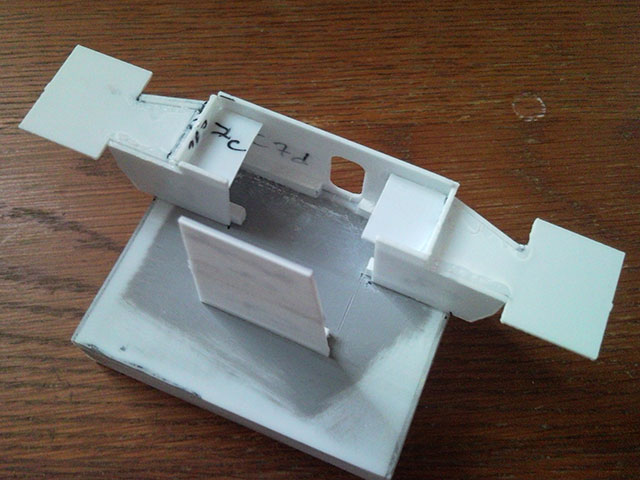
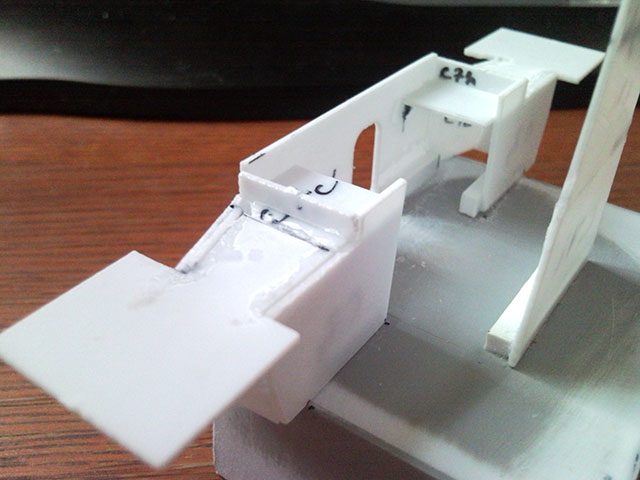
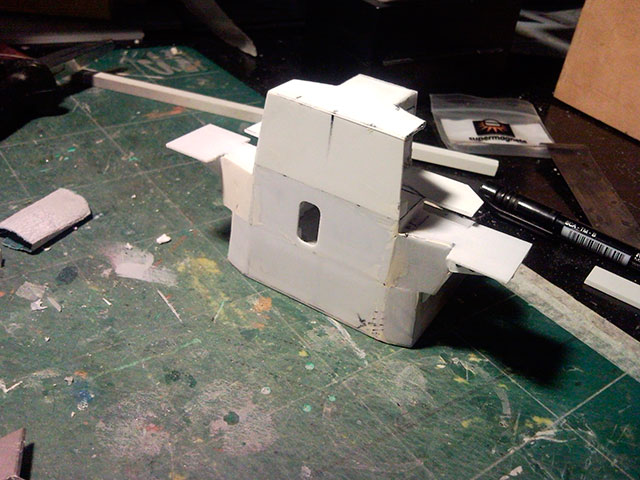
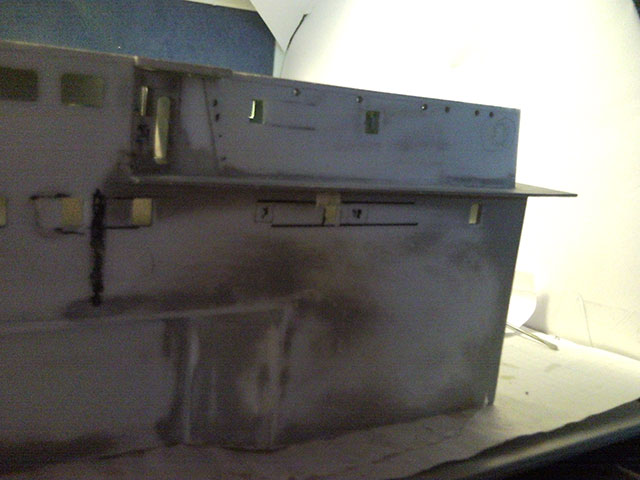
Inside the command bridge, all walls are set and I've started to correct the connections between walls with put to have good angles shapes...
Image

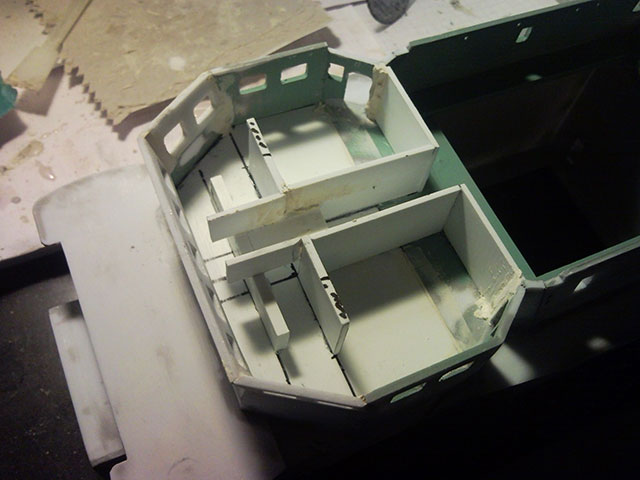
On the floor of the command bridge I will place place some materials to simulate the surface we found ont the real boat...
Image

Still more work to do to enhanced surfaces...
Image

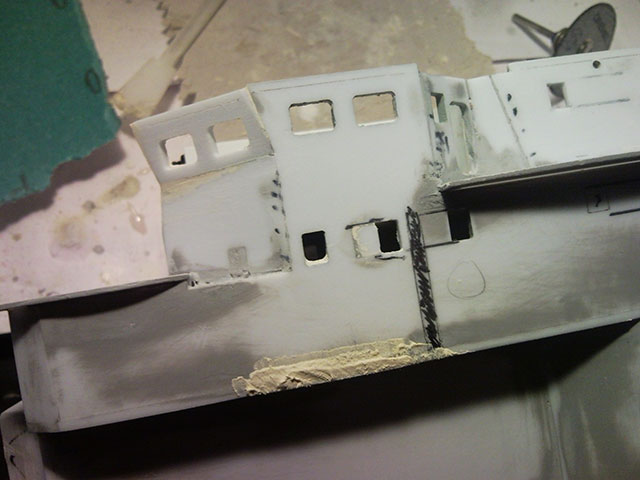
Sometimes, like here, it's much simple, the windows must disapear because she didn't exist !
Image

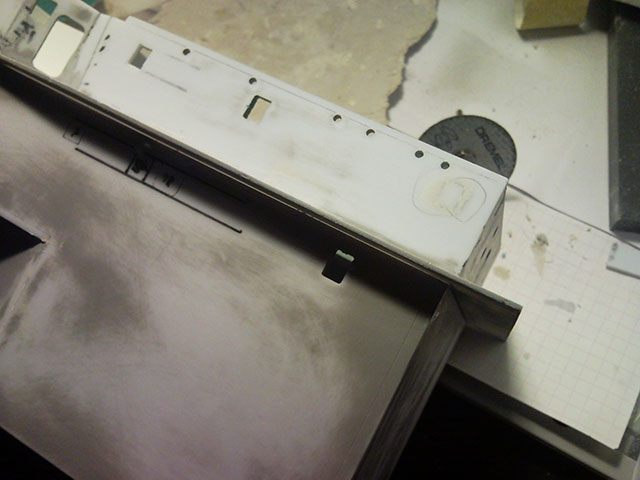
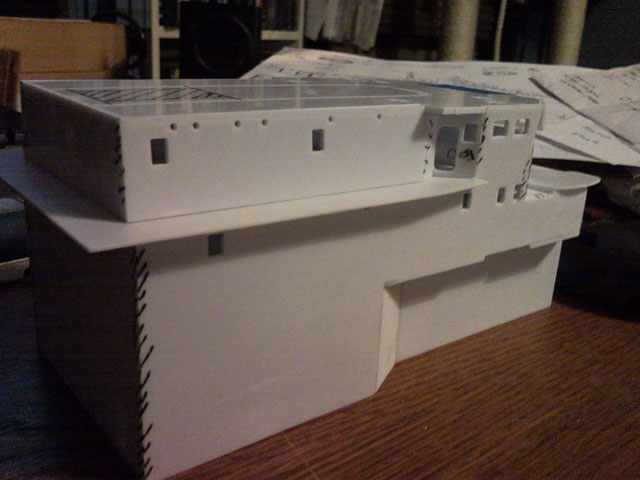
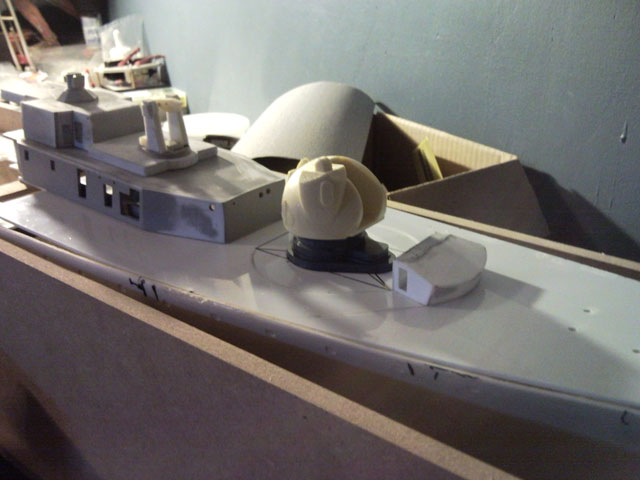
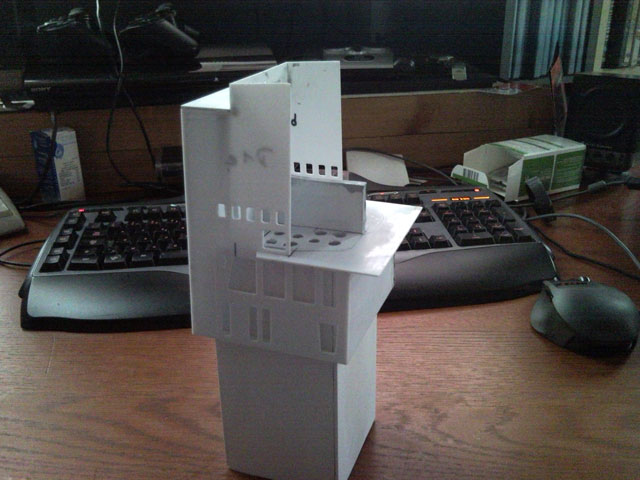
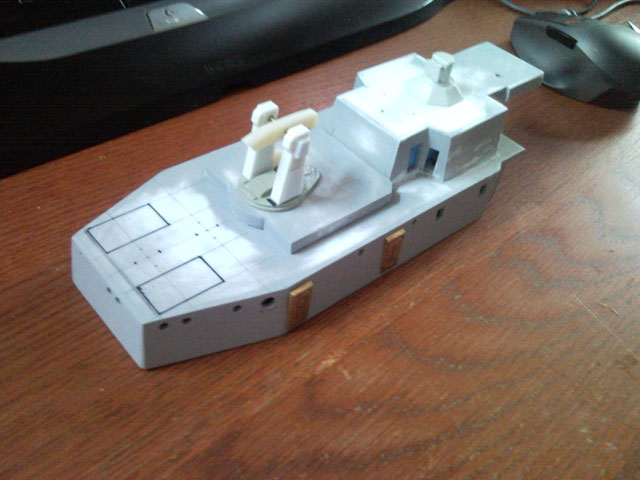
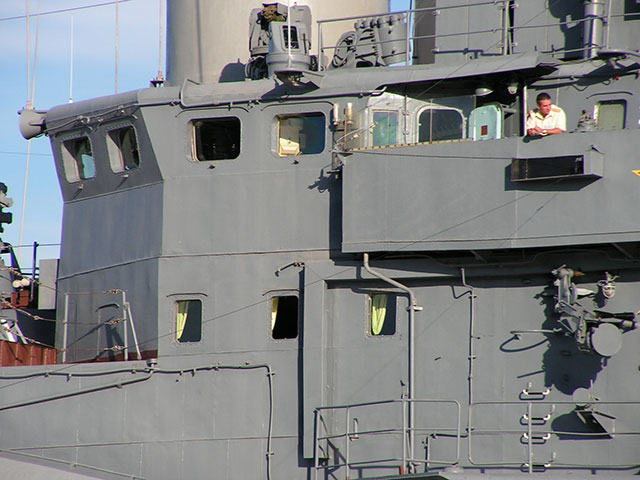
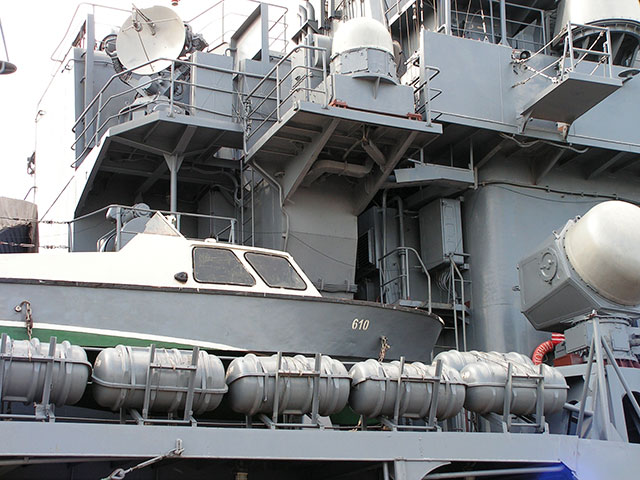
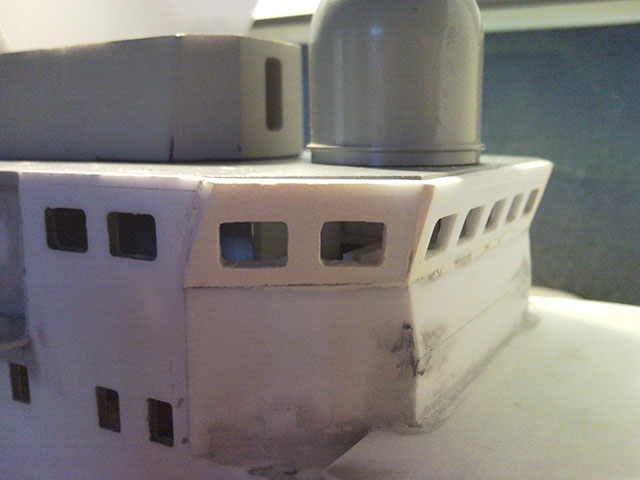
Starboard windows of the command bridge are in place, Now we can imagine the overall looking when all will be finished...
Image

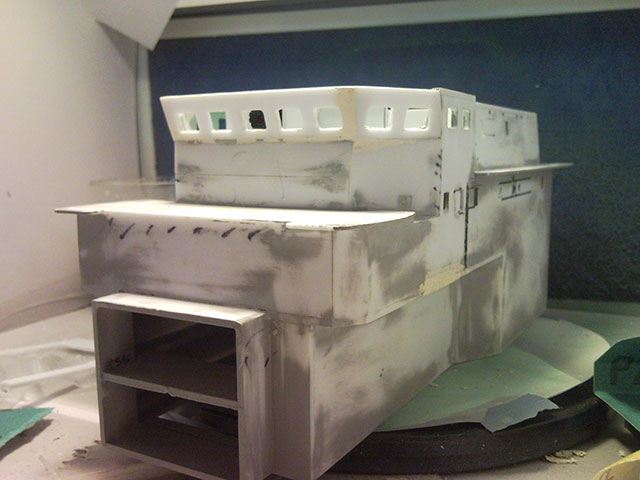
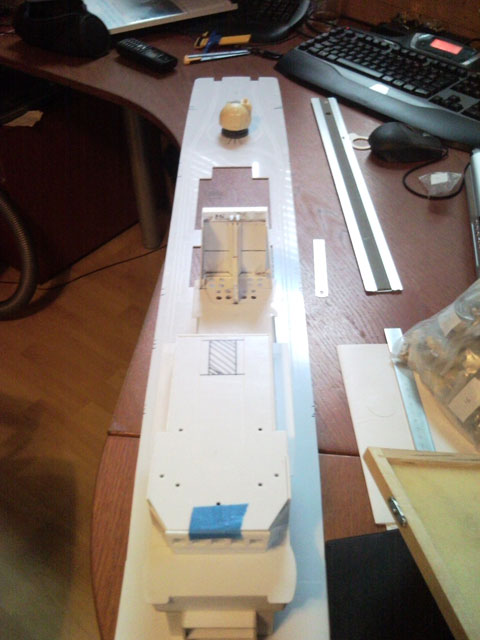
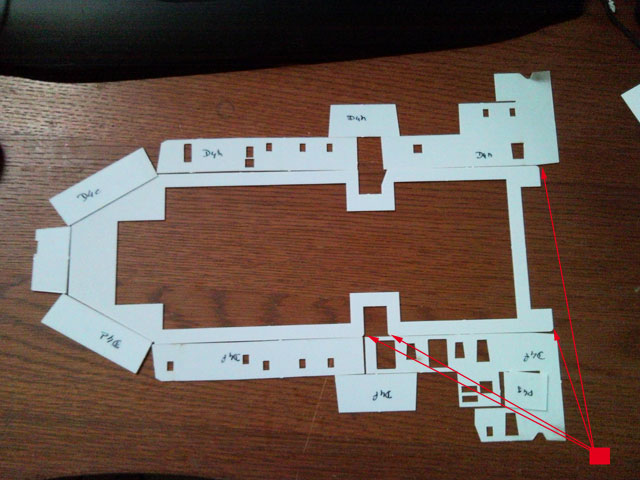
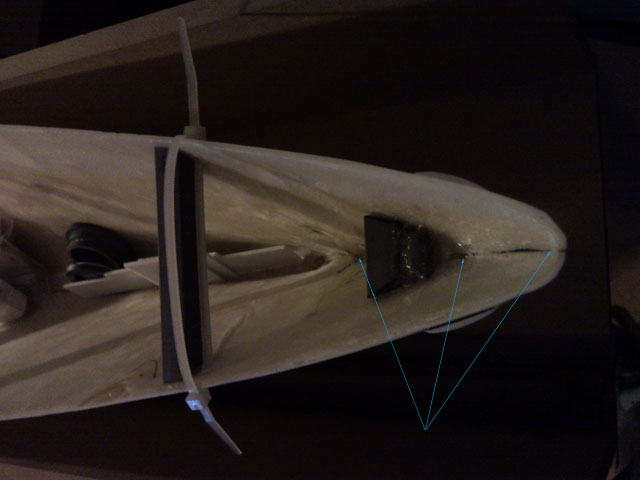
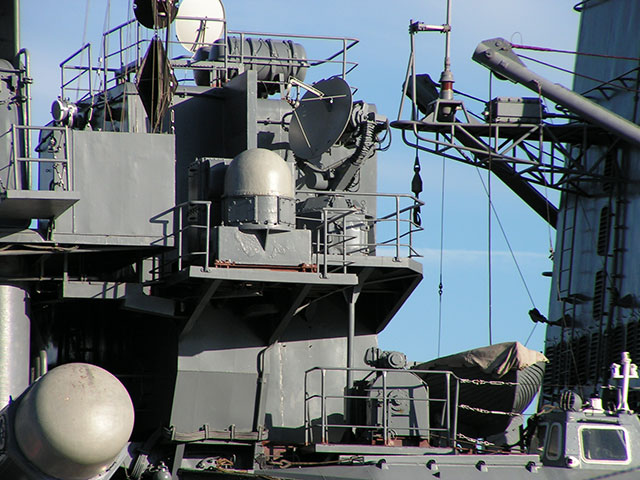
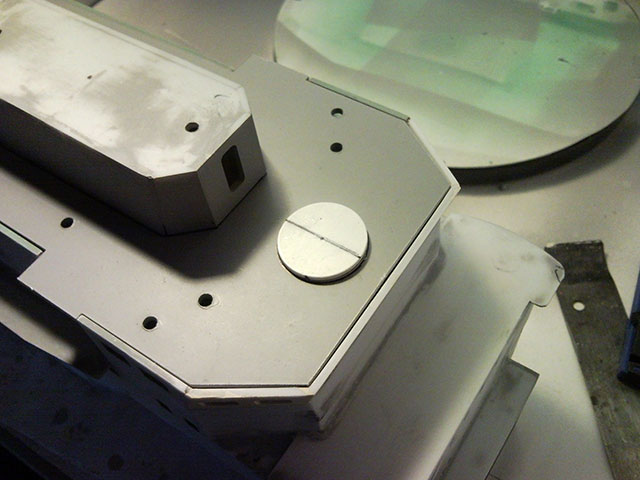
I've drawing a circle where the radar dome will take place. I will cut that circle. The dome will be removable to allow me to access to the camera and ajust easily her position...
Image

The structure who support radar mast will be also removable...
Image

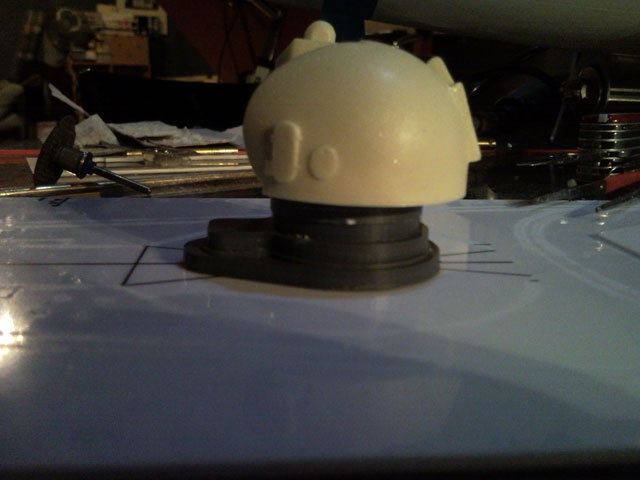
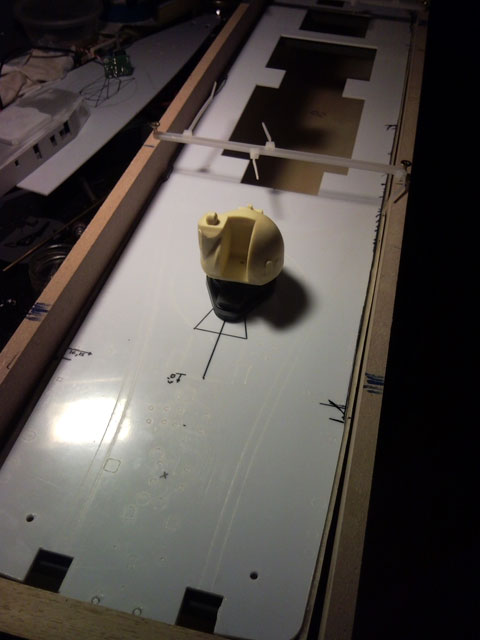
The dome is temporarilly place...
Image

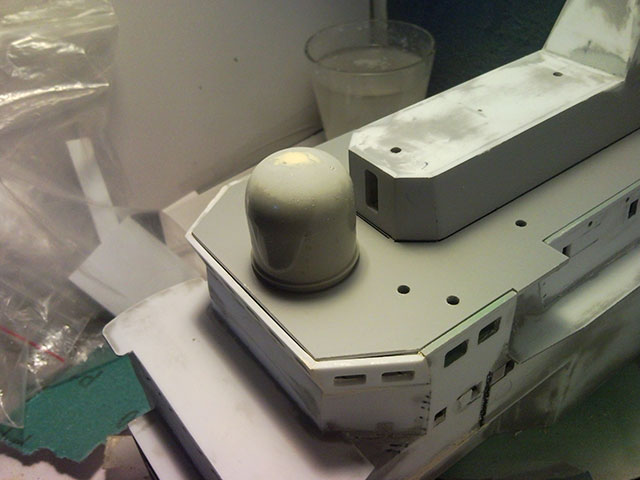
Now the circle on the roof is cut, we can see some walls inside the command bridge...
Image

A new windows at the correct place was cut...
Image

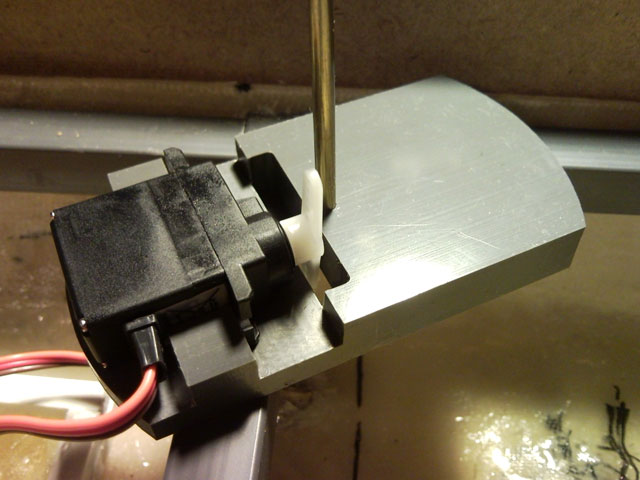
A piece who can be insert to fix the dome on the roof...
Image

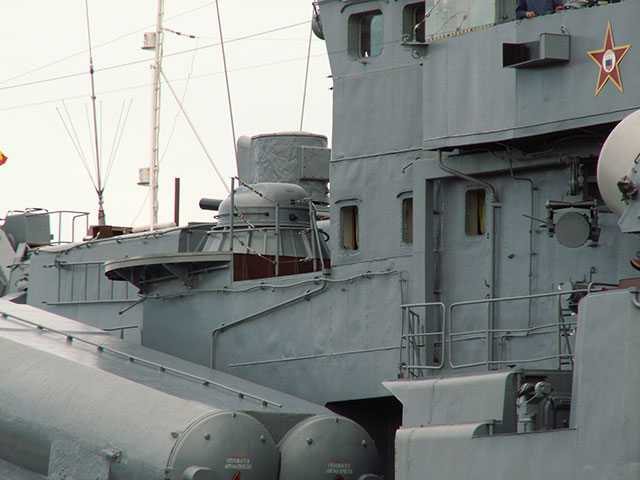
Port windows after some corrections with putty, whe also can see the dome correctly place on the roof...
Image

There is more work to do on bloc n°2 but I'm pretty satisfied about what I've done here. Of course I need to do more improvements and some parts will be completly build from scratch !

_________________
"Give me a ping Vassily, One ping only !"
Image


Report this post
Top
 Profile  
Reply with quote  
PostPosted: Wed Aug 14, 2013 9:06 am 
Offline
User avatar

Joined: Fri Nov 23, 2012 4:39 pm
Posts: 72
Here is some photos of the real one (N°610 Настойчивый), specially some vues of bloc n°2...

Image
Image
Image
Image

_________________
"Give me a ping Vassily, One ping only !"
Image


Report this post
Top
 Profile  
Reply with quote  
PostPosted: Wed Aug 21, 2013 3:02 am 
Offline
User avatar

Joined: Fri Nov 23, 2012 4:39 pm
Posts: 72
As you can notice, I've a multiple seperate work in progress, that allow me to have each parts of superstructure with the same level of completion. In meantime, that's also allow me to have a globale vue of the ship. That will provide me some information about the fittings and I can think and resolve problem with global position of each parts in mind.

I continue the work of the hidden parts of the funnel. The pipe is fixed with silicon. Now I need to do electrics connection to the steam generator.
Image

I've completly redone the basement of bloc n°2.5 because shapes provide by Ark model was inconsistent with this particular boat (N° 610). This basement is definitively glued on the main deck. Only an half part of this bloc can be removable.
Image

Now I will work on that removable parts of the bloc n°2.5. It's a communication tower enhanced on this particular boat with higher structures and more parabolic antenna. Of course, all must be redone from scratch.
Image

This part of the structure exist on the kit but was incomplete. I need a lot of surface corrections to have good surface looking !
Image

Inside this structure I will put a pitch controller. This pitch controller will operate on the servo's stabilizator.
Image

Here is the starboard vue of the structure. I enhanced some of details but I still have a lot of work to do on it !
Image

There is a lot of detail on that structure
Image

I've two parabolic antennas to do...
Image

The most difficult things to do is to properly mapped the exact location of each fittings !
Image

I'm really happy, the structure is pretty well placed on the overall structure.
Image

Now I will start the new scratch structure...
Image

Each parts need to be thought twice; however I don't have any plan neither quotations so I need to do all this structure with a wet finger. That's why I also need to look carefully all photos material I have to respect overall proportion of this bloc.
Image

_________________
"Give me a ping Vassily, One ping only !"
Image


Report this post
Top
 Profile  
Reply with quote  
PostPosted: Sun Sep 08, 2013 3:40 pm 
Offline
User avatar

Joined: Fri Nov 23, 2012 4:39 pm
Posts: 72
I continue the work on communication tower (bloc n°2.5). The top roof is in place and there is six walls left to place on structure.
Image

I still have a lot of work to do on details and fittings...
Image

I received my new motor gears. This kind of gearbox is perhaps much noiser than toothbelt but this device is solid and robust. Gear ratio is 1/3.
Image

Port View of Bloc n°2.5 on N°610 Настойчивый
Image
Image

Starboard view of bloc n°2.5
Image

All wals are in place now, I'm pretty happy about the result.
Image

Bloc n°2.5 is now in place and it fit very well between bloc n°2 and n°3.
Image

Of course, there is a lot of fitting to add and many enhancements to do..
Image

_________________
"Give me a ping Vassily, One ping only !"
Image


Report this post
Top
 Profile  
Reply with quote  
Display posts from previous:  Sort by  
Post new topic Reply to topic  [ 72 posts ]  Go to page Previous  1, 2, 3, 4  Next

All times are UTC - 6 hours [ DST ]


Who is online

Users browsing this forum: No registered users and 74 guests


You can post new topics in this forum
You can reply to topics in this forum
You cannot edit your posts in this forum
You cannot delete your posts in this forum
You cannot post attachments in this forum

Jump to:  
Powered by phpBB® Forum Software © phpBB Group