Ok, so here we go. It's been running for a while now, with the great help of Dave (and his book) and Ron! I cannot express my thanks enough to both of them in supporting me in this project.
I'll start with some history, like usual with big (and long term) projects.
My main interest in this ship (and sisters) came from the fact that I sailed on both Chaconia and Courcheville as well as the fact that they were built in Belgium and the availability of their plans.
It all started in Flanders, long time ago, there was the Boelwerf, a yard which was building about everything you can imagine, from the days of small riverine craft and transporters to warships, chemical carriers, bulk carriers, fruit carriers and so on, the yard even built the protection of a nuclear power plant and shore tanks. It used to be a very famous yard, being one of the first (if not the first) to have a side launch slipway. It also built the largest LNG carrier of its time (over 30 years ago now, she's still trading "Methania") and a drilling rig "Yatzi".
Technically, as with everything in Belgium and Europe, it became too expensive, government tried to save it with a lot of funding, but some scandals etc. caused a bancrupcy after all.
The history of this class of ships started by the beginning of the 80's. The "Tielrode" was the first of class, followed, one year later by the "Gent" (both named after vilages/cities). They were 155m long and had three cargo tanks as well as three cargo cooling plants. They could carry Ammonia, Propane, Butane, mixes thereof as well as Naphta and a few other products.
these two ships were followed on by another series of slightly modified ships namely, "Cheshire", "Chaconia", "Nyhall" (later renamed Courcheville), they were 10.2m longer than their predecessors, had a slightly different lay-out with the deck tanks being placed just in front of the accomodation block (on the older units the deck tanks were forward) and the addition of aeration fans (2 for each tank) on deck. They were followed by another unit called "Sombeke", which had 3 deck tanks as well as a higher freeboard with a stepped stern (now called Austalgas). Tielrode and Cheshire are now part of the Bergesen fleet.
Gent, Chaconia and Courcheville are part of the Exmar fleet. All of them are again different. Gent was built with two deck tanks of which one was removed. Chaconia was built with only 1 and Courcheville with 2 of them (which she retains up till now).
They represent a very basic quality of Western shipbuilding. A ship could be built according to the needs... You wanted a ship 1m longer, no problem they'd deliver it. Nowadays with South Korean and Chinese shipbuilding, it's like going to the supermarket. You buy a small one, Mid size one, Large one or Very Large one, with the choice of having deck tanks or not. The rest is all exactly the same on all ships. If you want to change something, better to accept the ship, get it in a dry dock somewhere and make your changes there, as in the yard it will cost a lot more to make a change!
But let's not deviate too much.
After building some 1/700 models of ships of our fleet, I decided to go for something big, seeing Ron and Dave's results and with the resources (and memory) at hand, I wanted to try something different.
First things first, I bought a scroll saw, something invaluable for a project like this!
Then I started planning, and more planning, and more of it. The final conclusion was that it just isn't like any other build I've seen here. The design, single propellor with single rudder and big bulb with blunt bow is very different from any battleship!
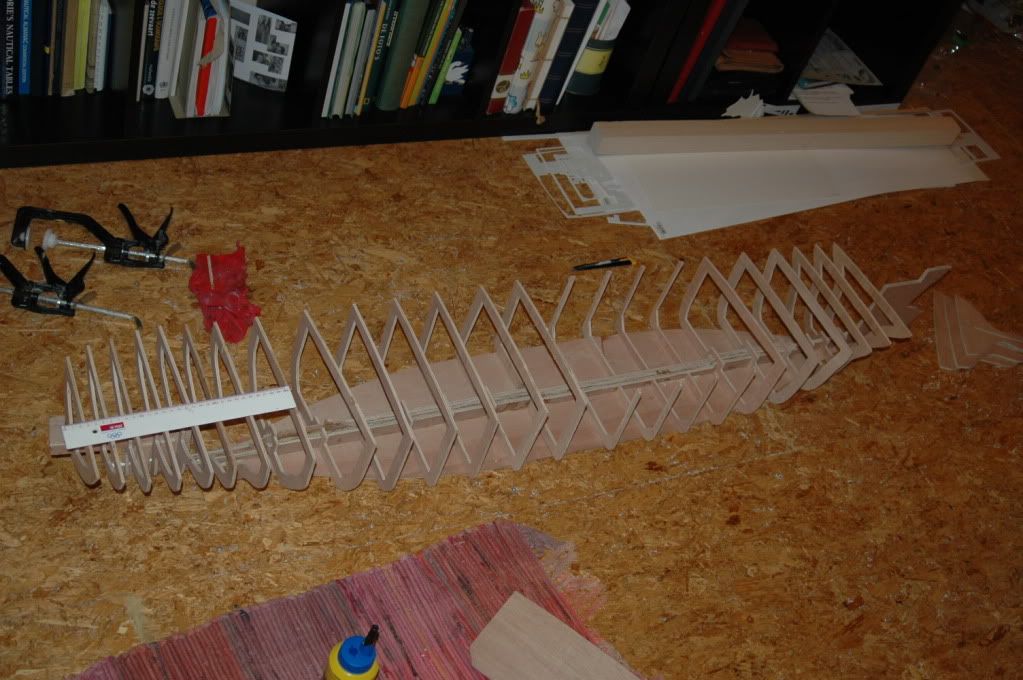
Technically speaking, it meant I had to cut the propellor shaft through the, central, keel, same for the rudder. After thinking about it myself and some help from Mr. Wooley (who had the same solution as me) I started cutting.
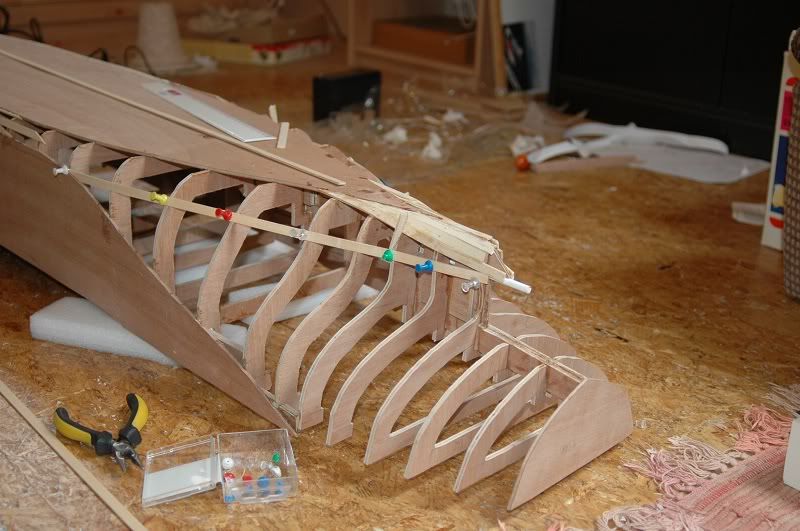
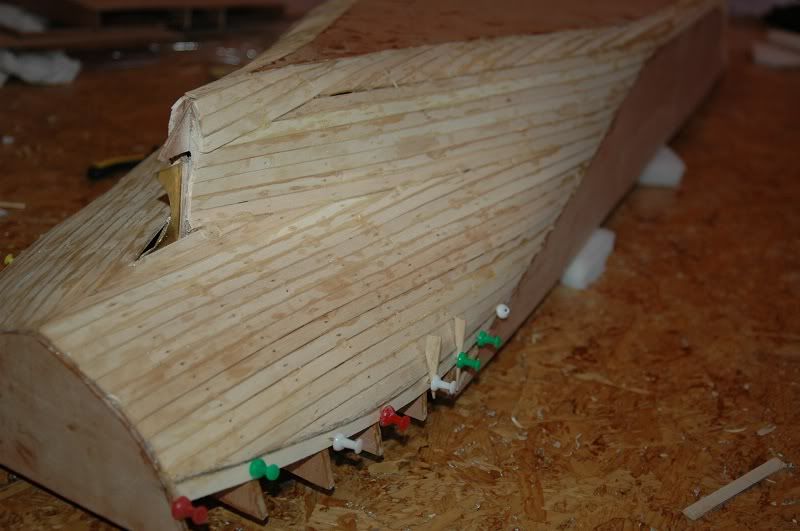
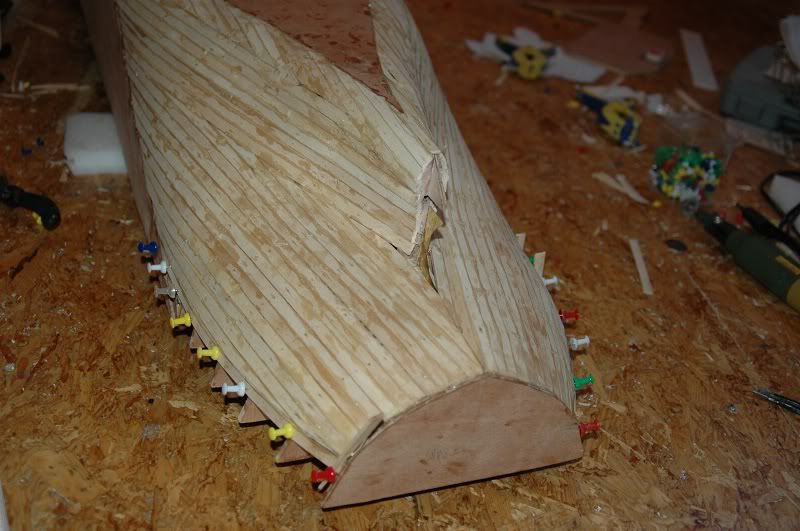
Another "different" feature of a tanker is of course the parallel body sides as well as the flat bottom. Which I decided would be best built from a single piece of wood rather than using the regular fully planked hull and then sand it flat. I also had the drawings for these surfaces, which allowed for a fairly accurate shape. Everything between the deck, sides and bottom has to be planked though.
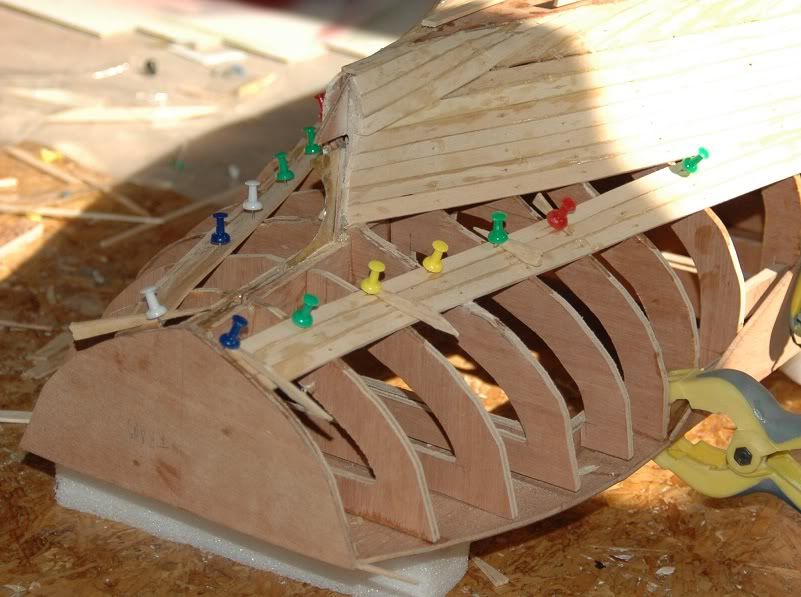
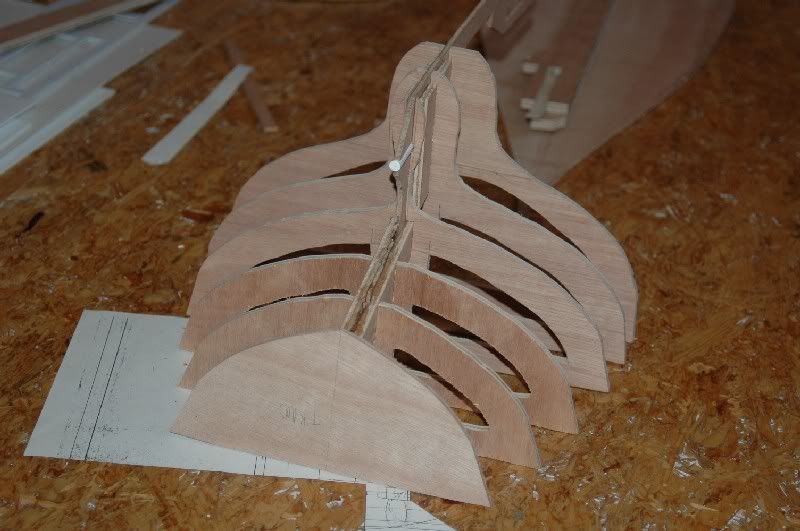
As usual also there is a rounded deck edge, which is a feature again common to tanker construction. It helps divide the forces, which are the largest around midships. This is also the reason why this rounding stops near the curves of the bow and stern. It's approximately 50% of the ship's length. I tried with a walnut cilinder, but that didn't work out well. Eventually I just bought a half cilindrical shaped piece of cedar. Cut that in half. The frames have a small cut-out on the corners to fit that quarter cilinder. The rest will be finished off with some filler I guess. Having a scroll saw is one thing, having a steady hand is a totally different thing....

First view of the shape.
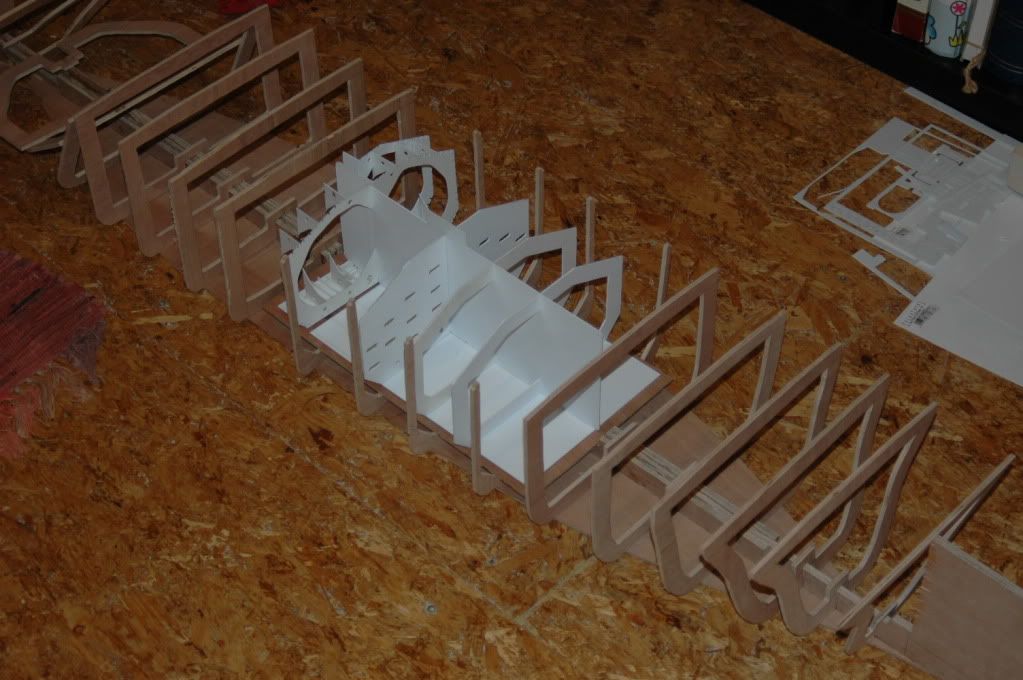
http://i894.photobucket.com/albums/ac145/Sevmash/DSC_0107.jpgThe handy thing on this model is that the baseboard which is normally used to put the frames on the keel, is replaced by the flat bottom of the ship.
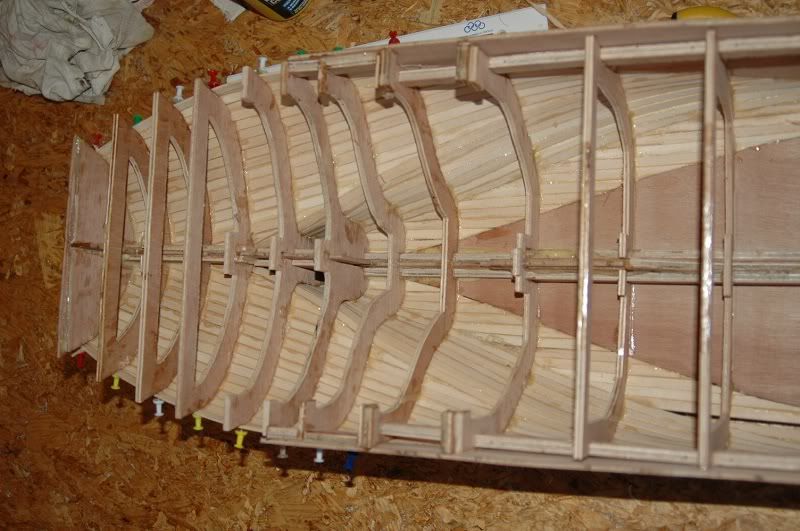
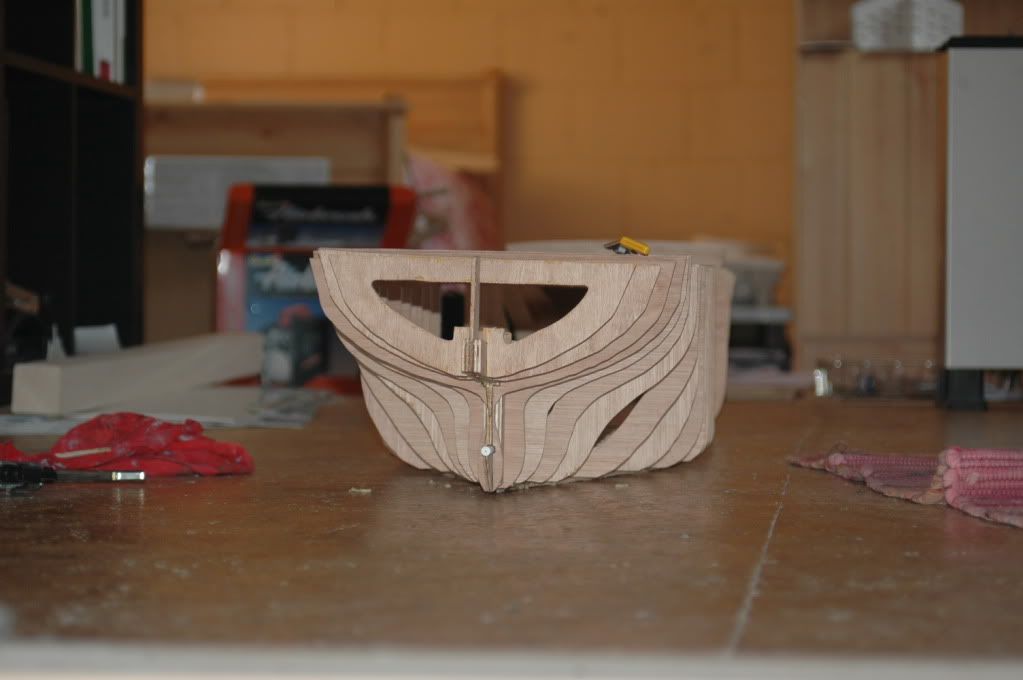
http://i894.photobucket.com/albums/ac145/Sevmash/DSC_0111.jpgShe was designed with an open cargo tank inside as the tanks in this type of ship are independent. They practically sit on blocks inside the ship's hold spaces. This project was started over four months ago though, and since I left it for that time, the tank, made from thin styrene sheets, has been deforming... Not sure if I'll try to salvage it or if I'll go for a wooden non-openable version.
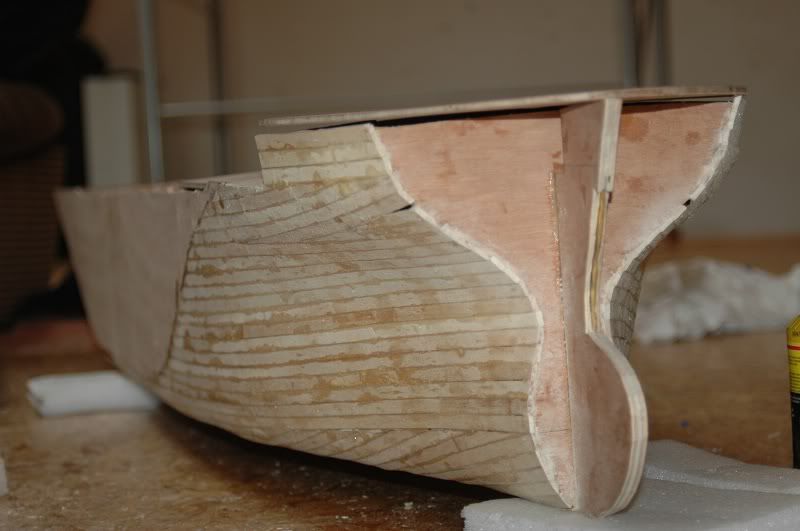
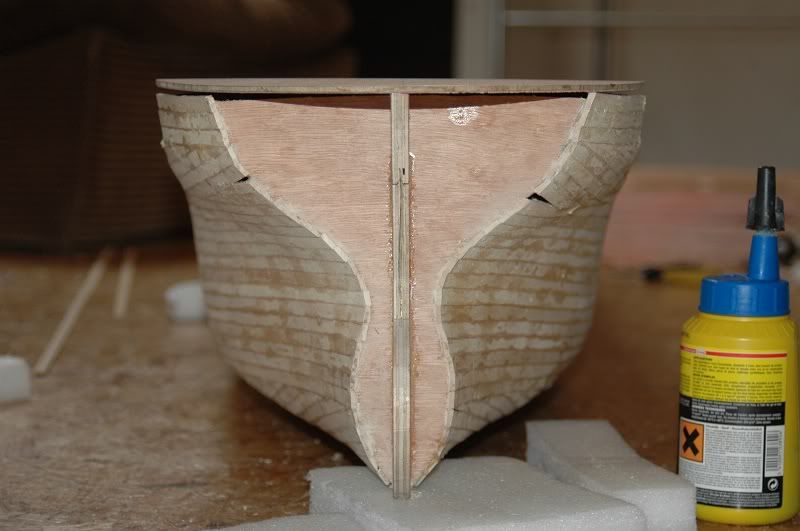
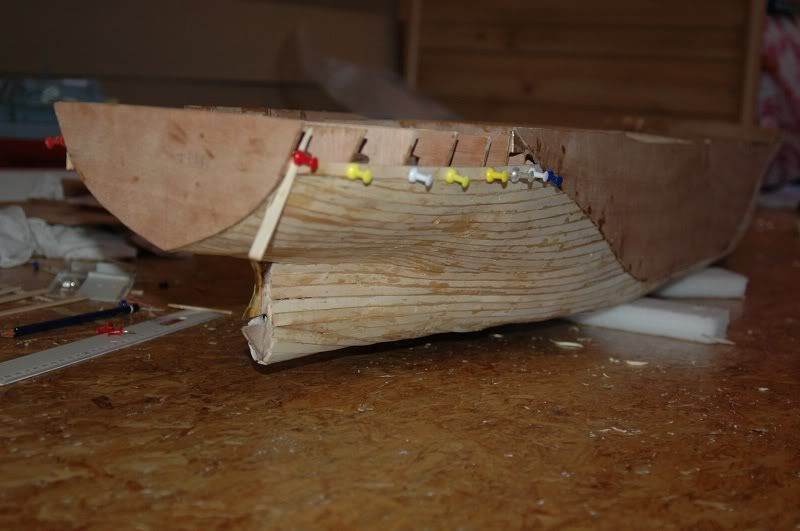
http://i894.photobucket.com/albums/ac145/Sevmash/DSC_0112.jpgThis is the stern section. Built seperately
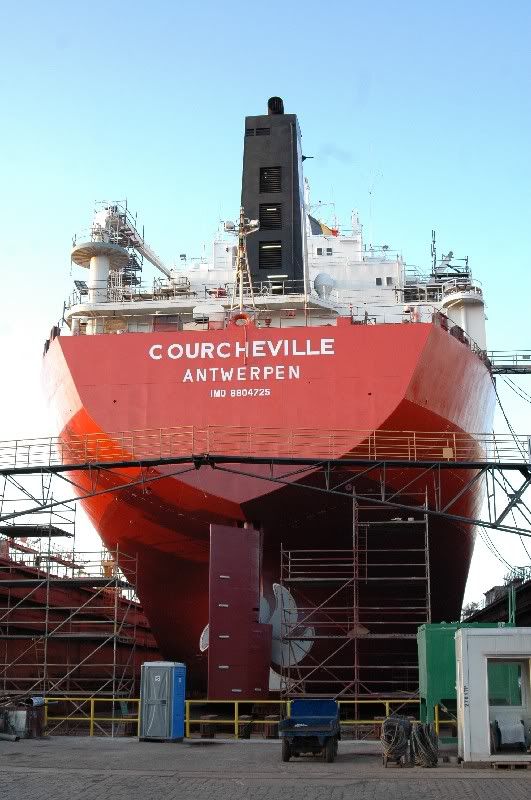
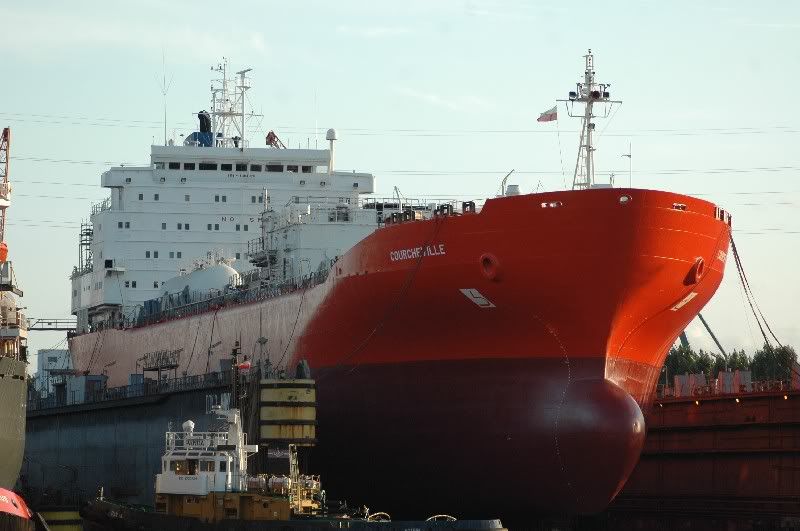
http://i894.photobucket.com/albums/ac145/Sevmash/smDSC_0106.jpgAnd here is the real thing:
The good thing about this is that the ballasting doesn't really matter. Her weight can range from 20kg to 32kg full load, distribution is also not that important as the trim of such ships can differ from cargo/voyage to voyage.


