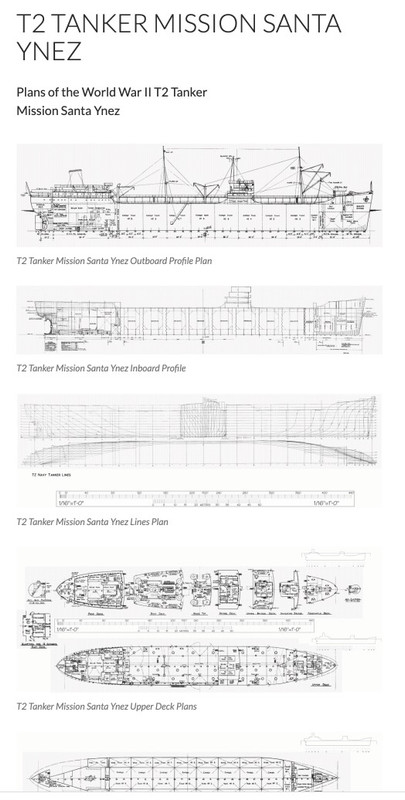
At the beginning of the project, i plan to build this 160 meters Santa Ynez T2 tanker, which had a very long life, from 1943 to 2010, because it is the last T2 tanker to be sent to the demolition yard during the Obama era.
A little history to soak up this ship:
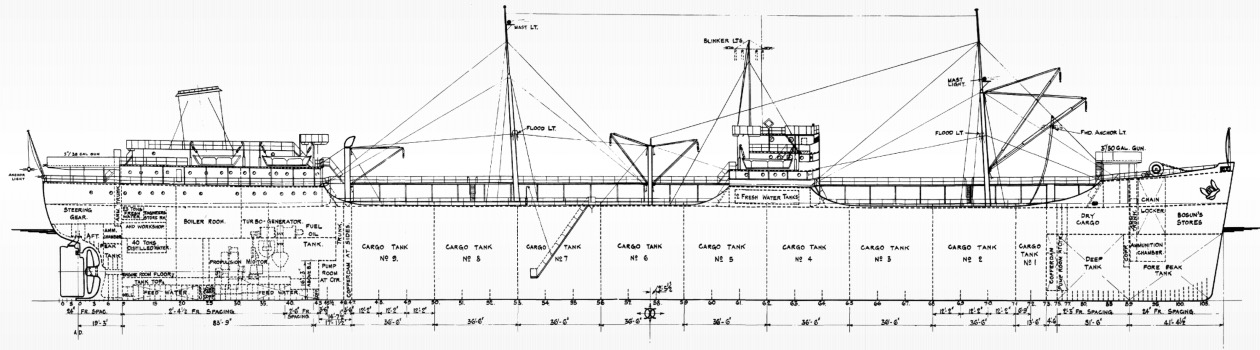
The SS Mission Santa Ynez was a type T2-SE-A2 tanker built for the United States Maritime Commission during World War II.
The Mission's thirty-one tankers were built by The Marinship Corporation.
The design was an adaptation of the T2-SE-A1 and boasted a more powerful propulsion unit, a power plant - 10,000 horsepower (hp) versus 6,000 hp.
After the war, it was acquired by the U.S. Navy as the USS Mission Santa Ynez (AO-134). Later, the tanker was transferred to the military shipping service as USNS Mission Santa Ynez (T-AO-134). It is a Mission Buenaventura class tanker, named after the Mission Santa Inés located in Solvang, California.
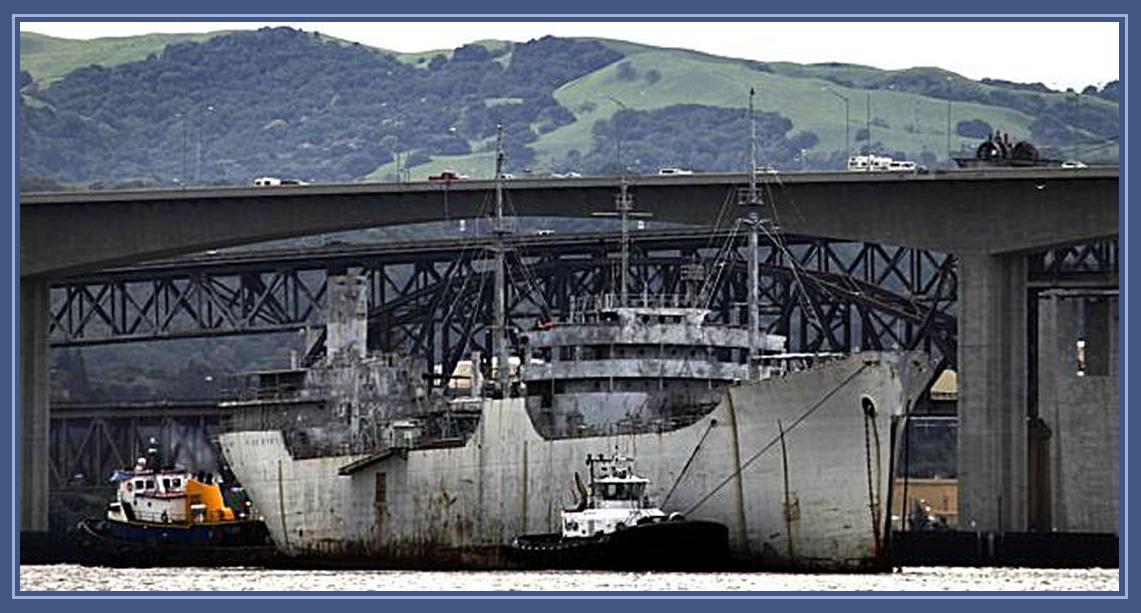
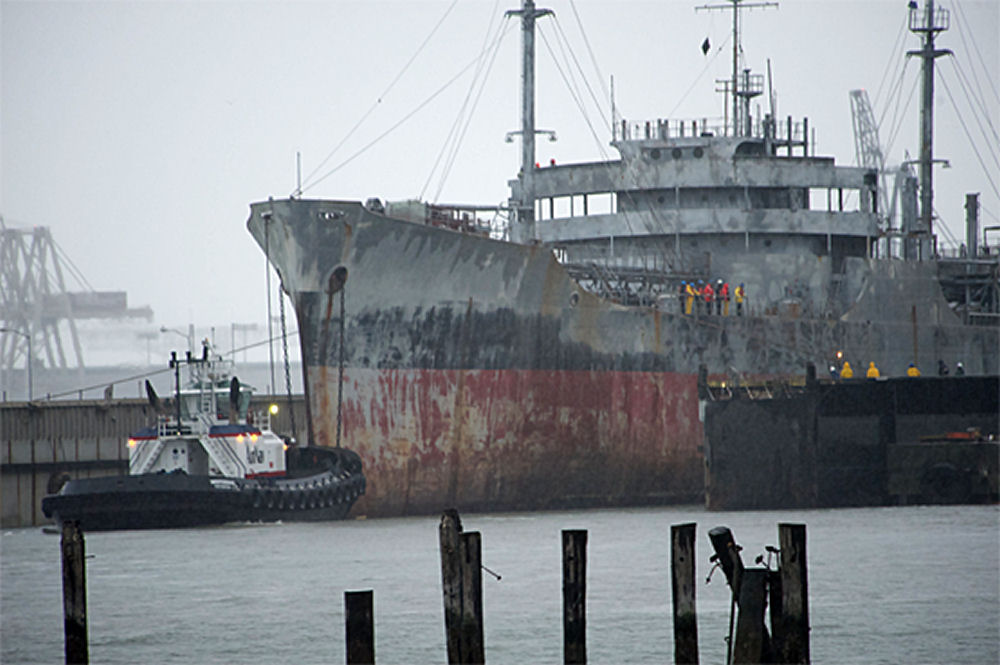
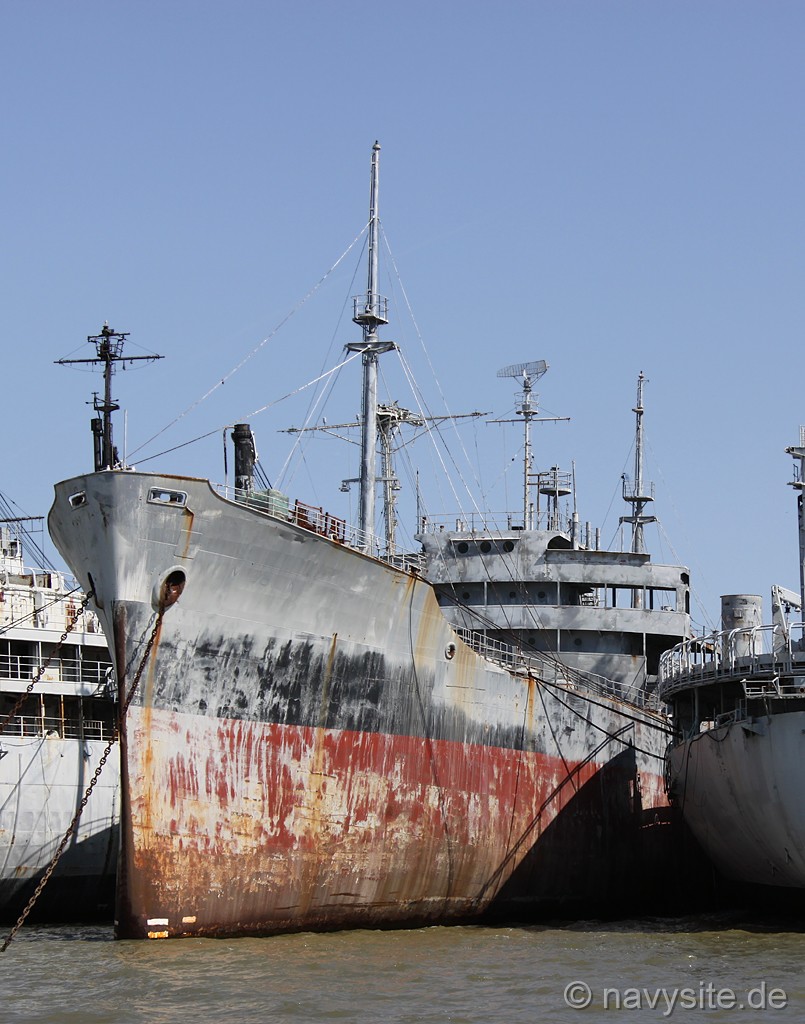
The Mission Santa Ynez, the last existing T-2 tanker, was stored in Suisun Bay as part of the Suisun Bay Reserve Fleet from 1975 until April 2010, when a lawsuit forced the U.S. Maritime Administration (MARAD) to withdraw it.
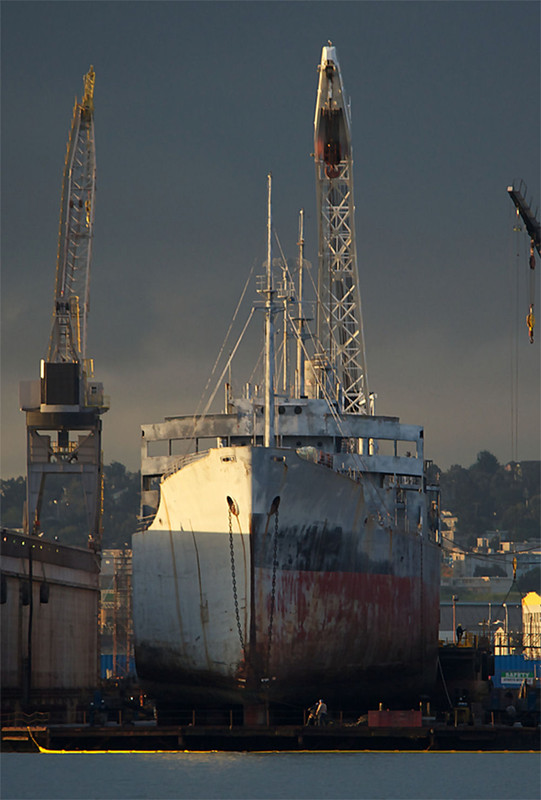
The tanker was transported to a ship recycling facility in Brownsville, Texas, via the Panama Canal in May 2010 for scrapping by Esco Marine.
Life of this ships:
The Santa Ynez Mission was established on September 9, 1943 under a Maritime Commission contract by the Marinship Corporation, Sausalito, California; she was launched on December 19, 1943, sponsored by Mrs. Ralph K. Davies and delivered on March 13, 1944. Chartered to Pacific Tankers, Inc. for operations, it spent the remainder of the war transporting fuel to our forces overseas. She remained in this capacity until March 28, 1946, when she was returned to the Maritime Commission and placed in reserve in the Maritime Reserve Fleet at James River, Virginia.
Acquired by the Navy on October 22, 1947, she was commissioned in the Naval Transport Service as Mission Santa Ynez (AO-134). Taken over by the newly created Military Naval Transport Service on October 1, 1949, it was renamed USNS Mission Santa Ynez (T-AO-134). Chartered to Mathiasens Tanker Industries, Inc. for operations, she joined the reserve fleet of the Suisun Bay Maritime Administration on March 6, 1975. She is the last existing T-2 tanker.
Towed from the Suisun Bay Marine Reserve Fleet in California on March 31, 2010, she was headed for dismantling in Texas via the Panama Canal.
During his active service, he was awarded the National Defence Service Medal (twice), the Korea Service Medal, the United Nations Service Medal and the Republic of Korea War Service Medal (retroactively).
For this model, which will probably be 1/200, I start from nothing, except the high definition shots made available by this site, I gave a little something to the Webmaster, but we are not obliged. It is a remarkable site with many plans including French ships, a gold mine. The "Golo" French ship would interest me for later also.
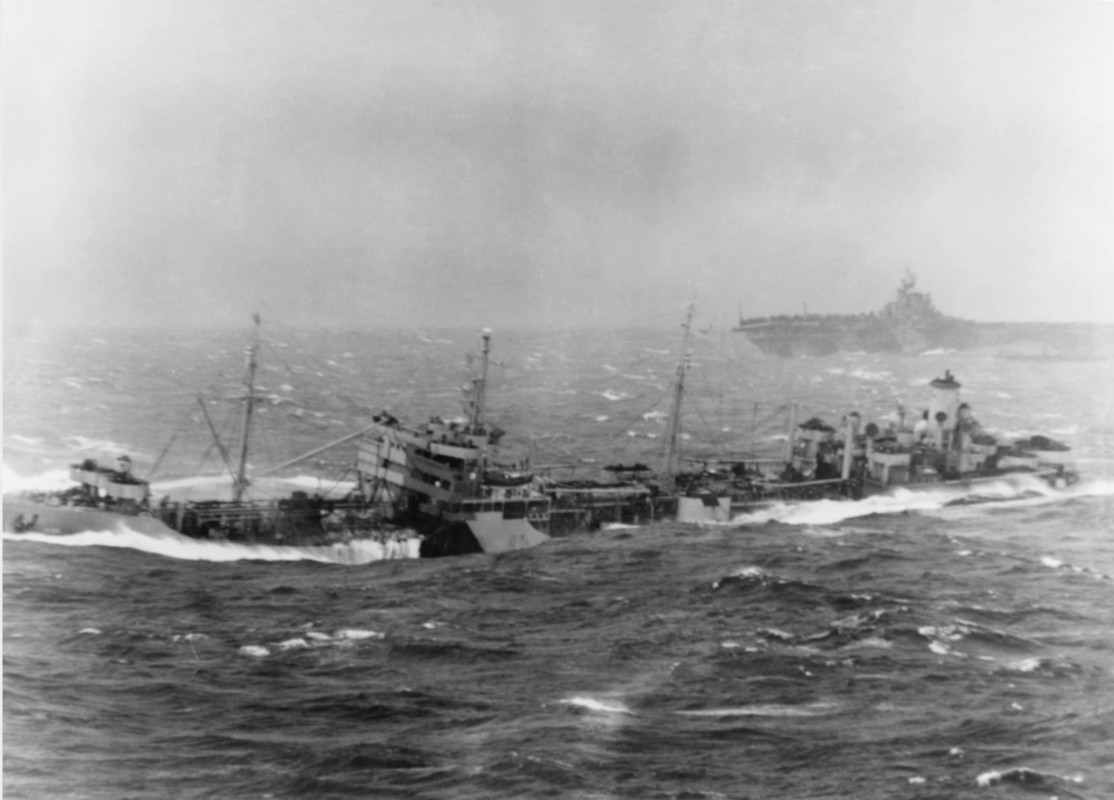
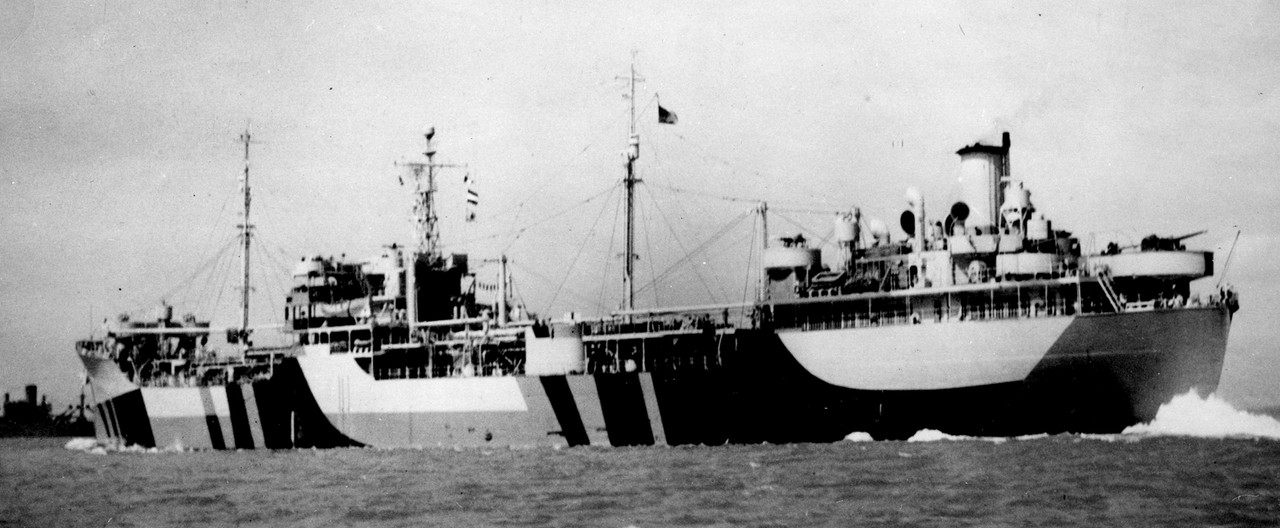
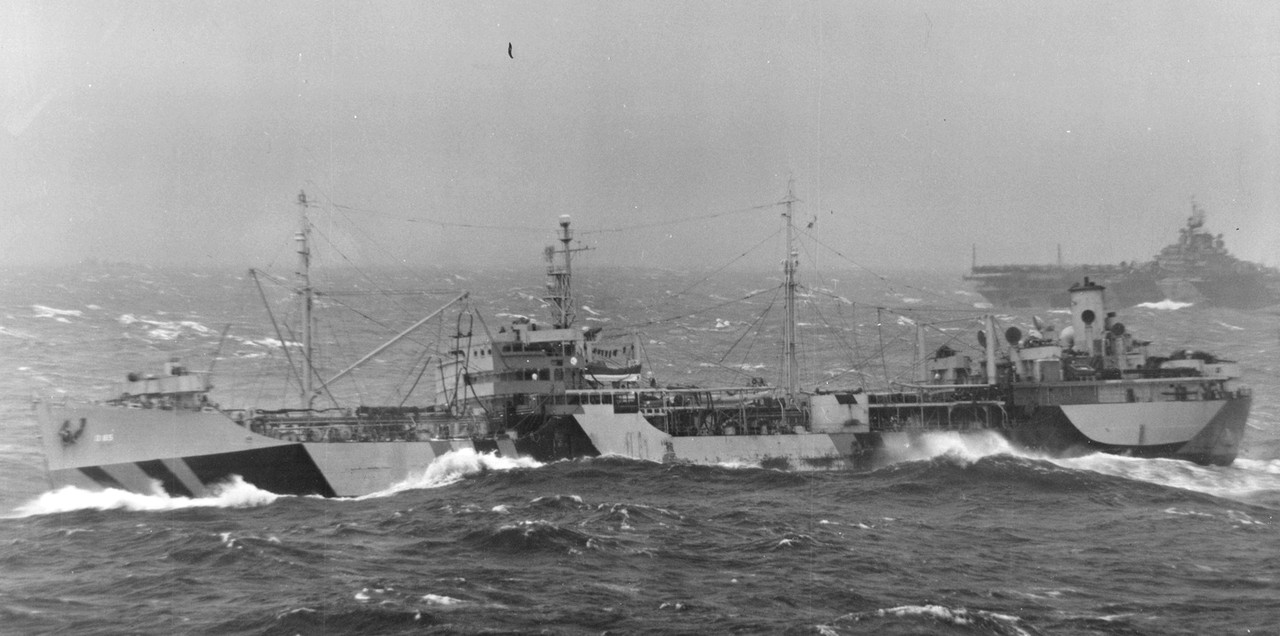
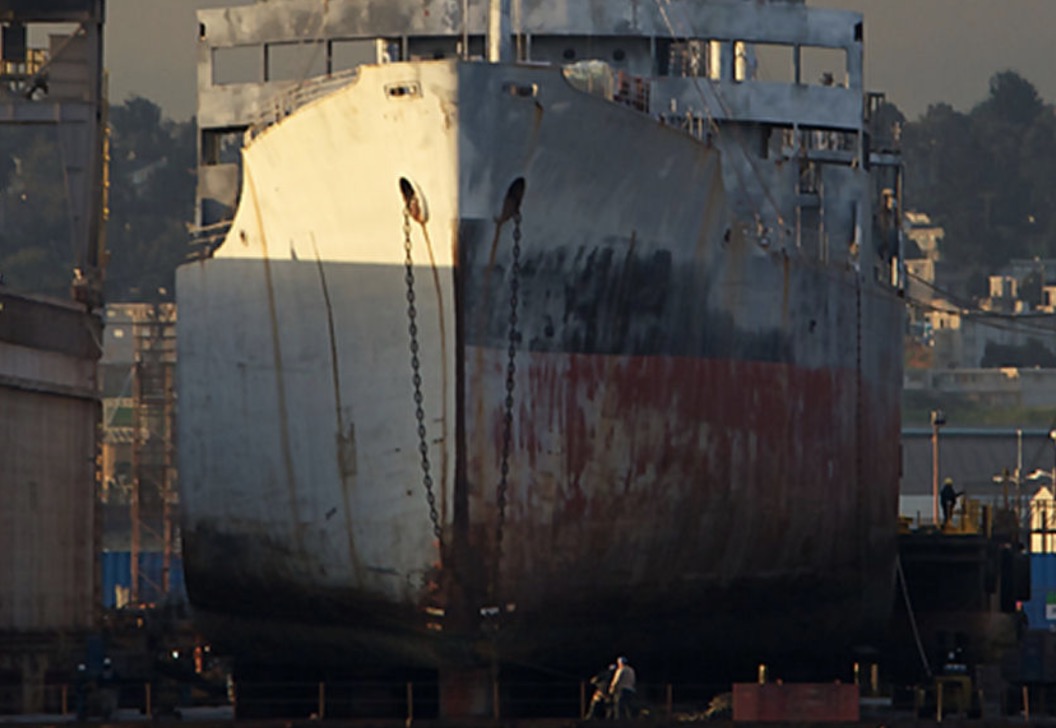
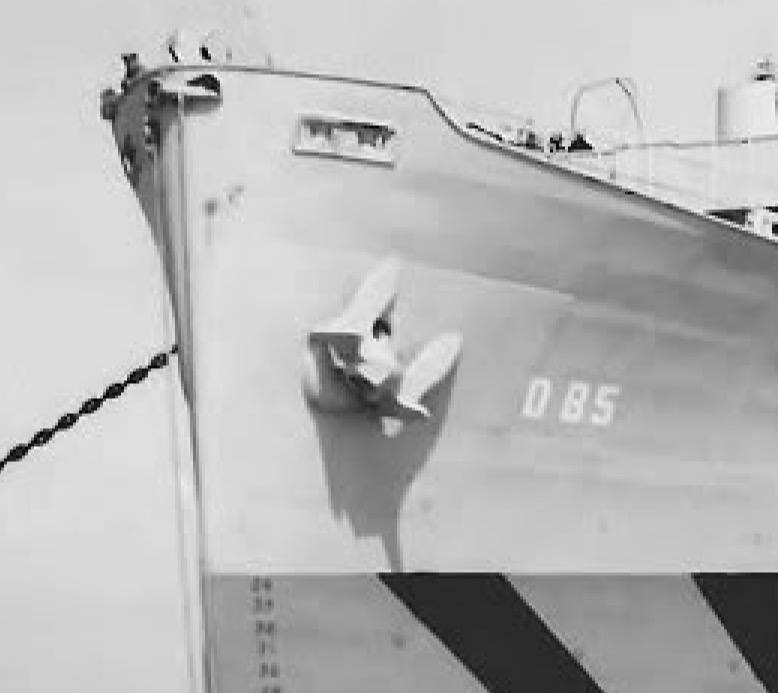
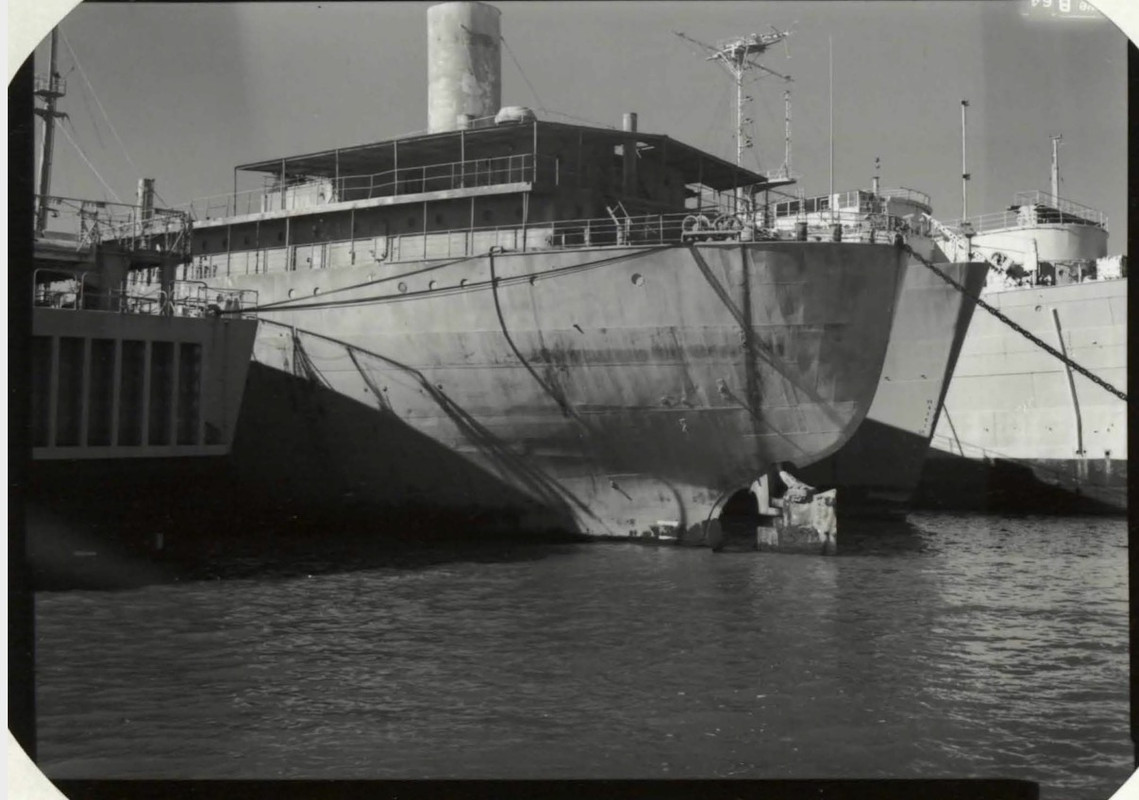
Since I came across the photos at sea with her Dazzle livery of the Tanker T2 Pamanset (AO-85) accompanying the aircraft carrier USS Essex (CV-9) in the China Sea, January 45, a few days ago, I've been asking about the casting...
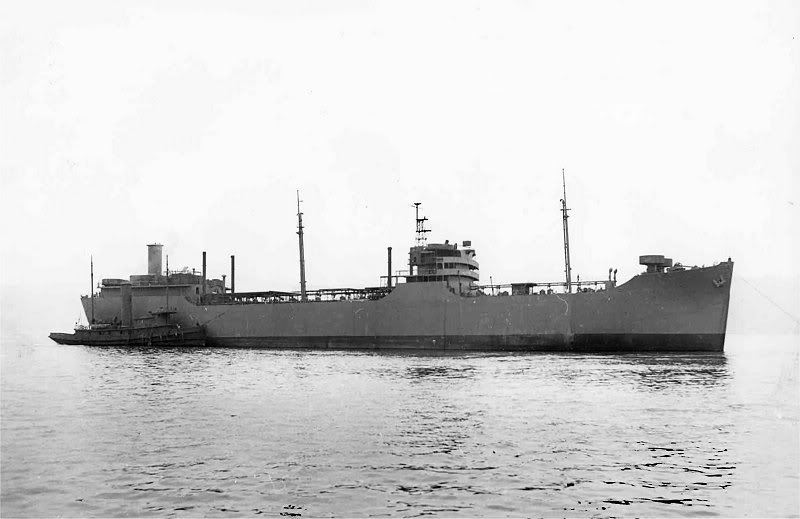
I have only one picture of the Santa-Ynez during the war, just after its launch, in sea trials, so without its final livery. As it is the armed version of the WW2 that I want to represent, it poses a problem of documentation. I don't know if it was equipped for refueling at sea. Anyway, I could represent it out of the shipyard, but it would lack... salt, weathering. And representing him with a dazzle and not knowing if he wore that camouflage makes me a little sad.
Good client:
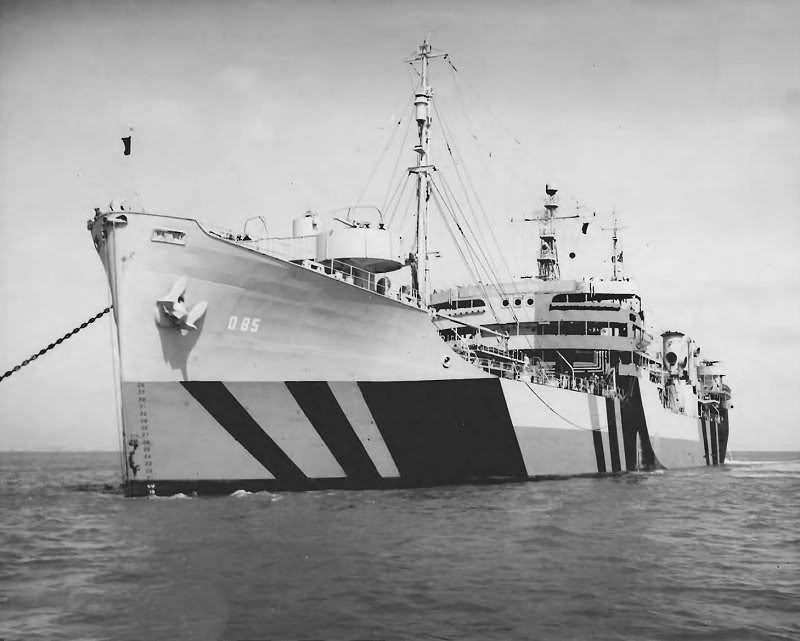
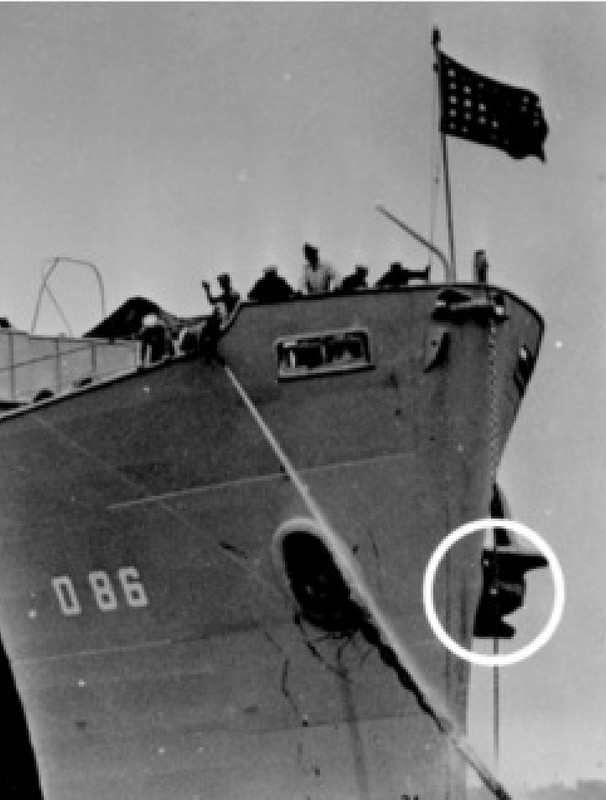
So I'm interested in the Pamanset (AO-85) and Ponaganset (AO-86), both built at the same MarineShipyard in Sausalito, California, as the Santa Ynez, but another series of the Escambia Class, pretty much the same. The AO-86 stopped sailing in 1949 ( Engine Power differe).
Quote:
Pamanset (AO-85)
A river in Massachusetts.
(AO-85: dp. 21,650; l. 523'6"; b. 68'; dr. 30'10"; s. 15.1 k.; cpl. 267; a. 1 5" 4 3", 4 40mm., 12 20mm.
Pamanset (AO-85) was laid down as MC hull 1264 by the Marinship Corp., Sausalito, Calif. under a Maritime Commission contract 30 March 1943; launched 25 June 1943; sponsored by Mrs. W. B. Murray; acquired by the Navy and commissioned 30 April 1944, Comdr. D. J. Houle in command.
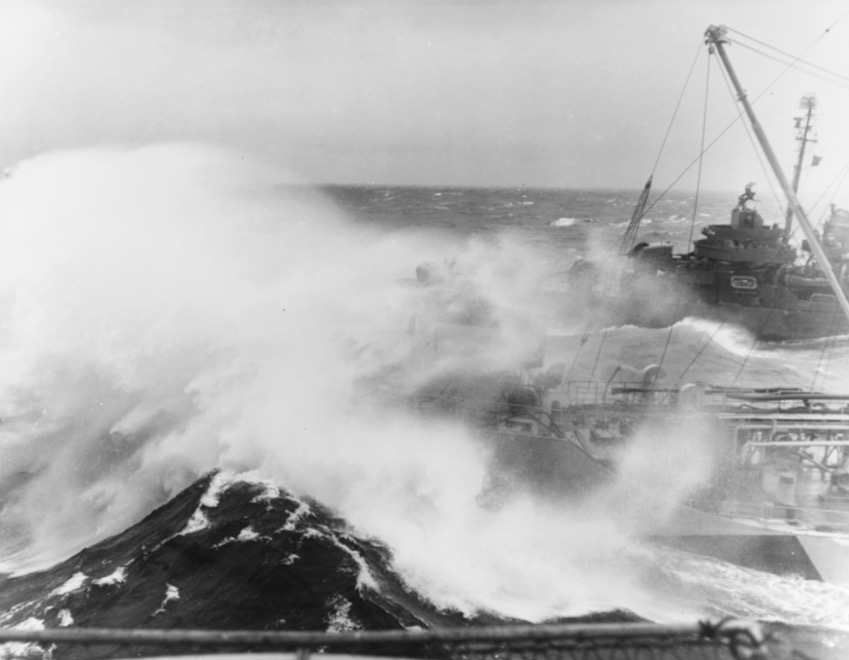
Following shakedown, Pamanset sailed for Pearl Harbor and duty with the Pacific Fleet during the final months of World War II. Departing Pearl Harbor 24 July 1944, she steamed to the Marshall Islands, then to the Admiralty Islands where she spent the next several months refueling units of the 3rd Fleet. She continued her support of the 3rd Fleet during the Western Caroline and Philippine Islands engagements in the fall of 1944 as well as during the Formosa and China coast attacks early in 1945. Refueling operations in very heavy seas in January 1945, resulted in injuries to several of her crew.
Pamanset arrived off Iwo Jima 26 February and participated in that campaign until returning to Ulithi, 2 March, thence proceeding to San Pedro, Calif. for extensive repairs. She was underway again 4 June for the Western Pacific and serviced the 3rd Fleet in various fueling areas until the end of the war. After extensive operations in support of the occupation fleet in Japanese home waters, she departed Yokohama 8 November for San Francisco where she decommissioned 18 March 1946. She was struck from the Naval Register 28 March and transferred to the Maritime Commission 11 October.
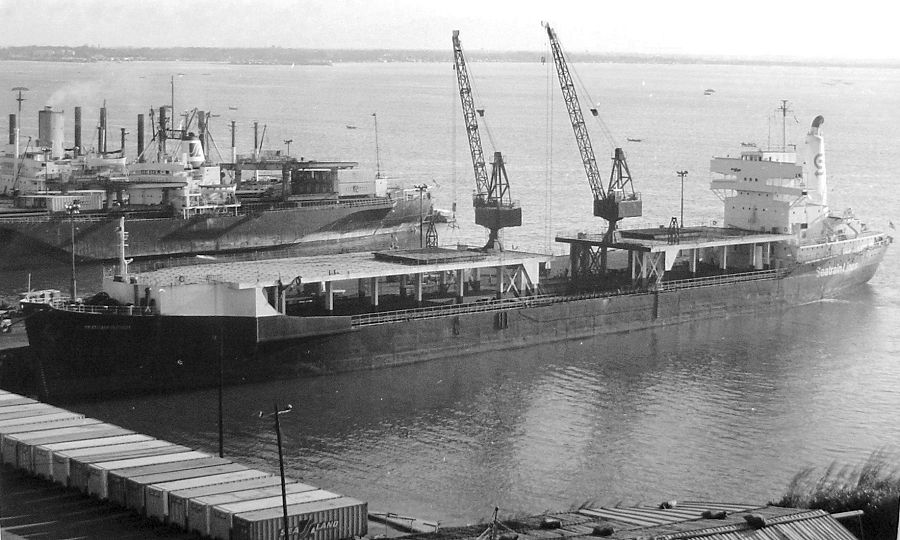
Reacquired 10 February 1948, Pamanset was assigned to Military Sea Transportation Service 1 October 1949 and manned by a merchant crew. After necessary fitting out and trials, she added to her wartime record by rendering valuable service during the Korean conflict. She was struck from the Naval Register and transferred to the Maritime Administration Reserve Fleet 24 February 1956, reinstated 26 June for MSTS contract operations again, then struck again 26 September 1957. Subsequently converted to a container ship, she was sold by the Maritime Administration to Hudson Waterway Corp. and serves into 1970 as Seatrain Florida.
There's a little mistake on the USN Dazzle website, they are indeed T2-SE-A2 Escambia Class Fleet Oiler and not A1 as often written. Just a bit less powerful than the "Mission" class, but more than 2000 hp than the A1 class, an intermediate class between the A1 and the pure A2 somehow.
These two ships wear the same Dazzle camouflage, but the Pamanset has better photo documentation, and sailed until 1986. She was converted into a container ship.
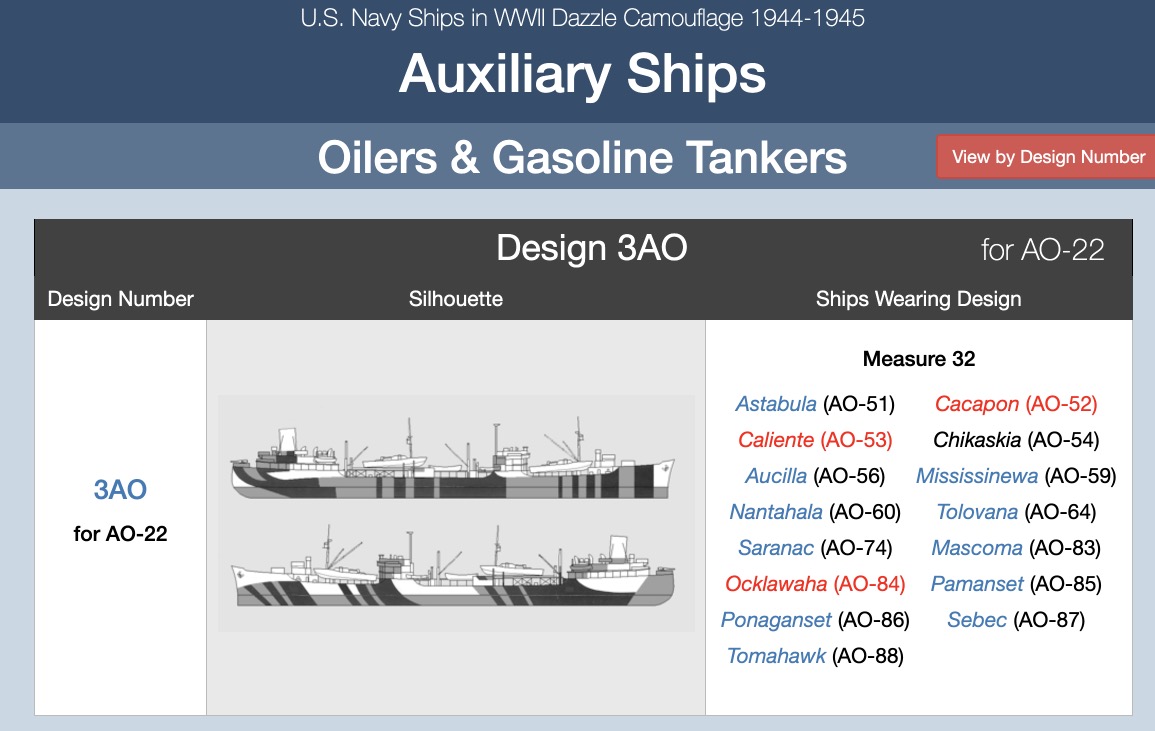
The USN Dazzle site provides all the information concerning the Dazzle 32/3AO scheme:
Port and starboard are of course not identical... this document is original:
HD:
The drawing for Design 32/3AO for the Cimarron and Ashtabula classes of fleet oilers based on the T3 maritime hull. The vertical colors specified were: dull black (BK), ocean gray (5-O) and light gray (5-L); ships that substituted haze gray (5-H) for light gray would have been in Measure 31. This drawing was probably completed by January 1944. Note the PT boats shown as deck cargo and the two waterlines.
This is the only design drawing for Design 3AO.
Original drawing source: NARA 80-G-160236 and 80-G-160237.
The supply tanker USS Pamanset AO-85 and the aircraft carrier USS Ticonderoga CV-14 in the storm in January 1945. Dazzle camouflage.
AO-86 the starboard side:
"Seatrain Florida", ex. USS Pamanset (AO-85).
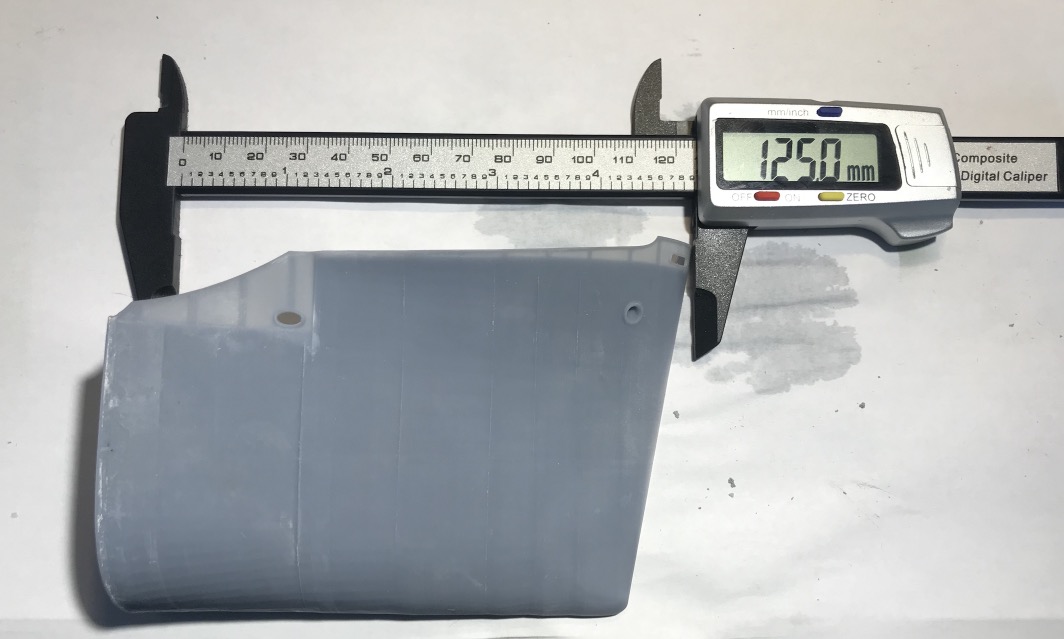
The hull will be printed in resin by sections and half hull for some, it's big the 1/200.
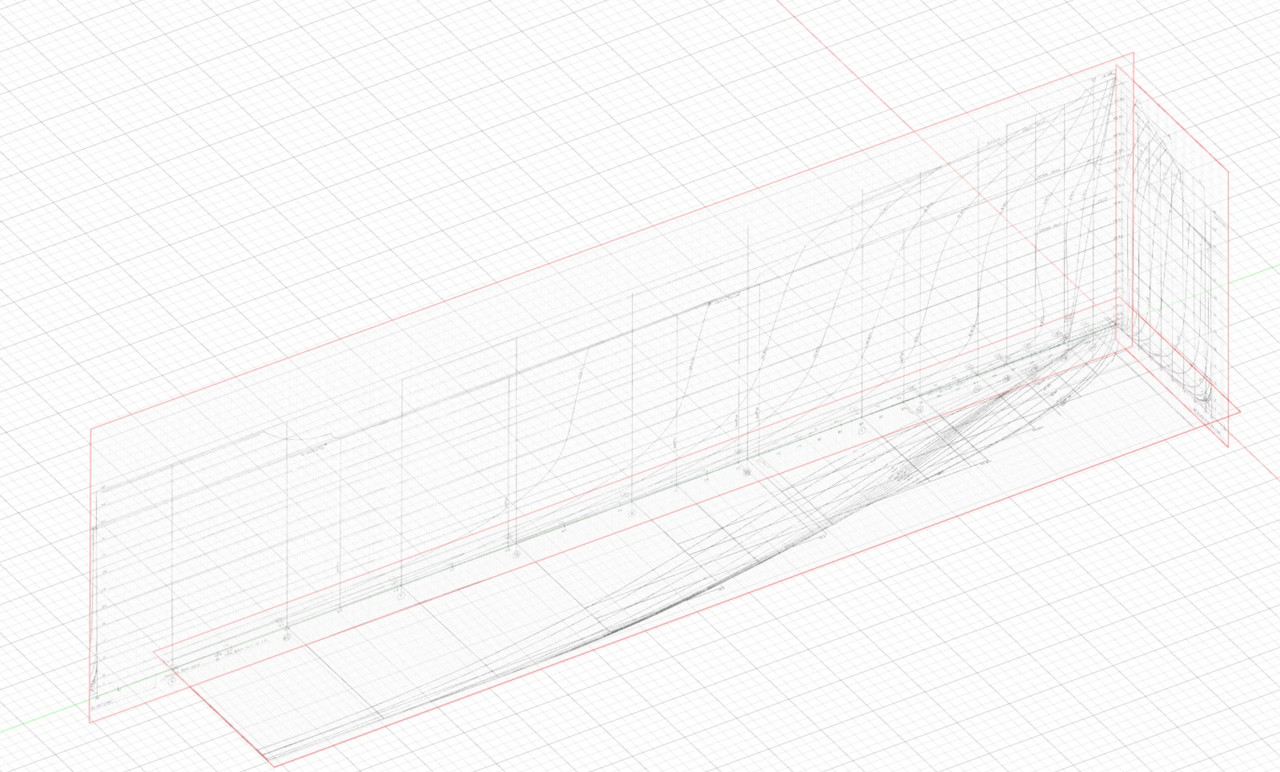
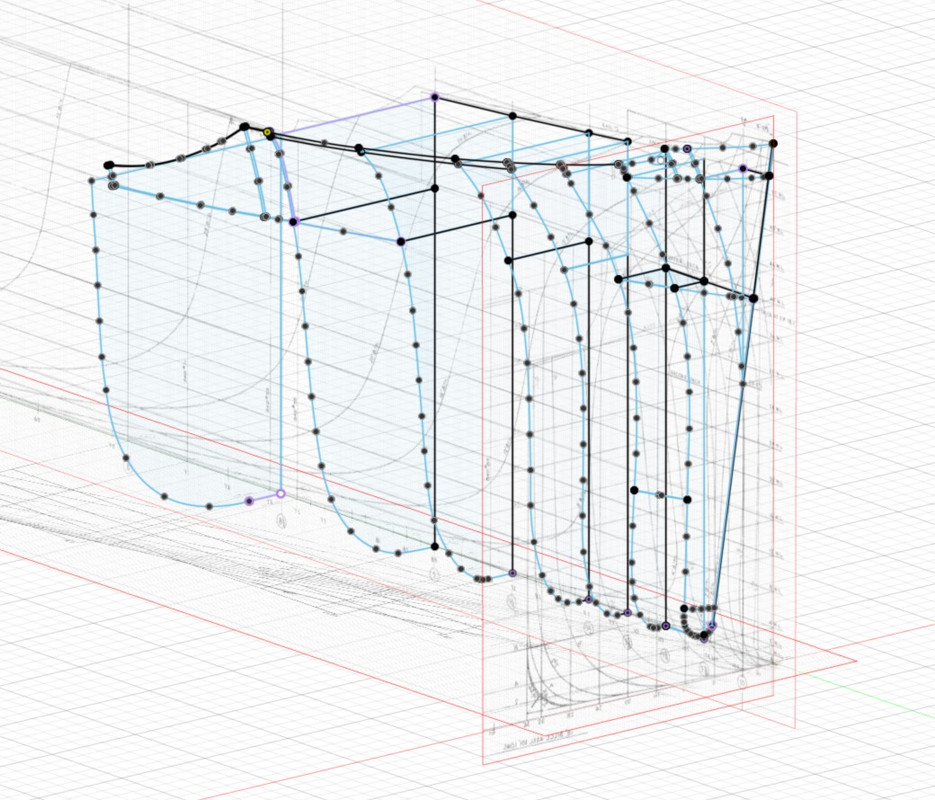
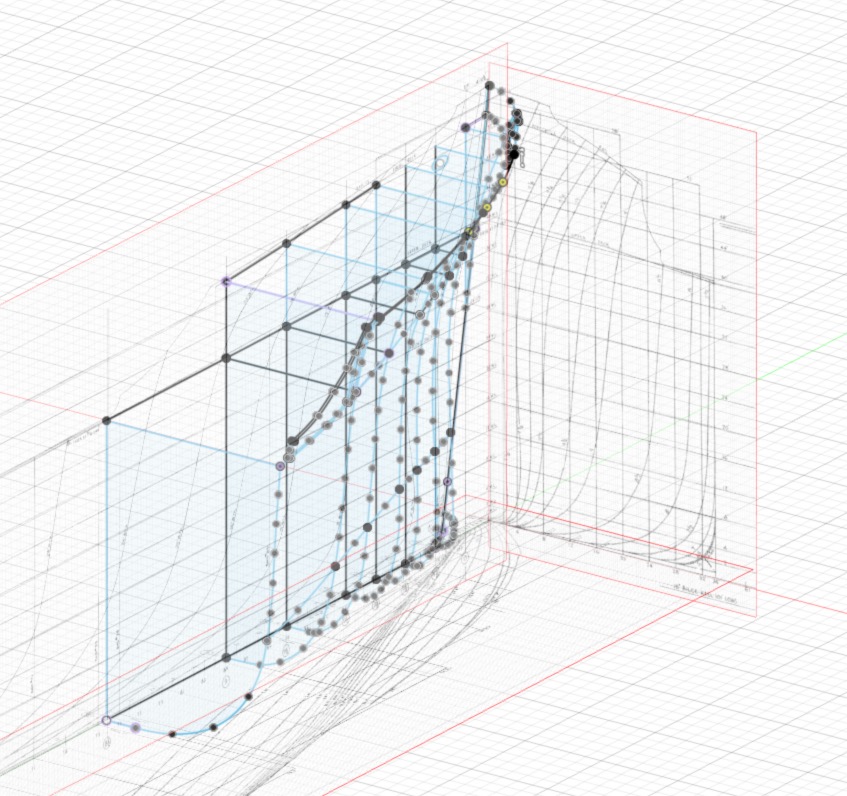
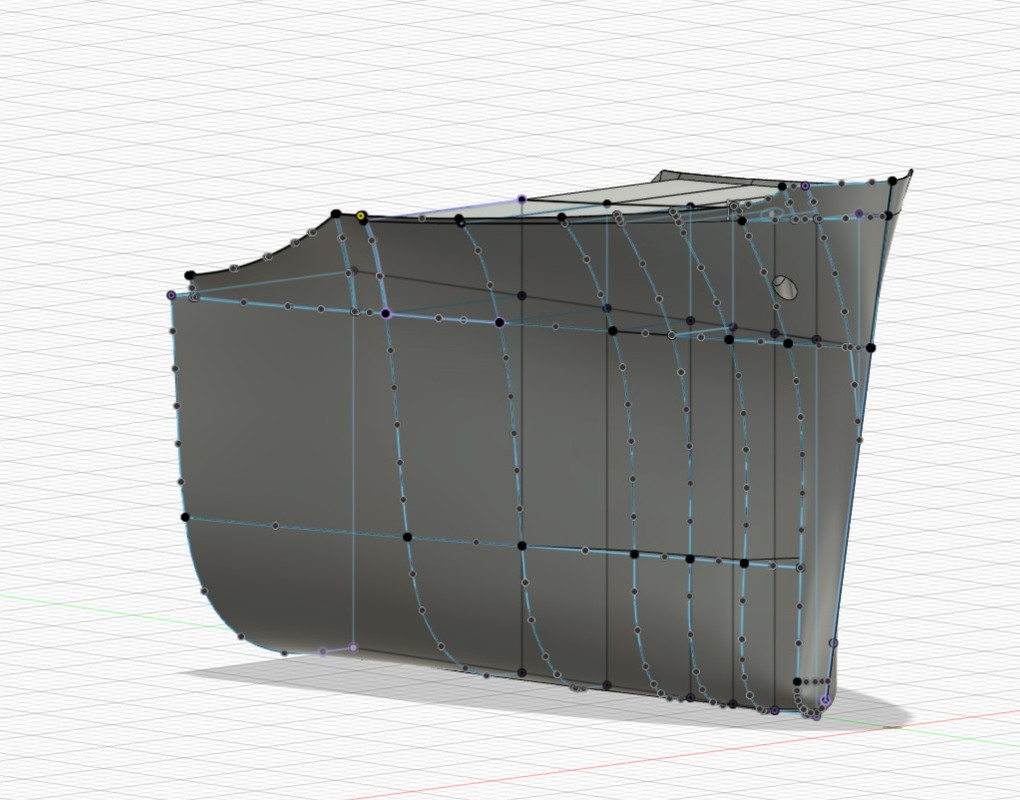
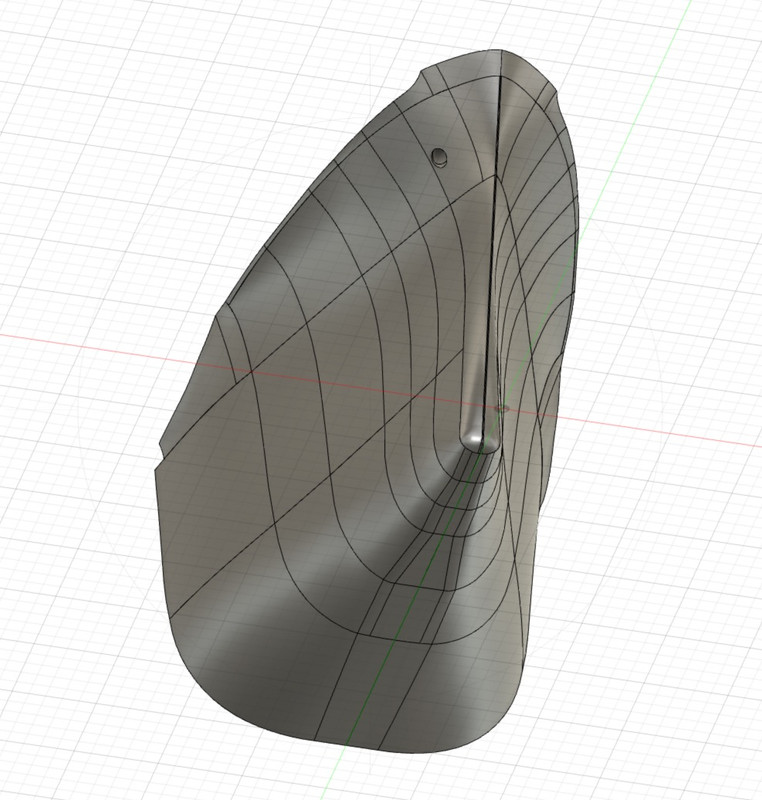
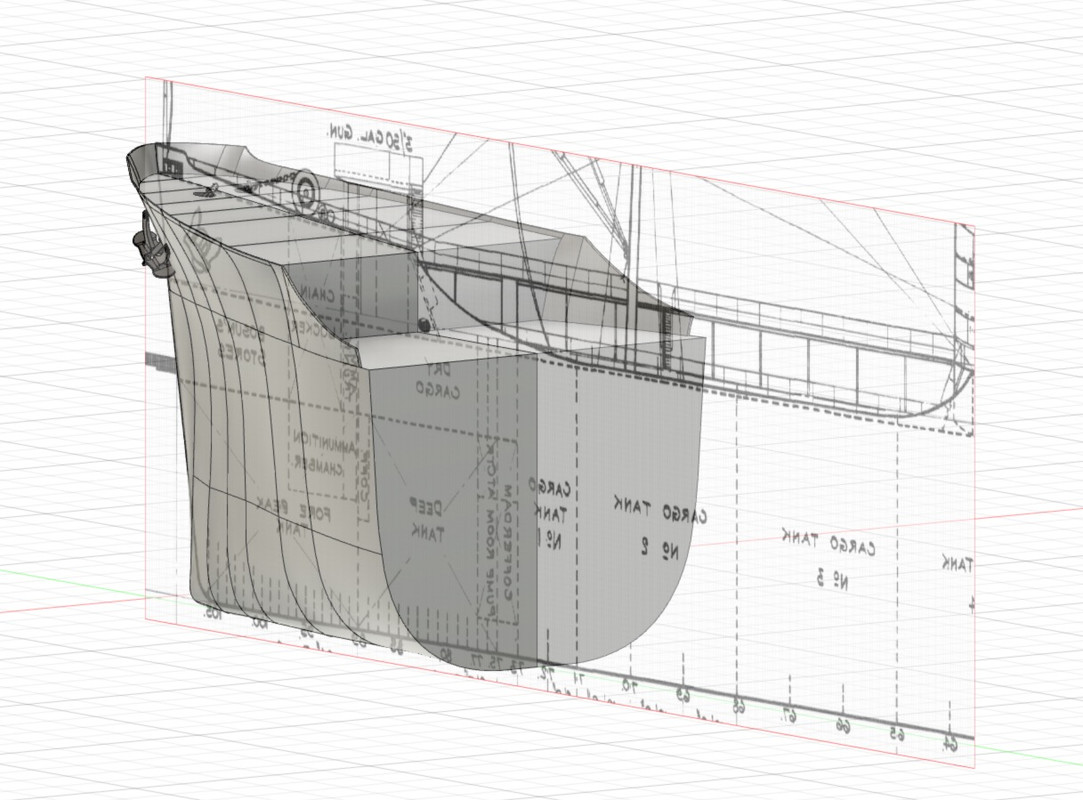
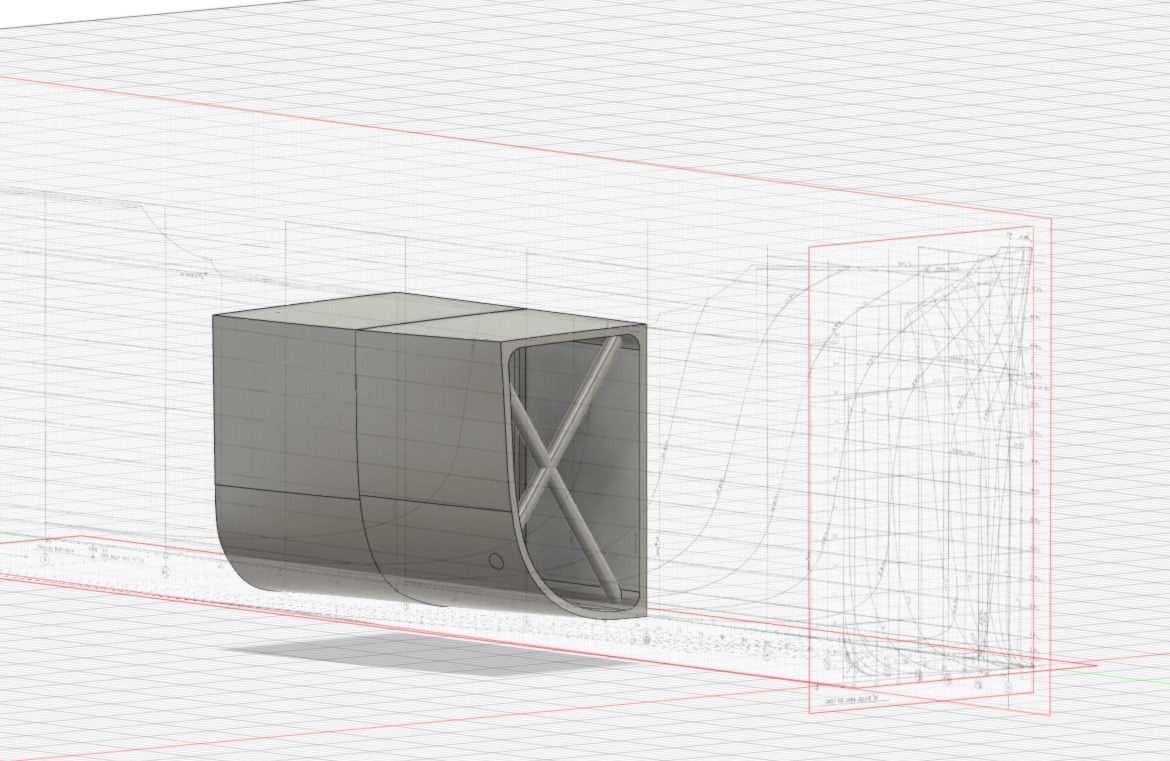
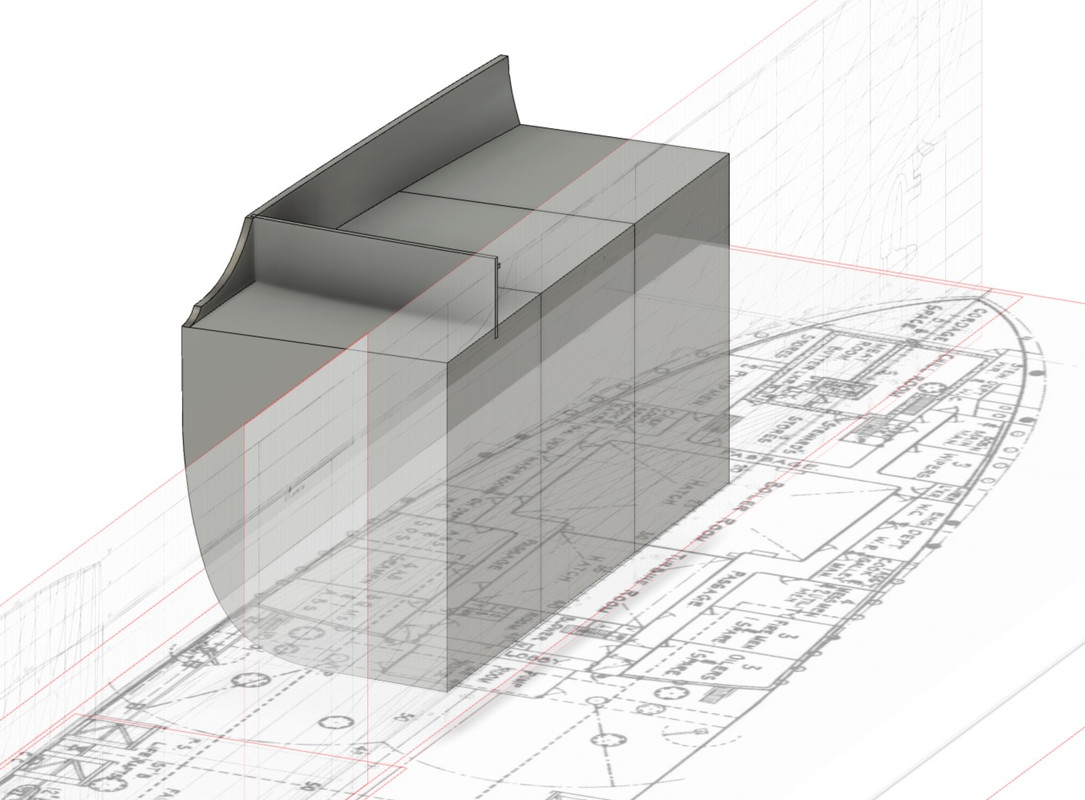
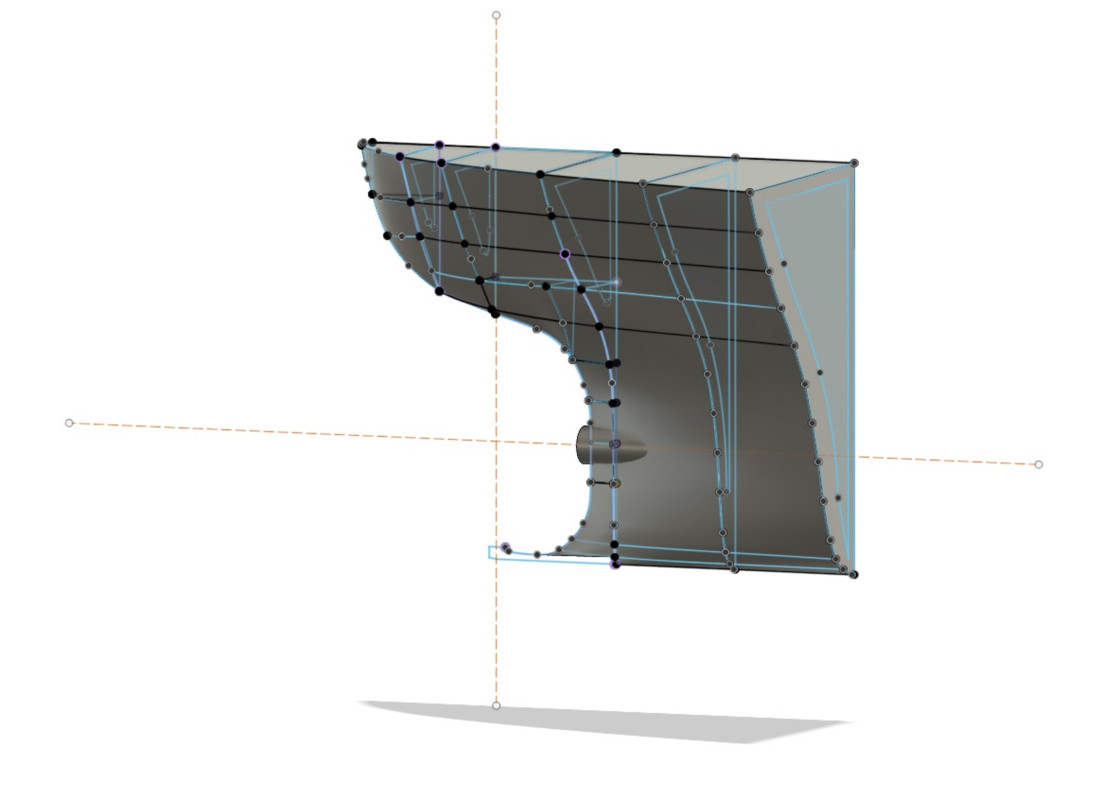
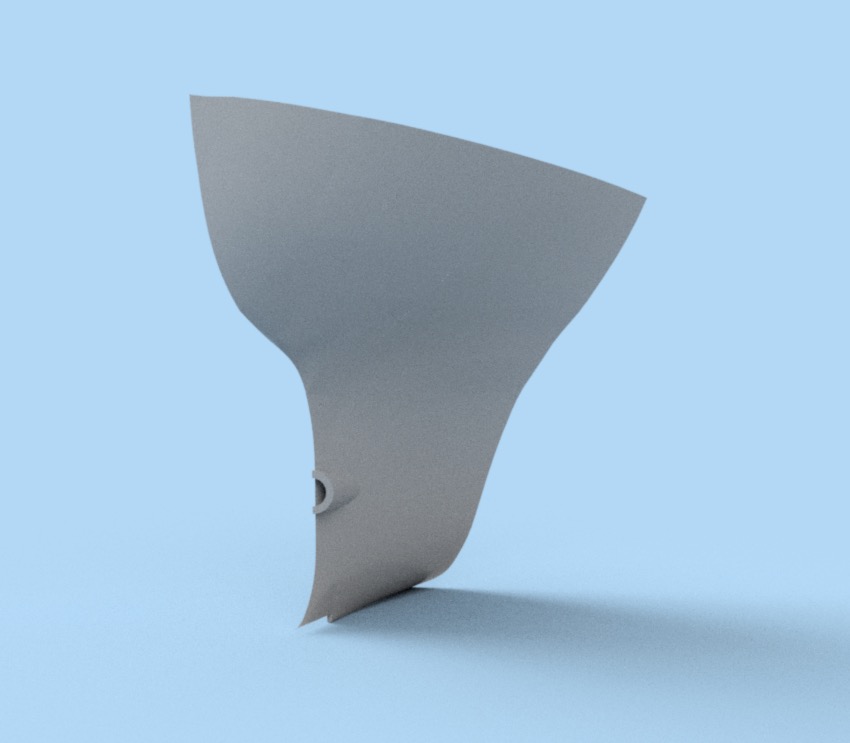
So I started to work on the 3D modeling of the front part to create 3D printing files. I'm starting in modeling. The modeling of the bow is particularly delicate, I am not too alaise with this tool which is the program Fusion 360. But after trial and error, I arrived at a few things that suits me, but that there will be some small errors to correct.
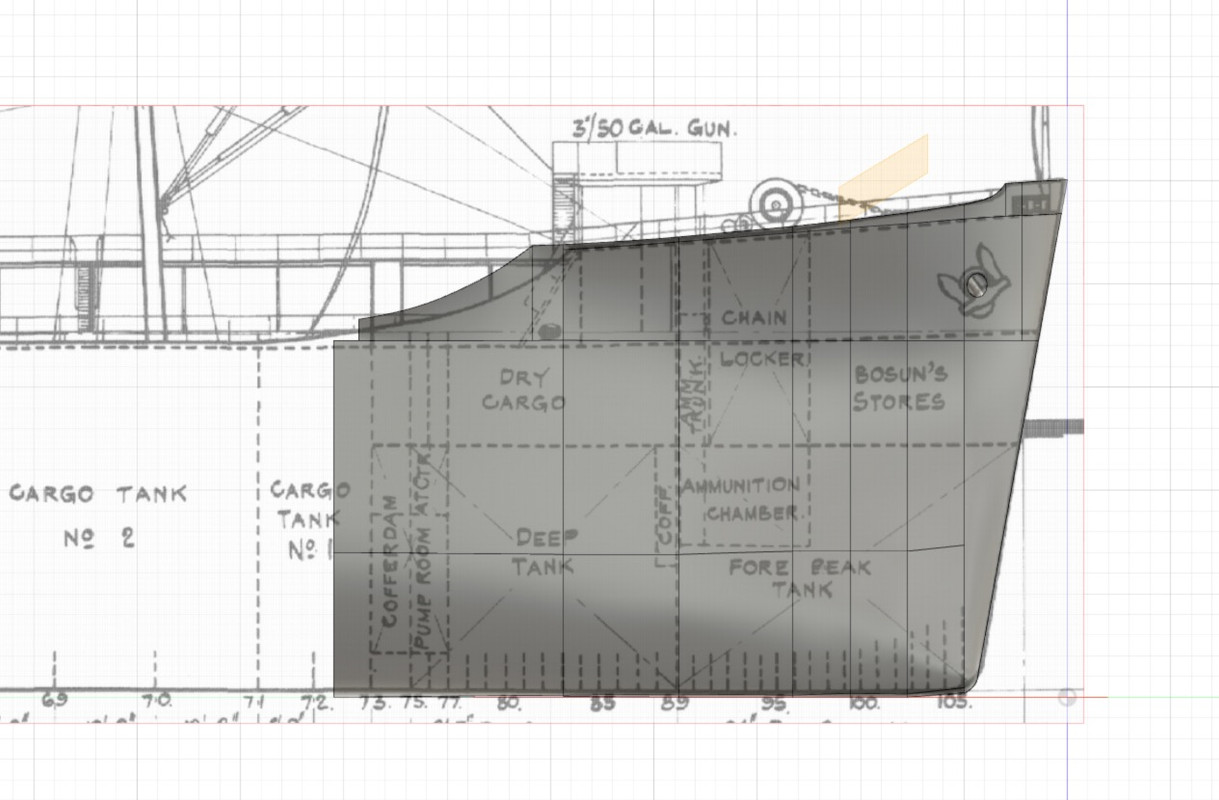
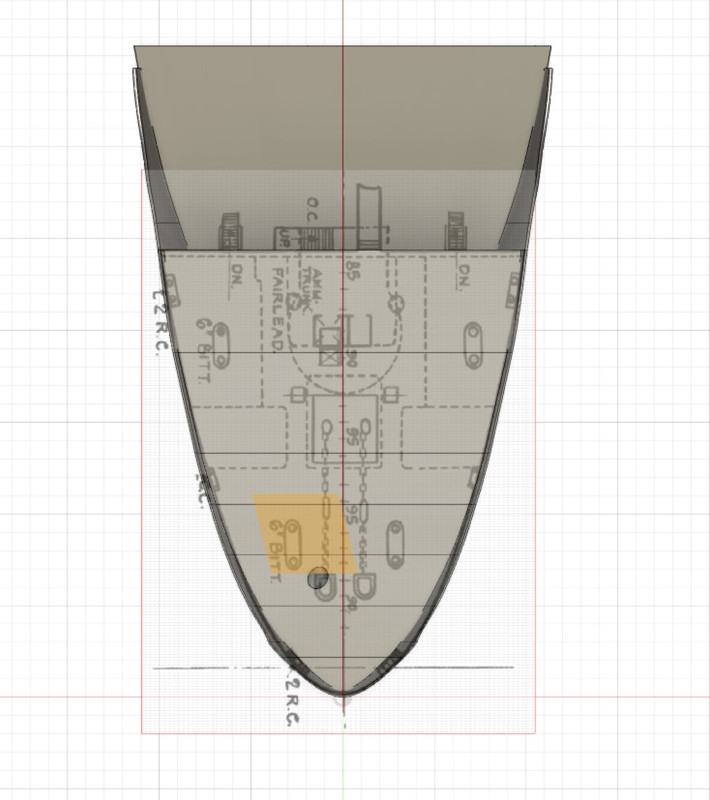
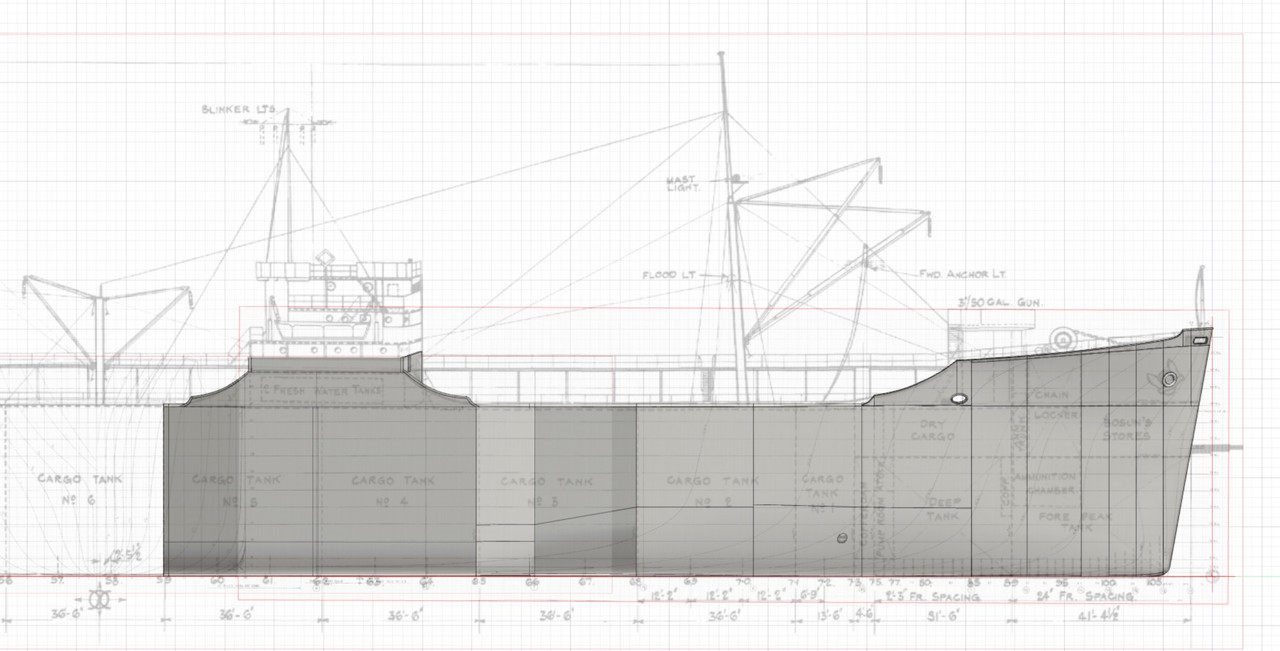
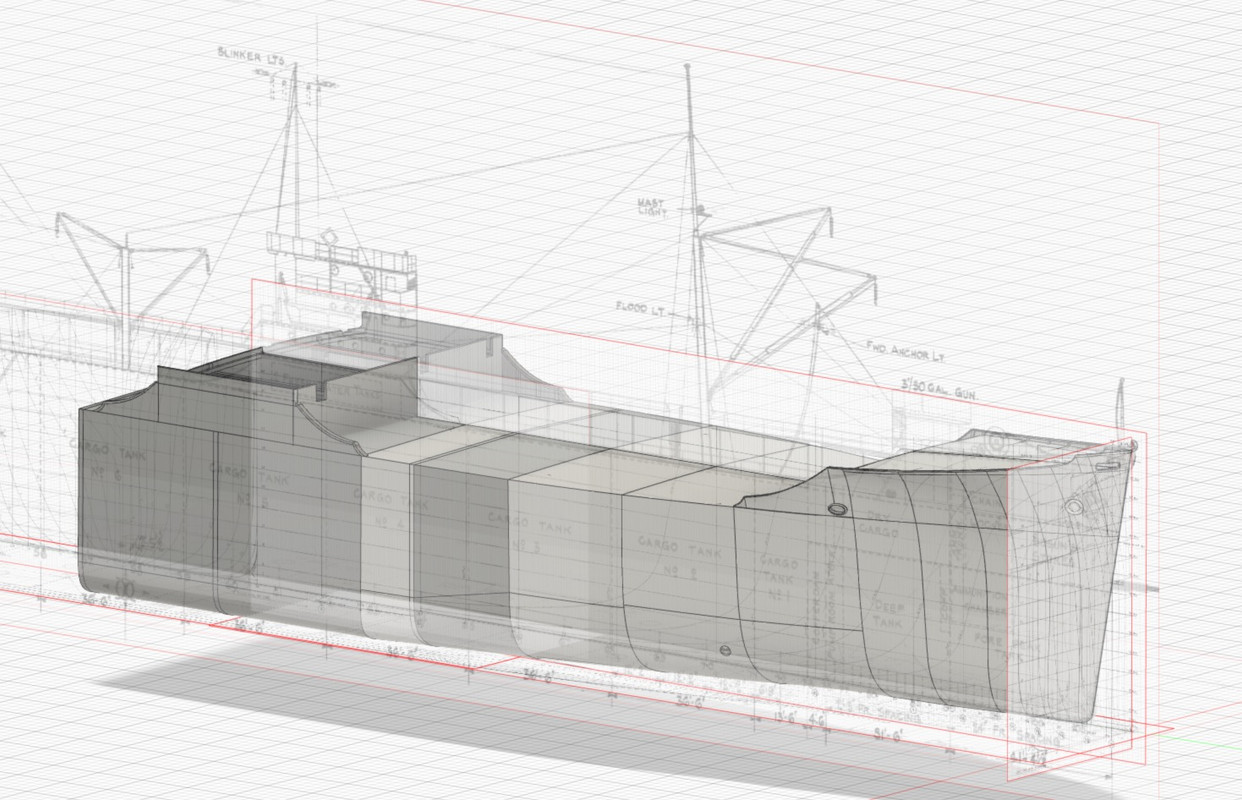
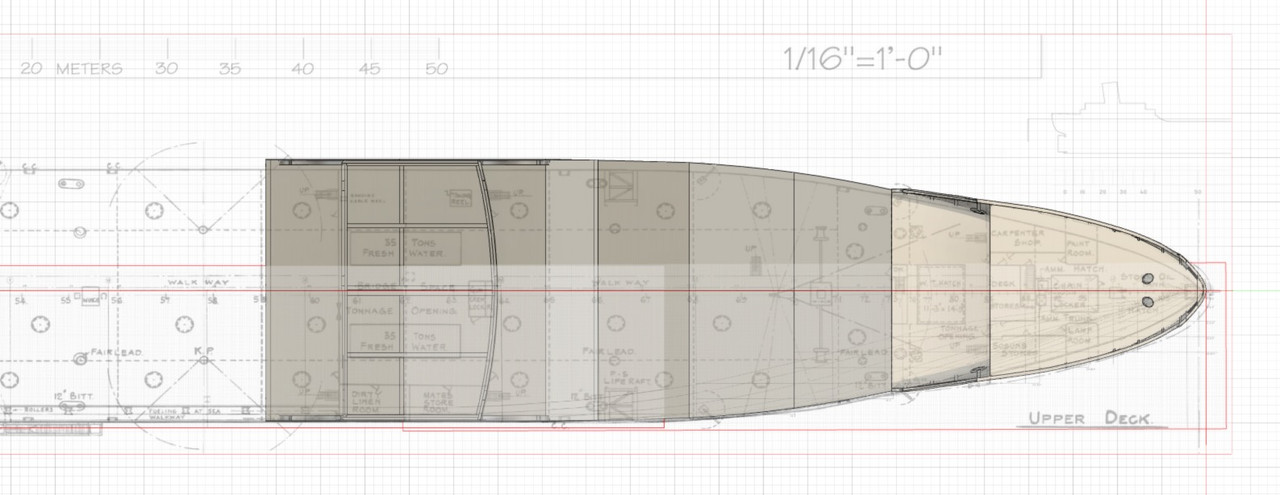
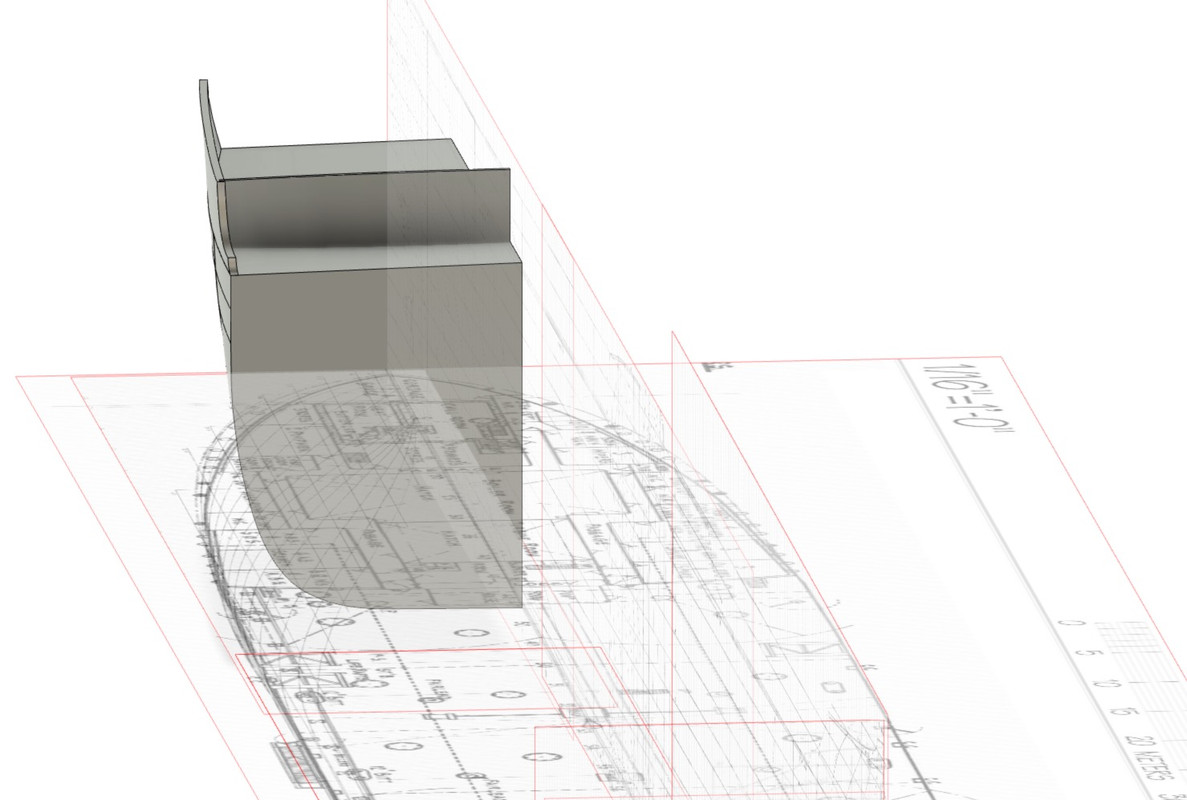
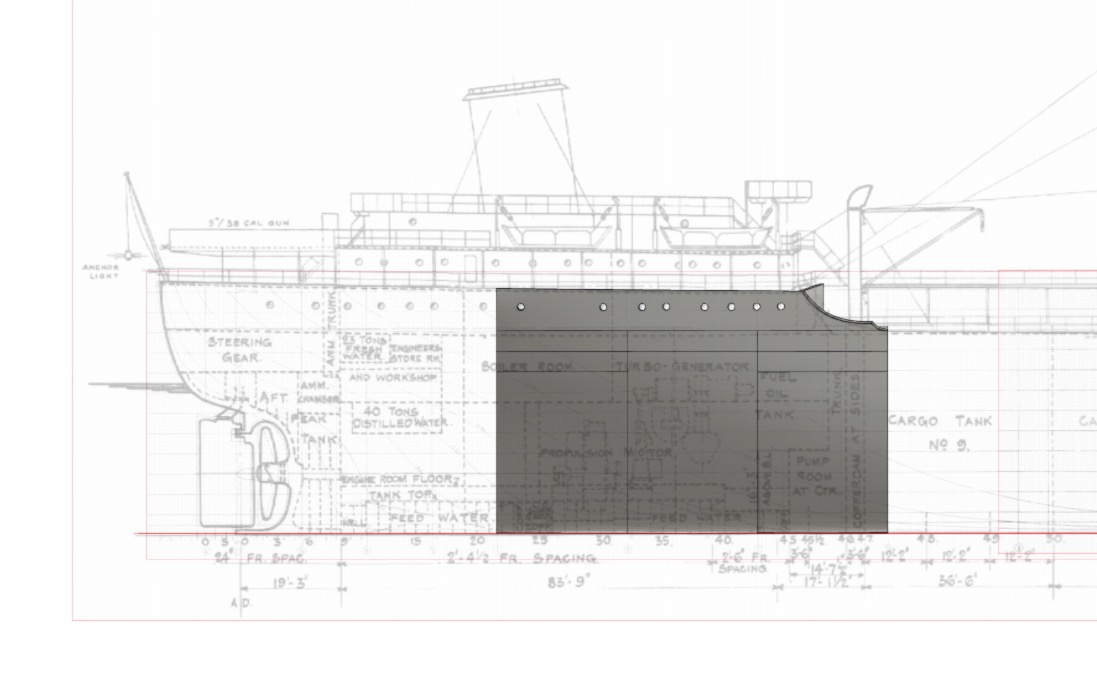
I started by installing the necessary plans as a layer on a 3D work plan.
I am aware of some deformations probably due to the digitization of the plans by the Americans, nothing serious, but the curves of the views are not always connected, so it is necessary to take this into account.
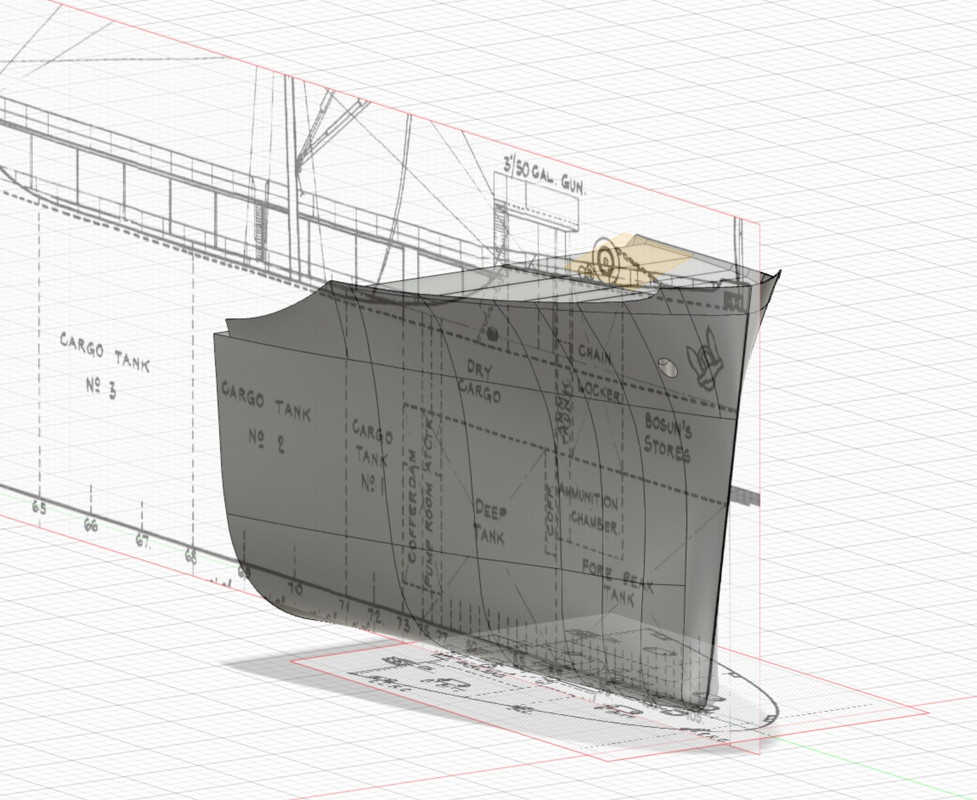
Put the 3 planes as layers:
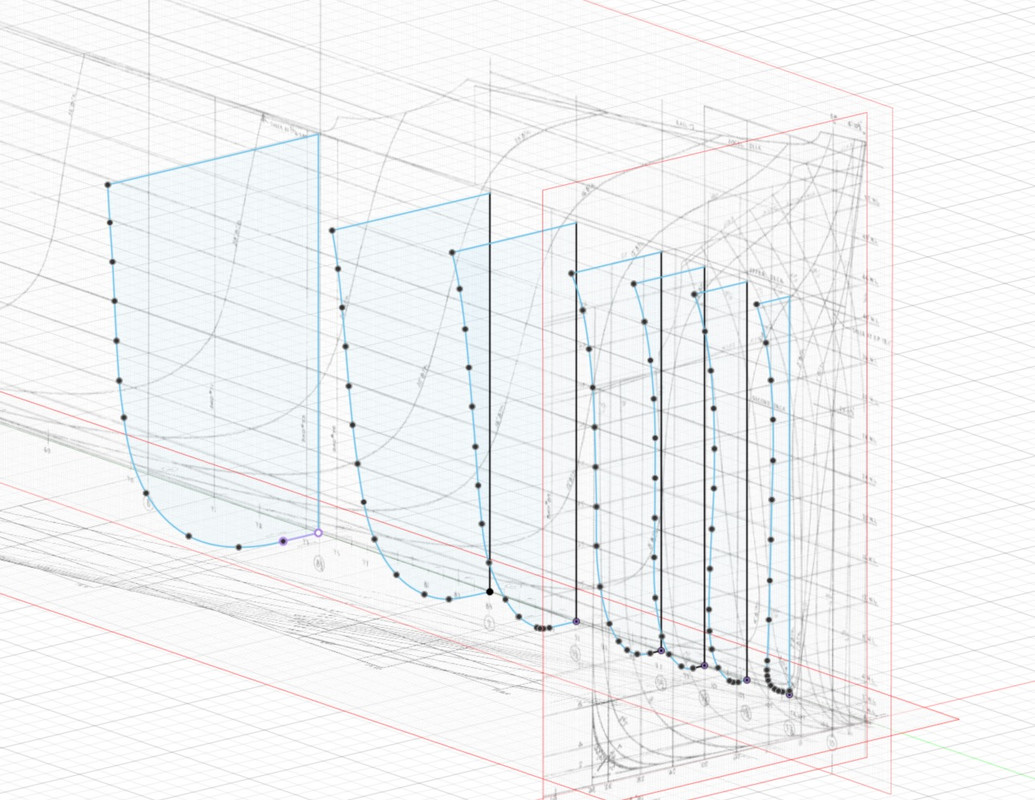
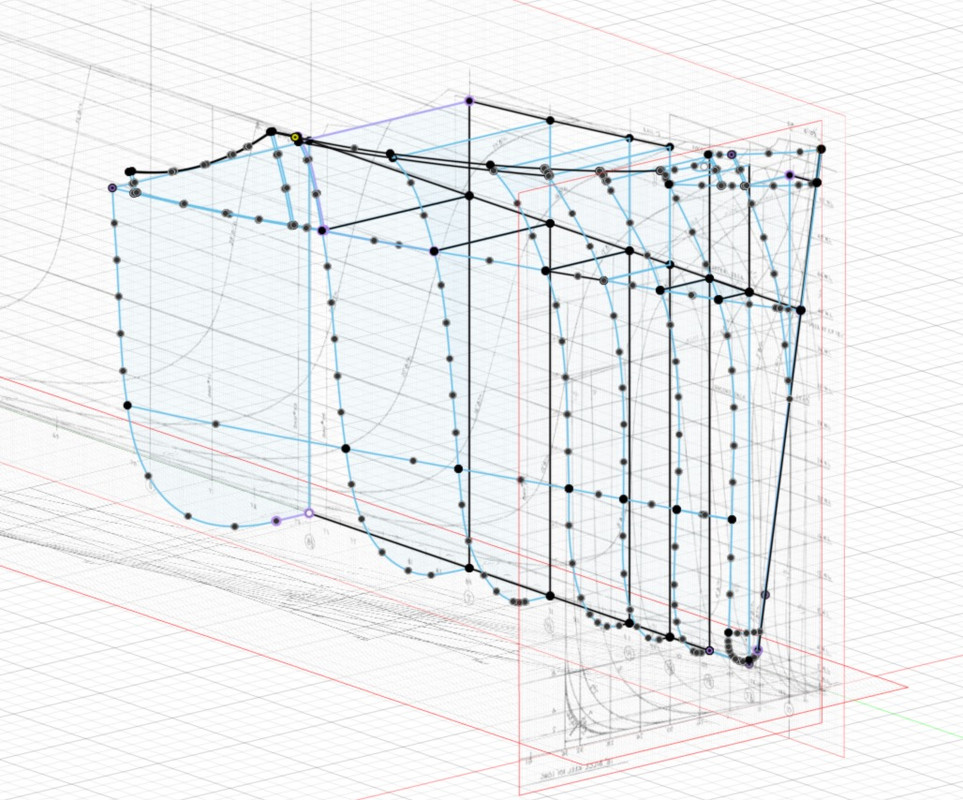
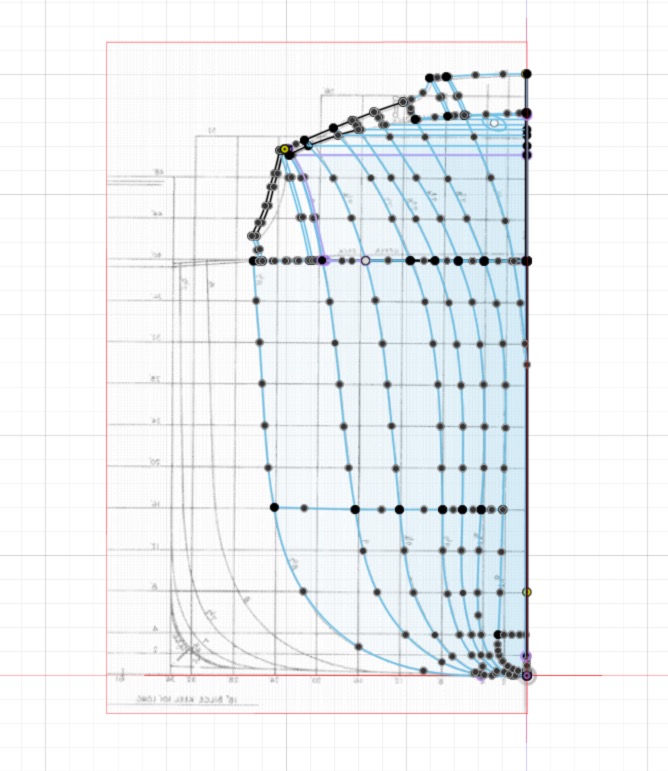
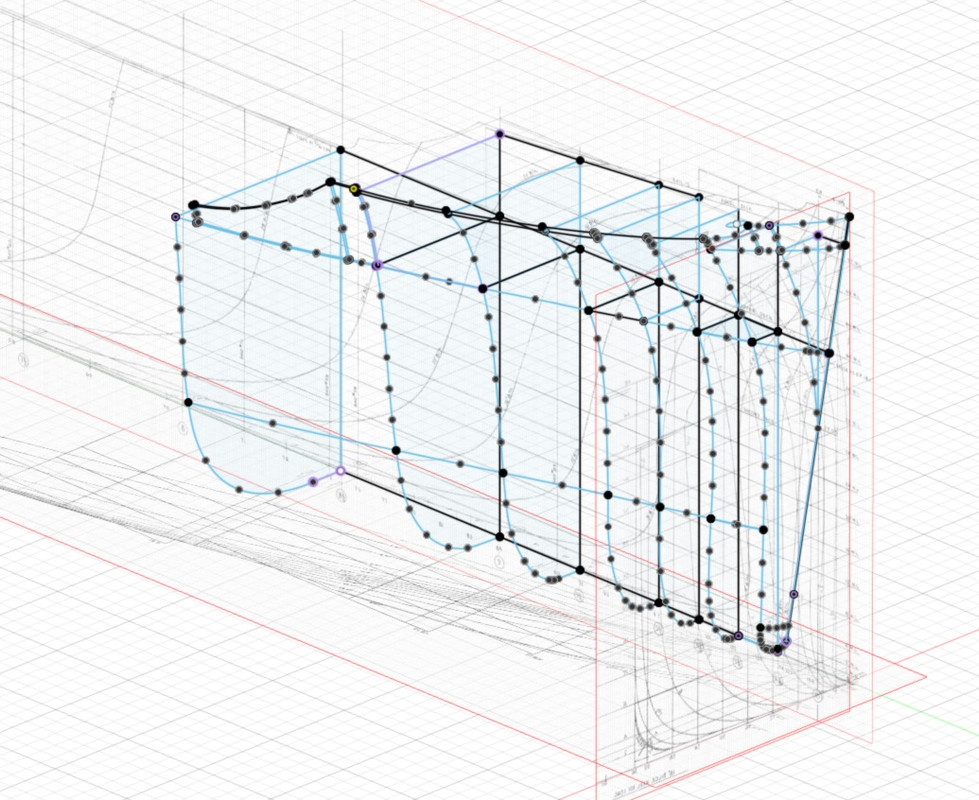
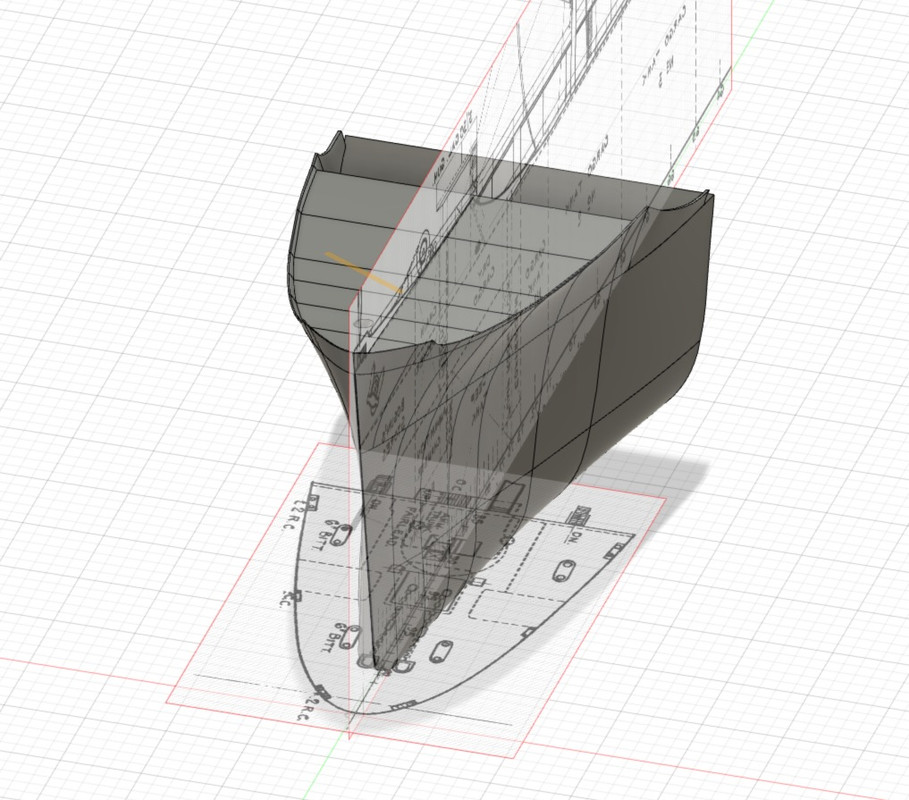
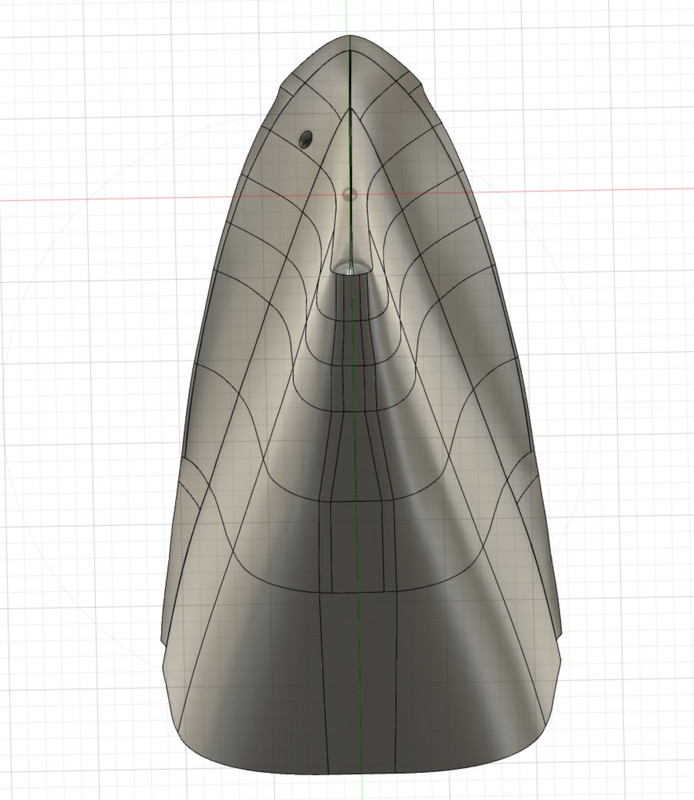
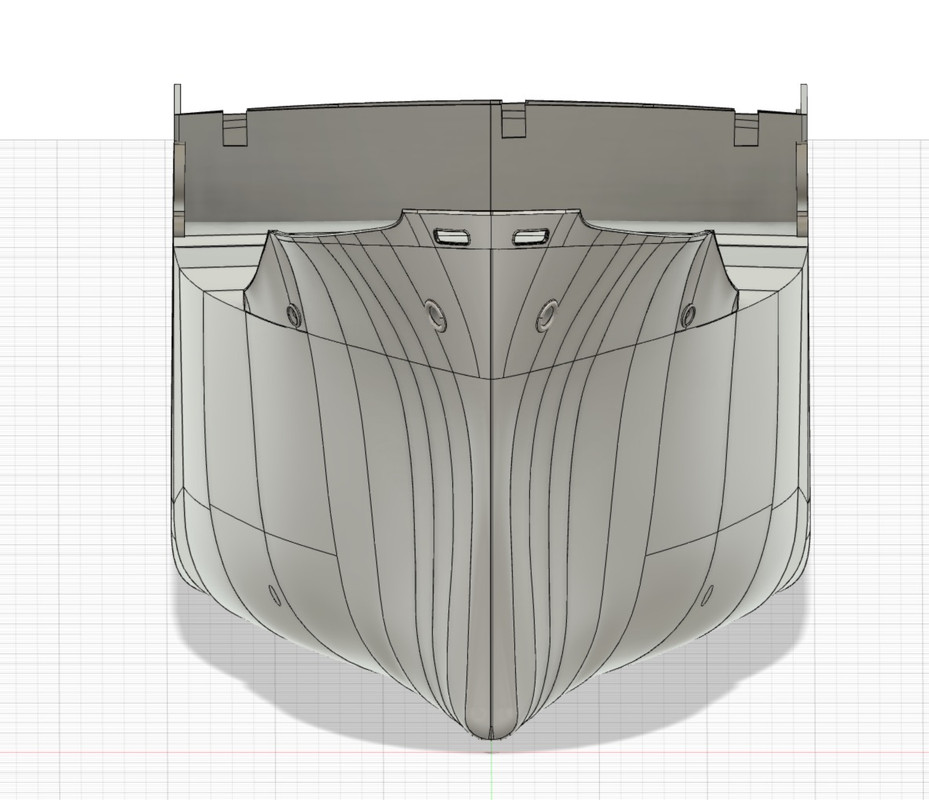
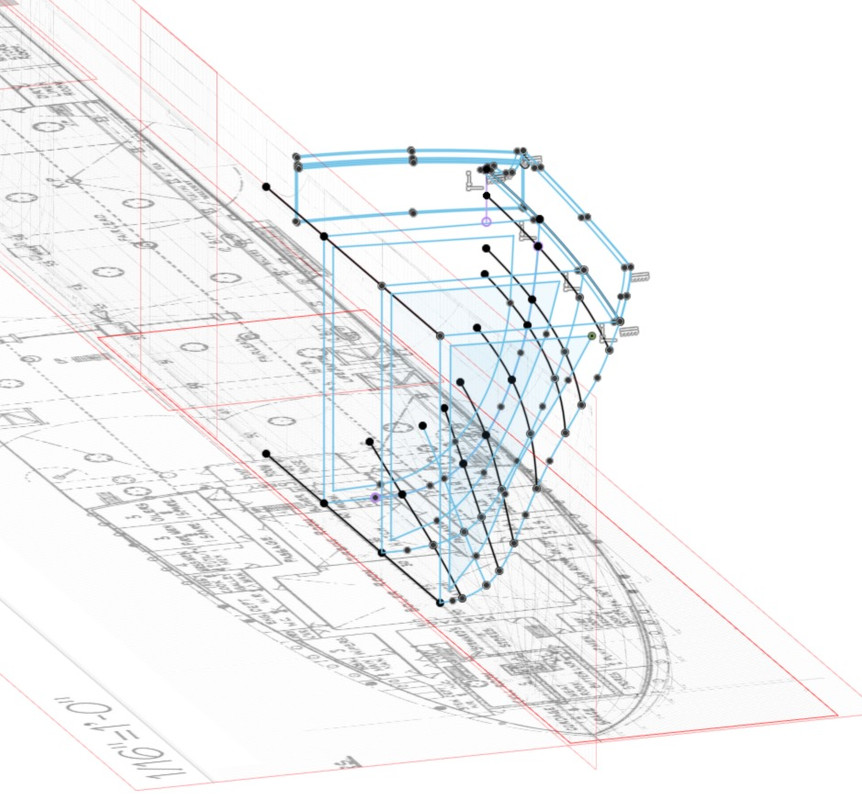
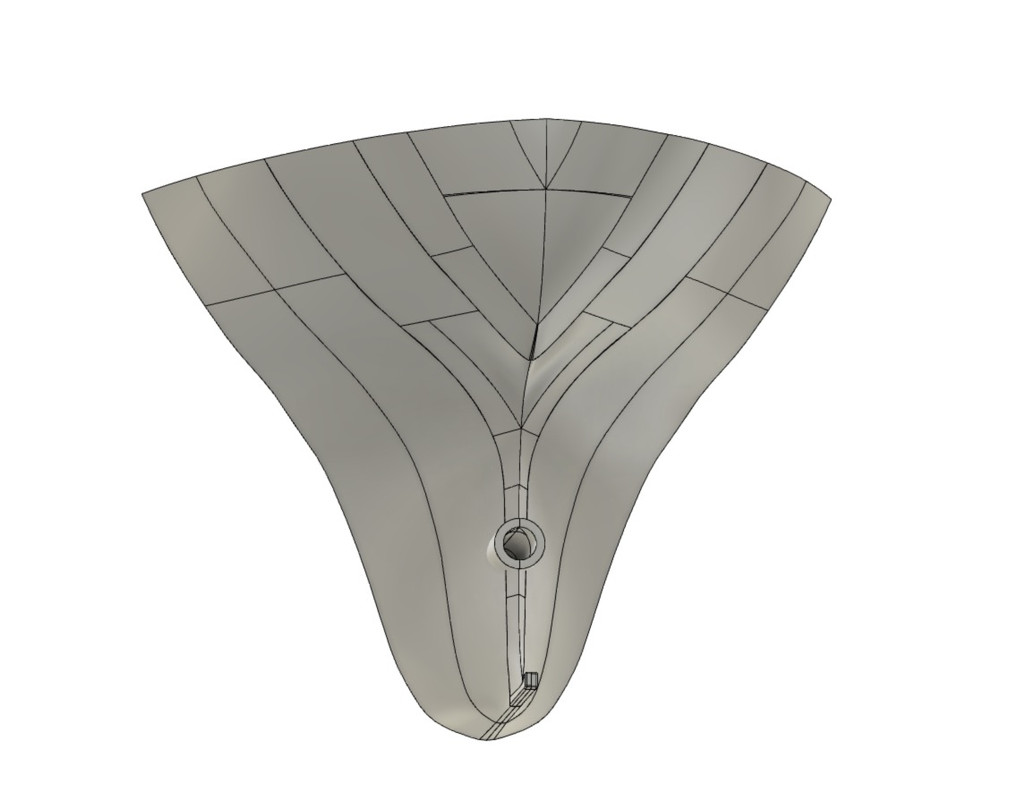
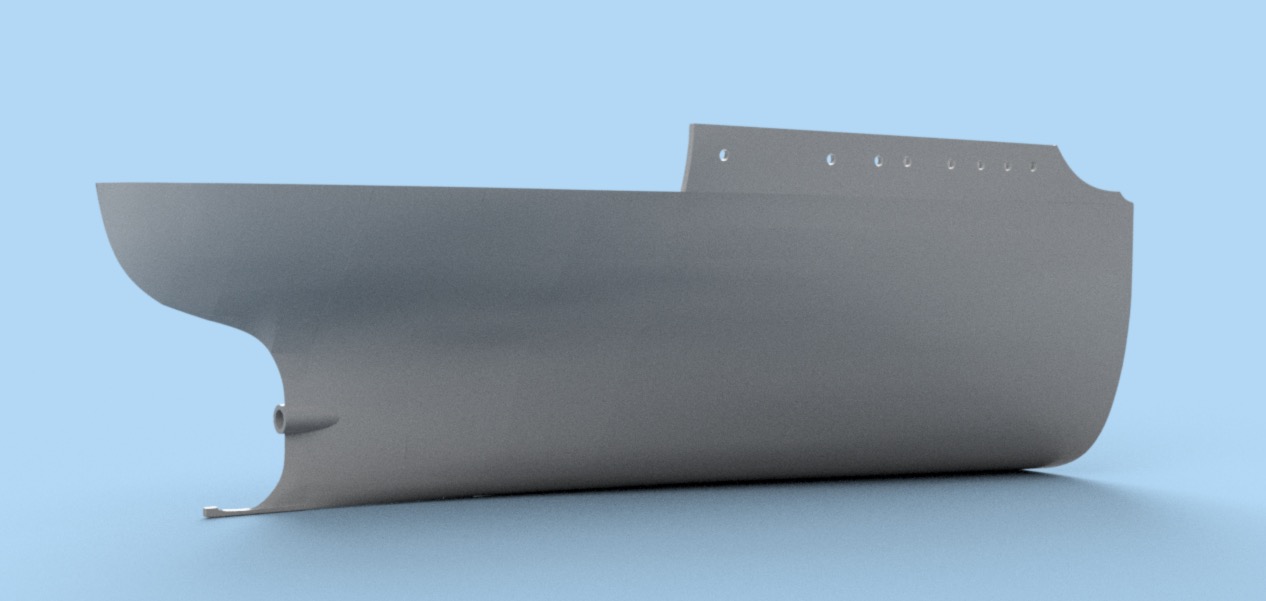
I started by creating the sketches of the first 8 couples by following the front view while stopping at the main bridge:
Then I continued on upwards, the forecastle.
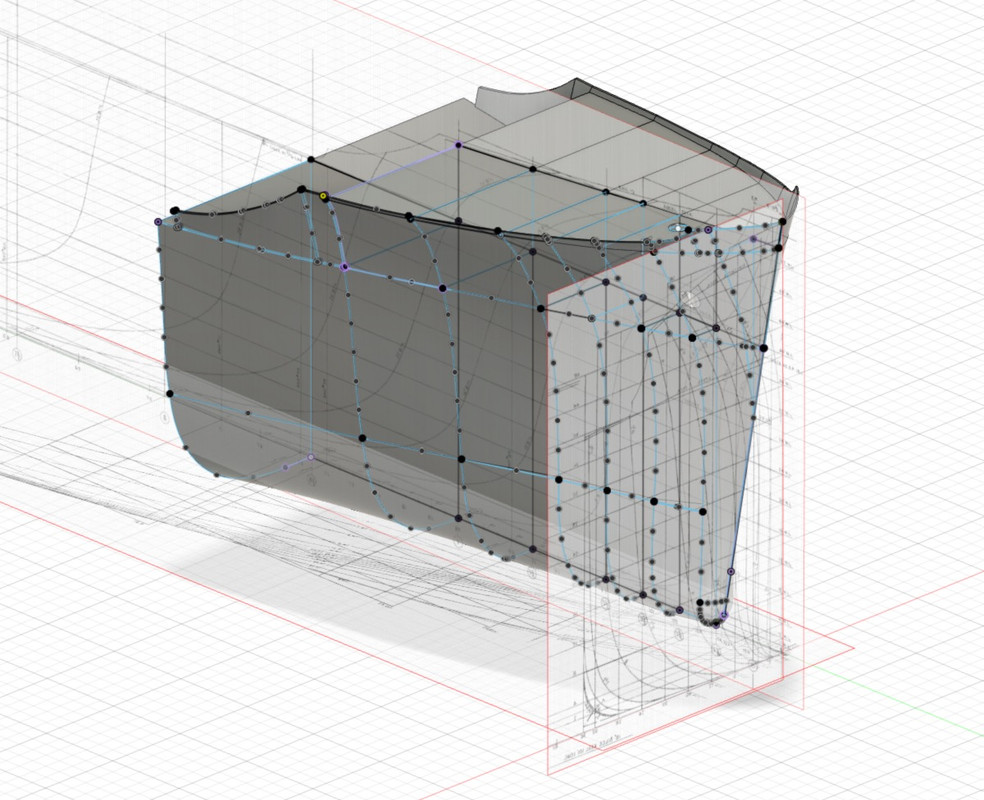
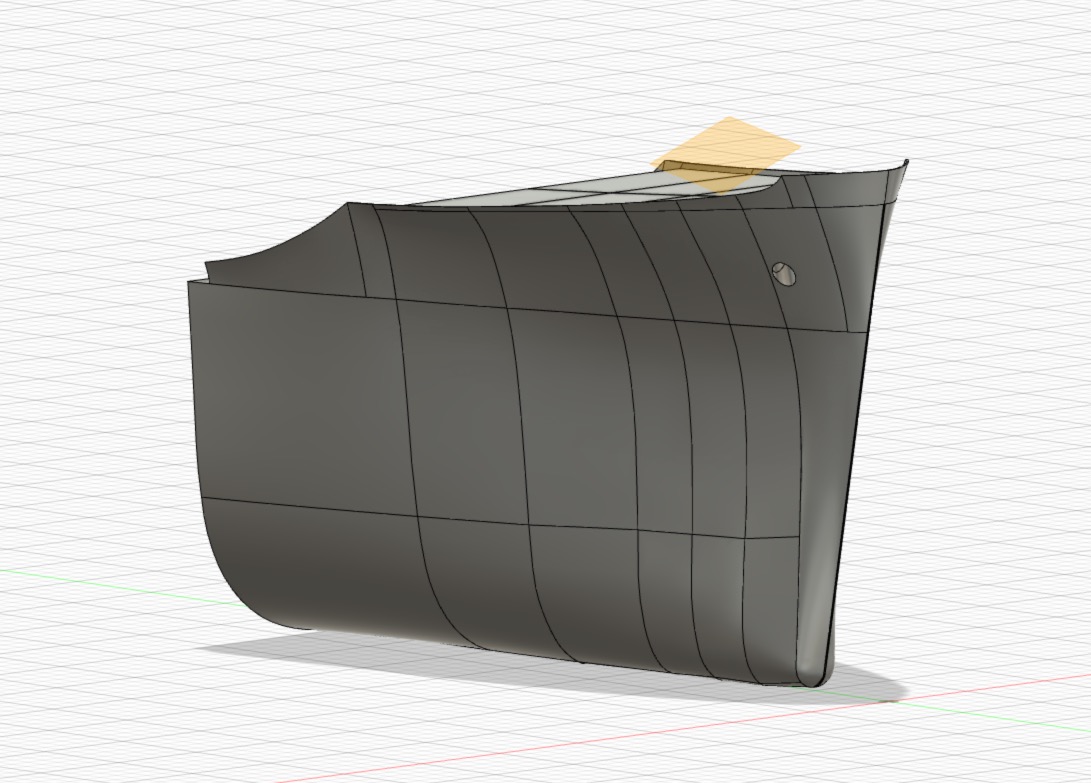
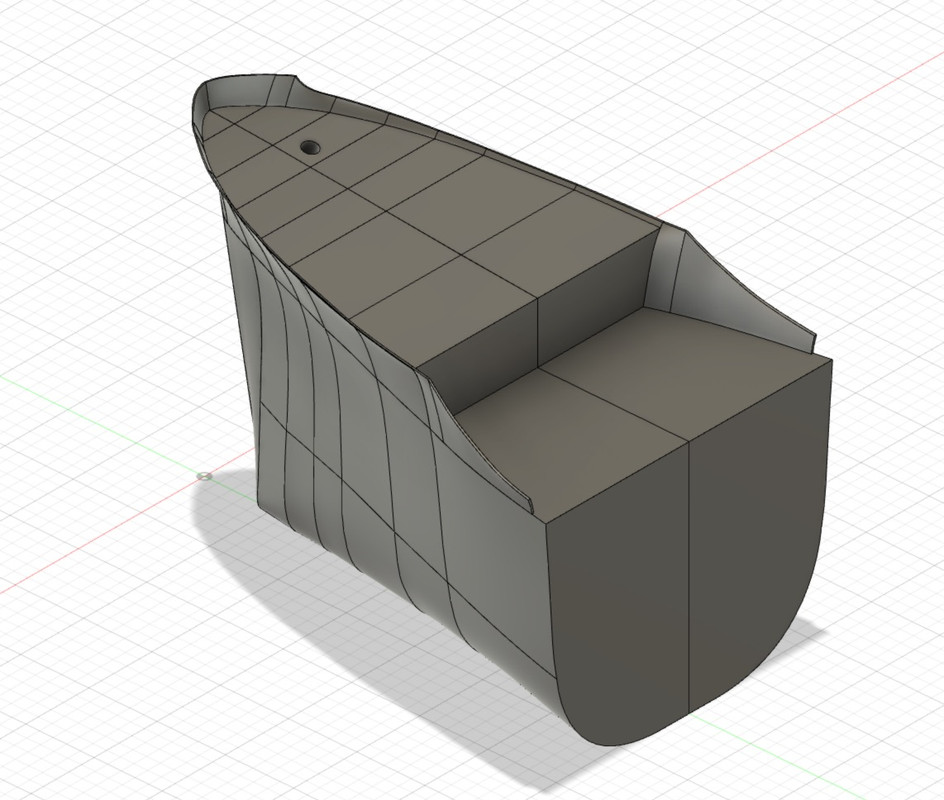
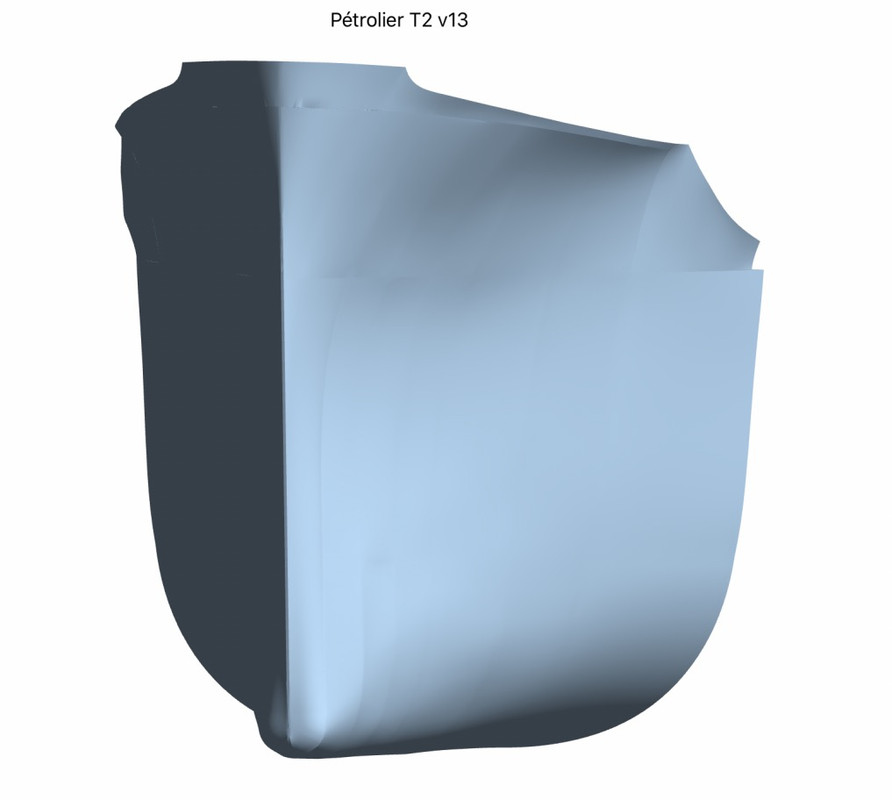
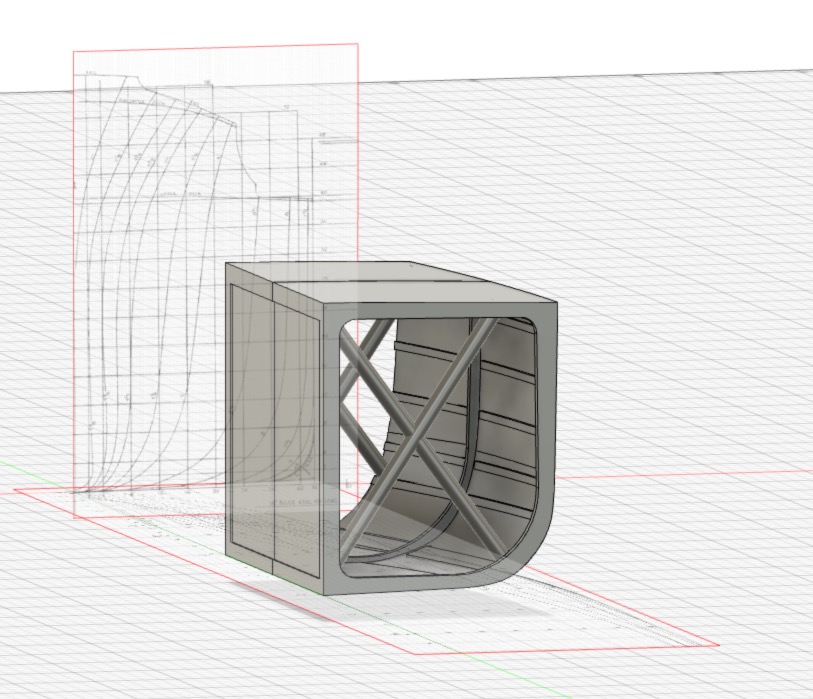
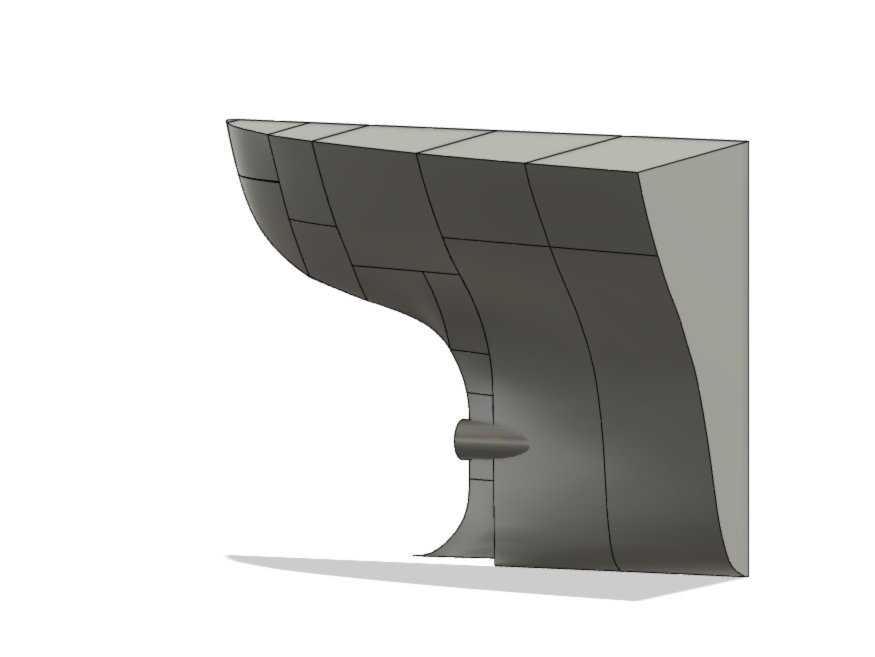
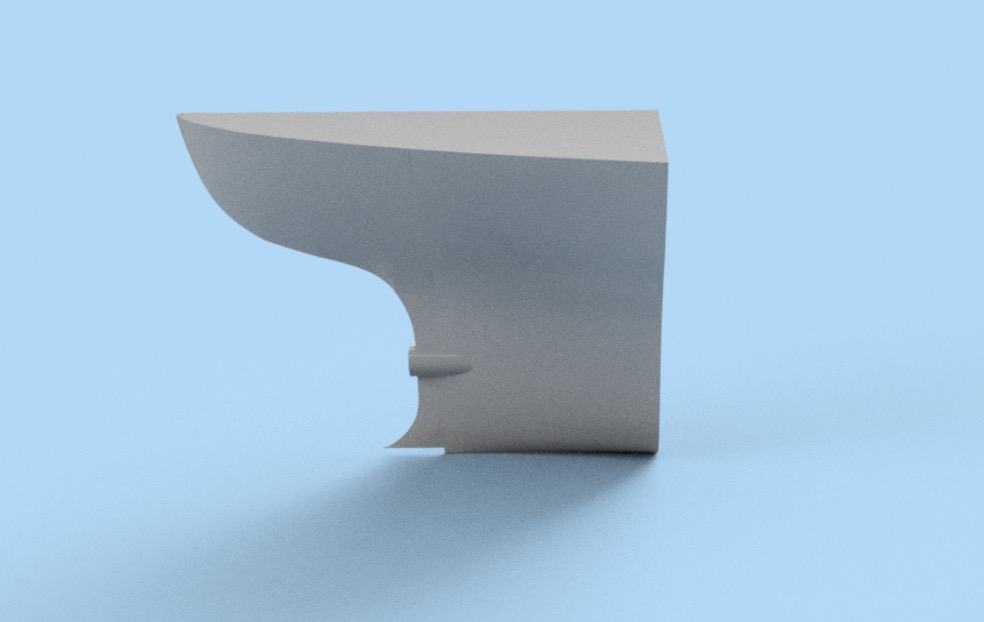
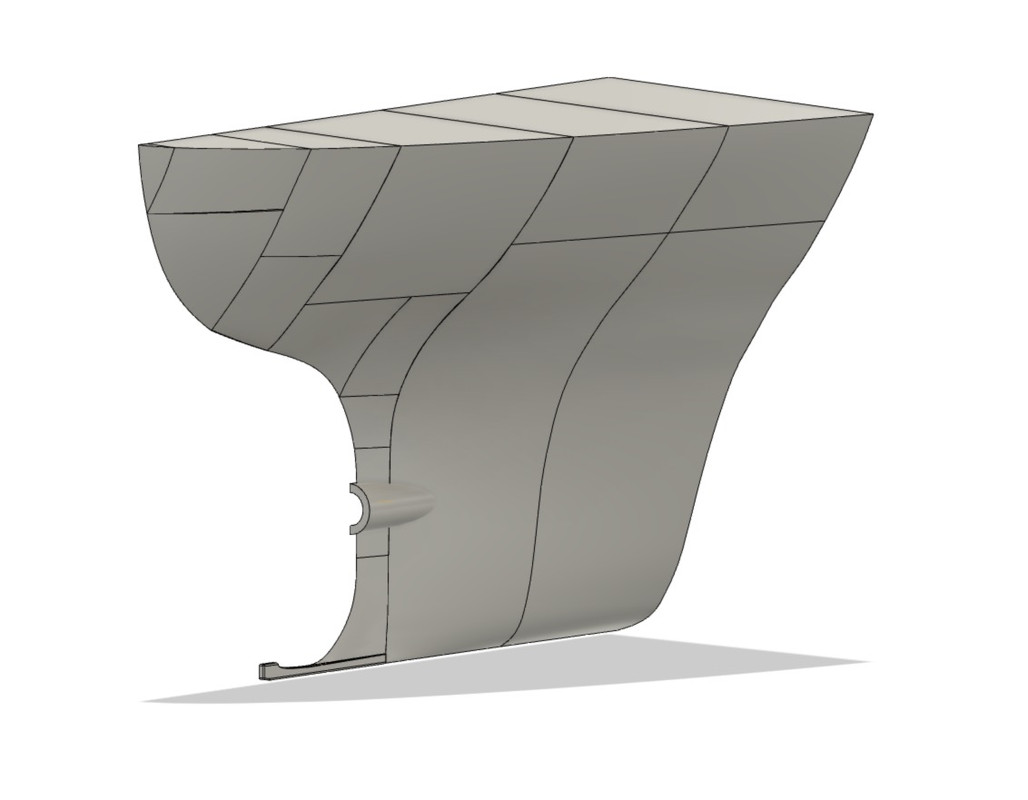
Then I created the block shapes with a very powerful function in the program, it's very impressive. And I created a mirror shape for starboard, the two sides being identical, so there's no need to design it. Moreover, it will be printed in half hull, then glued together.
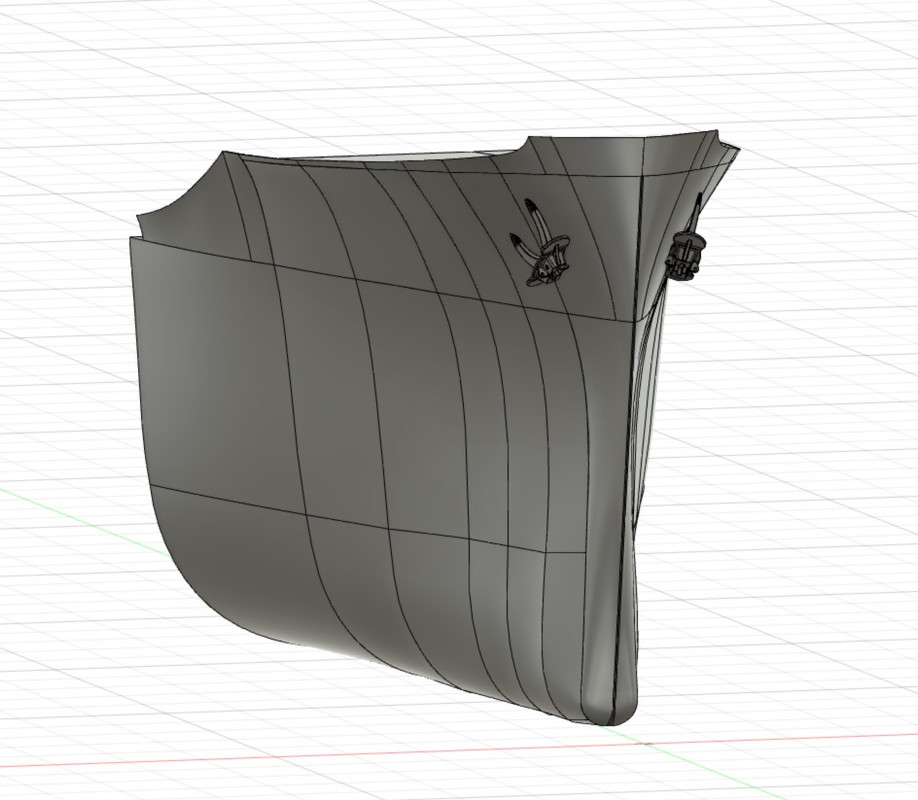
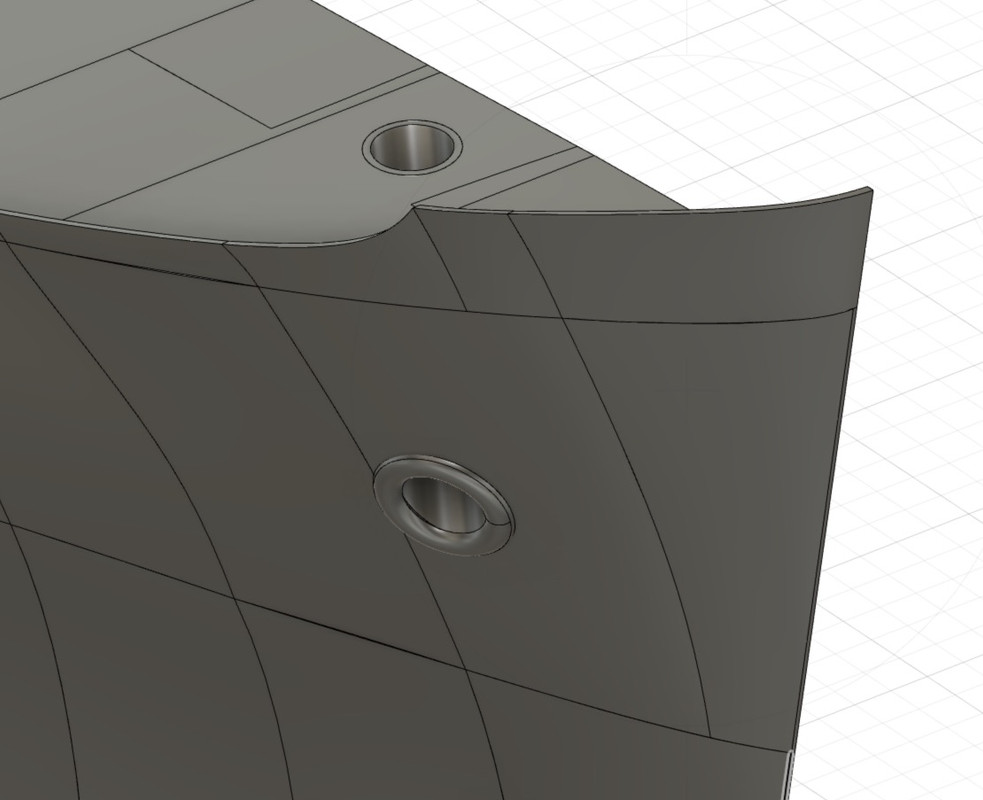
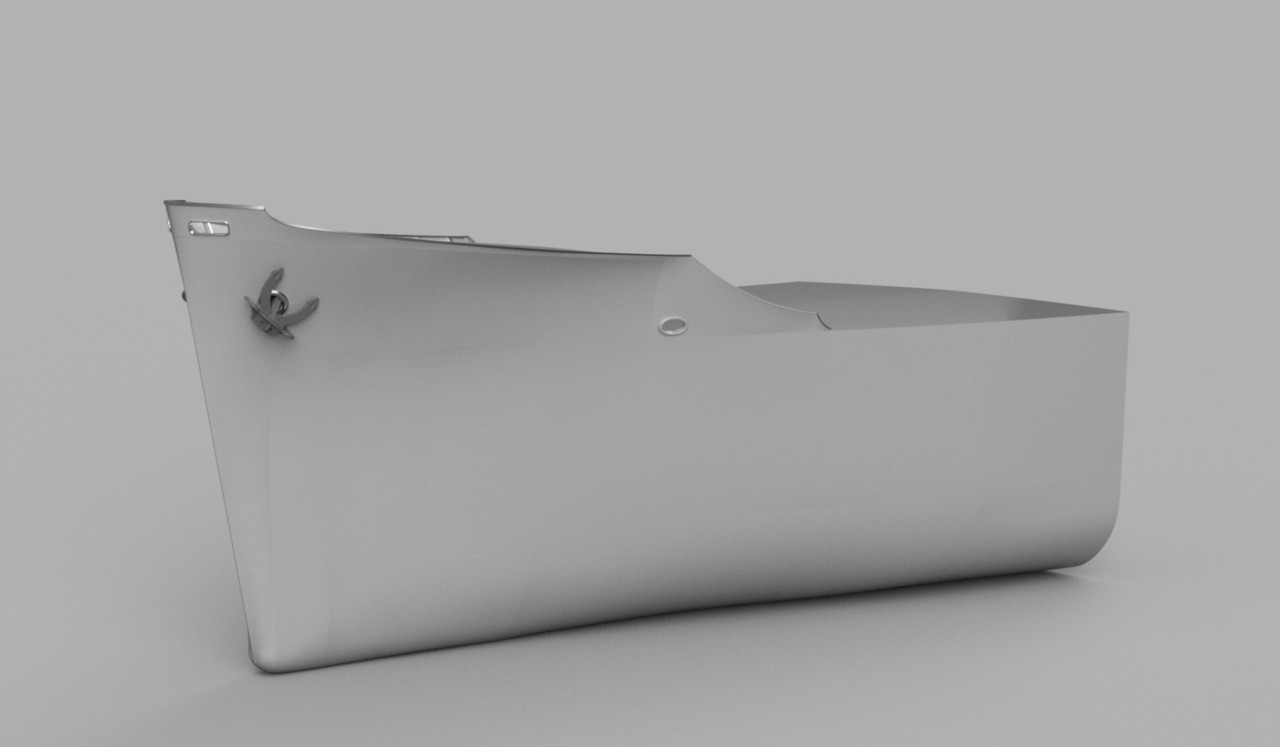
Drilling of the port hawser, it was necessary to deduce the exact angles of the hawser in the 2 planes thanks to two new layers from other planks.
There are some modifications made so that everything "holds the road..."
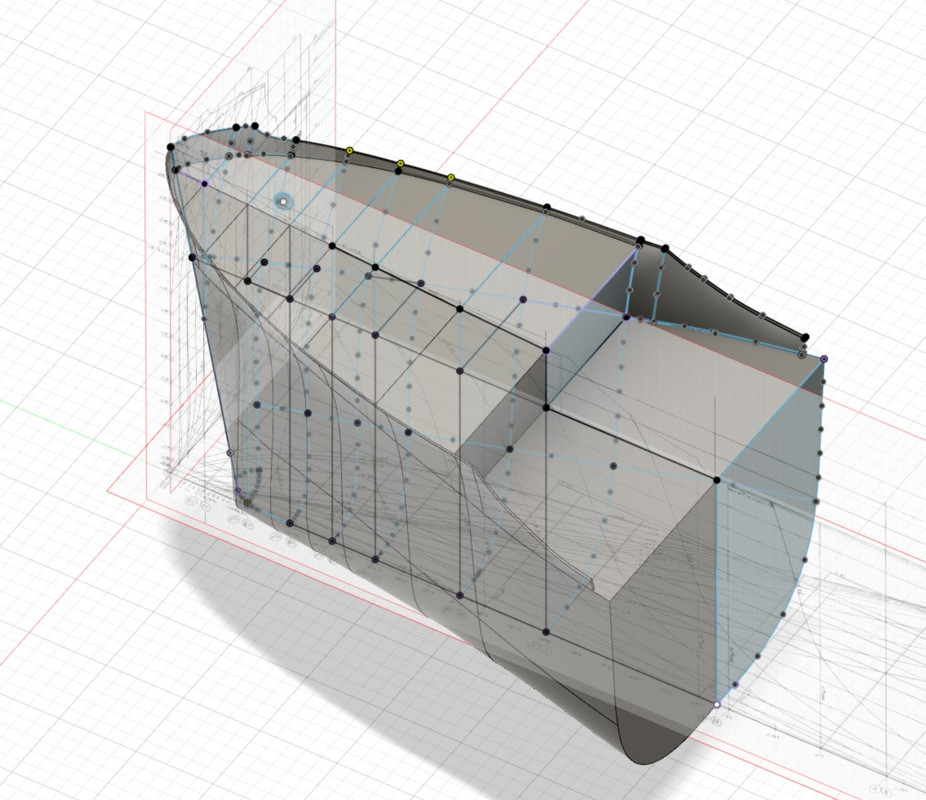
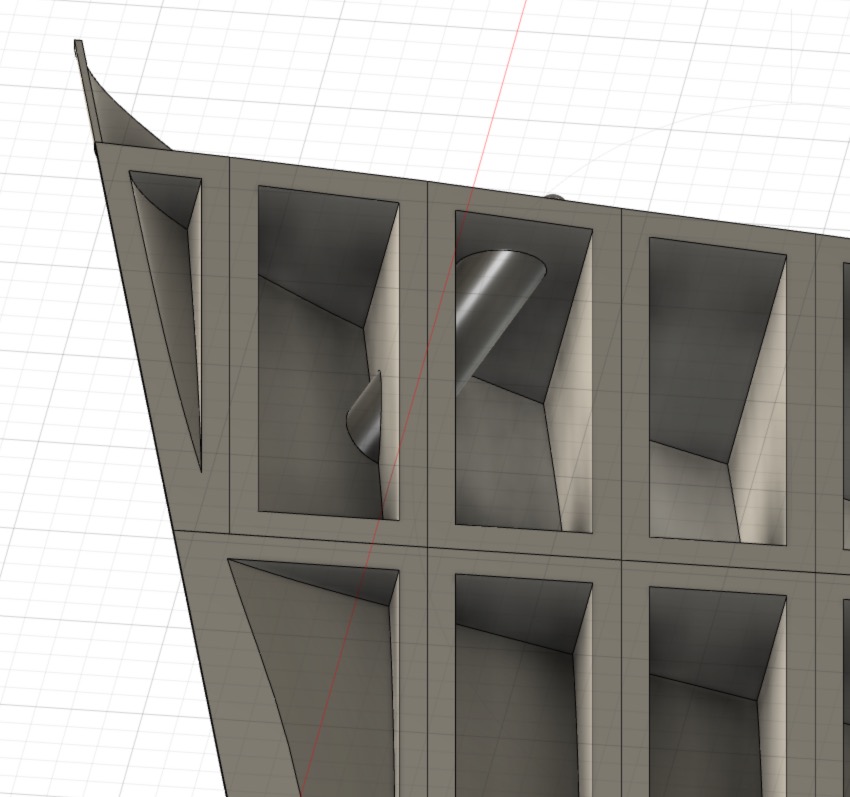
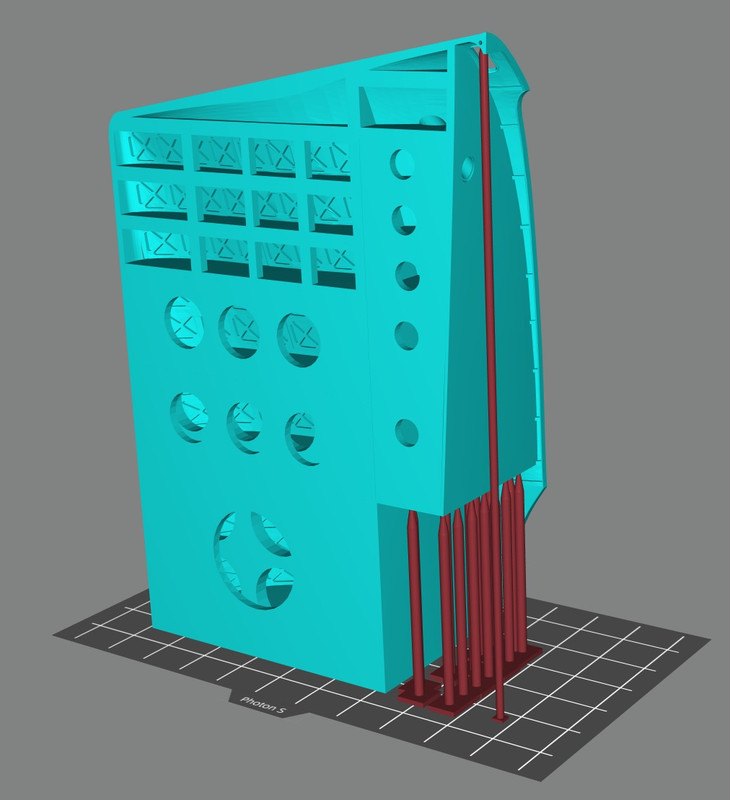
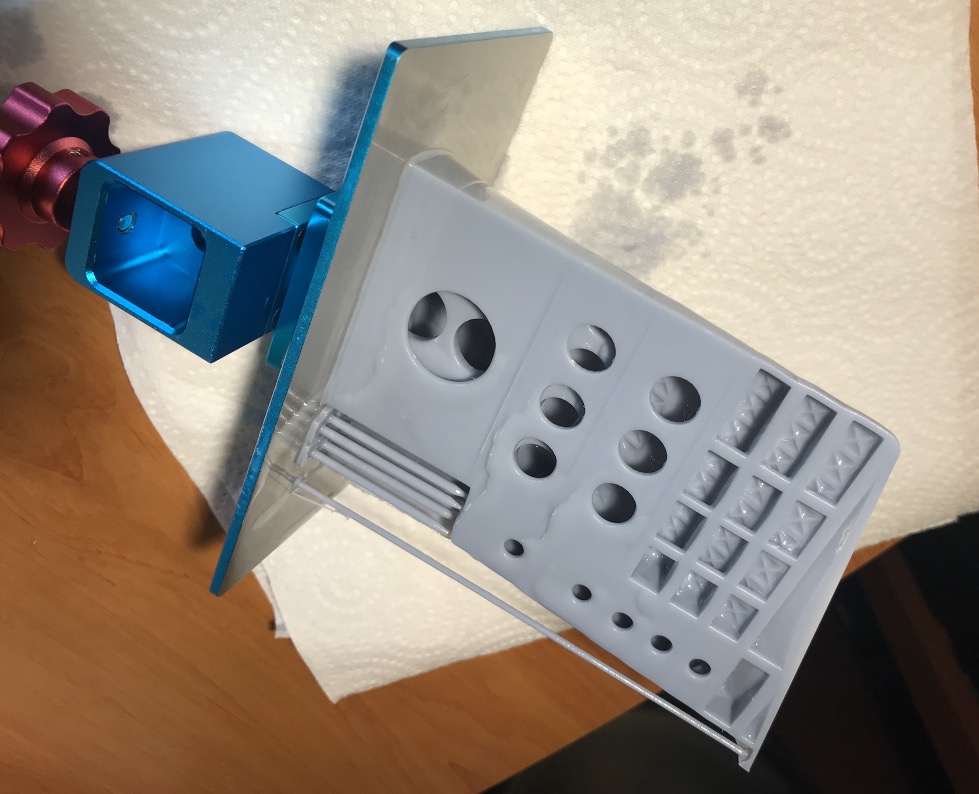
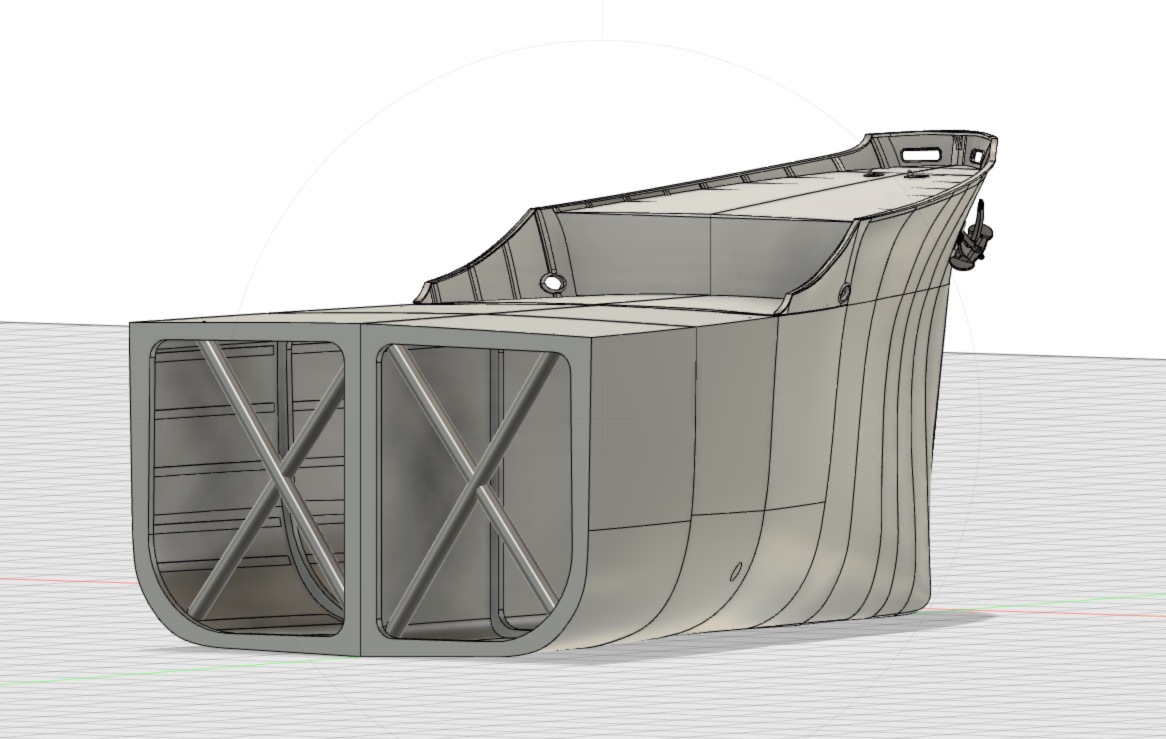
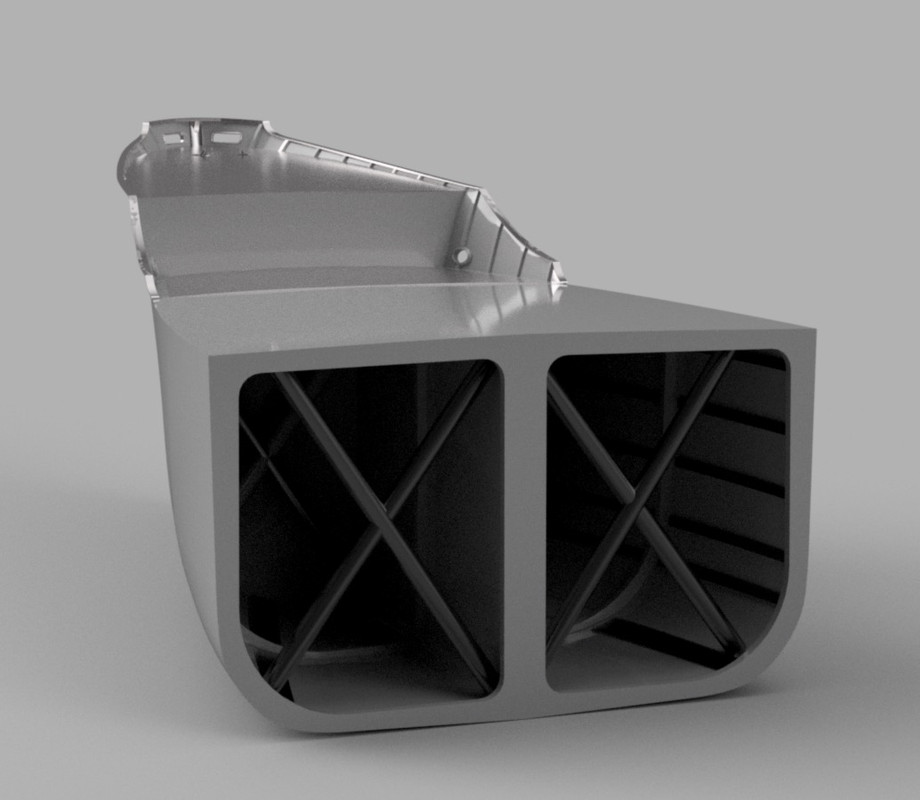
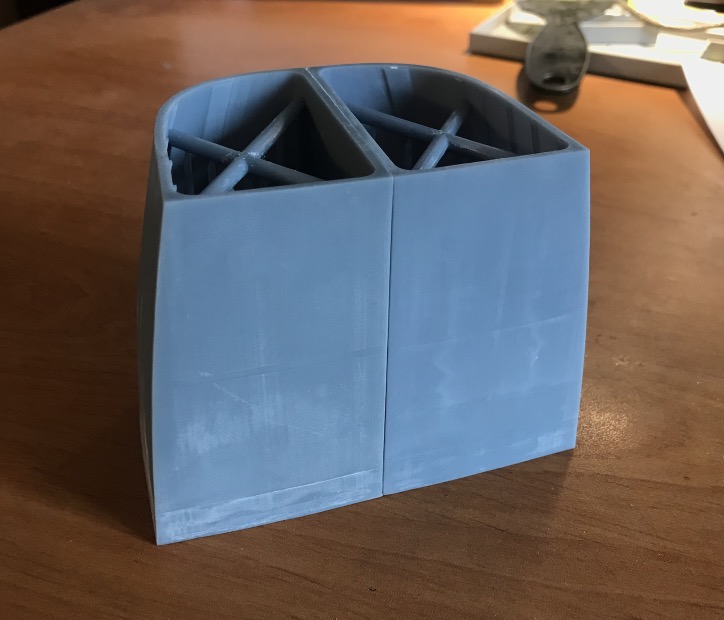
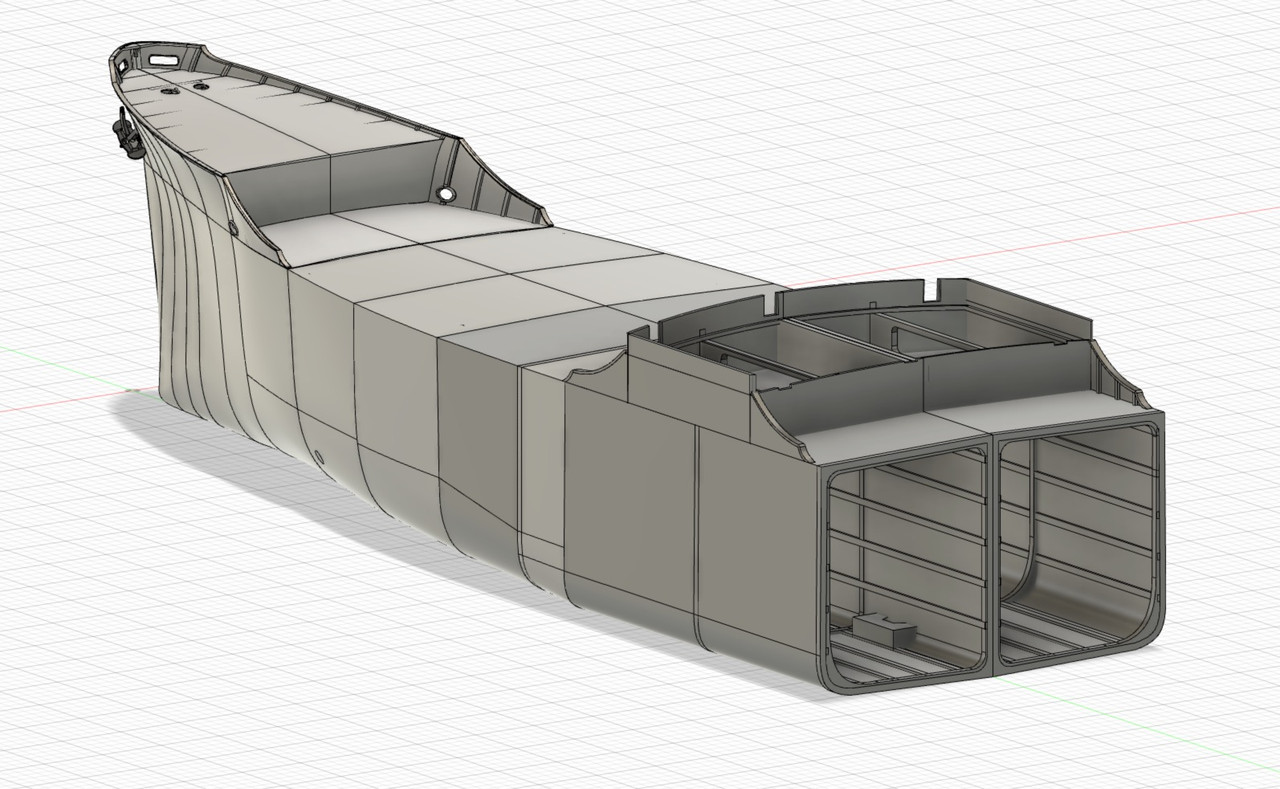
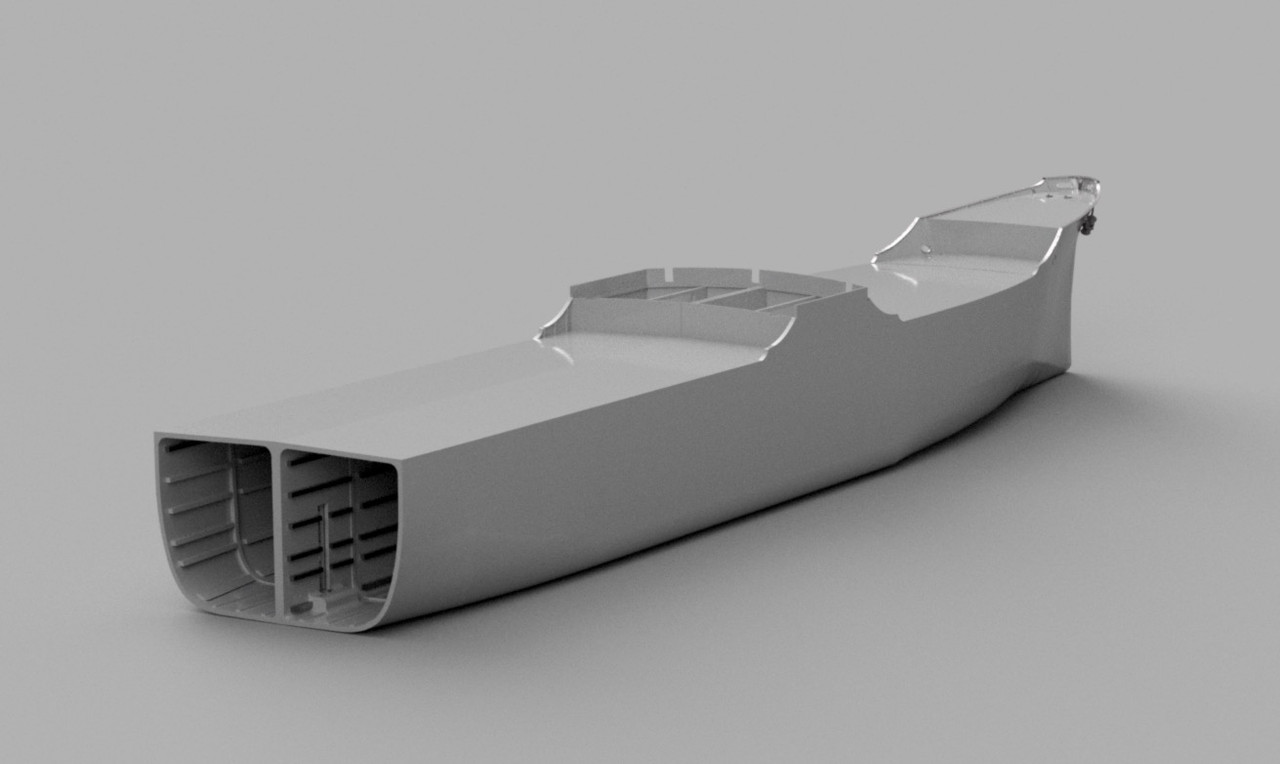
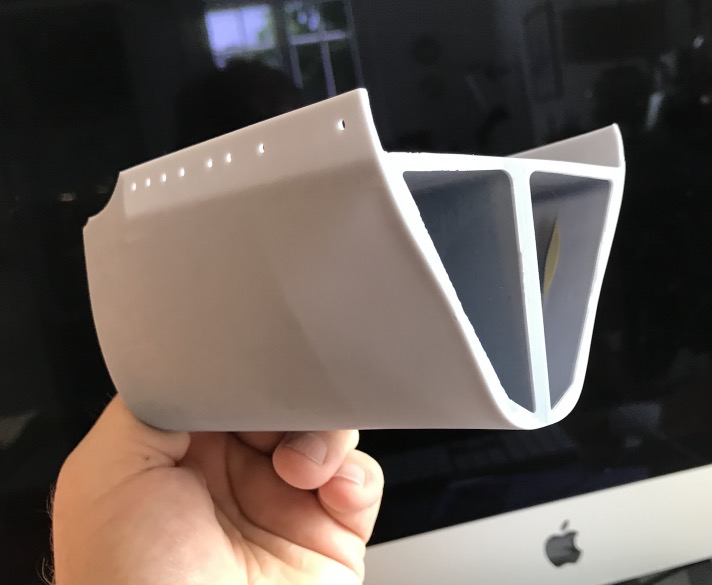
Then I'll do a small-scale print test after I make this part hollow because there's too much material. Flow holes for the resin will also be made so that it will drain out of the hull during printing.
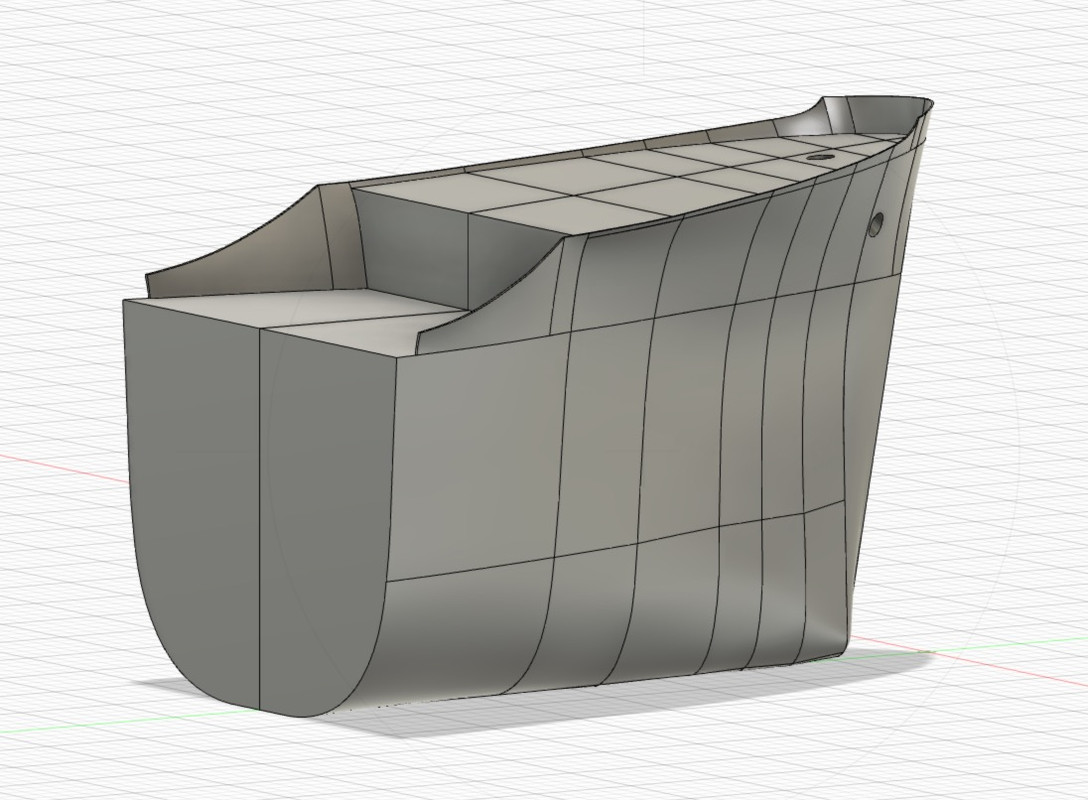
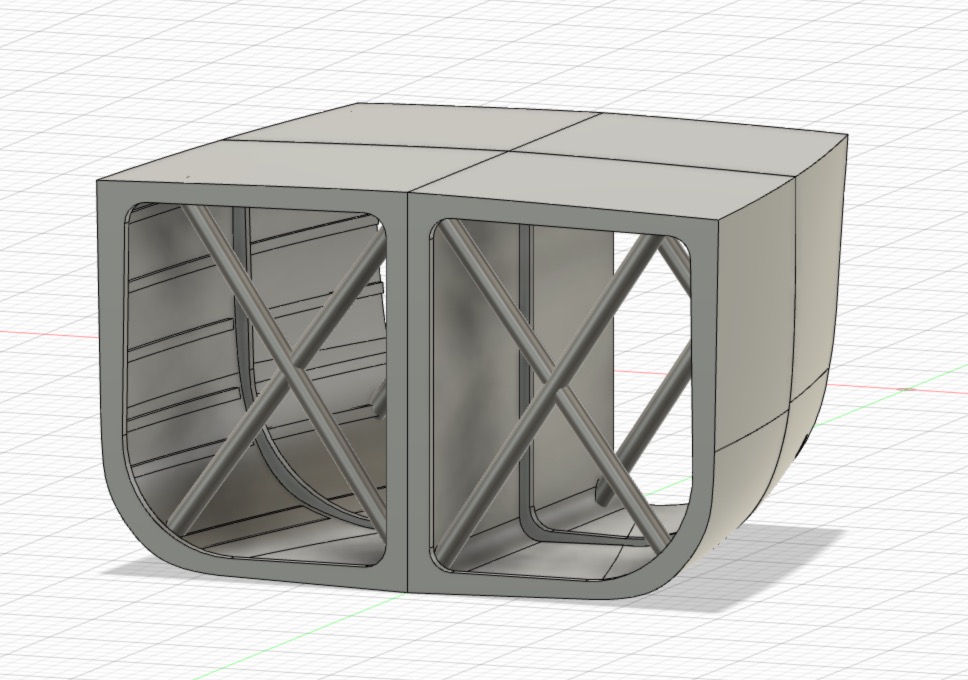
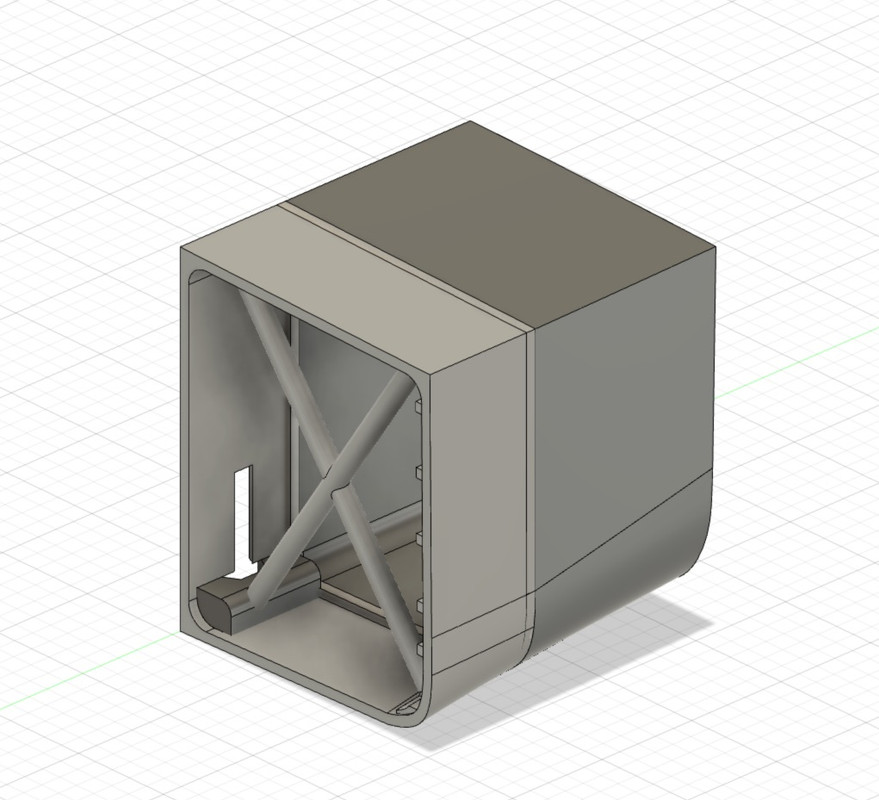
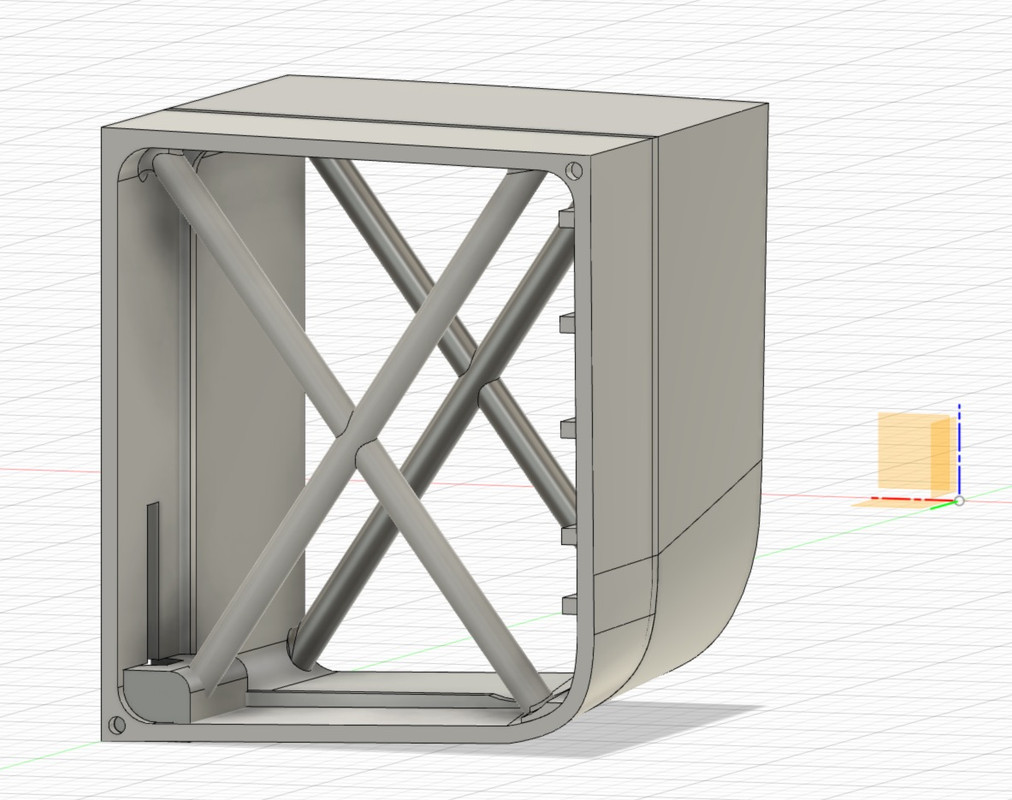
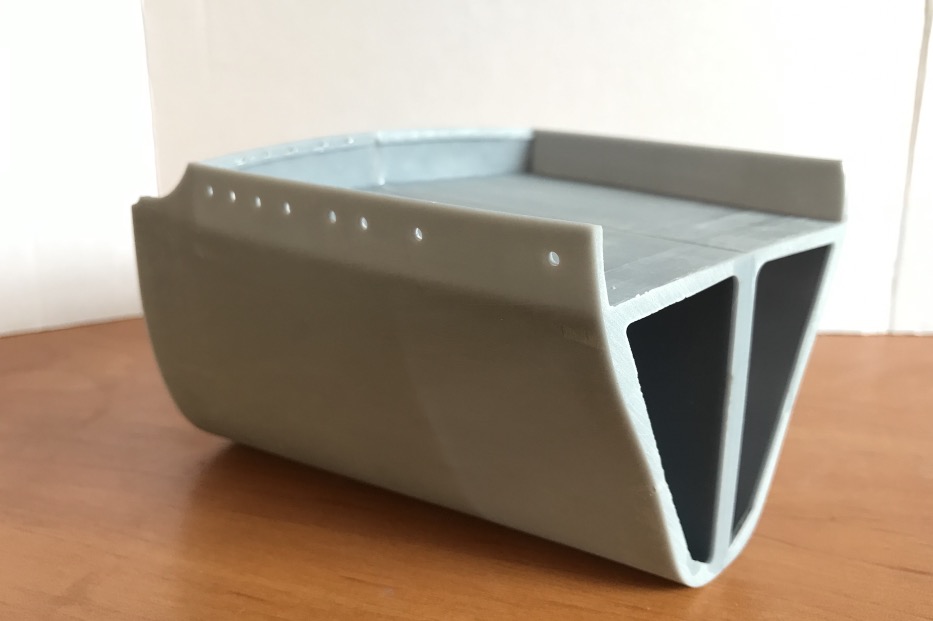
it'll be highly compartmentalized, each block is independently dug independently.
That's going to form a rigid structure like a real boat inside. It's still to be tested.
I took a block out here and I dug it out, but I dug it all the way to the bottom. There will be a hole placed where the resin will be drained off by gravity when it's printed.
I think it's going to be very rigid.
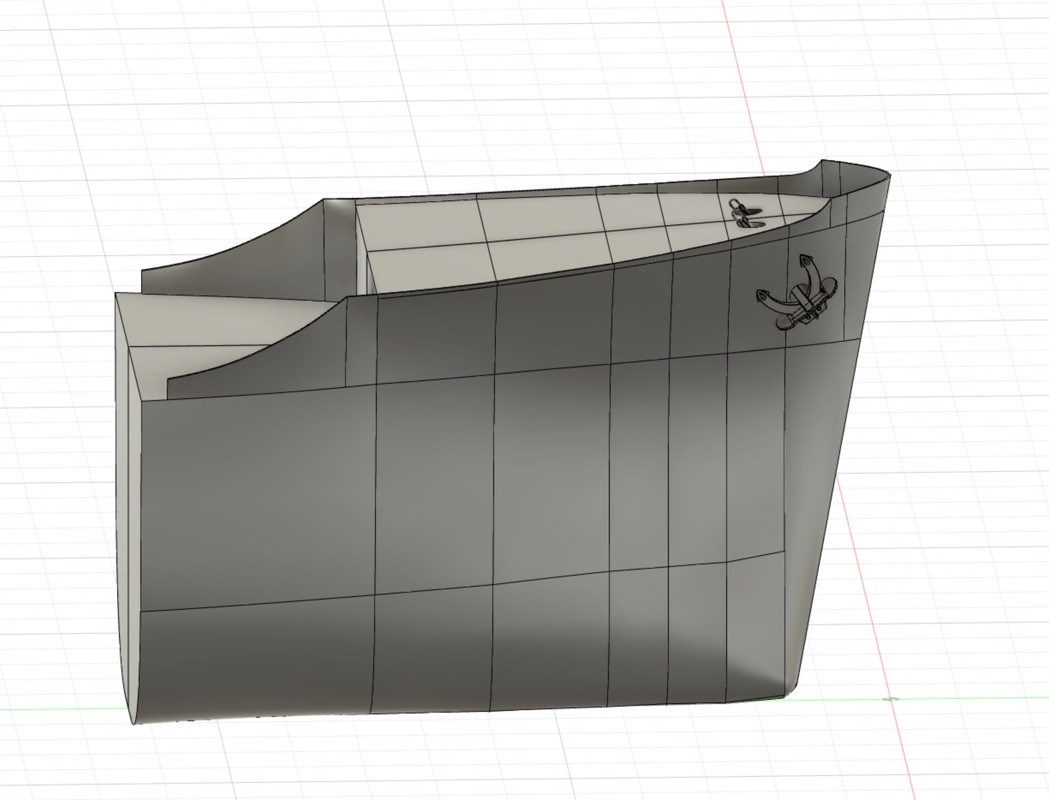
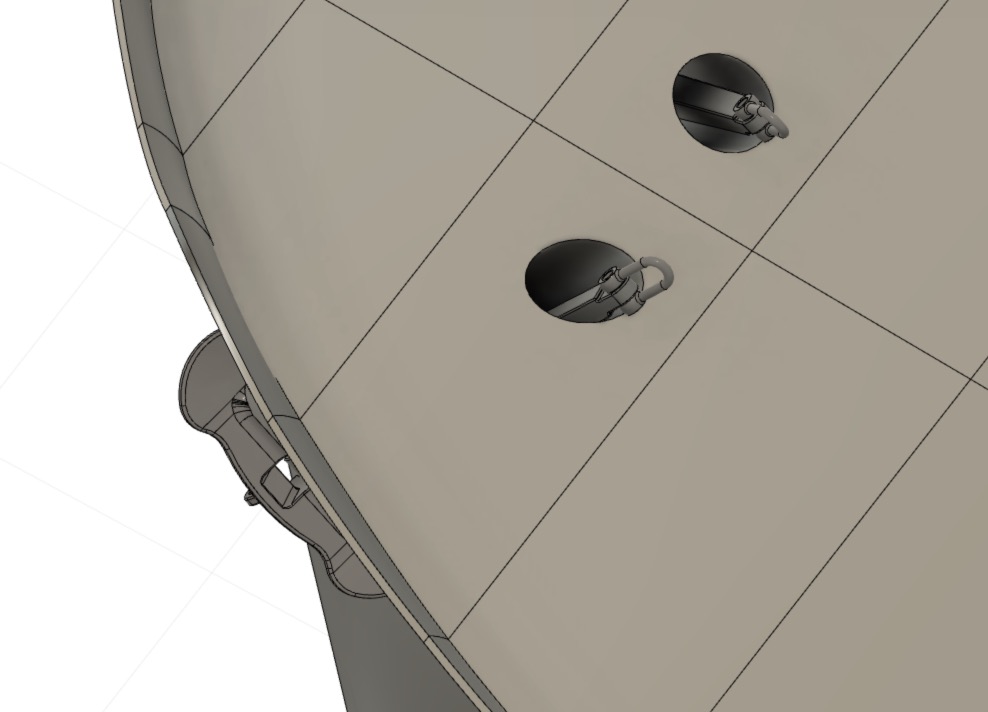
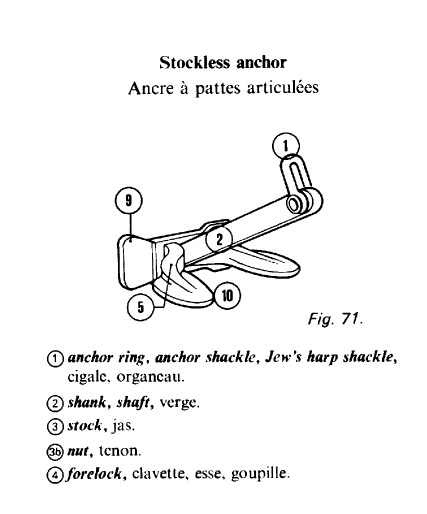
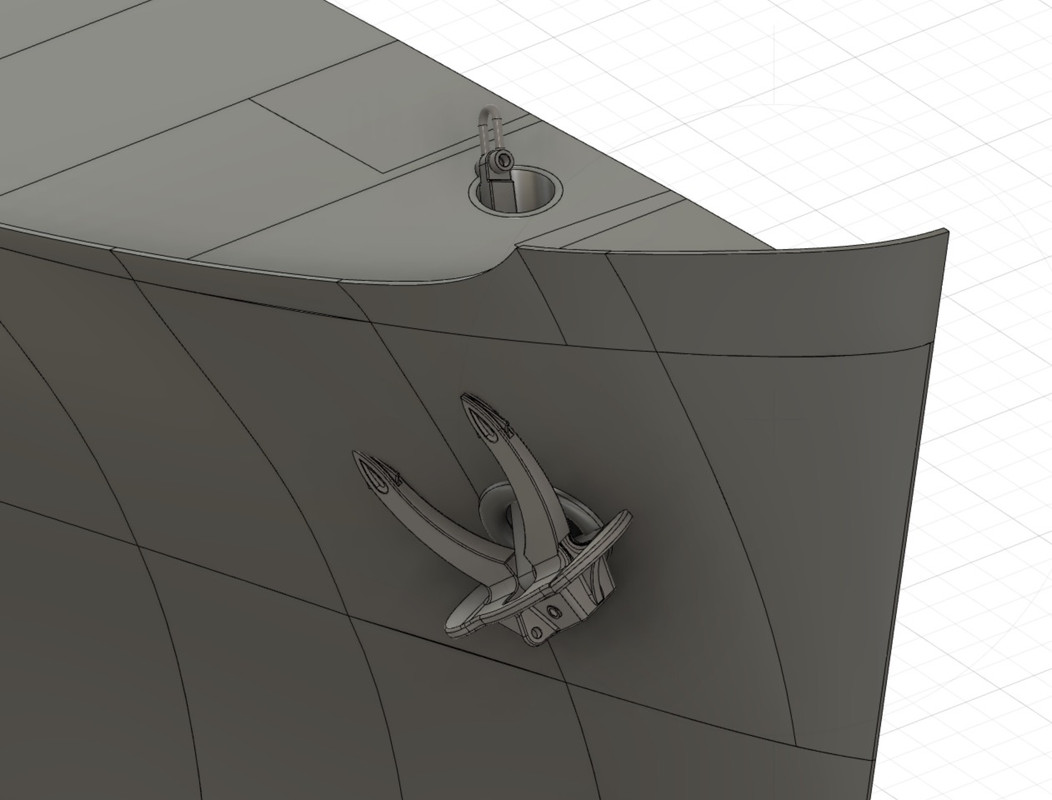
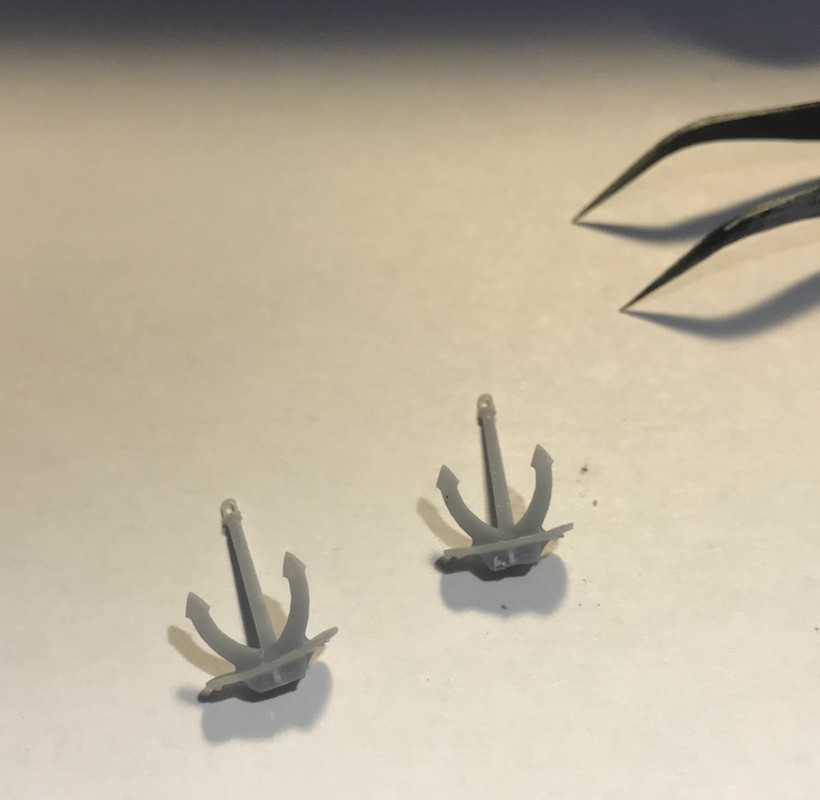
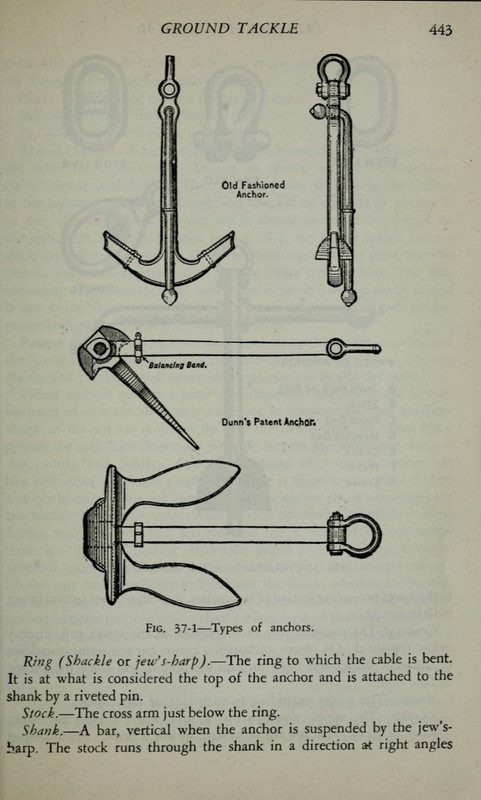
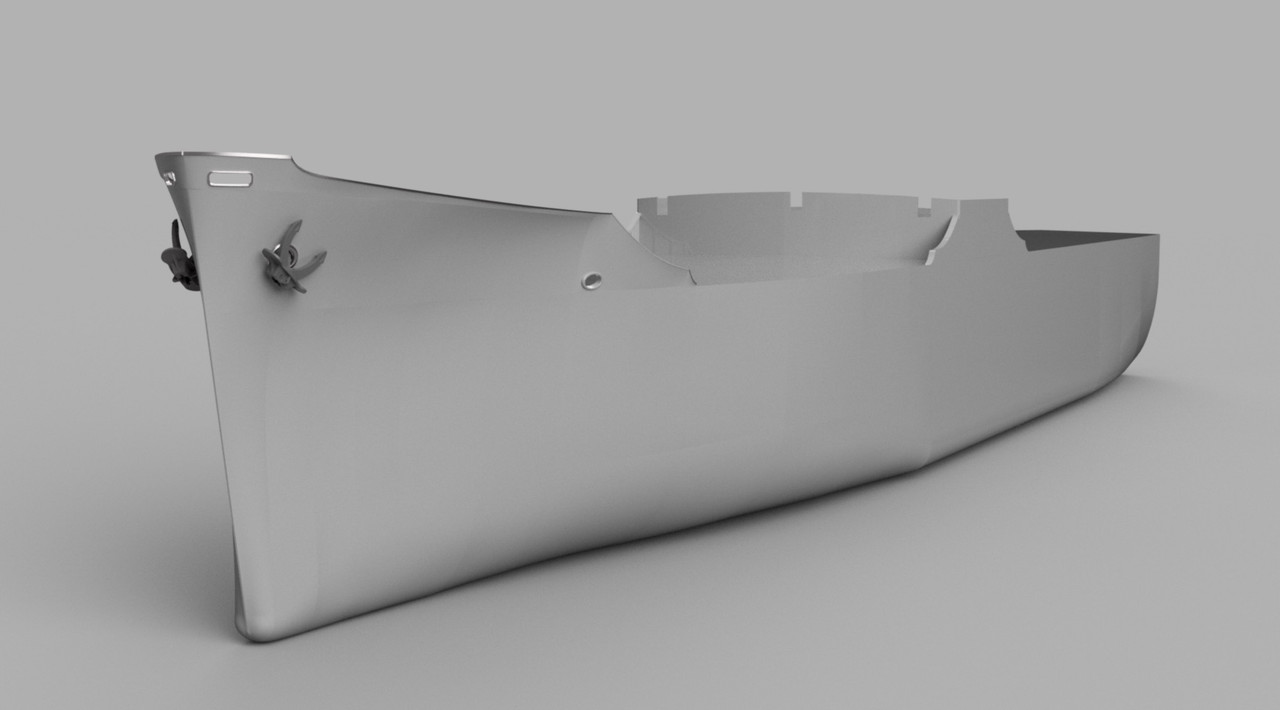
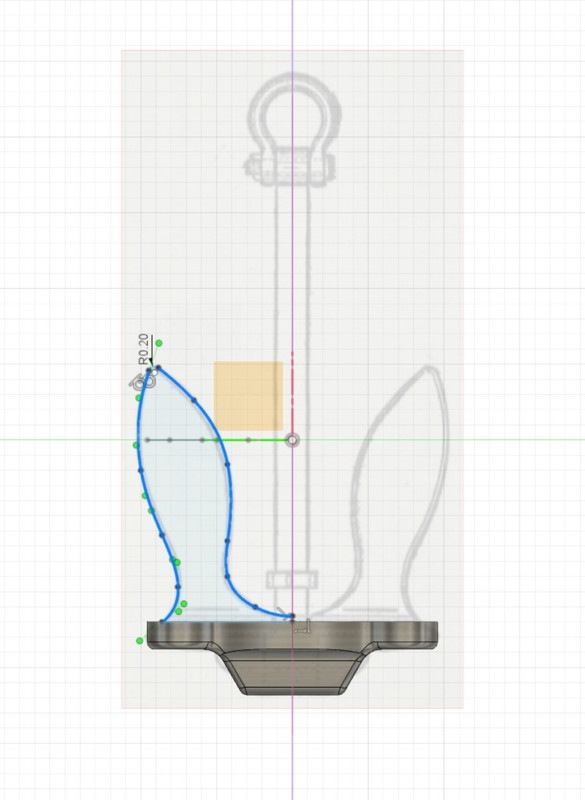
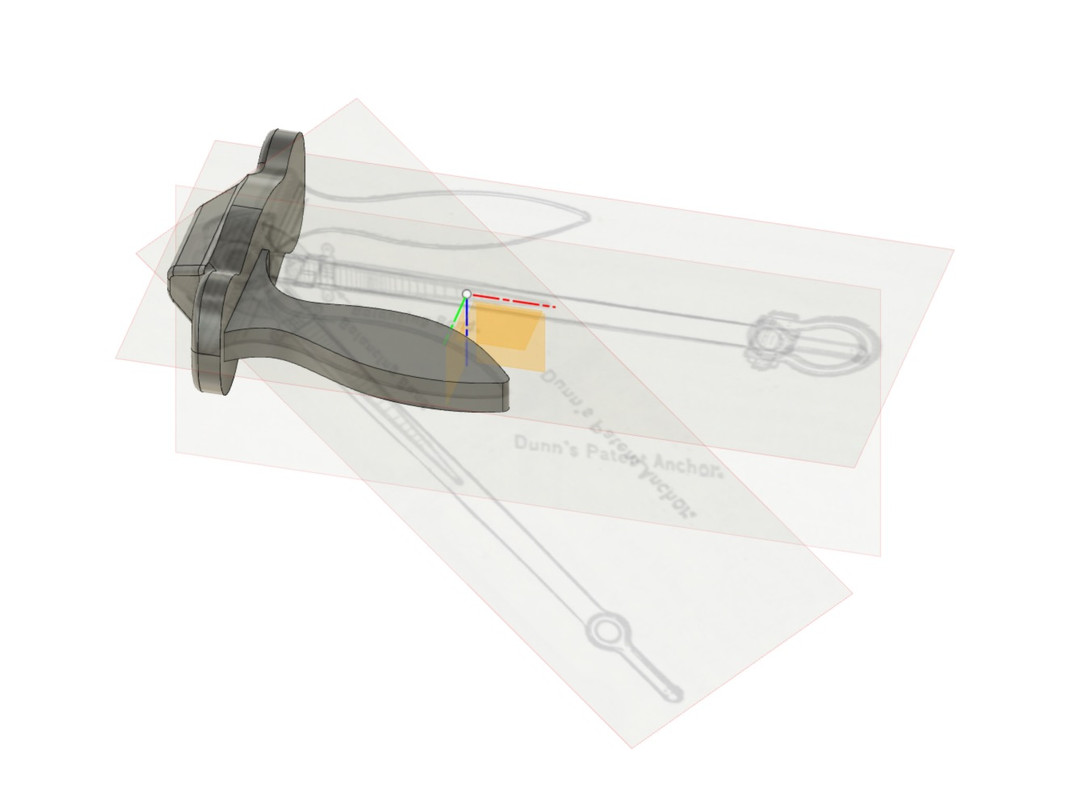
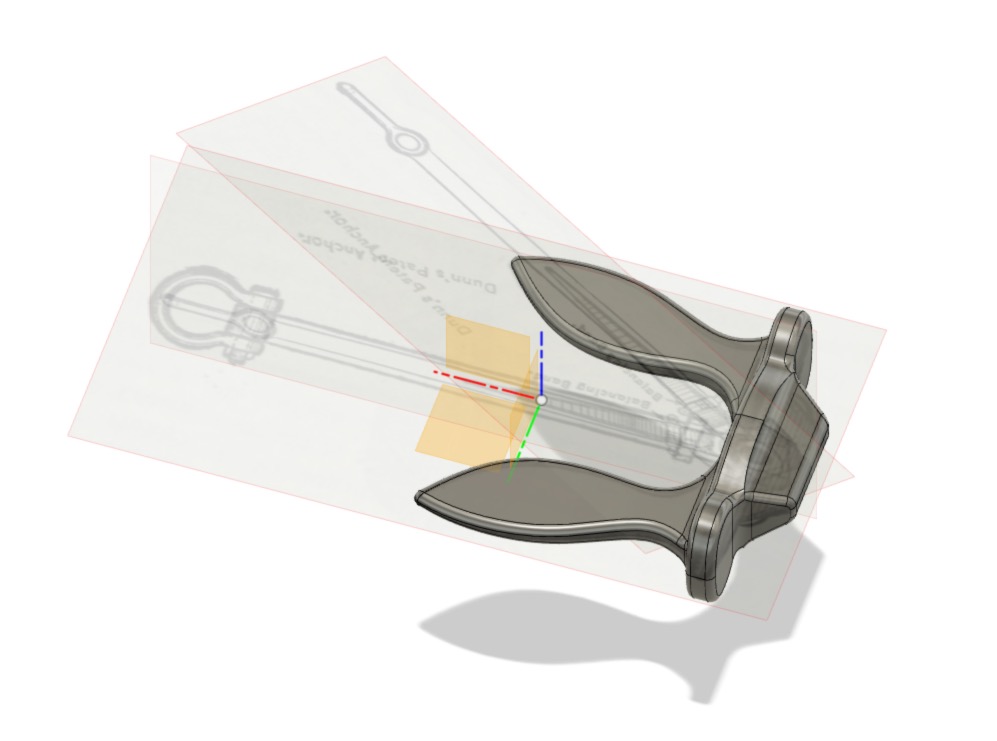
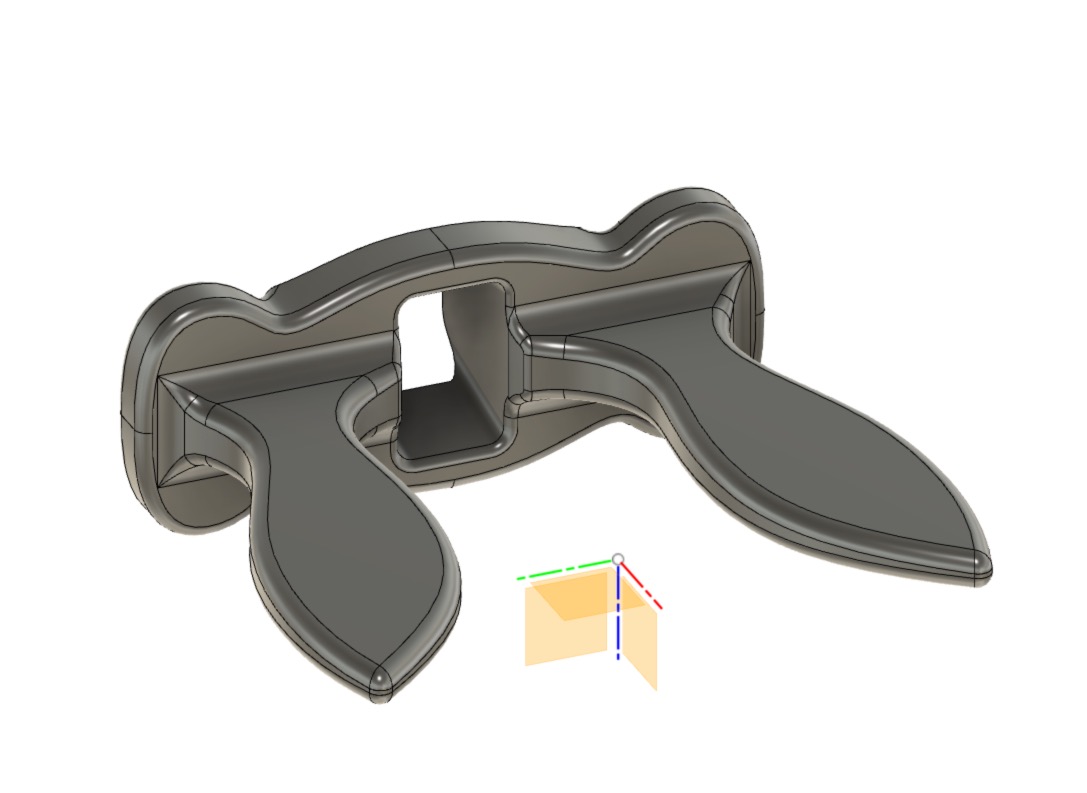
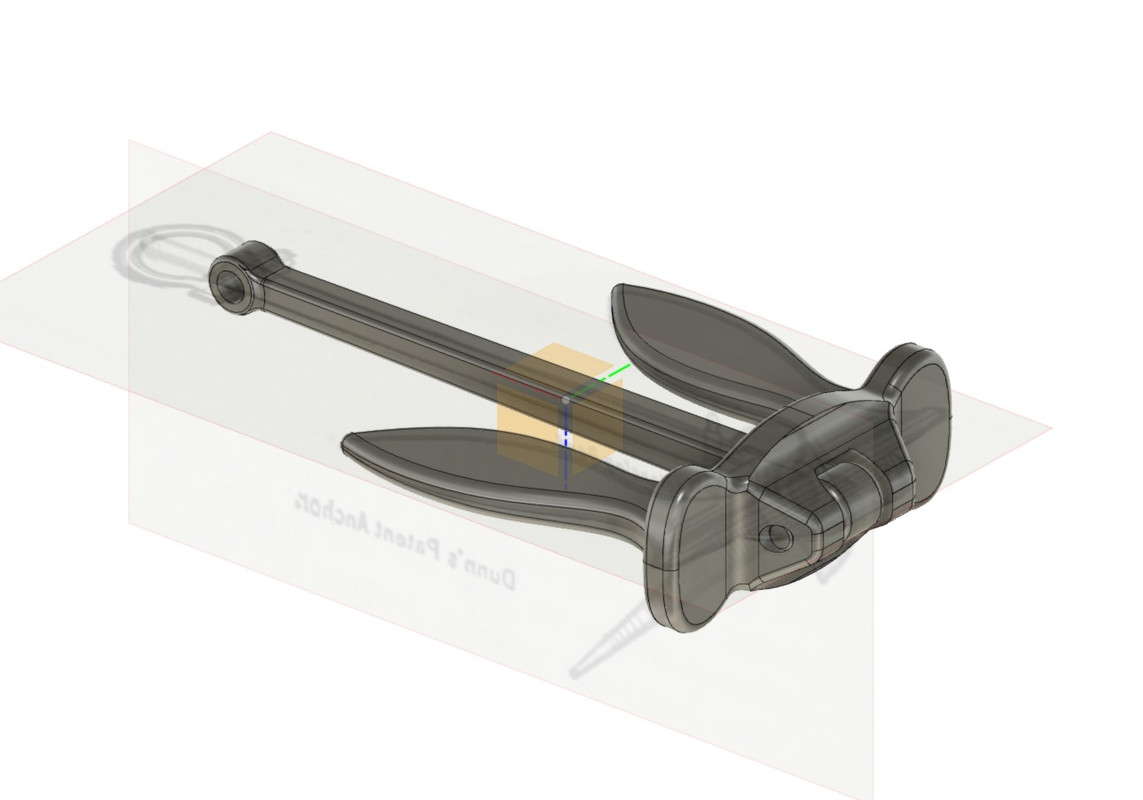
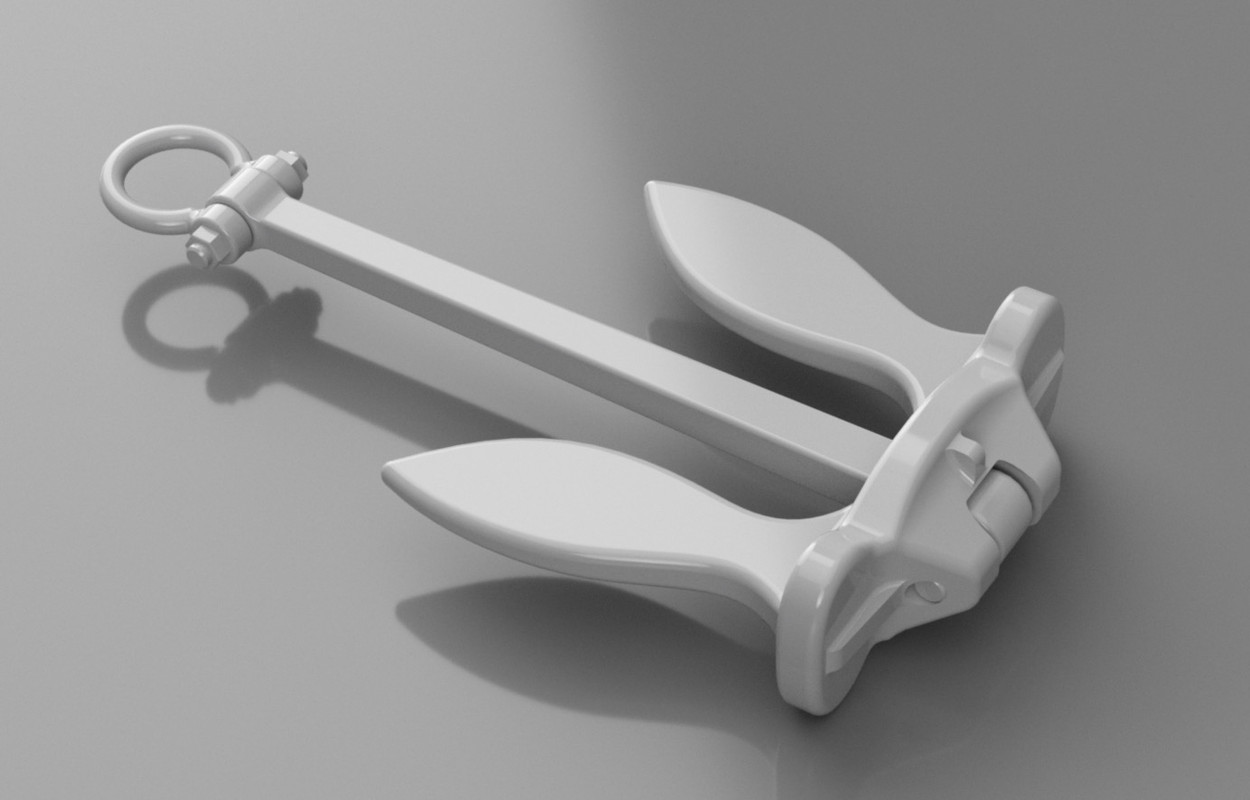
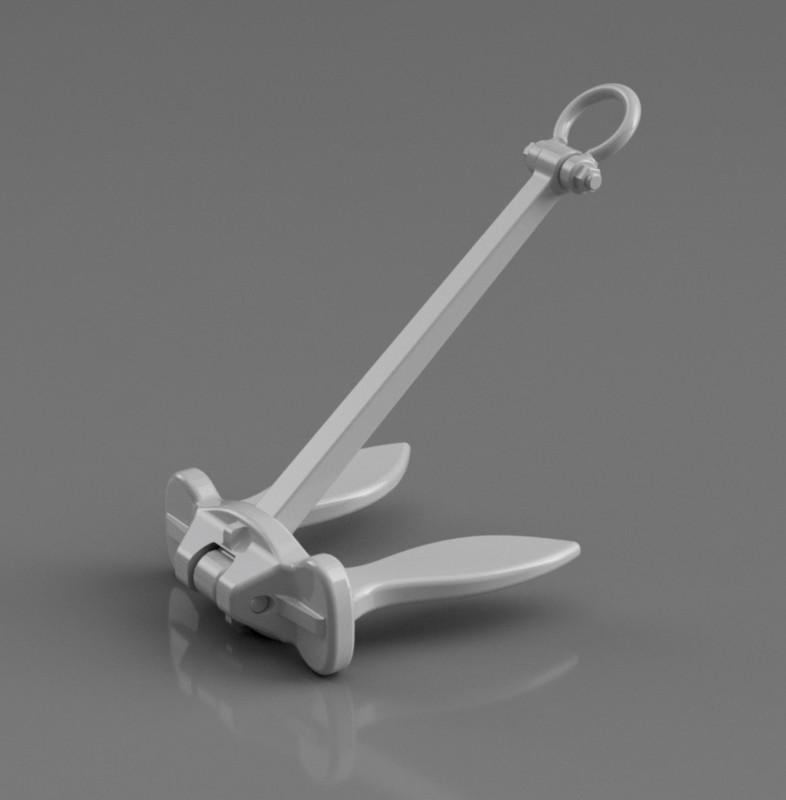
I found a 3D file free anchor here very well made and detailed that fits, bravo and thanks to the designer.
I scaled it to the required scale and angles for the penis and legs to fit the hull plating and hawser sleeve. They'll be printed apart from the hull, of course.
I still have the flanges to place on the hawse pipes and some details on the deck.
Installation of the hawser collar and sleeve.
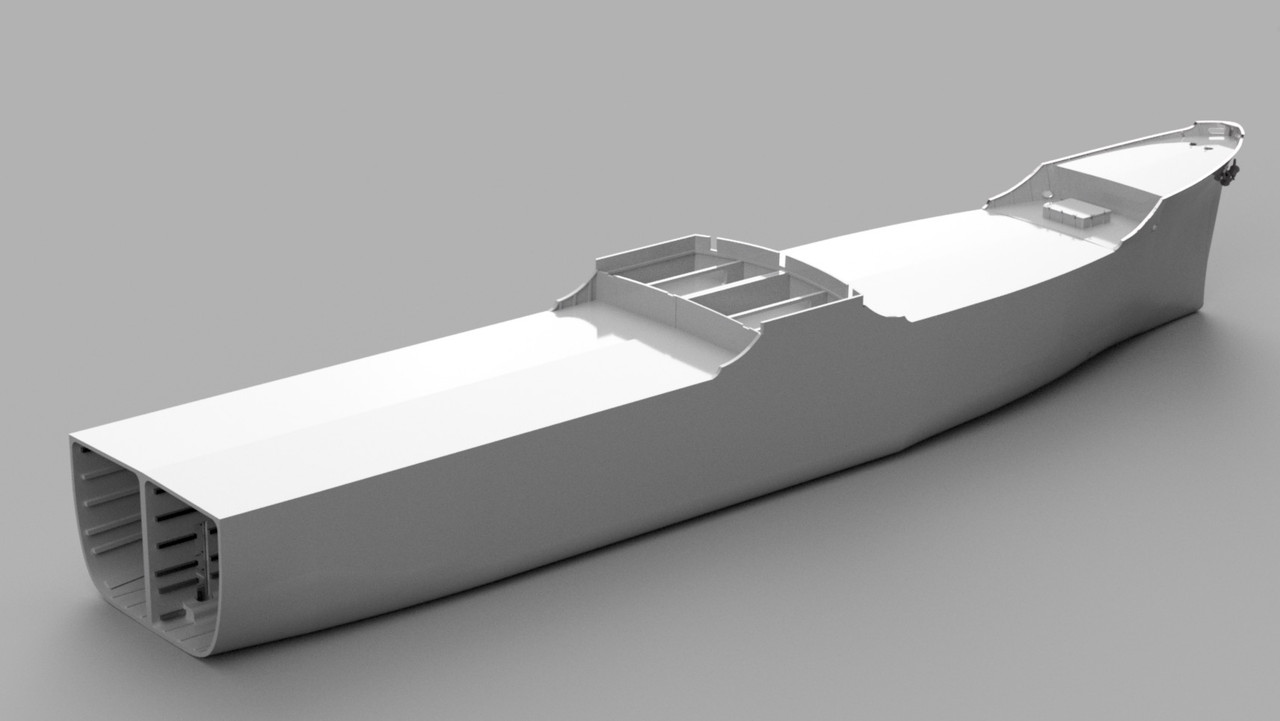
Emptying the compartments, finally I did it transversally, it's more judicious.
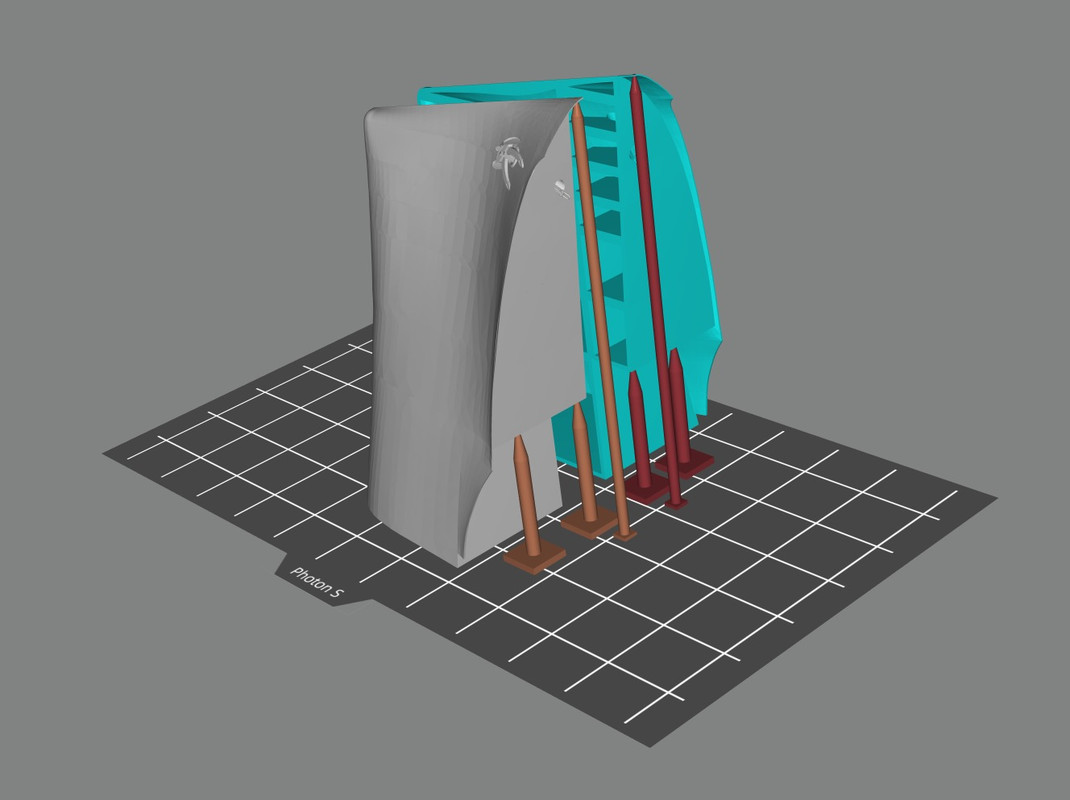
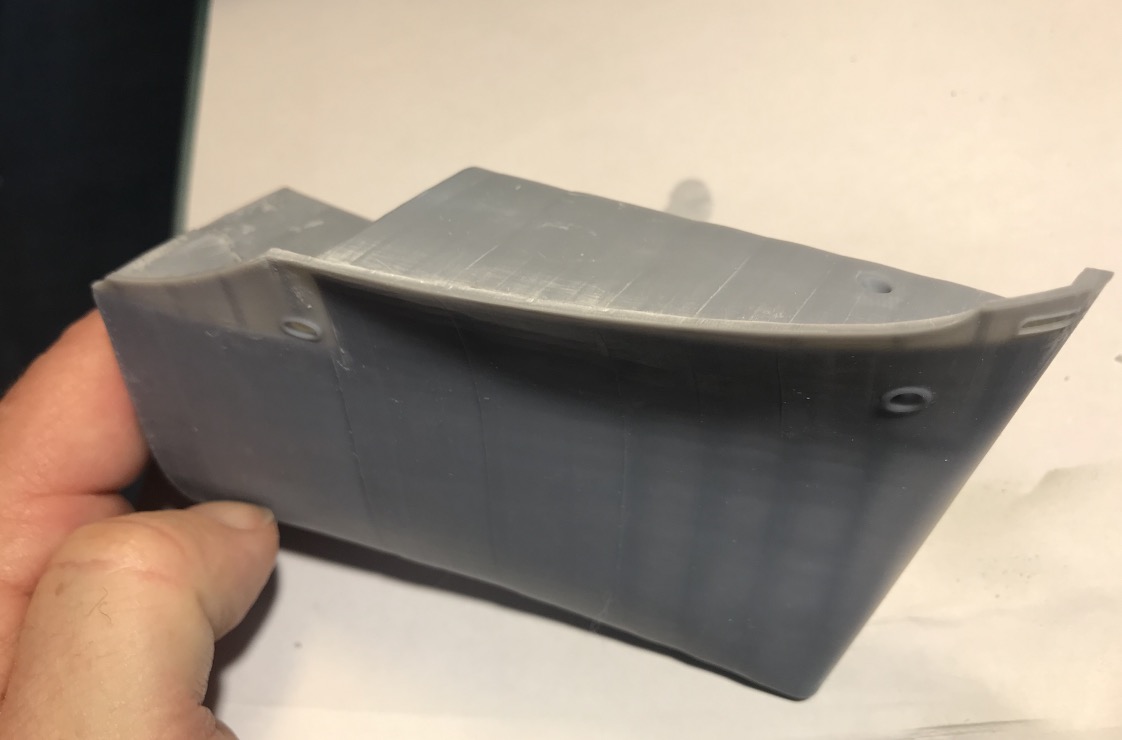
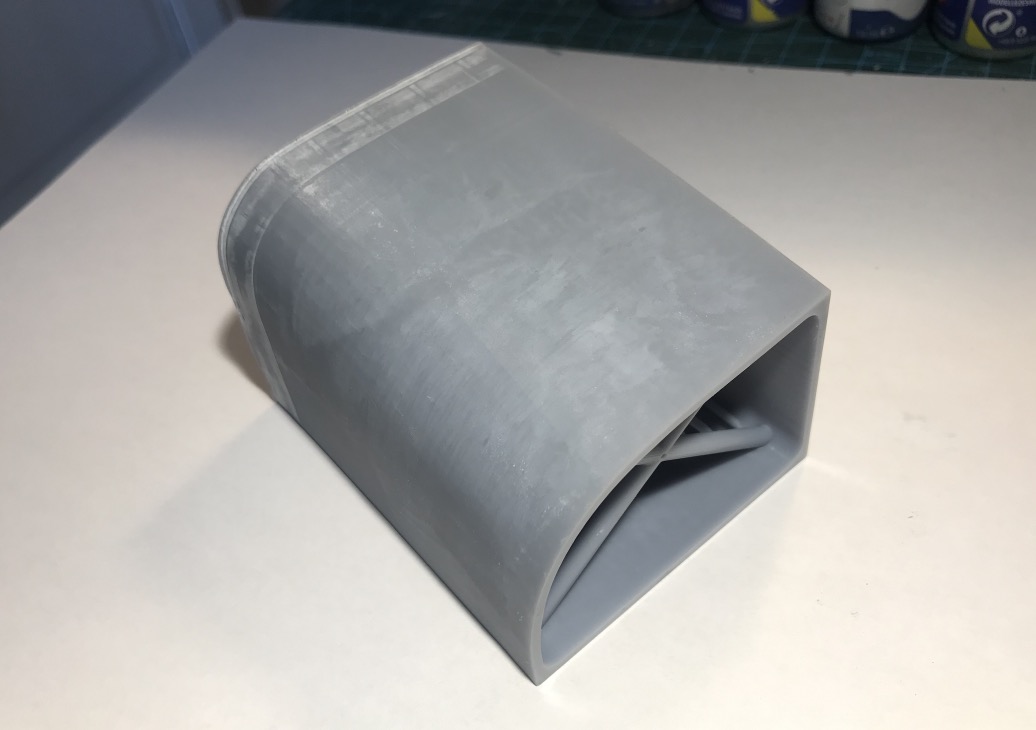
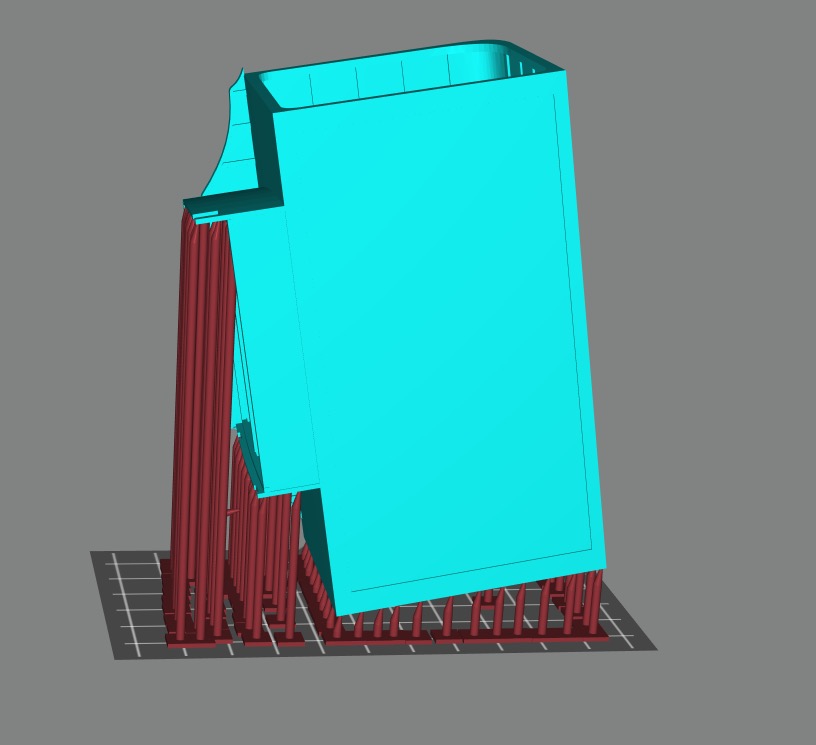
First impression of the two half hulls at 1/400 for a test, it's in progress, it takes 5 hours.
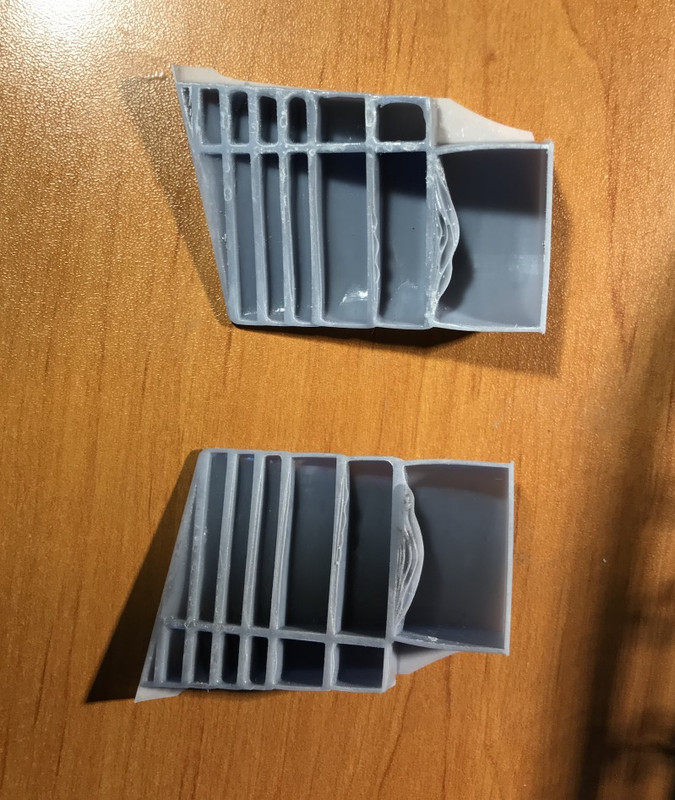
1/400 test, half the size I had planned. It's not perfect in terms of printing, but the result is encouraging.
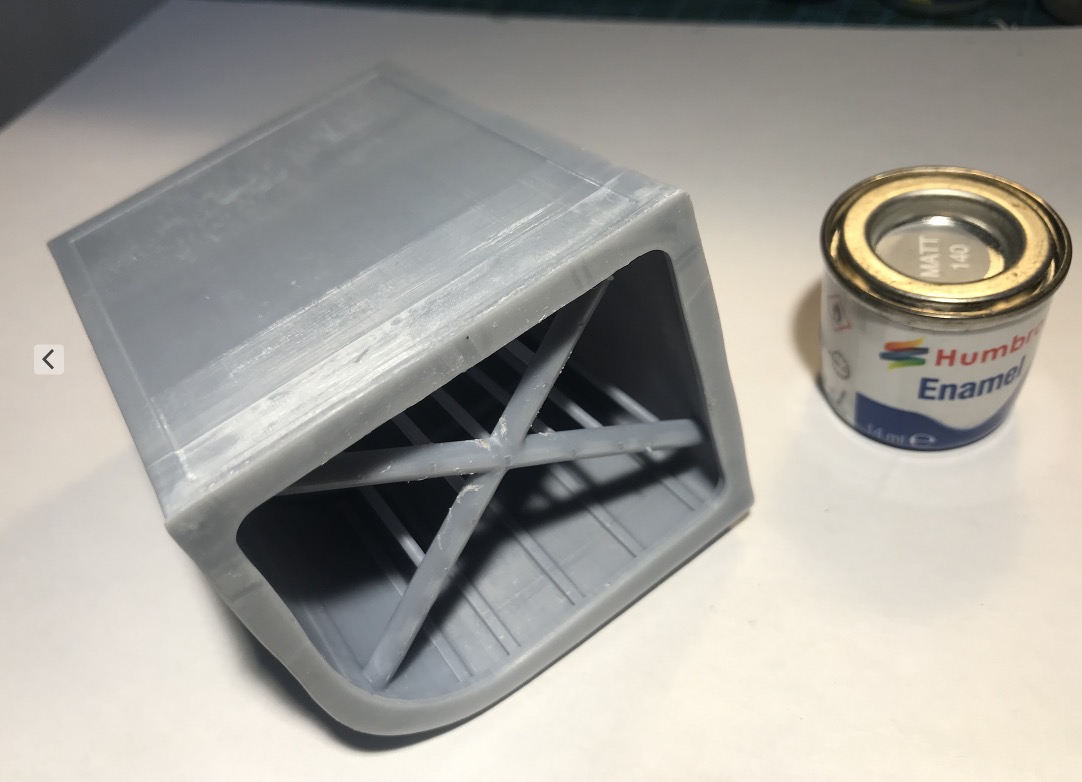
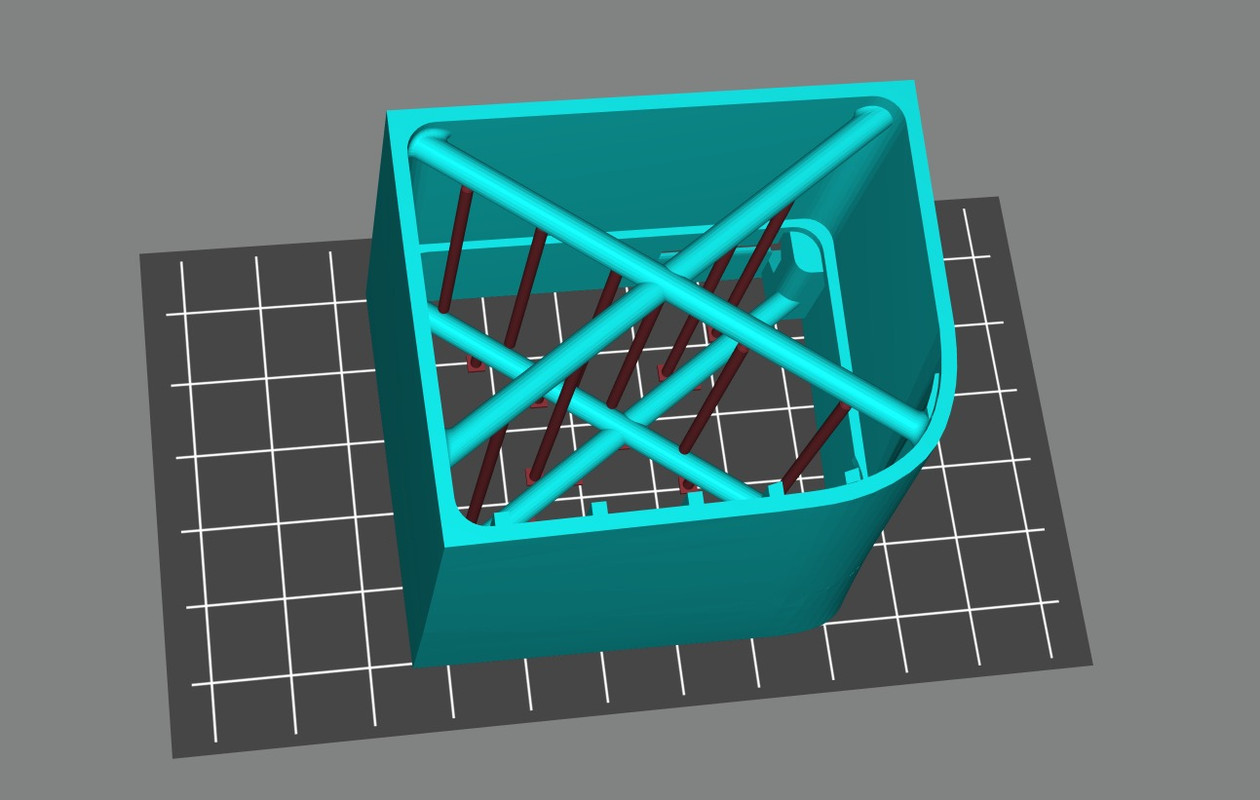
I have a lamination effect because I didn't put enough reinforcements, it also deformed the outer hull at the reinforcements level. It's at the takeoff from the bottom of the tank that it happens. So I have to reinforce all this or do something else...
As much as I'd like to keep a little deformation at the torques, it's more realistic, a steel ship's hull is not smooth.
I still have a bit of putty to put on the bow line.
The bulwark came out clean, at 1/400 it's a sheet of cigarette paper, I damaged it when I sanded the putty which allowed me to make up for the defects, it's glued again. It should be better at 1/200. because the thickness of the bulwark is designed for this scale.
I left the anchors for printing.
I put some rough filler and sand the hull, this bow is only a test.
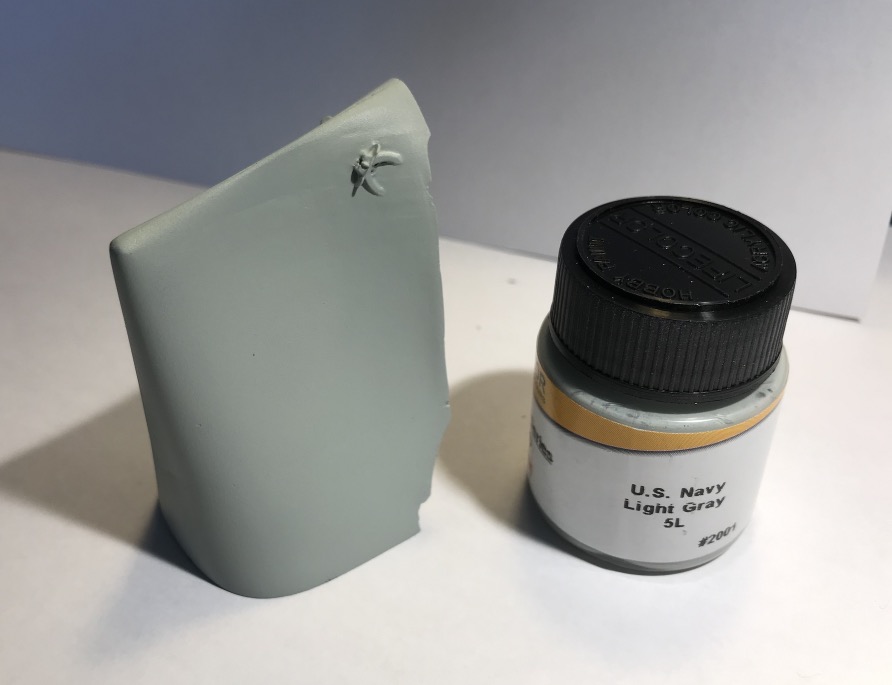
So I could also test the Lifecolor US Navy light gray 5L ( UA620 ) paint.
1/400 scale
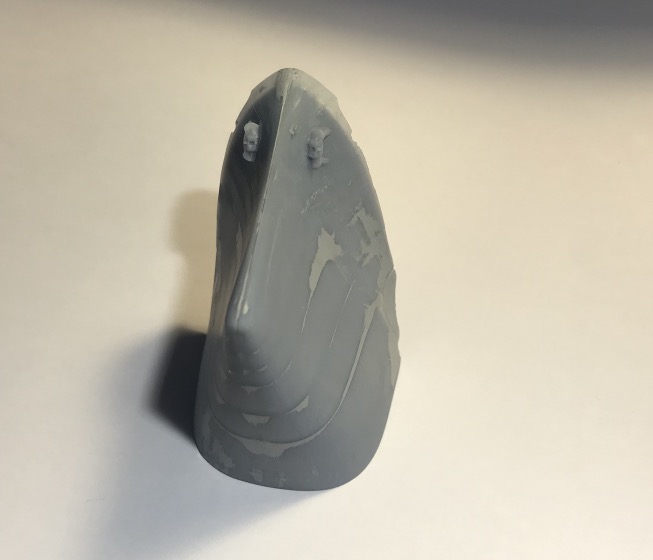
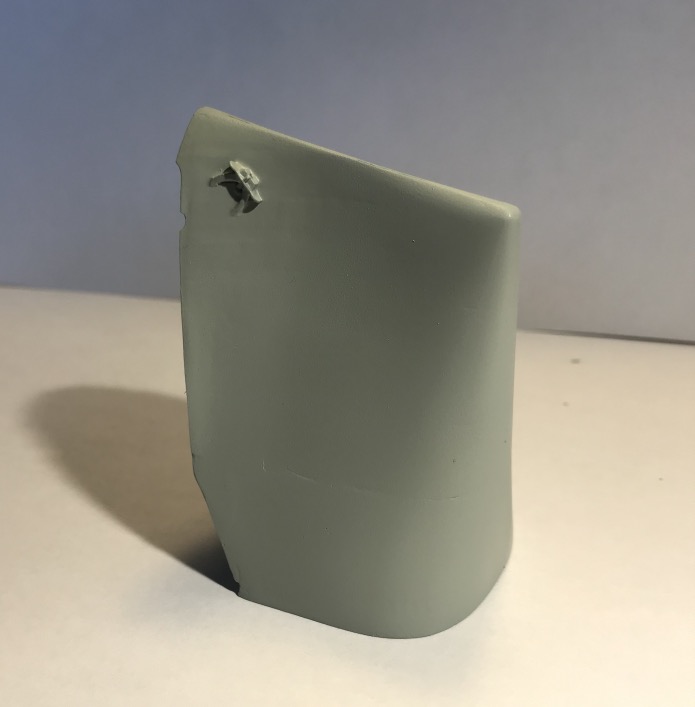
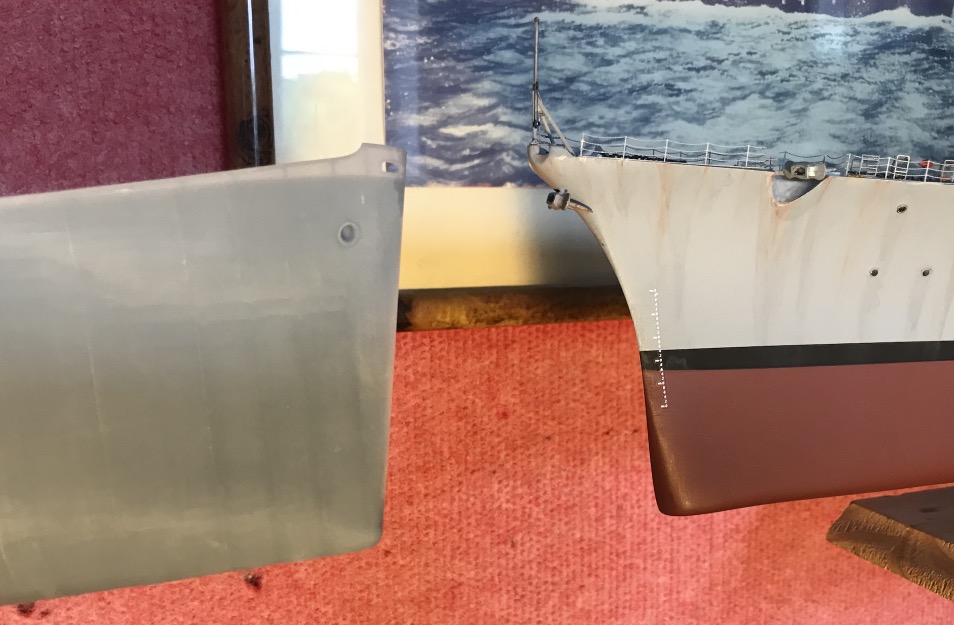
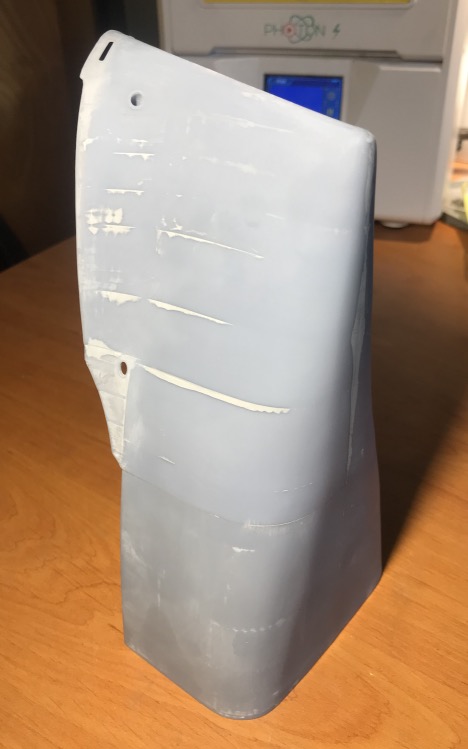
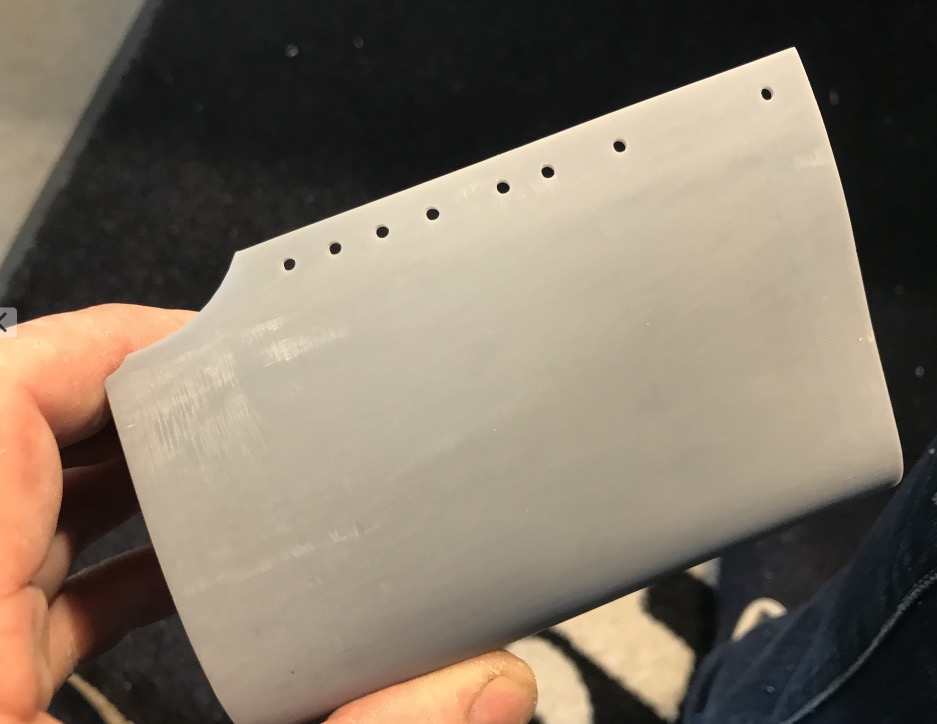
realization of the bow modified 1/200 :
Cleaned:
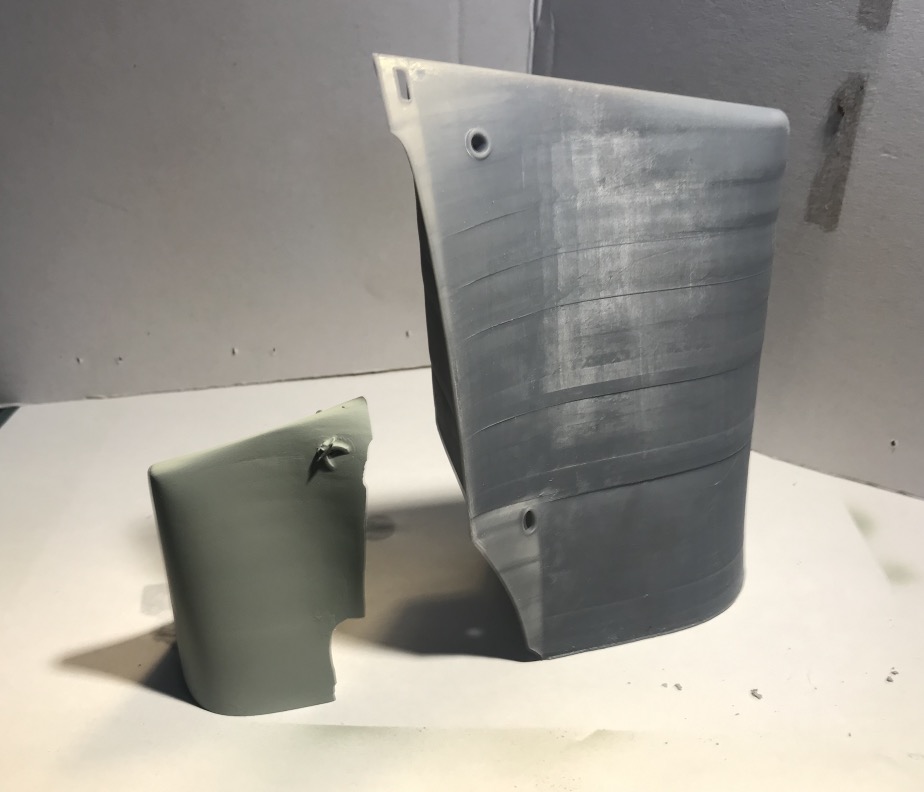
To compare to Bismarck, same scale:
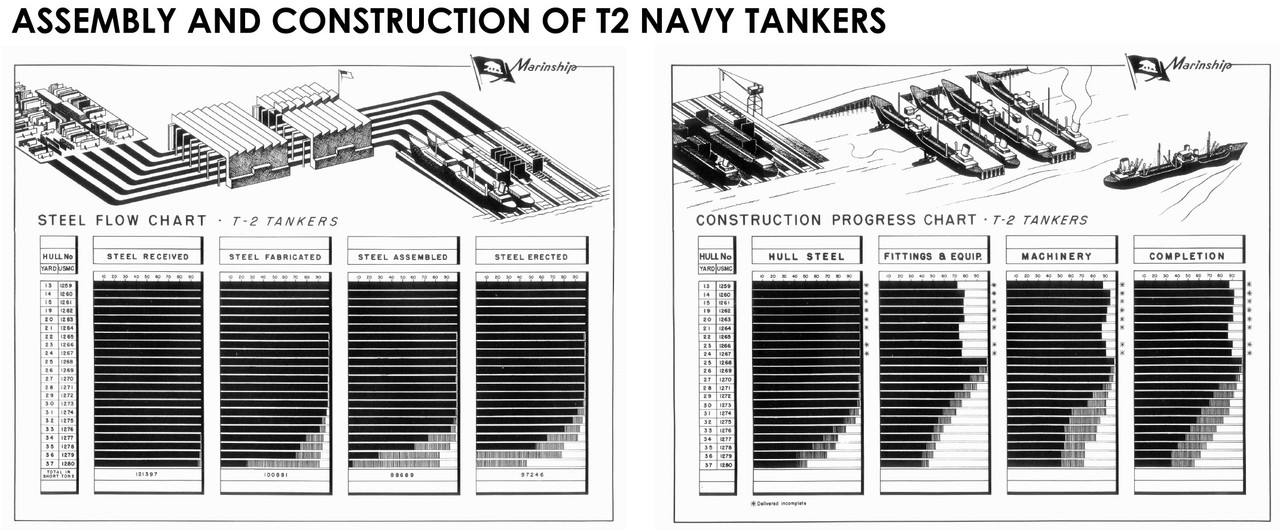
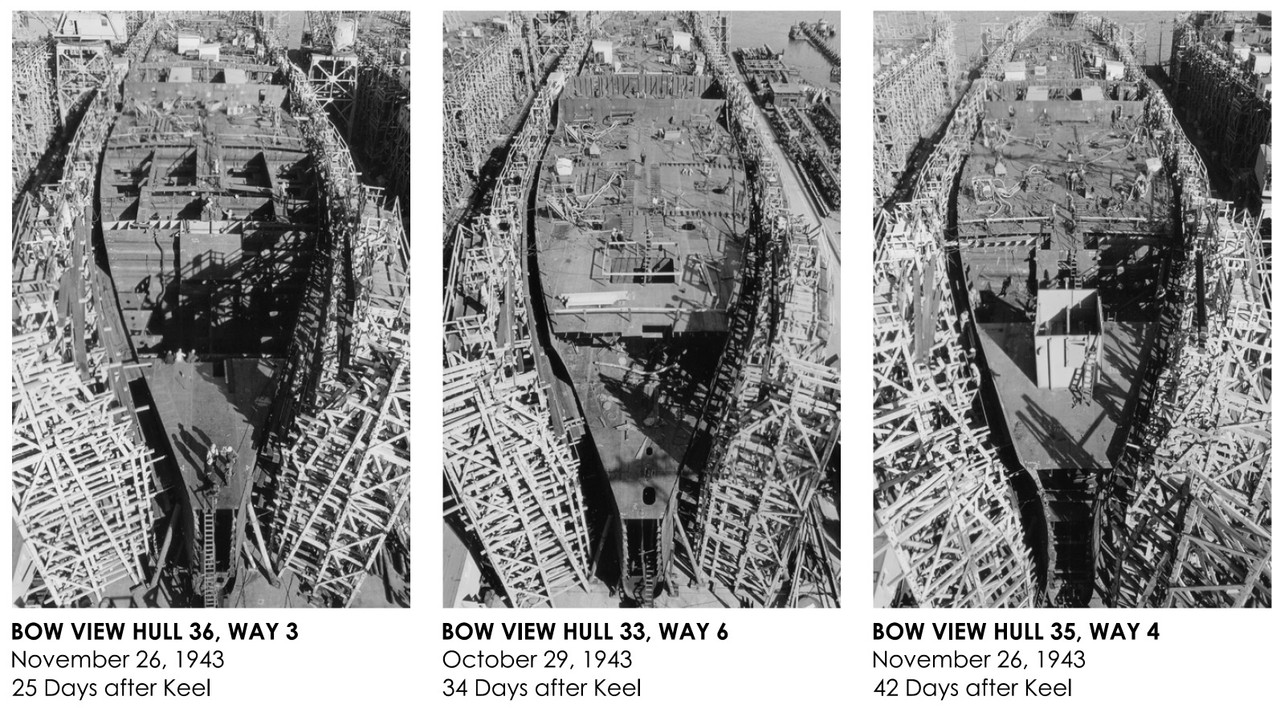
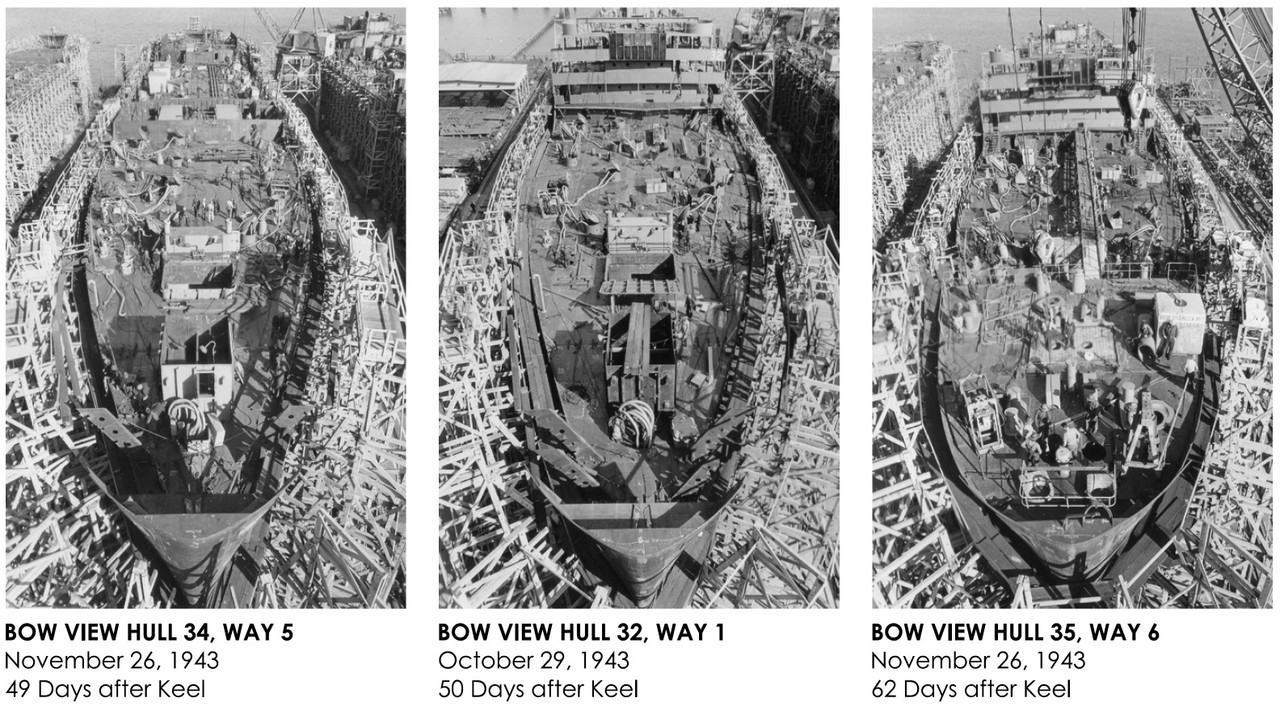
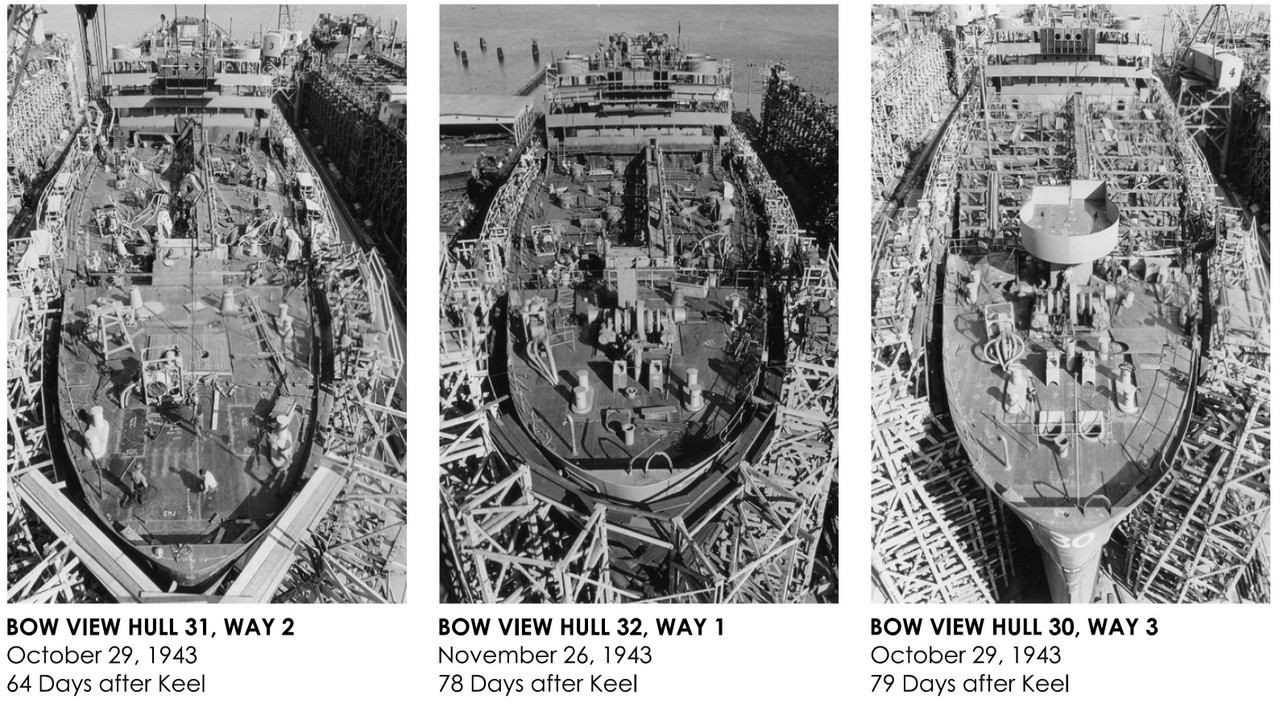
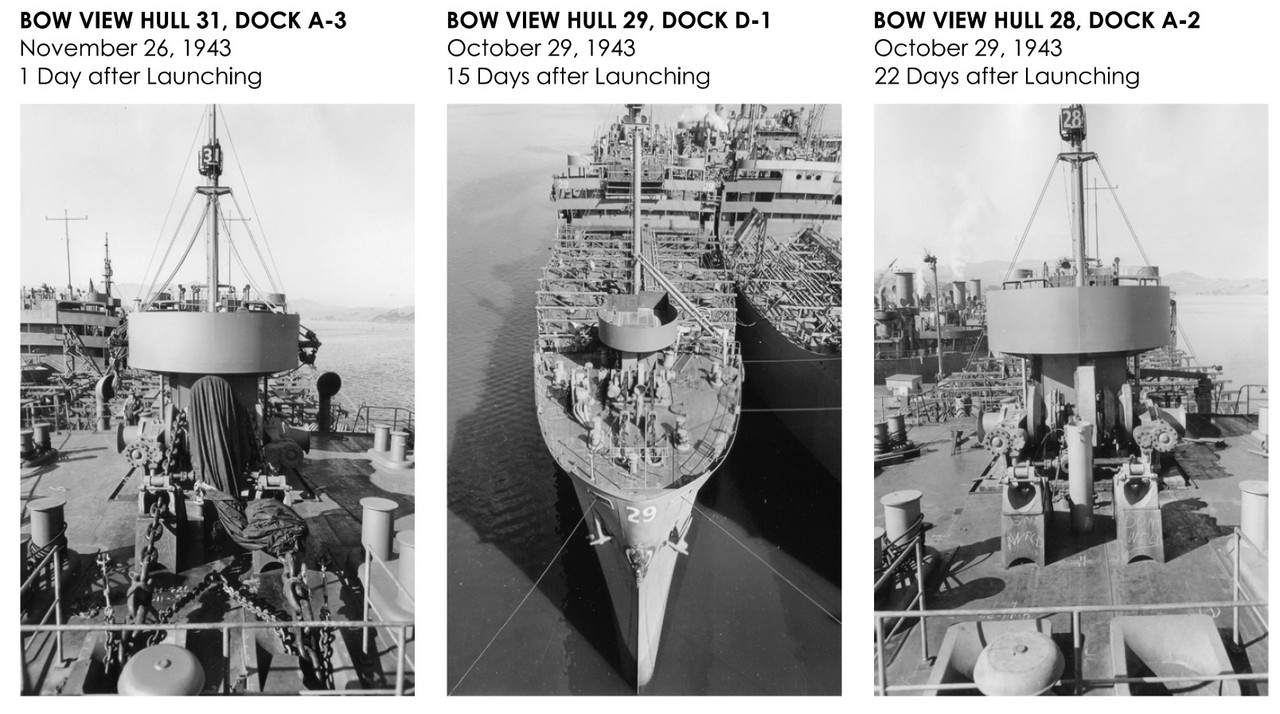
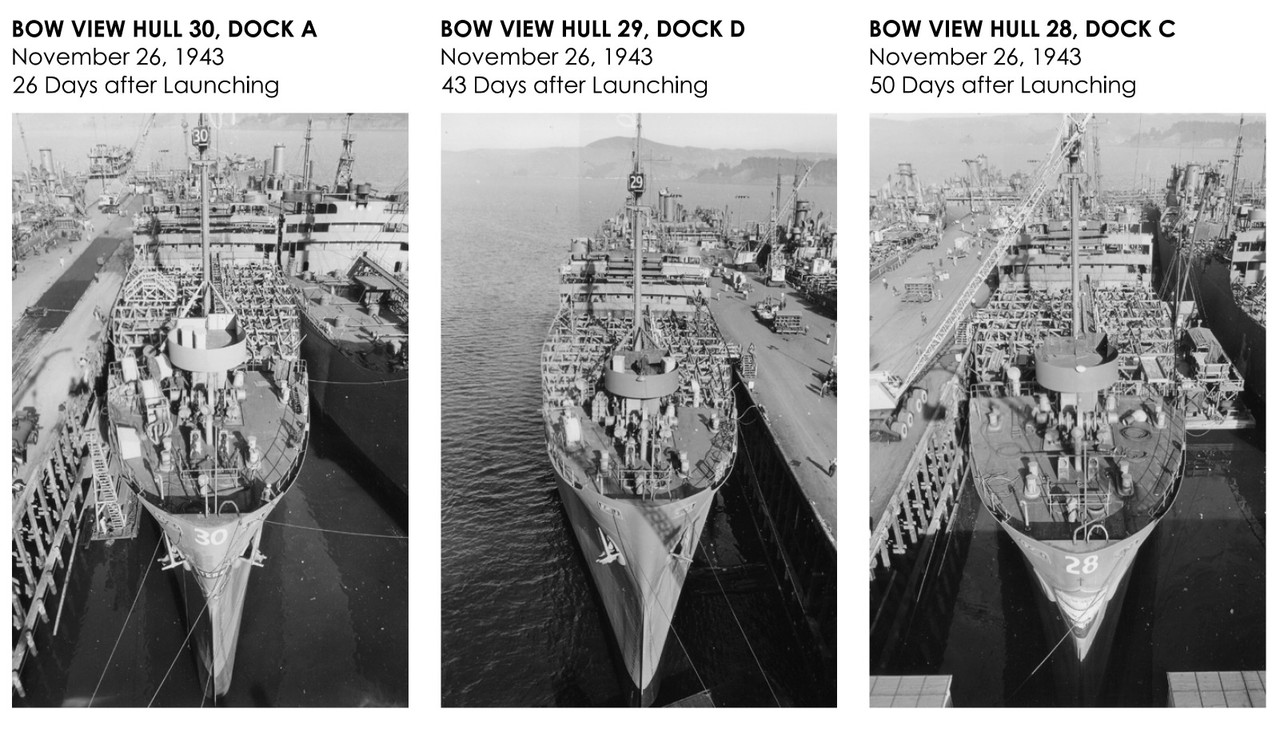
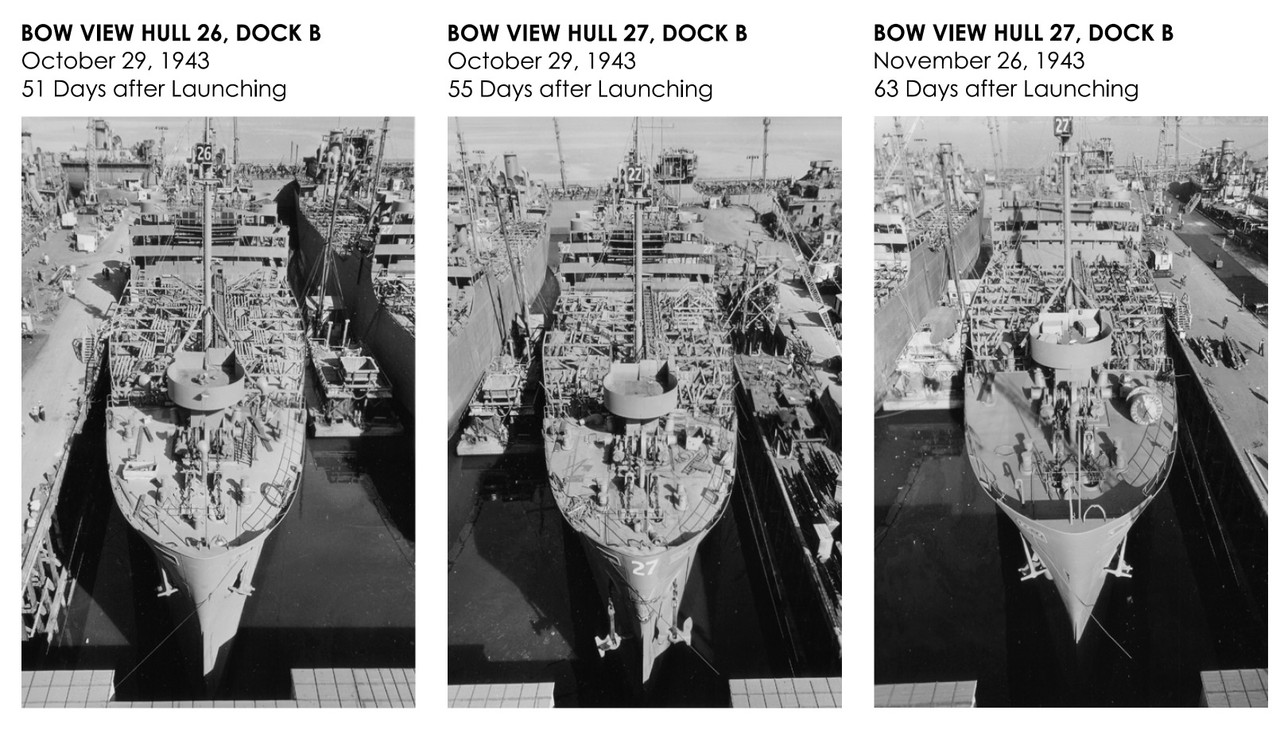
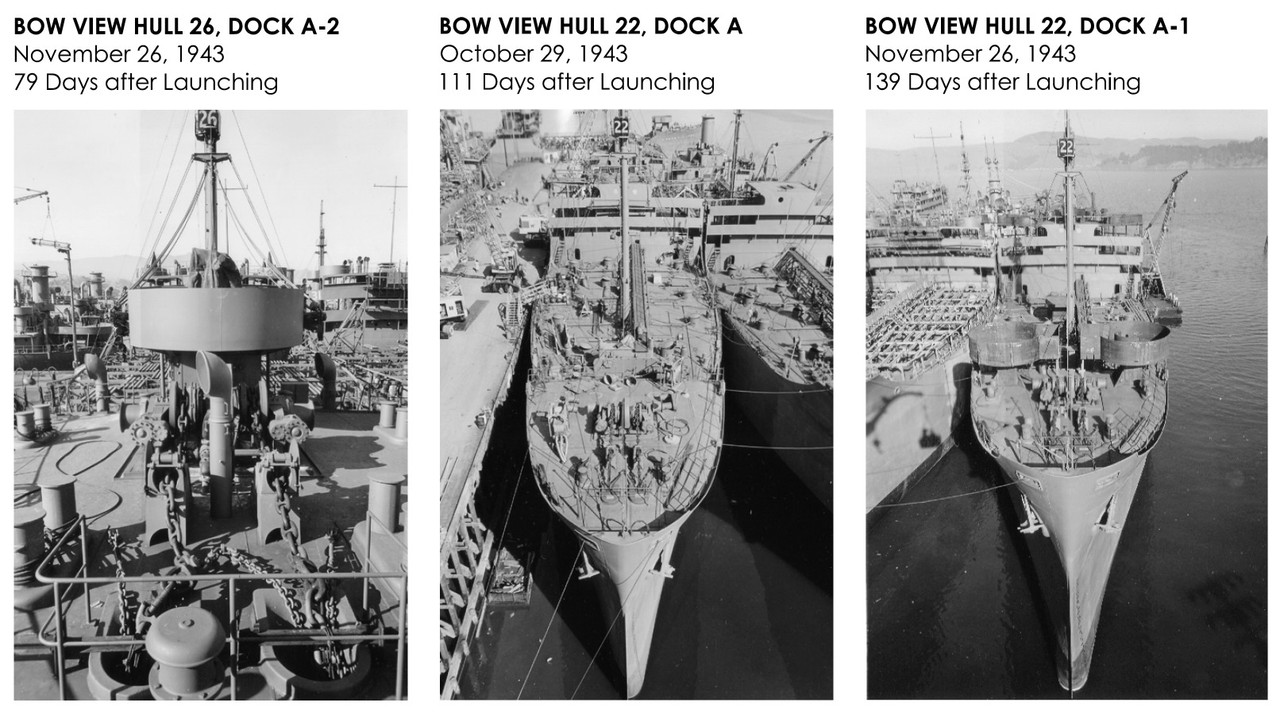
Manufacturing process of the tanker class T2 type "Mission":
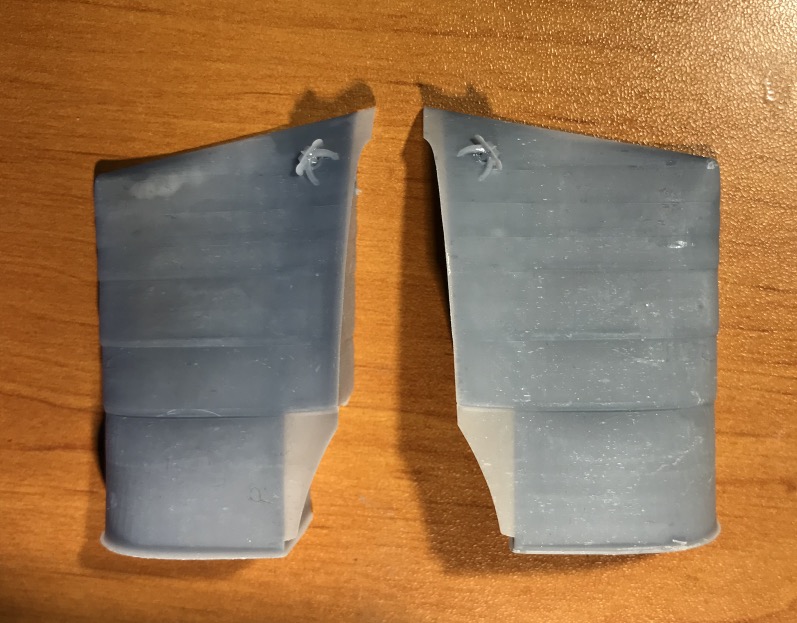
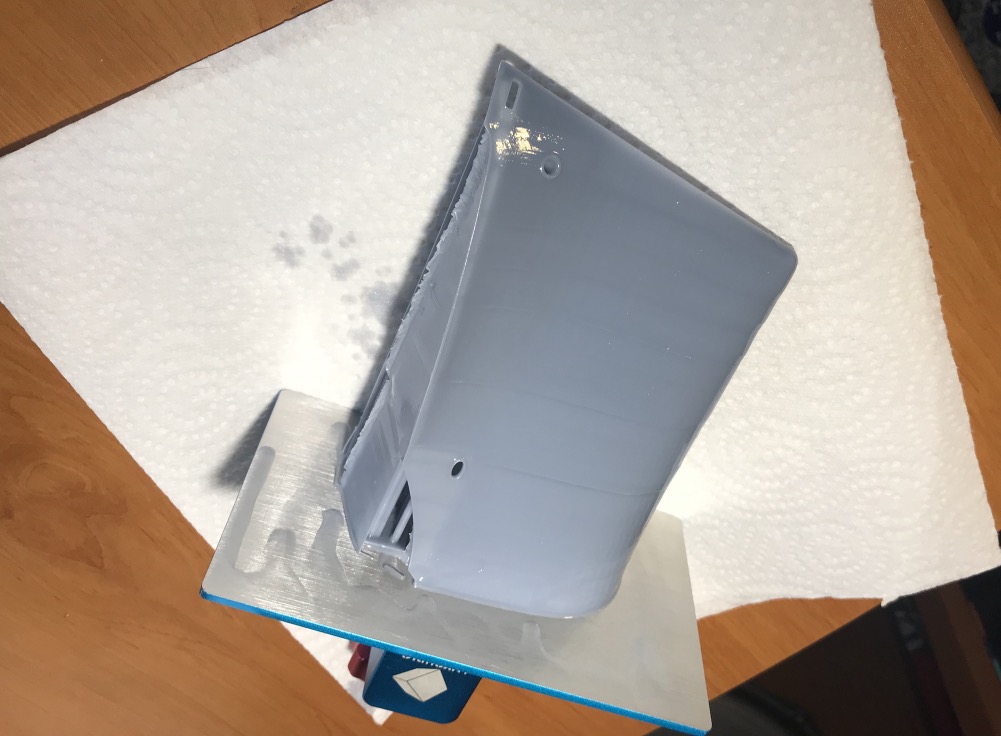
I released the second part, which I made lighter, it's much better and very robust.
The two half hulls of the bow were easily assembled.
The printing of the second portside section is in progress. We're coming up with some simple sections, it's going to get a bit complicated in the middle castle.
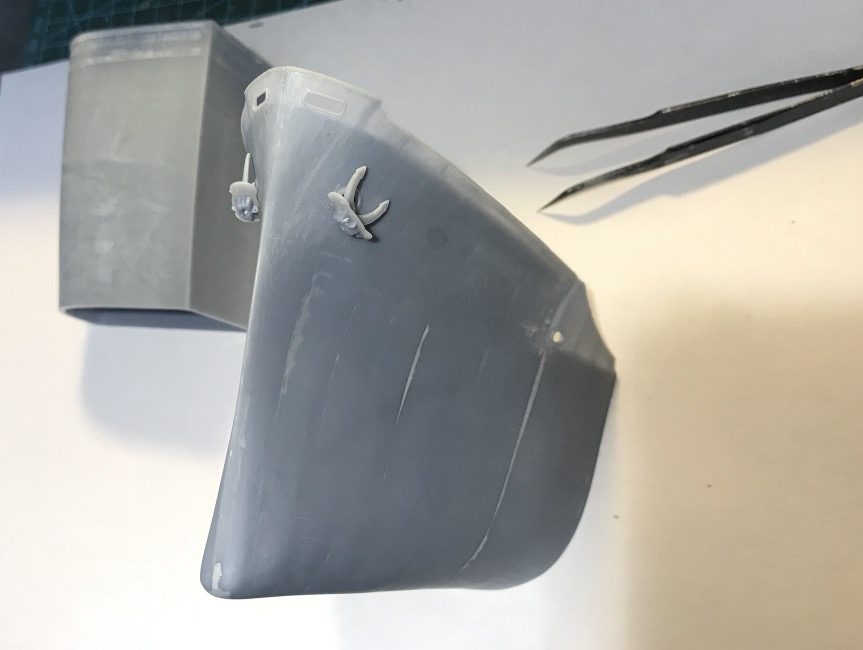
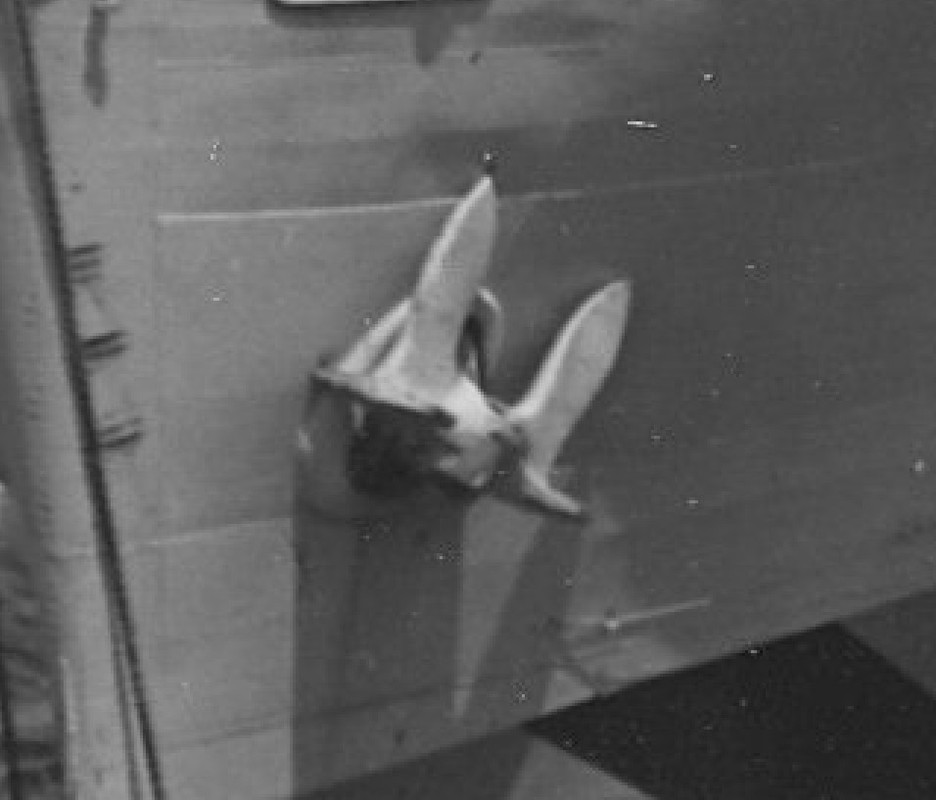
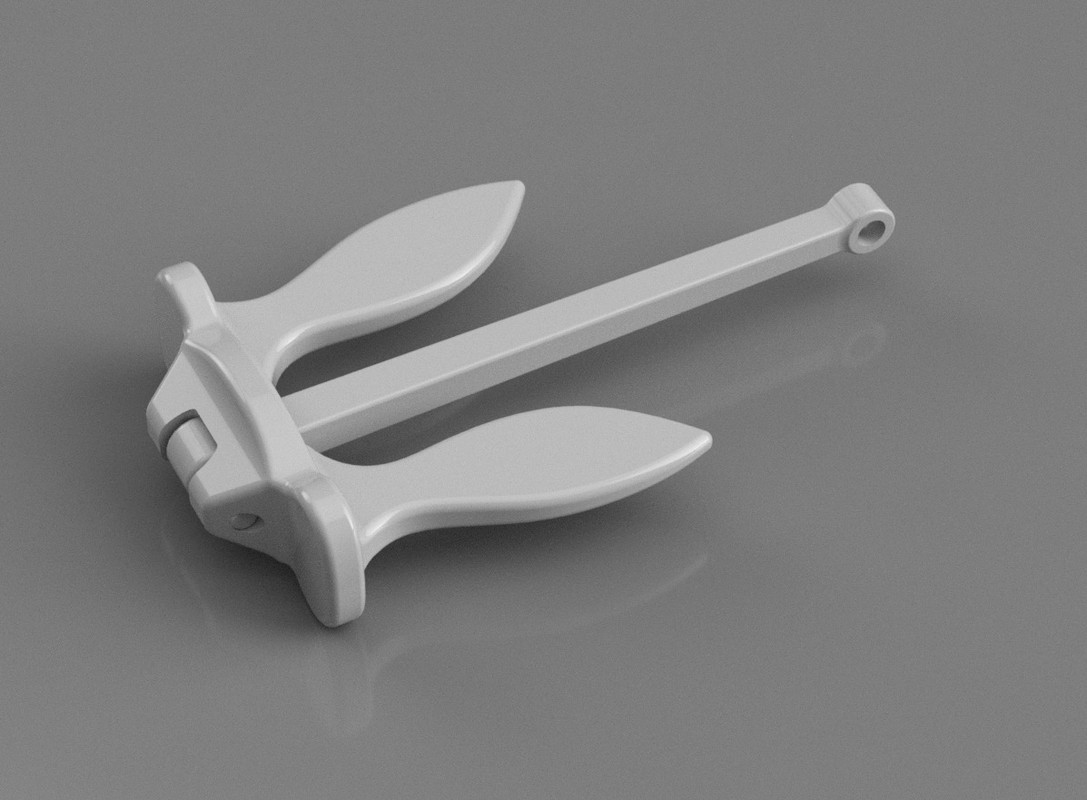
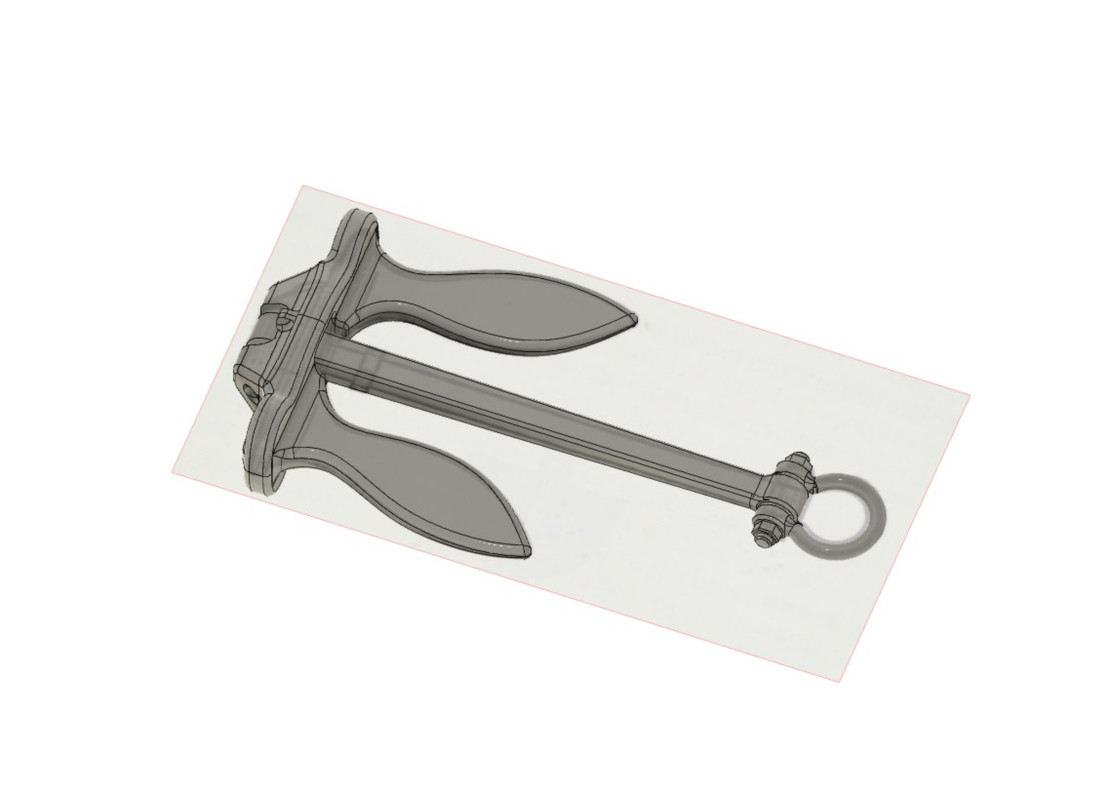
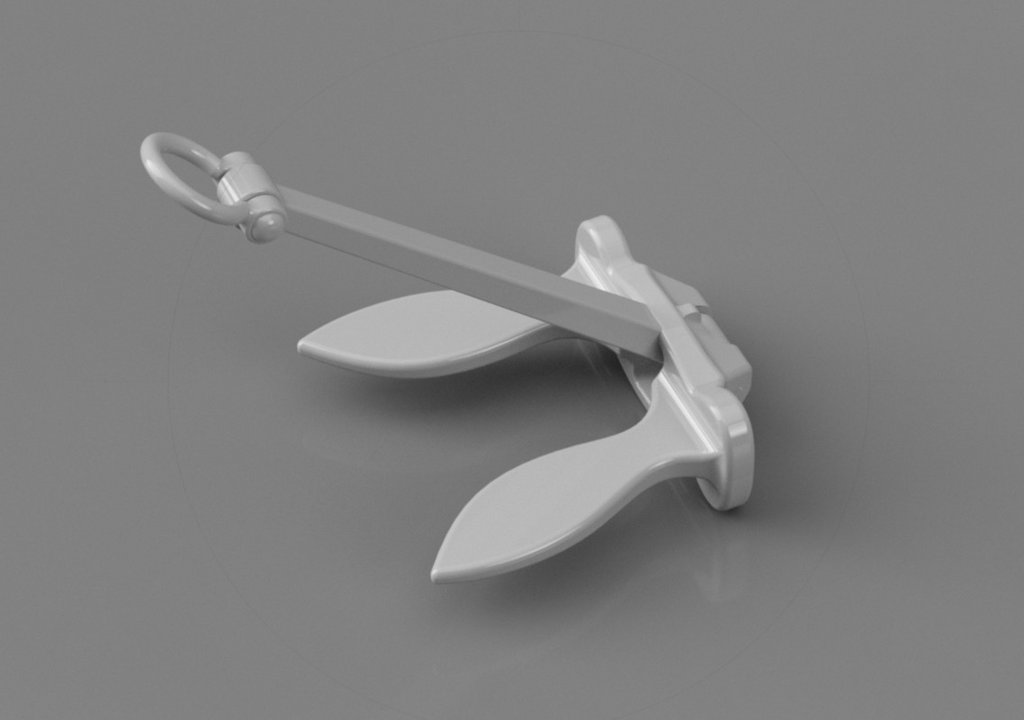
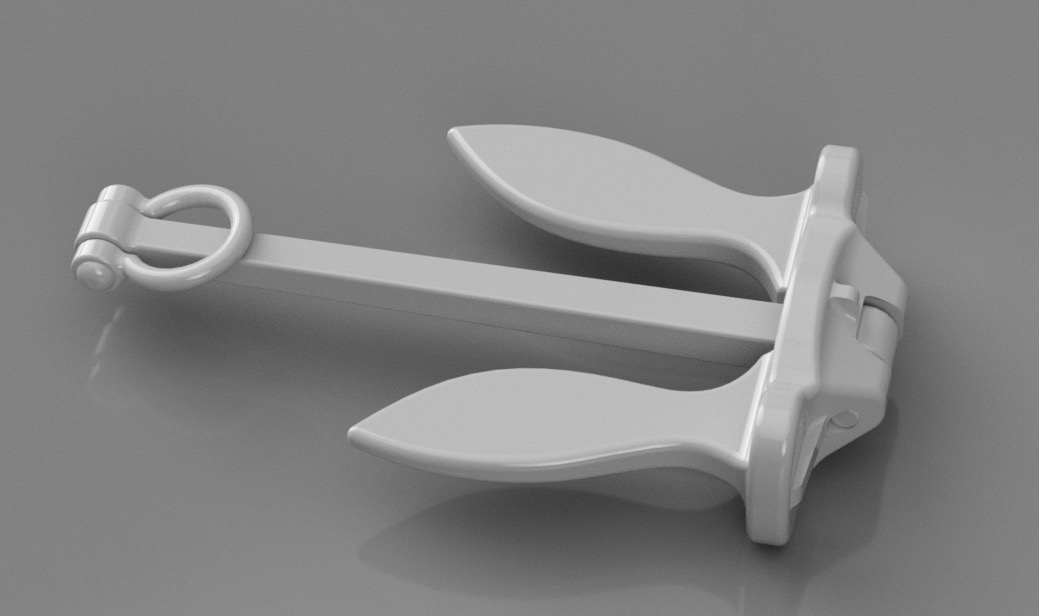
Both anchors are printed. That's not bad.
It fits perfectly.
The anchors are well reproduced. It's great because the shank is at the right angle, no need to tinker, it fits together perfectly.
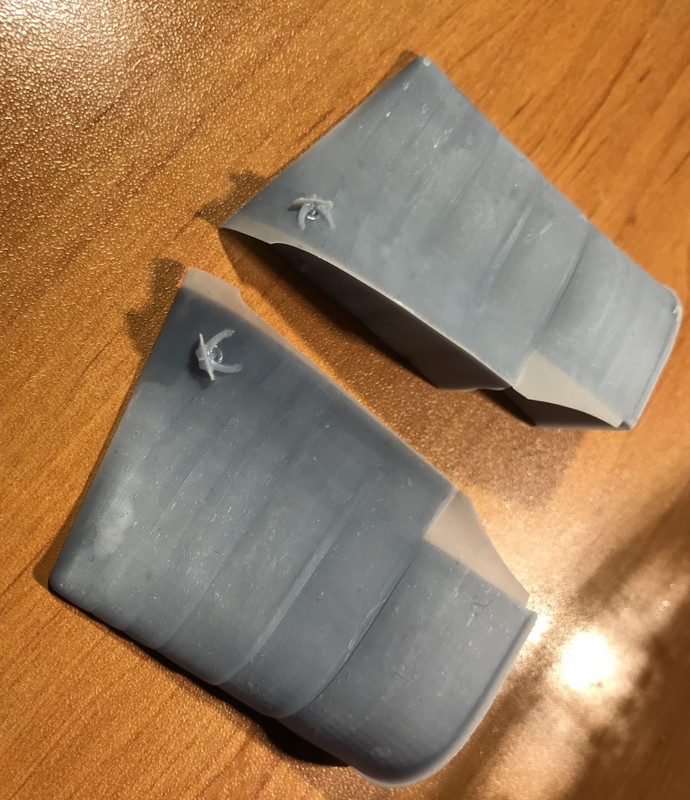
The impression of the port side half part No. 1 is finished, it's not bad.
We can see that the assembly of the hull sections is not going to be a problem.
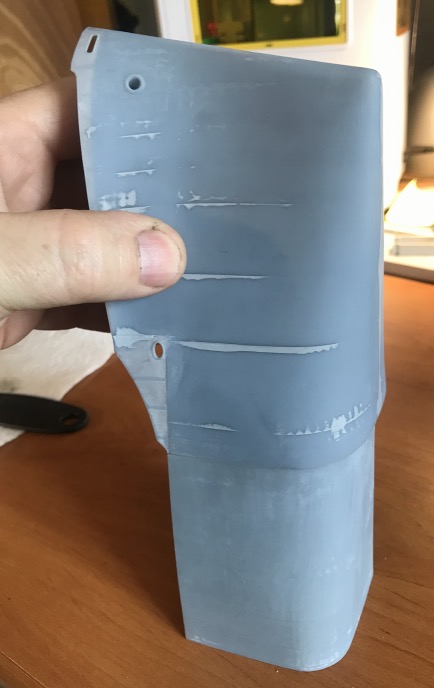
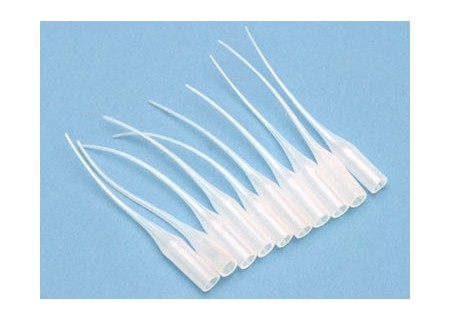
I proceed to the assembly with the glue cyano 21, the corners one by one, checking the alignment. I put the whole thing on a flat desk surface, very flat, the faces being perfectly flat, especially the one in contact with the printer plate. Then I put a little cyano all around with my cannula, it penetrates well. Then a good jet accelerates it, the cyano is used as a coating. We can sand immediately.
Nothing is stuck here yet.
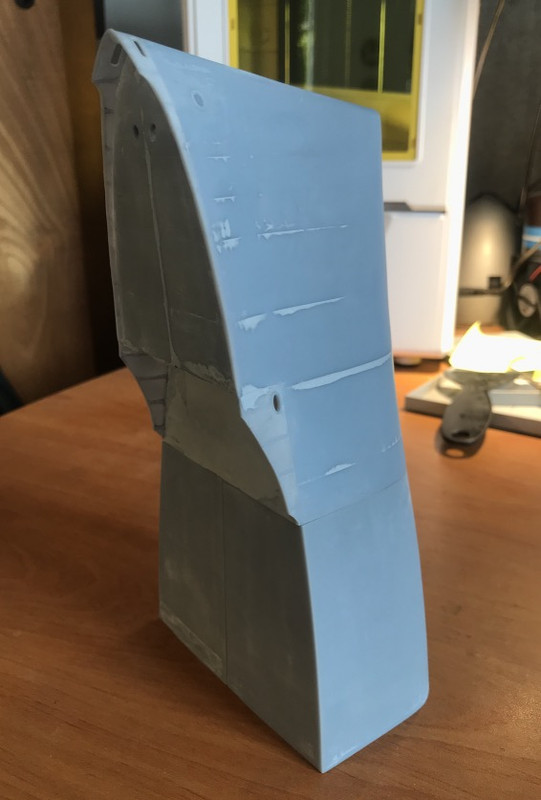
Here is the first section glued to the front part.
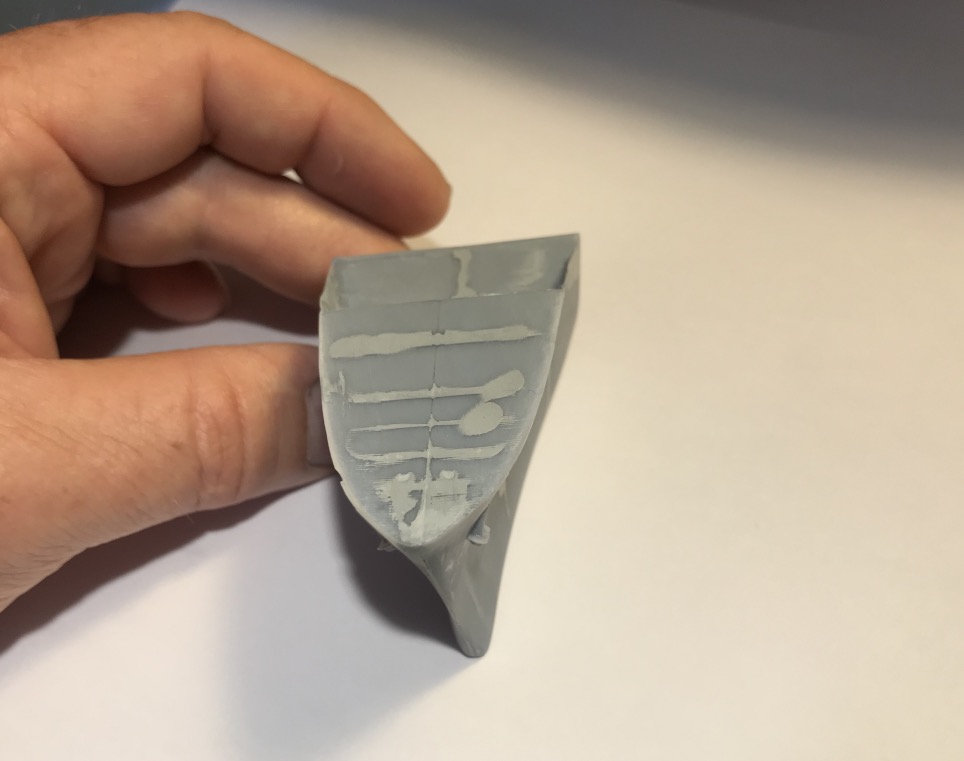
Sanding, repair of the deck of the bow section with putty and of the forecastle bulkhead with Evergreen 0.5mm plastic card.
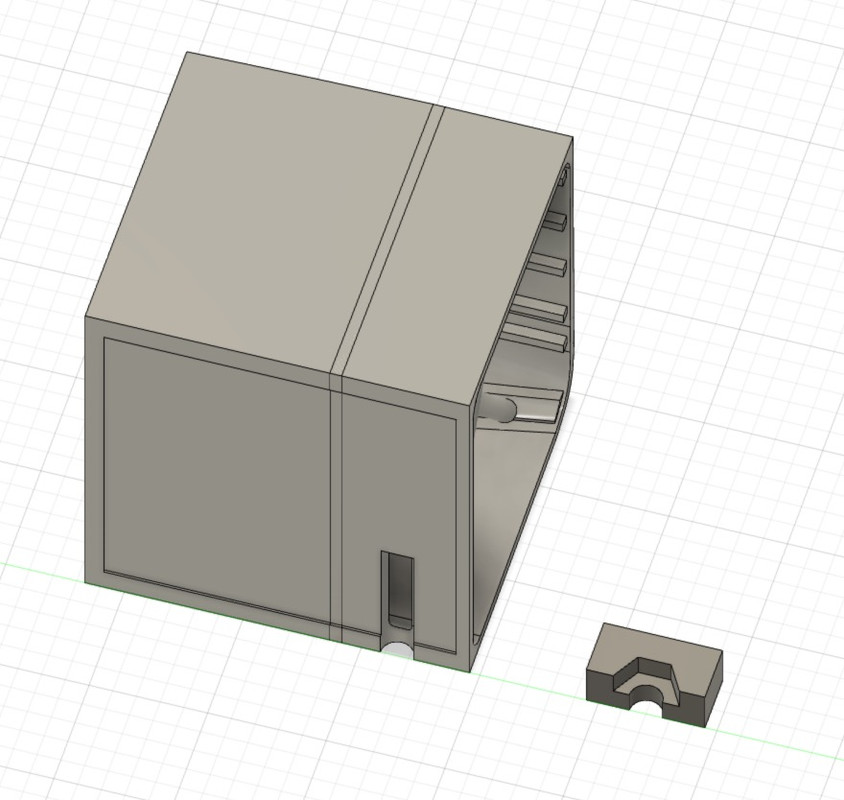
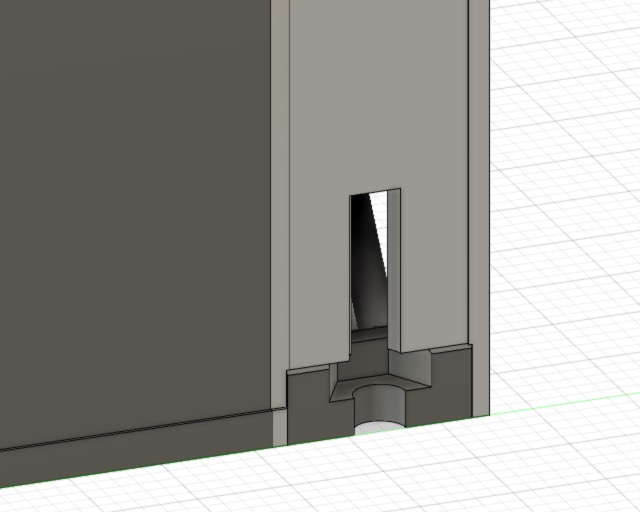
Creation of section n°2. I provided a housing to insert a 4mm nut to fix the ship to its support. Don't forget to put it in its housing before gluing the two half-hulls together...
Quite an ambitious project you've embarked upon - Kudos!!! I'm also interested in building either a T-2 or T-3 tanker, probably 1/144 scale, although I've toyed with 1:200 to match my USS NEW JERSEY (BB-62) model. However, I'm leaning towards 1/144 to match my current destroyer build.
Your adaptation of 3D printing is worth keeping an eye on. I do 2D CAD and use it for drawing up plans to scratchbuild necessary parts. 3D isn't in my plans anytime soon - however, I will be viewing this build as it progresses!
You've gotten a great start - with all the historical & photographic background to share with the members - good for viewing & learning!!
Good Luck!
Hank
_________________ HMS III Mocksville, NC BB62 vet 68-69
Builder's yard: USS STODDARD (DD-566) 66-68 1:144, Various Lg Scale FC Directors Finished: USS NEW JERSEY (BB-62) 67-69 1:200 USN Sloop/Ship PEACOCK (1813) 1:48 ROYAL CAROLINE (1748) 1:47 AVS (1768) 1:48
Thanks Hank, I looked up your topic on your "New Jersey", very nice work.
I just finished my Bismarck Trumpeter at 1/200 after a year and a half of work, so I know how much work it takes. But that's another subject I'll open another time.
I started this T2 at the beginning of July, it is well advanced now. 3D and 3D printing are amazing, there is no limit, if you have a paper plan ou numeric, you can made the model you want.
I didn't have this drawing. It's very important to me because it's what I was looking for without finding it. Thank you very much!
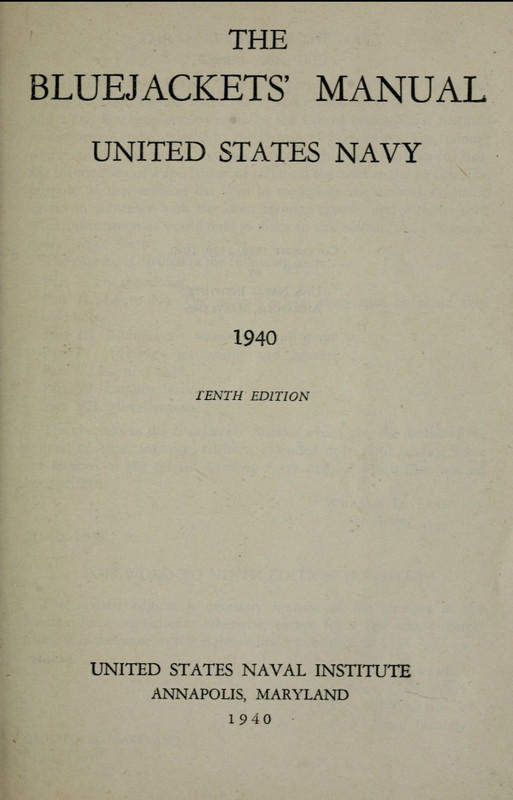
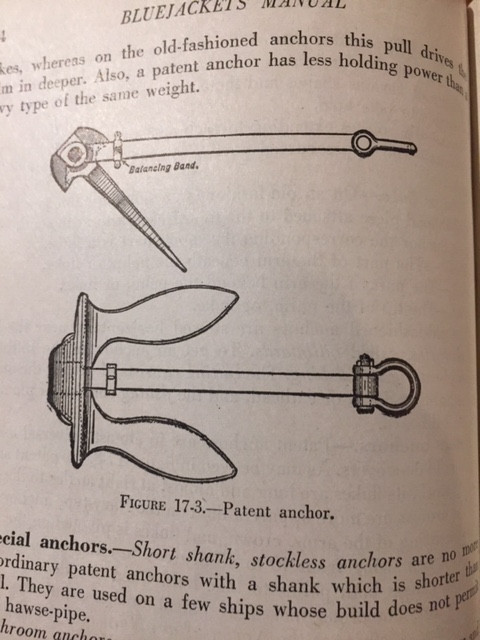
I just did some research on Blue jacket manuals, I found one online from 1940, page 443 on this edition, I found this drawing but the scan is flat, so I could use it as a canvas to make an original 3D anchor and print them.
Thank you David, I had seen that for the funnel, I'm not there yet for the moment fortunately. On the plan it is the funnel of an A1.
Indeed the roller type fairleads is not positioned exactly at the same place. and there is a horizontal little mast added in the bow, probably for the paravanes cables system.
For the anchor position ( Hawse pipe), it's also a bit different.
But it's too late, as I started with the Santa Ynez design and decided one month later to change the model (AO-85), I didn't have the courage to start again, the work was really too advanced. I have almost finished painting the hull, and the foredeck is finished up to the bridge.. You'll be able to see it in a few days.
There is indeed this differences between the two classes (Mission and Escambia), yet built in the same yard, Marinship Corporation, Sausalito, California.
_______________________
It's growing, I'm at a third of the length of the ship, just water regularly with resin and isopropanol alcohol ...
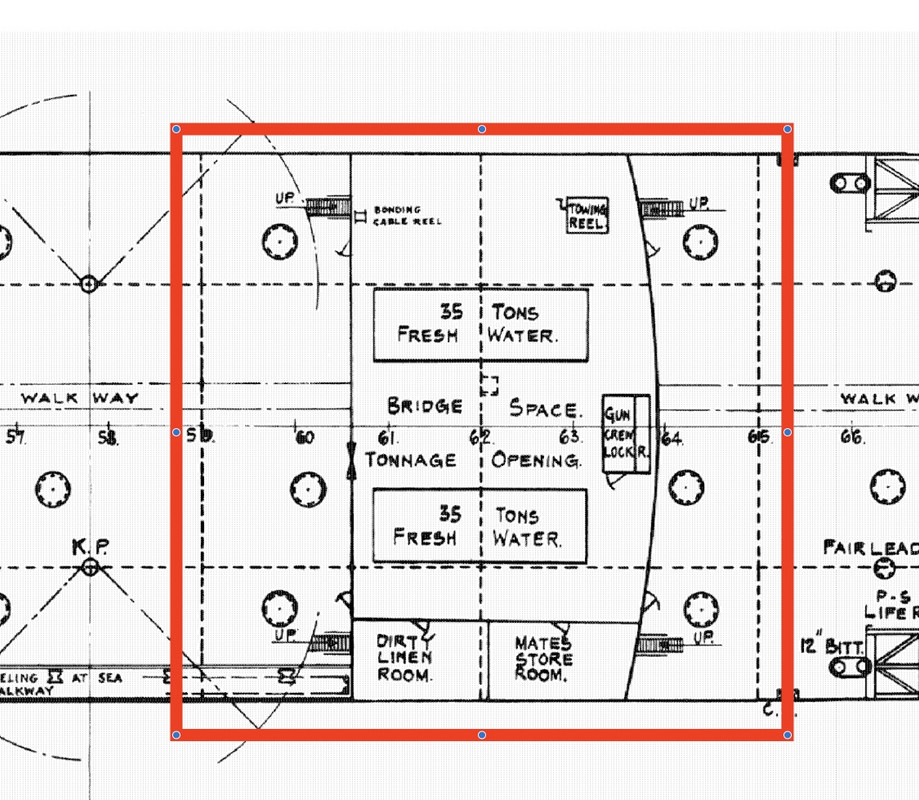
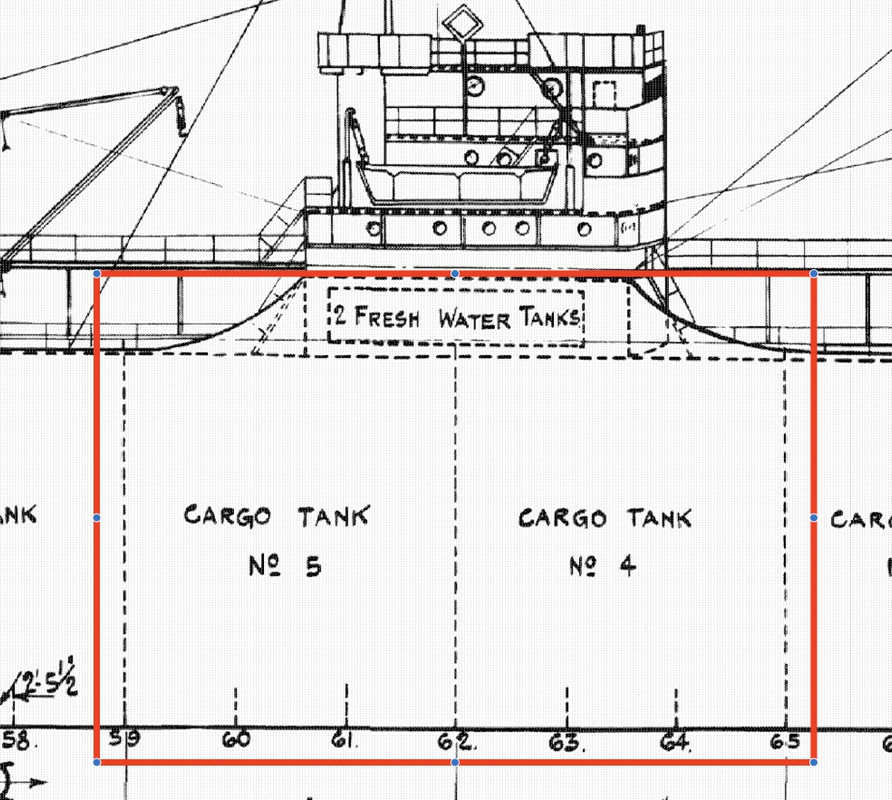
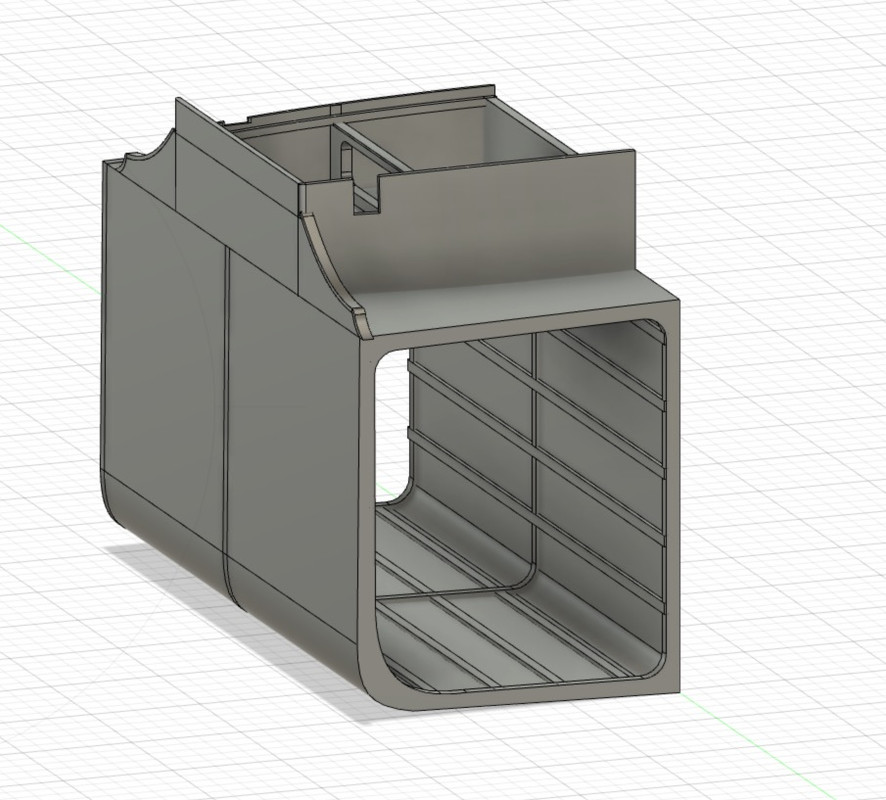
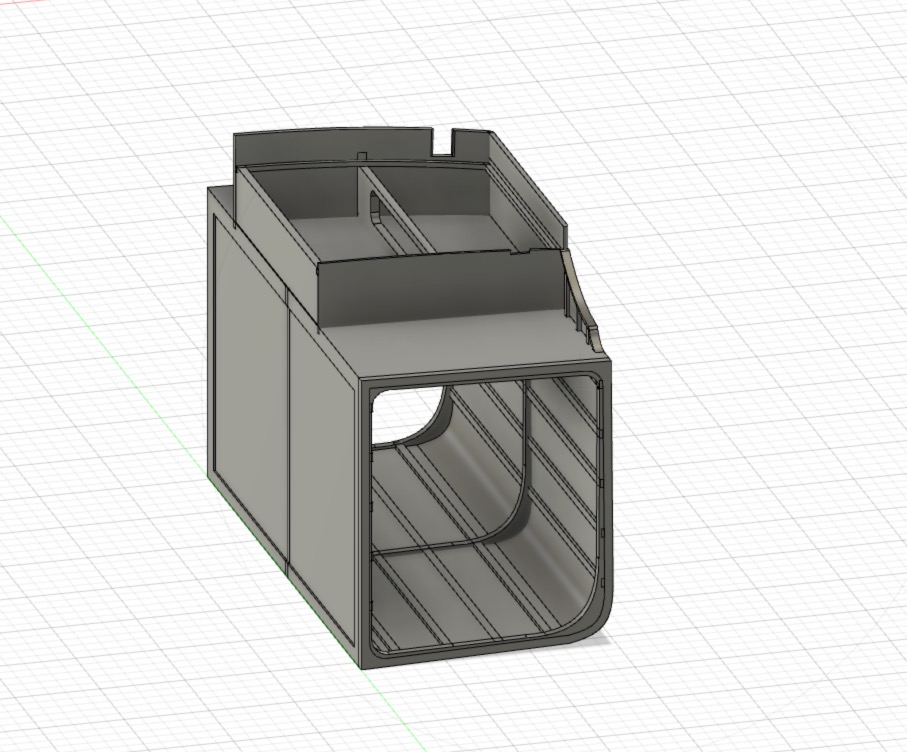
The block I'm going to start will go from couple 65 to 59, and vertically I'm going to stop at the first bridge of the middle castle. The rest of the castle will be done later by floor to detail it well +PE+ the 4 x 20 mm PE flak guns, I have to look at which model for these.
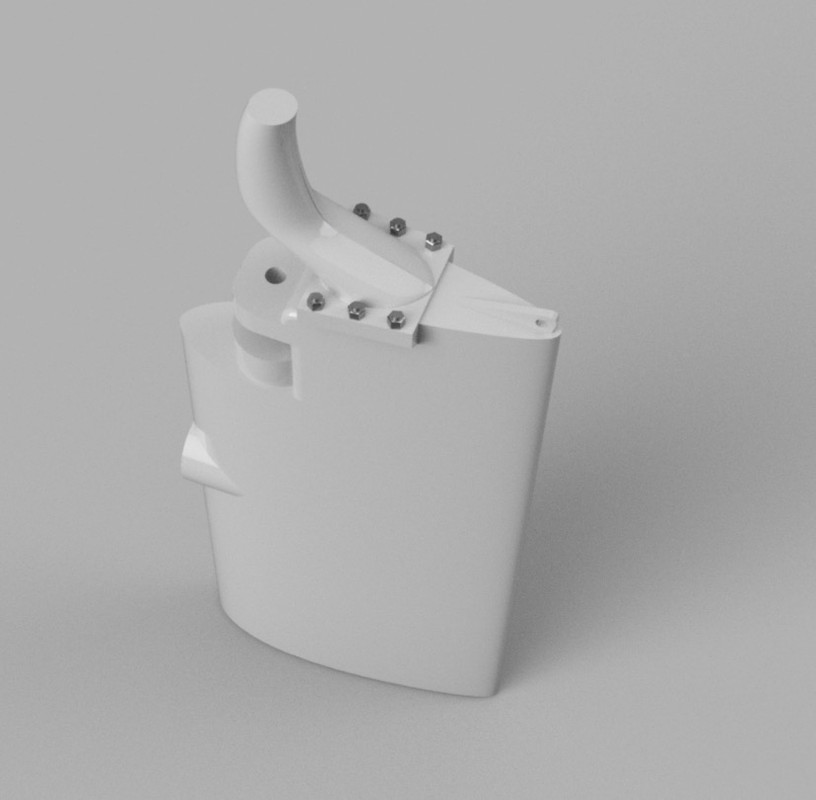
Ordered generic US Navy watertight doors from Toms modelworks :
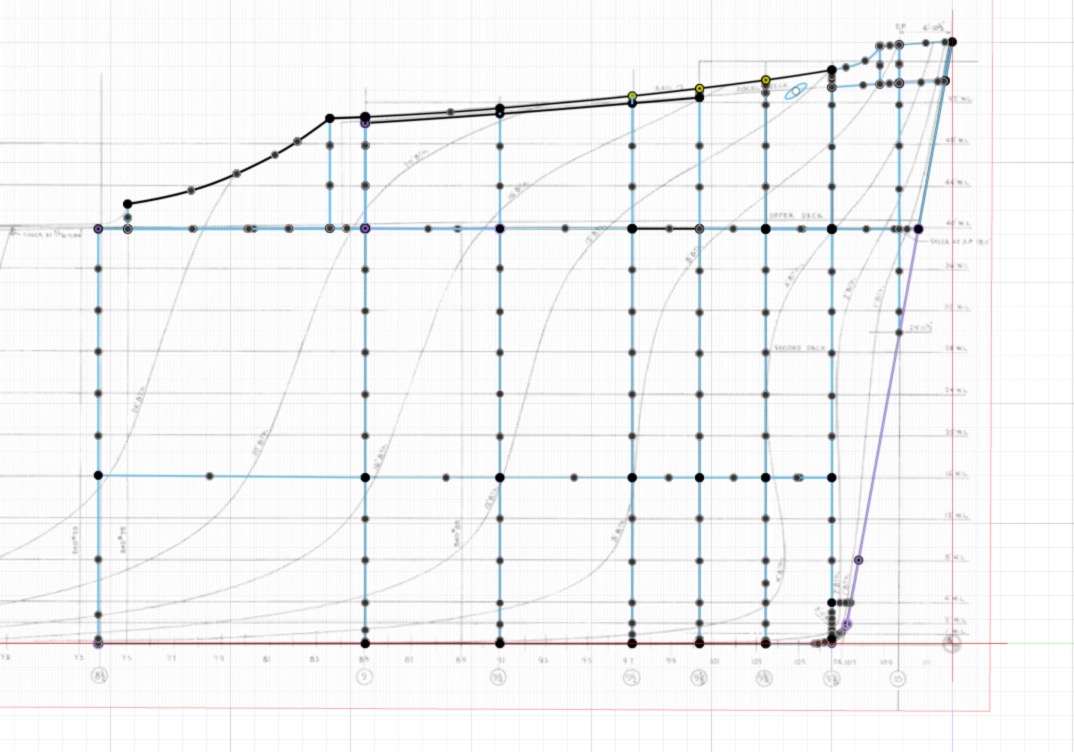
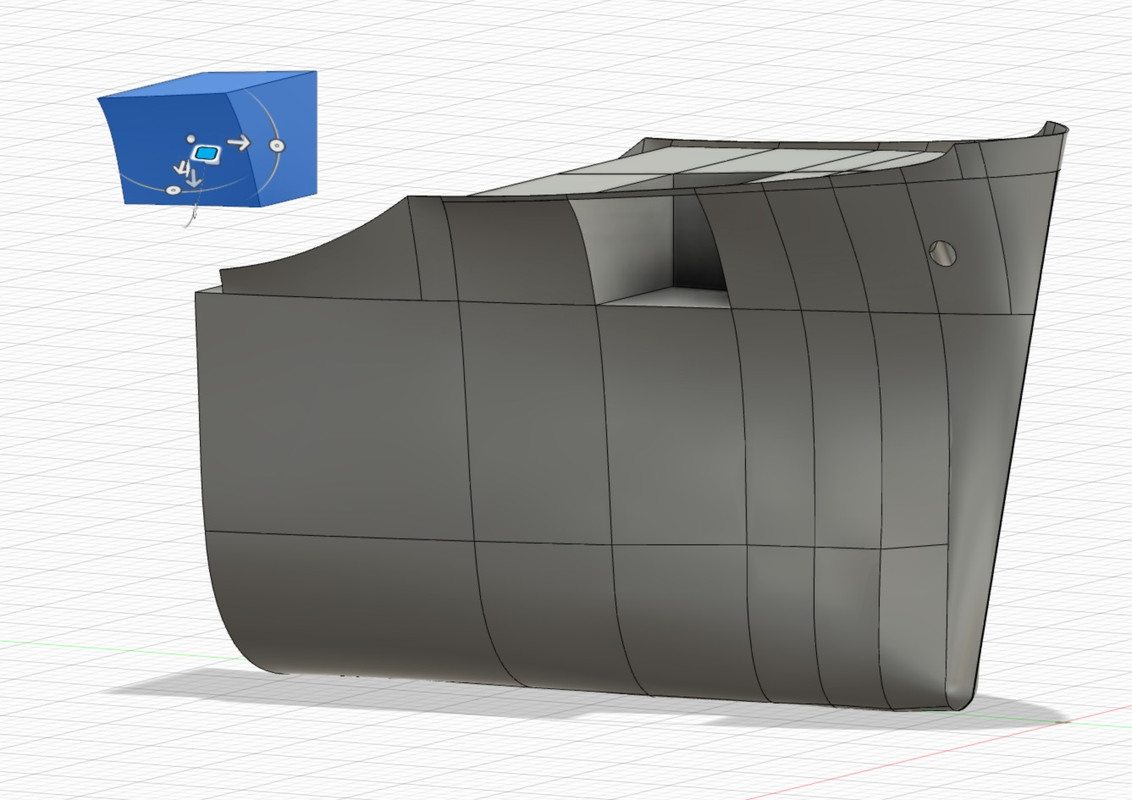
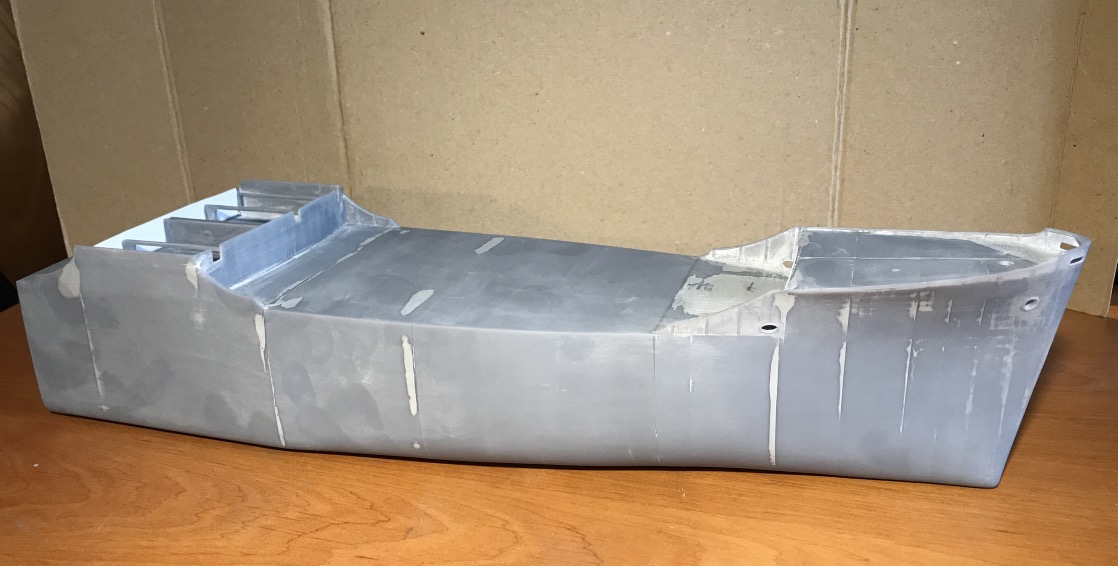
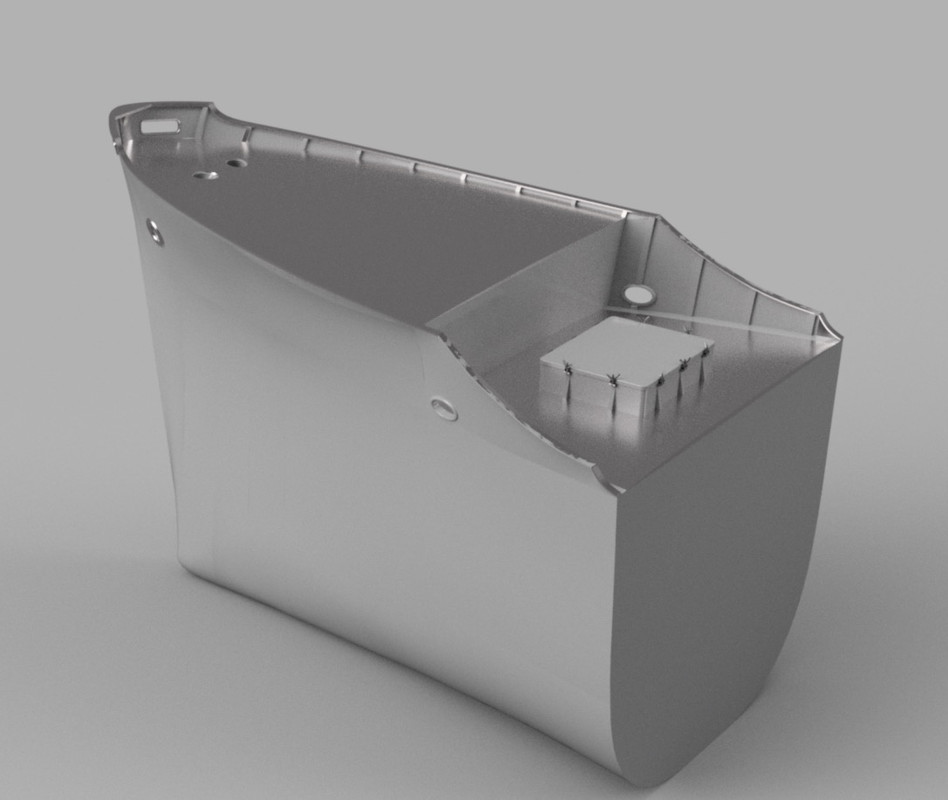
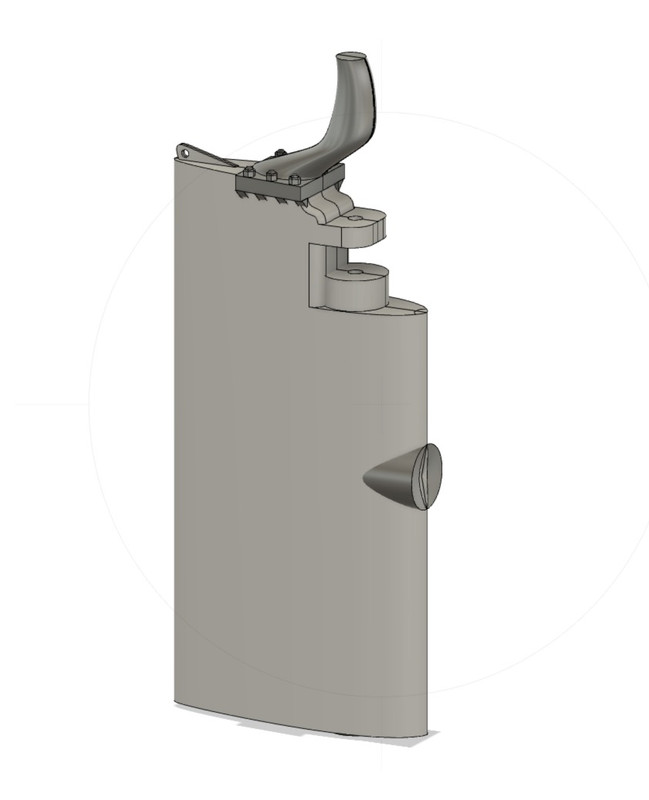
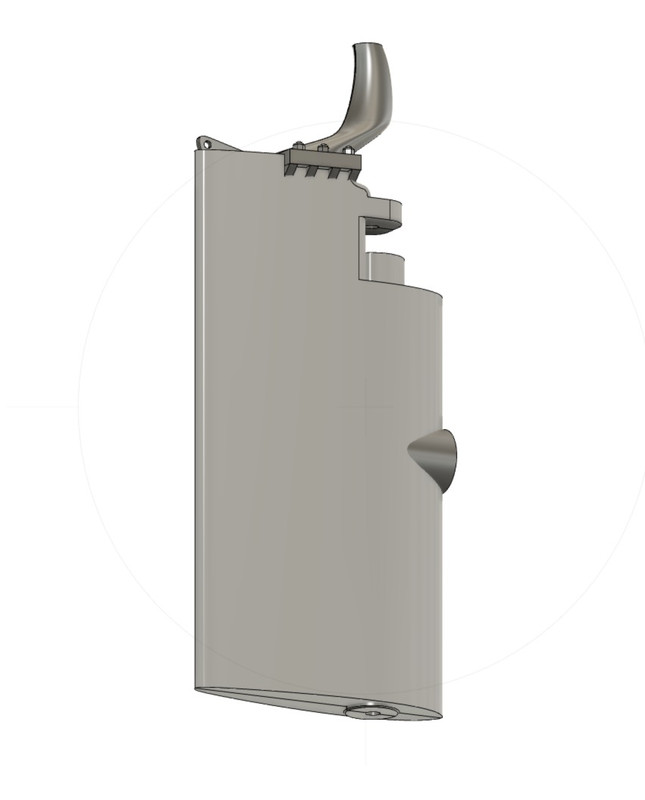
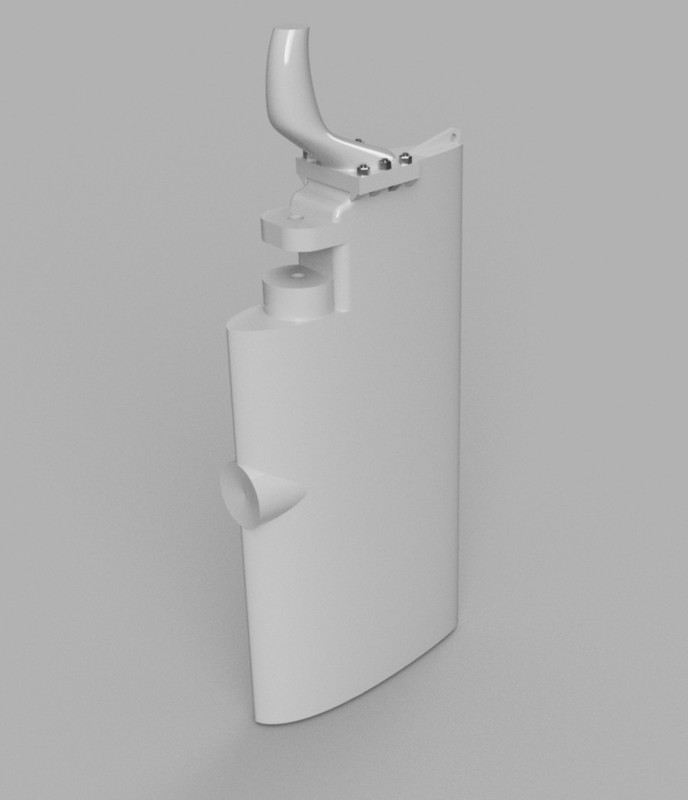
I spent an afternoon designing the middle section of the castle, not as simple as it looks. The bridges of the castle follow the camber of the main bridge, which gives the characteristic look of ships of that time.
I stopped at the first bridge. I'll stack the bridges later, printing them one by one to add details, PE etc. I have the 4 flak platforms with the 20mm guns to create on the upper deck.
The two half hulls are not fully symmetrical. The central walkway is offset to port because of the masts.
It will take about 11 hours of printing for this half-block.
I tried a tilted impression to try to erase some small defects on the bulkhead, the recommended tilt is around 40°, but because of the size of the element I put less. It didn't change much.
I redid the bulkhead that was problematic with the Evergreen card. Just like the forecastle.
37 cm of hull length, 43 remain to be created and printed.
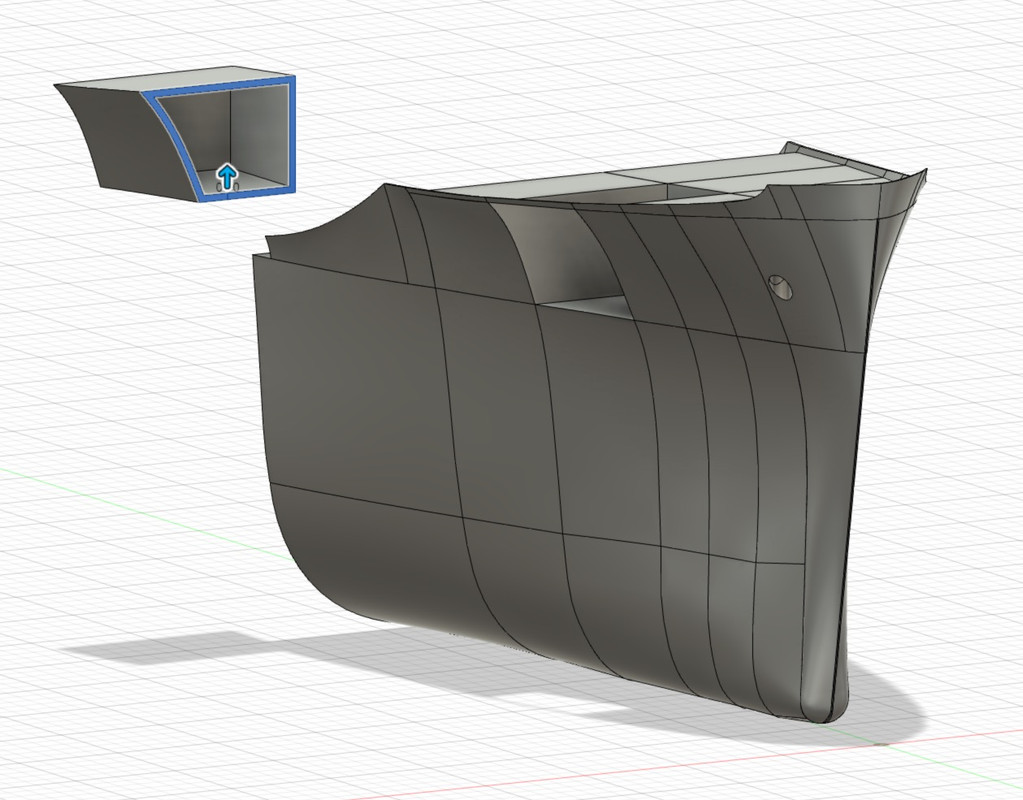
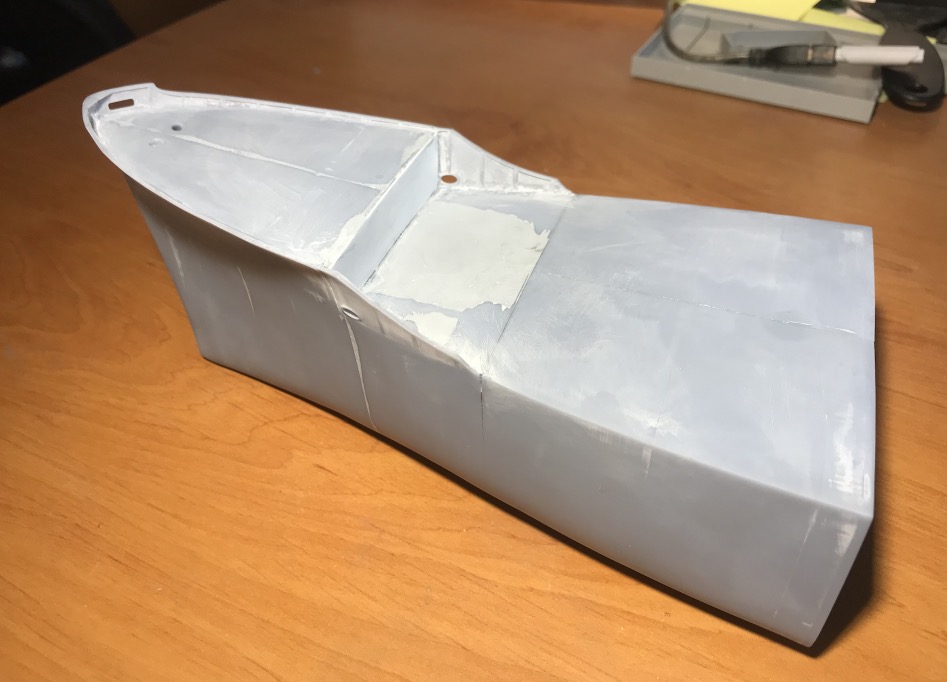
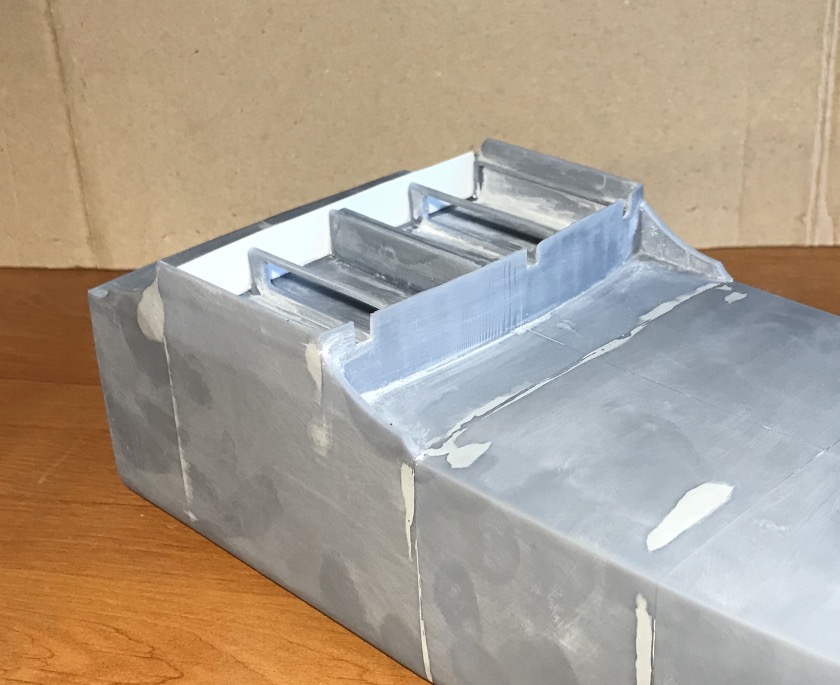
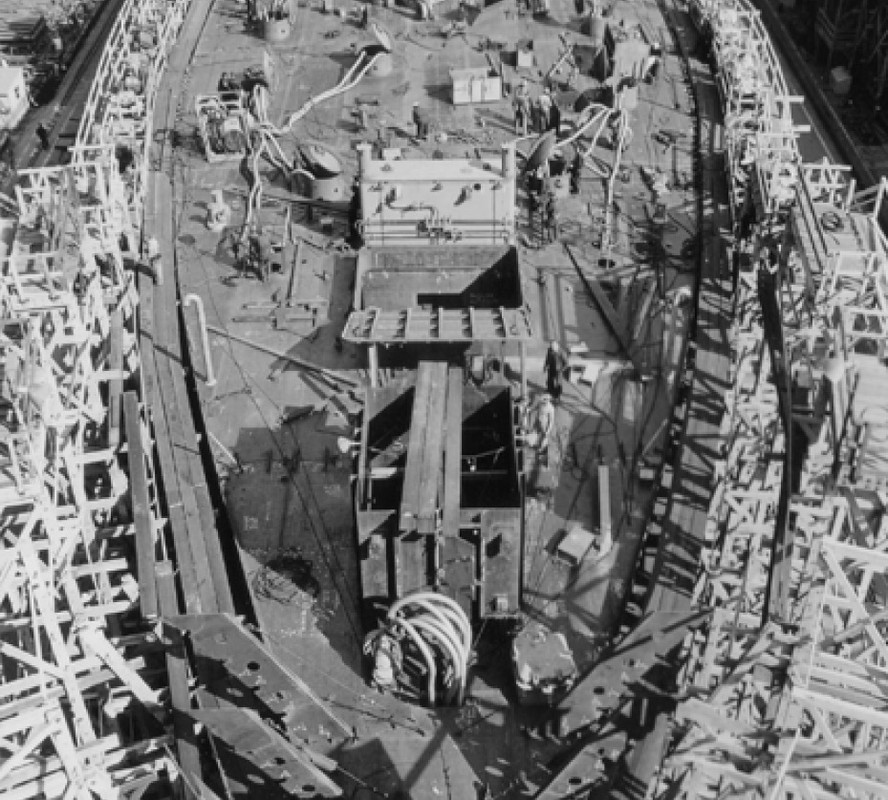
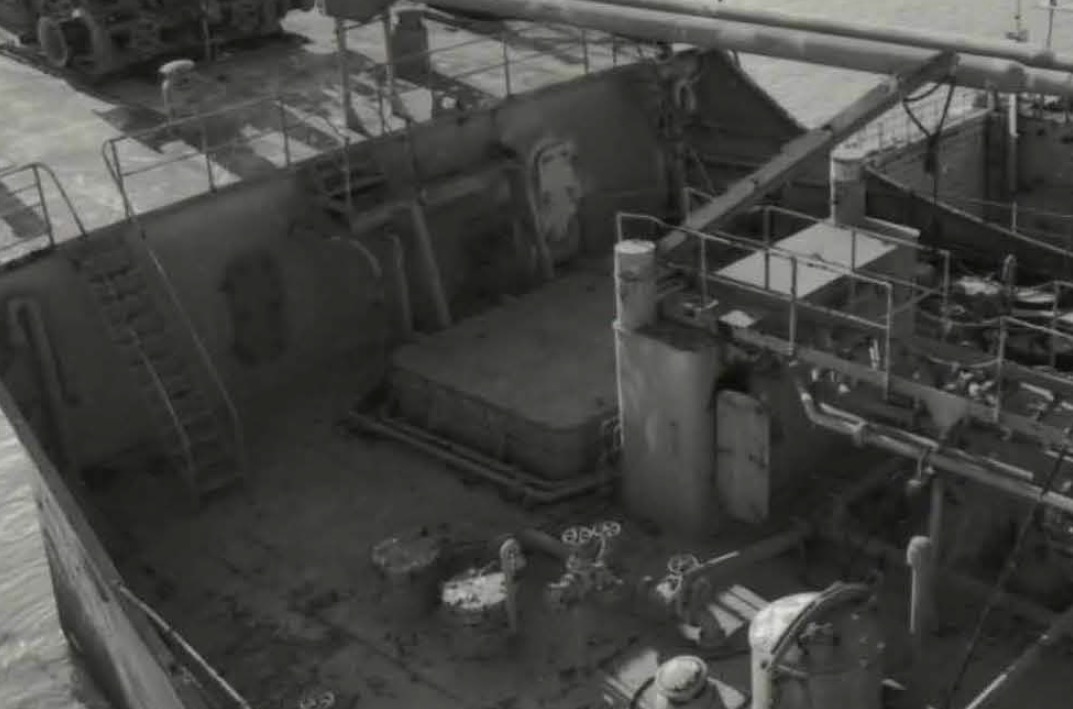
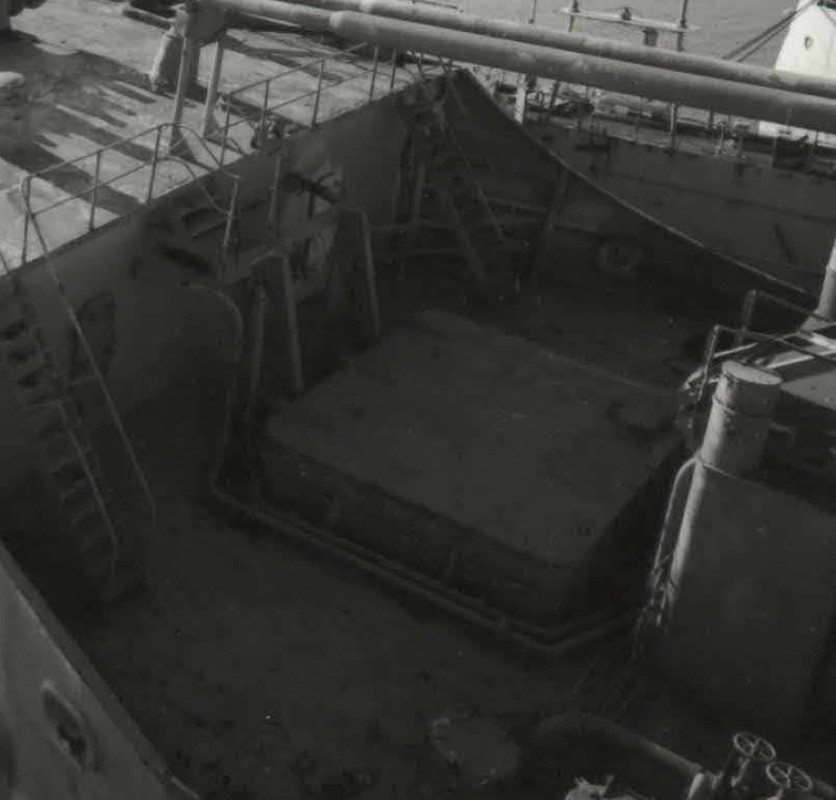
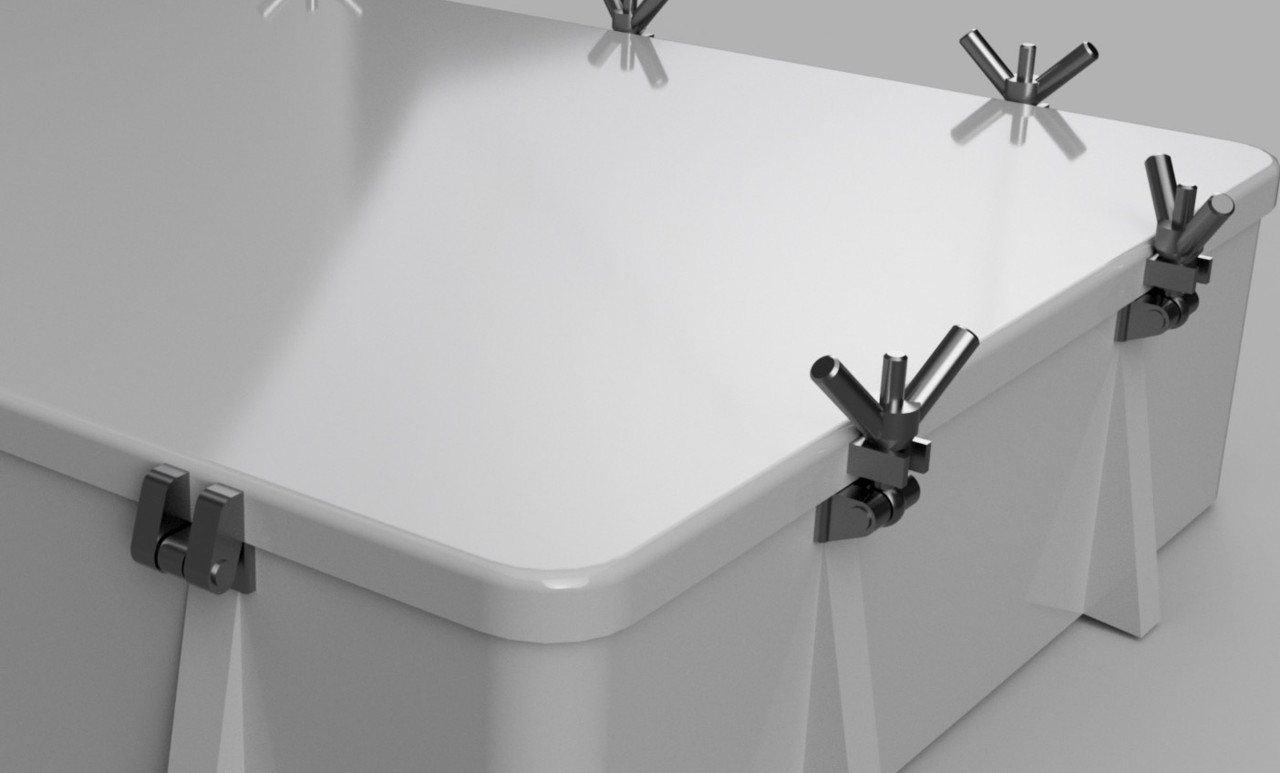
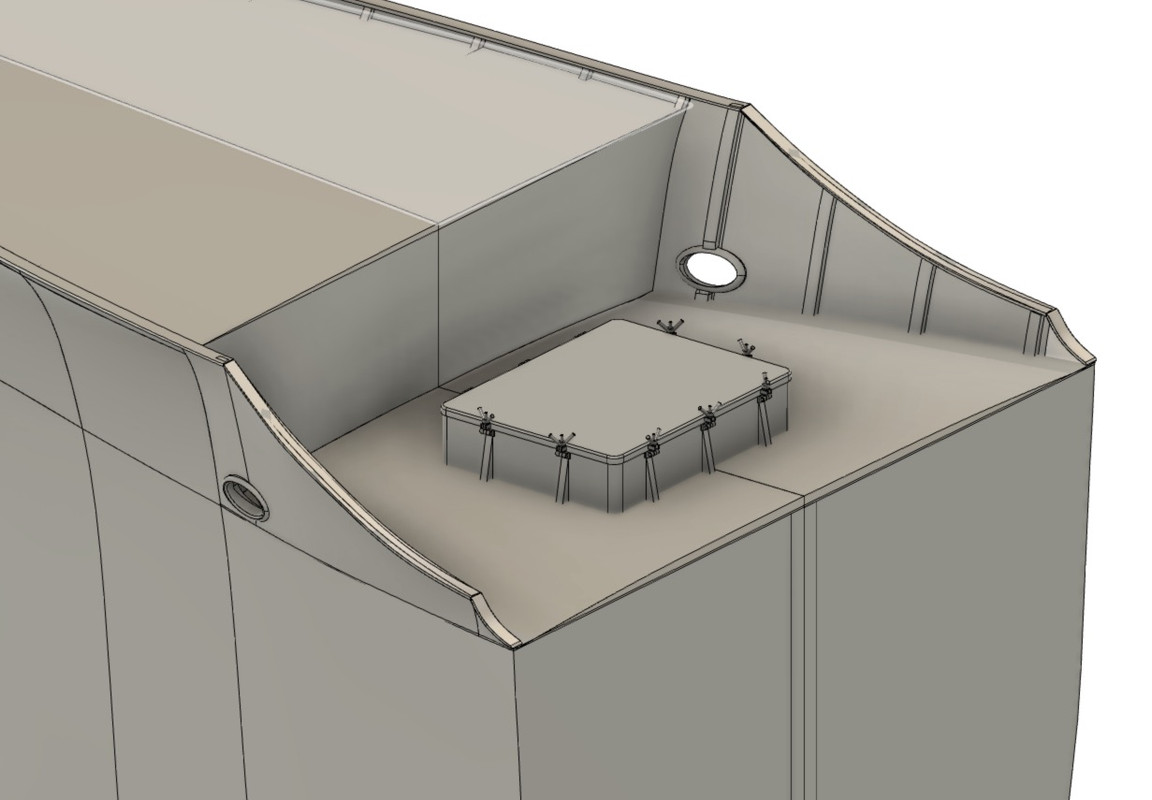
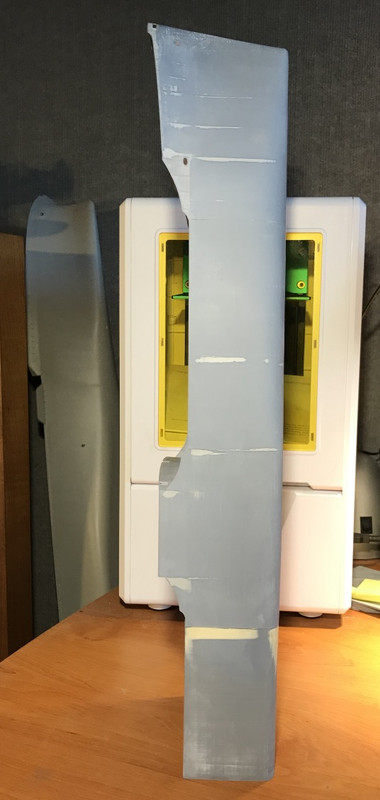
This afternoon I tackled the hatch of the small forward hold, which was to be used for cargo, storage of hoses and various equipments.
All I could find were these three pictures of that hatch. And I just got its size from the top view of one of the plans.
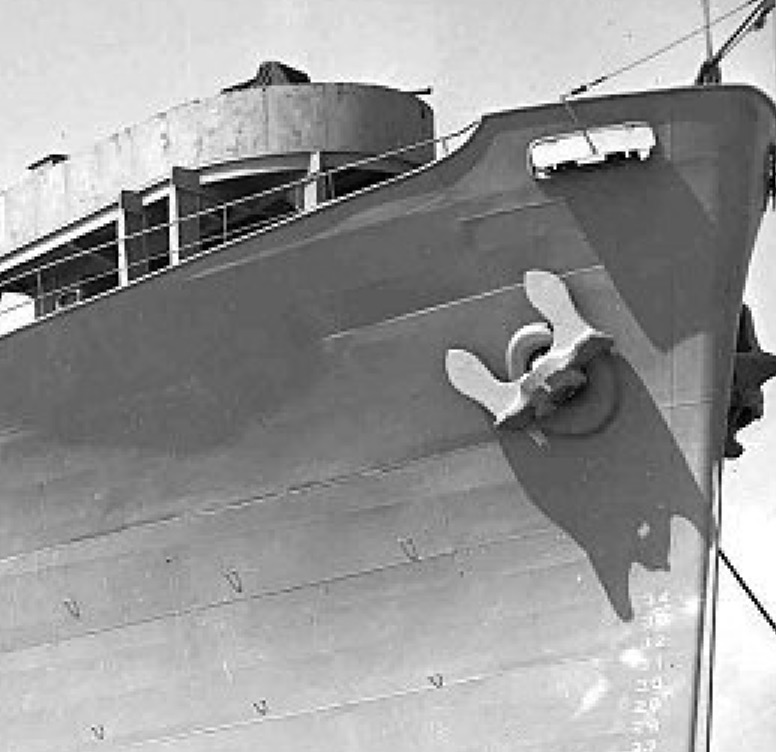
Here during construction, the forecastle hasn't been mounted yet.
Mission Santa Ynez At the Marad anchorage in 2006.
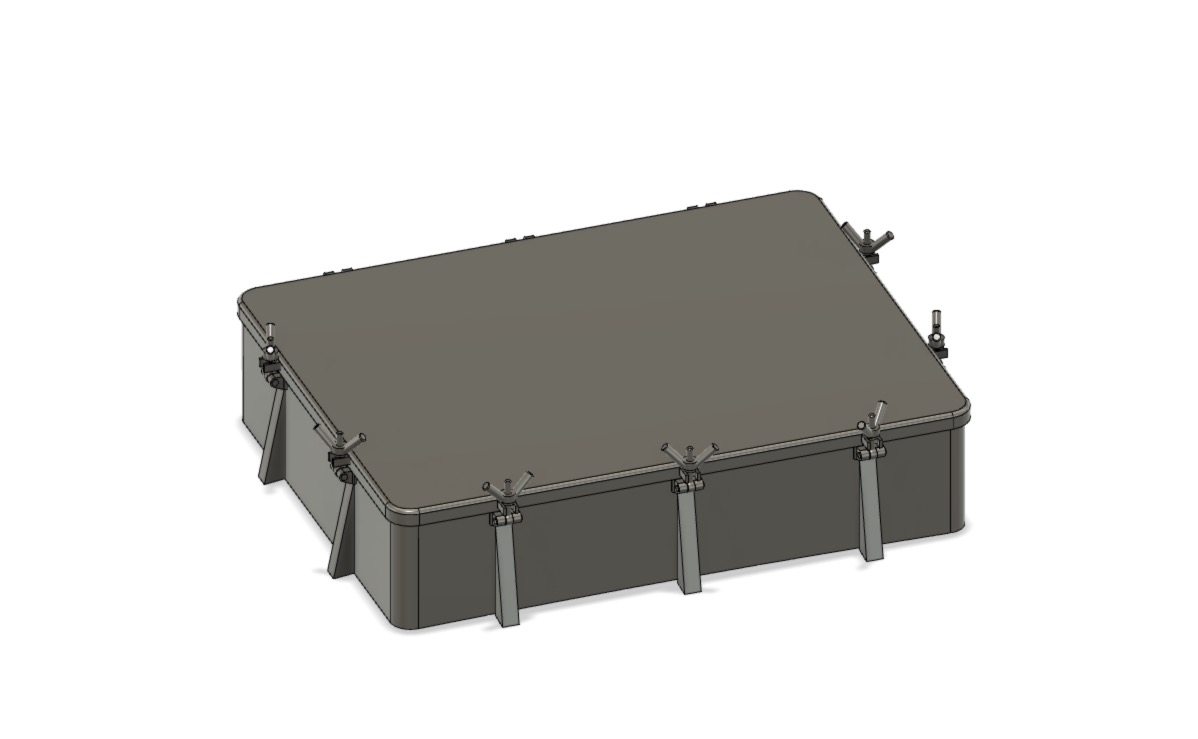
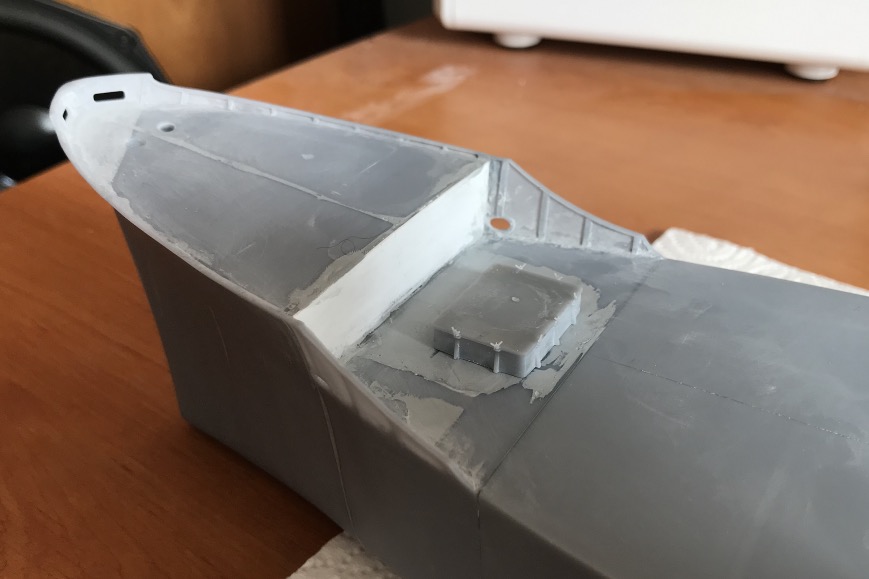
it's finished, I'll just have to add a PE hatch in the starboard aft corner. A round hatch that might allow you to take hoses out of the hold without having to open the large hatch.
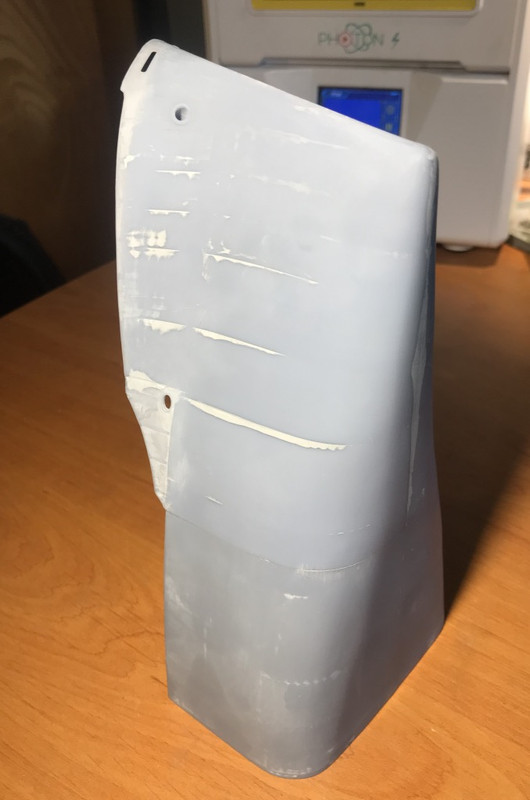
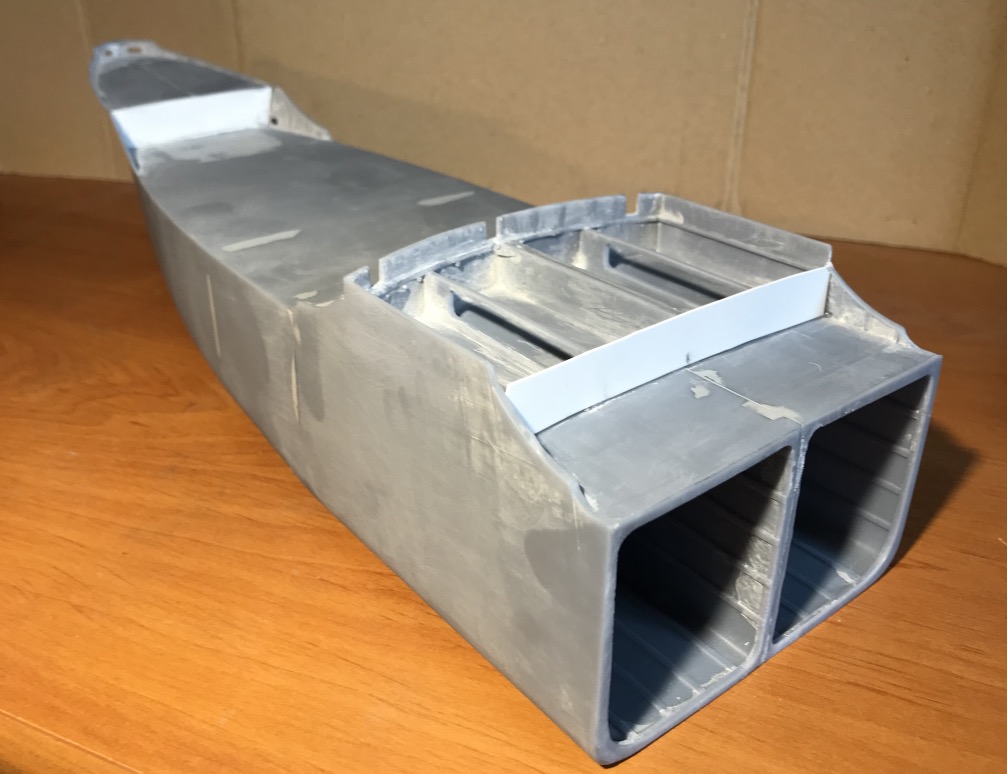
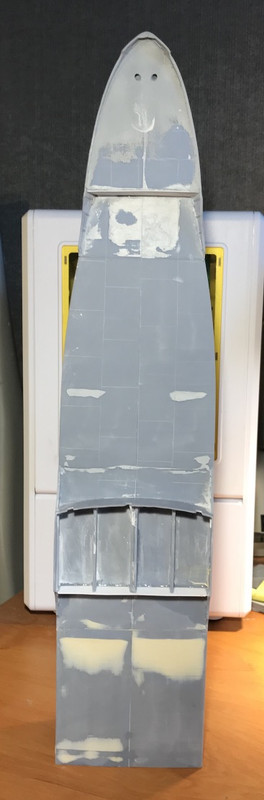
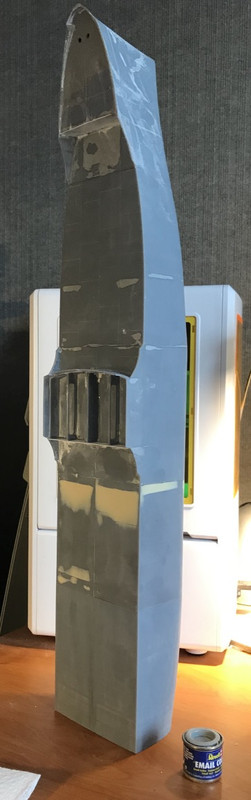
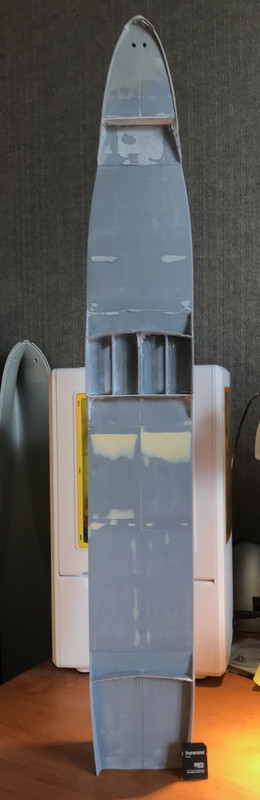
The now traditional picture of advancement:
You can see that the printer is starting to look rather small, we're at 47 cm of shell in ten pieces.
I'll have to weigh it to know the resin cost.
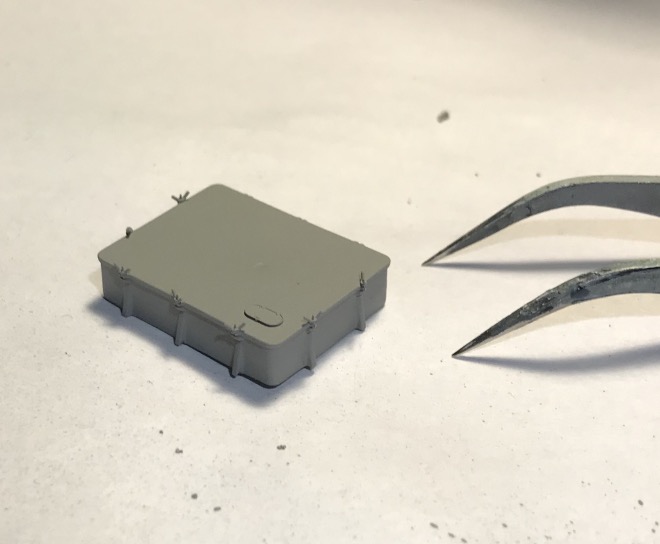
But what about the hatch cover, will you tell me?
Well it's printed pretty good, the details are there in the cleats.
I have a small defect on the flat of the panel, nothing serious. But the putty wasn't much help. Hence my change of putty. I hesitate to reprint it, it's sometimes easier. Sanding on the acrylic paint is not really good, I'll see. I'm waiting for it to dry perfectly.
Once painted: US Navy Haze Gray 5H Lifecolors.
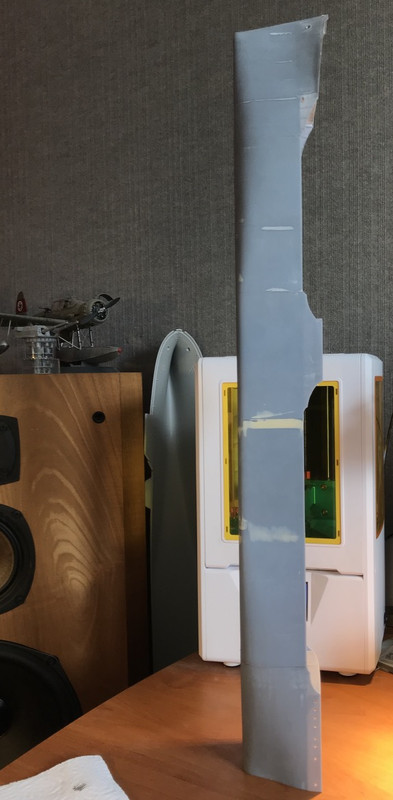
A new section of print, No. 5, is 9+10, a total of 14 elements will make up the hull.
For the moment it weighs 680 grams, for a resin cost of 25 euros in bulk.
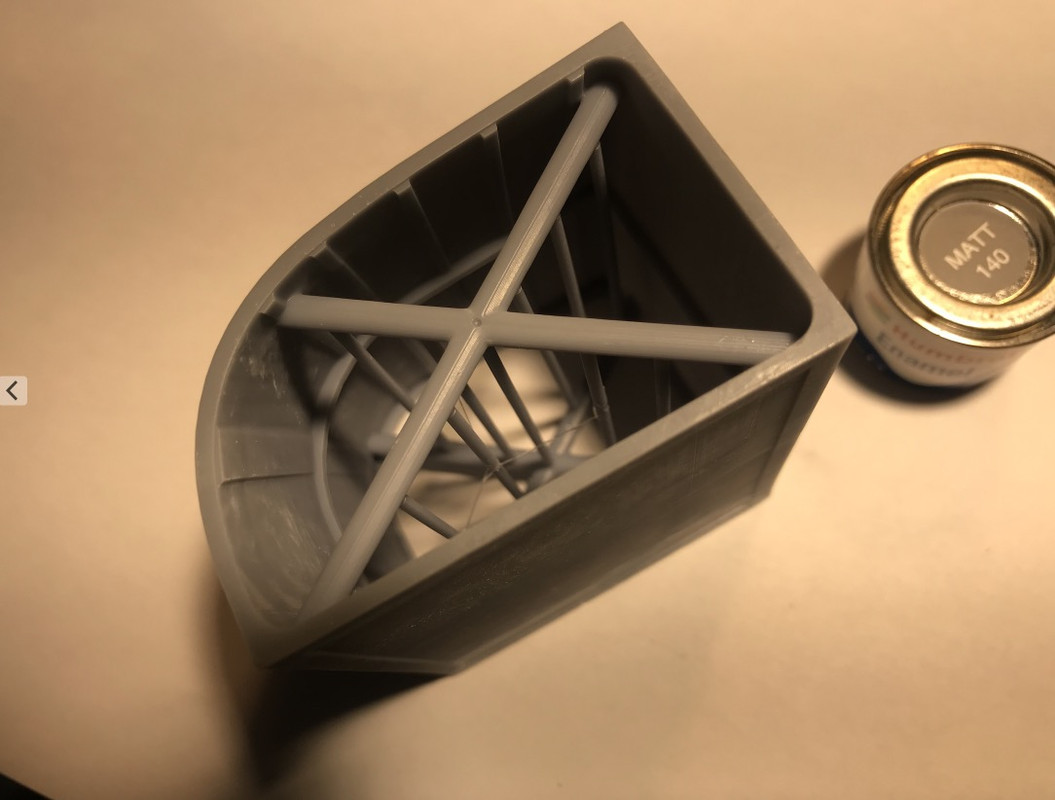
I removed the cross braces that deformed the parts when printed, it's much better.
I'm creating stage 6, I'm attacking the rear castle, we're coming to the end!
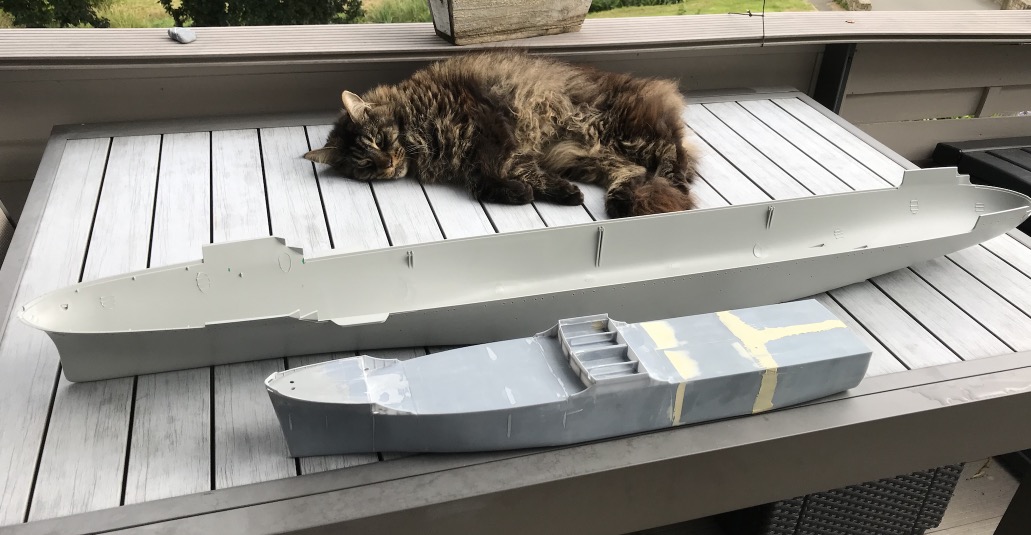
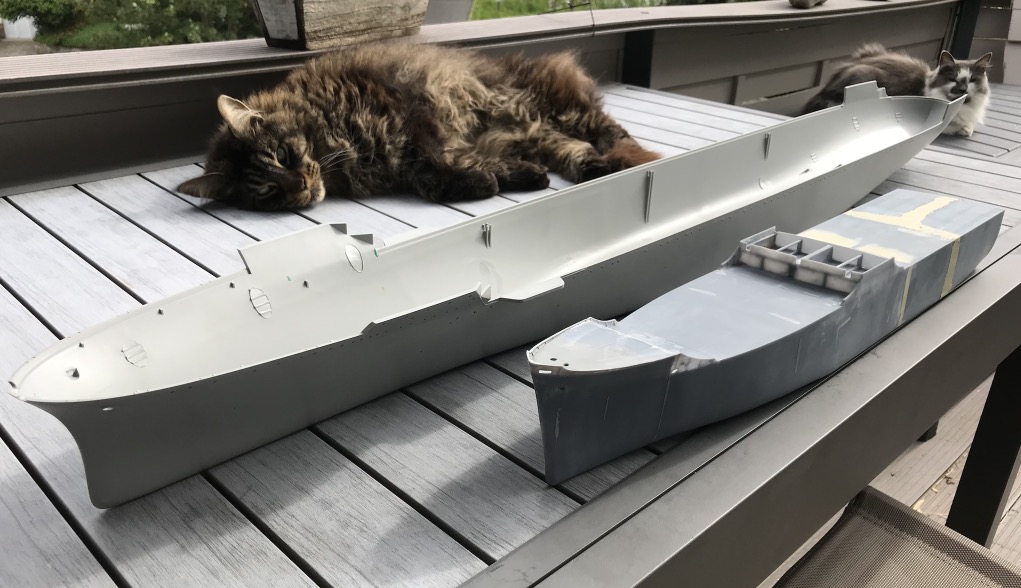
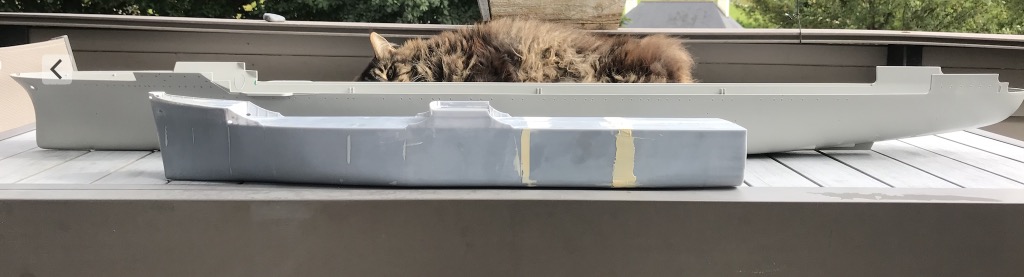
Under the watchful eye of an American cat... Of course! (Maine Coon)
We can compare the size on the same scale (of boats) with the Hornet.
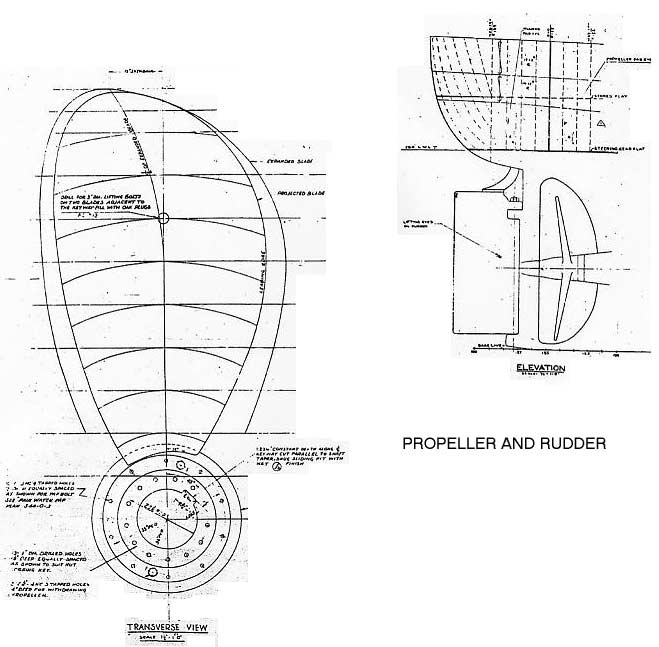
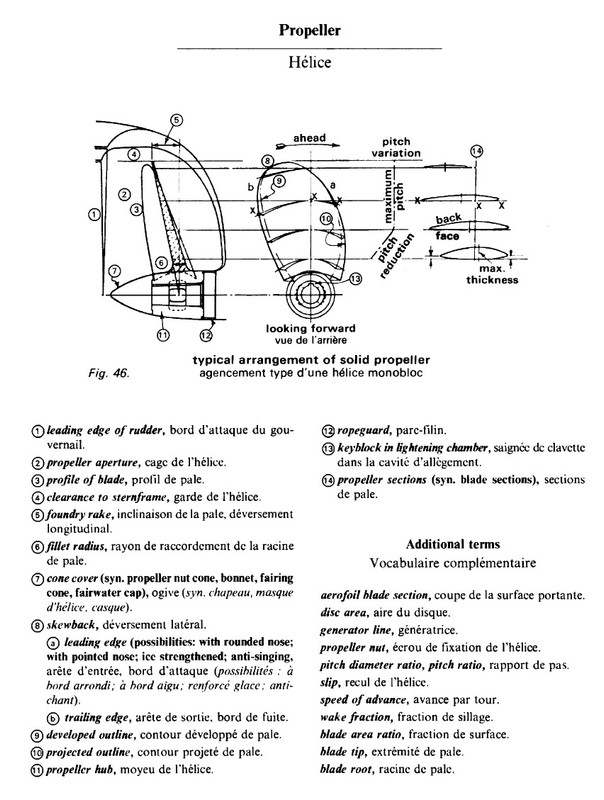
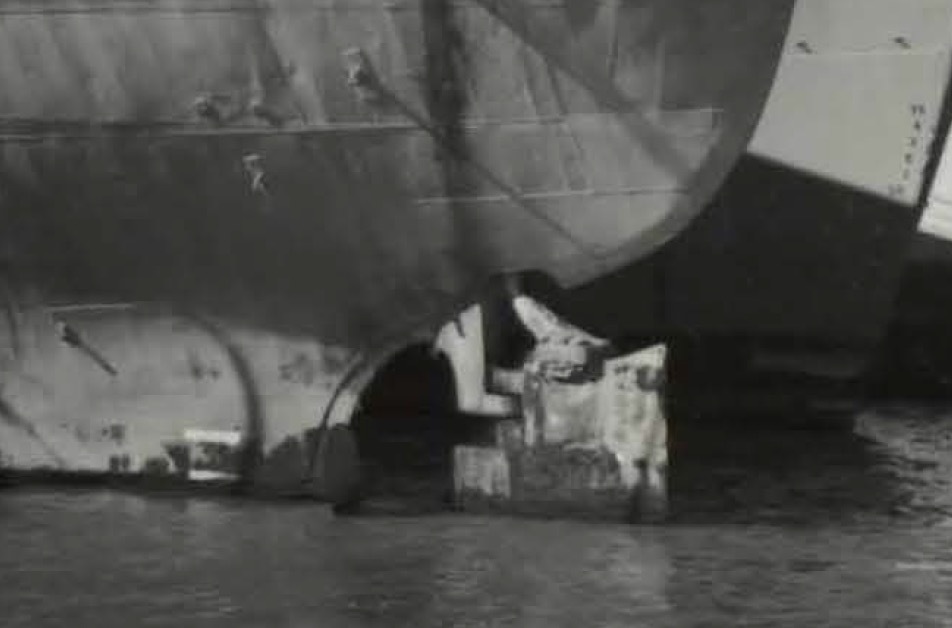
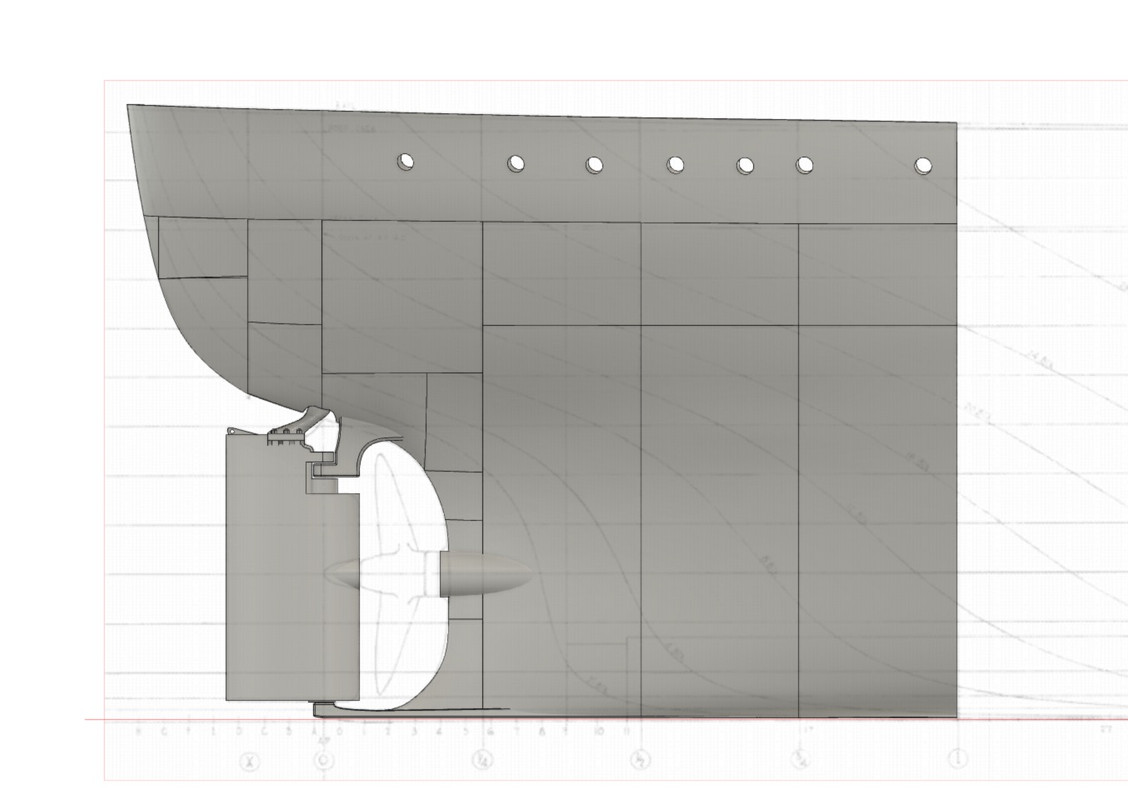
I found a T2 propeller plan, it's not complete, but I should be able to get something credible out of it.
Sometimes I have a doubt...
I glued the last two pieces together before gluing the stern. I had a printing problem on the first one, a debris in the resin. Nothing serious, but I'll have to think about filtering it from time to time.
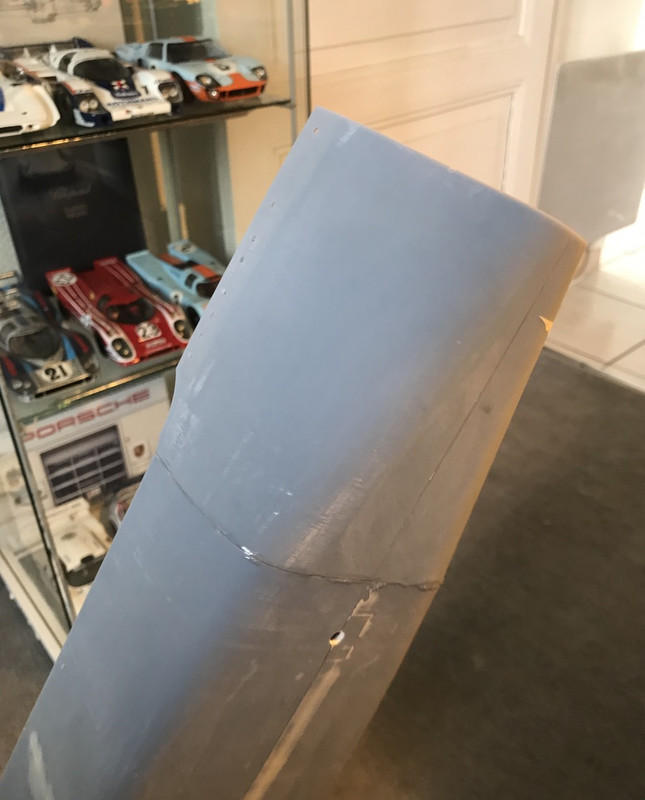
I had also made a tiny flatness error on the rear castle bulkhead along the planking, hard to detect on the software. The printer can't be mistaken...
It will be rectified with putty when gluing the stern, final section. Errors have been corrected on port side, so I also digitally drilled the portholes on port side, and manually on TD, an oversight, it's the age.
I almost scrapped the starboard one and reprinted it and then I changed my mind, it was repairable.
Putty repair of the hole due to debris in the tank, we won't see anything.
Starboard: We see the defect on the top left, easily repaired after gluing the next element.
Port: It came out flawlessly, the construction method is now perfected. I simply removed most of the reinforcements inside and increased the hull thickness slightly.
Gluing of section n°6 and before last. I overload with cyano that I dry with the activator, it becomes very hard immediately, I use it as a putty, I just have to sand to remove the excess to obtain an acceptable surface state for painting.
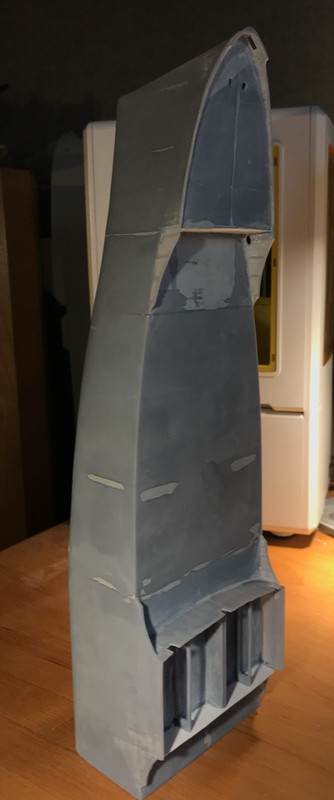
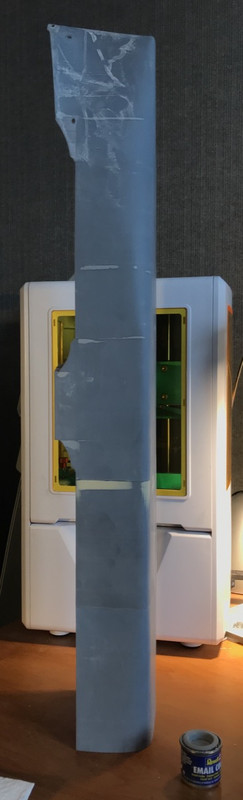
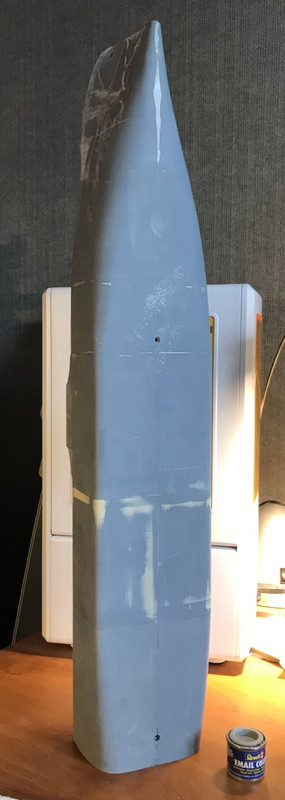
This is the last time you'll see the hull exposed in this posture... She'll soon be able to reach her temporary support.
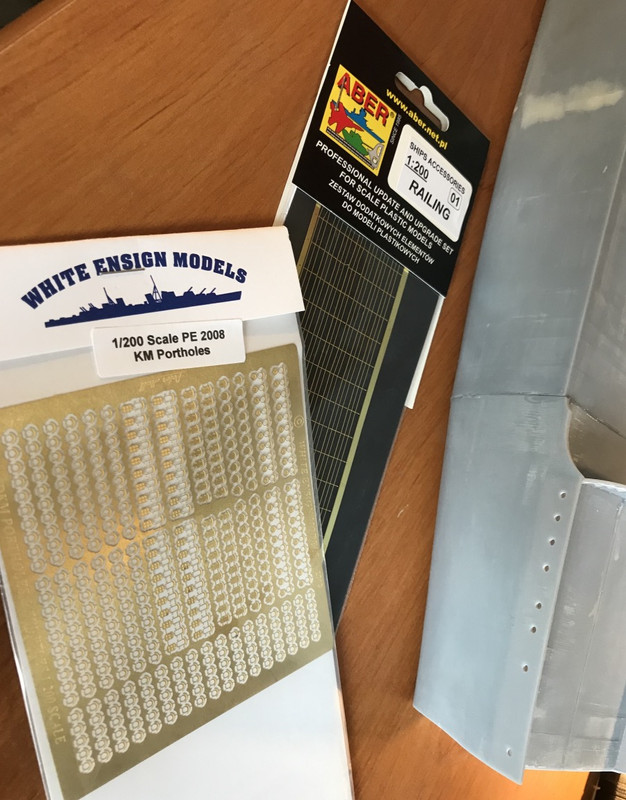
I received the PE portholes and raillings (2 bars):
The small access hatch on the aft starboard corner of the forward hatch would be called a "scuttle". Usually these have a trunk, elevated in this case (estimated) from your actual ship photo perhaps 8" or so.
Interesting modular construction, much like current shipyard techniques. I suppose the next advancement will be printing the ship with all the correct interior compartmentation?
I think there are too many pictures in this page of the forum, I will cinder my messages to change page faster and limit the number of pictures per page ( 20 posts by page) . It is possible now for me, because I no longer need the board administrator's approval to post, it's easier for me.
Good remark for the scuttle, but it must not be very high.
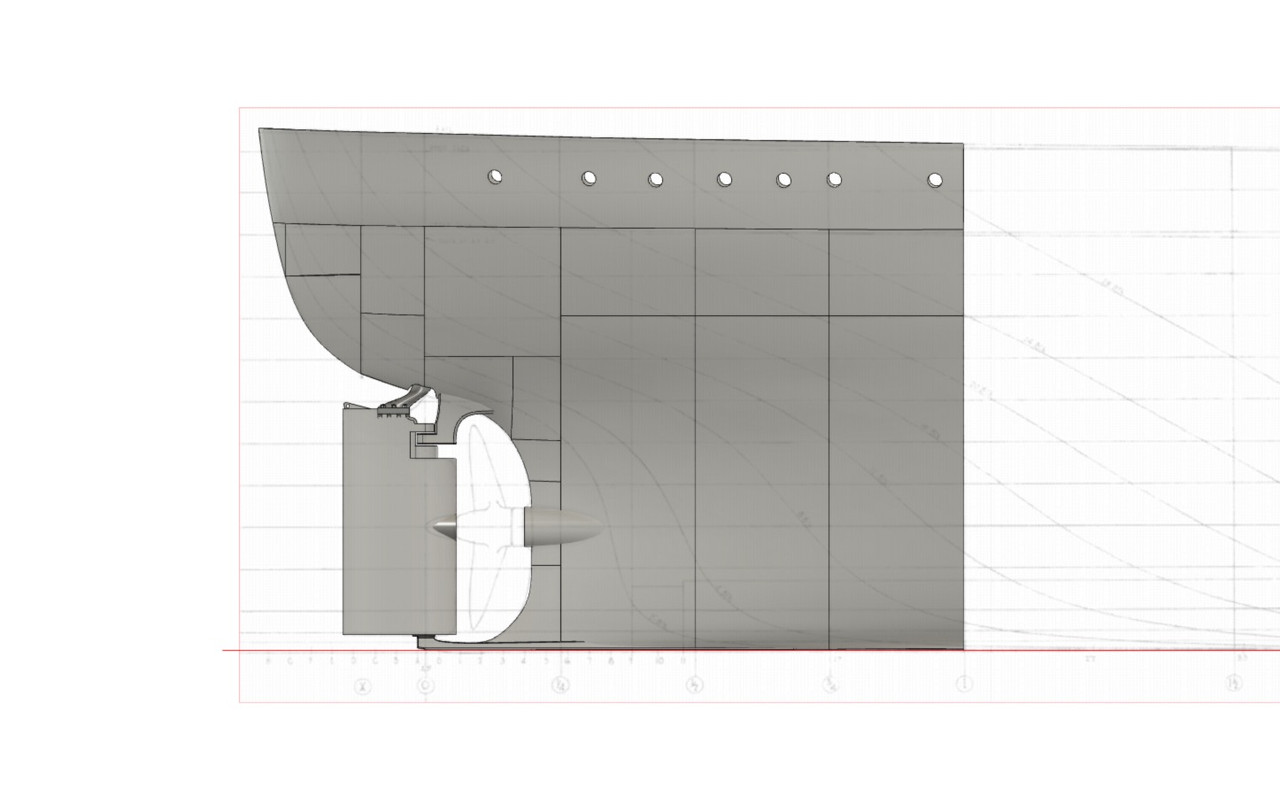
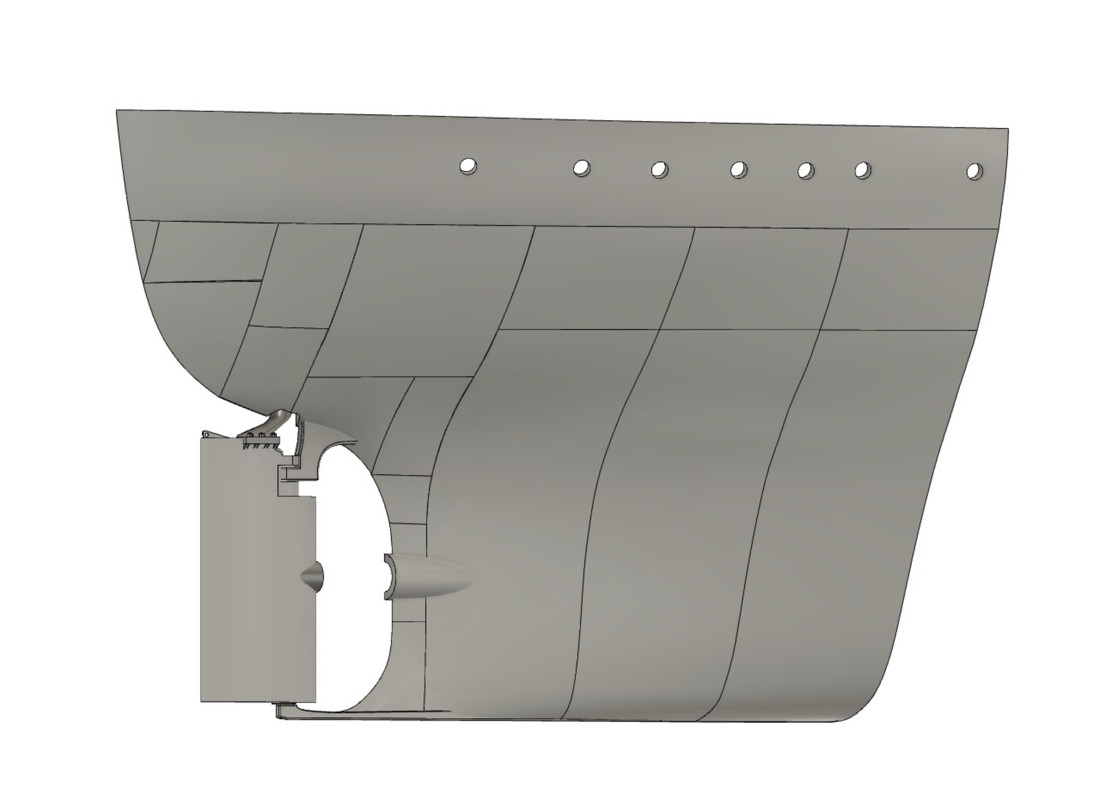
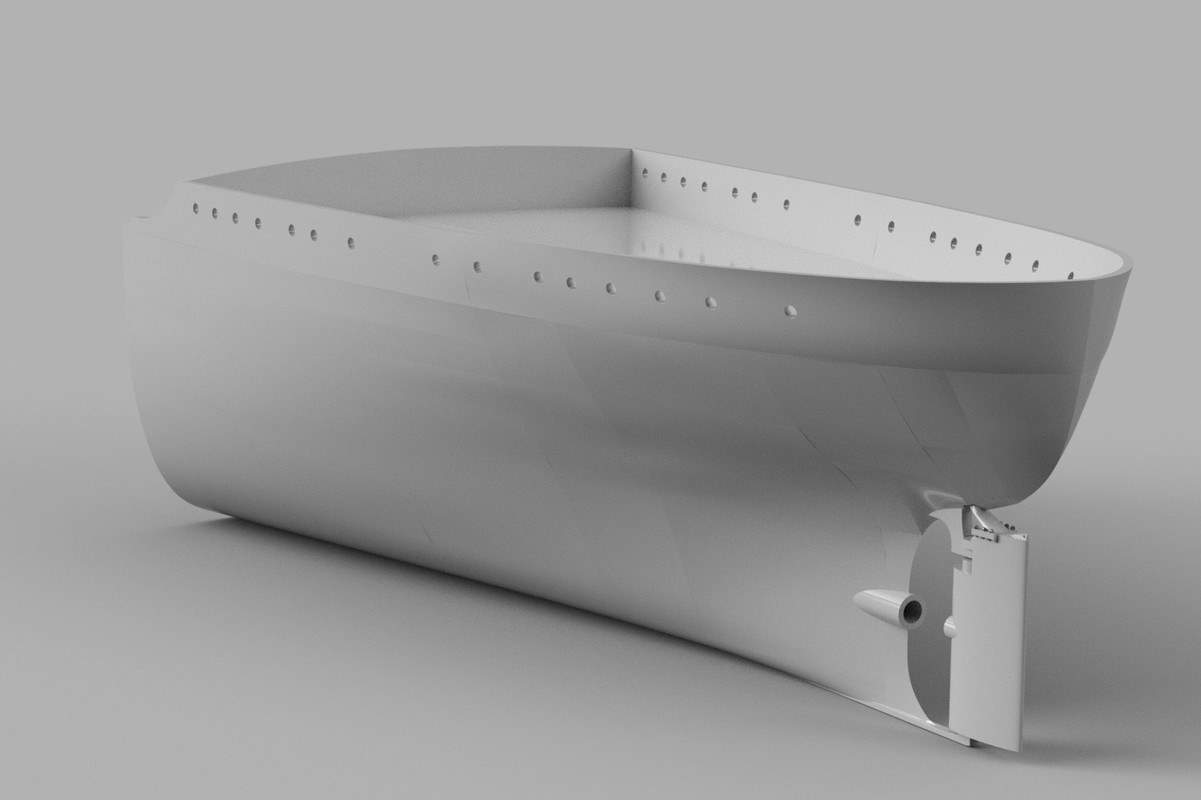
The drawing work is far from being finished on the stern, but I've made progress despite the difficulties I've encountered, I've been through a lot, I don't always have the level required for certain complex shapes of the arch, but I'm holding on... to the oars.
I still have the bulwark to continue designing which houses the main deck accommodation, the rudder and the propeller. And seeing a few small flaws here and there is nothing too bad.
All the photos showing now, perhaps problems with slow internet on my end? One of the nice things about your printing, it makes the positive camber of the main deck and superstructure to easily be accomplished. Using traditional modeling technique thins gets to be a bit more difficult.
All the photos showing now, perhaps problems with slow internet on my end? One of the nice things about your printing, it makes the positive camber of the main deck and superstructure to easily be accomplished. Using traditional modeling technique thins gets to be a bit more difficult.
Possible, you have to wait the end of download.
About the camber, yes, I didn't put enough I find, I followed the plan, but on the pictures of the Santa Ynez Mission, I find that there is more.
Congratulations for your APA project, I started to read it carefully, it's very interesting. Great job!
Users browsing this forum: No registered users and 51 guests
You can post new topics in this forum You can reply to topics in this forum You cannot edit your posts in this forum You cannot delete your posts in this forum You cannot post attachments in this forum