The Ship Model Forum

The Ship Modelers Source
It is currently Fri Jul 04, 2025 1:30 am

All times are UTC - 6 hours [ DST ]


Post new topic Reply to topic  [ 110 posts ]  Go to page 1, 2, 3, 4, 5, 6  Next
Author Message
PostPosted: Mon Jan 18, 2021 7:56 am 
Offline
User avatar

Joined: Tue Sep 29, 2020 4:35 pm
Posts: 1881
Location: Bretagne, France
Image

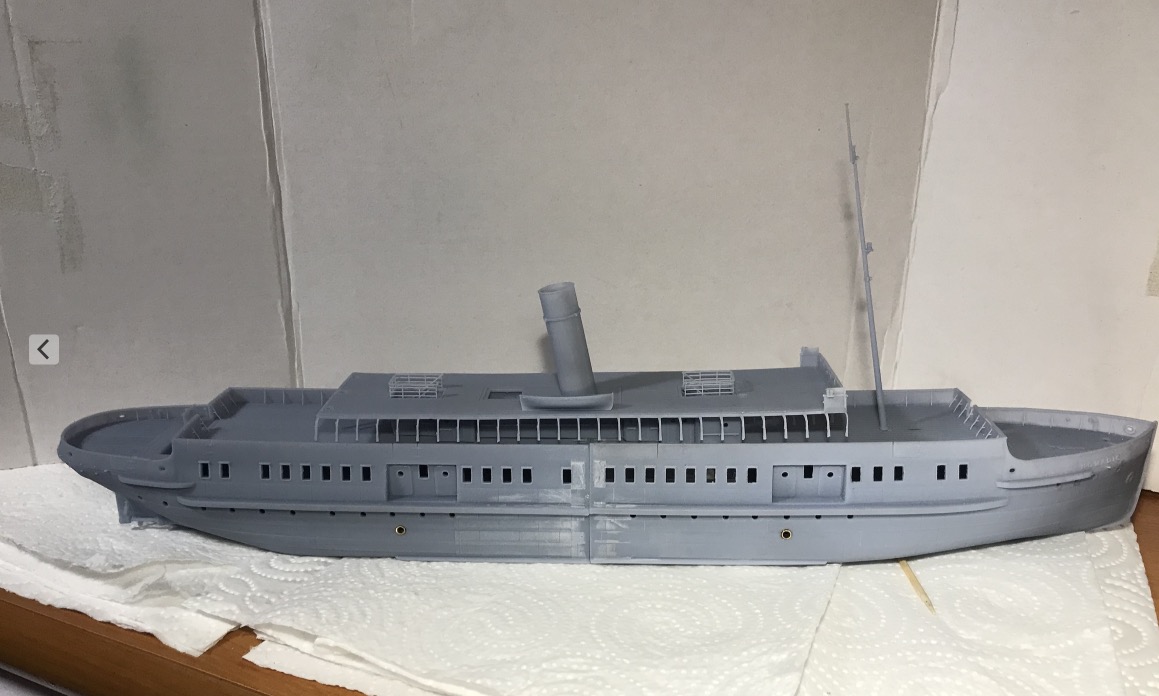
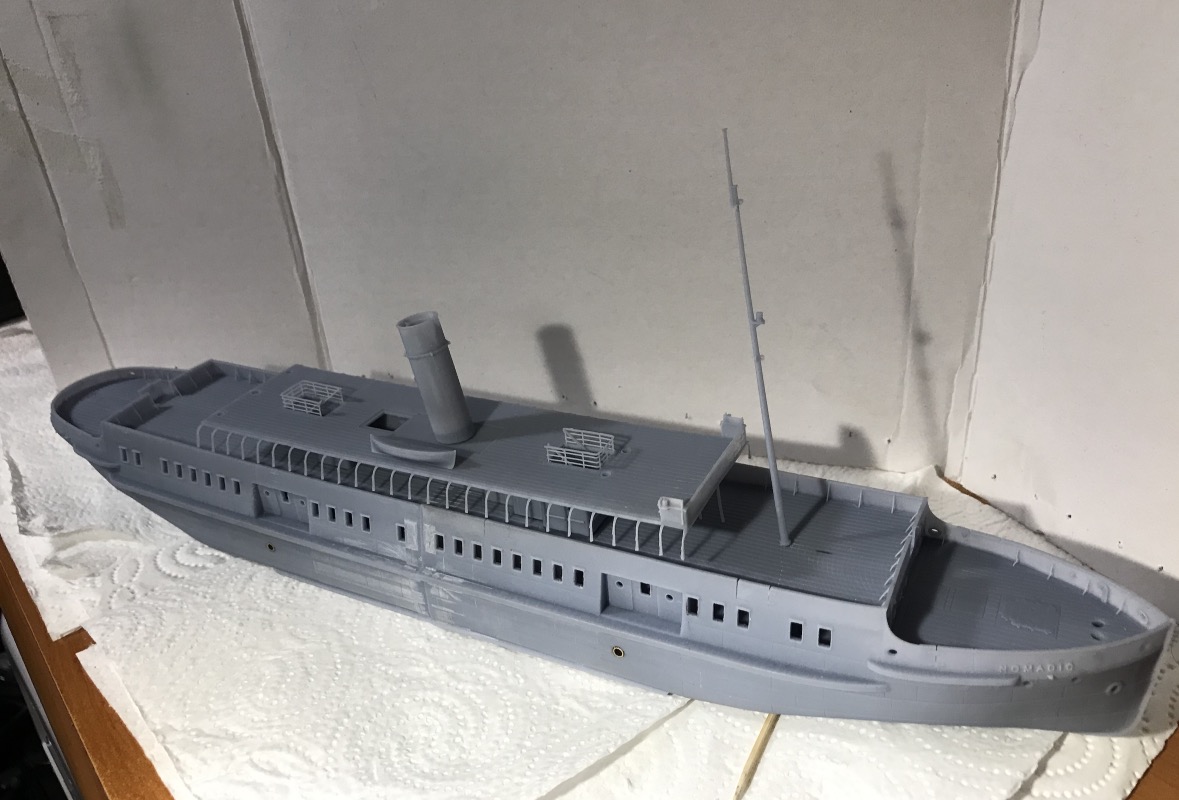
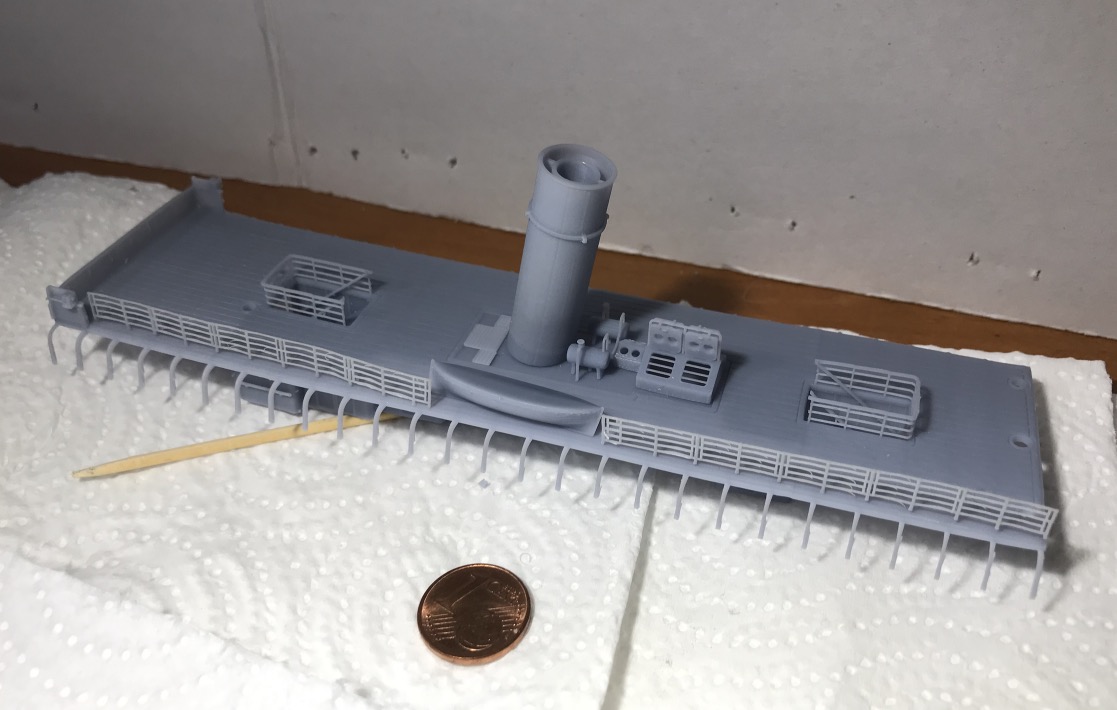
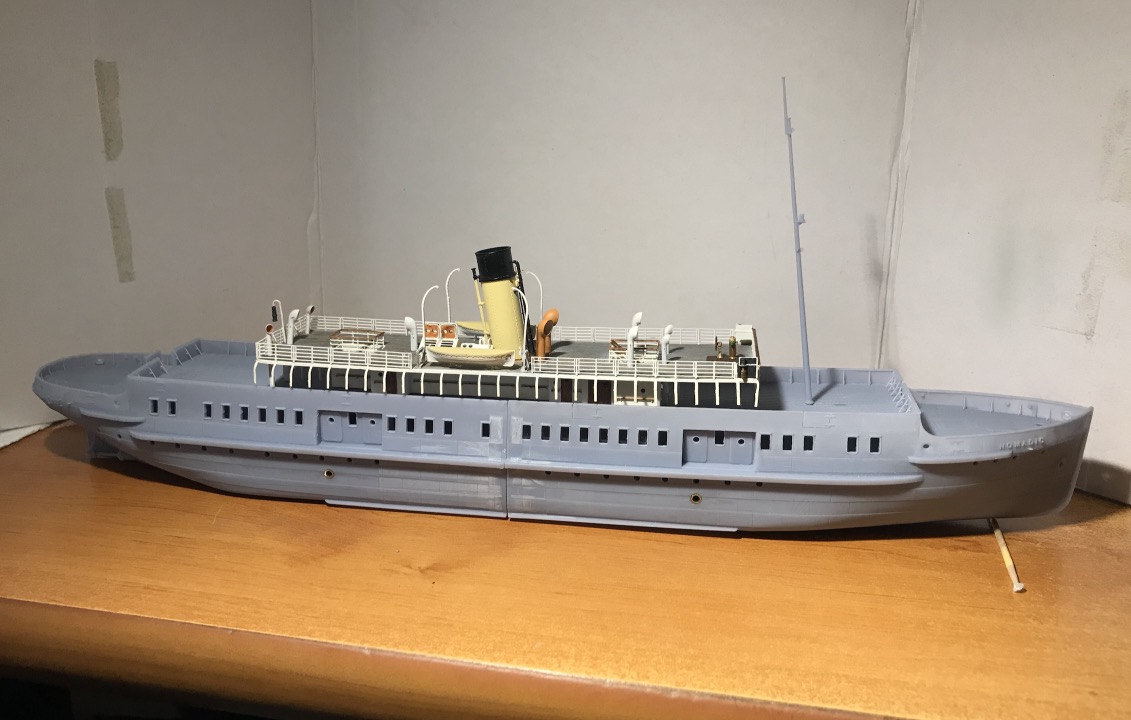
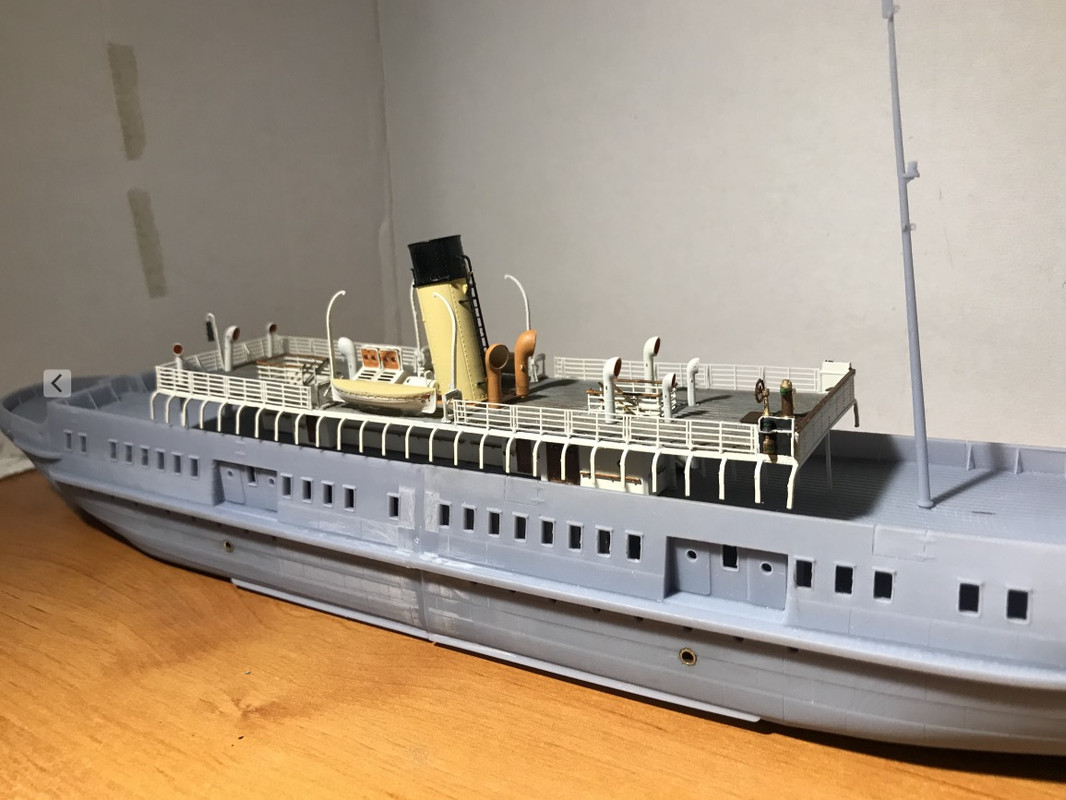
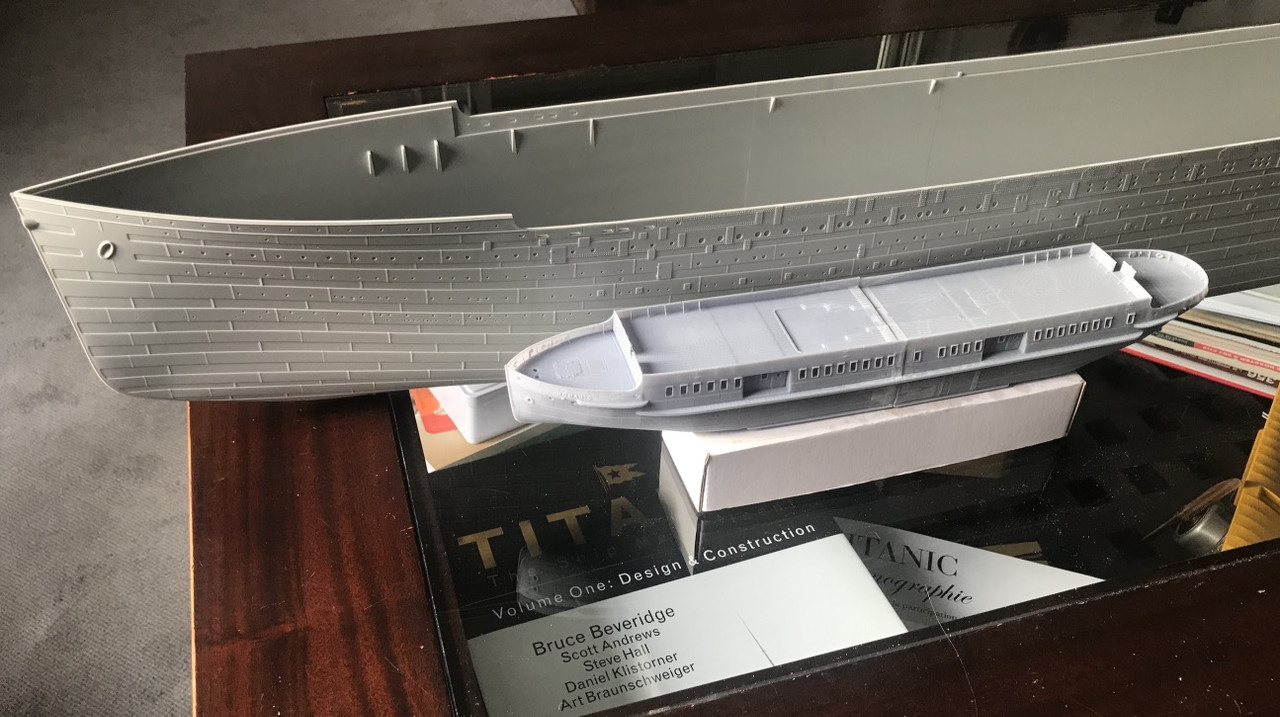
Subject exclusively concerning the assembly of this 71-metre ferry.

The subject of the design of the model is here:

viewtopic.php?f=13&t=311395&p=922249#p922249

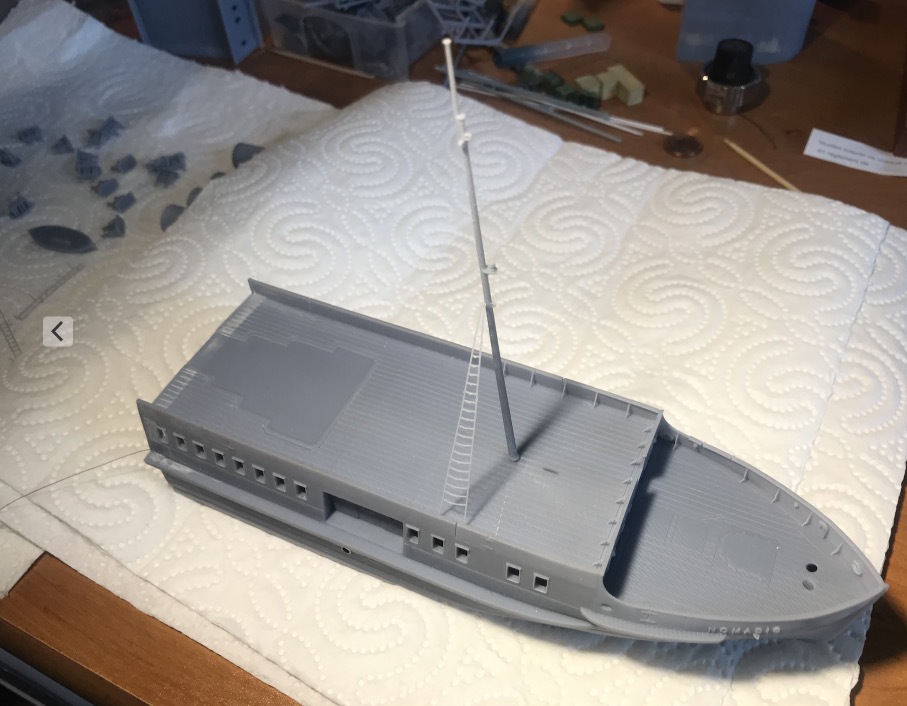
I can start the assembly even if the upper deck that we could call the walkway bridge is not designed yet, which would not be long in coming.

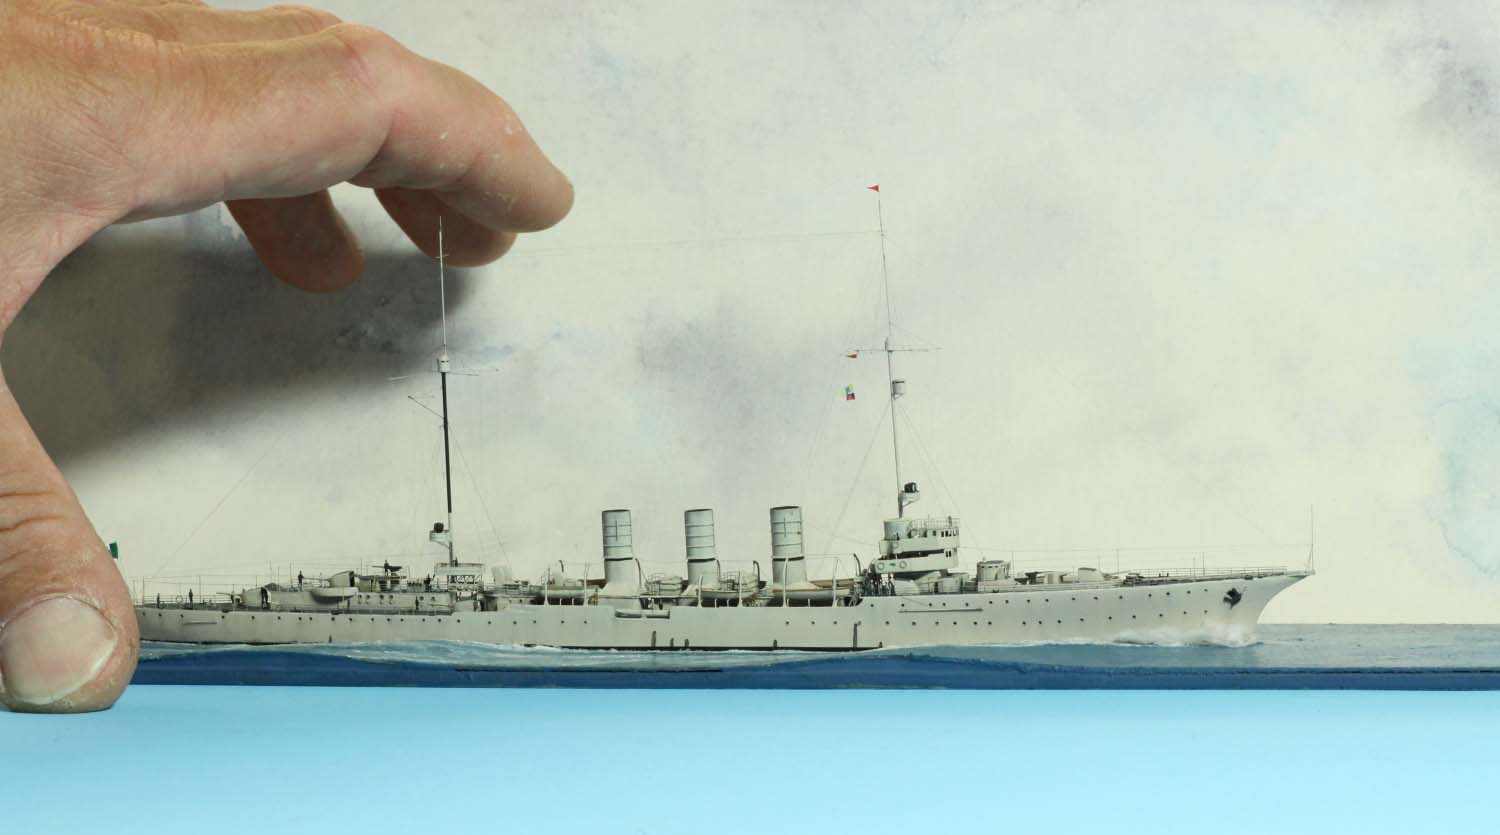
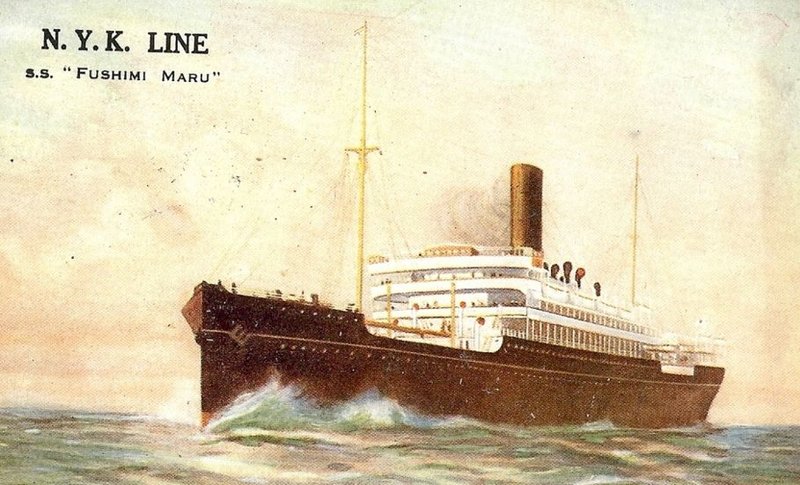
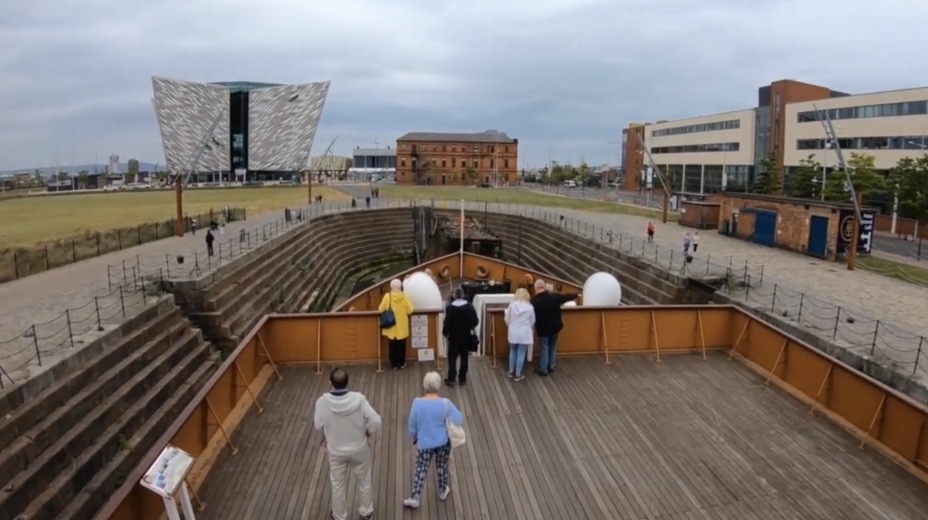
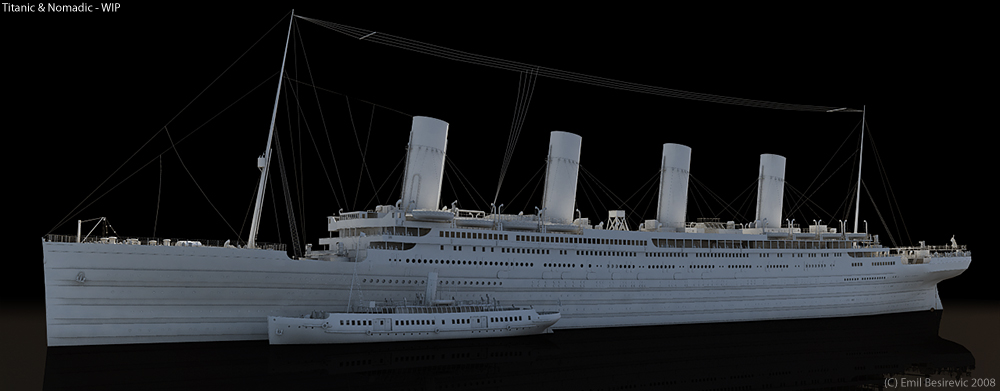
The goal of the project is to moor the Nomadic to the Titanic, as it did in Cherbourg before it left for Ireland, in order to transship passengers.

Image

Image

Part of the assembly of the accessories must be done before the gluing of the half shells, afterwards it will be impossible to come back to it.


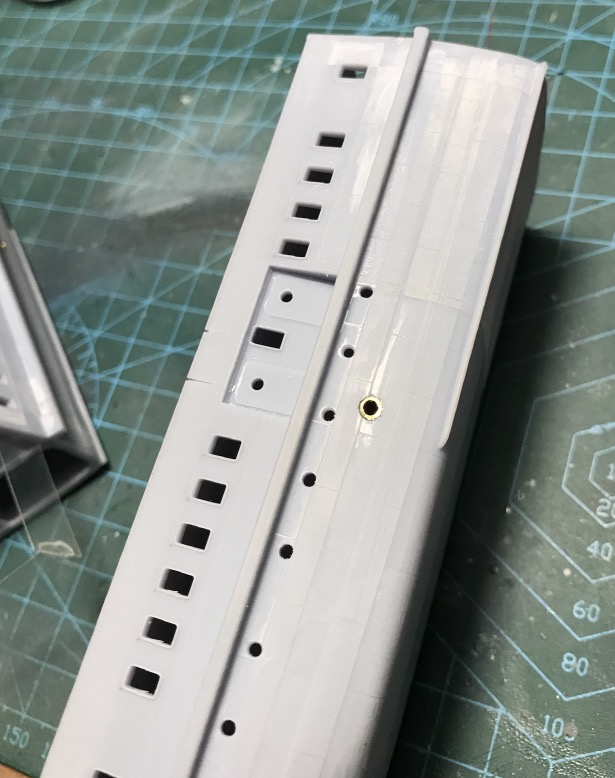
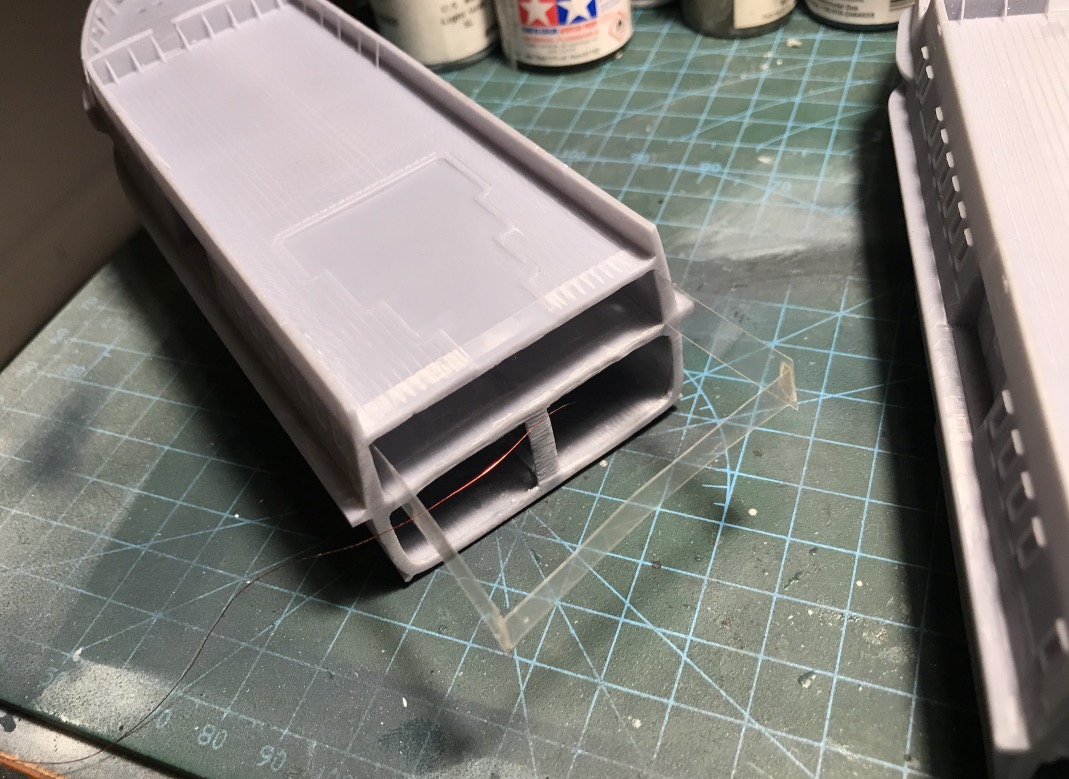
The Nomadic will be held to the Titanic by two piano ropes inserted in each ship. Everything will be dismountable. The Nomadic or the Titanic can be exposed alone as needed. The piano ropes will have another function, that of driving the 12 v continuous from ship to ship for lighting the Nomadic, the more on one rope the less on the other. No unsightly wires therefore.

Once the piano strings are removed, the holes will be two of the many cooling water or sewage outlets on both ships.

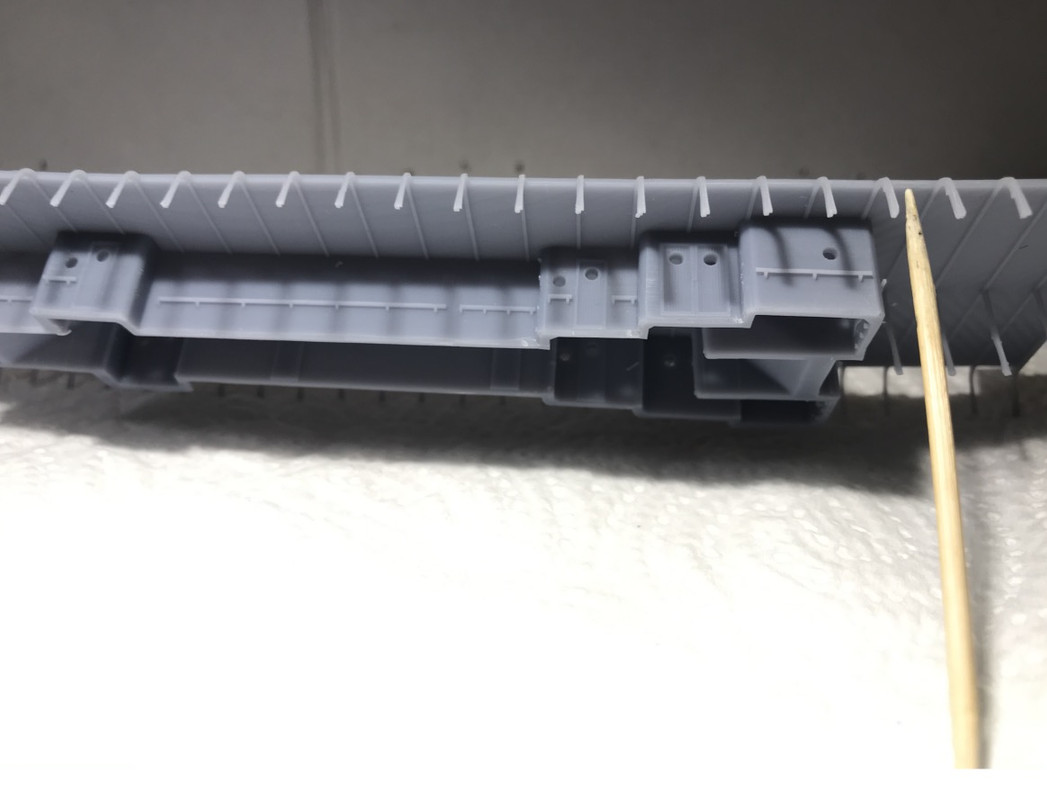
So I cut two brass tubes to insert them into the hull, they will serve as guide bearings for the piano strings.

I soldered well for the front tube a very thin transformer copper wire, this wire is very thin and very good conductor at least for the milliamps consumed by the two leds that will be used to simulate a main deck lighting. No need for more in my opinion, it must be low in intensity, hot leds (yellow) of course.

For the stern as I have a central bulkhead at this level I had to solder the wire after gluing it inside, then I soldered by putting the iron in the hull, a bit sporty...

The tubes:

Image

A little coating remains to be applied to integrate the tube to the hull, we will see that fire after painting.

Image[/

Both wires, the + at the front, the less at the back.
Image

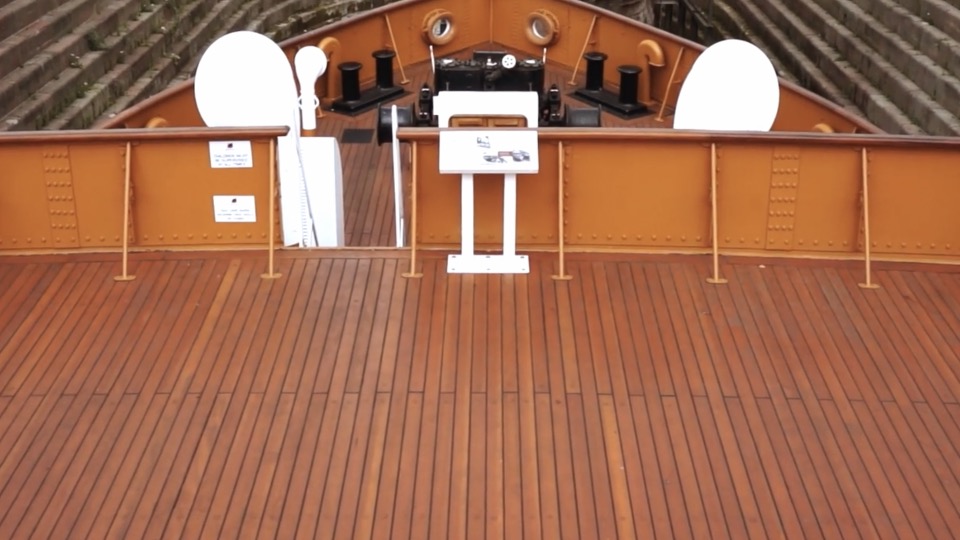
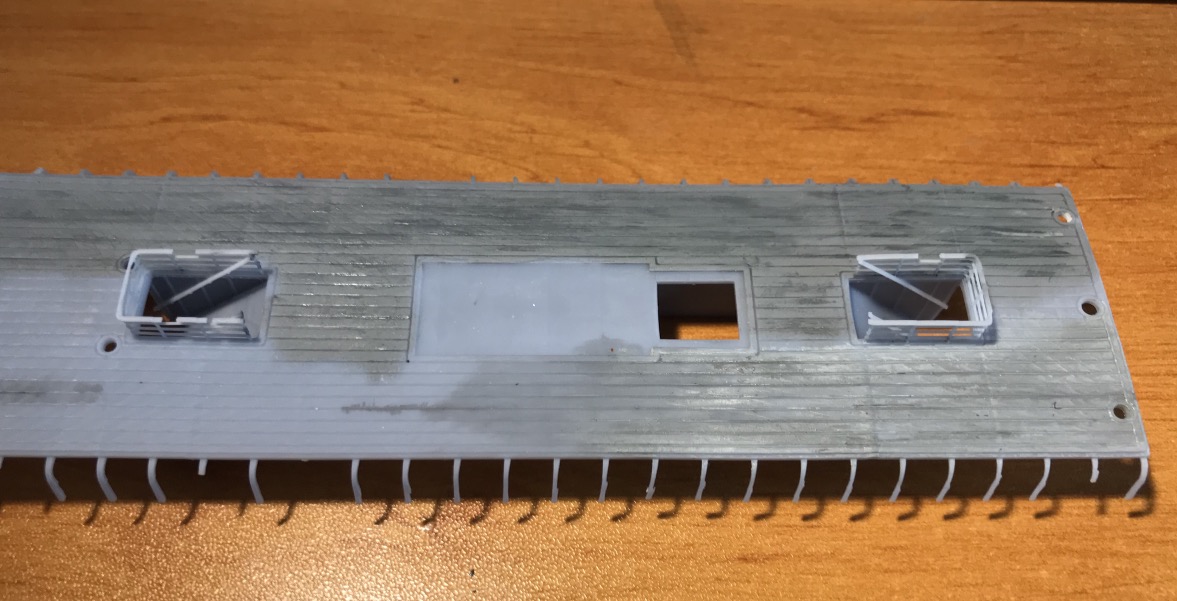
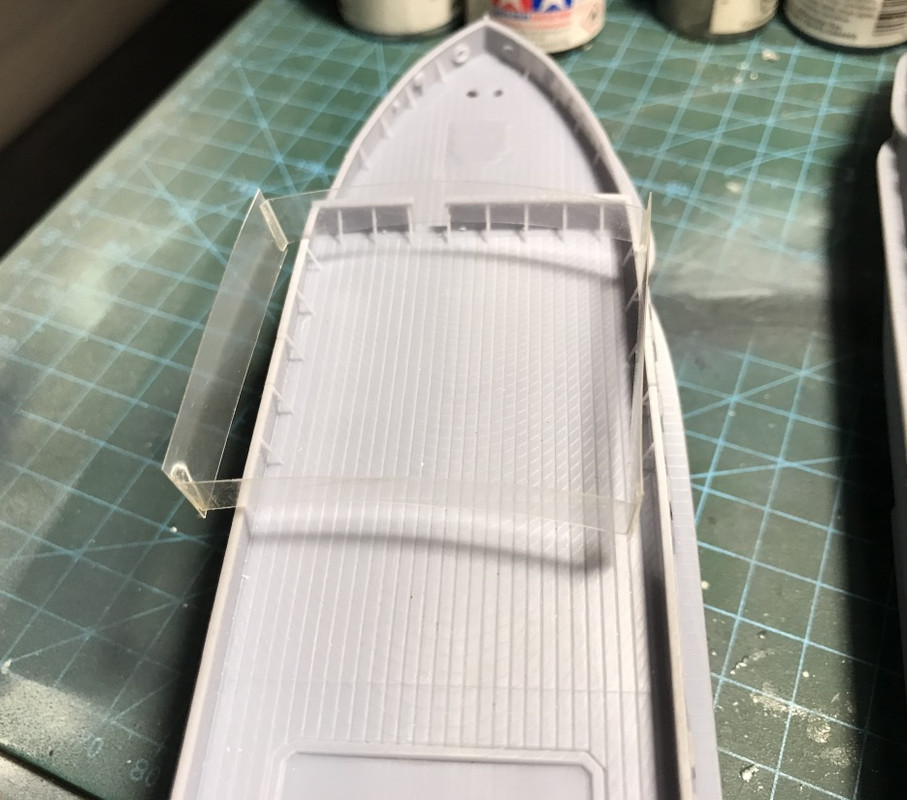
SE also poses the problem of glass in the end ports of the main deck. So I thought of Rhodoïd packing material to design them. It's port is not very accessible, it's impossible to glue directly a plate. The idea came to me to make a frame in Rhodoïd, which thanks to its flexibility will come to stick two of these faces on the ports giving the illusion of a glass.  

It will first have to paint at least the surrounds of the ports in white, because it would otherwise be impossible to paint with aerosol without putting some on the glass once the half-shells are glued. Once painted, I could mask the openings with either tape to paint the rest, in two steps.

For the ports more in the center, it's the same, but there I have access to glue the transparent...

Image

Image


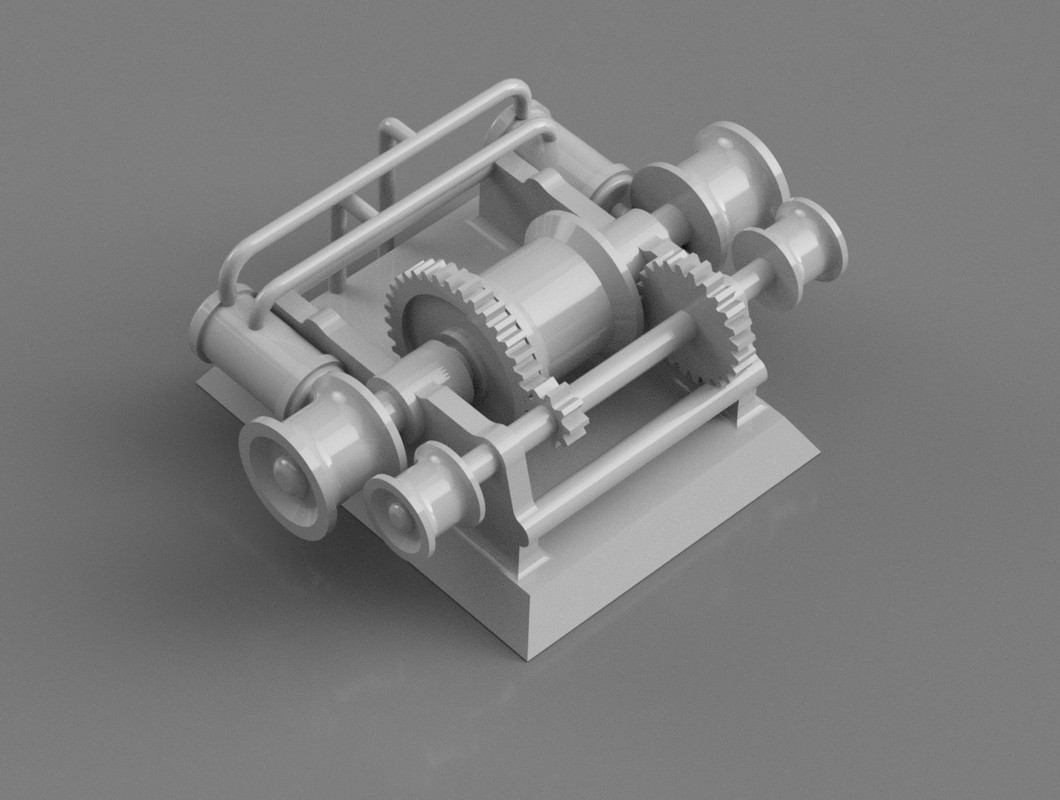
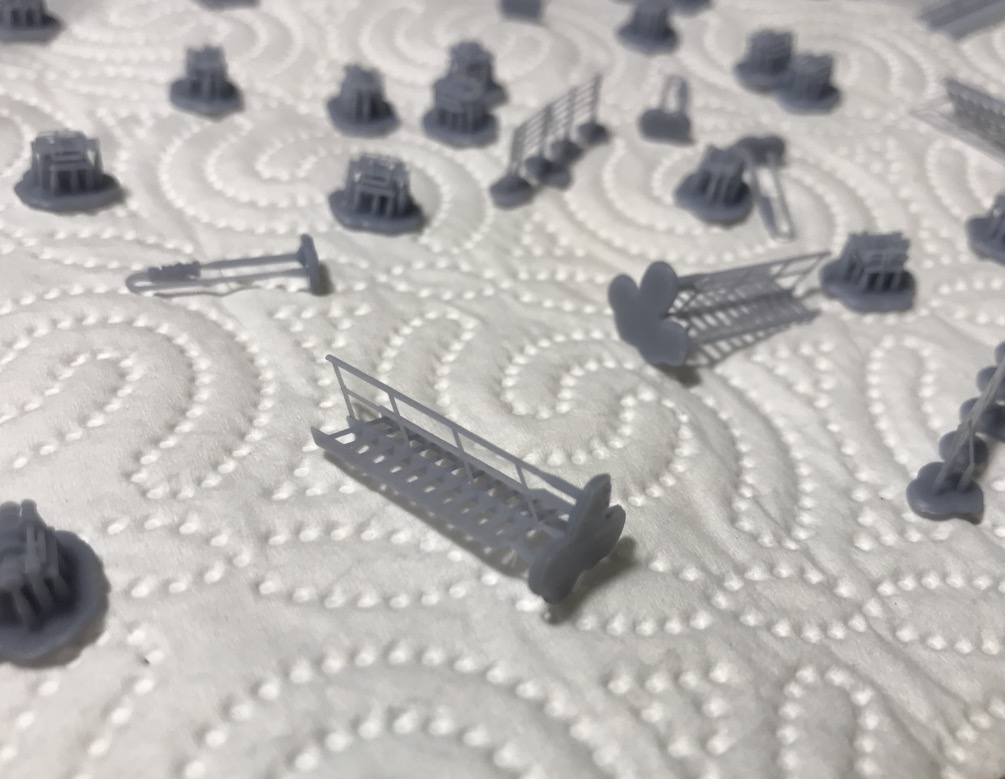
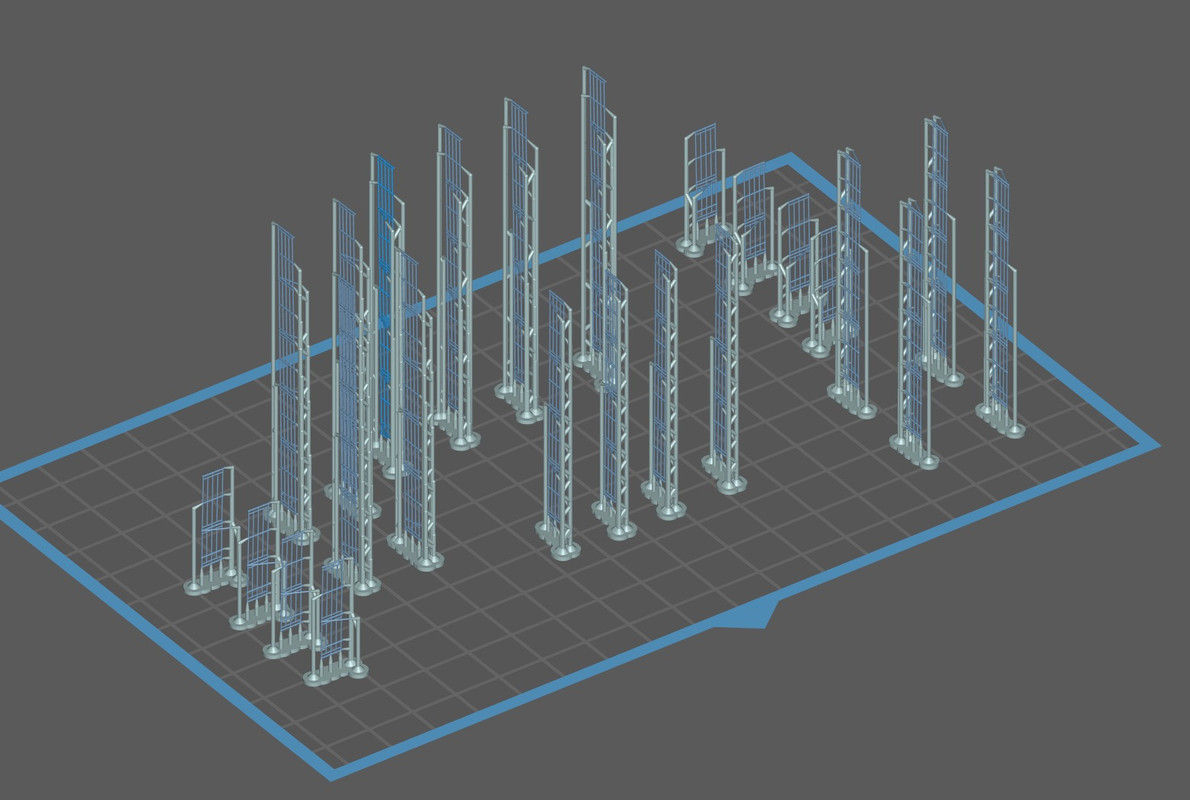
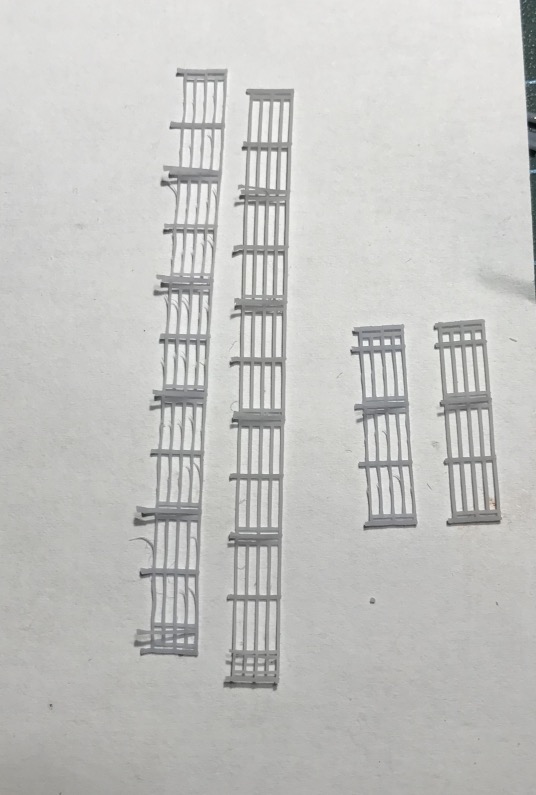
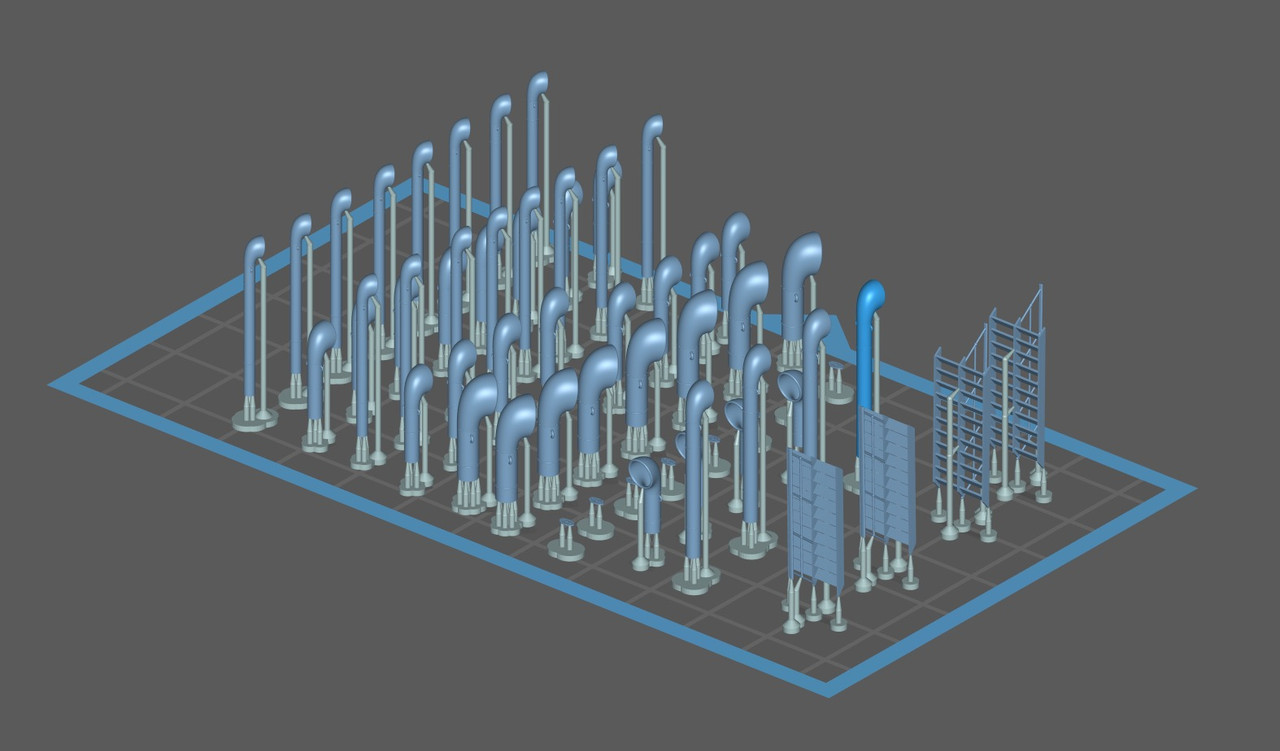
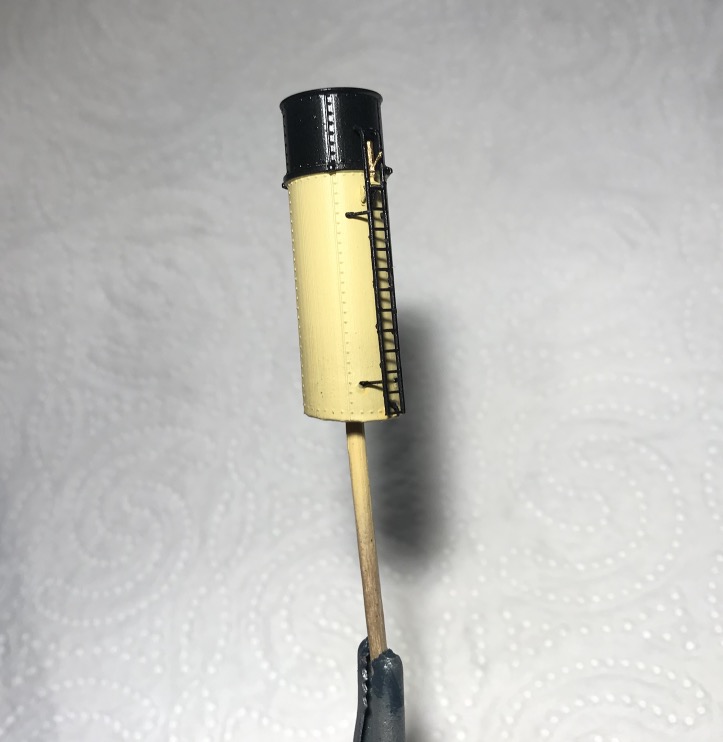
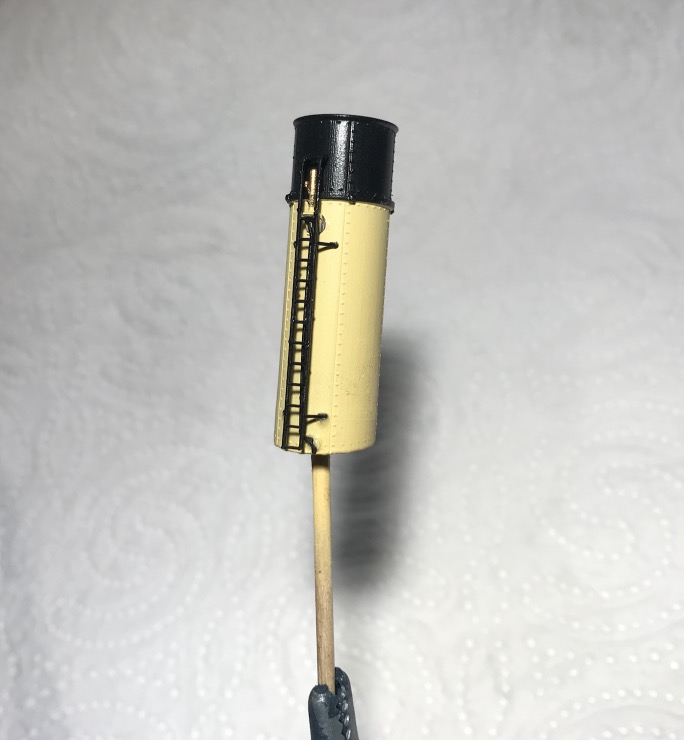
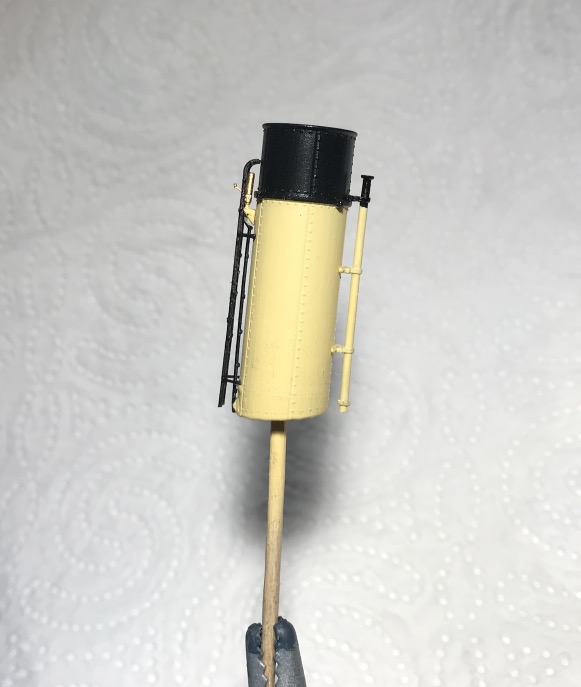
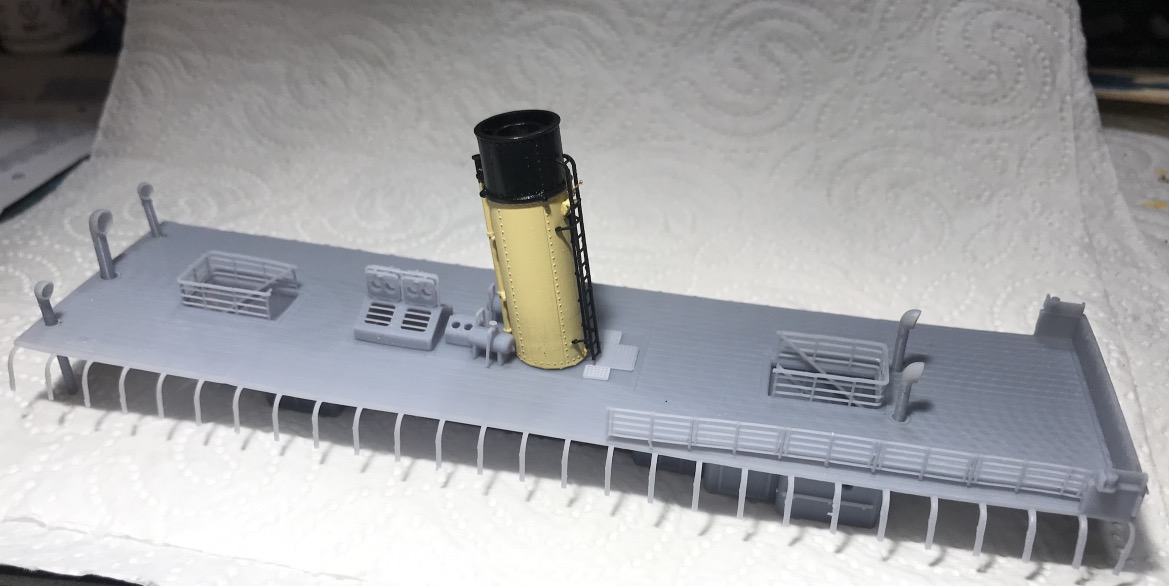
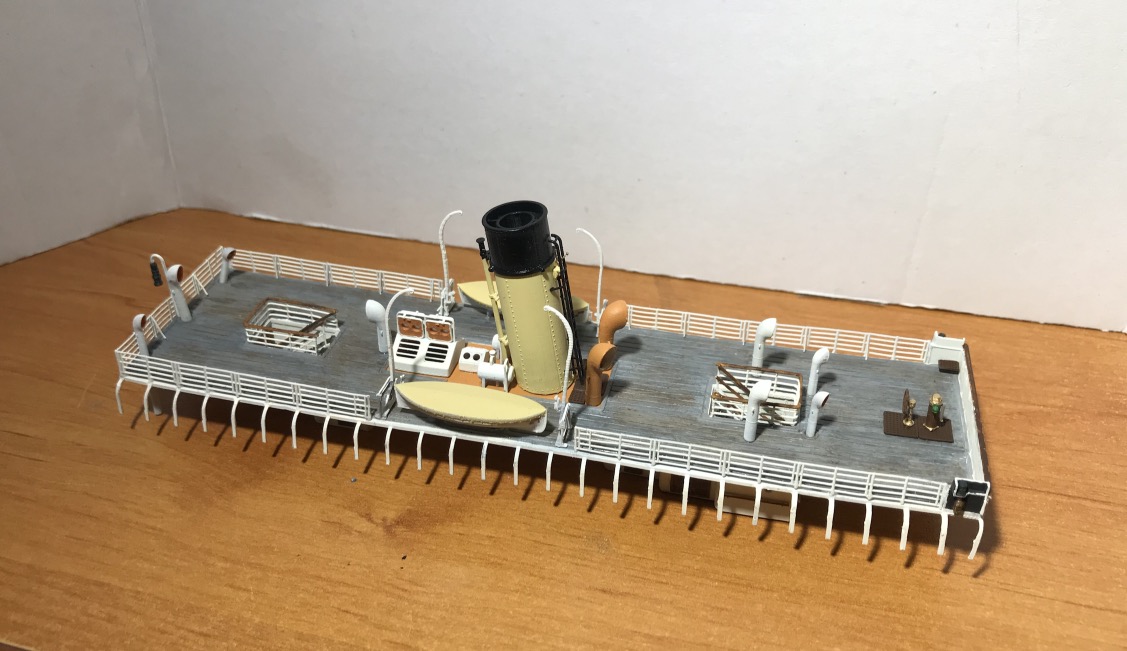
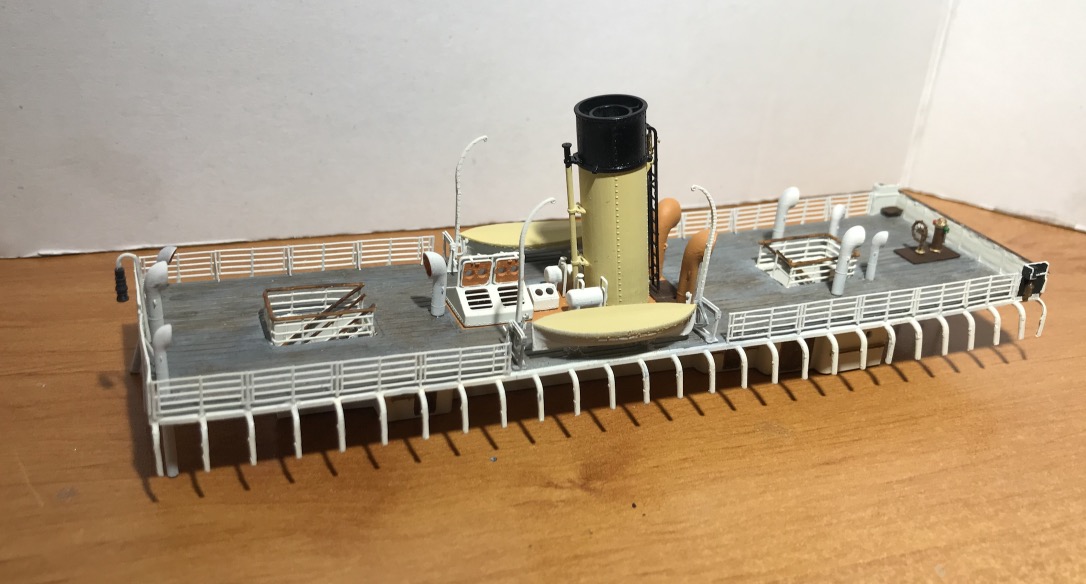
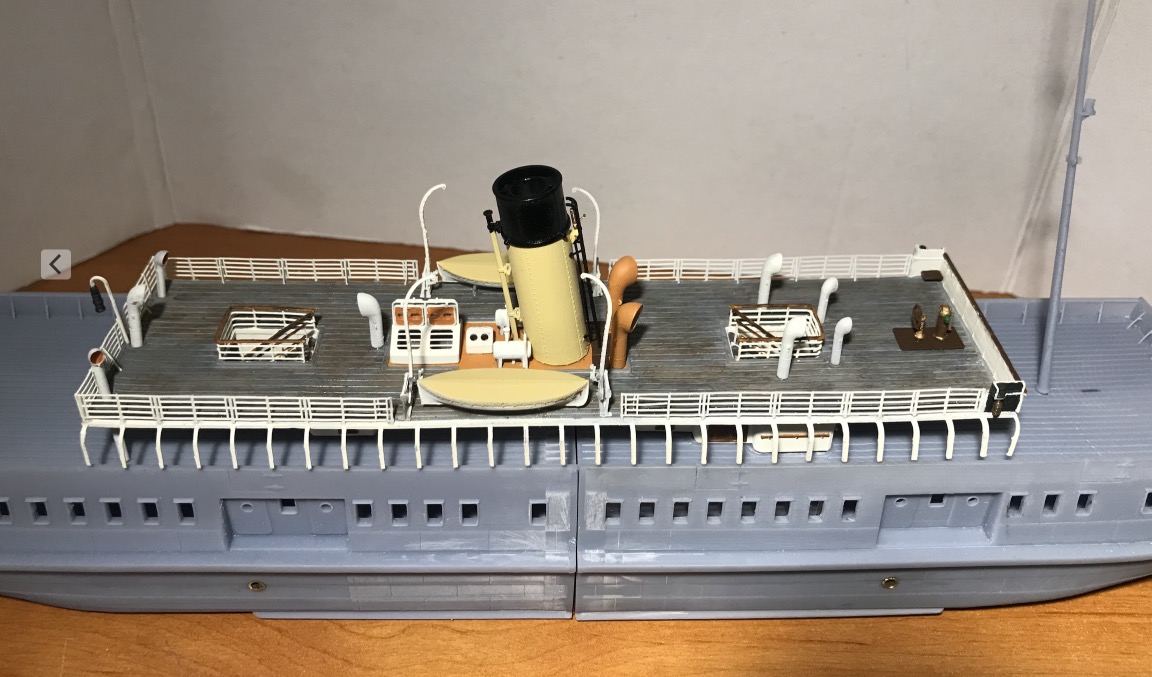
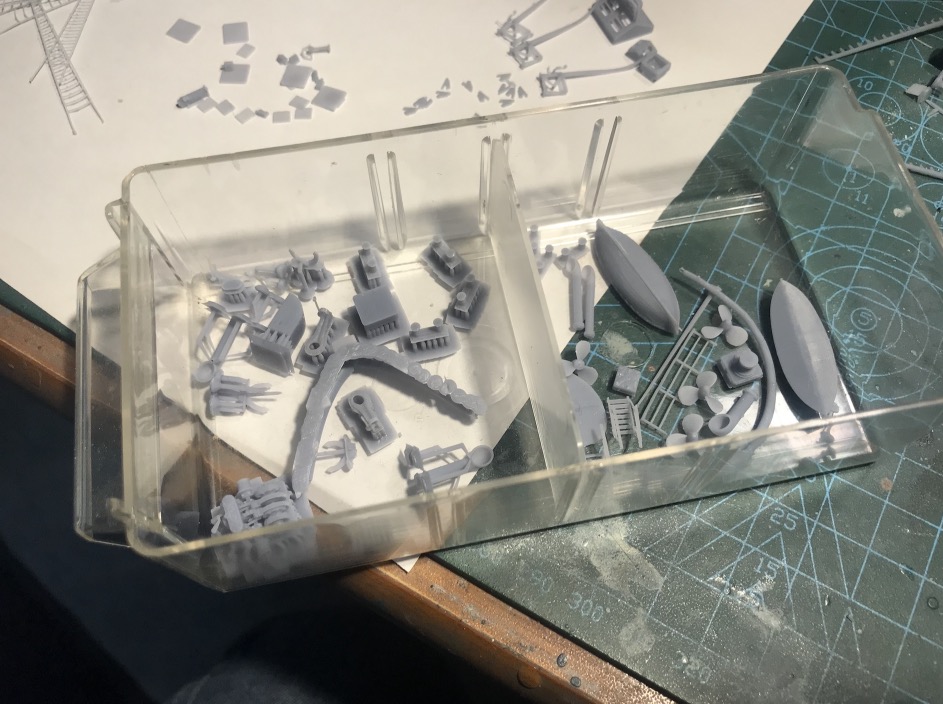
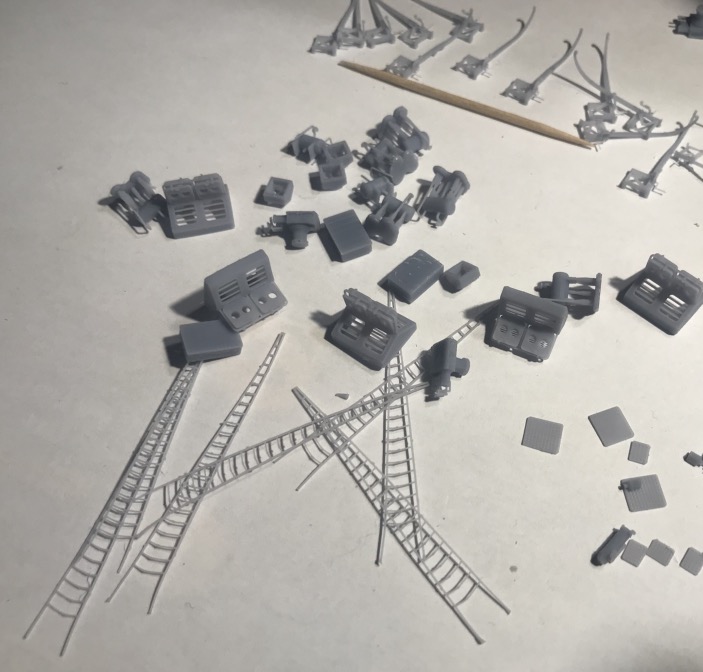
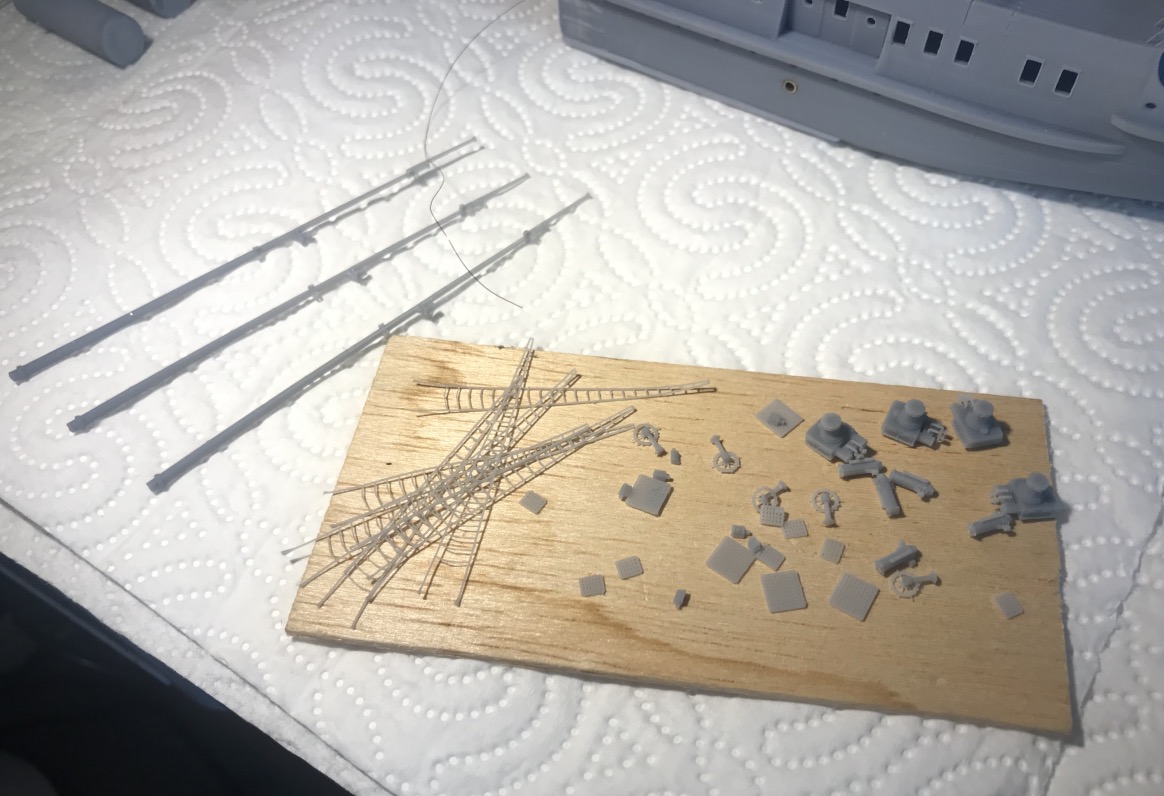
The parts are starting to pile up, I printed sometimes 4 copies, to have spare parts in case of breakage and for several copies.

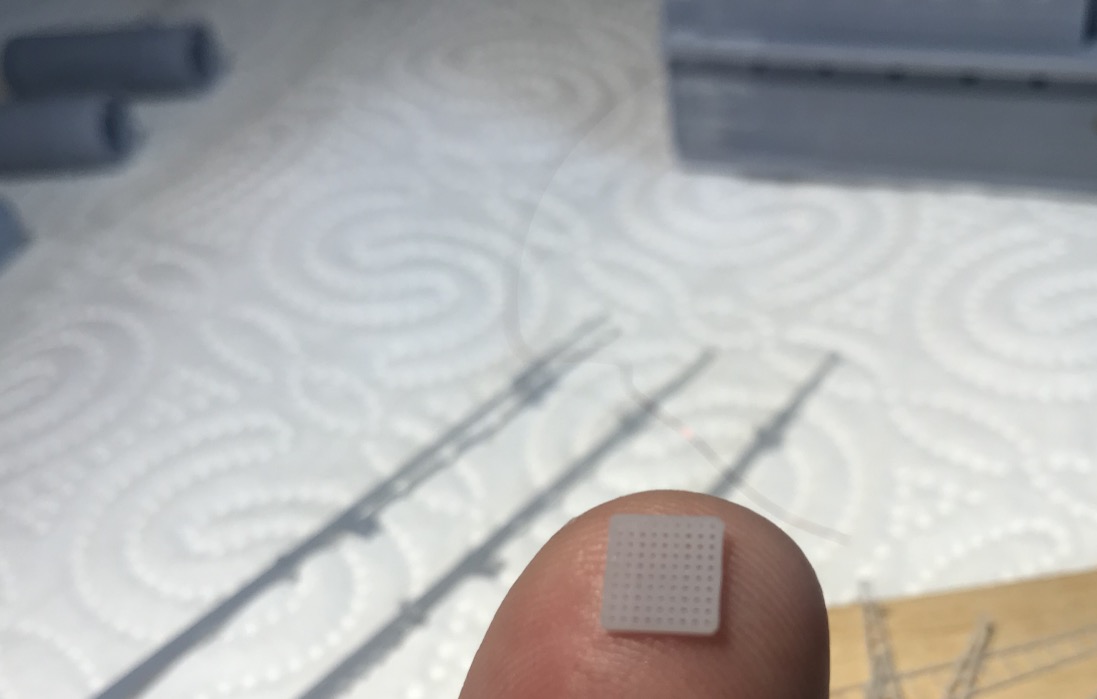
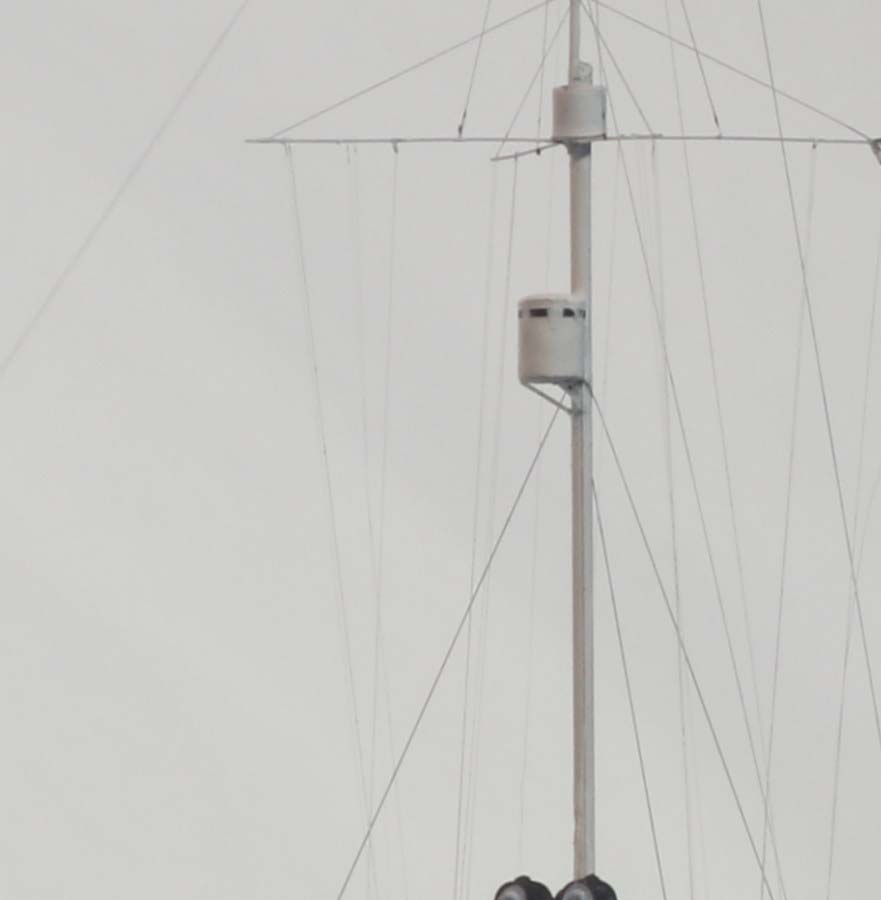
The last parts like the mast and its scales were well printed, the bar a little less because it is very thin, the compass is really beautiful. The gratings are also well done, we can see the micro-holes that should not be filled with paint...

Image

Image

Image

Image

Image

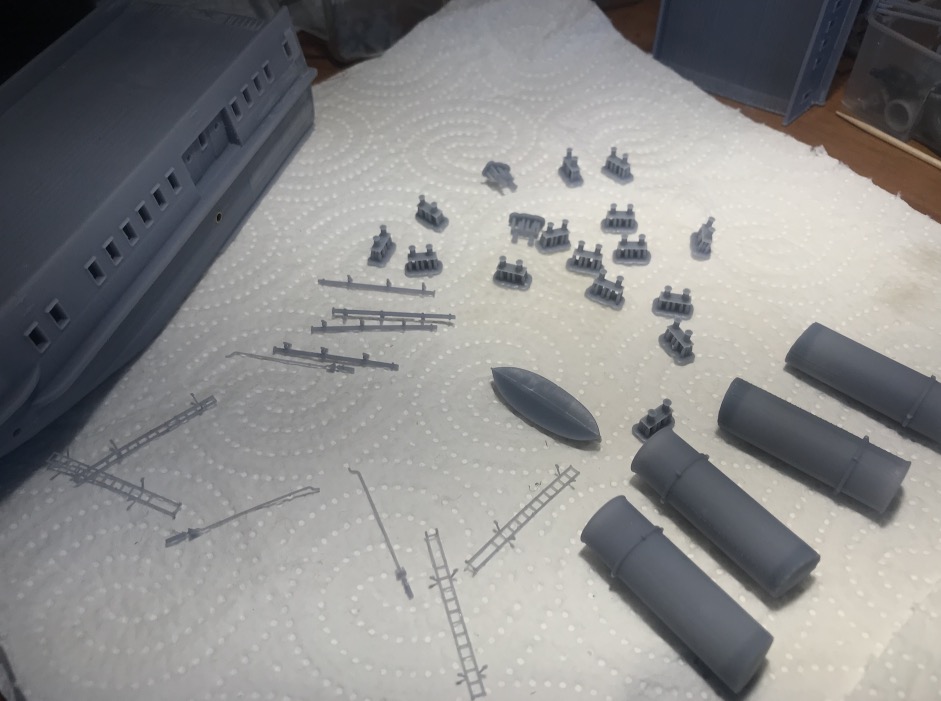
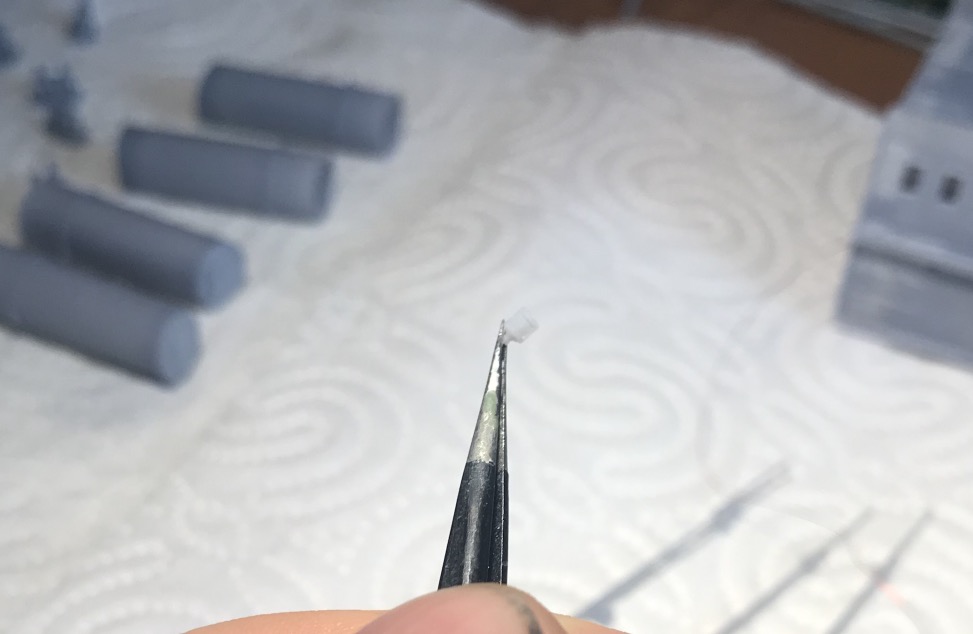
Navigation light lantern
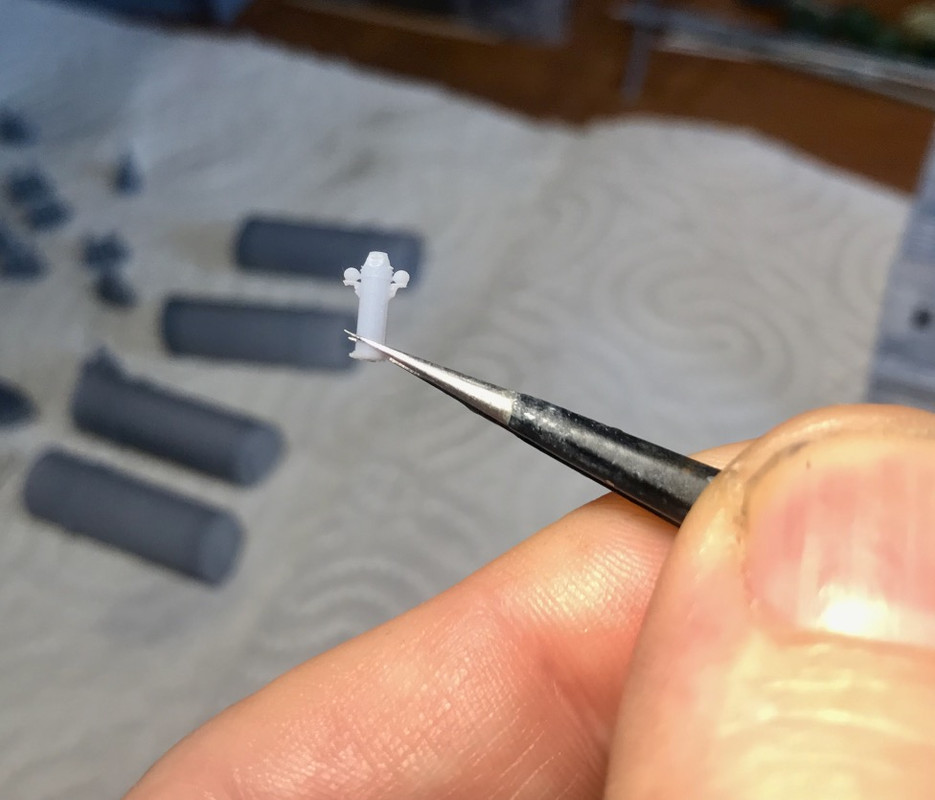
Image

Compass.

Image

Grating.

Image

_________________
Pascal

•Battleship Bretagne 3D: https://vu.fr/FvCY
•SS Delphine 3D: https://vu.fr/NeuO
•SS Nomadic 3D: https://vu.fr/tAyL
•USS Nokomis 3D: https://vu.fr/kntC
•USS Pamanset 3D: https://vu.fr/jXGQ


Report this post
Top
 Profile  
Reply with quote  
PostPosted: Mon Jan 18, 2021 2:25 pm 
Offline

Joined: Wed Jan 02, 2013 1:15 am
Posts: 5060
The binnacle came out quite nice, tiny little thing! As to the mast, is this as flexible as one might imagine? I can see where rigging might be difficult with a tendency to bend the parts, particularly if a yard arm is involved?

Assembly will be interesting to follow!

Cheers: Tom


Report this post
Top
 Profile  
Reply with quote  
PostPosted: Mon Jan 18, 2021 3:38 pm 
Offline
User avatar

Joined: Tue Sep 29, 2020 4:35 pm
Posts: 1881
Location: Bretagne, France
I'll be careful not to bend it this time. I'll tighten the rigging less.

_________________
Pascal

•Battleship Bretagne 3D: https://vu.fr/FvCY
•SS Delphine 3D: https://vu.fr/NeuO
•SS Nomadic 3D: https://vu.fr/tAyL
•USS Nokomis 3D: https://vu.fr/kntC
•USS Pamanset 3D: https://vu.fr/jXGQ


Report this post
Top
 Profile  
Reply with quote  
PostPosted: Thu Jan 21, 2021 3:54 pm 
Offline
User avatar

Joined: Mon Jan 10, 2005 5:30 pm
Posts: 5568
Location: Nr Southampton England
some very impressive prints; I am impressed! :wave_1:

A lot of careful painting now, especially the whites....

to avoid mast distortiuon, what are you planning to rig the ship with?

for minimum loading use the extra fine ( or larger )Modellkasten wire ( NINITOL )


Image


it can be ' propped' -thereby eliminating tension.

for some of the rigging you may consider also stretched sprue

have a look here

viewtopic.php?f=4&t=37536


and here , my 1/700 Ancona

Image


note the spindly masts and rigging


Image


one can get stretched sprue veeeery thin! and it does not load up.
Hope its useful.

BTW-off-topic -I sent an 'automotive' PM- send me an e-mail please and I shall send images

_________________
....I buy them at three times the speed I build 'em.... will I live long enough to empty my stash...?
http://www.modelshipgallery.com/gallery ... index.html

IPMS UK SIG (special interest group) www.finewaterline.com


Report this post
Top
 Profile  
Reply with quote  
PostPosted: Thu Jan 21, 2021 4:54 pm 
Offline
User avatar

Joined: Tue Sep 29, 2020 4:35 pm
Posts: 1881
Location: Bretagne, France
Thank for the advices, Jim, i had the equivalent line; lycra Infini Model, little bit bigger. Stretched Sprue can be an alternative like you said.

Test print of the "Centiped" upper deck today, Vertical print because horizontally it deforms a little too much when drying.

I still have some typical tearing defects due to a lack of support on the side uprights, but this will be rectified at the next printing.

The deck is very well taken out, you can see the battens, the staircase batayolles, the handrails, everything is perfect as much as it can be. On the other hand, you have to handle this bridge with concentration so as not to break anything, there is not a lot of grip. Once painted and glued it will be better! :big_grin:

Nothing is glued yet of course!

To be continued...  

Image

Image

Image

Image

Image

_________________
Pascal

•Battleship Bretagne 3D: https://vu.fr/FvCY
•SS Delphine 3D: https://vu.fr/NeuO
•SS Nomadic 3D: https://vu.fr/tAyL
•USS Nokomis 3D: https://vu.fr/kntC
•USS Pamanset 3D: https://vu.fr/jXGQ


Report this post
Top
 Profile  
Reply with quote  
PostPosted: Fri Jan 22, 2021 12:31 pm 
Offline

Joined: Wed Jan 02, 2013 1:15 am
Posts: 5060
Pascal!

Illuminating to see the appearance and solving of the numerous production and technical issues that arise. I wonder what improvements we will see in the 3D technology over the next few years? Yes orientation is a big issue for optimal printing, often in ways one might not anticipate. For instance I print airy structures such as inclined ladders at a bit of a sideways angle, allowing for proper fine support structures. Your large structures have their own unique printing issues, which take a long time to resolve by testing!

Thank you for discussing these techniques!

Regards: Tom


Report this post
Top
 Profile  
Reply with quote  
PostPosted: Sat Jan 23, 2021 4:30 pm 
Offline
User avatar

Joined: Tue Sep 29, 2020 4:35 pm
Posts: 1881
Location: Bretagne, France
I printed another batch of parts today. Mature 1/350 winches too, homemade, for a project of an English friend who is working on the waterline and scratch construction of the SS Fushimi Maru, a nice piece too.

Image

Image

Image

Here in large scale model at the Navy Museum in Virginia, USA. He was able to get one of the museum's employees to take pictures of the ship, rather nice:

Image

I'm thinking of reprinting the handrails vertically, they will be of better quality, although they're already not bad. You can see the difference with the printed ones, vertically.

Before being UV printed, the pieces are very flexible, especially the handrails. I usually take advantage of this to degrease them, then, for the handrails, I lay them flat on a support to put them back in line, then I UV print them to harden them definitively.

Image

Image

Image

Image

Re-printed the whole railing in vertical, no photo is better.

Image

Those on the right are printed vertically.

Image

@Tom

The next evolution of 3D printing will probably be this:

Xolography.

https://www.nature.com/articles/d41586-020-03543-3

Image

Image

_________________
Pascal

•Battleship Bretagne 3D: https://vu.fr/FvCY
•SS Delphine 3D: https://vu.fr/NeuO
•SS Nomadic 3D: https://vu.fr/tAyL
•USS Nokomis 3D: https://vu.fr/kntC
•USS Pamanset 3D: https://vu.fr/jXGQ


Report this post
Top
 Profile  
Reply with quote  
PostPosted: Sat Jan 23, 2021 11:57 pm 
Offline

Joined: Wed Jan 02, 2013 1:15 am
Posts: 5060
Very interesting! Unfortunately I can't print railings vertically as they are curved and rather complex in shape, curves, jogs and whatnot.

Cheers: Tom


Report this post
Top
 Profile  
Reply with quote  
PostPosted: Sun Jan 24, 2021 8:40 am 
Offline
User avatar

Joined: Mon Nov 18, 2013 3:41 pm
Posts: 3102
Location: Mocksville, NC
Pascal,

Your 3D railings are really nice!!! So, I have a couple questions re. your setup -
1) What type of resin are you using? (Brand, type, etc.)
2) Do you manually attach the supports or let the program do it for you?
3) If you don't mind sharing, what are your Chitubox Settings?

I am having very little success with even simple railings - I might try doing the short sections in a vertical position as you have done. The solid items seem to print fairly constantly, but right now I'm concerned with getting the railings done correctly.

Thanks,

Hank

_________________
HMS III
Mocksville, NC
BB62 vet 68-69

Builder's yard:
USS STODDARD (DD-566) 66-68 1:144, Various Lg Scale FC Directors
Finished:
USS NEW JERSEY (BB-62) 67-69 1:200
USN Sloop/Ship PEACOCK (1813) 1:48
ROYAL CAROLINE (1748) 1:47
AVS (1768) 1:48


Report this post
Top
 Profile  
Reply with quote  
PostPosted: Sun Jan 24, 2021 11:43 am 
Offline

Joined: Wed Jan 02, 2013 1:15 am
Posts: 5060
Pascal, I see that few of the rails have the curled peeling strips, an issue that I occasionally have with rail undersides and not adequately supported overhangs. Would exposure times or layer thicknesses affect this? Would more thinner layer tend to make a better rail, or not? I haven't noticed that much stiffening of the rails with UV curing. There is a resin described as "stiff", wonder if it is?

Thank you for sharing the workings of your construction!

Tom


Report this post
Top
 Profile  
Reply with quote  
PostPosted: Sun Jan 24, 2021 6:07 pm 
Offline
User avatar

Joined: Tue Sep 29, 2020 4:35 pm
Posts: 1881
Location: Bretagne, France
@Hank.

I place the supports completely manually. That's more judicious.

What settings do you want, Hank?

I use Elegoo Standard grey resin.

What type of printer do you have?

@Tom

If there are not enough supports it delaminates, especially on thin pieces , because the longer the exposure time, the more it sticks to the film.Ideally, the piece should be tilted a minimum to avoid having the maximum surface parallel to the FEP film. The lifting speed of the plate can also play a role.

UV has a big curing effect on the resin I use. I don't know about the thickness of the layers. I use all the time 0,05 with the Mono X.

_________________
Pascal

•Battleship Bretagne 3D: https://vu.fr/FvCY
•SS Delphine 3D: https://vu.fr/NeuO
•SS Nomadic 3D: https://vu.fr/tAyL
•USS Nokomis 3D: https://vu.fr/kntC
•USS Pamanset 3D: https://vu.fr/jXGQ


Report this post
Top
 Profile  
Reply with quote  
PostPosted: Sun Jan 24, 2021 8:35 pm 
Offline
User avatar

Joined: Mon Nov 18, 2013 3:41 pm
Posts: 3102
Location: Mocksville, NC
Pascal,

Thanks for responding. I have a Phrozen Sonic Mini 4K and currently using Phrozen Model Gray and Phrozen ABS-Like Matte Gray resins. The handrails are not coming out very well with the ABS-like resin so I'm thinking of going back to the Model Gray and also reorienting my parts vertically or at a 60° angle as you seem to have a fairly good success rate with yours.

I am looking for your Chitubox Settings - Machine/Resin/Print - mainly the Print settings, layer height, bottom layer count, etc. - that page of settings.

I also wonder how the Phrozen Model Gray resin compares to your Elegoo Std. Gray Resin.

Anyhow, any info for comparison would be appreciated.

And...thanks for the answer to Tom's question - I had noticed that also and had some of my rails doing likewise - so, this is more an issue of support/orientation to eliminate this.

Hank

_________________
HMS III
Mocksville, NC
BB62 vet 68-69

Builder's yard:
USS STODDARD (DD-566) 66-68 1:144, Various Lg Scale FC Directors
Finished:
USS NEW JERSEY (BB-62) 67-69 1:200
USN Sloop/Ship PEACOCK (1813) 1:48
ROYAL CAROLINE (1748) 1:47
AVS (1768) 1:48


Report this post
Top
 Profile  
Reply with quote  
PostPosted: Mon Jan 25, 2021 2:37 pm 
Offline
User avatar

Joined: Tue Sep 29, 2020 4:35 pm
Posts: 1881
Location: Bretagne, France
For the moment, I once used the Sonic to make my stairs with handrails, it was a failure. I was 3s away from exposure, I will go back up to 4s and try again.

I had positioned them this way, I had already successfully printed these stairs with the Anycubic Mono X see above.

To tell the truth, I regret a little my purchase Phrozen, the Anycubic Photon Mono X is much better at all levels, print size, finish of the printer, constant print quality, ease of use, Wifi application, reliability.

I should have bought a second one instead.

Image

Image

Today printing ventilation ducts.

Assembly and painting of the chimney, Sand Yellow Vallejo 69.033, normally the tint corresponding to the paint of the chimney of the White Star, then flat black Tamiya, and matte varnish X-86 Tamiya. Whistle painted with Revell No. 94.

Image

Image

Image

Image

_________________
Pascal

•Battleship Bretagne 3D: https://vu.fr/FvCY
•SS Delphine 3D: https://vu.fr/NeuO
•SS Nomadic 3D: https://vu.fr/tAyL
•USS Nokomis 3D: https://vu.fr/kntC
•USS Pamanset 3D: https://vu.fr/jXGQ


Last edited by Iceman 29 on Mon Jan 25, 2021 3:16 pm, edited 1 time in total.

Report this post
Top
 Profile  
Reply with quote  
PostPosted: Mon Jan 25, 2021 3:06 pm 
Offline

Joined: Wed Jan 02, 2013 1:15 am
Posts: 5060
Pascal:

The rivets look very nice with the paint applied! Really brings the stack to life!

Regards: Tom


Report this post
Top
 Profile  
Reply with quote  
PostPosted: Mon Jan 25, 2021 4:22 pm 
Offline
User avatar

Joined: Mon Nov 11, 2013 11:01 pm
Posts: 1257
Location: Detroit area
The future of scratchbuilding, ladies and gentlemen... :thumbs_up_1: :cool_1:

_________________
Sean Nash, ACG (aircraft camo gestapo)

On the ways:
1/200 Trumpeter HMS Nelson
1/700 Tamiya USS Yorktown CV-5

In the stash:
1/35 Italiari PT-109
1/35 Tamiya "Pibber" Patrol Boat
1/350 Trumpeter USS Yorktown CV-10


Report this post
Top
 Profile  
Reply with quote  
PostPosted: Mon Jan 25, 2021 6:55 pm 
Offline
User avatar

Joined: Mon Nov 18, 2013 3:41 pm
Posts: 3102
Location: Mocksville, NC
Pascal,

Thanks so much - I don't know how to relate your settings to mine (being that we use different resins), but I'll hang on to this in case I make a move to purchase the AnyCubic Photon resin.

Your stack looks like the real deal!! Very nice printout and painting!!

I'm taking into account the way you've laid out your items, orientation, etc. and also the supports - Thanks again for sharing!

Hank

_________________
HMS III
Mocksville, NC
BB62 vet 68-69

Builder's yard:
USS STODDARD (DD-566) 66-68 1:144, Various Lg Scale FC Directors
Finished:
USS NEW JERSEY (BB-62) 67-69 1:200
USN Sloop/Ship PEACOCK (1813) 1:48
ROYAL CAROLINE (1748) 1:47
AVS (1768) 1:48


Report this post
Top
 Profile  
Reply with quote  
PostPosted: Tue Jan 26, 2021 3:09 am 
Offline
User avatar

Joined: Tue Sep 29, 2020 4:35 pm
Posts: 1881
Location: Bretagne, France
Hello Hank:

I no longer use Anycubic resin, it smells too strong and is difficult to find on sale.

I no longer use standard grey Elegoo resin which smells nothing and is perfectly suitable.

https://www.amazon.com/s?k=elegoo+resin ... ts-a-p_3_9

_________________
Pascal

•Battleship Bretagne 3D: https://vu.fr/FvCY
•SS Delphine 3D: https://vu.fr/NeuO
•SS Nomadic 3D: https://vu.fr/tAyL
•USS Nokomis 3D: https://vu.fr/kntC
•USS Pamanset 3D: https://vu.fr/jXGQ


Report this post
Top
 Profile  
Reply with quote  
PostPosted: Wed Jan 27, 2021 4:49 pm 
Offline
User avatar

Joined: Tue Sep 29, 2020 4:35 pm
Posts: 1881
Location: Bretagne, France
The upper deck is almost finished, I have to add a few more details, a ventilation duct, the lifeboat hoists, the order transmitters, the chimney shrouds.

I painted the deck trying to imitate teak, which is normally grey beige when it is outside. I did some forward tests on a test deck. There are three different colors to make it look good.

The teak when it's just laid is this color:

Then it turns after some time and bad weather to the characteristic color of this wood:

Image

Image

It was necessary to make the color of the smooth that is closest to the Humbrol N°63, but the latter is not red enough, so I added some Revel N°84 to arrive at the color Peru, which corresponds fairly well to the color we are looking for.

Image

Image


Here it is too red because of the lighting for the photo. To realize this, you have to look at the lower windsocks which are near the funnel.

Image

Image

Image

Image

Image

Image

Image

Image

_________________
Pascal

•Battleship Bretagne 3D: https://vu.fr/FvCY
•SS Delphine 3D: https://vu.fr/NeuO
•SS Nomadic 3D: https://vu.fr/tAyL
•USS Nokomis 3D: https://vu.fr/kntC
•USS Pamanset 3D: https://vu.fr/jXGQ


Report this post
Top
 Profile  
Reply with quote  
PostPosted: Wed Jan 27, 2021 7:04 pm 
Offline

Joined: Wed Jan 02, 2013 1:15 am
Posts: 5060
Pascal:

The mixing of colors is a useful talent and came out well. Being 650 km from the closest "hobby shop" I end up mixing the Golden Acrylics fluid artists colors. Navy colors are moderately easy to mix, but with a trial and error. The wooden deck is nicely weathered much in the style of the model railroad artists.

Cheers: Tom


Report this post
Top
 Profile  
Reply with quote  
PostPosted: Thu Jan 28, 2021 12:17 pm 
Offline
User avatar

Joined: Tue Sep 29, 2020 4:35 pm
Posts: 1881
Location: Bretagne, France
Thank! 

I took the example of an old teak deck that had been mishandled like on a cargo ship, adding a little bit of brown by touch. Not easy to represent. But it's better in real life than in photo, prettier.

Image

Nomadic in Le Havre.
Image

_________________
Pascal

•Battleship Bretagne 3D: https://vu.fr/FvCY
•SS Delphine 3D: https://vu.fr/NeuO
•SS Nomadic 3D: https://vu.fr/tAyL
•USS Nokomis 3D: https://vu.fr/kntC
•USS Pamanset 3D: https://vu.fr/jXGQ


Report this post
Top
 Profile  
Reply with quote  
Display posts from previous:  Sort by  
Post new topic Reply to topic  [ 110 posts ]  Go to page 1, 2, 3, 4, 5, 6  Next

All times are UTC - 6 hours [ DST ]


Who is online

Users browsing this forum: No registered users and 7 guests


You can post new topics in this forum
You can reply to topics in this forum
You cannot edit your posts in this forum
You cannot delete your posts in this forum
You cannot post attachments in this forum

Jump to:  
Powered by phpBB® Forum Software © phpBB Group