The Ship Model Forum

The Ship Modelers Source
It is currently Fri Apr 19, 2024 7:12 pm

All times are UTC - 6 hours [ DST ]


Post new topic Reply to topic  [ 330 posts ]  Go to page Previous  1 ... 11, 12, 13, 14, 15, 16, 17  Next
Author Message
PostPosted: Thu Jul 21, 2011 4:12 pm 
Offline
User avatar

Joined: Wed Nov 22, 2006 4:42 pm
Posts: 379
Location: Lisbon, Portugal
A very quick reply on this Callen, I'll get back to you latter with more time.... :)

Vicente you can read it like this: Vee-ssen-the

And yes it would be a normal name to be given to a Nau - most of them had Saint names
Hope this clarifies your question

Cheers
Rui

PS: I haven't modeled since May :( so, no progress on my carrack! :( :(

_________________
Ship Modelers of the World UNITE


Report this post
Top
 Profile  
Reply with quote  
PostPosted: Thu Jul 21, 2011 5:19 pm 
Offline
User avatar

Joined: Fri Dec 21, 2007 4:10 pm
Posts: 998
Rui Matos wrote:
A very quick reply on this Callen, I'll get back to you latter with more time.... :)

Vicente you can read it like this: Vee-ssen-the


Great! That's the info I was looking for. So normally 't' is 'th' as in Continental Spanish?

Rui Matos wrote:
And yes it would be a normal name to be given to a Nau - most of them had Saint names
Hope this clarifies your question


Yes. Thanks for signing off on that. I'm trying to come up with plausible names, and it's fun too, although probably a little silly since these ships are entirely conjectural...

Rui Matos wrote:
PS: I haven't modeled since May :( so, no progress on my carrack! :( :(


Haven't heard anything from Jean, Bruno, Lars or Michel either on that score. As far as I know the only two modelers in the world building Carracks in 1/700th scale at the moment are me and Tom Lindsay. I've got nationals in 2 weeks here in the US, so I am working furiously trying to finish something in time. :heh:

Good to hear from you. :wave_1:

_________________
Pessimists see the world as it truly is...
Optimists change the world.


Report this post
Top
 Profile  
Reply with quote  
PostPosted: Fri Jul 22, 2011 11:47 am 
Offline

Joined: Tue Jun 14, 2005 6:23 am
Posts: 3698
Location: Bonn
callen wrote:
Haven't heard anything from Jean, Bruno, Lars or Michel either on that score.


Do you have any news on the PE parts? I would prefer to start, if I have also the PE parts.

_________________
Image


Report this post
Top
 Profile  
Reply with quote  
PostPosted: Fri Jul 22, 2011 8:09 pm 
Offline
User avatar

Joined: Thu Jul 07, 2011 2:34 pm
Posts: 14
Location: 18°00'33.64" N 76°46'50.73" W
Callen, any time you're ready, I have some reconstruction sketches i can e-mail to you, in relation to ancient Roman ships! :-)

_________________
Image
Thanks for your time, good intentions, ideas and help,

Sven
Forum Navis Romana
http://navis.TerraRomana.org/Forum


Report this post
Top
 Profile  
Reply with quote  
PostPosted: Tue Jul 26, 2011 3:10 am 
Offline
User avatar

Joined: Fri Dec 21, 2007 4:10 pm
Posts: 998
SvenLittkowski wrote:
Callen, any time you're ready, I have some reconstruction sketches i can e-mail to you, in relation to ancient Roman ships! :-)

Great Sven! Send them my way! :wave_1:

_________________
Pessimists see the world as it truly is...
Optimists change the world.


Report this post
Top
 Profile  
Reply with quote  
PostPosted: Tue Jul 26, 2011 4:02 pm 
Offline
User avatar

Joined: Fri Dec 21, 2007 4:10 pm
Posts: 998
Ok carrack club!

Today we will have to (quickly) post some updates from the previous two week-ends. Once again I am in a 'race to the finish' trying to complete the Fora on time. As of today, I have exactly one week to finish! :Mad_6: Trying very hard not to rush, skimp or skip anything important. Ok. Here goes.
Attachment:
Moreforajuly1.jpg
Moreforajuly1.jpg [ 41.15 KiB | Viewed 1060 times ]
Starboard somercastle gallery completed.
Attachment:
Moreforajuly2.jpg
Moreforajuly2.jpg [ 30.8 KiB | Viewed 1060 times ]
Taffrail and stern gallery, what there is of it.
Attachment:
Moreforajuly3.jpg
Moreforajuly3.jpg [ 35.35 KiB | Viewed 1060 times ]
Ready to paint galleries! :woo_hoo:
Attachment:
Moreforajuly6.jpg
Moreforajuly6.jpg [ 41.65 KiB | Viewed 1060 times ]
Back from the garage with a new coat of MM Dark Tan on the castles... I think I preferred the white styrene and shiny brass, though it wouldn't do to leave it that way. Now the question is, what colors to use? We can't make it too bright, and (alas) there's not a lot of room for triangle patterns. After consulting the Cowdray Engraving and looking closely at Breughel's 'Portuguese Carracks' I decided to go with basic wood colors, hopefully allowing the architecture to speak for itself...
Attachment:
Moreforajuly19.jpg
Moreforajuly19.jpg [ 51.67 KiB | Viewed 1060 times ]
blacking out the shooting galleries...
Attachment:
Moreforajuly20.jpg
Moreforajuly20.jpg [ 55.45 KiB | Viewed 1060 times ]
Attachment:
Moreforajuly22.jpg
Moreforajuly22.jpg [ 42.92 KiB | Viewed 1060 times ]
Attachment:
Moreforajuly23.jpg
Moreforajuly23.jpg [ 49.68 KiB | Viewed 1060 times ]
MM Flat Black on the base, and MM Sand for pillars and arches... The shape of the raised details made this relatively easy to paint, although the forecastle was more difficult.
Attachment:
Moreforajuly24.jpg
Moreforajuly24.jpg [ 57.95 KiB | Viewed 1060 times ]
Not happy with the hull color. Our Breughel shows a very dark hull with lighter upperworks... Back out to the garage for something dark... :cool_2:


Attachments:
Moreforajuly25.jpg
Moreforajuly25.jpg [ 63.8 KiB | Viewed 1060 times ]

_________________
Pessimists see the world as it truly is...
Optimists change the world.
Report this post
Top
 Profile  
Reply with quote  
PostPosted: Tue Jul 26, 2011 4:05 pm 
Offline
User avatar

Joined: Fri Dec 21, 2007 4:10 pm
Posts: 998
Attachment:
Moreforajuly28.jpg
Moreforajuly28.jpg [ 53.32 KiB | Viewed 1060 times ]
Dark!
But is it too dark? And too blue? Does it still look like wood? Maybe some weathering, etc. Seems like too great a contrast between castles and hull.
Attachment:
Moreforajuly30.jpg
Moreforajuly30.jpg [ 46.81 KiB | Viewed 1060 times ]
While mulling the hull color question over, I decided to go back to the sails... It had been so long since my experiments I actually had to go back to this thread and review my own ideas to remember what I had done... :big_grin: The first thing I wanted to try was combining decals and sail material. I had two different species of paper towel, 'Viva' and 'Bounty' both of them were plain white in color, which would avoid the problem of cutting away colored areas, etc.
Attachment:
Moreforajuly31.jpg
Moreforajuly31.jpg [ 49.41 KiB | Viewed 1060 times ]
In order to not ruin any of Bruno's precious decals in the process, I decided to use our NWM logo as a test bed for fusing decal and paper. Here is the NWM logo on wet bounty with Tite Bond II wood glue diluted with water.
Attachment:
Moreforajuly32.jpg
Moreforajuly32.jpg [ 69.15 KiB | Viewed 1060 times ]
Attachment:
Moreforajuly33.jpg
Moreforajuly33.jpg [ 56.18 KiB | Viewed 1060 times ]
Here is another logo decal on the Viva piece.
Attachment:
Moreforajuly34.jpg
Moreforajuly34.jpg [ 39.21 KiB | Viewed 1060 times ]
Attachment:
Moreforajuly35.jpg
Moreforajuly35.jpg [ 33.21 KiB | Viewed 1060 times ]
Attachment:
Moreforajuly36.jpg
Moreforajuly36.jpg [ 30.4 KiB | Viewed 1060 times ]
Attachment:
Moreforajuly37.jpg
Moreforajuly37.jpg [ 28.93 KiB | Viewed 1060 times ]
Attachment:
Moreforajuly38.jpg
Moreforajuly38.jpg [ 58.99 KiB | Viewed 1060 times ]
Both worked adequately; the decal completely fusing to the paper towel. It proved to be durable and flexible without breakage. However the Viva towel was very thick and coarse, while the plain Bounty paper (unlike the colored variety) had very strong quilting that was difficult to flatten... I began to cast about for alternatives...

_________________
Pessimists see the world as it truly is...
Optimists change the world.


Report this post
Top
 Profile  
Reply with quote  
PostPosted: Tue Jul 26, 2011 4:36 pm 
Offline
User avatar

Joined: Fri Dec 21, 2007 4:10 pm
Posts: 998
I felt ready at last to proceed in earnest with sail creation. The idea is to combine decal film sandwiched between two layers of paper, and with nylon rigging line running through the sail to represent the seams between the cloth pieces. I had yet to combine both techniques in a single sail, and realized that not only would I need to find a better consistency of paper, but that I would need to create a jig for running the seam lines through the sails. I decided to take a piece of clear styrene and (using good old IJN perforate bar as a template) create a series of holes to run the thread through. Trying to tape and lay those threads one at a time on a curved side of a cup was a nightmare... much better to do them flat. :thumbs_up_1: I began by taping the IJN bar to the plastic using double sided tape.
Attachment:
Moreforajuly39.jpg
Moreforajuly39.jpg [ 33.21 KiB | Viewed 1060 times ]
Attachment:
Moreforajuly40.jpg
Moreforajuly40.jpg [ 41.69 KiB | Viewed 1060 times ]
This worked well. I simply drilled through the tape as I proceeded. And the best part is, the perforate bar survived the process and can still be used later to make more arches, etc. :woo_hoo:

I had never been successful in creating jigs for modeling before, but this time it worked as advertized and all the materials performed as I had intended.
Attachment:
Moreforajuly42.jpg
Moreforajuly42.jpg [ 47.92 KiB | Viewed 1060 times ]
However, threading the line through those holes was very time consuming... But I don't mind time so much, as long as the results are good in the end. :big_grin:
Attachment:
Moreforajuly43.jpg
Moreforajuly43.jpg [ 42.96 KiB | Viewed 1060 times ]
Cutting out the sail cross decals...

Attachment:
Moreforajuly44.jpg
Moreforajuly44.jpg [ 77.91 KiB | Viewed 1060 times ]
New Sail material... I went to Walmart and bought some nice disposable 'dinner napkins' these are the kind that come white with fine printed quilt designs of ribbing and scallop shells. This I think is the ideal sail material, light, thin without completely disintegrating in water, and the quilt pattern is easy to flatten out. Decals applied to sail layer. As the glue infused paper dries, it actually becomes transparent... except for the areas around the decal... somewhat problematic. I was hoping the upper layer would give us an even opaque appearance.
Attachment:
Moreforajuly45.jpg
Moreforajuly45.jpg [ 59.37 KiB | Viewed 1060 times ]
Attachment:
Moreforajuly48.jpg
Moreforajuly48.jpg [ 60.36 KiB | Viewed 1060 times ]
Threading internal seam rigging...
Attachment:
Moreforajuly49.jpg
Moreforajuly49.jpg [ 43.89 KiB | Viewed 1060 times ]
Time consuming... This was still four weeks ago and I wasn't feeling the pressure yet as much as I am now now... :heh:
Attachment:
Moreforajuly50.jpg
Moreforajuly50.jpg [ 49.08 KiB | Viewed 1060 times ]
Attachment:
Moreforajuly51.jpg
Moreforajuly51.jpg [ 77.19 KiB | Viewed 1060 times ]
This was a whole evening, just threading these sails...

_________________
Pessimists see the world as it truly is...
Optimists change the world.


Report this post
Top
 Profile  
Reply with quote  
PostPosted: Tue Jul 26, 2011 4:50 pm 
Offline
User avatar

Joined: Fri Dec 21, 2007 4:10 pm
Posts: 998
Attachment:
Moreforajuly55.jpg
Moreforajuly55.jpg [ 123.15 KiB | Viewed 1059 times ]
I decided for the large crosses on the main sails I would use double the spacing of threads for these sails, to differentiate them from the smaller ones. I don't know how accurate this is, but I was getting tired of drilling holes... :heh:
Attachment:
Moreforajuly56.jpg
Moreforajuly56.jpg [ 102.78 KiB | Viewed 1059 times ]
Lower layer and threading completed.
Attachment:
Moreforajuly57.jpg
Moreforajuly57.jpg [ 43.03 KiB | Viewed 1059 times ]
applying the upper layer. This was tricky, as it wasn't as easy to flatten the upper layer on the spongy lower layer as it had been to smooth the paper of the lowest layer on the plastic. With a little careful manipulation I was able to get it done...
Attachment:
Moreforajuly59.jpg
Moreforajuly59.jpg [ 64.78 KiB | Viewed 1059 times ]
Attachment:
Moreforajuly61.jpg
Moreforajuly61.jpg [ 47.45 KiB | Viewed 1059 times ]
'Dry fitting' the first cut mainsail...
Attachment:
Moreforajuly62.jpg
Moreforajuly62.jpg [ 56.8 KiB | Viewed 1059 times ]
Cross shows through the upper layer, but is a bit faded. :thumbs_up_1: Aligning the crosses with the threading proved very difficult... didn't get it perfect every time.
Attachment:
Moreforajuly63.jpg
Moreforajuly63.jpg [ 37.64 KiB | Viewed 1059 times ]
How to create the 'bagginess' of the sails? I hit on the idea of cutting wedges out of the edges and gluing them together...
Attachment:
Moreforajuly65.jpg
Moreforajuly65.jpg [ 23.54 KiB | Viewed 1059 times ]
This worked reasonably well in principle... although I have learned that instead of cutting out a large wedge from the middle, it is better to make several small simple cuts along the edge that you want to 'take in' and then glue the edges together with a slight overlap with titebond. If this is done carefully the cuts are not noticeable and the effect is a 3D sail. :thumbs_up_1:
Attachment:
Moreforajuly66.jpg
Moreforajuly66.jpg [ 51.78 KiB | Viewed 1059 times ]
Now what if we take that concept one step further? remember those wonderful bulging sails from the Breughel paintings? All it would need would be to cut the sail into quarters, taper each piece and re glue them...
Attachment:
Moreforajuly67.jpg
Moreforajuly67.jpg [ 30.57 KiB | Viewed 1059 times ]

_________________
Pessimists see the world as it truly is...
Optimists change the world.


Report this post
Top
 Profile  
Reply with quote  
PostPosted: Tue Jul 26, 2011 5:09 pm 
Offline
User avatar

Joined: Fri Dec 21, 2007 4:10 pm
Posts: 998
Hmmm... I don't seem to have any pics of my 'quarter baggy' sail... Suffice it to say, after spending a whole evening trying to create a sail that had four bulging quarters with a deep crevace down the center for the mainstay, I had something that looked...ok, but not spectacular. However cutting and shaping the sail like that reduced its area tremendously and resulted in something that was too small to work on the Fora. So I switched my efforts back to the ship and decided that my baggy sails would be of the 'simple' variety. I began by creating the wolding on the masts using the same method I had used for the Beja and for the Flemish Carrack, but it was so tedious, time consuming, and (as I got more frustrated and the results deteriorated) more and more unsatisfactory I finally decided to simply paint black stripes on the masts to represent the molding. Not as realistic as actually winding thread around the masts, but giving a better look when finished.
Attachment:
Moreforajuly69.jpg
Moreforajuly69.jpg [ 45.16 KiB | Viewed 1058 times ]
Attachment:
Moreforajuly70.jpg
Moreforajuly70.jpg [ 69.78 KiB | Viewed 1058 times ]
Time to add the chainplates...
Attachment:
Moreforajuly71.jpg
Moreforajuly71.jpg [ 65.24 KiB | Viewed 1058 times ]
Overhead. There were chainplates cast as part of the hull originally, but some of them broke through handling during construction, so I decided to tear them off and rescratch them. Hull color still bothering me...

Masts are up! Chainplates in place! Finally ready for the tops! :woo_hoo:
Attachment:
Moreforajuly72.jpg
Moreforajuly72.jpg [ 37.53 KiB | Viewed 1058 times ]
Penny for scale...
Attachment:
Moreforajuly73.jpg
Moreforajuly73.jpg [ 34.77 KiB | Viewed 1058 times ]
The 'basket with rings' idea for these tops was my concept, which Bruno realized beautifully, however when it came time to actually build them, they proved quite difficult...
Attachment:
Moreforajuly74.jpg
Moreforajuly74.jpg [ 24.89 KiB | Viewed 1058 times ]
Attachment:
Moreforajuly75.jpg
Moreforajuly75.jpg [ 55.41 KiB | Viewed 1058 times ]
Attachment:
Moreforajuly78.jpg
Moreforajuly78.jpg [ 31.68 KiB | Viewed 1058 times ]
Attachment:
Moreforajuly79.jpg
Moreforajuly79.jpg [ 39.91 KiB | Viewed 1058 times ]
1st top 'dry fitted' to the mainmast. I should mention the main mast... I noticed some old glue tips I had had a nice taper to them. In the old days masts had something called 'mast partners' which was a ring of stout timbers around the base of the mast. I adapted the glue tip to form the main mast and feel pleased with its shape, although the base doesn't precisely resemble 'mast partners...' At any rate, it's much better than a straight rod. Most of the depictions of carracks I've seen show a very stout mainmast with a very definite taper.

Getting the rings glued in place round the basket of the top proved very difficult. It was very hard to get the ring even in height all the way around, also it was very difficult to get the basket perfectly symmetrical in flare on all sides. I intend to hide the flaws in the top by hanging shields on their outsides when I'm done... This will be an authentic detail and will also hide my mistakes in construction. :big_grin:
Attachment:
Moreforajuly80.jpg
Moreforajuly80.jpg [ 64.35 KiB | Viewed 1058 times ]
Now it's getting fun! :cool_2: Cannon mounted and positioned through the bulwark. Railings up, access ladders, etc.

_________________
Pessimists see the world as it truly is...
Optimists change the world.


Report this post
Top
 Profile  
Reply with quote  
PostPosted: Tue Jul 26, 2011 5:24 pm 
Offline
User avatar

Joined: Fri Dec 21, 2007 4:10 pm
Posts: 998
Attachment:
Moreforajuly81.jpg
Moreforajuly81.jpg [ 49.06 KiB | Viewed 1058 times ]
Attachment:
Moreforajuly82.jpg
Moreforajuly82.jpg [ 31.72 KiB | Viewed 1058 times ]
Attachment:
Moreforajuly83.jpg
Moreforajuly83.jpg [ 76.49 KiB | Viewed 1058 times ]
Attachment:
Moreforajuly84.jpg
Moreforajuly84.jpg [ 55.13 KiB | Viewed 1058 times ]
Attachment:
Moreforajuly91.jpg
Moreforajuly91.jpg [ 45.02 KiB | Viewed 1058 times ]
Note the arches facing the somercastle. These were cut from a very ancient bit of Eduard PE that I bought for the Hasegawa South Dakota way back in the mid-90s... This set was very thick and crude in comparison to modern PE, however, the parts were set in these wonderful ovals, which, when cut and shaped, proved perfect for Renaissance ship-board architectural arches. :thumbs_up_1: Never throw away old PE!!! :big_grin:
Attachment:
Moreforajuly92.jpg
Moreforajuly92.jpg [ 79.25 KiB | Viewed 1058 times ]
Gunports! Why didn't I think of them eariler??? :heh: First I had to drill the holes, then square the holes carefully keeping to the width of the styrene strip I would use to make the lids, then paint the holes black...
Attachment:
Moreforajuly99.jpg
Moreforajuly99.jpg [ 79.55 KiB | Viewed 1058 times ]
I almost didn't do them. Very much optional as far as Carracks go. According to Dr. Howard, depending on the era, a Carrack might have a full gun deck below the weather deck (not an option for me because of the placement of the wales on Fatty, guns only on the deck, or only (or mostly) in the stern... One thing though, if you have a transom on your carrack, stern chase cannons are mandatory. The whole point of a transom is to provide field of fire. Making the gunports was slowing me down as I was eager to get the PE shrouds up, but, in the end I was glad I made the effort...
Attachment:
Moreforajuly100.jpg
Moreforajuly100.jpg [ 44.91 KiB | Viewed 1058 times ]
Attachment:
Moreforajuly101.jpg
Moreforajuly101.jpg [ 76.17 KiB | Viewed 1058 times ]
In scratch building there is nothing more mind-numbing than fiddling with tiny bits of strip, trying to cut a dozen or so into the same shape, going back with the knife to take a barely perceptible sliver off of this one, only to realize now you've made it too small and you'll have to cut down the others, etc. etc. etc... :heh: The hardest part about all of that is trying to cut a loose (unsecured) bit of plastic. So, instead of doing all of that I decided to glue the gunport lids in place long, and paint and cut them after placement.
Attachment:
Moreforajuly102.jpg
Moreforajuly102.jpg [ 54.47 KiB | Viewed 1058 times ]

_________________
Pessimists see the world as it truly is...
Optimists change the world.


Report this post
Top
 Profile  
Reply with quote  
PostPosted: Tue Jul 26, 2011 5:36 pm 
Offline
User avatar

Joined: Fri Dec 21, 2007 4:10 pm
Posts: 998
Attachment:
Moreforajuly103.jpg
Moreforajuly103.jpg [ 84.33 KiB | Viewed 1058 times ]
Attachment:
Moreforajuly104.jpg
Moreforajuly104.jpg [ 54.17 KiB | Viewed 1058 times ]
Attachment:
Moreforajuly108.jpg
Moreforajuly108.jpg [ 59.83 KiB | Viewed 1058 times ]
Attachment:
Moreforajuly112.jpg
Moreforajuly112.jpg [ 75.07 KiB | Viewed 1058 times ]
Attachment:
Moreforajuly113.jpg
Moreforajuly113.jpg [ 42.83 KiB | Viewed 1058 times ]
Attachment:
Moreforajuly114.jpg
Moreforajuly114.jpg [ 38.47 KiB | Viewed 1058 times ]
These gunport guns were not the very fine resin casts of the BMK guns, but were instead cut from Trumpeter WWII Quad 40mm Bofors mounts... too thick for Bofors, but perfect for demiculverins... but don't tell Trumpeter I said that. :cool_2:

I felt the large overhang at the stern of the Fora would naturally need some supporting structure beneath it, and this would also improve the appearance of the model... again, something I could have done a long time before, so much painting and gluing and cutting all at the same time, all late in the build... I kept thinking I should have thought this build out better, but fortunately have not ruined the build yet.
Attachment:
Moreforajuly115.jpg
Moreforajuly115.jpg [ 32.52 KiB | Viewed 1058 times ]
Attachment:
Moreforajuly116.jpg
Moreforajuly116.jpg [ 47.77 KiB | Viewed 1058 times ]
Attachment:
Moreforajuly117.jpg
Moreforajuly117.jpg [ 46.56 KiB | Viewed 1058 times ]
Attachment:
Moreforajuly118.jpg
Moreforajuly118.jpg [ 45.35 KiB | Viewed 1058 times ]

_________________
Pessimists see the world as it truly is...
Optimists change the world.


Report this post
Top
 Profile  
Reply with quote  
PostPosted: Tue Jul 26, 2011 5:59 pm 
Offline
User avatar

Joined: Fri Dec 21, 2007 4:10 pm
Posts: 998
Attachment:
Moreforajuly120.jpg
Moreforajuly120.jpg [ 46.45 KiB | Viewed 1056 times ]
Attachment:
Moreforajuly121.jpg
Moreforajuly121.jpg [ 38.72 KiB | Viewed 1056 times ]
Attachment:
Moreforajuly122.jpg
Moreforajuly122.jpg [ 37.53 KiB | Viewed 1056 times ]
Attachment:
Moreforajuly123.jpg
Moreforajuly123.jpg [ 45.45 KiB | Viewed 1056 times ]
Forgot to document the the rudder, but as you can see from the pics, it is built and in place. Used up a good deal more of the length this time than I did on the Flemish Carrack.
Attachment:
Moreforajuly124.jpg
Moreforajuly124.jpg [ 48.11 KiB | Viewed 1056 times ]
Attachment:
Moreforajuly127.jpg
Moreforajuly127.jpg [ 32.62 KiB | Viewed 1056 times ]
State of the build as of today.
Attachment:
Moreforajuly125.jpg
Moreforajuly125.jpg [ 75.56 KiB | Viewed 1056 times ]
Beginning the waist canopy... still figuring out how to complete it. In dealing with the hull color, I went back over the Flat Black wash I had done on the hull with a dry brush of MM Wood, and that seems to be giving me the look that I've been wanting. Wood stained with tar, but still recognizably wood.

A replica of the Nina once visited Oklahoma at Muscogee where the USS Batfish resides, and we were able to visit her. The hull of that replica was BLACK... BLACK BLACK.. Black up close, black from a distance. But whether or not that is what these ships looked like in real life or not is another question. Then again, there is reality and then there is what looks good on a model. I wanted to have a look that looked like wood that had been stained dark, but still be seen to be wood. So all together the hull of my little carrack has gone from MM Dark Tan with planks in various colors, to a moderate dusting of MM Schwartz Grau, to a wash in Flat Black, and finally dry brushing in MM Wood... again not the simplest most straightforward build, :heh: but it's all a learning process. :big_grin: That's all I have for now. Hoping to get her done over this next week end. (fingers crossed...)

:wave_1:


Attachments:
Moreforajuly129.jpg
Moreforajuly129.jpg [ 61.85 KiB | Viewed 1056 times ]

_________________
Pessimists see the world as it truly is...
Optimists change the world.
Report this post
Top
 Profile  
Reply with quote  
PostPosted: Wed Jul 27, 2011 2:15 am 
Offline
User avatar

Joined: Sun Nov 16, 2008 7:56 am
Posts: 556
Beautiful work! :thumbs_up_1:

:wave_1:

_________________
»Als ik kan«
http://artisanmodeler.blogspot.com/


Report this post
Top
 Profile  
Reply with quote  
PostPosted: Wed Jul 27, 2011 3:42 am 
Offline
User avatar

Joined: Mon Jan 10, 2005 10:52 am
Posts: 2557
Location: Land of the Cheshire cat
Hi Callen, Your build gets better by the day ,lovely work, look forward to more, :woo_hoo: :woo_hoo: :thumbs_up_1: :thumbs_up_1: :thumbs_up_1: :thumbs_up_1:

_________________
Simple but effective.


Report this post
Top
 Profile  
Reply with quote  
PostPosted: Sun Aug 07, 2011 6:00 pm 
Offline
User avatar

Joined: Fri Dec 21, 2007 4:10 pm
Posts: 998
109 wrote:
Beautiful work! :thumbs_up_1:

:wave_1:


Thank you sir! :wave_1:

ARH wrote:
Hi Callen, Your build gets better by the day ,lovely work, look forward to more, :woo_hoo: :woo_hoo: :thumbs_up_1: :thumbs_up_1: :thumbs_up_1: :thumbs_up_1:


Hey Ron! Good to hear from you! I hope you are well. Your encouragement is much appreciated my friend! I think I will oblige you here as much as I am able as it has been a bit since my last post. Stay tuned! :wave_1:

_________________
Pessimists see the world as it truly is...
Optimists change the world.


Report this post
Top
 Profile  
Reply with quote  
PostPosted: Sun Aug 07, 2011 6:14 pm 
Offline
User avatar

Joined: Mon Jan 10, 2005 6:00 pm
Posts: 12144
Location: Ottawa, Canada
So I hear that you won a little something something, Mr. Clarke! Well-deserved and congratulations!

_________________
De quoi s'agit-il?


Report this post
Top
 Profile  
Reply with quote  
PostPosted: Sun Aug 07, 2011 6:20 pm 
Offline
User avatar

Joined: Fri Dec 21, 2007 4:10 pm
Posts: 998
Timmy C wrote:
So I hear that you won a little something something, Mr. Clarke! Well-deserved and congratulations!


Hey Tim!

Got to meet your compadre Mr. Dike, as well as a good chunk of 'The Gang' here on Model Warship. Had an absolute blast at the Nats! Hoping to make a go of it next year. :thumbs_up_1: Maybe I'll see you there? :cool_2:

:wave_1:

_________________
Pessimists see the world as it truly is...
Optimists change the world.


Report this post
Top
 Profile  
Reply with quote  
PostPosted: Sun Aug 07, 2011 6:21 pm 
Offline
User avatar

Joined: Mon Jan 10, 2005 6:00 pm
Posts: 12144
Location: Ottawa, Canada
Heh, not likely - Florida in the summer is not my idea of fun, unfortunately!

_________________
De quoi s'agit-il?


Report this post
Top
 Profile  
Reply with quote  
PostPosted: Sun Aug 07, 2011 7:21 pm 
Offline
User avatar

Joined: Fri Dec 21, 2007 4:10 pm
Posts: 998
Ok friends! Time to post some updates... some very significant updates! :big_grin:

...or to put that another way, after 2 weeks of furious activity I finally have a chance to catch my breath! :thumbs_up_1:

Attachment:
Forafinish1.jpg
Forafinish1.jpg [ 66.04 KiB | Viewed 974 times ]

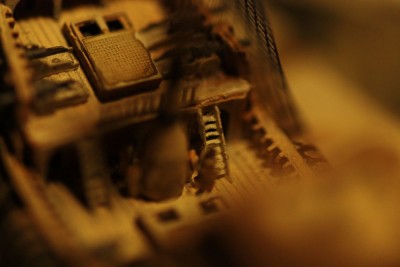
Ok, so we have a problem. The waist hatch coaming consumes all of the space at the base of the cubbridge arch. In order for the crew to access the forward part of the hatch, they would have to walk over the grating itself... which is possible, unless the grating is raised for loading the hold, or damaged in combat. This is an unacceptable situation and needs a remedy. Here's what I settled on:
Attachment:
Forafinish2.jpg
Forafinish2.jpg [ 58.44 KiB | Viewed 974 times ]
Access doors built into the face of the cubbridge on either side, this would give crewmen an additional way into the forward part of the ship. It's not totally implausible as some illustrations show carracks with 2 or even 3 cubbridge arches. The door frames themselves are made from IJN door frames with the bases cut out. This makes them a little short for a proper scale door by our standard, but as deck height in the Age of Sail was as little as 5 ft even up to the 1830s, this is not an unreasonable situation. I was a little unhappy with this solution as it would be better to drill out the cubbridge structure and make two real doorways, rather than simply painting the doorways black, but I was running out of time and needed to press on, also, such an operation would have been very difficult under the circumstances, and might even have resulted in damage to the masts & yards. At any rate, the instillation of the waist canopy wound up obscuring almost all of this detail anyway, so the problem eventually was solved for me.
Attachment:
Forafinish3.jpg
Forafinish3.jpg [ 56.61 KiB | Viewed 974 times ]
Figures! An officer standing in the archway atop the grating. Difficult to make out here is a crewman tending the cannon mount on the port side of the waist deck.
Attachment:
Forafinish4.jpg
Forafinish4.jpg [ 56.91 KiB | Viewed 974 times ]
Two officers having a discussion at the base of the main-mast, with two crewmen tending the cannon mount.
Attachment:
Forafinish5.jpg
Forafinish5.jpg [ 49.18 KiB | Viewed 974 times ]
Attachment:
Forafinish6.jpg
Forafinish6.jpg [ 63.53 KiB | Viewed 974 times ]
Waist Deck Anti-Boarding Net-Canopy in place. I thought I would put a catwalk running down the center of the canopy, as is sometimes seen in illustrations. My intention was to put a figure on top of it, but I began by putting a little fellow sitting at the end of it. Bending his legs made him look as if he is sitting and having a conversation with the officer in the archway. He is partially painted to represent someone stripped to the waist for work. Perhaps his hands are outstretched in a plea of innocence, while the officer is pointing out some infraction? Of course, the fellow sitting atop the canopy might himself be an officer... who knows?
Attachment:
Forafinish8.jpg
Forafinish8.jpg [ 64.77 KiB | Viewed 974 times ]
Attachment:
Forafinish9.jpg
Forafinish9.jpg [ 57.44 KiB | Viewed 974 times ]
Attachment:
Forafinish11.jpg
Forafinish11.jpg [ 56.16 KiB | Viewed 974 times ]
Attachment:
Forafinish12.jpg
Forafinish12.jpg [ 37.41 KiB | Viewed 974 times ]
I wanted to make a comment about these crows' nests. They are very difficult to construct. I have asked Bruno to re-design them, and he has agreed. The radial design I originally came up with (a-la-Peter Hall) was very difficult to work with and did not produce good results. The only way I was able to work with this kind of part was to place the trimmed part on a bit of cardboard taped with double-sided tape (very useful) and then attempt to glue the top-rail-ring to the upturned stanchions. After that, it is necessary to flip the part over by carefully prying it loose from the tape with a knife to fit the middle ring over the upturned base of the part. The effort was challenging, and the results were mediocre at best. You can see the mis-shapen appearance of it here. I determined at this point to partially hide the structure of the tops with livery shields. This wound up working well, as it exposed enough of the transparent radial structure of the part to be seen, but interrupted it enough to hide the asymmetries in the shape. Is that cheating? :whistle: I don't know, but it worked out. :big_grin:

_________________
Pessimists see the world as it truly is...
Optimists change the world.


Report this post
Top
 Profile  
Reply with quote  
Display posts from previous:  Sort by  
Post new topic Reply to topic  [ 330 posts ]  Go to page Previous  1 ... 11, 12, 13, 14, 15, 16, 17  Next

All times are UTC - 6 hours [ DST ]


Who is online

Users browsing this forum: No registered users and 54 guests


You can post new topics in this forum
You can reply to topics in this forum
You cannot edit your posts in this forum
You cannot delete your posts in this forum
You cannot post attachments in this forum

Jump to:  
Powered by phpBB® Forum Software © phpBB Group