The Ship Model Forum

The Ship Modelers Source
It is currently Wed Jul 02, 2025 2:42 am

All times are UTC - 6 hours [ DST ]


Post new topic Reply to topic  [ 34 posts ]  Go to page 1, 2  Next
Author Message
 Post subject: Surprise
PostPosted: Sun Aug 12, 2012 2:45 am 
Offline

Joined: Tue Aug 09, 2005 7:00 am
Posts: 344
Location: S Yorks, England
Turning my hand to the days when men were made of Iron, and ships were made of wood (Groan!)

Signed up for the HMS Surprise part kit and while waiting for enough deleviries to make it worth while starting I had a bash at putting it into into the virtual world.

First main problem I have hit is the copper tiled bottom. At first I tried overlaying the hull with strips of modelled copper tiles, my poor computer promptly died trying to render them. Obviously mapping was a better answer. This is the first simplistic attempt, a single tile, itself tiled over the lower hull. Fairly obviously that is not good enough, going to have to delve into the previously unknown world of UV unwrapping I suppose, unless someone knows better?

Image


Report this post
Top
 Profile  
Reply with quote  
 Post subject: Re: Surprise
PostPosted: Sun Aug 12, 2012 2:57 am 
Offline

Joined: Tue Aug 09, 2005 7:00 am
Posts: 344
Location: S Yorks, England
A step back view of where I am at the moment, after several false starts, and this one too may yet go under the digital hammer. The square port holes are a nightmare to punch out against the curves of the hull and inevitably generate all sorts of weird artefacts which show up as creases and different shades when rendered.

Image


Report this post
Top
 Profile  
Reply with quote  
 Post subject: Re: Surprise
PostPosted: Sun Aug 12, 2012 5:01 am 
Offline

Joined: Mon Jan 31, 2011 4:29 am
Posts: 79
Location: North of Poland
Hi!

First of all, let us know what software do you use. It will be easier to give you some hints (in my case the Blender3D is a soft I am familiar with).
Second: a quality of mapping depends strongly on the distance of view. If you are not going to zoom the particular parts of your model - you can forget "strong" bump mapping. Otherwise your computer is going to "die" :big_grin:
Third: so far a hull of your model is too "sharp" - try to use some kind of "subdivision modifier".
Fourth: use the "mirror modifier". This way when modelling one half of the hull, at the same time you will create an identical mirrored half.
Fifth: it is much better for rendering when the particular parts do not diffuse through each other (and of course it looks much better od the final image).
And sixth - just for my curiosity :cool_2: - what drawings do you use?

Good luck with you model.


Report this post
Top
 Profile  
Reply with quote  
 Post subject: Re: Surprise
PostPosted: Tue Aug 14, 2012 7:53 am 
Offline

Joined: Tue Aug 09, 2005 7:00 am
Posts: 344
Location: S Yorks, England
I am using 3DS Max, the hull is mirrored. I have not yet applied any smoothing while I batter out the basic shapes.

"Drawings" are scans of the actual frames and keel sections sent with the first issue of the model. I imported them into 3DS and used them as templates to create shapes which I formed into the skeleton and wrapped a mesh aroung it. I did make the mistake of joining the keel frame to the result and will correct that, the frames are hidden and recalled only when I work on the hull to make sure I do not lose the original shape. For generic drawings I have a book called "The Frigate HMS Surprise" which usefully has a mix of drawings of the original L'unite, the actual carronade armed HMS Surprise and the adapted fictional HMS Surprise with Long Nines. Even a cursory glance around the internet produces a plethora of different layouts, further confused by HMS Rose which was used in the film Master and Commander. So there is lots of scope to improvise with very few actual Admiralty records left to contradict them.

Main issues for me is the thick hull, I have tried a number of methods but all based on shell and extrusion. I am now wondering if it would be better to produce two hulls, a inner and an outer and join them, that seems to be the way the physical model is shaping up to do.


Report this post
Top
 Profile  
Reply with quote  
 Post subject: Re: Surprise
PostPosted: Tue Aug 14, 2012 6:49 pm 
Offline
User avatar

Joined: Sat Jun 11, 2011 5:02 pm
Posts: 275
With Blender, there is a hull modifier (I think it's 'shell' in Max). The problem I found was to get the shell to behave in creases where it got tight - like in the base of the keel and the stem.

One solution may be to chop the hull in half lengthways (along the keel) and then shell one half. Then, mirror the shelled half and meld the two together afterwards.

If it's babbing up on the holes, then fill them. If they are filled, you will still have the geometry of the edge in your mesh and you can just cut them out after the shell modifer has been applied.

Owen


Report this post
Top
 Profile  
Reply with quote  
 Post subject: Re: Surprise
PostPosted: Mon Aug 27, 2012 2:10 pm 
Offline

Joined: Tue Aug 09, 2005 7:00 am
Posts: 344
Location: S Yorks, England
Thanks for the advice. Going back to the start this is my skeleton, made up from scans of the keel and frames supplied with the kit...

Image


Report this post
Top
 Profile  
Reply with quote  
 Post subject: Re: Surprise
PostPosted: Mon Aug 27, 2012 2:13 pm 
Offline

Joined: Tue Aug 09, 2005 7:00 am
Posts: 344
Location: S Yorks, England
Using a Plane Mesh (Autodesk 3DS Max 12) I wrap one half of the skeleto, but this time I only go from keel to the line of the lower deck.

Image


Report this post
Top
 Profile  
Reply with quote  
 Post subject: Re: Surprise
PostPosted: Mon Aug 27, 2012 2:14 pm 
Offline

Joined: Tue Aug 09, 2005 7:00 am
Posts: 344
Location: S Yorks, England
Adding a symmatry filter gives me the port and starboard side, though at the moment still rough and ready.

Image


Report this post
Top
 Profile  
Reply with quote  
 Post subject: Re: Surprise
PostPosted: Mon Aug 27, 2012 2:16 pm 
Offline

Joined: Tue Aug 09, 2005 7:00 am
Posts: 344
Location: S Yorks, England
I now create both gun decks, or if you want to be picky, the gun deck and weather deck, HMS Surprise was a captured French Corvette, not a true frigate, there was no Quarterdeck.

Image

I have extruded the edges of the decks, these will form the rubbing strakes, position of these differs on different drawings but to me it is only logical they would follow the strong points of the decks themselves.


Report this post
Top
 Profile  
Reply with quote  
 Post subject: Re: Surprise
PostPosted: Mon Aug 27, 2012 2:21 pm 
Offline

Joined: Tue Aug 09, 2005 7:00 am
Posts: 344
Location: S Yorks, England
Showing the guides I have exploded the view slightly and created shapes from the two rubbing strakes, I will shrink these and use them as the top and bottom of the shape that will form the main gun deck exterior.

Image


Report this post
Top
 Profile  
Reply with quote  
 Post subject: Re: Surprise
PostPosted: Mon Aug 27, 2012 2:24 pm 
Offline

Joined: Tue Aug 09, 2005 7:00 am
Posts: 344
Location: S Yorks, England
Using symmatry freely I now have a basic, if lumpy, hull draft, the main hull and upper section of the hull that will contain the tricky gunports are seperate entities, as are the decks themselves.

Image


Report this post
Top
 Profile  
Reply with quote  
 Post subject: Re: Surprise
PostPosted: Mon Aug 27, 2012 2:27 pm 
Offline

Joined: Tue Aug 09, 2005 7:00 am
Posts: 344
Location: S Yorks, England
Time to start tidying up, reviewing against the skeleton shows I am missing a flare at the focsul in the vertical.

Image


Report this post
Top
 Profile  
Reply with quote  
 Post subject: Re: Surprise
PostPosted: Mon Aug 27, 2012 2:29 pm 
Offline

Joined: Tue Aug 09, 2005 7:00 am
Posts: 344
Location: S Yorks, England
Poking and playing with vertices I refined the shape, I am not too anal on the position of the frames, reading forums on the construction of this model it is rife with comments about them not fitting exactly, a problem I often experience, even in scratch builds when copying from plans. I just use them as a guide here.

Image


Report this post
Top
 Profile  
Reply with quote  
 Post subject: Re: Surprise
PostPosted: Mon Aug 27, 2012 2:32 pm 
Offline

Joined: Tue Aug 09, 2005 7:00 am
Posts: 344
Location: S Yorks, England
Adding a colour scheme helps me judge how the thing is coming along, at the moment there is no smoothing in place. The artefacts around the gun ports can clearly be seen, I have used boolean to cut them out, tried other methods and not seen a huge advantage with any, but Boolean is easy and consistent if you copy the plug and use it for each hole punch.

Image


Report this post
Top
 Profile  
Reply with quote  
 Post subject: Re: Surprise
PostPosted: Mon Aug 27, 2012 2:33 pm 
Offline

Joined: Tue Aug 09, 2005 7:00 am
Posts: 344
Location: S Yorks, England
Burying back down the stack I return to the base hull and spend some time tweaking vertices and applying a Turbo Smooth until I have a reasonable result...

Image


Report this post
Top
 Profile  
Reply with quote  
 Post subject: Re: Surprise
PostPosted: Mon Aug 27, 2012 2:35 pm 
Offline

Joined: Tue Aug 09, 2005 7:00 am
Posts: 344
Location: S Yorks, England
The Gun Deck externals are a different matter, there is a lot to clean up, here is the raw view...

Image


Report this post
Top
 Profile  
Reply with quote  
 Post subject: Re: Surprise
PostPosted: Mon Aug 27, 2012 2:38 pm 
Offline

Joined: Tue Aug 09, 2005 7:00 am
Posts: 344
Location: S Yorks, England
Taking each gun port in turn my priority is to get rid of duplicate and spurious vertices, my preferred weapon of choice is Target Weld, some sneaky ones hide so it is worth selecting over each to see what the vertices count is, and temporary moving them if needed, worse case is I delete polygons and recreate them, target welding the vertices back to clean up the result.

Image


Report this post
Top
 Profile  
Reply with quote  
 Post subject: Re: Surprise
PostPosted: Mon Aug 27, 2012 2:40 pm 
Offline

Joined: Tue Aug 09, 2005 7:00 am
Posts: 344
Location: S Yorks, England
The result, still some artefacting going on in the form of creases, but they are minor and will be softened with a smooth filter later, the plain and simple fact is I found some just simply could not be made totally clean.

Image


Report this post
Top
 Profile  
Reply with quote  
 Post subject: Re: Surprise
PostPosted: Mon Aug 27, 2012 2:57 pm 
Offline

Joined: Tue Aug 09, 2005 7:00 am
Posts: 344
Location: S Yorks, England
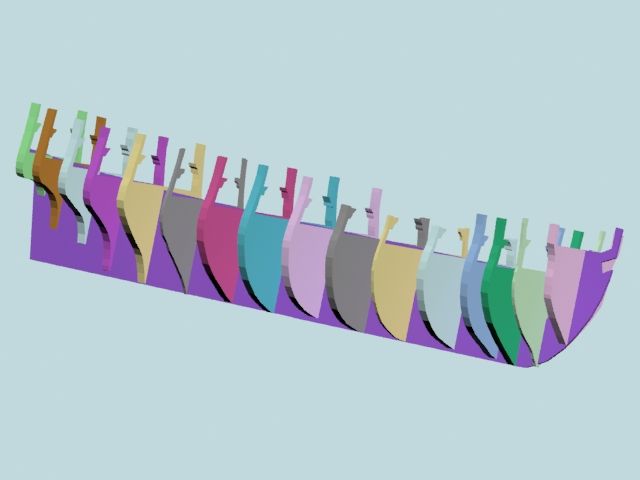
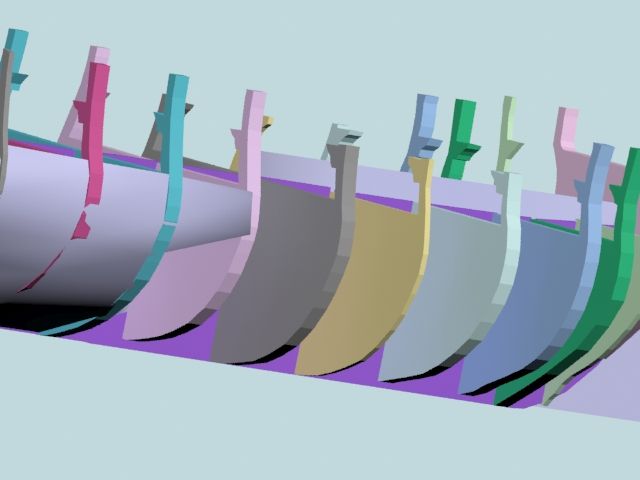
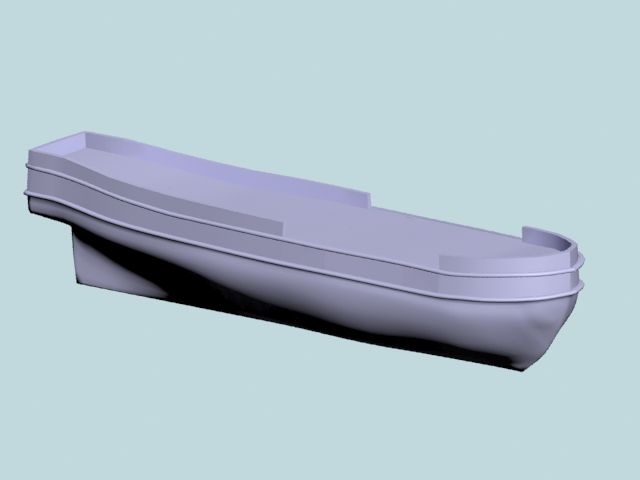
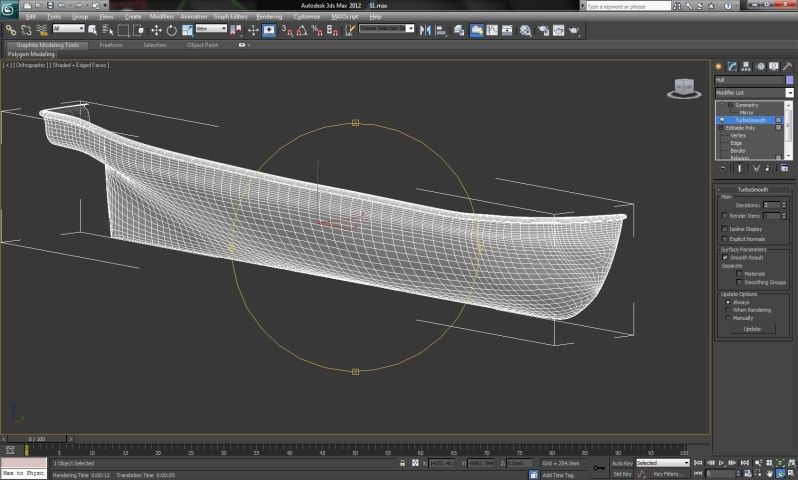
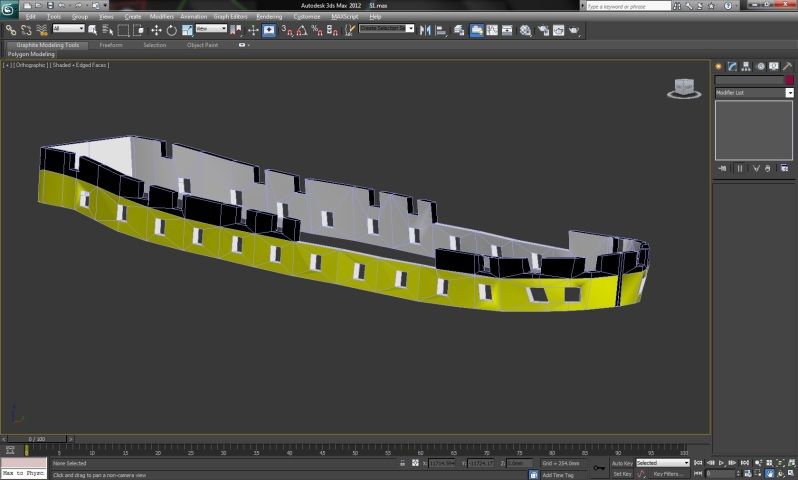
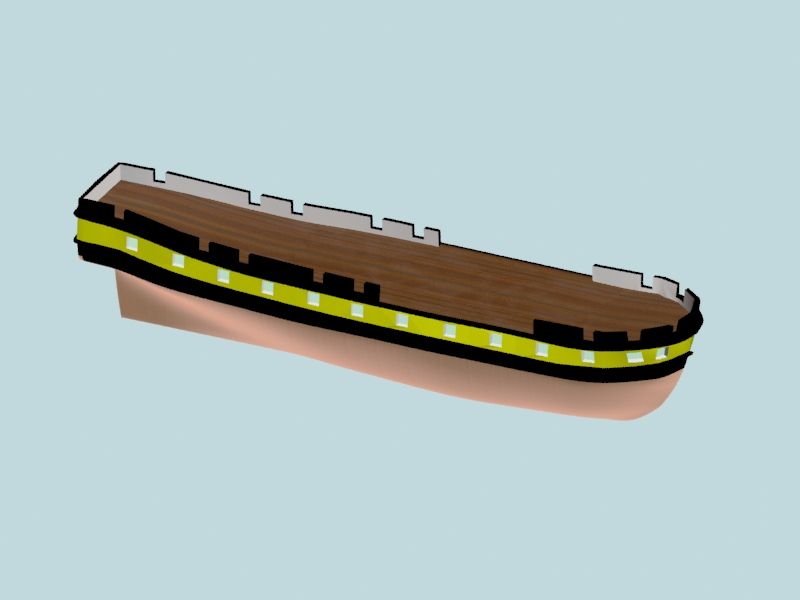
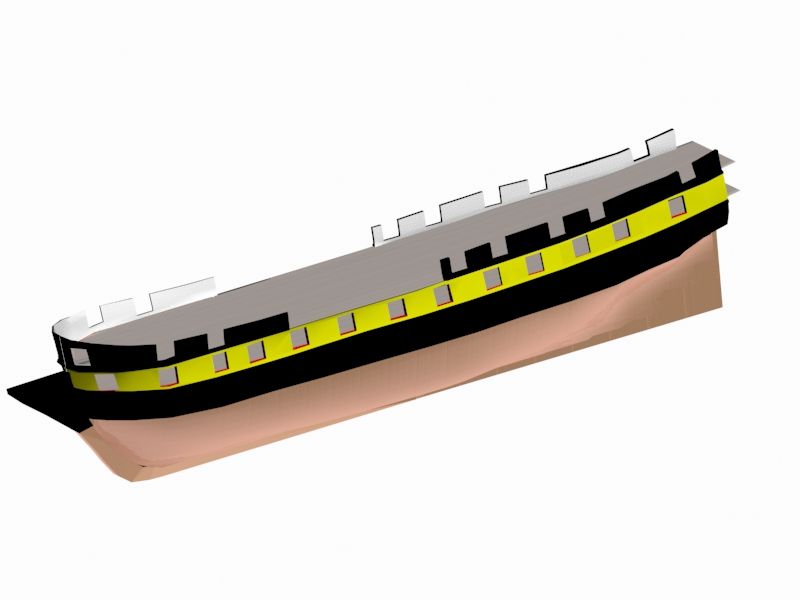
My basic hull to date, I dont like the look of the forad gunports, but then neither did her real life commanders who complained the guns fouled each other, one reason why in her real career in the RN her weaponry was replaced with carronades, making Surprise one of the first (steady the flames, I said "one of" !) all carronade ships.

Fellow Alexandra Kent followers may be disappointed though, the Smasher did not fire an explosive shell as the Great Man wrote, he probably got that from the first shot Victory fired at Trafalgar, her carronade was topped off with a case of musket balls which caused the explosive effect noted. The true shell was still a few years away yet. The Carronade was effective as a short range weapon, doubling the weight of a normal cannon, and was a big leg up against the French whose foundries could not machine metal to the fine tolerances required by a Carronade.

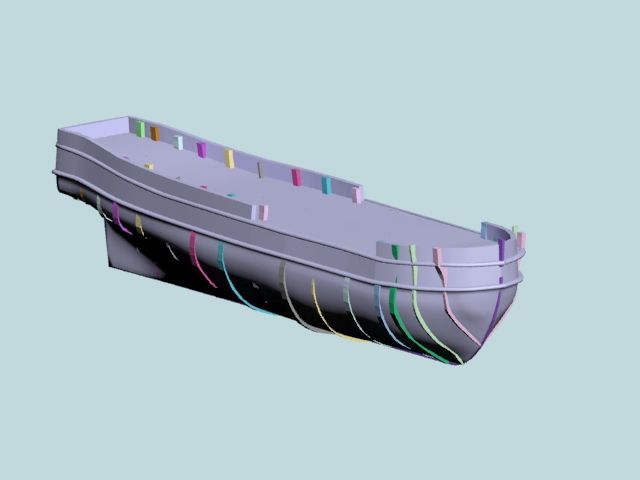
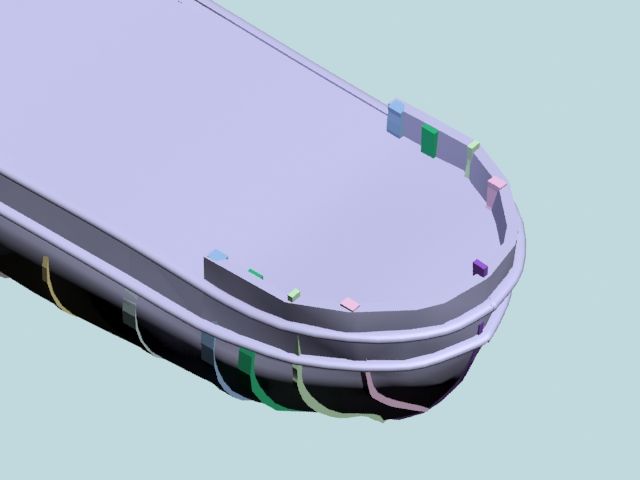
There is considerable debate on the lower two ports facing almost forad, on a fully rigged model it is clear anything fired from them would blow off the bowsprit, I have my own theory there: I think they could be the Heads?

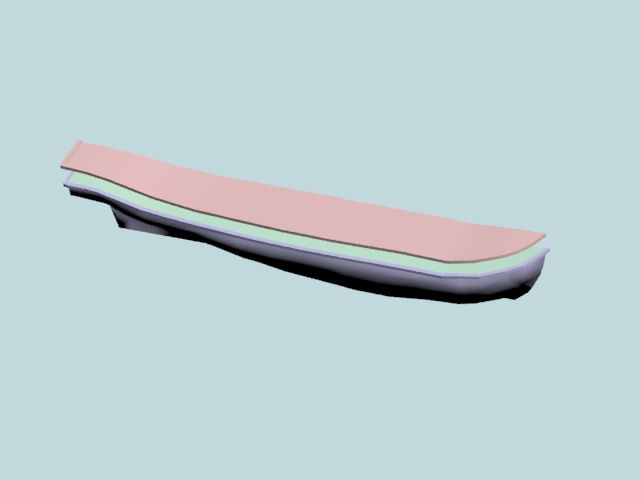
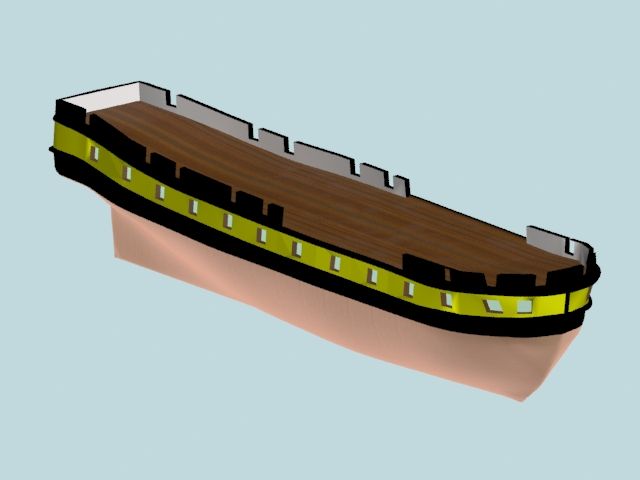
The wood of the decks needs a lot of work of course, most contemporary writers speak of the oak being "Holy Stonned to paper white", my own childhood experience of Holy Stones recalls they produced a peach colouration, but we used them on stone, not wood, some historians now think the lower decks were white washed, but that still leaves the weather deck, scrub and swab oak with salt water, itself an abrasive and do you really get white? I submit you get rough oak.

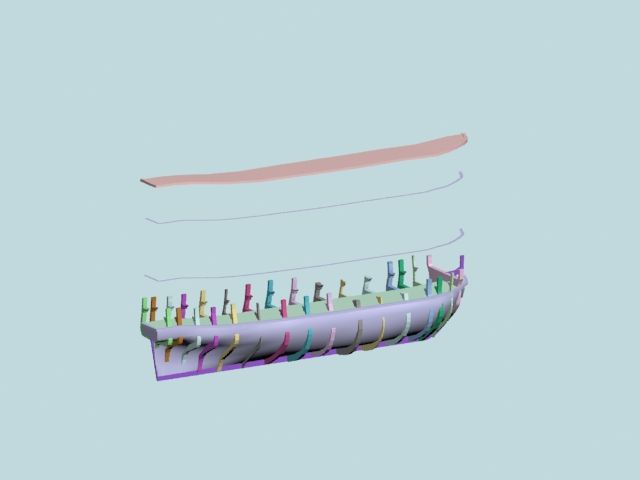
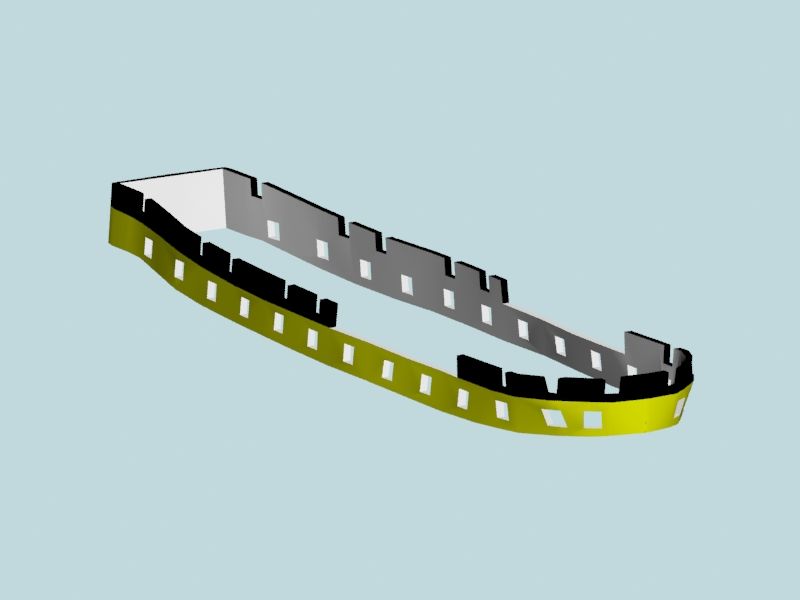
Either way, here we go to date.

Image


Report this post
Top
 Profile  
Reply with quote  
 Post subject: Re: Surprise
PostPosted: Mon Aug 27, 2012 11:27 pm 
Offline
User avatar

Joined: Sun Mar 07, 2010 12:01 am
Posts: 1677
Location: Corvallis, Oregon, USA
I served on two ships with wooden decks (teak) and both were holystoned using a bleach like oxalic acid. The result was a very, very, very light wood color, almost white. Something like newspaper paper, but not as white as typing paper.

I suspect the contemporary writers knew what they were talking about.

Phil

_________________
A collision at sea will ruin your entire day. Aristotle


Report this post
Top
 Profile  
Reply with quote  
Display posts from previous:  Sort by  
Post new topic Reply to topic  [ 34 posts ]  Go to page 1, 2  Next

All times are UTC - 6 hours [ DST ]


Who is online

Users browsing this forum: No registered users and 1 guest


You can post new topics in this forum
You can reply to topics in this forum
You cannot edit your posts in this forum
You cannot delete your posts in this forum
You cannot post attachments in this forum

Jump to:  
Powered by phpBB® Forum Software © phpBB Group