I know some of you are interested in 1/350 shipyard cranes, so I thought I’d share some info on one I recently purchased and built.
I bought it from timos-modelworld on ebay. I’m not sure if he produces it or if someone else does.
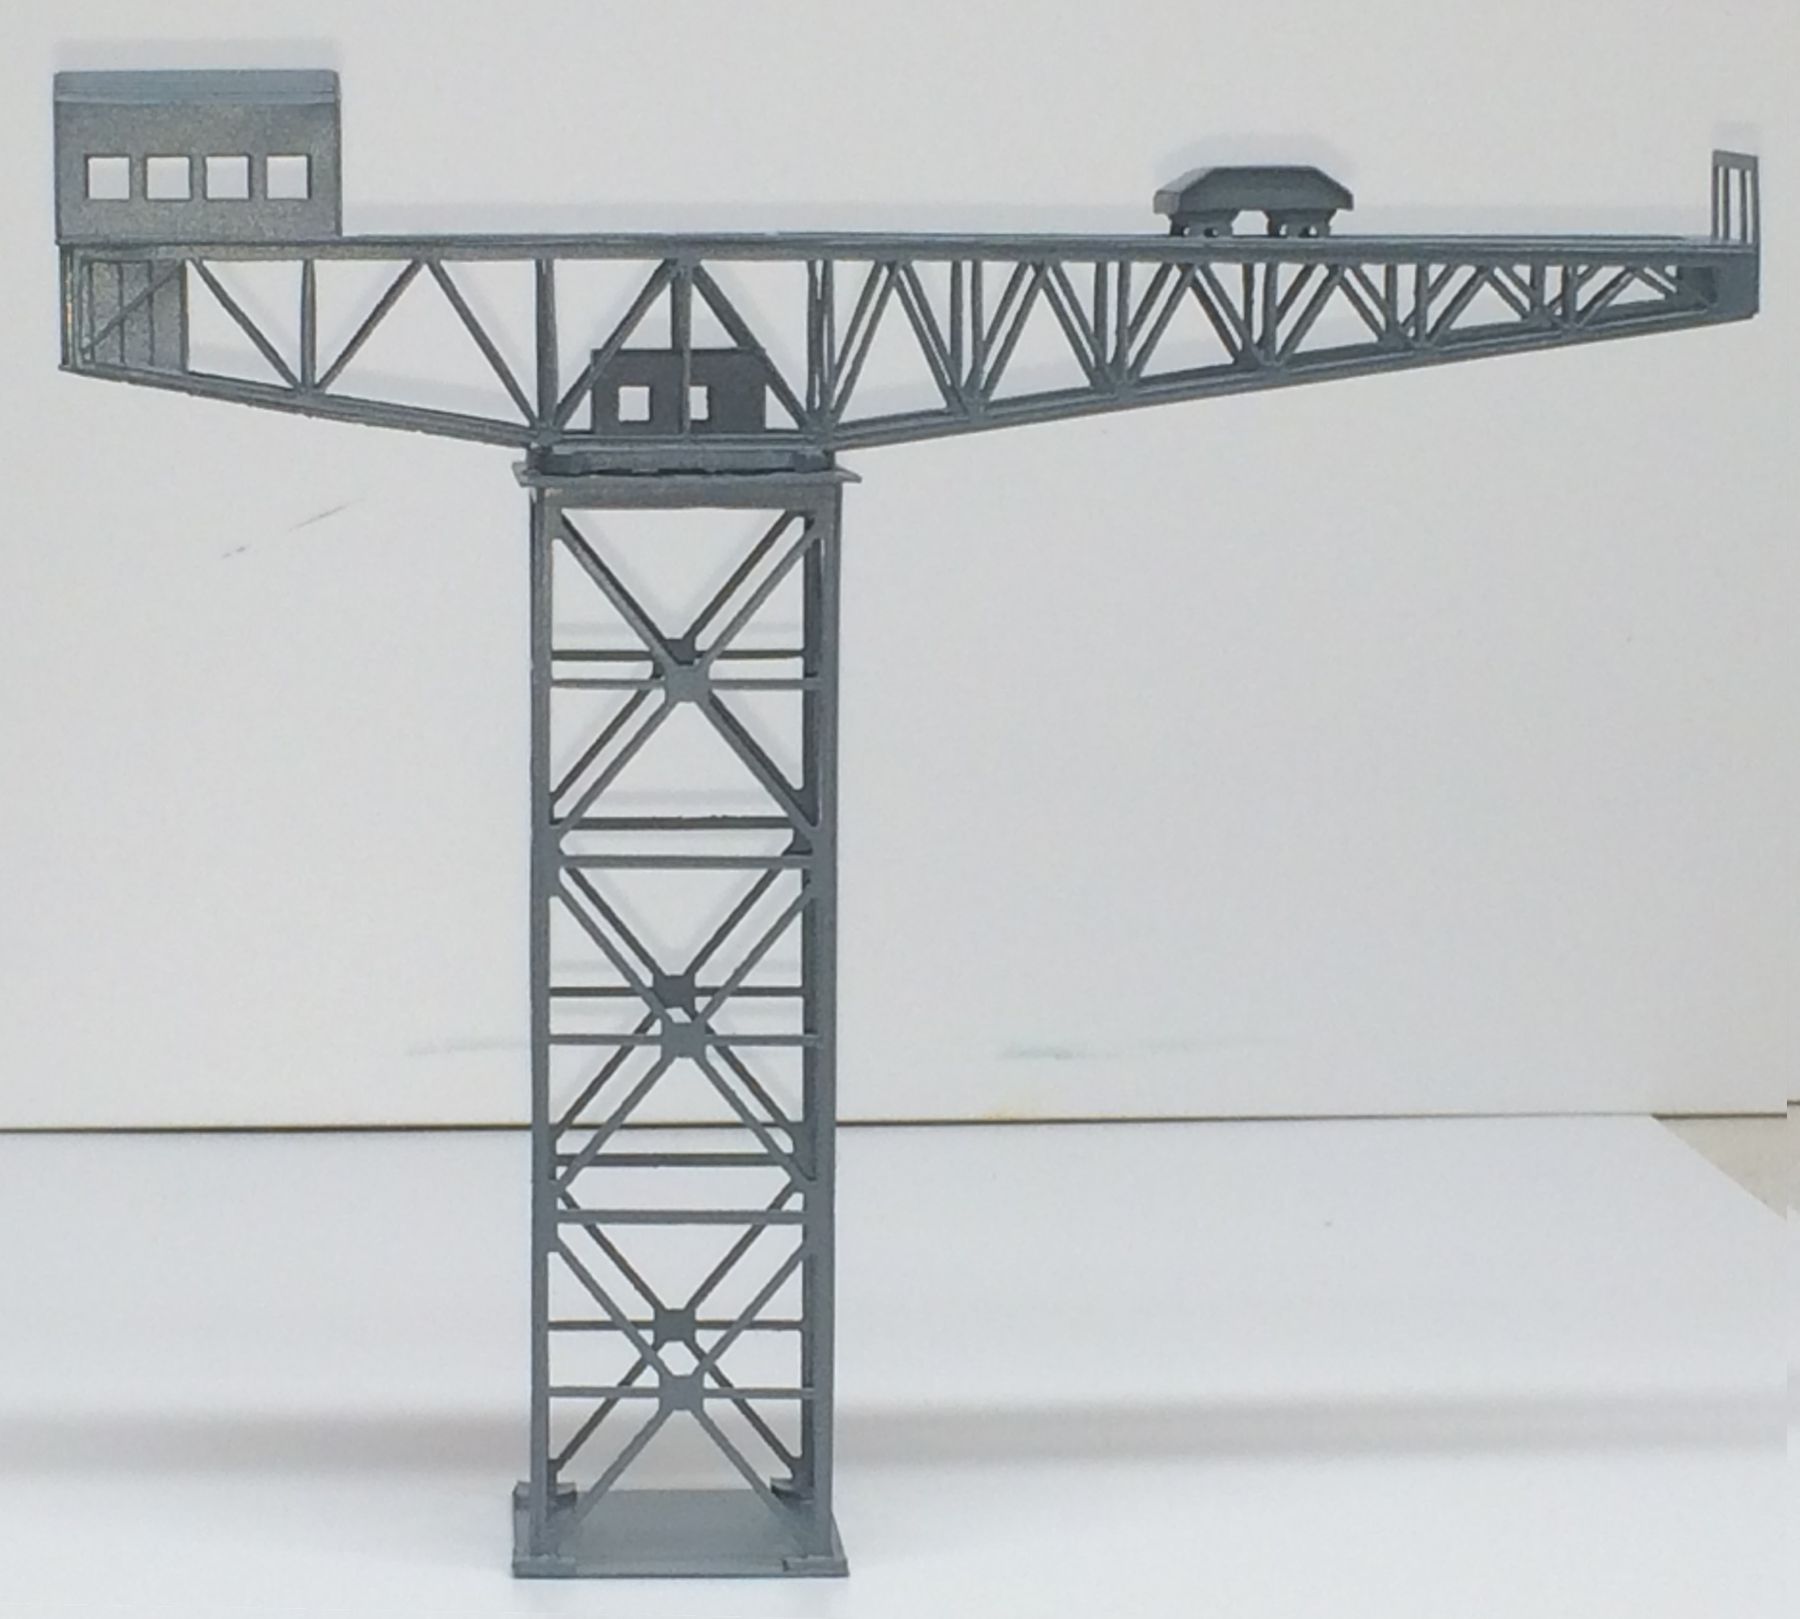
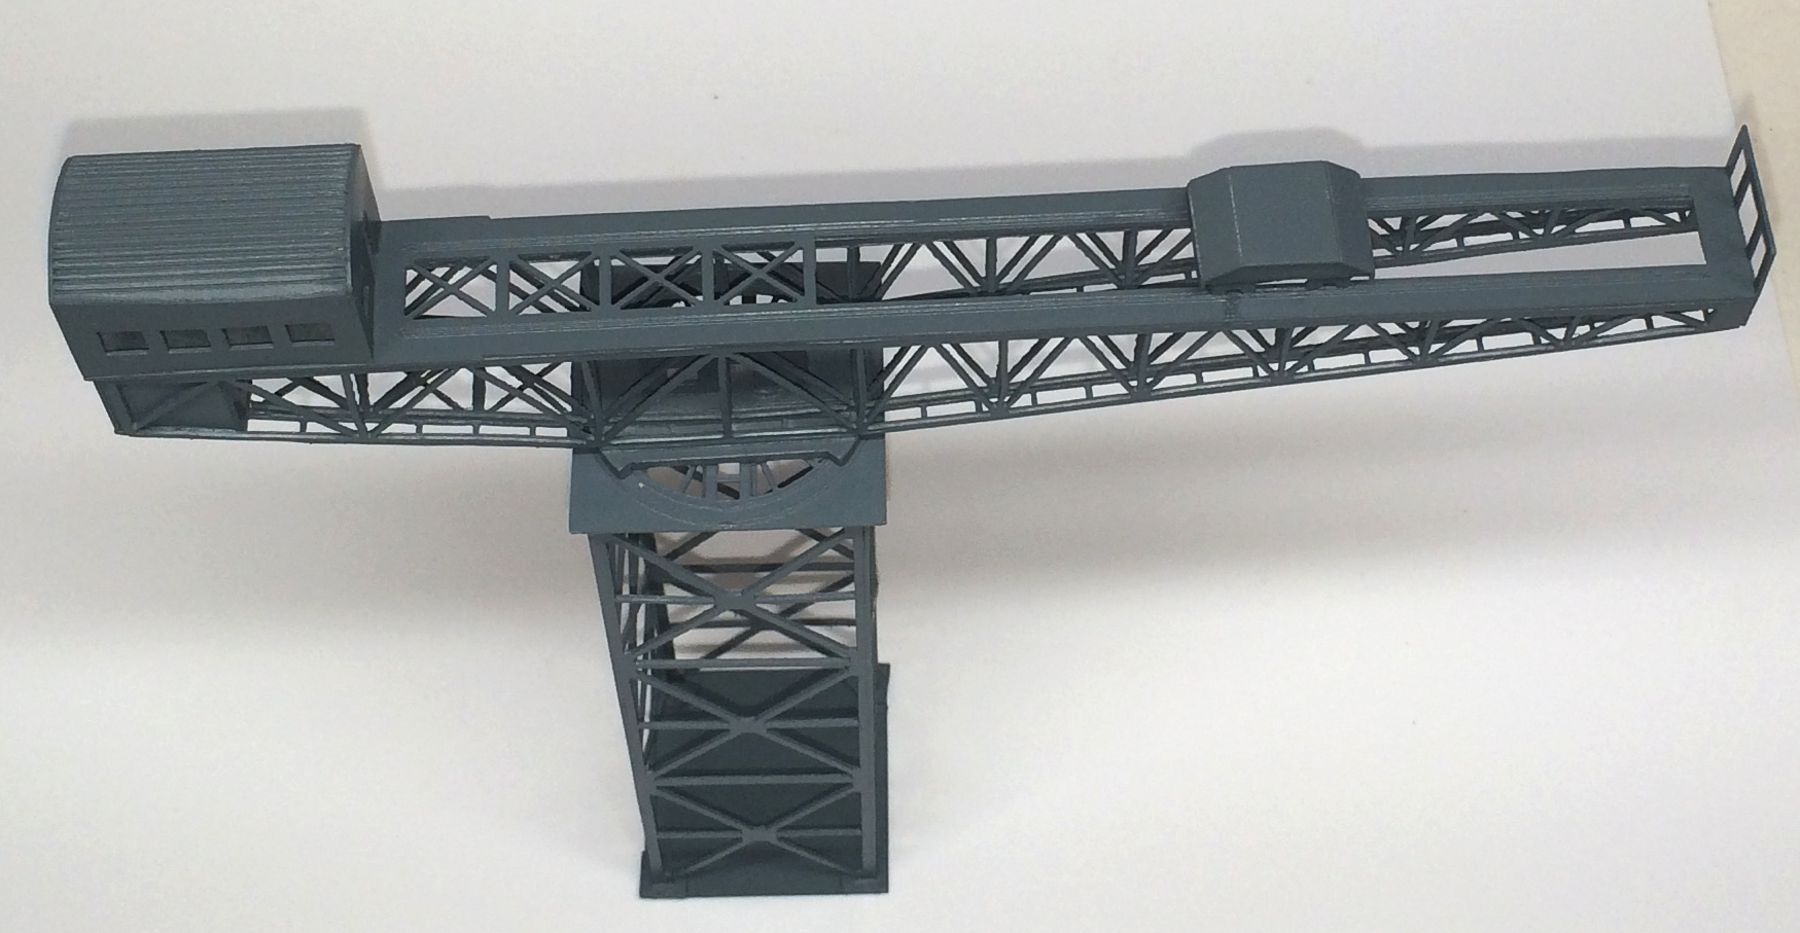
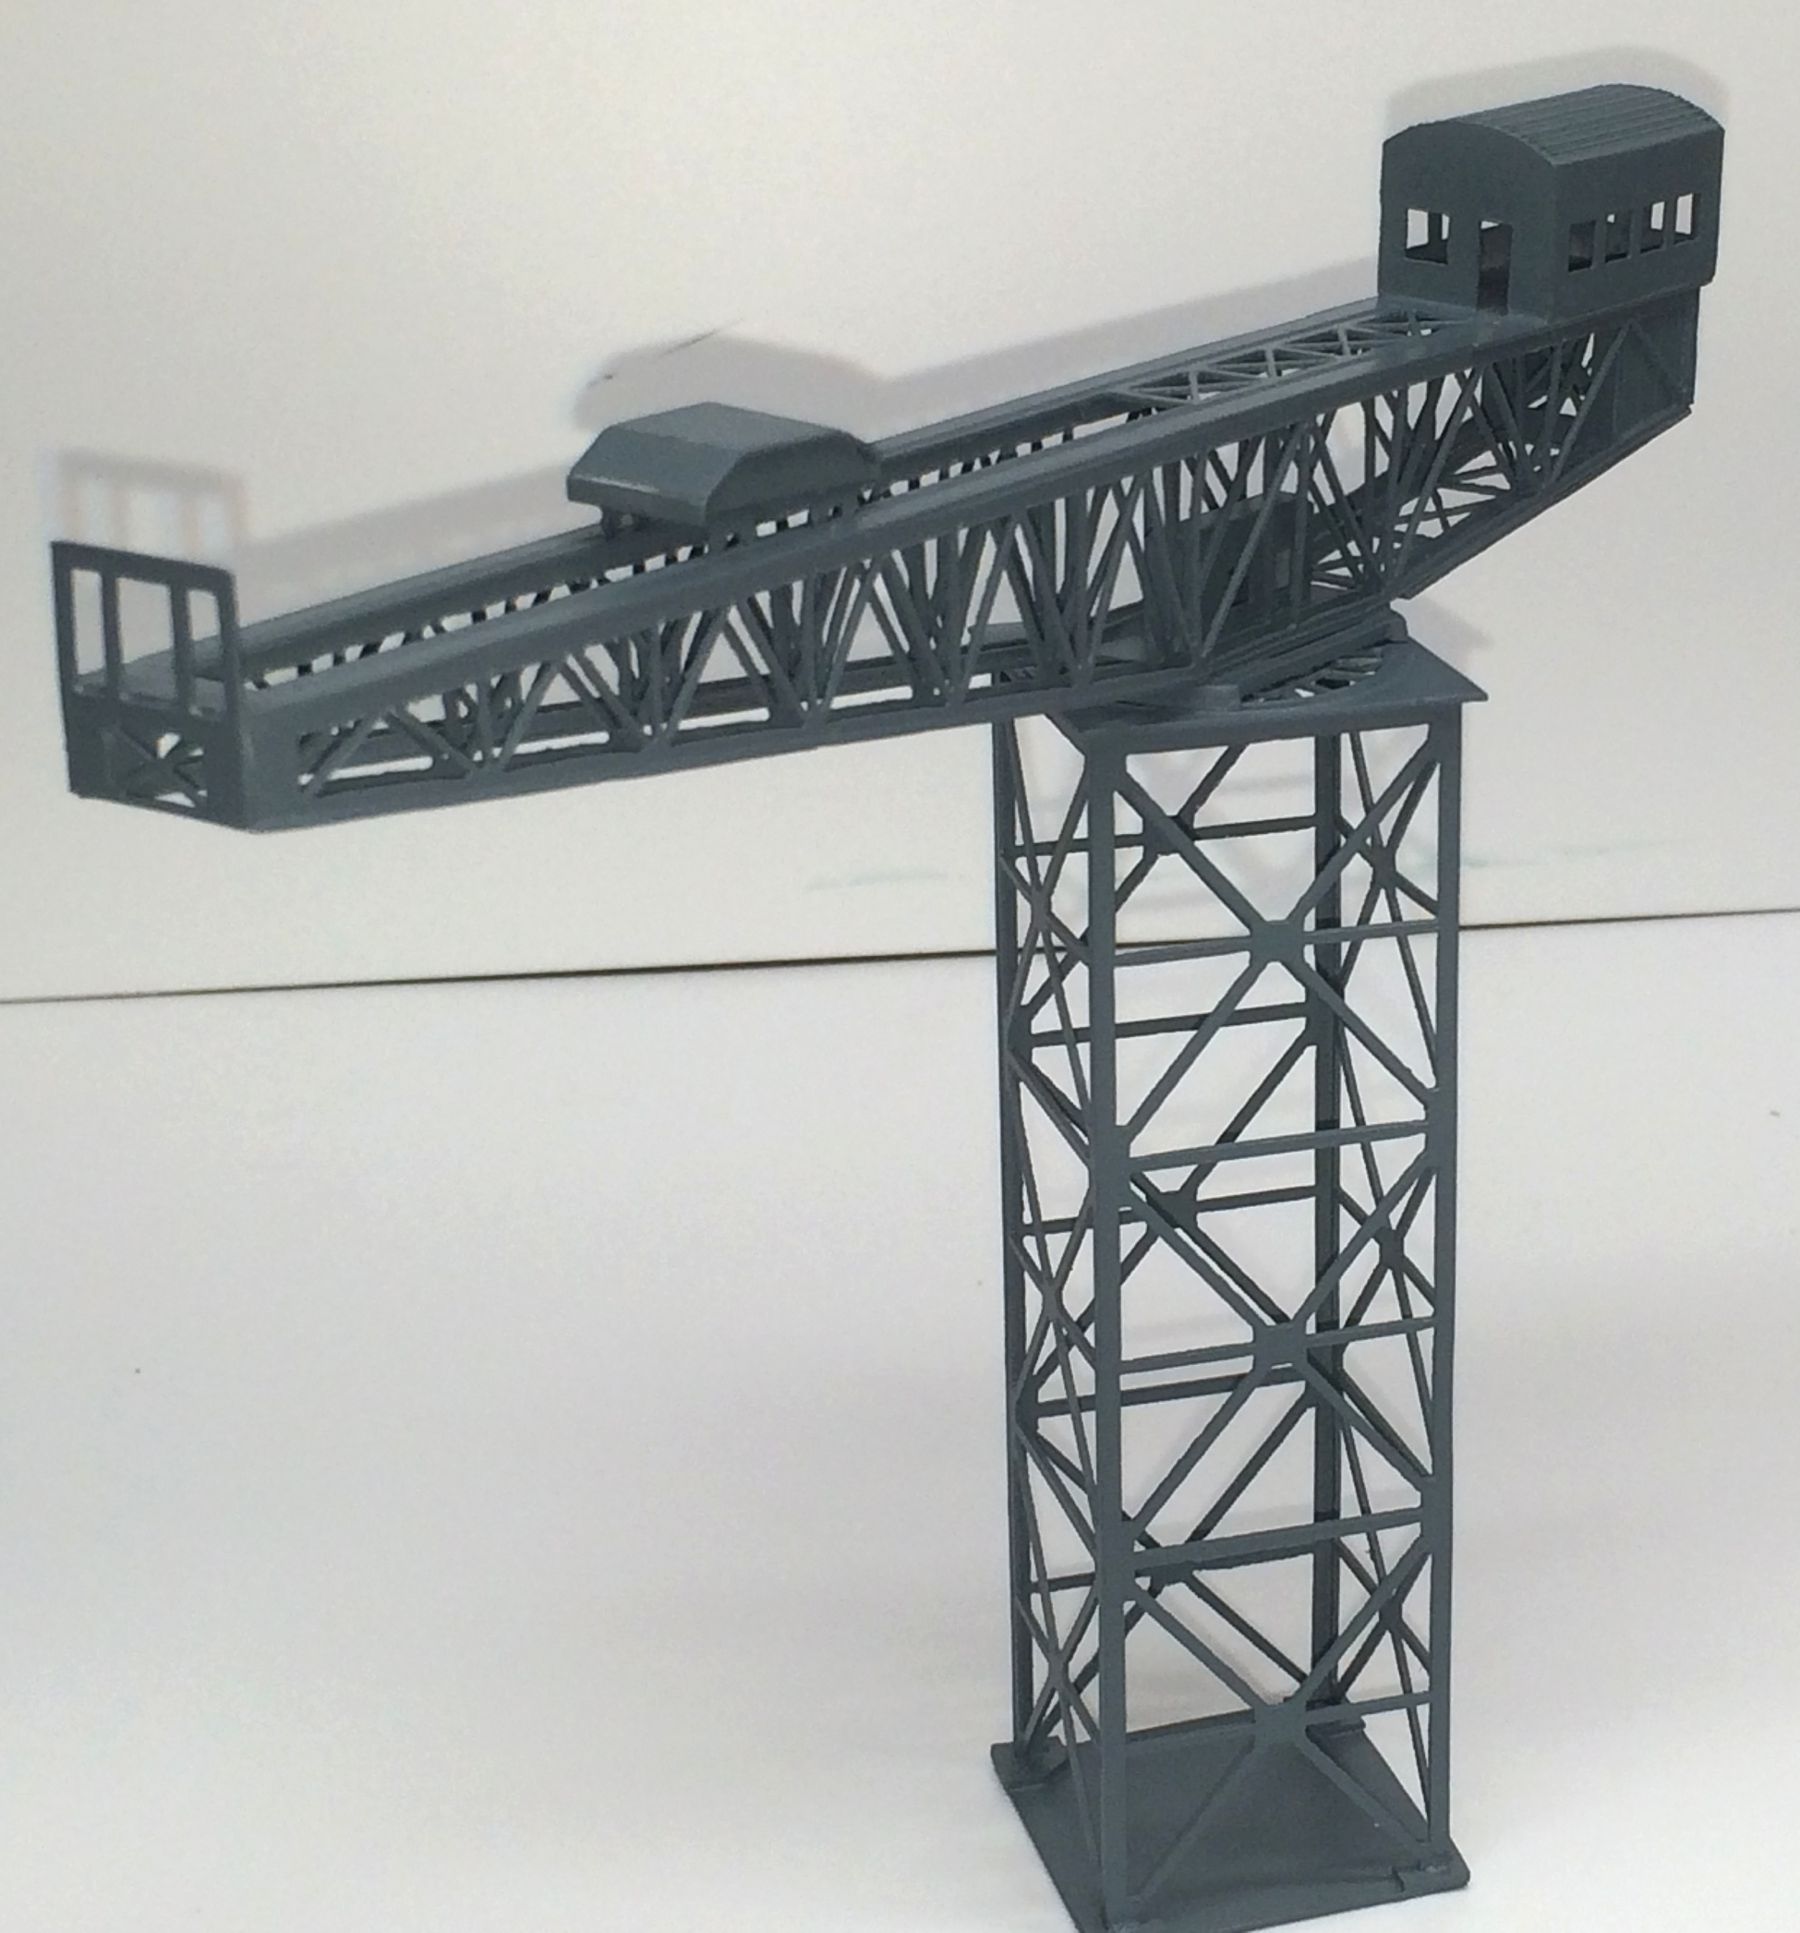
The description is CY809 1/350 Glasgow Crane length:16.9cm base width:3.4cm height:14.4cm
The cost was only $12.99usd with free shipping worldwide, pretty reasonable I thought.
There are a couple of cranes that this kit resembles, but it doesn’t seem to be a perfect match for any particular one. It’s close to the Finnieston Crane, The heavy duty crane at Port Glasgow harbor, and The old Fairfield Shipyard crane.
To be honest, when I first ordered it, I thought it was injection molded. I was disappointed when it arrived to find that it was thin laser cut ABS. I decided to try it anyway and am glad I did. There are some issues, but I think it is a fair representation as long as you keep about a foot away. I didn’t attempt any super detailing, but it wouldn’t be too hard to add ladders, railings and cables/hooks.
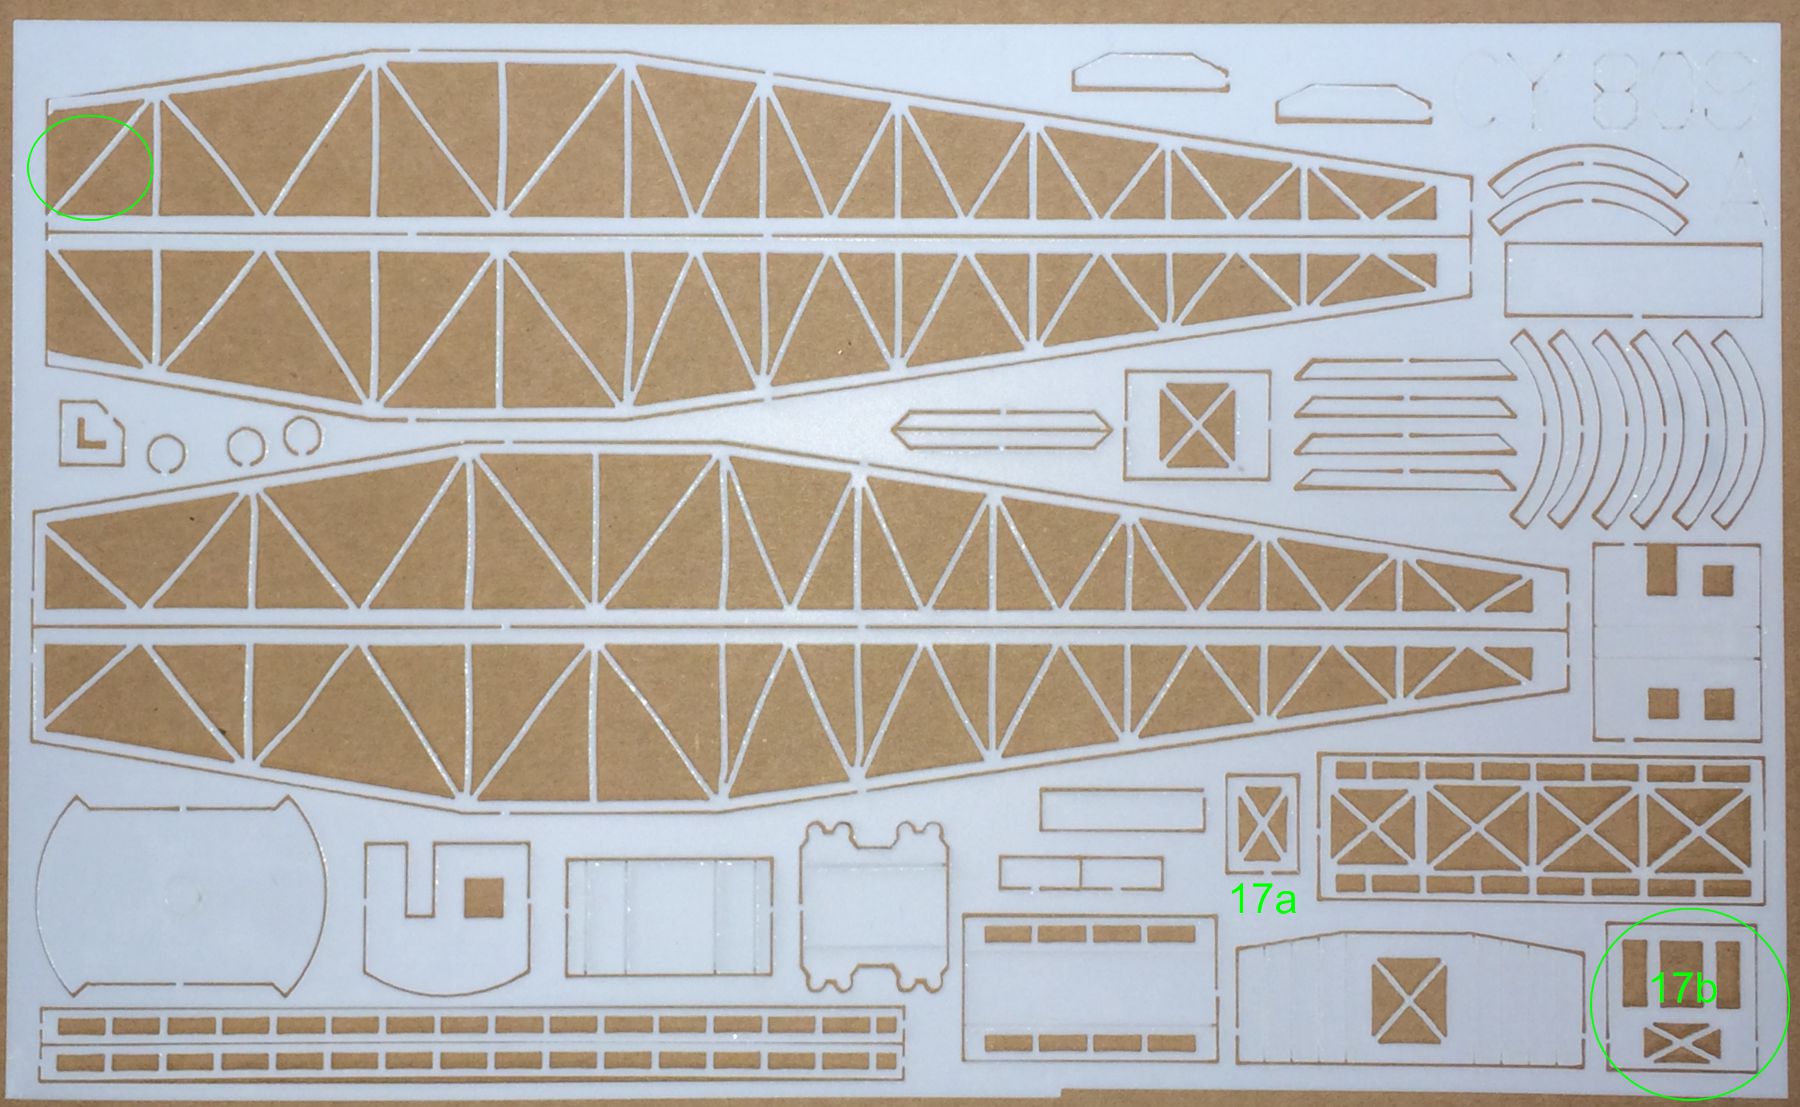
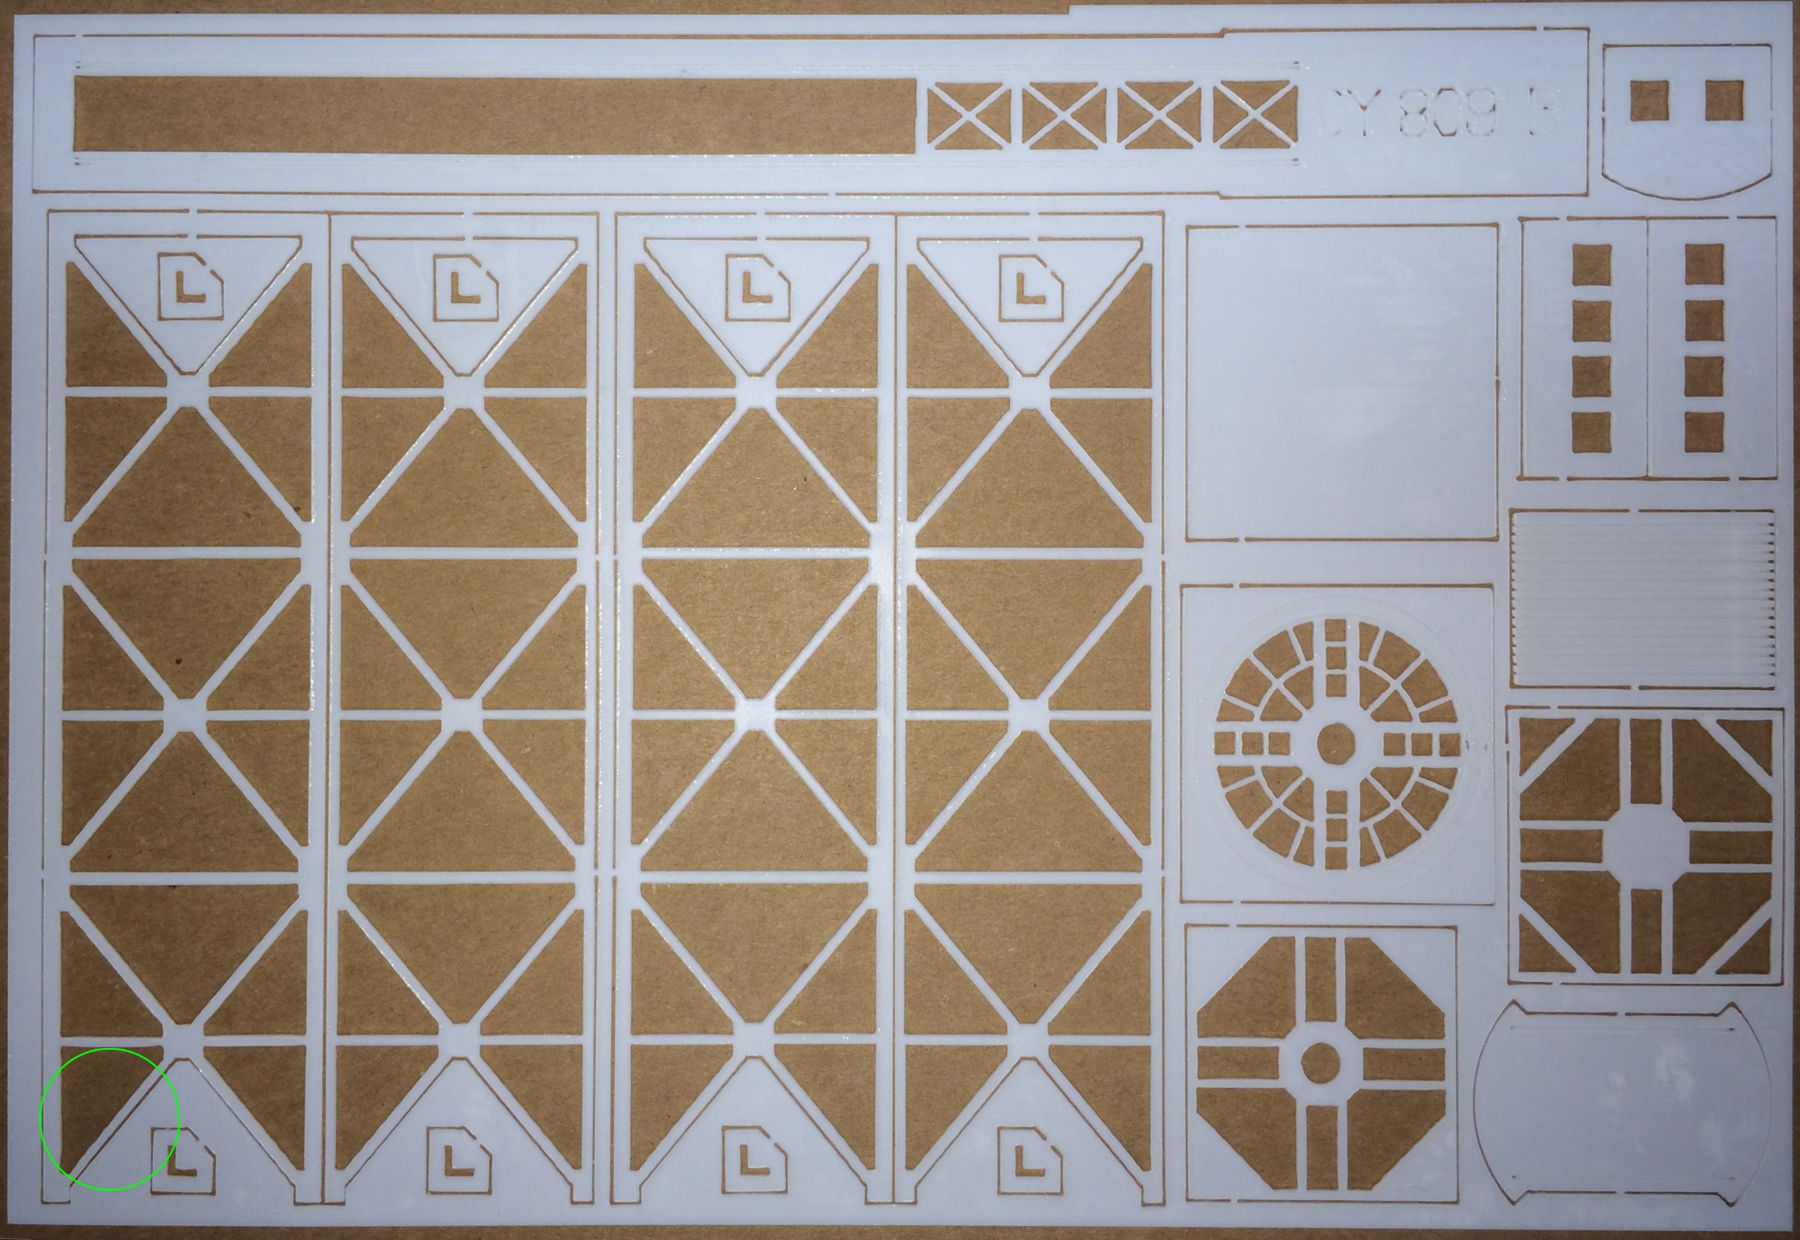
I ordered 2 sets and the first set I ordered had a couple of issues. The second set was better. It looks like they were having a bit of trouble with the Laser cutter, a couple of areas were not cut through, while a couple were cut through too much. It doesn’t take much for a laser to over cut such thin plastic. Luckily the damage was restricted to a couple of cross beams. A bit of the plastic framing around the parts was cut and glued in place very easily. The damaged areas were located in the green circles on the sprue images.
The instructions were a little too simple in places, but I think I managed to figure them out.
First, the parts layout doesn’t quite match the actual cut parts, but it’s close enough.
Second, part 17 doesn’t fit properly or match the photo of the real crane. There is a part that does match and fit, but isn’t on the instruction layout. I’ve labelled it 17b.
I used Methylene Chloride as my glue/solvent. Any liquid plastic hobby solvent should work fine.
The first 2 steps are pretty straight forward, with one exception. Part 6. If you try and put them on with the structure upside down as shown, they don’t have any support or decent gluing surface. It’s easier to turn the structure right side up and place it on part 7 with 4 part 6’s at each corner. Now you glue them all at once and keep them squared to part 7.
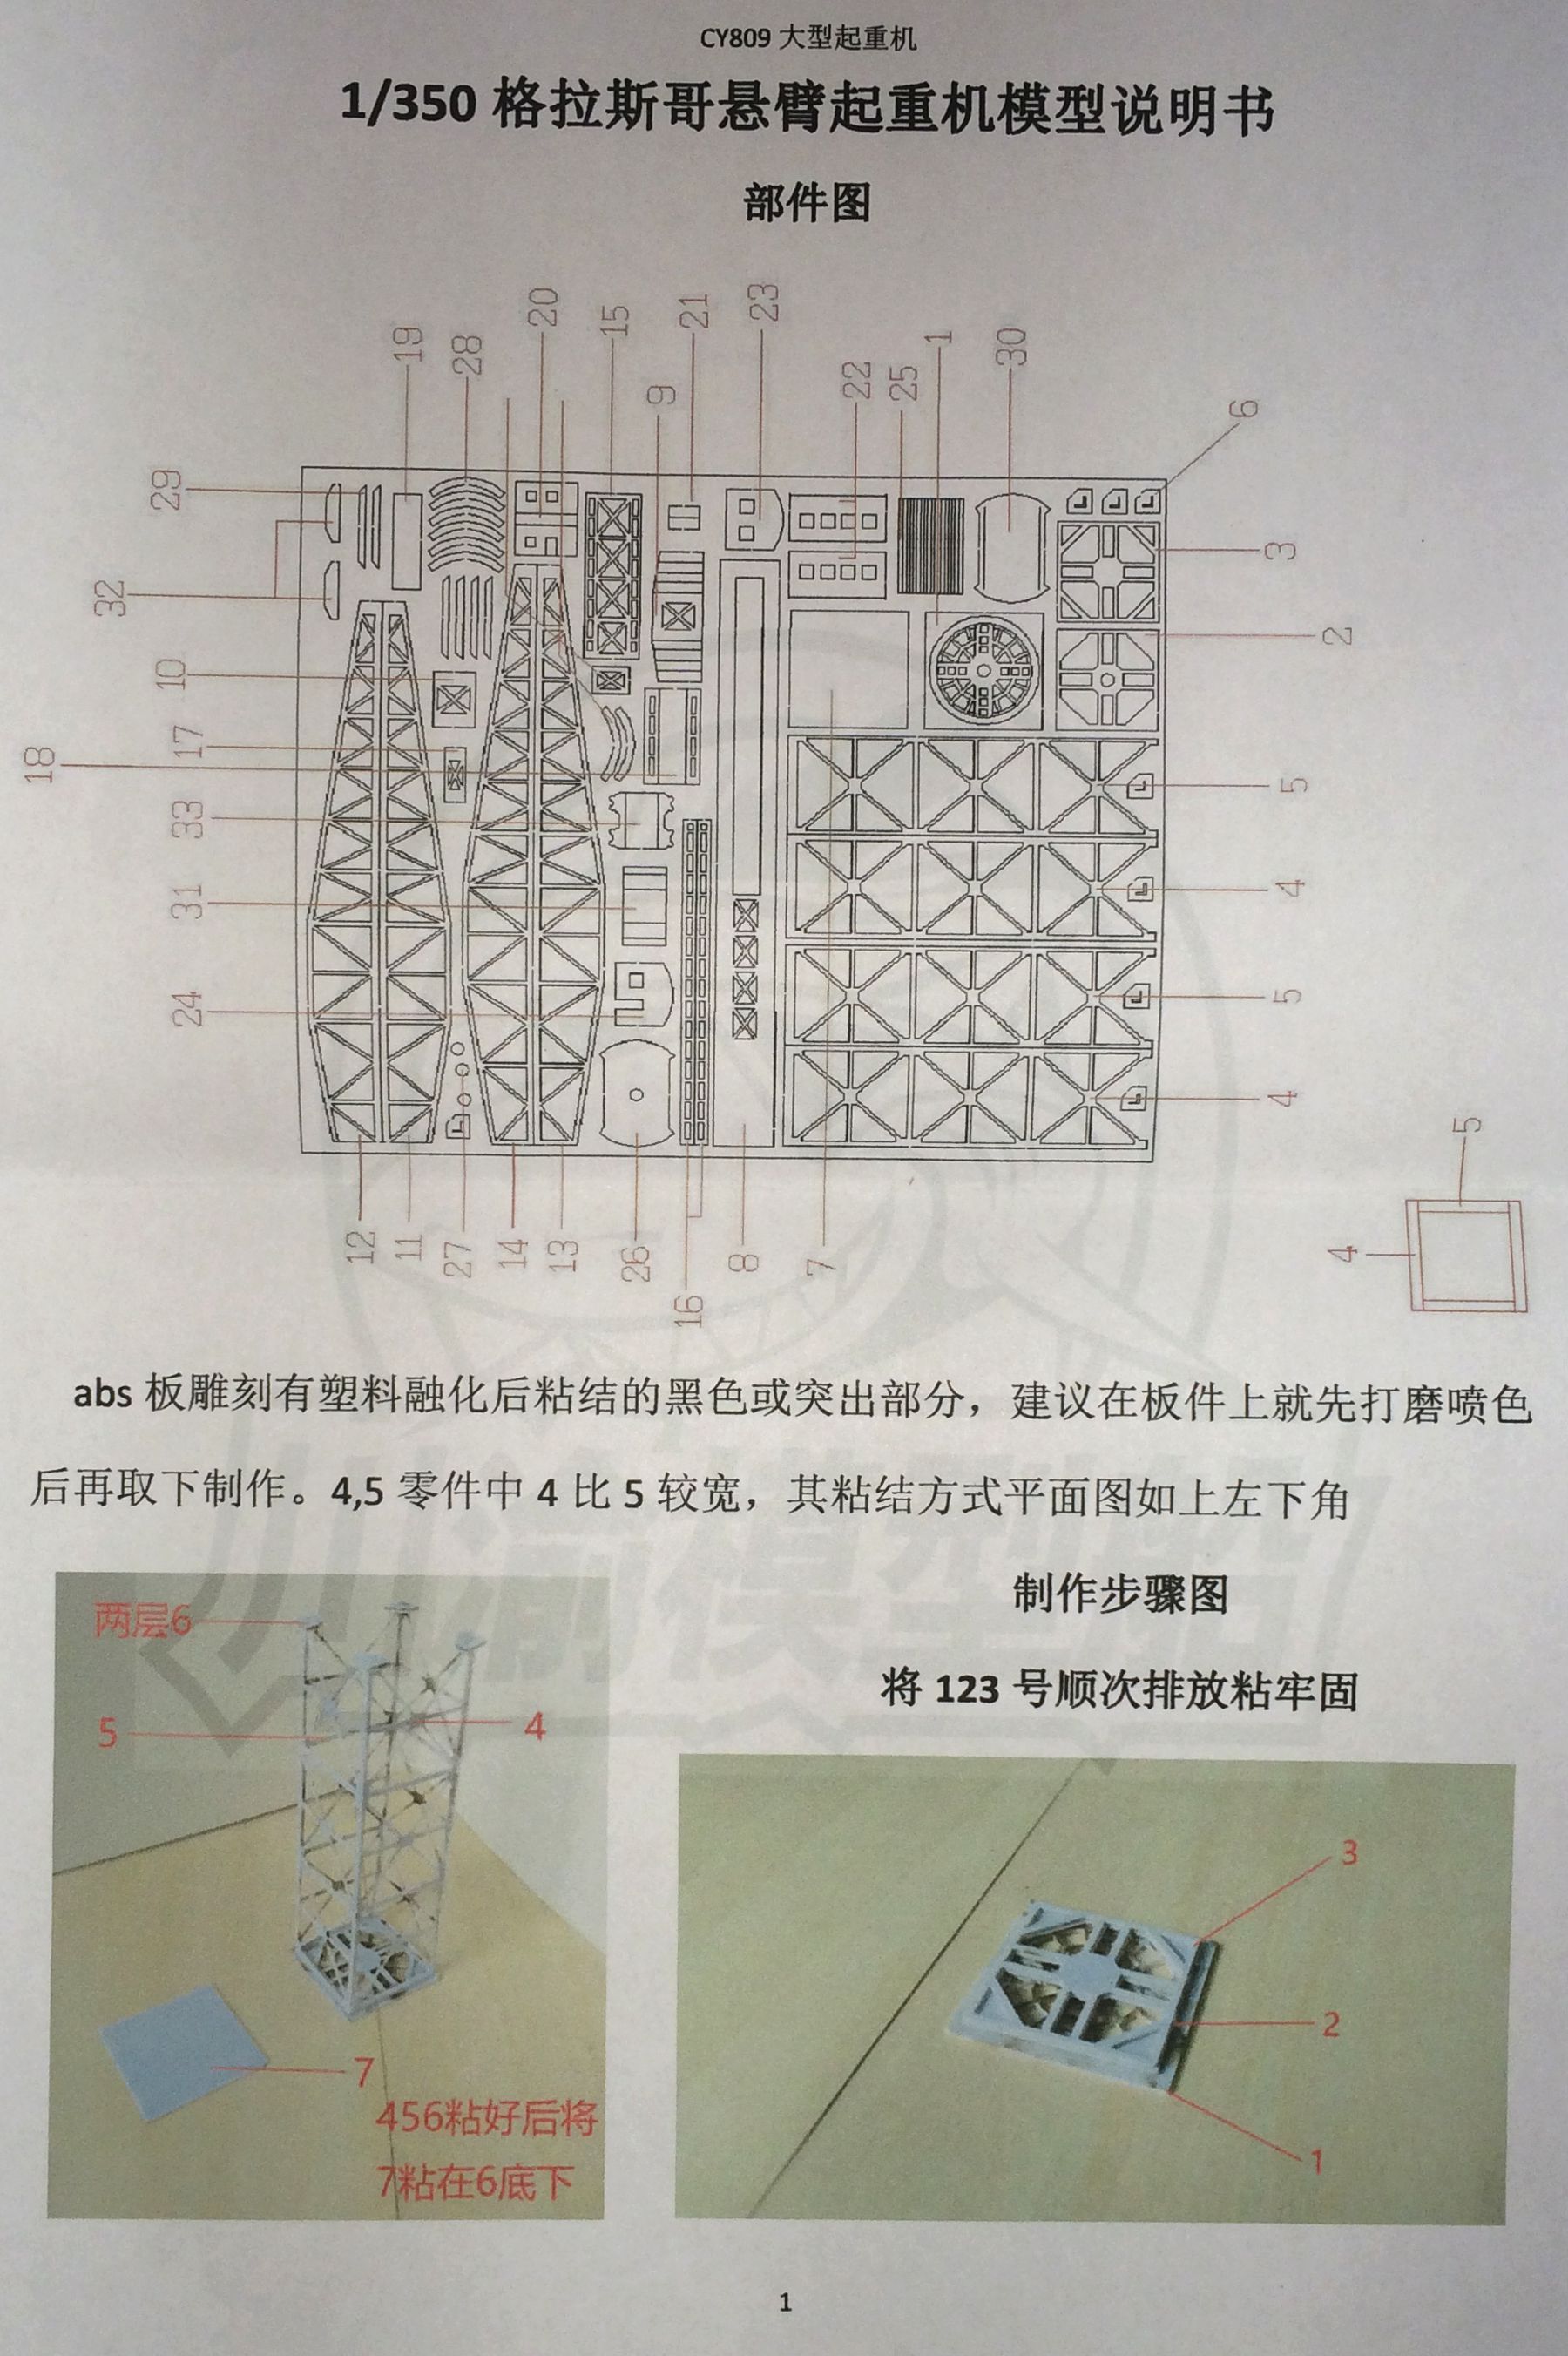
Gluing parts 9 & 10 is a bit tricky, there is nothing to show exact position, so you need to use parts 11 and 12 to align them. With 11 and 12 flush with the end of 8, parts 9 and 10 will be touching the other end of 11 and 12. I’ve highlighted the areas of interest with green circles on the instructions. Parts 11,12,13,14 are glued along the inside and outside edges of 8.
You can decide if you want to use 17 or the one I’ve labelled as 17b.
It took me a minute to see where 19,20,21 went. I show a green line to it. You can glue it on now, or glue it to 26,30 after it’s assembled.

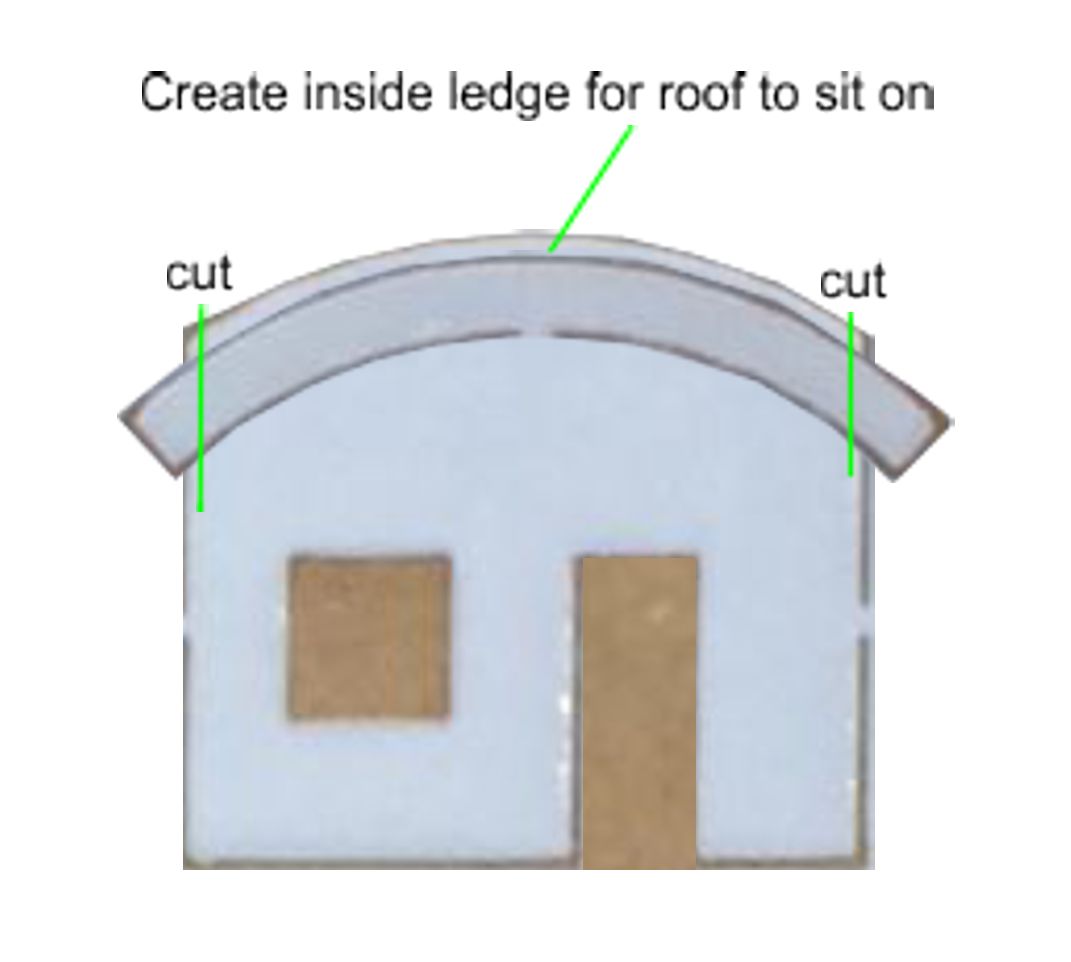
25 (the roof) was trickier than I thought it would be. It fits in between 23 and 24, not on top as I had assumed at first. 25 has to be curved slightly, I used a thick paint brush and rolled it with my fingers. I also decided to add an inside ledge to help it stay in place. I took a couple of 28’s and attached to the inside of 23 and 24 as shown, cutting off the excess at the green line. Leaving enough of a lip for the 22’s and 25 to glue in snuggly.
The next parts sequence was a little vague as well. After gluing 28s and 29s onto 30, glue 26 on top. Then glue 2 more 28s onto 30 along with two 27s, one on top of the other, in the scribed circle. I put the last 27 in between 30 and 26 to prevent any flexing, but I’m not sure it’s actually req’d.
A couple of parts (21 and 32) were a bit undersized due to the Laser being a bit too hot or slow, so I cut new ones out of the sprue kerf that fit better.
I painted it with the first can of grey I found, they came in all sorts of colours, so it doesn’t matter much. I’m actually pretty happy with how it turned out, it does a nice job of looking like a crane. If you look close enough, you can see the beams and cross members have edges that aren’t perfectly smooth. I built it in less than 2 days, including paint. I didn’t want to spend time cleaning the parts, although I did do a little surface sanding to smooth some edge ridges caused by the laser melting the plastic. If I tried to smooth out the main structure frame edges, they probably would have broken. They are fairly flexible, but really thin. Too much sanding or filing would break them.
They are offered in several scales, 1/700, 1/350, 1/150, 1/200. And one other style, a Dusseldorf Crane.
All in all I’m pretty happy with it, it’s not perfect, but for the price, it’s not too shabby.