The Ship Model Forum

The Ship Modelers Source
It is currently Sun Jun 16, 2024 7:54 am

All times are UTC - 6 hours [ DST ]


Post new topic Reply to topic  [ 1012 posts ]  Go to page Previous  1 ... 3, 4, 5, 6, 7, 8, 9 ... 51  Next
Author Message
PostPosted: Wed Dec 26, 2012 6:20 pm 
Offline
User avatar

Joined: Mon Mar 12, 2012 11:13 am
Posts: 911
Location: Ludwigsburg/Germany
And as a small X-Mess story I still prepared a three curse menu, if you still have the time ...

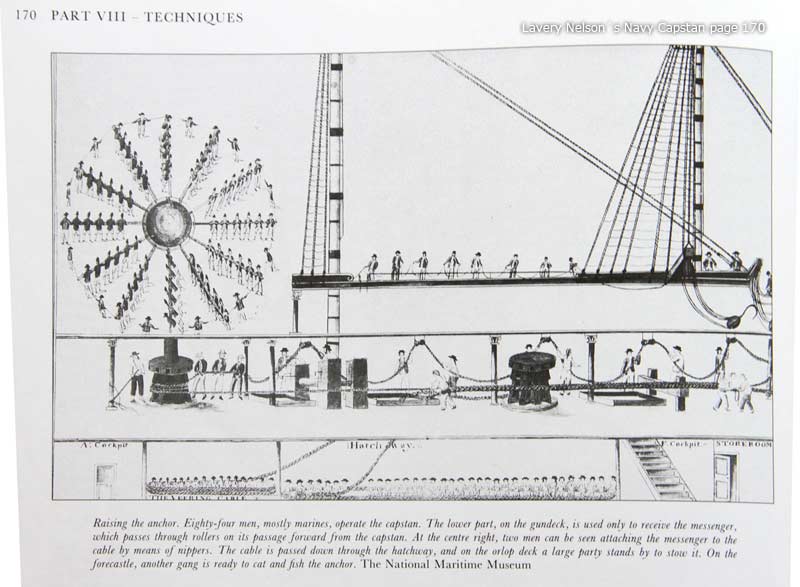
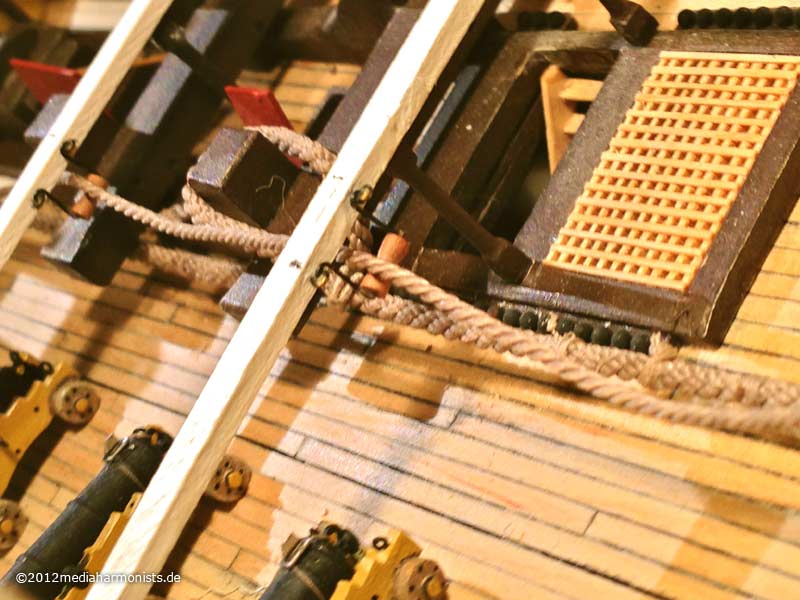
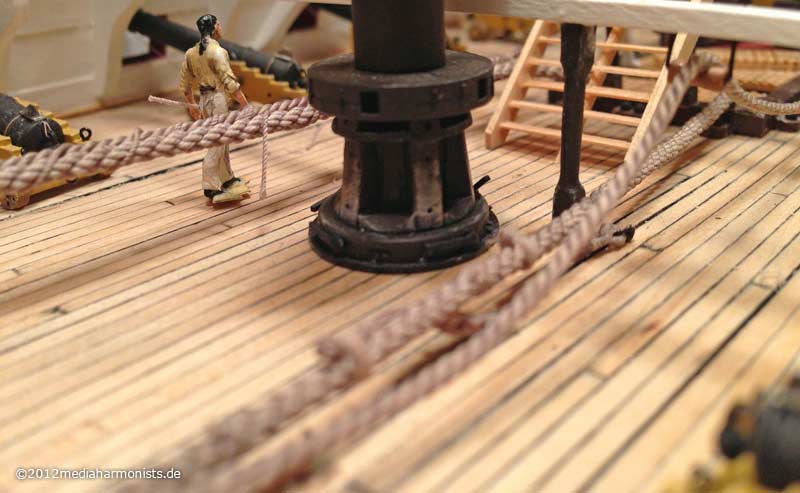
Once upon a time, when young dafi still was young and in the youth of his years, he sat enchantetly in front of his beloved thick book, showing drawings of McKay of the lovingly crafted anchor gear of his big love, the sweet little Vic. As much as dafi treasures the work of this author, this far day he realised some small strange things in the drawings: Why can those heavy cables, the anchor and the messenger be braced hip-high all along the way without sag? How can those rollers in the bows bear the pull, their construction is clearly not for pulling? How can this thin manger board stand the strain of the heavy cables rubbing over it as usually shown?

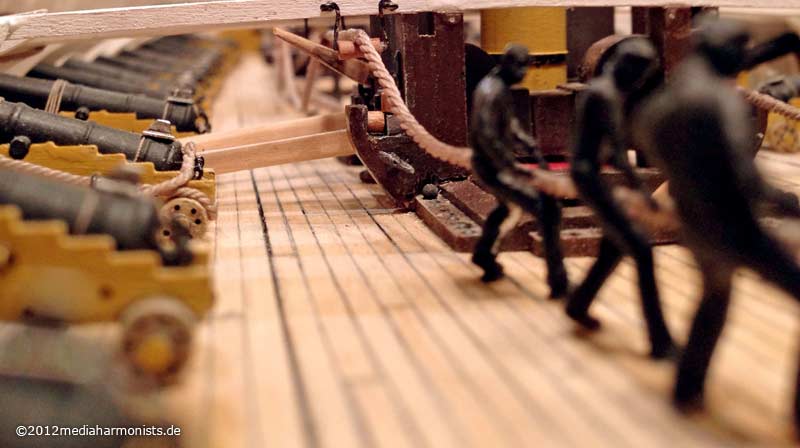
Thrown out of his dream, little dafi opended his eyes and started looking more closely ...

... and this is where the odyssey began ...

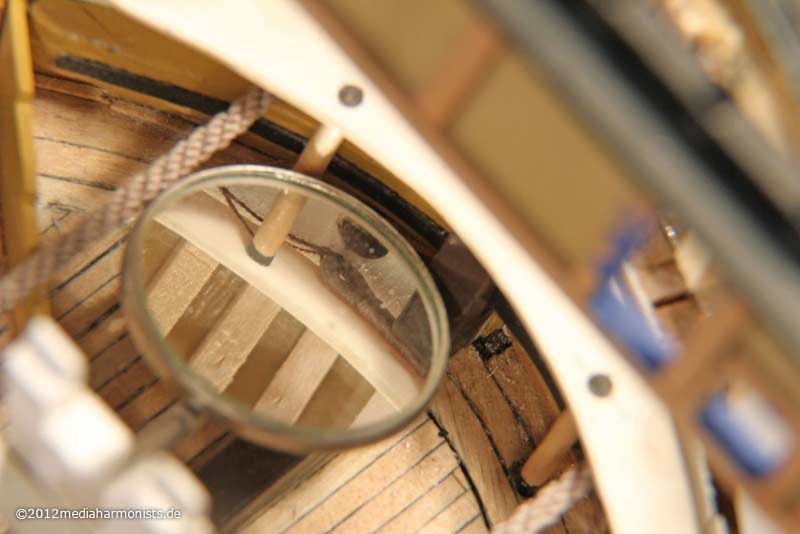
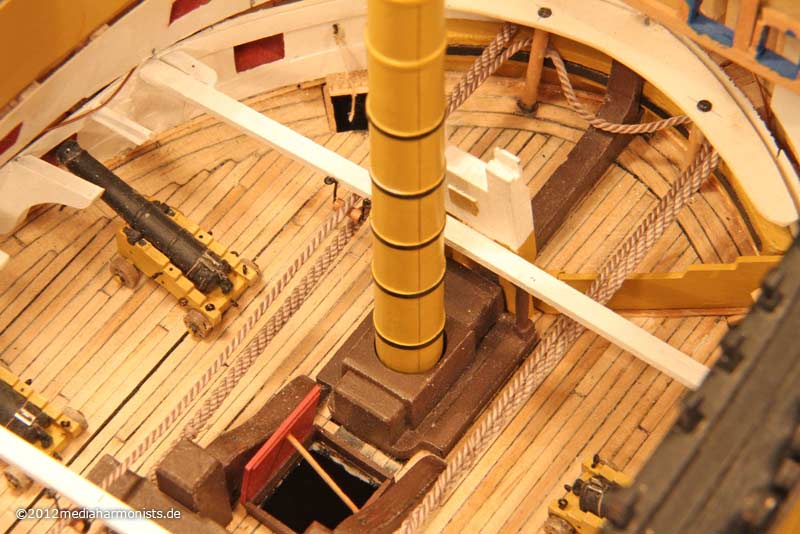
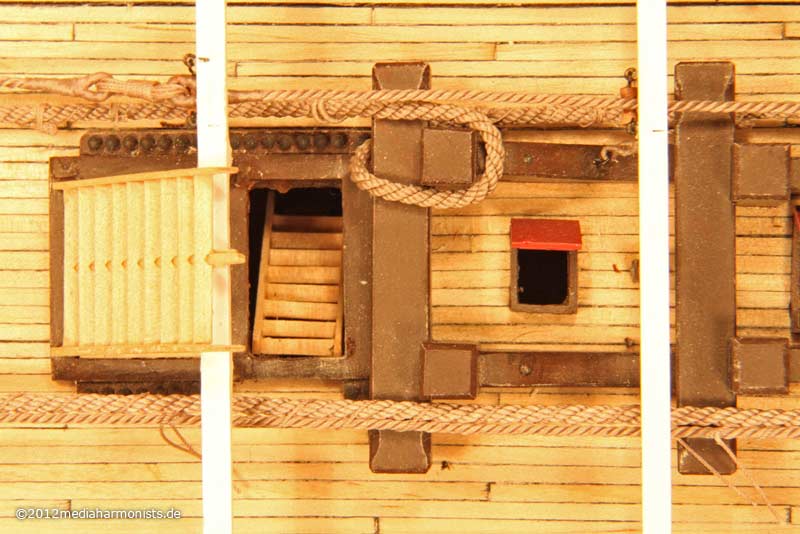
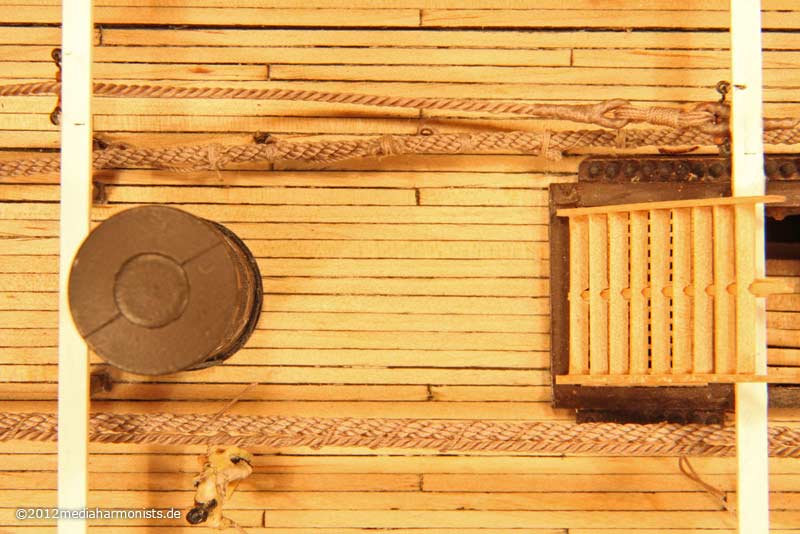
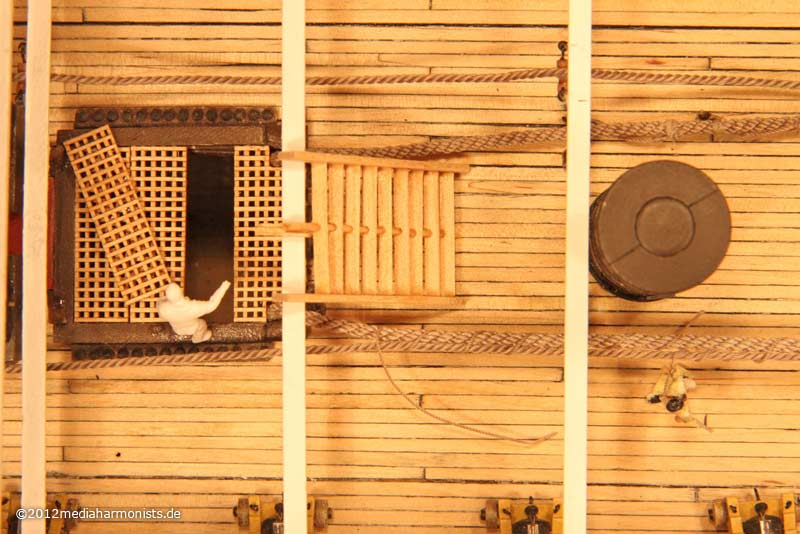
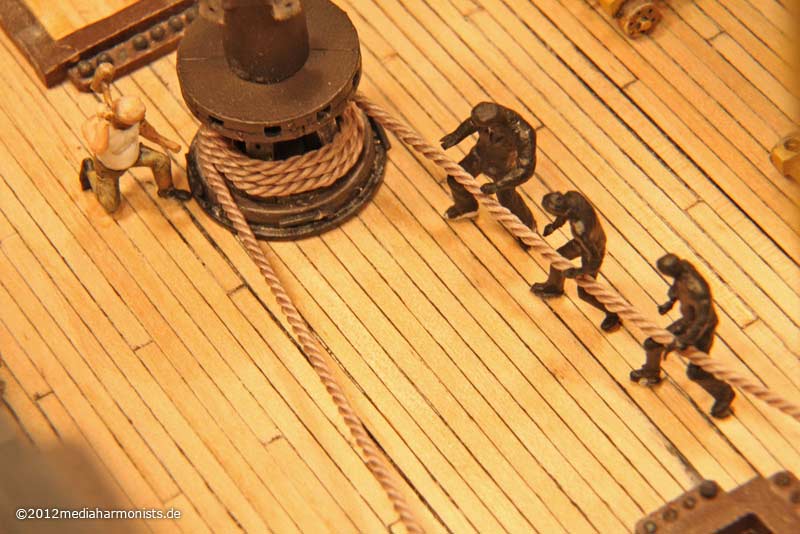
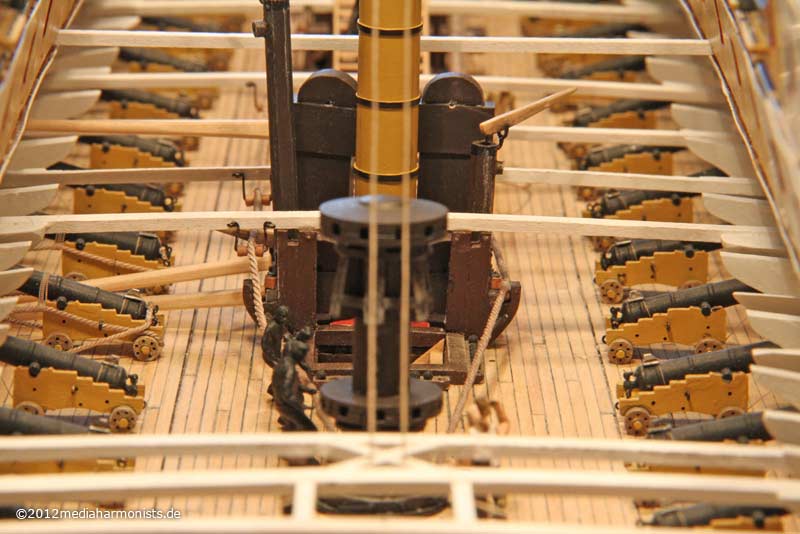
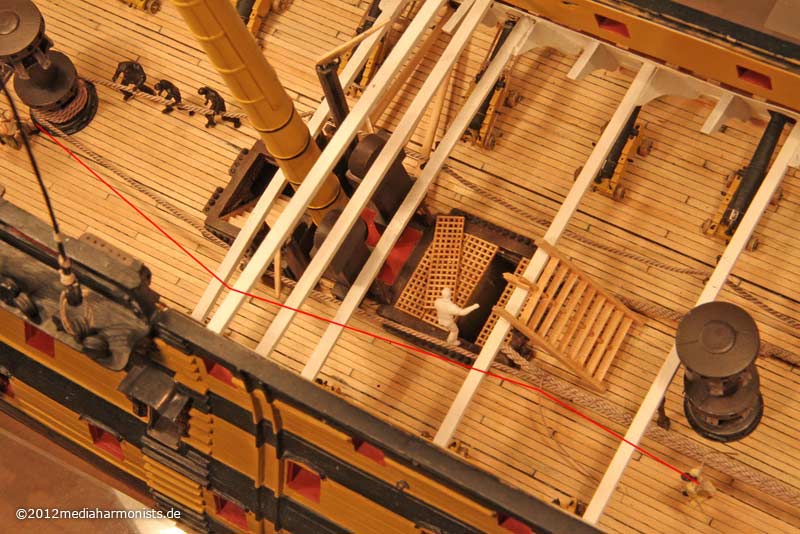
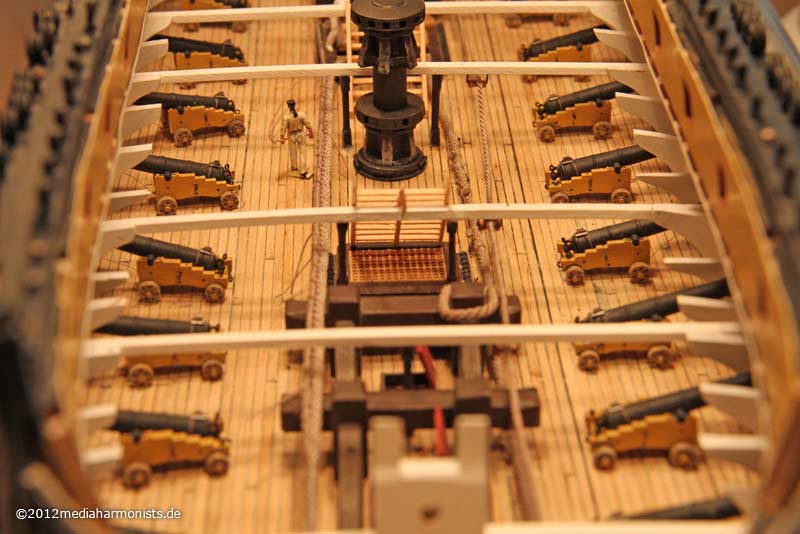
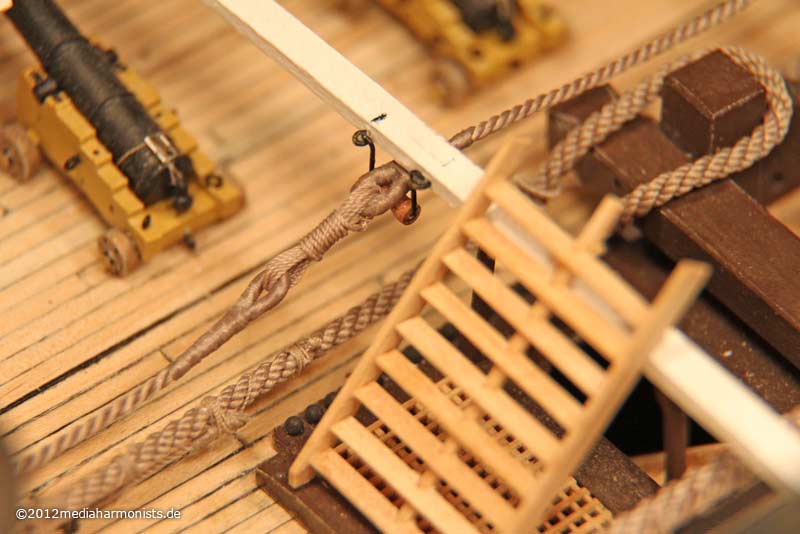
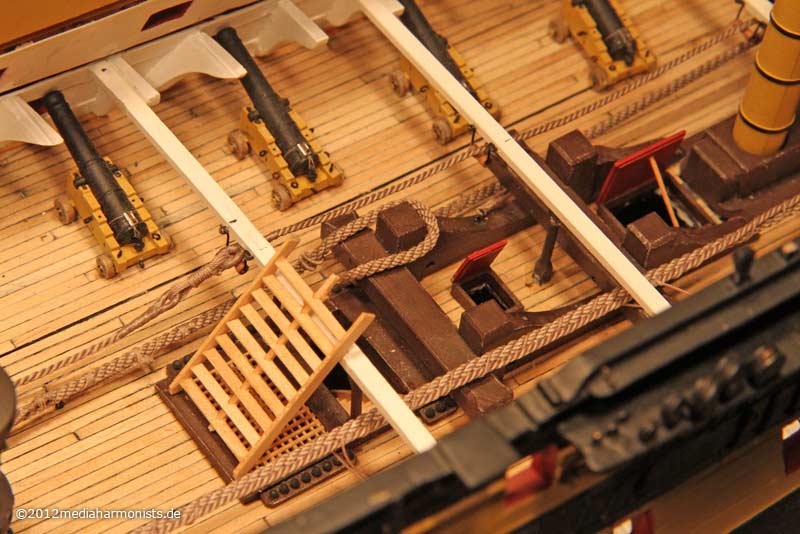
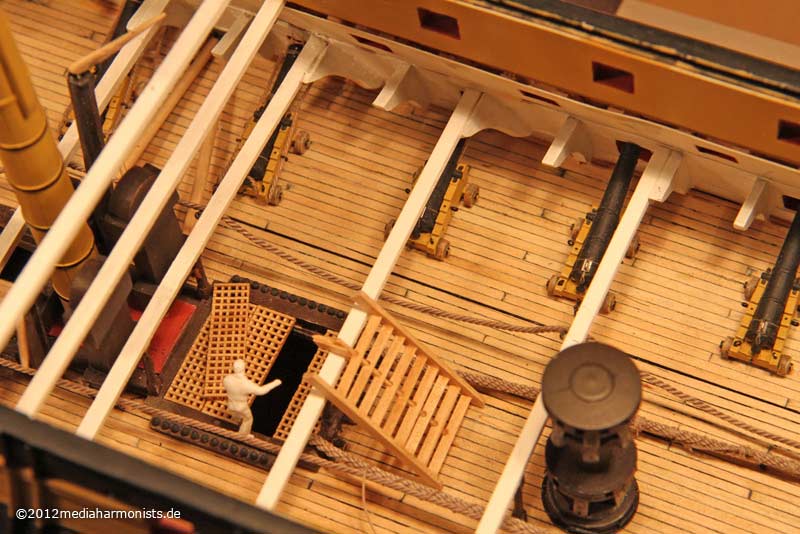
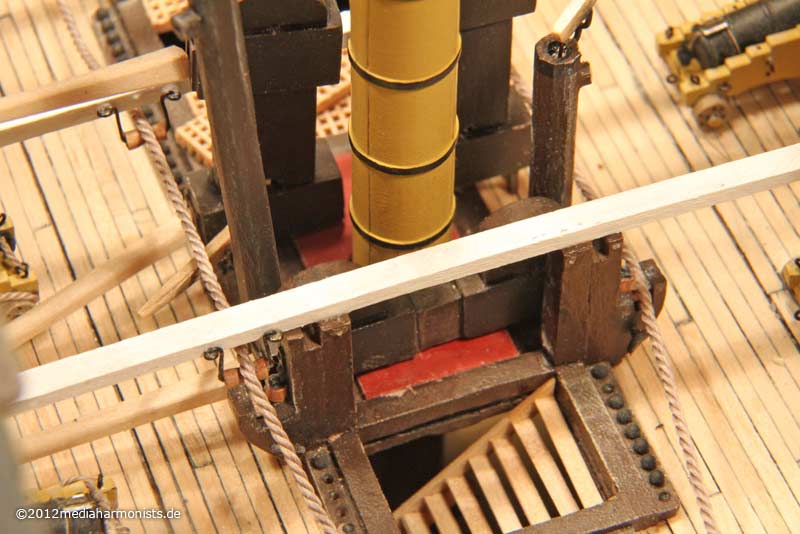
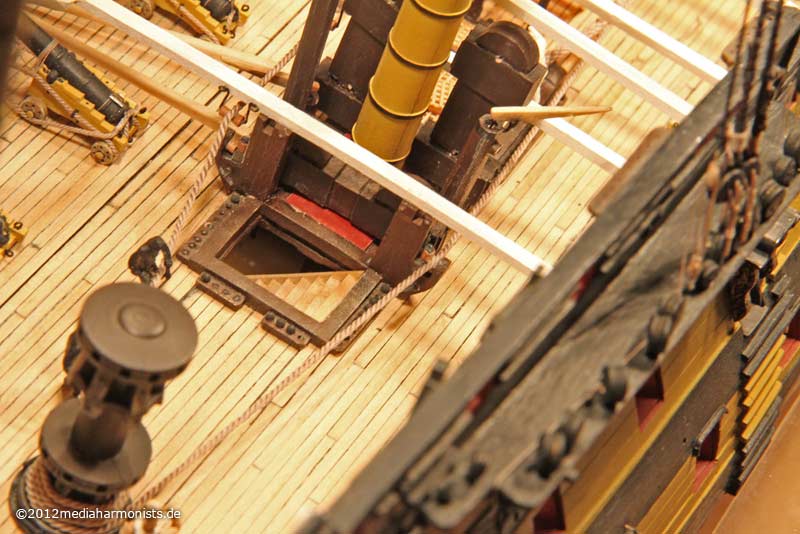
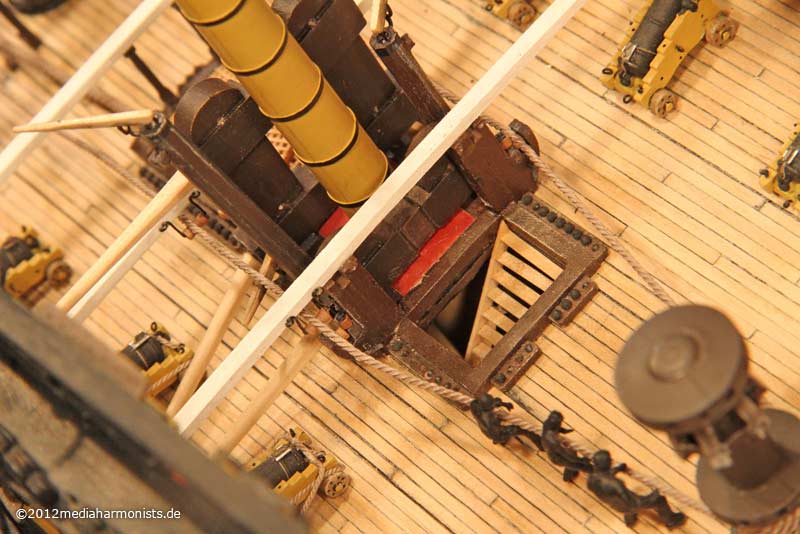
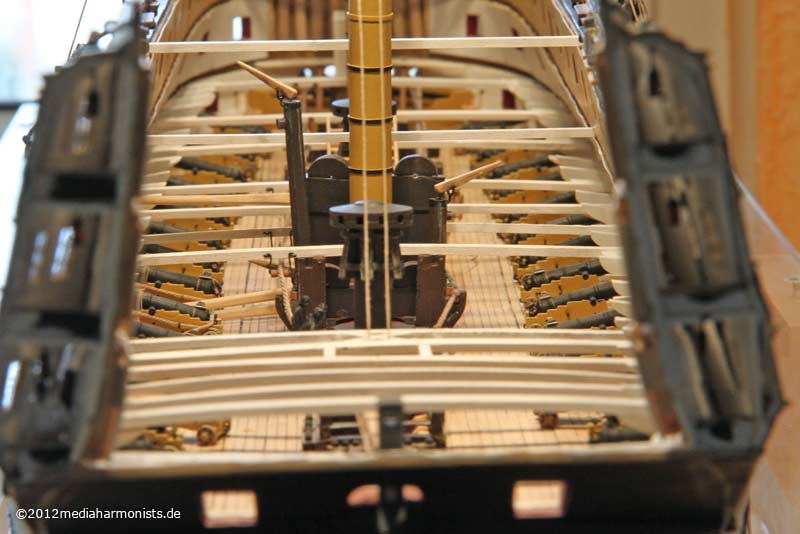
These points can be seen on this beautifully build model of this system, exactely as the book says .
http://nautarch.tamu.edu/model/report2/

Small Interlude

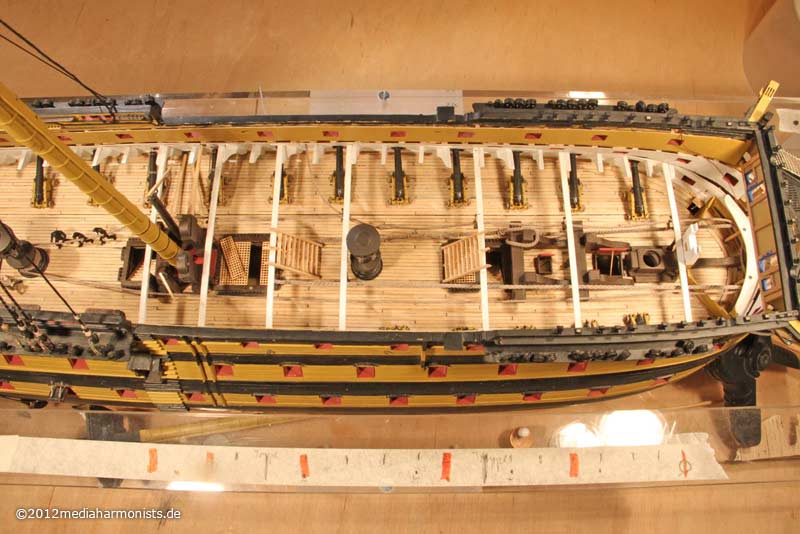
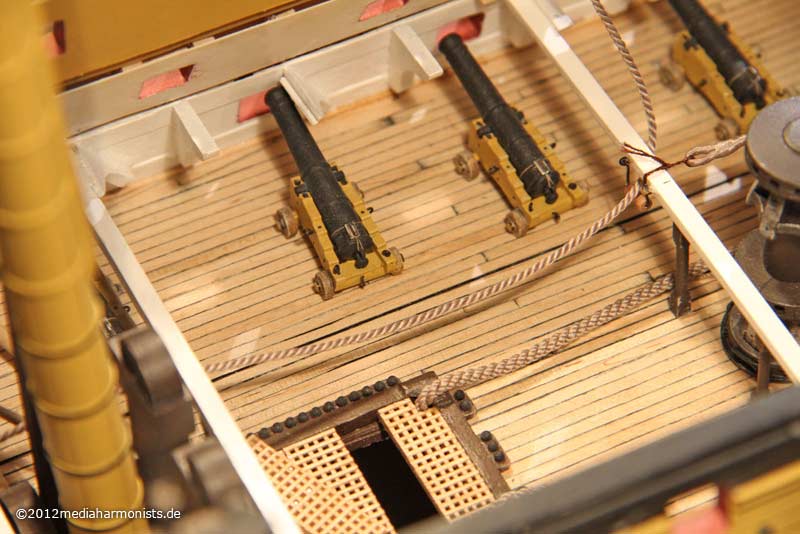
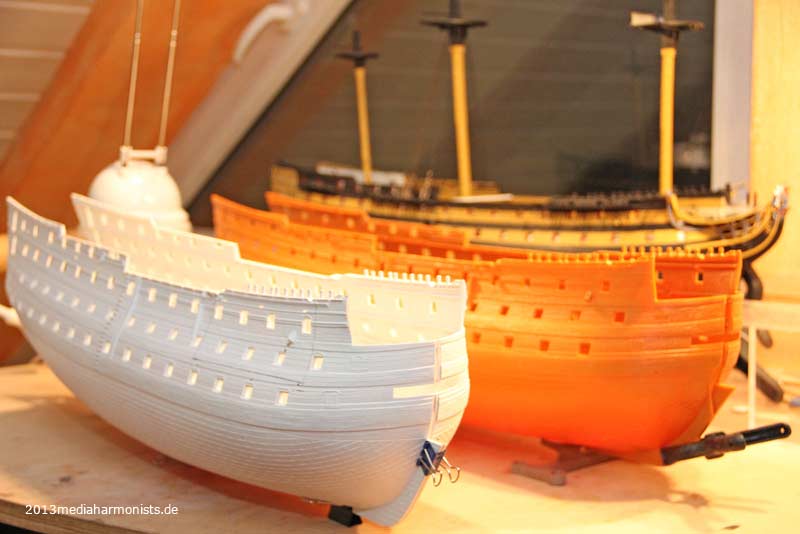
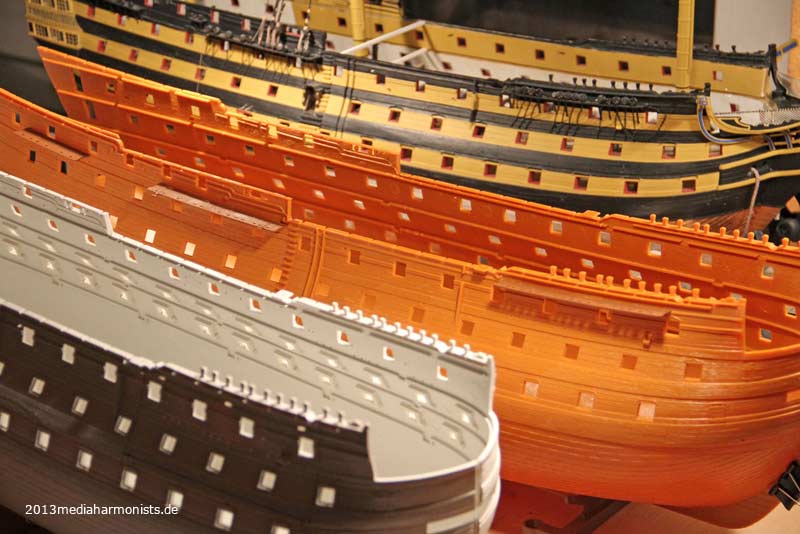
I think some 4 years or more passed ever since and perhaps that is the reason, why the lower gun deck took some more time than planned :-)

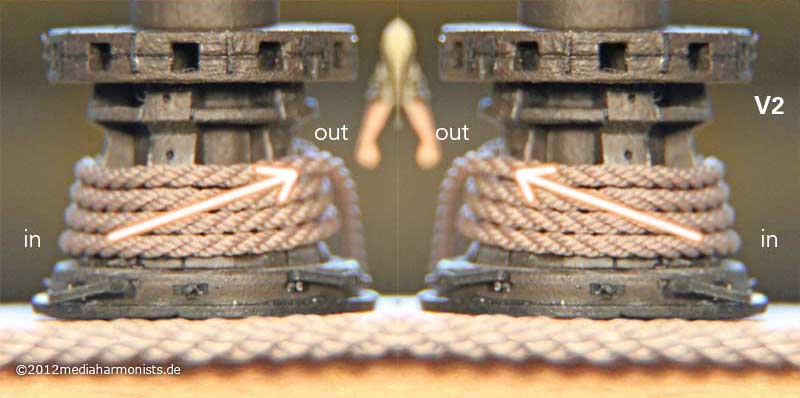
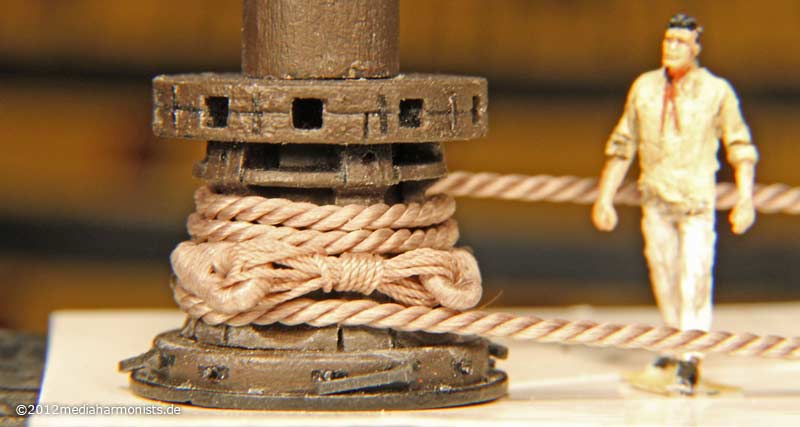
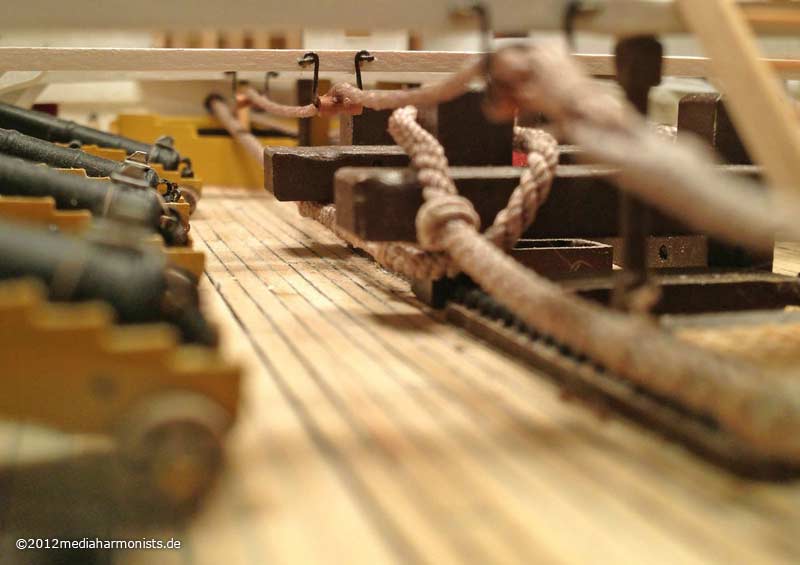
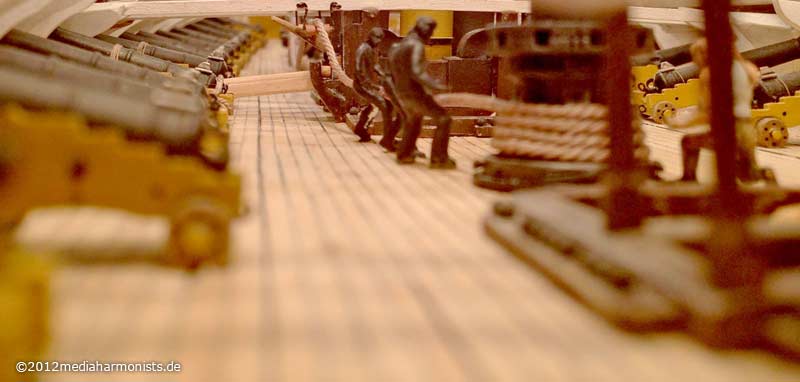
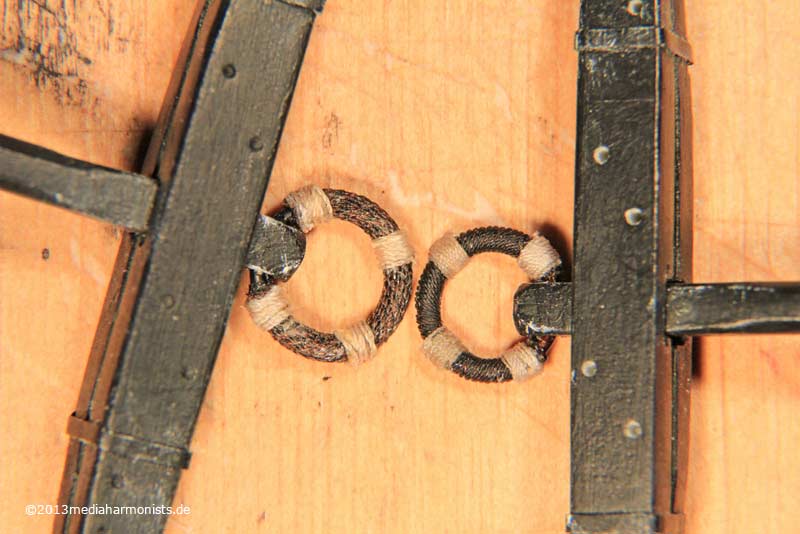
The odyssey took me through lots of literature and original sources like drawings and plans. I fastily realised, that the side of the cable running back to the bows is very loose, plenty of sources show this. The French even use an similar system without the 2 rollers. Also the way a viol worked helped to understand.

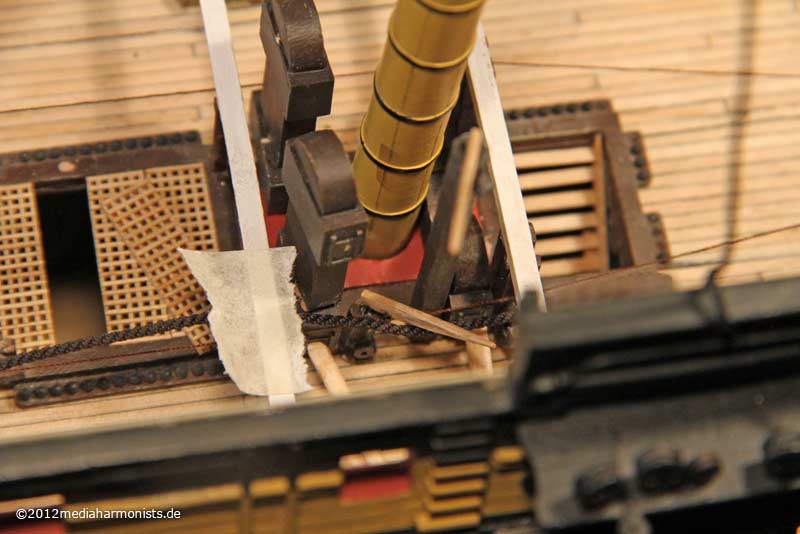
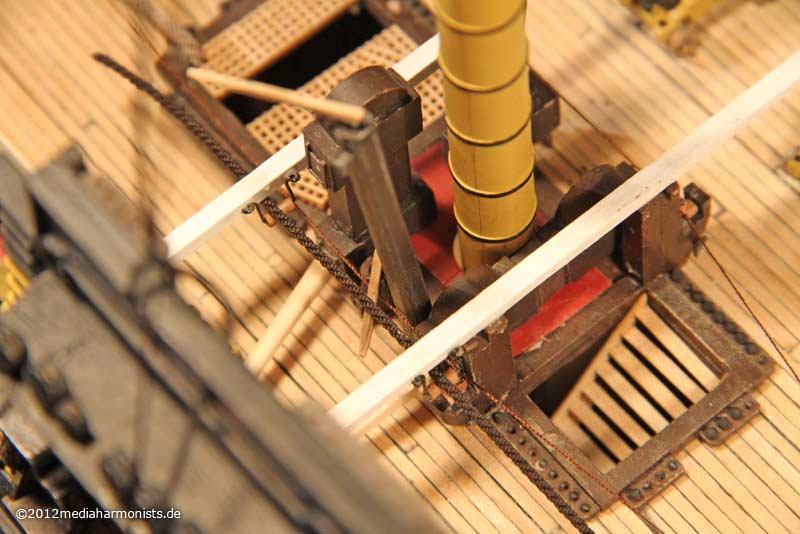
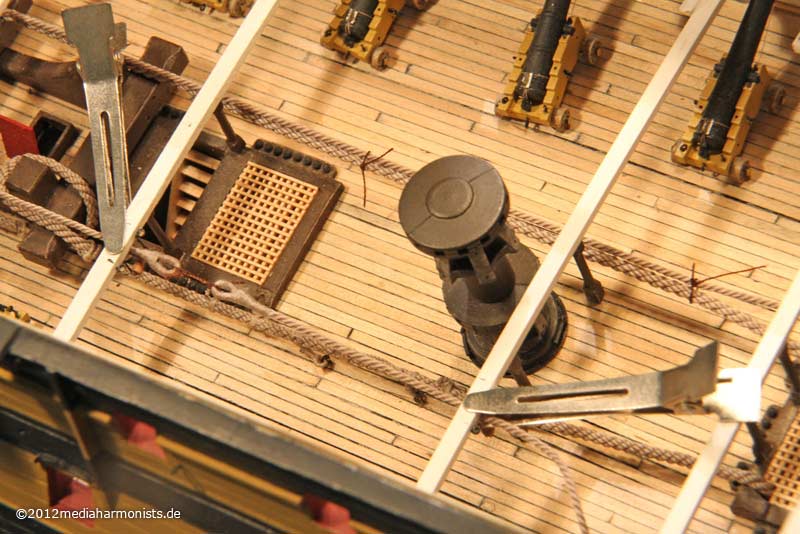
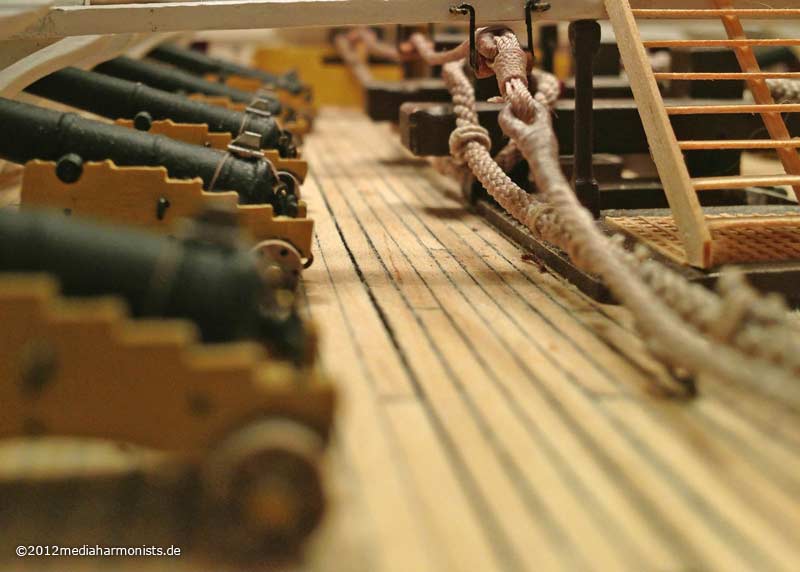
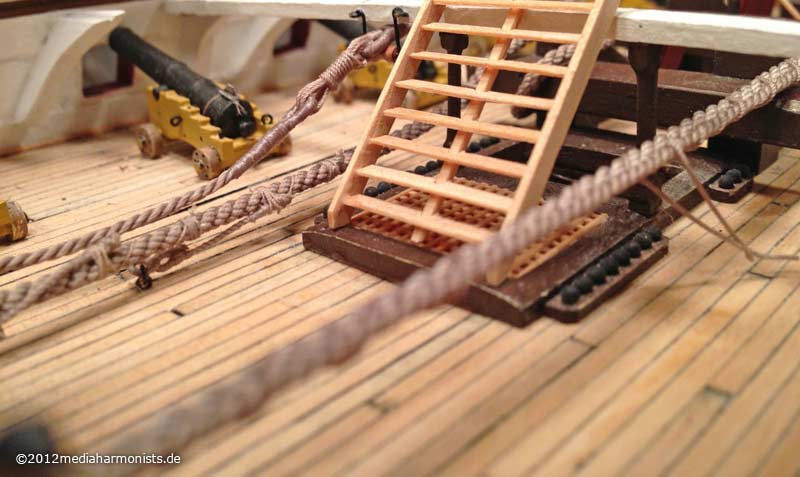
Next step was to understand the different functions. The trials with the anchor cable laid out to be thrown was shown already. This lead to the conclusion, that the manger boards were most possibly removed for that.

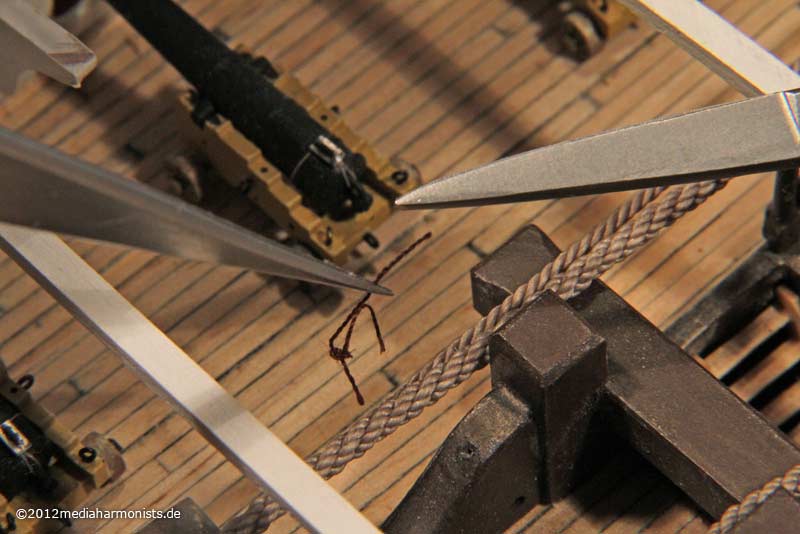
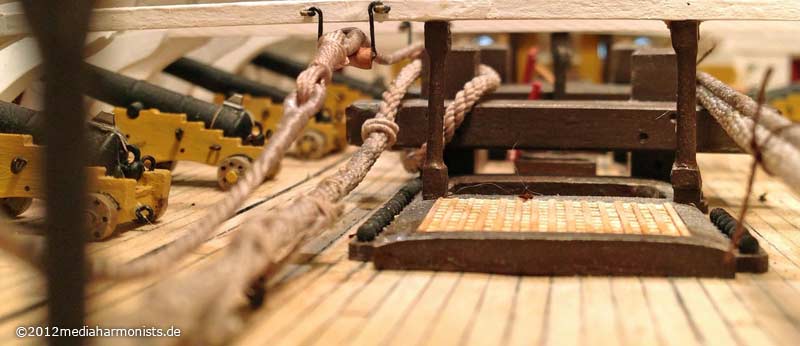
Also riding the anchor was easily understood, the system with the different stoppers was clear, also if the details were sometimes a bit tricky.

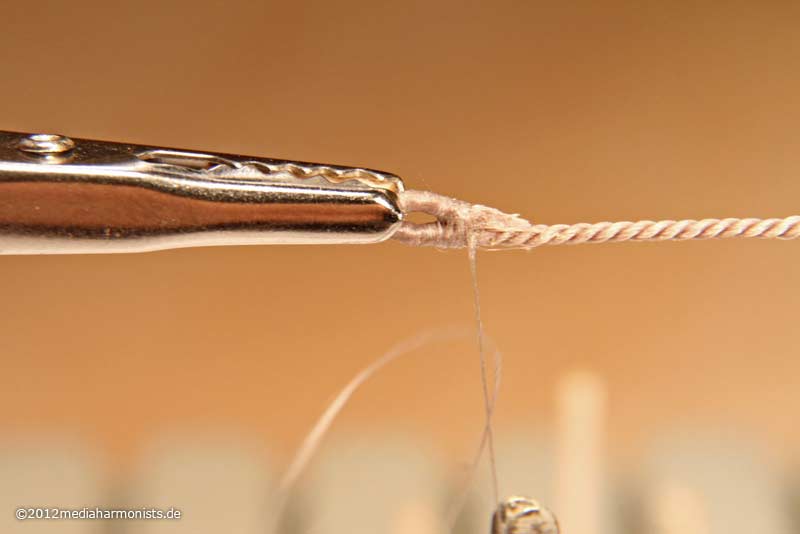
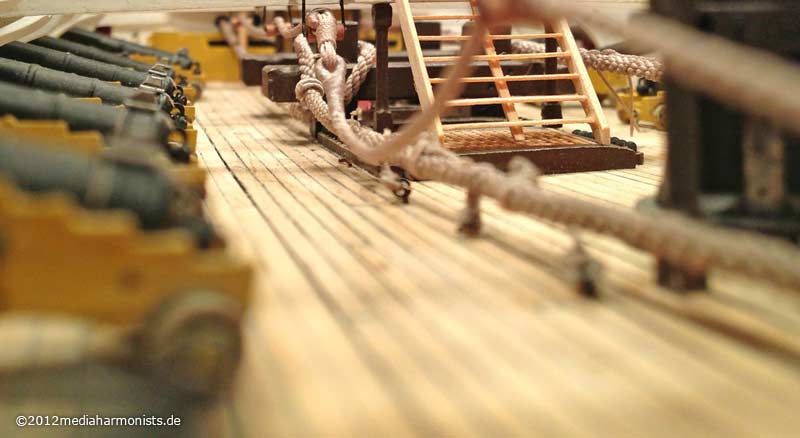
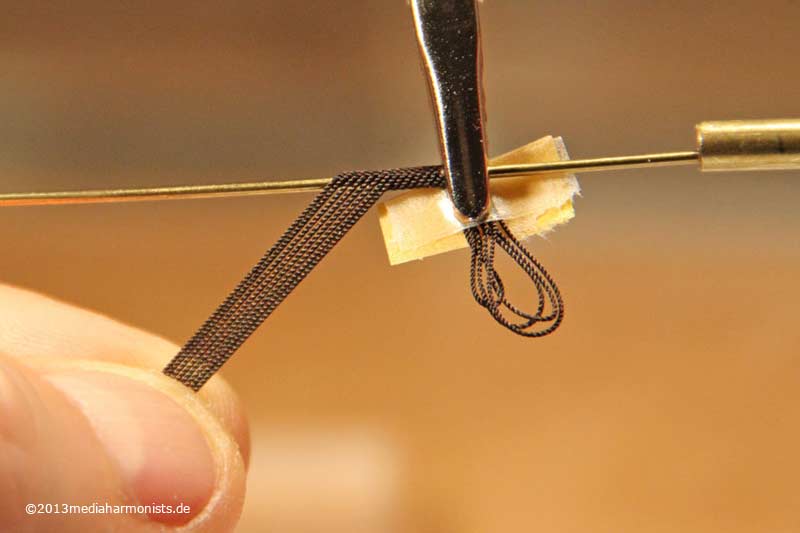
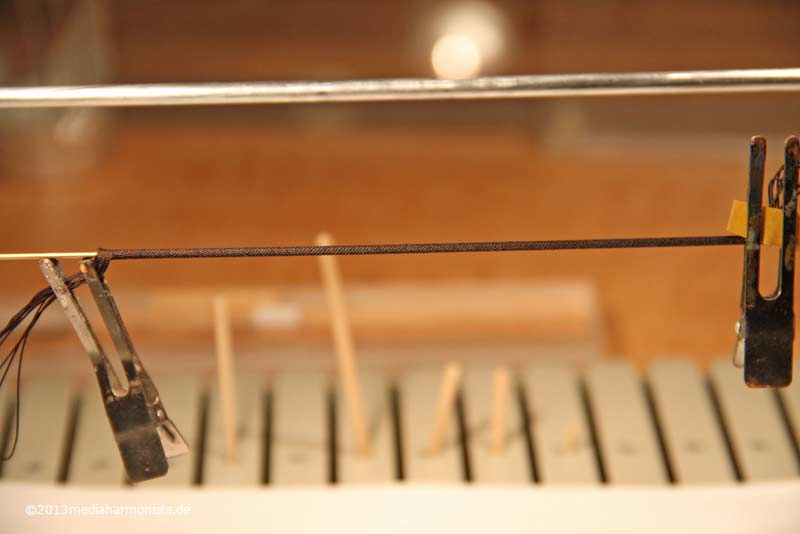
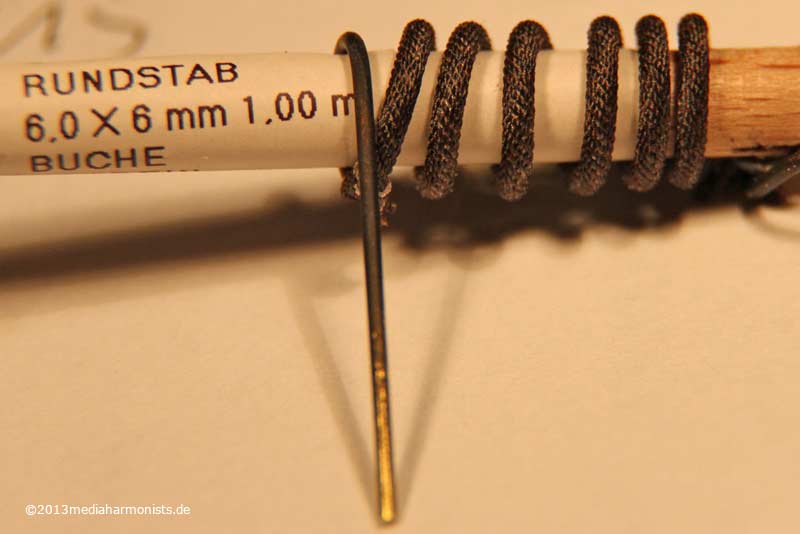
So the messenger itself was left. I already realised earlier, that the cable laid messenger on the Vic in P. was replaced by one of identical twist (one counter twist omitted in production) of the same diameter.
http://modelshipworld.com/phpBB2/viewto ... 754#310754

Amicalement, Chef de la Cousine, dafi

_________________
To Victory and beyond ...
viewtopic.php?f=59&t=99050&start=60

See also our german forum for the age of Sail and History:
http://www.segelschiffsmodellbau.com


Report this post
Top
 Profile  
Reply with quote  
PostPosted: Wed Dec 26, 2012 6:41 pm 
Offline
User avatar

Joined: Mon Mar 12, 2012 11:13 am
Posts: 911
Location: Ludwigsburg/Germany
Aperitif

... so first a new messenger was done and there came the next question: which way was the messenger worked? Always from the bottom to the top or always clockwise because of the lay of the cable?

So Jack, Ben und Phil were pushed away from the old capstan, this one was made turnable, the messenger was wound 4 times round, some weight put onto the cables to simulate load and the capstan was worked.

Image

The frictional connection worked extremely well on the model, I did not manage to make it loose grip, neither with little or with heavy load. The pile of turns nicely slid upwards, giving space on the bottom. The other way round - cable coming in on the top and leaving on the bottom - did not work as expected. (picture still with an old cable-laid cable)

As the messenger is endless, it is linked by 2 eye splices with a lashing. Curious as I am, I wanted to see what happens if this big fat end comes to the capstan - it looks less dramatically than expected :-)

Image

And here comes the big topic, the side that runs back too the bows. On the Vic in P. it is shown on the floor, most models show the same. This for sure is the basic idea. But early in the research i found the drawing of 1815, showing hanging rollers.

Image

Many contemporary drawings show cables lashed up to the ceiling, the AOTS of Bellona 1760 and Diana 1794 show the same system of rollers as seen on the drawing.

So great happiness as I found a uncommon feature to put to discussion.

First tests proved successful

Image

*jumpingofjoy*

*runningbacktokitchen*

_________________
To Victory and beyond ...
viewtopic.php?f=59&t=99050&start=60

See also our german forum for the age of Sail and History:
http://www.segelschiffsmodellbau.com


Report this post
Top
 Profile  
Reply with quote  
PostPosted: Wed Dec 26, 2012 7:03 pm 
Offline
User avatar

Joined: Mon Mar 12, 2012 11:13 am
Posts: 911
Location: Ludwigsburg/Germany
First Course

... and if you think things are now sorted, you could be wrong ...

... first a threat was streched to get an idea of the way the messenger takes. Bows rather easy, the capstan too, but the pump ensemble appeared intresting ...

Image

... if the messenger is on the floor, it is underneath the dales and could get stuck in the sharp corner of the stanchion, if it is put on the roller of the stanchion, it hangs in the front of the chain pumps´cisterns, if it is lead from the stanchion´s roller to a hanging roller it interferes with the elmtree pump. Only if it is guided by a roller abreast and aback the pumps it can move freely ...

Image

... what was to be proved easily by a test messenger.

So distributed the hanging messengers by means of a tape on the stand and doing the count of the deckbeams ...

Image

... and drilling the holes ...

Image

... which resulted in another of my funny operations deep inside the intestines of my Vic.
Then taking out the thread, putting in the real messenger ...

Image

... adjusted the length, and taking out the whole thing again to build up the second eye spice ...

Image

... and putting everything in again, sometimes using the heavy duty special devices ...

Image

... just to end up with the fun and honnor to have to do the lashing all down in there :-)

Image

But sometimes two hair clamps work wonders :-)!

Afterwards Dr dafi still had to remove the stitches ...

Image

*andrunnighastilybacktothekitchen*

_________________
To Victory and beyond ...
viewtopic.php?f=59&t=99050&start=60

See also our german forum for the age of Sail and History:
http://www.segelschiffsmodellbau.com


Report this post
Top
 Profile  
Reply with quote  
PostPosted: Wed Dec 26, 2012 7:28 pm 
Offline
User avatar

Joined: Mon Mar 12, 2012 11:13 am
Posts: 911
Location: Ludwigsburg/Germany
Second Course

Next curse is about the nippers ...

Image

... here shown the newer version, a long rope, that links the anchor cable with the messenger. The older version is shorter with a small plate on the end, but apparently more difficult to unlock.

The system is simple: 3 turns around the messenger, three around both cables, there around the anchor cable. There were more complicated versions, but I hope, this one will do. The ends are not knotted, so I believe the end was to be stretched by a hand. This is why my little shipyard worker was helping out - What a smart nipper he is :-)

And here are the details: The messenger is pulled on the starbord side and running back on larboard.

At the bows the messenger is running loosely around the rollers ...

Image

... and will be nipped straight after the manger.

Image

Both cables run over the horizontal parts of the riding bits.

Image

On larboard the eye splices are to be seen, then it goes just straight ...

Image

... before the nipping is taken off for the anchor cable to disappear in the orlop deck. The starboard cable is stored on the port side and vica versa for handling reasons.

Image

Of course the grating should still be taken down, but unfortunately it was glued in to professionally in my dim and distant past ...

The messenger still has to finish its turn round the pumps, on starboard over the stanchion´s roller ...

Image

... and finally running round the capstan to proceed bowwards.

Image

And if you have a close look, you will discover our mysterious Mr. Thor swinging his mighty hammer :-)

Image

His duty was to make shure, that the incoming cable does not jump over the turn lying above it. And we see Jack, Ben und Phil pulling free the outgoing cable.

Here a overview from the back, one can see the space above the elmtree pumps ...

Image

... also interesting the turns the cables take on the pulled side, both horizontally and vertically ...

Image

... and from the front.

Image

...hihihihihihi...

*runningbacktokitchen*

_________________
To Victory and beyond ...
viewtopic.php?f=59&t=99050&start=60

See also our german forum for the age of Sail and History:
http://www.segelschiffsmodellbau.com


Report this post
Top
 Profile  
Reply with quote  
PostPosted: Wed Dec 26, 2012 7:33 pm 
Offline
User avatar

Joined: Mon Mar 12, 2012 11:13 am
Posts: 911
Location: Ludwigsburg/Germany
Third Course

To end something less heavy to digest, just some details ...

Image

Image

Image

Image

Image

Image

Image

Image

Image

Image

What a nice back ...

...hihihihihihi...

_________________
To Victory and beyond ...
viewtopic.php?f=59&t=99050&start=60

See also our german forum for the age of Sail and History:
http://www.segelschiffsmodellbau.com


Report this post
Top
 Profile  
Reply with quote  
PostPosted: Wed Dec 26, 2012 7:38 pm 
Offline
User avatar

Joined: Mon Mar 12, 2012 11:13 am
Posts: 911
Location: Ludwigsburg/Germany
Dessert

And as icing on the cherry :-)

Image

Image

Image

Image

Image

Image

Image

Image

I wish you a good night and a good digestion, also we hope you liked Mr Thor and his mighty hammer :-)

Image

Daniel

_________________
To Victory and beyond ...
viewtopic.php?f=59&t=99050&start=60

See also our german forum for the age of Sail and History:
http://www.segelschiffsmodellbau.com


Report this post
Top
 Profile  
Reply with quote  
PostPosted: Thu Dec 27, 2012 3:56 am 
Offline
User avatar

Joined: Mon Jan 10, 2005 5:30 pm
Posts: 5408
Location: Nr Southampton England
brilliant..... :thumbs_up_1: :thumbs_up_1: :thumbs_up_1: :thumbs_up_1: :thumbs_up_1: :thumbs_up_1:

INSANE- but brilliant!!


>>>>>>>>>>> His duty was to make shure, that the incoming cable does not jump over the turn lying above it. <<<<

well observed.... a riding turn even on a small sailboat winch is quite a disaster-- leave alone a heavy cable....

all in all ..... you are probabaly barking mad.... :big_grin: :cool_2:

-- but truly excellent!!

Hochachtunsvoll ( admiringly )

JB

_________________
....I buy them at three times the speed I build 'em.... will I live long enough to empty my stash...?
http://www.modelshipgallery.com/gallery ... index.html

IPMS UK SIG (special interest group) www.finewaterline.com


Report this post
Top
 Profile  
Reply with quote  
PostPosted: Thu Dec 27, 2012 6:30 pm 
Offline
User avatar

Joined: Sun Mar 19, 2006 3:00 am
Posts: 741
Location: Greece
That is funny.I was on Ebay the other day trying to make my mind up if i wanted to get myself into building one of these monsters (Either L.SRoyal or HMS Victory in 1/100) but sanity prevail in the end and i bought a smaller 1/185 HMS Victory by Airfix.That will be my first go at a sailing ship, and although am fascinated by all the rigging that goes on, i must confess i have no clue whatsoever of what goes were and for what purpose.I want to build one in heavy seas , smashing its way through and perhaps even firing a few cannons , so i want a lot of action, but also as much detail i can add .I know these kits are rather old, and specially in the smaller scales a lot can be replaced , so your built and this thread will be invaluable help to me .Eventually i will get one of these monsters as i reckon despite the amount of work they require , they are still excellent value for money , and with some extra work they can be a great addition in in any collection.

_________________
http://katsflyby.blogspot.gr/


Report this post
Top
 Profile  
Reply with quote  
PostPosted: Fri Dec 28, 2012 1:03 pm 
Offline
User avatar

Joined: Thu Aug 27, 2009 11:05 am
Posts: 2261
Location: Paris France
Hello Daniel

I repeats, this is always so wonderful precision :thumbs_up_1: this model of victory ( except for the real :smallsmile: ) is the most complete that I know
congrats daniel
Nicolas

_________________
https://ladiagonaledubosco.blogspot.fr/


Report this post
Top
 Profile  
Reply with quote  
PostPosted: Tue Jan 15, 2013 5:27 pm 
Offline
User avatar

Joined: Mon Mar 12, 2012 11:13 am
Posts: 911
Location: Ludwigsburg/Germany
Question:

How can one manage to make the best of all wives get cold sweat, panic and feel big discomfort in just a second?

Very easy, just leave "by mistake" all three hulls lying on the table ;-)

Image

But one has to admit: it´s looking great !!!

Image

Greetings, Daniel

_________________
To Victory and beyond ...
viewtopic.php?f=59&t=99050&start=60

See also our german forum for the age of Sail and History:
http://www.segelschiffsmodellbau.com


Report this post
Top
 Profile  
Reply with quote  
PostPosted: Sun Jan 20, 2013 5:03 am 
Offline
User avatar

Joined: Mon Mar 12, 2012 11:13 am
Posts: 911
Location: Ludwigsburg/Germany
Wormsigns ...

Image

... here we go again. Where too? Next picture makes it clear :-)

Image

Then dressing them nicely for sacrifice on an old Inca pyramid with several high steps and silicon over it.

Image

Because of the steps, I do not need an extra fence for the casting, in goes a batten in the middle for the anchor shaft and the resin goes over it ...

Image

... and then cursing over ones own stupidity, too much resin and who wants to rework that abundance of material overflow?!?

So back to start, this time less resin and immediately one sheet into each half to press the excess material to the side ...

Image

... and parts were perfect to be taken out by the help of a cutter blade only :-)


Then took an evergreen batten, painted red and did the chamfer with sight control flight ...

Image

... which worked very easily. Then still the arms and throat glued in and positioned the points ...

Image

... as they were guide for thinning the arms. Still glued in the blades ...

Image

... and a nice anchor comes out :-)

In brown the original Heller one, too round, a much later shape ...

Then fenced a small playground, positioned the anchor on three needle tops in the right height ...

Image

... and filled with silicon.

Then used the spay silicon and soaked the first half of the form and even put Vaseline into the corners for that the second half of the form does not form one solid block with the first half - guess how I found out ...

Then filled with resin ...

Image

... and out came ...

Image

... lot of bubbles. Ok, mixed some drops of resin, put back the parts in the form, the resin onto the right places and closed the form - and magically the parts were repaired :-)

Image

By now I learnsd the waffle-cooker method, by first putting the resin in both halves and wait until it starts getting thik and just then to close the form. Works wonders and much better results :-)

Image

Then cleaning up a little, painting, dry brushing and here we have a sweet little set of anchors. Looks like tailor made ;-)

Image

Image

On the last picture one can nicely see the gap in between the two halves of the stocks. By the conical form the stock rings can easily be pushed towards the middle, thus closing the gap and refastening the shaft :-)

Kenavo, Daniel

_________________
To Victory and beyond ...
viewtopic.php?f=59&t=99050&start=60

See also our german forum for the age of Sail and History:
http://www.segelschiffsmodellbau.com


Report this post
Top
 Profile  
Reply with quote  
PostPosted: Sun Jan 20, 2013 8:02 am 
Offline
User avatar

Joined: Mon Jan 10, 2005 5:30 pm
Posts: 5408
Location: Nr Southampton England
very very brilliant indeed!!!


sooooo much thought and pain doe the anchors....
:thumbs_up_1: :thumbs_up_1: :thumbs_up_1:


>>>> How can one manage to make the best of all wives get cold sweat, panic and feel big discomfort in just a second? <<<

that is very very funny!!!!!

Your ( our !!!!! ) poor wives.....


JIM BAUMANN

_________________
....I buy them at three times the speed I build 'em.... will I live long enough to empty my stash...?
http://www.modelshipgallery.com/gallery ... index.html

IPMS UK SIG (special interest group) www.finewaterline.com


Report this post
Top
 Profile  
Reply with quote  
PostPosted: Sun Jan 20, 2013 8:05 am 
Offline
User avatar

Joined: Mon Jan 10, 2005 5:30 pm
Posts: 5408
Location: Nr Southampton England
Ahoi Dafi

have you seen this...?

viewtopic.php?f=16&t=146162

Do contact Robin--he is a really good guy!

maybe you can assist each other?

Rgds

JB

_________________
....I buy them at three times the speed I build 'em.... will I live long enough to empty my stash...?
http://www.modelshipgallery.com/gallery ... index.html

IPMS UK SIG (special interest group) www.finewaterline.com


Report this post
Top
 Profile  
Reply with quote  
PostPosted: Sun Jan 20, 2013 11:32 am 
Offline
User avatar

Joined: Mon May 14, 2012 12:18 pm
Posts: 2068
Location: Salt Lake City, USA
Daniel, I was looking at all the Caldercraft/Jotika Victory model builds on the "other site" and your once humble Heller plastic kit blows them all away. Don't tell 'em I said that! :big_grin:

_________________
-Jason Channell

Current Project: 1/200 Bismarck


Report this post
Top
 Profile  
Reply with quote  
PostPosted: Sun Jan 20, 2013 4:58 pm 
Offline
User avatar

Joined: Mon May 02, 2005 10:00 am
Posts: 638
Location: Michigan
This is the most impressive build of this model Ive ever seen! I really love the figures that you have made. Are they made from milliput ?? like to see how you make them. I will have to use a few of your techniques on my far humbler build.. Carry on good sir!


Report this post
Top
 Profile  
Reply with quote  
PostPosted: Mon Jan 28, 2013 6:03 pm 
Offline
User avatar

Joined: Mon Mar 12, 2012 11:13 am
Posts: 911
Location: Ludwigsburg/Germany
Thank you Sirs!


As the stream, the kedge and one for my little Mistery were still on the way and I took the chance to make a better documentation ...

First printing the plan in the right size, taking double sided Scotch tape to fix some Evergreen in the right position, and flood the joints with CA ...

Image

... took it out and glued the reverse too. As the arms grow thinner, I glued a thinner material on the tip as guide:

Image

Then files carefully the whole area in between the shaft and the tip ...

Image

... until the small step to the thinner tip disappeared. Then turned the anchor to do the other side, and as it was not lying flat any more I supported the hanging arm by some sheet.

Image

Here from a different perspective:
before ...

Image

... and after.

Image

Then for the bent of the arms I colored the surface with Edding ...

Image

... and one can nicely see what is done and what still has to be done.

Image

It helps to work on a thin Plexi, as one can use the sides as guide for the file.

Image

Then comes the throat, the area in beween the shaft and the arms. At those days it was rather small, later versions of anchors accumulated much more material on this spot.

Image

The filing itself is easy...

Image

... just getting both sides equal is needs a careful approach.

Image

Colored the shaft and the arms for the chamfers ...

Image

... drilled the hole for the ring and most was done.

Image

Used my small template to cut the palms ...

Image

...glued in place, cut ...

Image

... cleaned up and done :-)

Image

And here the family shot with all the needed tools that were needed for conception.

All the best, Daniel

_________________
To Victory and beyond ...
viewtopic.php?f=59&t=99050&start=60

See also our german forum for the age of Sail and History:
http://www.segelschiffsmodellbau.com


Report this post
Top
 Profile  
Reply with quote  
PostPosted: Tue Feb 05, 2013 3:33 pm 
Offline

Joined: Tue Feb 05, 2013 3:28 pm
Posts: 1
Hello

An amazing piece of work and I'm sure I'll be referring back to these photos again and again as I undertake my own journey of building the victory. Though not to this level, I doubt I'd have the patience. I'm right at the very beginning, still trying to make sense of the terrible Heller instructions while still amazed at the quality of the mouldings.

Anyway - within these pages there's a link to Pete Coleman's victory site, which also looks like a mine of information, but the registration function doesn't seem to work properly. Does anyone know how I can successfully register, or get a message to Pete?


Report this post
Top
 Profile  
Reply with quote  
PostPosted: Tue Feb 05, 2013 4:25 pm 
Offline
User avatar

Joined: Mon Mar 12, 2012 11:13 am
Posts: 911
Location: Ludwigsburg/Germany
Hello Kevin,

thank you for your kind works and good luck with your own build. The Heller instructions are a good help to identify the parts, the rest is better to be researched ...

The rest see my PM.

Greetings, Daniel

_________________
To Victory and beyond ...
viewtopic.php?f=59&t=99050&start=60

See also our german forum for the age of Sail and History:
http://www.segelschiffsmodellbau.com


Report this post
Top
 Profile  
Reply with quote  
PostPosted: Wed Feb 06, 2013 2:48 am 
Offline
User avatar

Joined: Mon Mar 12, 2012 11:13 am
Posts: 911
Location: Ludwigsburg/Germany
Of course, it had to come ...

... of course, I admit, I made it easier by using just one single strand to serve the anchor´s ring and not the multitude as in the original ...

... of course, this was already tricky enough to me ...

... of course, I had no idea how to do other wise ...

... and of course someone was moaning ...

... and of course, the challenge was accepted!


Once I used my thinking equipment ...

... and of course I used first 4 strands to serve ...

Image

... but the difference was not to visible, so I tried 8 of them ...

Image

... and of course looks much more authentic :-)

Image

Then bent the served wire around a core ...

Image

... and here we are, on the left side the new one :-)

Image

...hihihihihihi...

Challenge won!!!

Of course the seizings are badly done as I did take the wrong rope and it was already late, but the next ones, just wait!!!

Mission accomplished :-)

And now to the other rings ...

... underneath the eyes as these things cost sleep ...

... of course ...

XXXDAn

_________________
To Victory and beyond ...
viewtopic.php?f=59&t=99050&start=60

See also our german forum for the age of Sail and History:
http://www.segelschiffsmodellbau.com


Report this post
Top
 Profile  
Reply with quote  
PostPosted: Thu Feb 07, 2013 11:44 am 
Offline
User avatar

Joined: Thu Aug 27, 2009 11:05 am
Posts: 2261
Location: Paris France
Hello Dan

as always, a work of more accurate,and research to implement techniques and materials, none obstacles you resists :-)
superb!
Nicolas

_________________
https://ladiagonaledubosco.blogspot.fr/


Report this post
Top
 Profile  
Reply with quote  
Display posts from previous:  Sort by  
Post new topic Reply to topic  [ 1012 posts ]  Go to page Previous  1 ... 3, 4, 5, 6, 7, 8, 9 ... 51  Next

All times are UTC - 6 hours [ DST ]


Who is online

Users browsing this forum: Stefano Salesi and 4 guests


You can post new topics in this forum
You can reply to topics in this forum
You cannot edit your posts in this forum
You cannot delete your posts in this forum
You cannot post attachments in this forum

Jump to:  
Powered by phpBB® Forum Software © phpBB Group