Quote:
I'm pretty sure Pontos did the same as KA with regard to the portholes; here's how mine start life:
http://i1275.photobucket.com/albums/y44 ... 399194.jpghttp://i1275.photobucket.com/albums/y44 ... 9aa2a5.jpg(The porthole rings
with shields are mostly on the 1st level of the superstructure, BTW)
The intent is to put the empty ring around the kit molded porthole opening after scraping off the molded porthole "eyebrow". Check out Anton's (hopefully not yet dead) Bismarck thread for example:
viewtopic.php?f=59&t=144178The main reason for them is because many of the kit portholes are warped and slapping the whole thing on top over the kit ports "solves" that problem with minimum effort as well as adding the "eyebrow" and porthole shields (for those portholes that had them) all in 1 shot.
(Here's where I get preachy so disregard if needed.

)
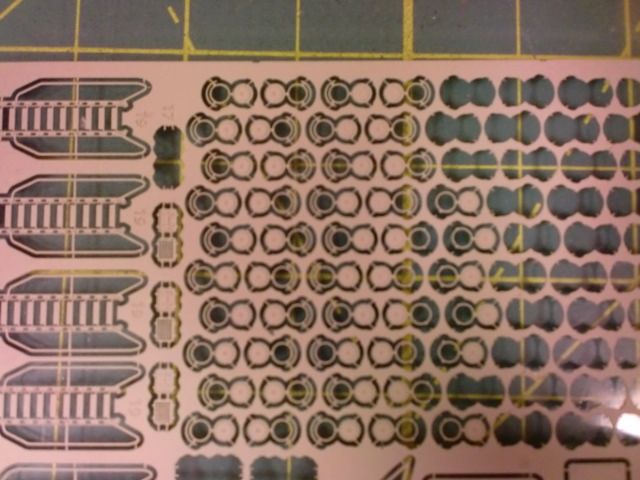
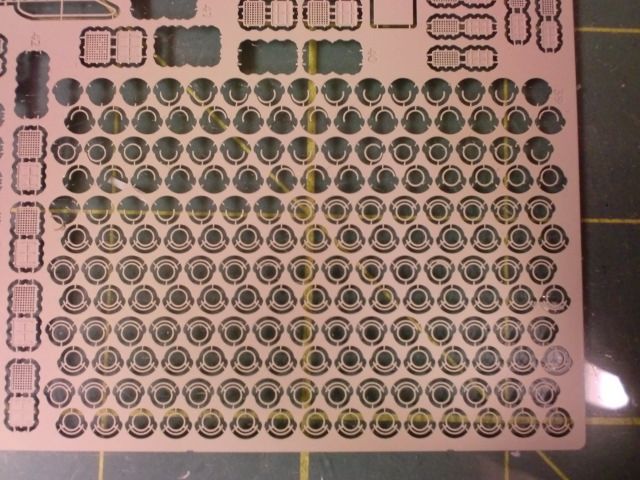
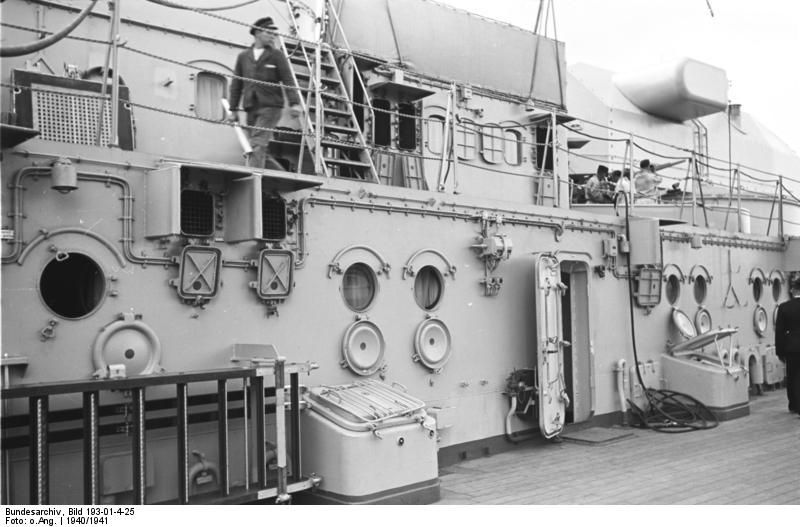
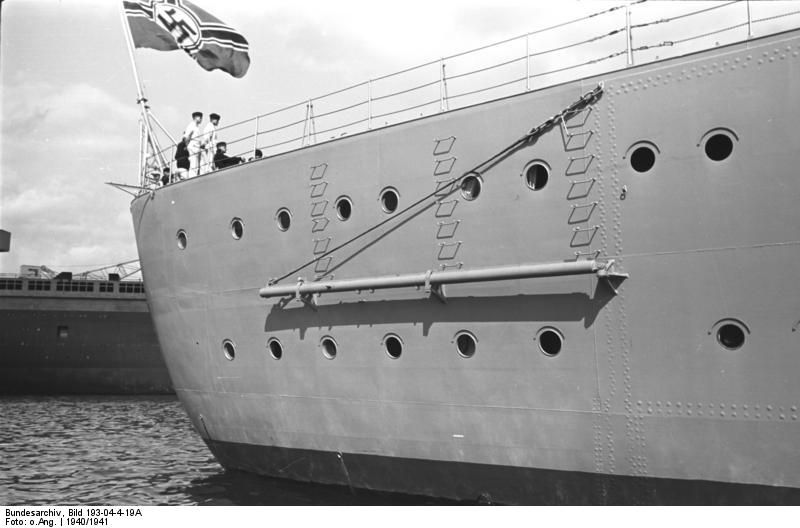
If you look at photos of the real Bismark however, you will see the installed PE porthole rings are completely out of scale and not anywhere near that visible:
http://i1275.photobucket.com/albums/y44 ... 634e36.jpghttp://i1275.photobucket.com/albums/y44 ... 62b31d.jpgThe PE rings should be about half as wide
and thick, which would also make them impossible to handle without crushing. When translated to 1/200 scale, the rings pretty much vanish.
In my opinion, most of the original kit portholes are completely unacceptable as they are warped and generally poorly molded. So you have 2 options: "quick and dirty" with aftermarket PE for a decent but ultimately inaccurate appearance or complete porthole replacement (which is a giant 50+ hour long PITA) and chopping up the PE for a more accurate look.
I don't think the portholes are unacceptable as is, because they really are so small: On the worse warped maybe a tiny strand of putty curled on the washed-out edge, plus delicate painting with gloss black and a wash, will do for me... I think the moulded-on eyebrows, and even the moulded-on port covers, are sort of ok too...
One thing I did do is counter-sink the whole deck so the edge of a self-adhesive wood deck should end up flush with the hull sides: It was very hard work and took many hours, but the fit of the deck is very sound so that ended up fine, with a consistent protruding hull edge of about 0.7 mm all around (for a wood deck that is about 0.3 or 0.4 mm for both Pontos and Ka model). This was with some scrapping off of the plastic deck surface near the peak of the final curve towards the bow. That part did not want the deck to sit deeper no matter how much I scrapped, as the vertical hull curvature is so steep there that you have to bevel the deck at an extremely slanted angle to follow the slanted shape of the hull's edge...
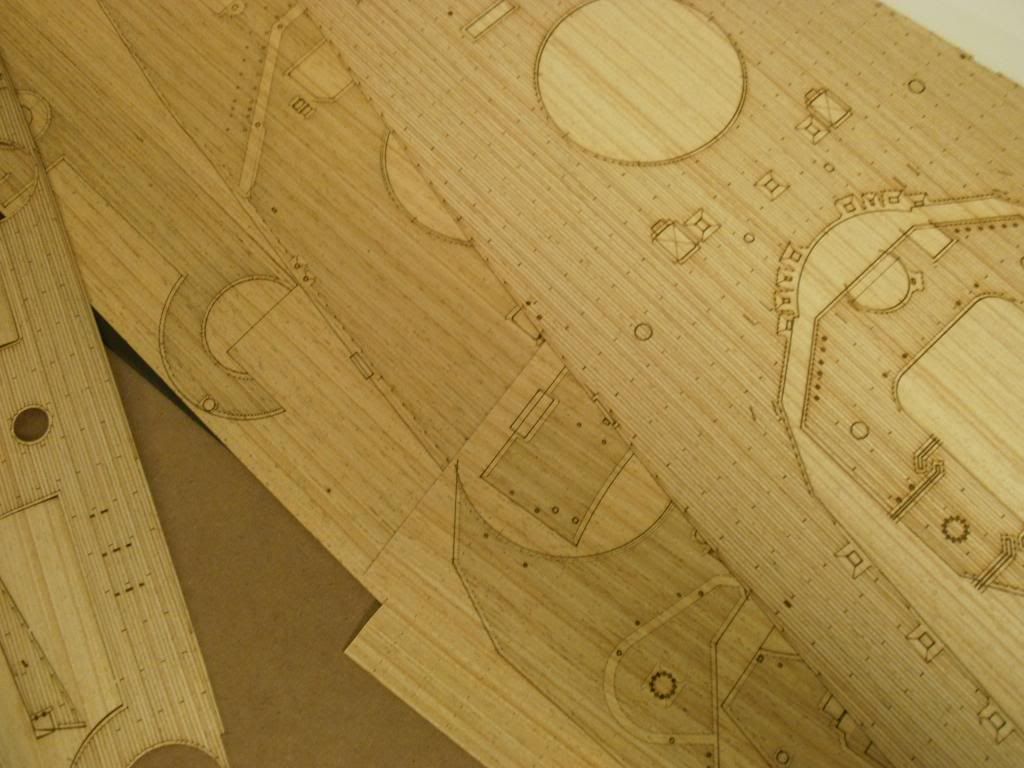
I have got both the Pontos and Ka Model decks and detail sets: The Photo etch is sturdier on the Ka models, which may be less in scale but seems much easier to install. The Pontos set is the basic one and is still almost overwhelming...
You cannot see the rifling of the main guns in the pontos set, but they are etrememly nice anyways...
I would spray that photo-etch with lacquer matte black paint, from spray cans most likely, just to make the weaker parts sturdier and more workable... This would help painting problems too...
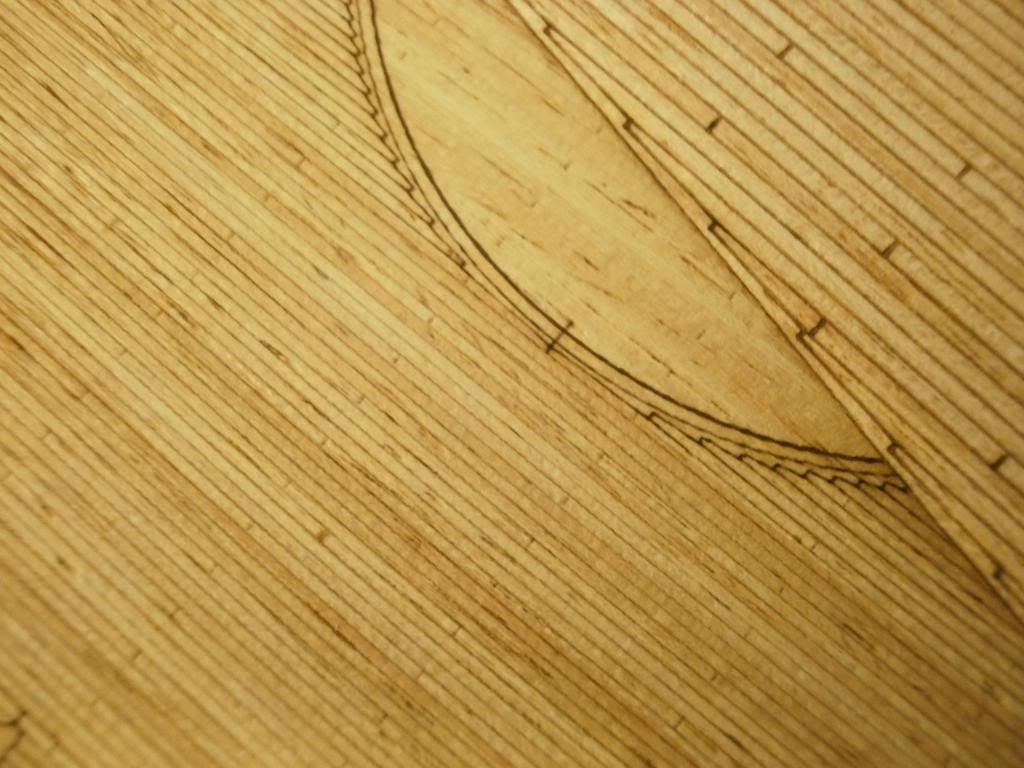
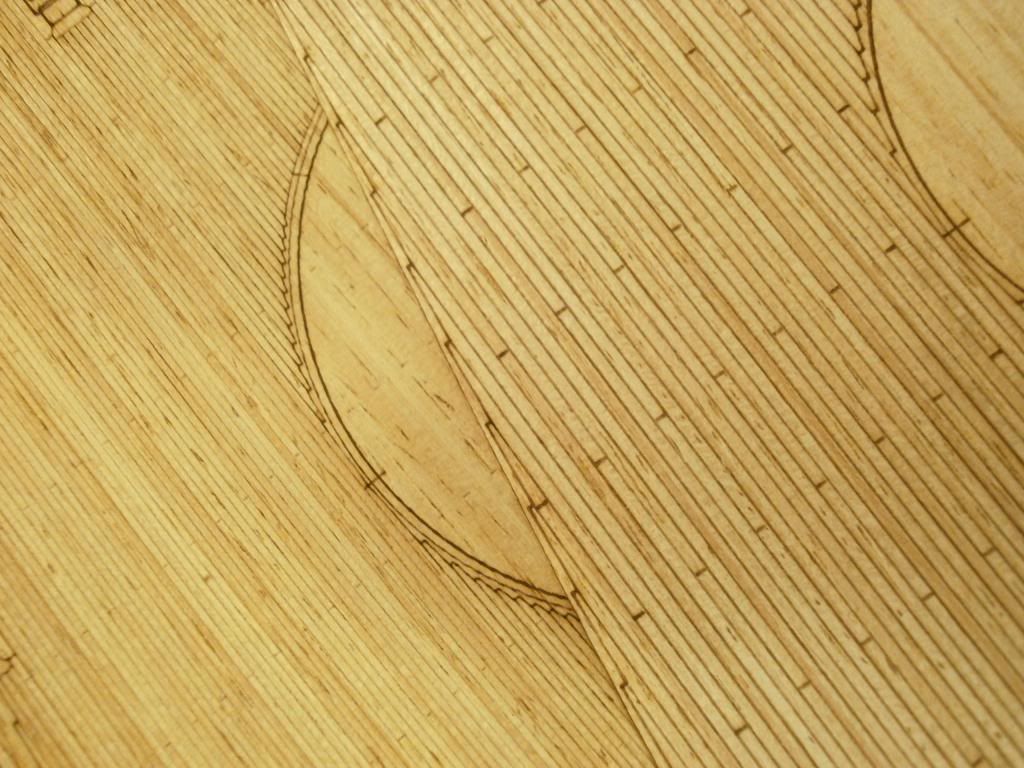
The Pontos deck has much narrower wood deck planking, on the order of 30-40% compared to Ka models, and a comparison to Bismarck wreck footage shows this is correct (amazingly enough, as it seems as fine as some 1/700 scale I have seen!)...
I am still a bit perplexed as to which deck I like better: The Pontos is in scale but the "wood effect" is less intense than with Ka models because so many striations actually darken it, a bit like a gray haze... Its wood tinge is also darker and yellower than Ka models, but that is said to be correct...: Here are comparison photos to help you make up your mind:

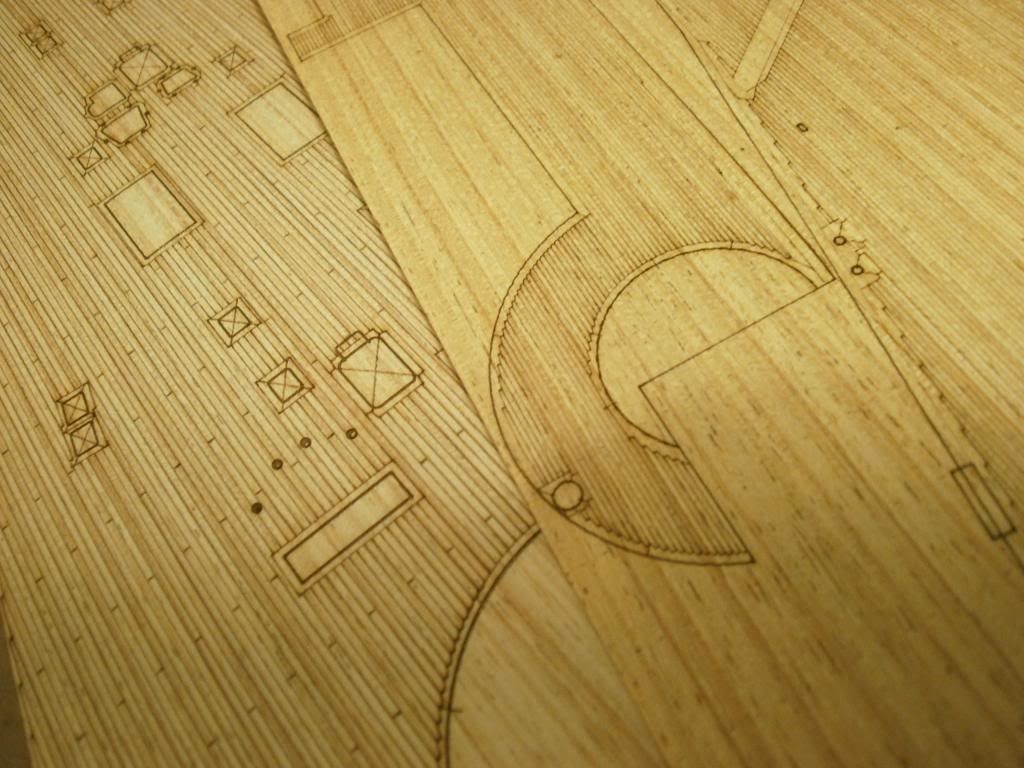
Of note is that the Pontos deck had some very slight cracking damage in an upper superstructure deck, which I felt compelled to fix with a drop of crazy glue and a minuscule application of thickened paint, followed by slicing back the planking into the paint, but it would probably have been nearly invisible even if left alone. Ka model's basic set definitely had more secure packaging, from the results at least...
Gaston


 but what happened to Nigel and Anton? Are you guys still building?


 that's always a good thing! Looks good so far.


 I do like the look of my new portholes but the whole "


