The Ship Model Forum

The Ship Modelers Source
It is currently Tue Apr 16, 2024 3:41 pm

All times are UTC - 6 hours [ DST ]


Post new topic Reply to topic  [ 118 posts ]  Go to page Previous  1, 2, 3, 4, 5, 6
Author Message
PostPosted: Thu Jan 09, 2014 7:35 am 
Offline
User avatar

Joined: Mon Jan 10, 2005 12:25 pm
Posts: 1534
Location: England
Excellent work, I am amazed by the colouring and weathering; and the shere amount of effort in all that broken interior detailing. :thumbs_up_1:

Regarding water, I have seen in the past 1:350 submarines displayed at periscope depth in a tinted perspex case. Don't know if that is the effect you want but did you consider the possibility of building a blue tinted display case around it, making a partial seascape on top and putting the destroyers on that?

_________________
Vlad


Report this post
Top
 Profile  
Reply with quote  
PostPosted: Thu Jan 09, 2014 11:18 am 
Offline
User avatar

Joined: Sat Jan 05, 2008 5:03 pm
Posts: 492
Thanks for the king words yall.
Blacman; Three problems with the water,One the weight of it would probably dis form or break the styroam base,Two adding the water would most likely destroy the powder I used for the sea floor,and Third I would have to add a filtration system to keep the water from going funky.
Silvershadow and Vlad; I think those ideas are closer to something I could afford and pull off. not too sure about tinting the glass. I could do a half tint to give the general idea of water. Kind'of like what I did below.
Image
I do appreciate the ideas from everyone. If anybody else has any ideas I would love to hear 'em.
I'm also now thinking about building a submersible, I think it would be cool to add some working lights. any thoughts?
Thanks for the advice!


Report this post
Top
 Profile  
Reply with quote  
PostPosted: Fri Jan 10, 2014 8:33 am 
Offline
User avatar

Joined: Wed Mar 30, 2011 9:38 am
Posts: 1381
Quite a while back in a Fine Scale Modeler (Reader Gallery section I believe) someone did a SBD that had crashed underwater in a Dio. The paint effects where amazing and gave a sense of light moving through the water.

The other one that I remember was on here somewhere, I want to say it was a North Carolina build (could be wrong). The builder had painted a bunch of random squiggly lines in various colors as a preshading underneath the anti-fouling. When the red was applied it looked great.

Both of these thoughts might be too late to implement but it might provide some inspiration that would allow you to get the effect you want.

I will attempt to find the links to those unless someone beats me to it.

Your build is awesome by the way.

_________________
Gabriel


Report this post
Top
 Profile  
Reply with quote  
PostPosted: Fri Jan 10, 2014 1:37 pm 
Offline
User avatar

Joined: Sat Jan 05, 2008 5:03 pm
Posts: 492
Angeliccypher; I would appreciate that very much. Thanks for the kind words. I think I'll try a google search for that SBD. I'll psot a link if I can find it.


Report this post
Top
 Profile  
Reply with quote  
PostPosted: Fri Jan 10, 2014 8:24 pm 
Offline
User avatar

Joined: Wed Mar 30, 2011 9:38 am
Posts: 1381
Found the thread here for the hull. Memory served correct. It was a North Carolina build.

viewtopic.php?f=59&t=119530

_________________
Gabriel


Report this post
Top
 Profile  
Reply with quote  
PostPosted: Sat Jan 11, 2014 3:20 pm 
Offline
User avatar

Joined: Sat Jan 05, 2008 5:03 pm
Posts: 492
Angeliccypher; That was an awesome build, and I think I may be able to use that on both the first cast and final cast of the Yamato. I will have to take a closer look at who built that and see if I can get some advice from obviously a very talented builder.


Report this post
Top
 Profile  
Reply with quote  
PostPosted: Thu Jan 16, 2014 1:20 pm 
Offline
User avatar

Joined: Sat Jan 05, 2008 5:03 pm
Posts: 492
I've been a busy beaver as of lately, I know that the amount of work doesn't show very well, but some good work has gone into this thus far. I first started out by laying some concrete squares on the whole piece. I cut the squares into 3"x3".
Image
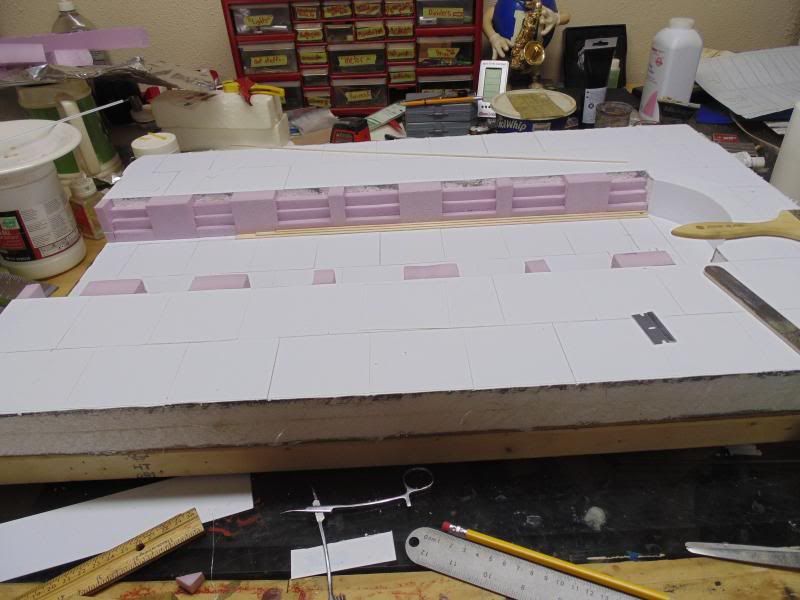
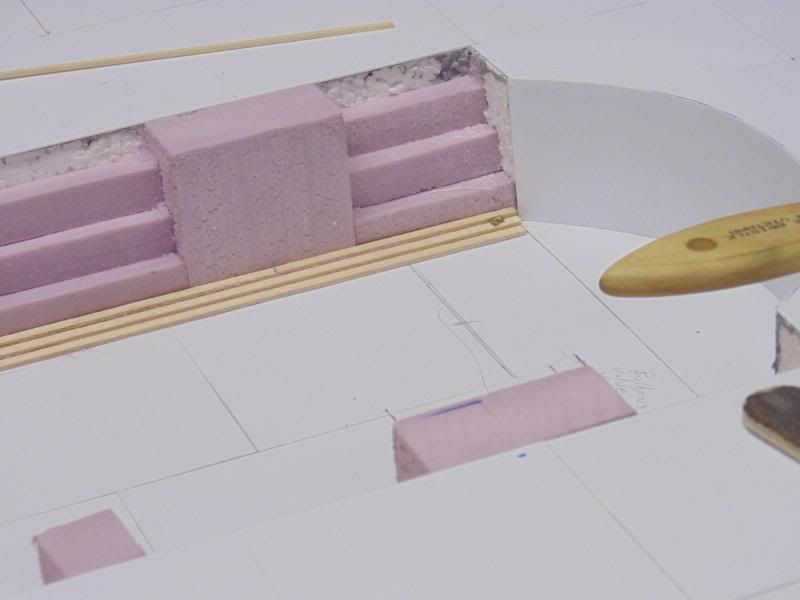
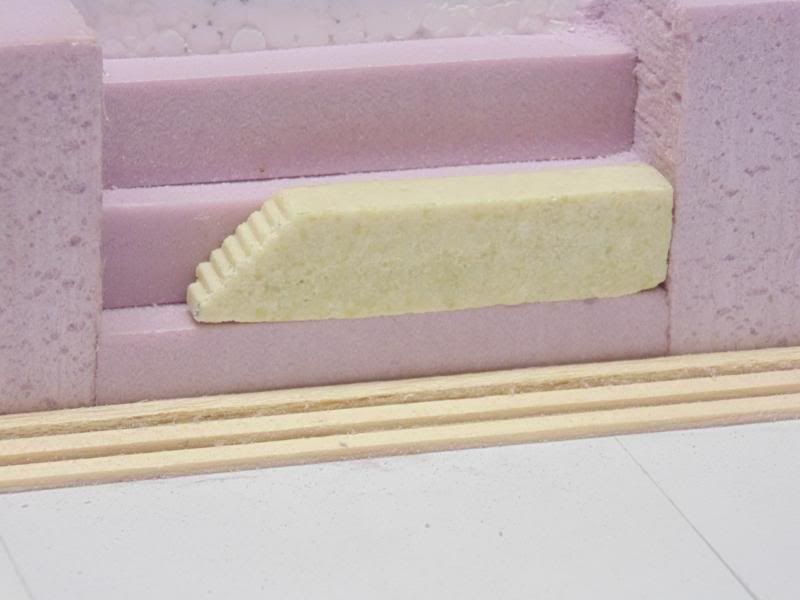
I then went onto making the 3 tier forms along the side walls. I made this from 1/8x3/16" balsa wood strips.
Image
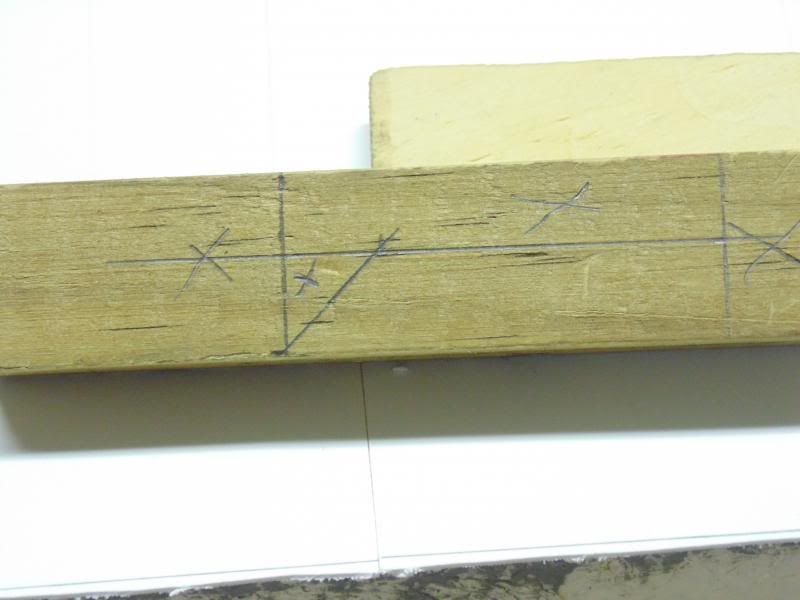
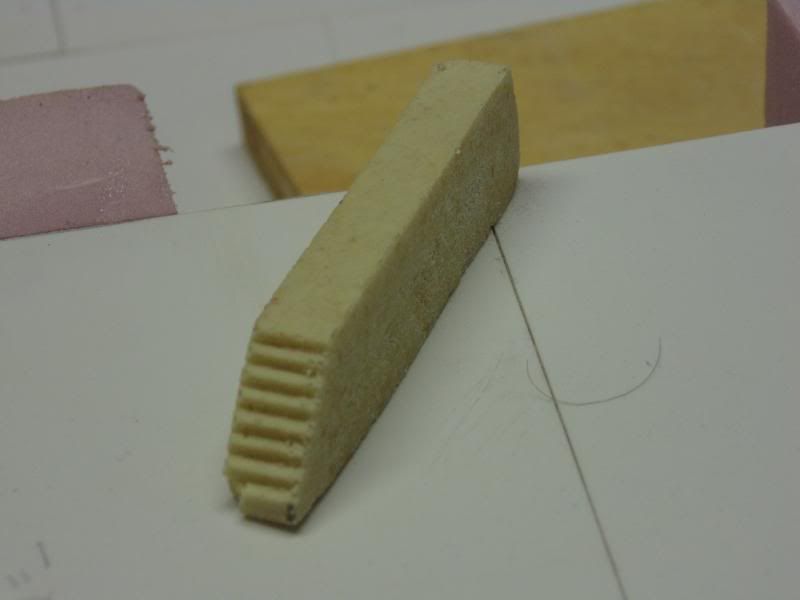
Next I focused my attention onto the multiple staircases that need to be made. 42 of them to be exact. I had a major problem with these darn things. Seriously took about 2 full weeks to get something that fit, and looked right. These darn things are seriously the hardest part of the build so far. But in the end it was a simple solution that I think will look right in the end.
Image
Image

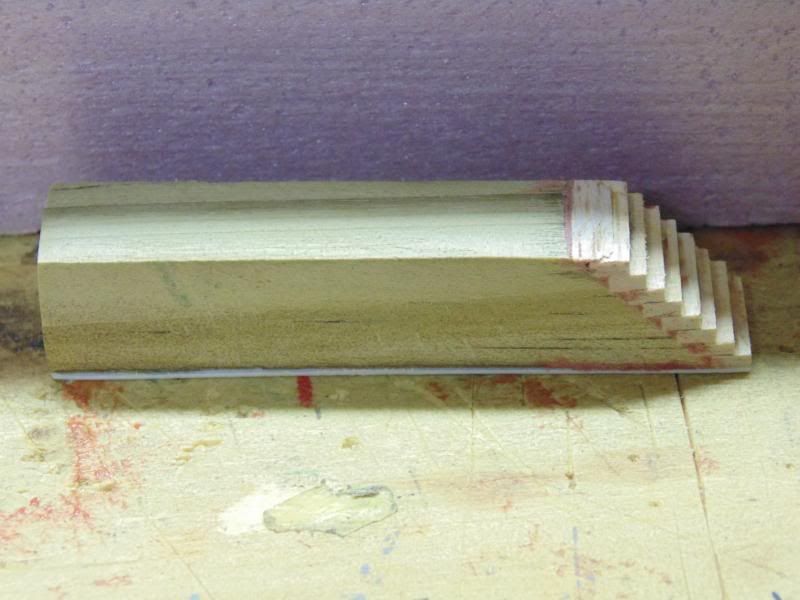
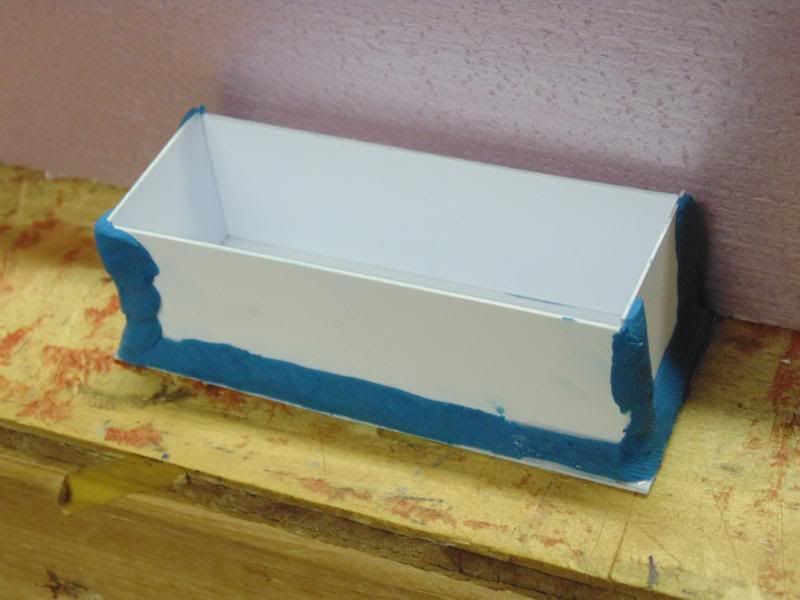
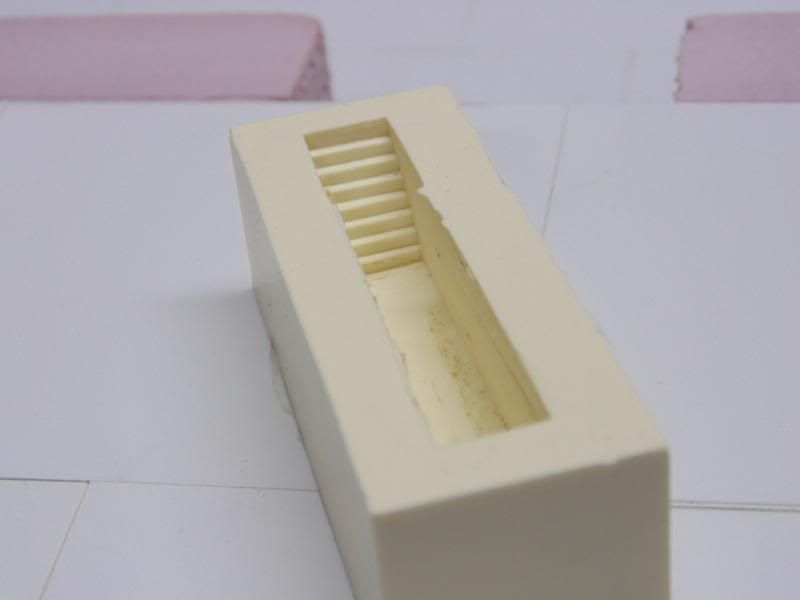
I then made a mold from alumilite RTV rubber , and was very worried about it , because I've attempted this before and had a major failure, but it turned out good this time.
Image
Image
As it turns out casting resin does have a shelf life, I poured this cast from obviously the outdated material. It did work, but the final product was seriously flawed.
Image
Image
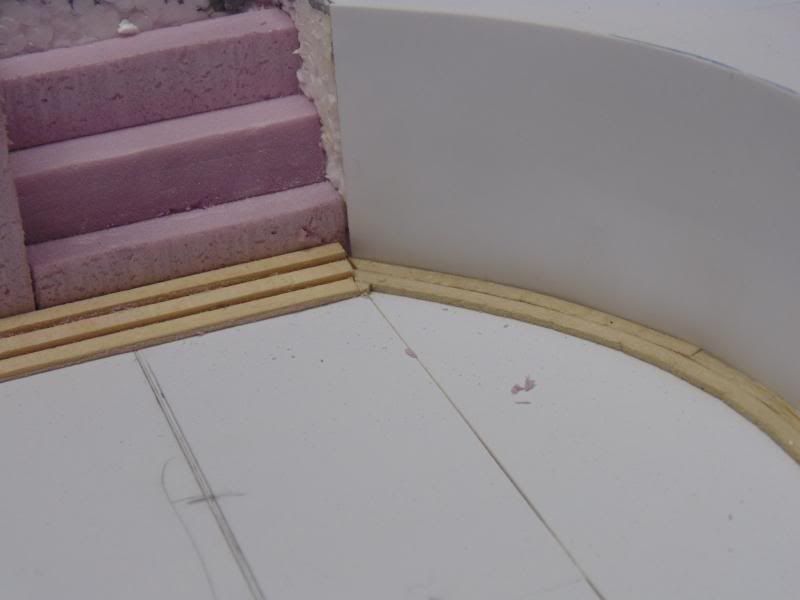
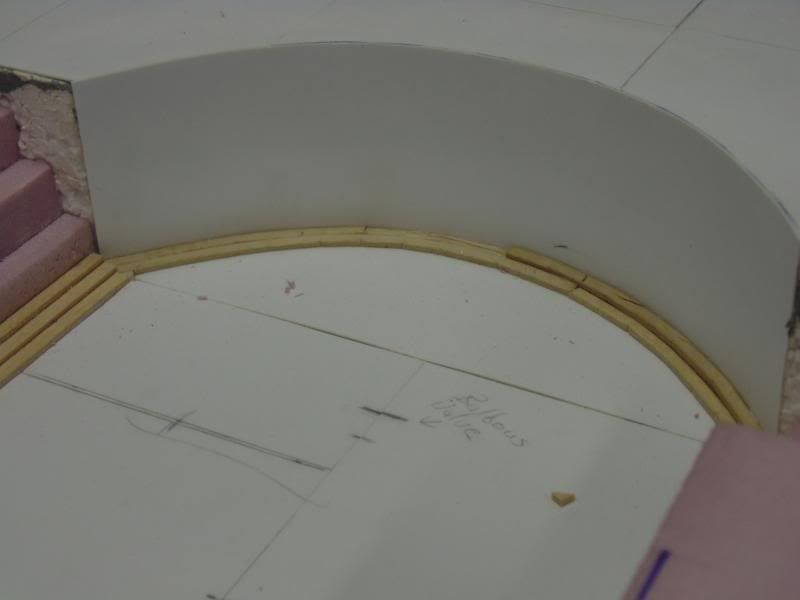
Since I have to stop by the store to get some more casting resin, and I had the wood soaking overnight, I made the curved planks for the head of the drydock.
Image
Image
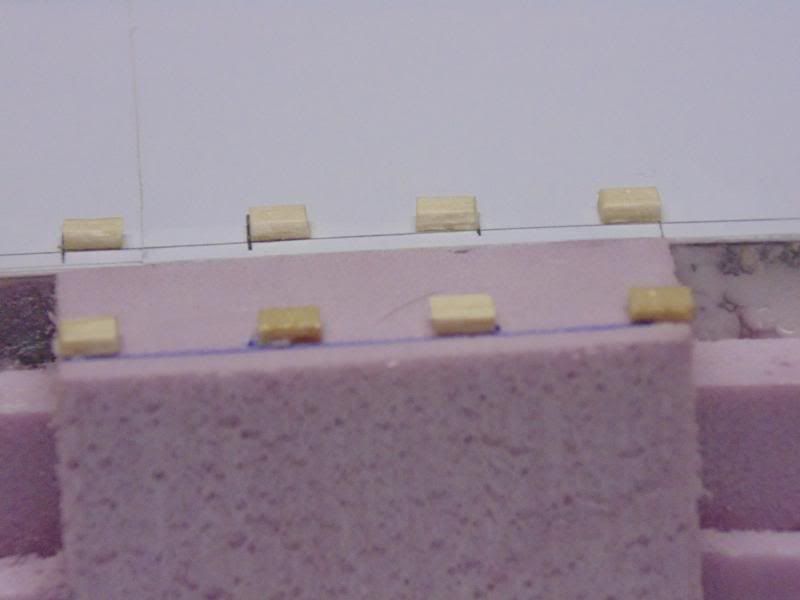
After I ran out of wet wood I installed the column pads.
Image
Image
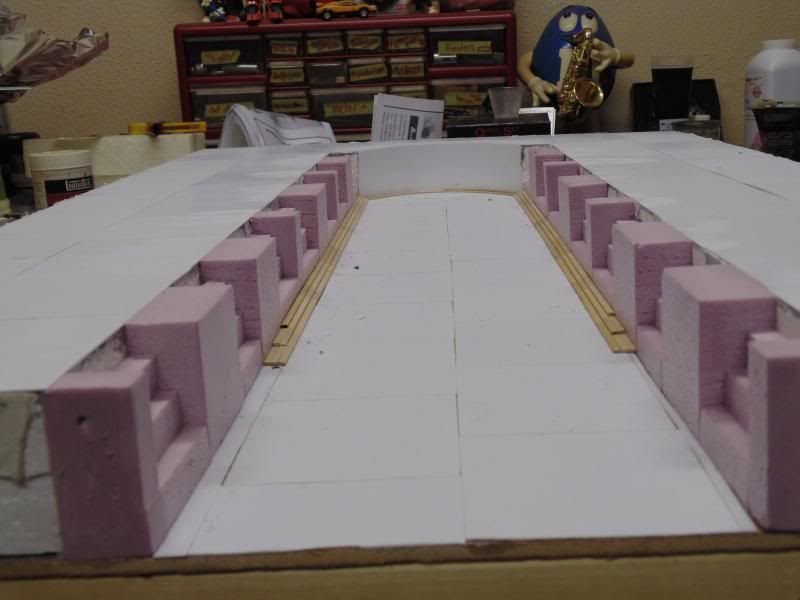
Finally a long shot of the dock. And as always any and all comments welcome, thanks for looking and have a good one.


Report this post
Top
 Profile  
Reply with quote  
PostPosted: Thu Jan 16, 2014 1:32 pm 
Offline
User avatar

Joined: Mon Nov 11, 2013 11:01 pm
Posts: 1257
Location: Detroit area
Interesting work there, mate. It's good to see the steps and all, in case someone else wants to build a Japanese drydock.

_________________
Sean Nash, ACG (aircraft camo gestapo)

On the ways:
1/200 Trumpeter HMS Nelson
1/700 Tamiya USS Yorktown CV-5

In the stash:
1/35 Italiari PT-109
1/35 Tamiya "Pibber" Patrol Boat
1/350 Trumpeter USS Yorktown CV-10


Report this post
Top
 Profile  
Reply with quote  
PostPosted: Thu Jan 16, 2014 2:10 pm 
Offline
User avatar

Joined: Sat Dec 19, 2009 12:11 pm
Posts: 586
Location: Virginia
This looks like a lot of fun. Keep up the sweet work.

_________________
Building 1/200 Nichi.'45
viewtopic.php?f=59&t=152105


Report this post
Top
 Profile  
Reply with quote  
PostPosted: Thu May 07, 2015 8:31 pm 
Offline
User avatar

Joined: Mon Jul 29, 2013 6:35 pm
Posts: 536
This thread hasn't been touched in over a year? :(

_________________
-Shane

Dallas, Tx

Working on: Revell 1/426 USS Arizona BB-39

In the Stash: USS Arizona 1/700 Dragon Premium, DKM Bismarck 1/700 Dragon Premium, Admiral Graf Spee 1/700 Trumpeter, & Prinz Eugen 1/700 Trumpeter


Report this post
Top
 Profile  
Reply with quote  
PostPosted: Sat Jul 14, 2018 12:24 pm 
Offline
User avatar

Joined: Sat Jan 05, 2008 5:03 pm
Posts: 492
I can't believe it's been this long! I finally got to a point were I can start building again. A lot has happened in the last few years that kept me from building,But hopefully it's behind me. I started back with cleaning things up a bit and I started building 2 unmanned ROV's. Of course with the new survey in 2016 my wreck dio is a bit out of date,But I'm going to finish the wreck dio. As far as the rest of the progressive dio goes it most likely won't happen.Atleast until I get back into the swing of things! If I can figure out how to post pics I will do tomorrow. I have to leave now and go to my nephews deployment party.


Report this post
Top
 Profile  
Reply with quote  
PostPosted: Wed Jul 18, 2018 9:58 am 
Offline
User avatar

Joined: Sat Jan 05, 2008 5:03 pm
Posts: 492
Attachment:
DSC01097.jpg
DSC01097.jpg [ 62.81 KiB | Viewed 1459 times ]
Attachment:
DSC01094.jpg
DSC01094.jpg [ 114.08 KiB | Viewed 1459 times ]
Attachment:
DSC01093.jpg
DSC01093.jpg [ 166.38 KiB | Viewed 1459 times ]
Attachment:
DSC01092.jpg
DSC01092.jpg [ 160.44 KiB | Viewed 1459 times ]
Attachment:
DSC01091.jpg
DSC01091.jpg [ 166.79 KiB | Viewed 1459 times ]
Attachment:
DSC01089.jpg
DSC01089.jpg [ 162.4 KiB | Viewed 1459 times ]
Attachment:
DSC01085.jpg
DSC01085.jpg [ 179.32 KiB | Viewed 1459 times ]

Well after my nephews send off party I wasn't feeling to good the next few day! But this is my first shot at a ROV. I drilled 4 tiny holes in the front and quickly realized this was a mistake, So I'm going to start again with a single hole. I believe this will give me the light I desire. Somehow one of the light holes is pointing hard left. Yellow arrow is 1 ROV location red is second location. Any help or advice is greatly appreciated.

P.S. Remember this is my first work in almost 4.5 years.


Report this post
Top
 Profile  
Reply with quote  
PostPosted: Sat Jul 21, 2018 9:37 pm 
Offline
User avatar

Joined: Sun Dec 03, 2006 5:36 pm
Posts: 2160
Location: About 50 miles away from the Gulf of Mexico ( traveling W is you do so :)
Its nuts how fast time goes and sometimes you don realize until start counting years.. Good to see you back in action though :thumbs_up_1: :thumbs_up_1:


Jose :wave_1:


Report this post
Top
 Profile  
Reply with quote  
PostPosted: Mon Aug 06, 2018 1:01 pm 
Offline
User avatar

Joined: Sat Jan 05, 2008 5:03 pm
Posts: 492
Here is the newly designed ROV, Not sure about it though.In testing the light didn't shine through the body. I think the ground wasn't good thus letting the light be dimmer then. Anyway I'd appreciate any thoughts!

Attachment:
IMG_20180806_124415707.jpg
IMG_20180806_124415707.jpg [ 95.29 KiB | Viewed 1269 times ]

Attachment:
IMG_20180806_124447190.jpg
IMG_20180806_124447190.jpg [ 68 KiB | Viewed 1269 times ]

Attachment:
IMG_20180806_124525136.jpg
IMG_20180806_124525136.jpg [ 97.68 KiB | Viewed 1269 times ]

Attachment:
IMG_20180806_124526202.jpg
IMG_20180806_124526202.jpg [ 104.24 KiB | Viewed 1269 times ]

Attachment:
IMG_20180806_124732614.jpg
IMG_20180806_124732614.jpg [ 240.05 KiB | Viewed 1269 times ]

Attachment:
IMG_20180806_124734552.jpg
IMG_20180806_124734552.jpg [ 218.83 KiB | Viewed 1269 times ]

Attachment:
IMG_20180806_124739183.jpg
IMG_20180806_124739183.jpg [ 158.05 KiB | Viewed 1269 times ]

Attachment:
IMG_20180806_124745747.jpg
IMG_20180806_124745747.jpg [ 203.95 KiB | Viewed 1269 times ]

Attachment:
IMG_20180806_124749028.jpg
IMG_20180806_124749028.jpg [ 187.07 KiB | Viewed 1269 times ]

Attachment:
IMG_20180806_124911414.jpg
IMG_20180806_124911414.jpg [ 71.46 KiB | Viewed 1269 times ]


Report this post
Top
 Profile  
Reply with quote  
PostPosted: Tue Aug 07, 2018 1:17 am 
Offline
User avatar

Joined: Mon Nov 11, 2013 11:01 pm
Posts: 1257
Location: Detroit area
The intensity of the light when it is the only source of illumination seems consistent with almost all photos I've seen of various shipwrecks, so I'd say you have it about right.

_________________
Sean Nash, ACG (aircraft camo gestapo)

On the ways:
1/200 Trumpeter HMS Nelson
1/700 Tamiya USS Yorktown CV-5

In the stash:
1/35 Italiari PT-109
1/35 Tamiya "Pibber" Patrol Boat
1/350 Trumpeter USS Yorktown CV-10


Report this post
Top
 Profile  
Reply with quote  
PostPosted: Thu Aug 16, 2018 12:46 pm 
Offline

Joined: Thu Sep 28, 2017 9:41 am
Posts: 161
This is really something different! Excellent!

Marco


Report this post
Top
 Profile  
Reply with quote  
PostPosted: Thu Aug 16, 2018 10:23 pm 
Offline
User avatar

Joined: Thu Dec 23, 2010 5:00 pm
Posts: 297
Location: Salt Lake City, Utah
Very cool work you're doing. The ROV and lighting look great!

_________________
Brett Matthews


Report this post
Top
 Profile  
Reply with quote  
PostPosted: Fri Aug 17, 2018 11:14 am 
Offline

Joined: Tue Jan 11, 2005 10:56 am
Posts: 8571
Location: New York City
Great effect with the ROV/light.


Report this post
Top
 Profile  
Reply with quote  
Display posts from previous:  Sort by  
Post new topic Reply to topic  [ 118 posts ]  Go to page Previous  1, 2, 3, 4, 5, 6

All times are UTC - 6 hours [ DST ]


Who is online

Users browsing this forum: No registered users and 52 guests


You can post new topics in this forum
You can reply to topics in this forum
You cannot edit your posts in this forum
You cannot delete your posts in this forum
You cannot post attachments in this forum

Jump to:  
Powered by phpBB® Forum Software © phpBB Group