The Ship Model Forum

The Ship Modelers Source
It is currently Fri Apr 19, 2024 6:33 am

All times are UTC - 6 hours [ DST ]


Post new topic Reply to topic  [ 140 posts ]  Go to page Previous  1, 2, 3, 4, 5, 6, 7  Next
Author Message
PostPosted: Thu Dec 15, 2016 1:15 pm 
Offline
User avatar

Joined: Thu Aug 13, 2015 1:28 pm
Posts: 303
Location: Mesa, Arizona
Hello Mark,

I checked out your repair thread, it stinks when you pay for a company to carefully handle items and they still get damaged. But the repairs look good and you made a couple little improvements that made it better. Hopefully your Pennsylvania isn't too bad, I'm looking forwards to seeing her again. I will be back in Mesa at the end of next week for holiday shutdown, maybe we can arrange something or I can stop by the shop you work at.

I got back in the model room yesterday and got acquainted with where I was when I stopped working on her. I spent a little more time wet sanding the hull seam, I think that area is finished, the first coat of primer will reveal any defects. Once I fix any defects I find I will fit the horizontal ribs to the bulges. I also filed the prow a little sharper to look more realistic. It's not perfect, but without going crazy it looks better. I still need to get the hawse pipes finished on the outside and then I think the hull is basically done.

ImageIMG_6286_zpsnz6ovraw by Nelson Wallace, on Flickr


I also dry fitted all the parts I had on the bench just to make her look a little complete, still lots of PE and cleanup work needed on these pieces before they will be ready for paint. I also verified that the masts were at the same heights since I had seen on other builds that they were off, mine came out perfect.

ImageIMG_6291_zpsn85wbazu by Nelson Wallace, on Flickr

ImageIMG_6292_zpslgbfmgup by Nelson Wallace, on Flickr

ImageIMG_6293_zps7ogcfd1n by Nelson Wallace, on Flickr


She's getting closer to her first primer coat!

ImageIMG_6294_zpsl0pohwvh by Nelson Wallace, on Flickr

Thanks for stopping by.

_________________
-Nelson
Current Project:
1:200 U.S.S. Arizona
1:350 U.S.S. Chicago SSN-721

Future Projects:
All of them!


Last edited by hondaman117 on Mon Jul 24, 2017 1:29 pm, edited 1 time in total.

Report this post
Top
 Profile  
Reply with quote  
PostPosted: Thu Dec 15, 2016 2:12 pm 
Offline
User avatar

Joined: Mon Oct 13, 2014 5:39 pm
Posts: 668
Location: San Tan Valley Arizona
Hi Nelson:

Looks like progress. I see you modified the electrical boxes and some other mods to the cranes. Having the foretops level is a concern. I didn't have it with mine, but I know others have.
Looking forward to your update.
Yes, let's plan on hooking up when you are in town.

_________________
Mark
Master Gunnery Sergeant USMC (Ret.)
http://www.modelshipgallery.com/gallery ... index.html

On the bench:

1/200 USS Enterprise, CV-6


Report this post
Top
 Profile  
Reply with quote  
PostPosted: Mon Feb 13, 2017 12:17 pm 
Offline
User avatar

Joined: Thu Aug 13, 2015 1:28 pm
Posts: 303
Location: Mesa, Arizona
Some progress has been made since my last post.

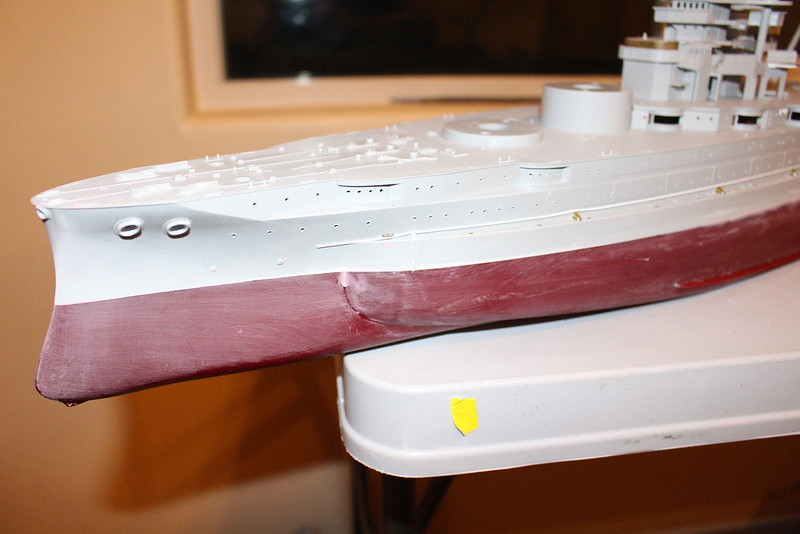
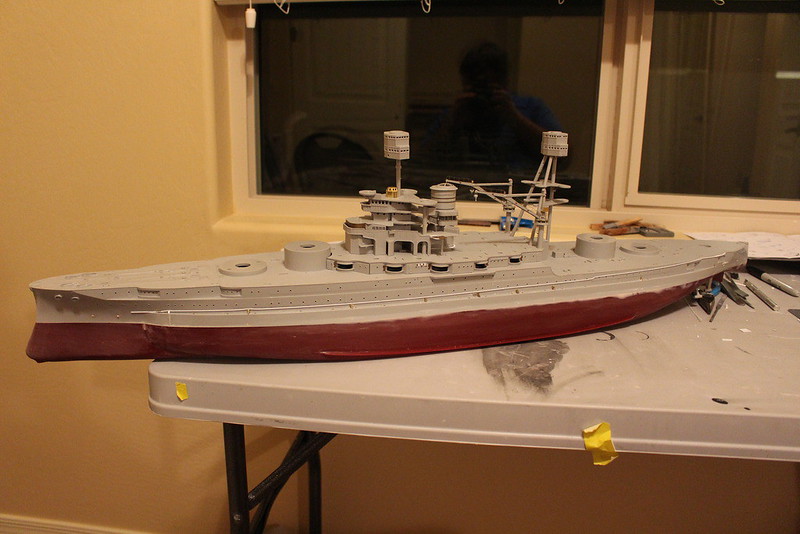
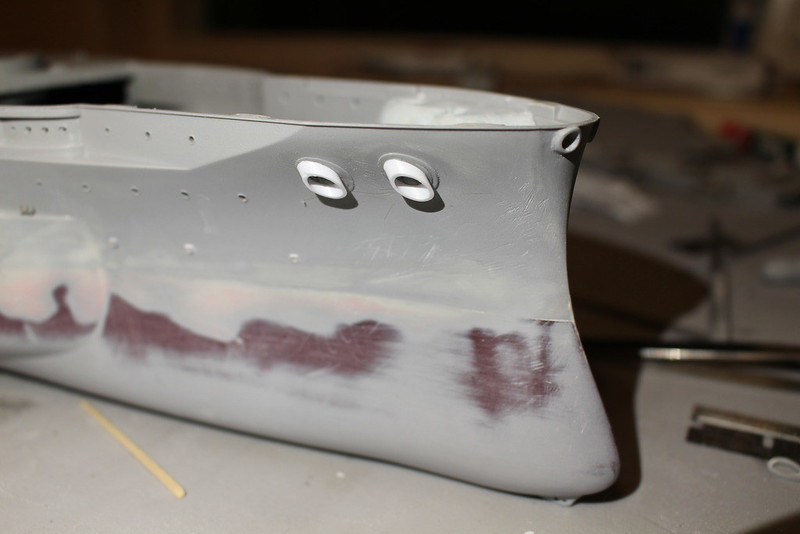
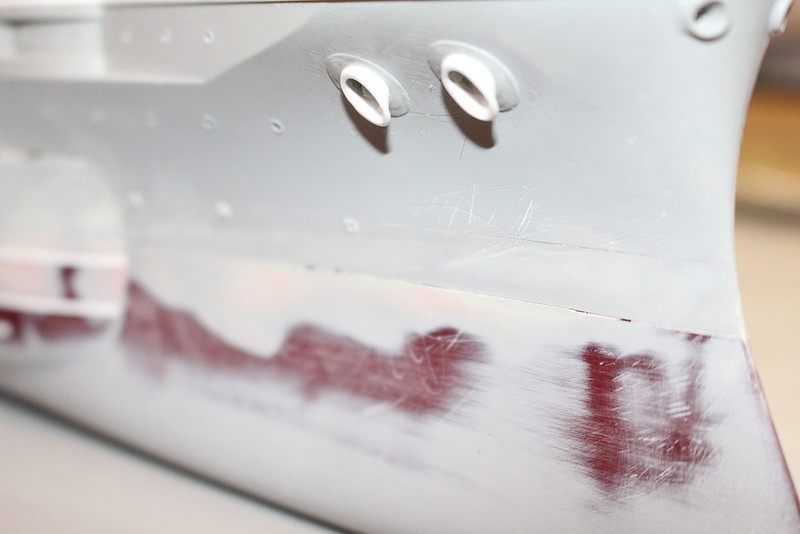
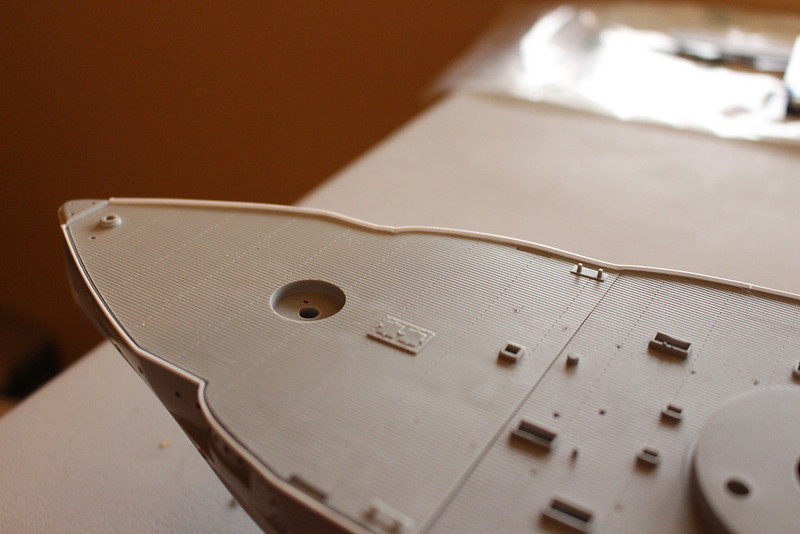
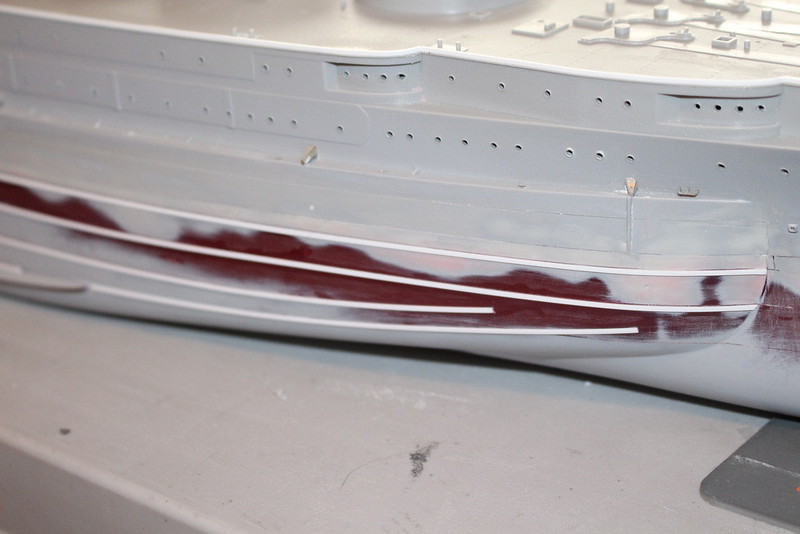
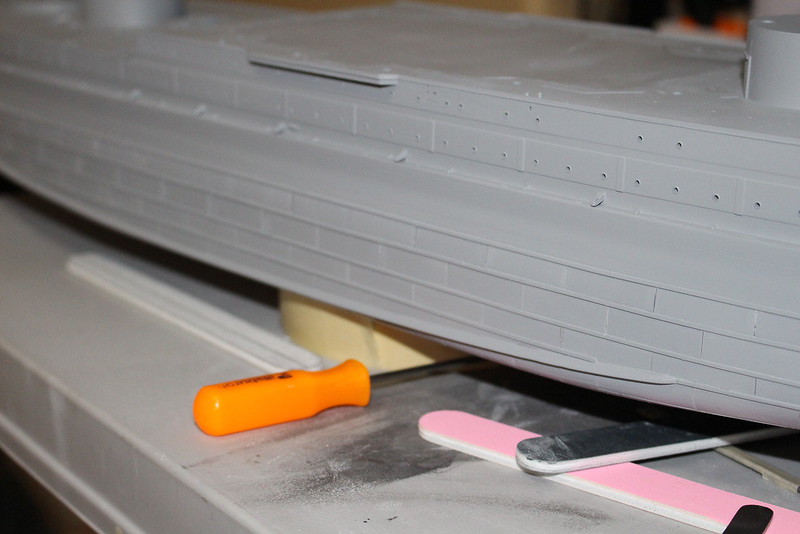
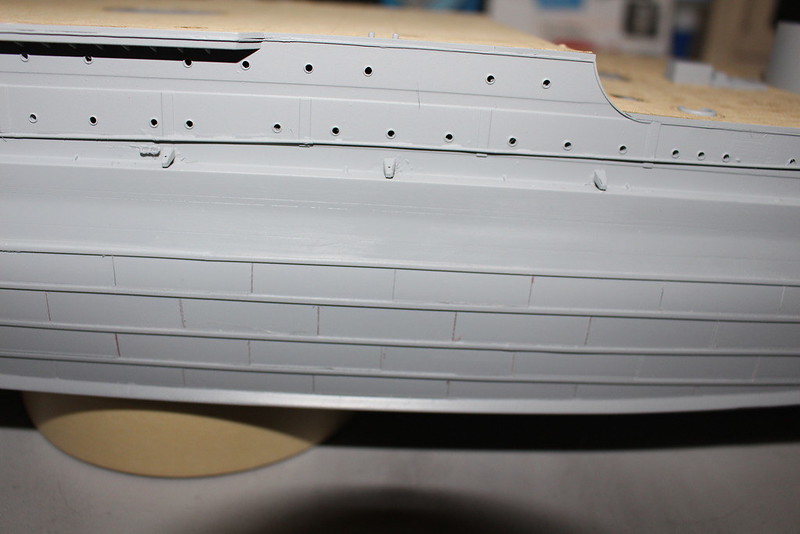
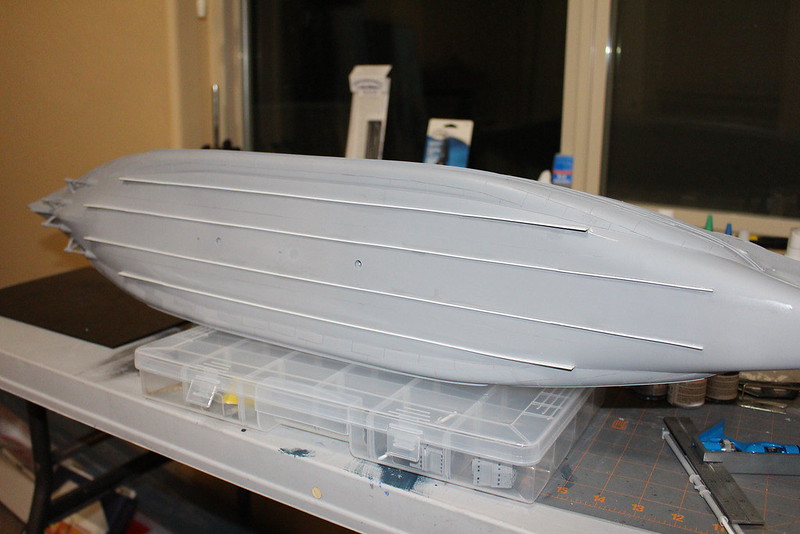
I got the first coat of primer on the hull and noticed that the hull seam needed a little more work for me to be satisfied with it. Out came the putty and I reworked the seam again, hopefully I have all of it this time.

Image
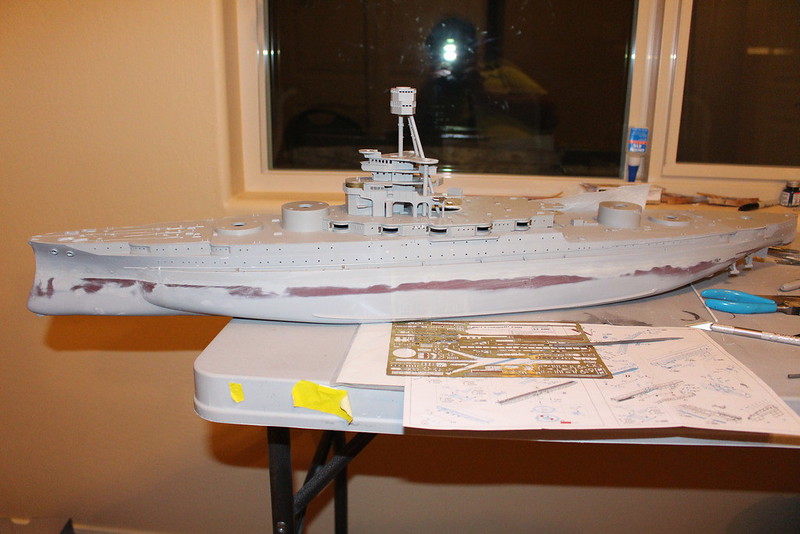
IMG_6318_zpsccuu5efv by Nelson Wallace, on Flickr


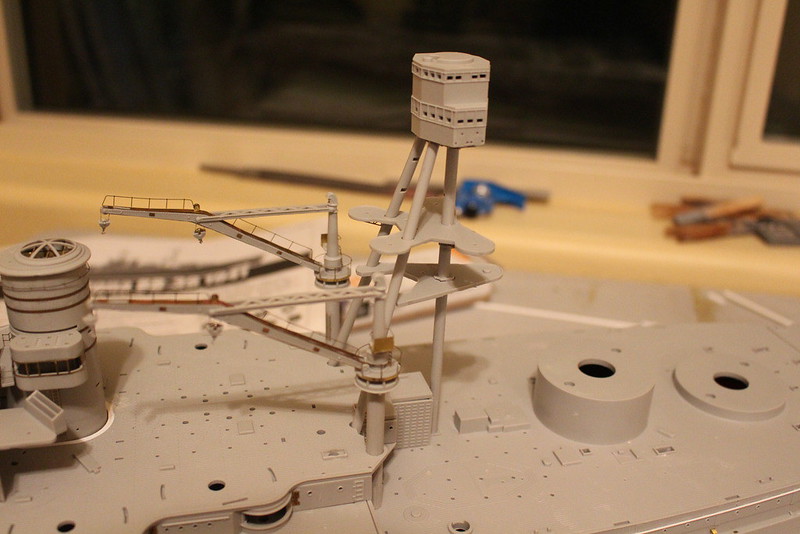
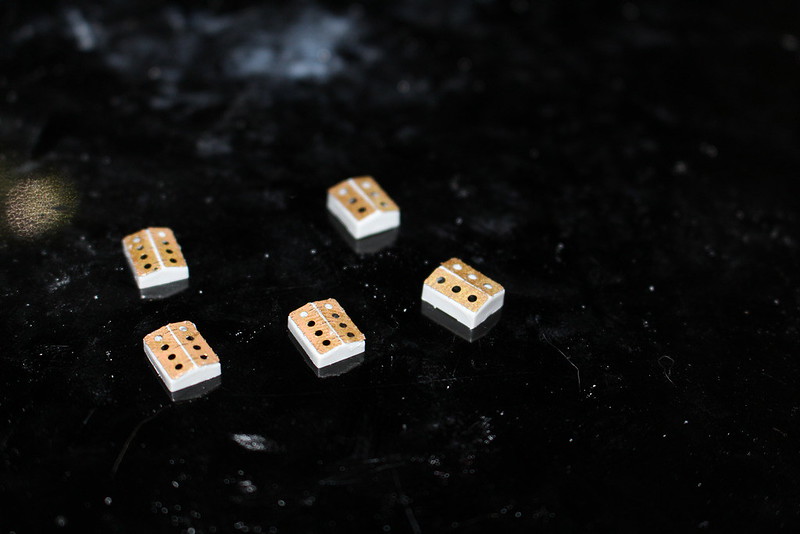
Since I had ran out of primer and sticking with my usual method of jumping all over the place I decided I wanted to build the stern aircraft crane. I got out the PE bender and made quick work of it, just needs mounted to the base and some rigging added. I was going to start on the turret catapult as well but ran out of time before the weekend.

Image
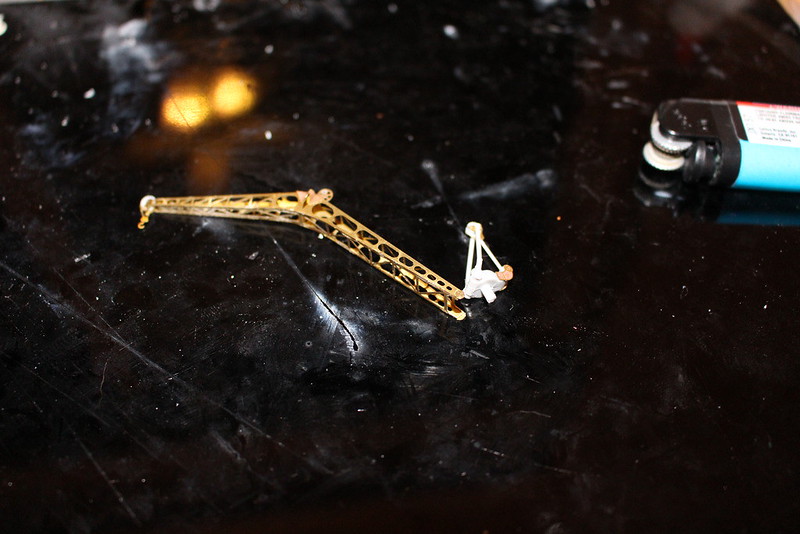
IMG_6317_zpsgufktsfw by Nelson Wallace, on Flickr


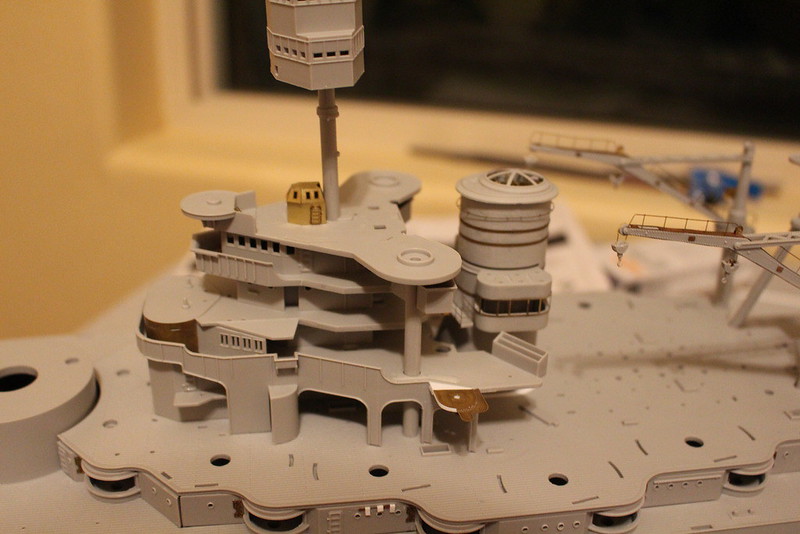
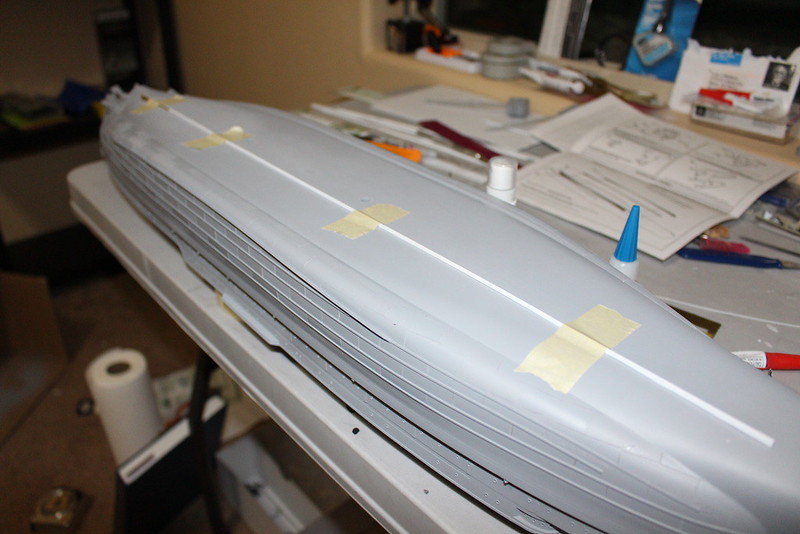
I also got the foretop out and sitting in place because I plan on working on it soon.

Image
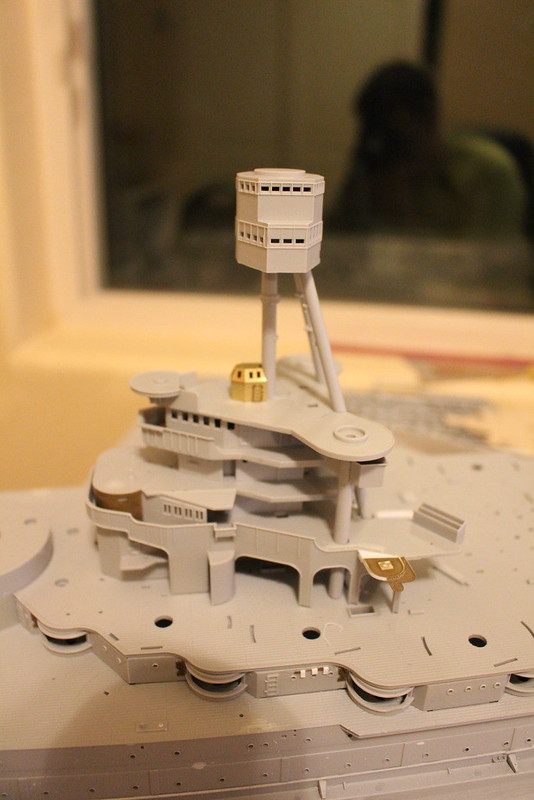
IMG_6320_zpsusvlpwbt by Nelson Wallace, on Flickr


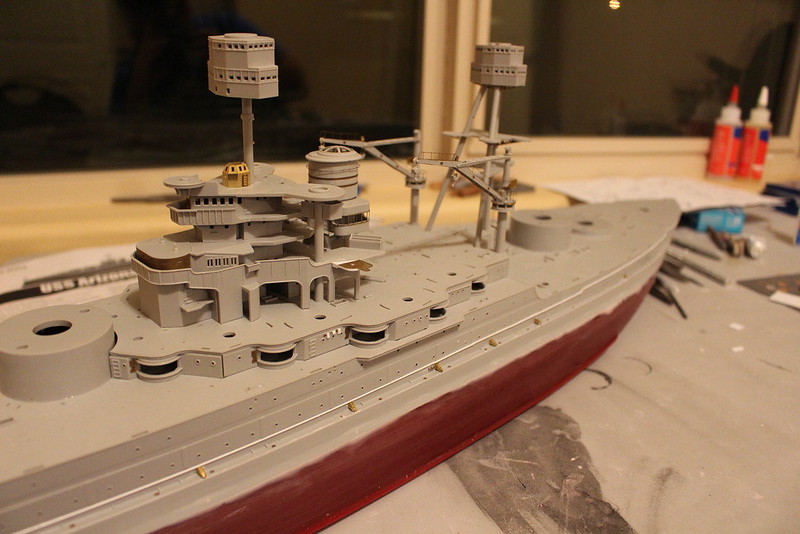
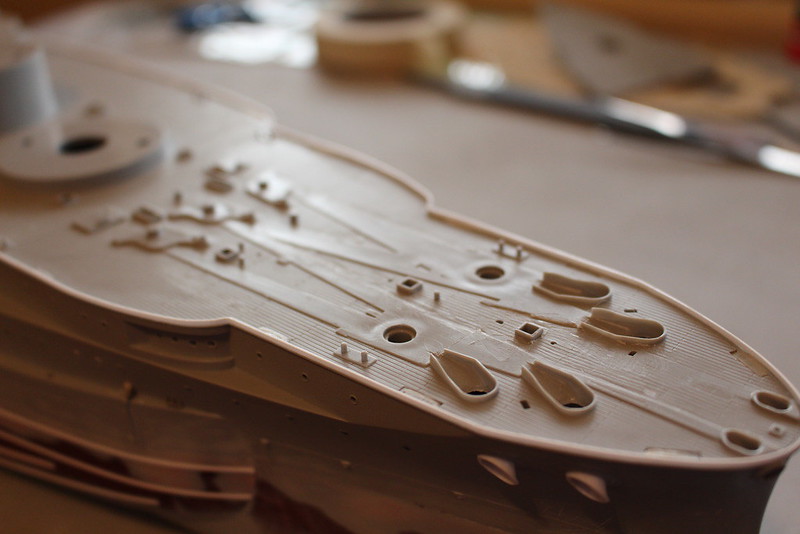
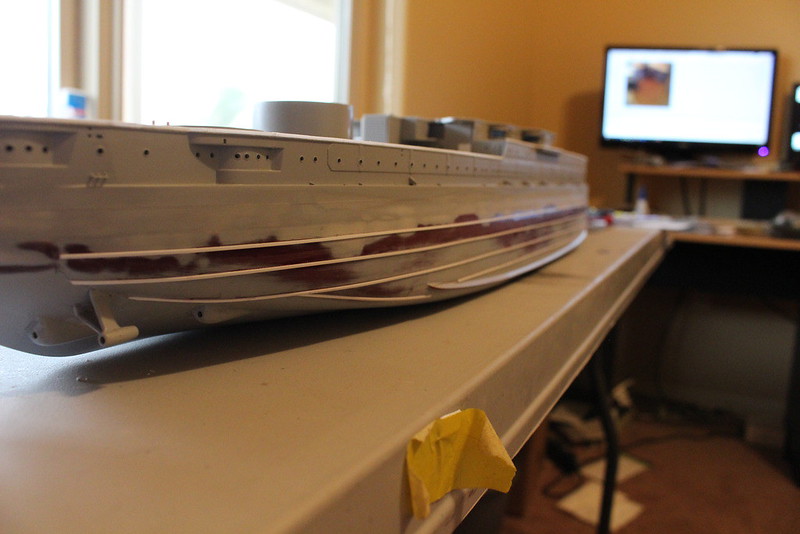
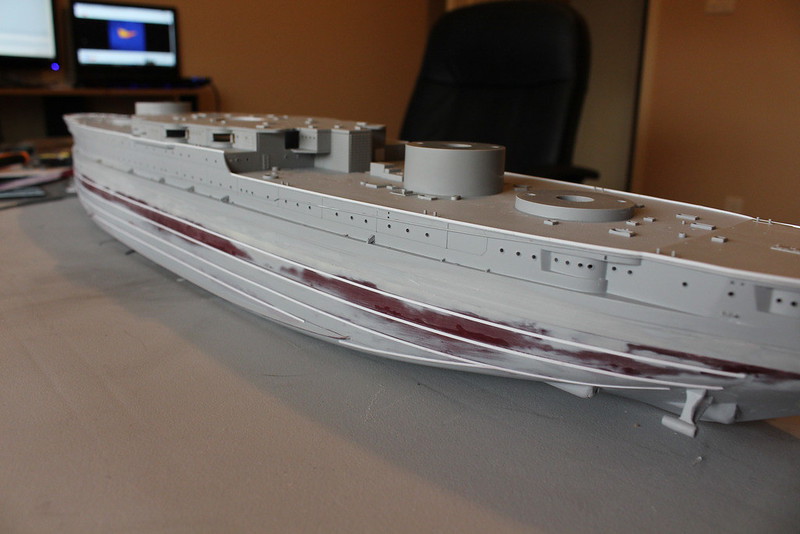
That's where she sits at this point. I went to shop called Hobby Depot in Tempe while I was in town and loaded up with supplies I was in desperate need of. I also picked up the paint for the hull while I was there. Felt good to have finally made that choice and I'm excited to do a test spray to see what it looks like. I also got some more Evergreen products of various shapes, I have an experiment to run attempting to recreate the hawsepipe "flare" on the outside of the hull. I will be sure to post the results if it works.

I also had a very nice visit with Mark (Mgunns) while I was in town. It was fun to meet a fellow member and talk ships for a few hours. Not sure about others here, but I am the only one of my immediate family/friends that does this hobby, so it's nice to meet somebody with shared interests!

I plan on getting after the Zona hard and working towards getting her done. I feel like I've let her drag on for too long and I'm motivated to see her finished.

Thanks for stopping by!

_________________
-Nelson
Current Project:
1:200 U.S.S. Arizona
1:350 U.S.S. Chicago SSN-721

Future Projects:
All of them!


Last edited by hondaman117 on Mon Jul 24, 2017 1:31 pm, edited 1 time in total.

Report this post
Top
 Profile  
Reply with quote  
PostPosted: Mon Feb 13, 2017 10:42 pm 
Offline

Joined: Tue Jul 28, 2009 1:47 pm
Posts: 336
Location: Texas
Nelson,
Looking like you are making some good progress. Keep up the momentum, doing work on her regularly, no matter how small.
Randy

_________________
Completed: Trumpeter 1/200 USS Arizona
Current Project: Trumpeter1/200 scale HMS Hood
Future Project: TBD


Report this post
Top
 Profile  
Reply with quote  
PostPosted: Mon Feb 13, 2017 11:45 pm 
Offline
User avatar

Joined: Mon Oct 13, 2014 5:39 pm
Posts: 668
Location: San Tan Valley Arizona
Hi Nelson:

Looks like some progress is being made. Glad you could stop by and hang out. With some motivation you can make some progress and keep it going. Looking good.

Mark

_________________
Mark
Master Gunnery Sergeant USMC (Ret.)
http://www.modelshipgallery.com/gallery ... index.html

On the bench:

1/200 USS Enterprise, CV-6


Report this post
Top
 Profile  
Reply with quote  
PostPosted: Tue Feb 14, 2017 10:14 am 
Offline
User avatar

Joined: Thu Aug 13, 2015 1:28 pm
Posts: 303
Location: Mesa, Arizona
True to my word, I started working on Arizona last night. I decided to take on the hawse pipe flares that are incorrect on the kit. I had an idea to use some evergreen tube and heat if with a lighter to mold it to the correct shape. Well, that plan ended in flames haha. After that I started looking at the shape of the flares and tried cutting the tube at an angle with my chopper. This worked and I was able to get 4 flares that were identical without much effort.

ImageIMG_6326_zpsmirr7hyn by Nelson Wallace, on Flickr

ImageIMG_6321_zpshbaw383p by Nelson Wallace, on Flickr

ImageIMG_6325_zpswzvmbzzr by Nelson Wallace, on Flickr


I may mess with them more tonight, I had another idea for how I might be able to get them to a little more accurate shape. If that idea does not work, I'm content to leave them as is.

More progress to come...

_________________
-Nelson
Current Project:
1:200 U.S.S. Arizona
1:350 U.S.S. Chicago SSN-721

Future Projects:
All of them!


Last edited by hondaman117 on Mon Jul 24, 2017 1:33 pm, edited 1 time in total.

Report this post
Top
 Profile  
Reply with quote  
PostPosted: Wed Feb 15, 2017 3:06 pm 
Offline
User avatar

Joined: Mon Oct 13, 2014 5:39 pm
Posts: 668
Location: San Tan Valley Arizona
HI Nelson:

It looks like you are on the right track. I would scope out some photo's of the flanges and regroup. Your work has inspired me to attempt flanges on my BB38. So far so good.

_________________
Mark
Master Gunnery Sergeant USMC (Ret.)
http://www.modelshipgallery.com/gallery ... index.html

On the bench:

1/200 USS Enterprise, CV-6


Report this post
Top
 Profile  
Reply with quote  
PostPosted: Fri Feb 17, 2017 6:40 am 
Offline
User avatar

Joined: Wed Nov 17, 2010 10:51 am
Posts: 382
Location: S.C.
Looking good Nelson. Glad you are back to her again.
I like what you are doing with the Hawser Pipes. I tried a similar method with a soda straw cut at the angle. I had noticed the forward area of the lip on the Hawser was "thin" and sharper than you would see on other ships of that area...or so it appears. What I had intended was to form the lip and then let the straw become the "tunnel" running up to the deck since I had not poured resin into the Bow area. ehh well I didn't work.
Anyways, like what you are doing and looking forward to more!


Report this post
Top
 Profile  
Reply with quote  
PostPosted: Fri Feb 17, 2017 10:22 am 
Offline
User avatar

Joined: Thu Aug 13, 2015 1:28 pm
Posts: 303
Location: Mesa, Arizona
Thanks for the comments!

I actually made good progress the past few days due to me being home sick. It's funny that the first time I've been sick in years means I make good progress on the Zona.

I re-worked the hawse pipe flanges and made them look more accurate, I'm really glad I did as it made a big improvement to the bow. I was also able to get the scupper/waterway onto the forecastle deck as well as the main deck, now only the boat deck needs a scupper added to it. Finally I was able to get all of the strakes on the torpedo bulges using a couple pictures of Arizona, Pennsylvania, and some guesswork. I think it added some substance to the lower half of the hull that is usually a barren sea of anti-fouling red.

It was after I did all this work that I realized I left my camera memory card in my work computer. I'll get some pictures later today or over the weekend and post them up for your viewing pleasure.

Thanks for stopping by!

_________________
-Nelson
Current Project:
1:200 U.S.S. Arizona
1:350 U.S.S. Chicago SSN-721

Future Projects:
All of them!


Report this post
Top
 Profile  
Reply with quote  
PostPosted: Mon Feb 20, 2017 10:18 am 
Offline
User avatar

Joined: Thu Aug 13, 2015 1:28 pm
Posts: 303
Location: Mesa, Arizona
Hello all,

Here are the pictures I promised the other day.

Re-worked anchor hawse pipe. Hard to tell from the picture but the shape is closer to the actual ship now. May need a little tweaking, but I'm happy with them at this point.

ImageIMG_6339_zpsr6ueiht5 by Nelson Wallace, on Flickr


Got the waterway added to the forecastle deck and main decks. Only the boat deck needs one now.

ImageIMG_6329_zpsybrg7x4h by Nelson Wallace, on Flickr

ImageIMG_6330_zpsuxe3qggq by Nelson Wallace, on Flickr


And finally the torpedo bulge strakes. I laid them out using some pictures from Navsource and a photo from the Stillwell book that shows Arizona in dry dock sometime after her modernization. I'm happy with how they came out. As with everything I do, they are subject to a little artistic interpretation and may not be 100% accurate, but they look good.

ImageIMG_6332_zpsiizfdhvz by Nelson Wallace, on Flickr

ImageIMG_6336_zpshilokx1q by Nelson Wallace, on Flickr

ImageIMG_6337_zpslbbm7a2c by Nelson Wallace, on Flickr


That's all the pictures I have for now. I plan on continuing at a good pace now, I think I'm going to put the hull in primer tonight and work on cleaning it up for paint.

Stay tuned for more!

_________________
-Nelson
Current Project:
1:200 U.S.S. Arizona
1:350 U.S.S. Chicago SSN-721

Future Projects:
All of them!


Last edited by hondaman117 on Mon Jul 24, 2017 1:36 pm, edited 1 time in total.

Report this post
Top
 Profile  
Reply with quote  
PostPosted: Sat Feb 25, 2017 9:05 pm 
Offline
User avatar

Joined: Mon Oct 13, 2014 5:39 pm
Posts: 668
Location: San Tan Valley Arizona
Hi Nelson:

The adjusted hawse flanges look pretty decent as do the hull strakes. You also did a good job with the water way around the entire hull. I was going to do that on my Pennsy Project, and due to the confusion of where I was etc., after the move, totally forgot. It's a nice touch to your model. This is coming along nicely.

_________________
Mark
Master Gunnery Sergeant USMC (Ret.)
http://www.modelshipgallery.com/gallery ... index.html

On the bench:

1/200 USS Enterprise, CV-6


Report this post
Top
 Profile  
Reply with quote  
PostPosted: Tue Feb 28, 2017 12:26 pm 
Offline
User avatar

Joined: Thu Aug 13, 2015 1:28 pm
Posts: 303
Location: Mesa, Arizona
Thanks Mark! I know the flanges are not 100% correct, but I'm ok with that since they look better than the kit OOB. At this point I'm happy they are done and happy to be making progress again.

I've spent the past couple nights adding tape to one of the blisters, I'm going to run an experiment to add some plating detail to the hull and see how it looks. There's no reference I've been able to find for how the plates should be, so I made some assumptions on plate sizes and taped accordingly. It may look great, but if it doesn't I can sand it off and no harm done. I'll find out once I spray primer and remove the tape.

I also got re-energized to put the docking keels on the hull. I stopped by Hobby Depot and they had the size of evergreen stock that is the perfect size, so I grabbed some and will try to make them again. I have some better tools to use that I didn't have last time, so I think the chance of success will be higher this time.

I posted this on the At 'em Arizona thread but haven't gotten a reply. Does anyone know what the height of the boot stripe was in 1941? I marked mine out before doing the hull strakes but I think I had it too tall. I would like a second opinion before I mark the final stripe.

Hopefully I will get some pictures tonight and will get them up soon.

_________________
-Nelson
Current Project:
1:200 U.S.S. Arizona
1:350 U.S.S. Chicago SSN-721

Future Projects:
All of them!


Report this post
Top
 Profile  
Reply with quote  
PostPosted: Wed Mar 01, 2017 11:13 am 
Offline
User avatar

Joined: Thu Aug 13, 2015 1:28 pm
Posts: 303
Location: Mesa, Arizona
Only have one picture to post from last night.

ImageIMG_6346_zpsp1sp4rhk by Nelson Wallace, on Flickr


I'm not sure why the picture is so blurry, I need to get a better camera lens.


But I'm glad to say my plating experiment was a success! I did the tape and primer method to make the alternating plates and seams. Once I removed the tape some of the edges needed cleaned up because they weren't very crisp. I went over all of the joints with a fine sanding stick, but I felt like that took too much material off. So then I went back over all of the seams with a straight edge and Xacto knife to scribe the joints and it looks perfect! It's not over scale like the new Trumpeter kits, but it is noticeable and I can't wait to see it red. Now I just have to make the other side match! :thumbs_up_1:


Work will continue as usual. I had planned on trying to paint some pieces to get my colors figured out, but I accidentally left my airbrush in Mesa. I should get that this weekend so hopefully I can try next week.

Until then I'll keep the updates coming.

_________________
-Nelson
Current Project:
1:200 U.S.S. Arizona
1:350 U.S.S. Chicago SSN-721

Future Projects:
All of them!


Last edited by hondaman117 on Mon Jul 24, 2017 1:37 pm, edited 1 time in total.

Report this post
Top
 Profile  
Reply with quote  
PostPosted: Wed Mar 01, 2017 11:23 am 
Offline
User avatar

Joined: Wed Nov 17, 2010 10:51 am
Posts: 382
Location: S.C.
Nelson it's coming along fine......the hull plating looks good in this scale


Report this post
Top
 Profile  
Reply with quote  
PostPosted: Wed Mar 01, 2017 12:15 pm 
Offline
User avatar

Joined: Mon Oct 13, 2014 5:39 pm
Posts: 668
Location: San Tan Valley Arizona
Hi Nelson:

The plating really turned out nice, whatever you did to achieve the look, it worked. As Mark wrote, it's coming along nicely.

_________________
Mark
Master Gunnery Sergeant USMC (Ret.)
http://www.modelshipgallery.com/gallery ... index.html

On the bench:

1/200 USS Enterprise, CV-6


Report this post
Top
 Profile  
Reply with quote  
PostPosted: Wed Mar 01, 2017 1:32 pm 
Offline
User avatar

Joined: Tue Jan 11, 2005 1:40 pm
Posts: 8175
Location: New Jersey
hondaman117 wrote:
I'm not sure why the picture is so blurry, I need to get a better camera lens.

Make sure you are using your macro setting. Takes better close-ups.

I like the hull plating, it looks good.

_________________
Martin

"Tomorrow is the most important thing in life. Comes into us at midnight very clean. It's perfect when it arrives and it puts itself in our hands. It hopes we've learned something from yesterday." John Wayne

Ship Model Gallery


Report this post
Top
 Profile  
Reply with quote  
PostPosted: Wed Mar 01, 2017 2:12 pm 
Offline
User avatar

Joined: Mon Jan 10, 2005 6:00 pm
Posts: 12143
Location: Ottawa, Canada
The photo looks fine - just the focus point is on the right side of the frame rather than the middle.

Several possibilities for this:
1 the autofocus chose that area to focus on (especially easy to happen on touchscreen cameras like your phone, where tapping an area of the screen makes it focus on the touched point);

2 you had focused on one area of the hull, then moved the camera to the side, resulting in the new centre to be out of focus

3 or in macro mode, your camera had reached its maximum focal length - i.e. your camera's too far away from the object to focus on properly. You can fix this either by moving the camera closer so it's within the macro range, or by turning off macro mode.

_________________
De quoi s'agit-il?


Report this post
Top
 Profile  
Reply with quote  
PostPosted: Thu Mar 09, 2017 1:52 pm 
Offline
User avatar

Joined: Thu Aug 13, 2015 1:28 pm
Posts: 303
Location: Mesa, Arizona
Timmy C wrote:
The photo looks fine - just the focus point is on the right side of the frame rather than the middle.

Several possibilities for this:
1 the autofocus chose that area to focus on (especially easy to happen on touchscreen cameras like your phone, where tapping an area of the screen makes it focus on the touched point);

2 you had focused on one area of the hull, then moved the camera to the side, resulting in the new centre to be out of focus

3 or in macro mode, your camera had reached its maximum focal length - i.e. your camera's too far away from the object to focus on properly. You can fix this either by moving the camera closer so it's within the macro range, or by turning off macro mode.


Thanks for the pointers. I was using my Canon T5i with a standard lens. I was using the macro/close-up setting with the focus in the center, but the stock lens does not have a wide focus range as I've discovered. It was bad enough that when I went to Hawaii for Dec. 7th I rented a good lens so I would not be disappointed with my pictures. I know I need to invest in a better lens, just gotta find budget for it.

_________________
-Nelson
Current Project:
1:200 U.S.S. Arizona
1:350 U.S.S. Chicago SSN-721

Future Projects:
All of them!


Report this post
Top
 Profile  
Reply with quote  
PostPosted: Thu Mar 09, 2017 2:18 pm 
Offline
User avatar

Joined: Thu Aug 13, 2015 1:28 pm
Posts: 303
Location: Mesa, Arizona
Hello all,

I'm still picking away at Arizona. I still didn't get my airbrush from Mesa so I've had to stop working on many parts that are ready for paint. On things like the main mast & superstructure I am stuck until parts are able to be painted before railings are attached & assembled. I'll be getting to that next week come hell or high water. This is not all bad as there are many pieces that needed work anyways.

For instance the skylights for the boat deck needed work. I modified the rear ones as instructed for the Big Ed boat racks and added the PE covers. I hollowed the covers out so the holes are only shown by the PE and look in scale.

ImageIMG_6347_zpsmortpa1l by Nelson Wallace, on Flickr


I also took time to finish adding the hull plating to the port torpedo blister. It came out the same as the starboard side.

ImageIMG_6349_zps8icqldod by Nelson Wallace, on Flickr


Last night I began my second attempt at the docking keels. I got the WEM templates from Randy (tegunn) a while ago and intended to build them. However, at the time I was still living at my friends house and did not have many tools to work with. In light of those conditions I scrapped the idea. Since getting my house I've collected some more tools and now the docking keels are completely doable. So I started last night on them and was able to get one done before stopping for the night. I have not glued it to the hull yet, but it is taped in the proper position. I'm going to complete the second inner keel before gluing them to make sure I get them identical and parallel on the hull. Then I'll complete the outer keels in a similar fashion and attach them. This is a detail not many people will see but I like knowing they are there.

ImageIMG_6350_zpsmemmzbmq by Nelson Wallace, on Flickr


As usual progress will continue, I'm looking forwards to getting some color on her.

Thanks for stopping by!

_________________
-Nelson
Current Project:
1:200 U.S.S. Arizona
1:350 U.S.S. Chicago SSN-721

Future Projects:
All of them!


Last edited by hondaman117 on Mon Jul 24, 2017 1:38 pm, edited 1 time in total.

Report this post
Top
 Profile  
Reply with quote  
PostPosted: Tue Mar 14, 2017 12:19 pm 
Offline
User avatar

Joined: Thu Aug 13, 2015 1:28 pm
Posts: 303
Location: Mesa, Arizona
DavidP wrote:
this is a picture of the bottom side of the New York after it capsized after the bikini bomb tests, look at the keel. http://www.navsource.org/archives/01/013413.jpg
pictures of the capsized Oklahoma http://navsource.org/archives/01/037/013741c.jpg http://www.navsource.org/archives/01/014617.jpg http://navsource.org/archives/01/037/013741o.jpg


David,

I've seen that picture of the New York, it's one of the best examples of how docking keels were laid out on these ships. I followed the WEM instructions for placement, hopefully they used plans to get the locations right.


I got all 4 of the keels onto the hull last night. It took a little time to get the lined up and straight, but otherwise it was a non-event. I'm glad I did them!

ImageIMG_6351_zpsldigce06 by Nelson Wallace, on Flickr


I've also got my airbrush situation figured out and am ready to start painting parts. I'm going to mix some paint today while its light outside so I can get a good color. Hopefully I can get some test parts painted today and if they look good I can work on getting the hull painted in the next few days.

Exciting times!

_________________
-Nelson
Current Project:
1:200 U.S.S. Arizona
1:350 U.S.S. Chicago SSN-721

Future Projects:
All of them!


Last edited by hondaman117 on Mon Jul 24, 2017 2:05 pm, edited 1 time in total.

Report this post
Top
 Profile  
Reply with quote  
Display posts from previous:  Sort by  
Post new topic Reply to topic  [ 140 posts ]  Go to page Previous  1, 2, 3, 4, 5, 6, 7  Next

All times are UTC - 6 hours [ DST ]


Who is online

Users browsing this forum: Majestic-12 [Bot] and 78 guests


You can post new topics in this forum
You can reply to topics in this forum
You cannot edit your posts in this forum
You cannot delete your posts in this forum
You cannot post attachments in this forum

Jump to:  
Powered by phpBB® Forum Software © phpBB Group