The Ship Model Forum

The Ship Modelers Source
It is currently Tue Mar 19, 2024 5:49 am

All times are UTC - 6 hours [ DST ]


Post new topic Reply to topic  [ 78 posts ]  Go to page 1, 2, 3, 4  Next
Author Message
PostPosted: Mon Oct 23, 2017 5:00 pm 
Offline
User avatar

Joined: Sat Feb 08, 2014 1:58 pm
Posts: 537
Location: Idaho, United States
Wall of pictures warning! :!:

This is a blitz build, as much as such a large model can be rushed, to get it ready for my local IPMS show.

I thought I would share my construction report here. My photography was secondary to the need for speed. As such, the visual coverage of intermediate steps is somewhat abbreviated. I shall endeavor to try and fill in the gaps with text.

The subject of this project is Trumpeter's 1:200 scale rendition of the legendary HMS Rodney. I will hold off making a detailed description of the ship's history until I get around to the end.

I am building this Out of the Box. Plus scrap P.E. and my spare parts collection. Also a set of 1:200 Trumpeter U.S.N. sailors press ganged into the Royal Navy.

Image

Here is a nice review of the contents of the box at Britmodeller.com:

http://www.britmodeller.com/forums/index.php?/topic/235001332-hms-rodney-1200/

And the suggested paint scheme from Trumpeter:

Image

Let's dive right in.

_________________
Image
Si hortum in bibliotheca habes, nihil deerit.
- Consul Marcus Tullius Cicero


Last edited by Strategos Augustus on Mon Oct 23, 2017 5:47 pm, edited 2 times in total.

Report this post
Top
 Profile  
Reply with quote  
PostPosted: Mon Oct 23, 2017 5:15 pm 
Offline
User avatar

Joined: Sat Feb 08, 2014 1:58 pm
Posts: 537
Location: Idaho, United States
Yikes! What a mess:
Image

A giant is born:
Image
Image
Image

First problem, the kit trunnions are a bit short in height and as these ships are some of the few of its generation without bloomers this must not stand:
Image

Solution:
Image
Image
Image
Not pictures is the foil separating the paper from the cotton balls. As can be seen from the final image, there was some wrinkling on the portmost gun. I was able to partially resolve the problem with some delicate white-glue sculpture port mortem. This situation was caused by cutting the blue paper too wide, when I attached the turret shell, it crumpled the edges. The other two turrets were more or less perfect.

Dry fitting:
Image

Some drilling:
Image
Image

_________________
Image
Si hortum in bibliotheca habes, nihil deerit.
- Consul Marcus Tullius Cicero


Last edited by Strategos Augustus on Sun Jun 16, 2019 5:09 pm, edited 1 time in total.

Report this post
Top
 Profile  
Reply with quote  
PostPosted: Mon Oct 23, 2017 5:21 pm 
Offline
User avatar

Joined: Sat Feb 08, 2014 1:58 pm
Posts: 537
Location: Idaho, United States
There were handrails on the top of the turrets. This is my quick and dirty solution:
Image
Image
Image
Image
Then add a bit of wire across the tops. More pictures of these later when completed.

Some railing:
Image

Shots of mostly completed sub-assemblies:
Image
Image
Image
Image
Image

Building the mainmast:
Image
Image
Image
Image
Image
Image
Image

As she stands:
Image

_________________
Image
Si hortum in bibliotheca habes, nihil deerit.
- Consul Marcus Tullius Cicero


Last edited by Strategos Augustus on Sun Jun 16, 2019 5:11 pm, edited 1 time in total.

Report this post
Top
 Profile  
Reply with quote  
PostPosted: Mon Oct 23, 2017 5:31 pm 
Offline
User avatar

Joined: Sat Feb 08, 2014 1:58 pm
Posts: 537
Location: Idaho, United States
The monster is beginning to take shape:
Image

_________________
Image
Si hortum in bibliotheca habes, nihil deerit.
- Consul Marcus Tullius Cicero


Last edited by Strategos Augustus on Sun Jun 16, 2019 5:12 pm, edited 1 time in total.

Report this post
Top
 Profile  
Reply with quote  
PostPosted: Mon Oct 23, 2017 5:36 pm 
Offline
User avatar

Joined: Sat Feb 08, 2014 1:58 pm
Posts: 537
Location: Idaho, United States
Everything is built and ready to be painted:
Image

Image

Image

Image

Image

Image

Image

Image

Image

Image

Image

Image

Image

Image

Image

Image

Image

Image

Image

Image

Image

Image

Image

Image

Image

Image

Image

Image

Image

_________________
Image
Si hortum in bibliotheca habes, nihil deerit.
- Consul Marcus Tullius Cicero


Last edited by Strategos Augustus on Sun Jun 16, 2019 5:27 pm, edited 1 time in total.

Report this post
Top
 Profile  
Reply with quote  
PostPosted: Mon Oct 23, 2017 5:42 pm 
Offline
User avatar

Joined: Sat Feb 08, 2014 1:58 pm
Posts: 537
Location: Idaho, United States
And this the remainder of the photographs of the unpainted ship:


Image

Image

Image

Image

Image

Image

Image

Image

Image

Image

Image

Image

Image

Image

Image

Image

Image

Image

Image

Image

Image

Image

Image

Image

Image

Image

Image

Image

Image

Image

Image

Image

Image

Image

Image

Image

Image

Image

Image

Image

_________________
Image
Si hortum in bibliotheca habes, nihil deerit.
- Consul Marcus Tullius Cicero


Last edited by Strategos Augustus on Sun Jun 16, 2019 6:11 pm, edited 1 time in total.

Report this post
Top
 Profile  
Reply with quote  
PostPosted: Mon Oct 23, 2017 6:36 pm 
Offline
User avatar

Joined: Sat Feb 08, 2014 1:58 pm
Posts: 537
Location: Idaho, United States
Here is the dry fit of all associated components before painting. This is my wife's favorite stage. She likes to see all the brass bits visible.

This is the point where I have to make my decisions about color and rigging strategy. There is a definite 'wow' factor handling it at this point. This is the first time I have seen it all together. The ship is 42.6 inches / 108.204cm long and has a dominating presence. Over a meter of fun!

I spent a couple hours just sitting with it...thinking, looking...anyway, please enjoy.

Image

Image

Image

Image

Image

Image

Image

Image

Image

Image

Image

Image

Image

Image

Image

Here it is with a Tamiya 1/700 Nelson from the wall of shame for scale:
Image

I'll launch into the painting process next time.

Thank you for viewing!

_________________
Image
Si hortum in bibliotheca habes, nihil deerit.
- Consul Marcus Tullius Cicero


Last edited by Strategos Augustus on Sun Jun 16, 2019 6:14 pm, edited 1 time in total.

Report this post
Top
 Profile  
Reply with quote  
PostPosted: Mon Oct 23, 2017 6:46 pm 
Offline

Joined: Sat Jan 24, 2009 5:16 pm
Posts: 808
Location: Wisconsin
This is a crazy and awesome looking project! Can't wait to see your paint job!


Report this post
Top
 Profile  
Reply with quote  
PostPosted: Tue Oct 24, 2017 3:25 pm 
Offline
User avatar

Joined: Sat Feb 08, 2014 1:58 pm
Posts: 537
Location: Idaho, United States
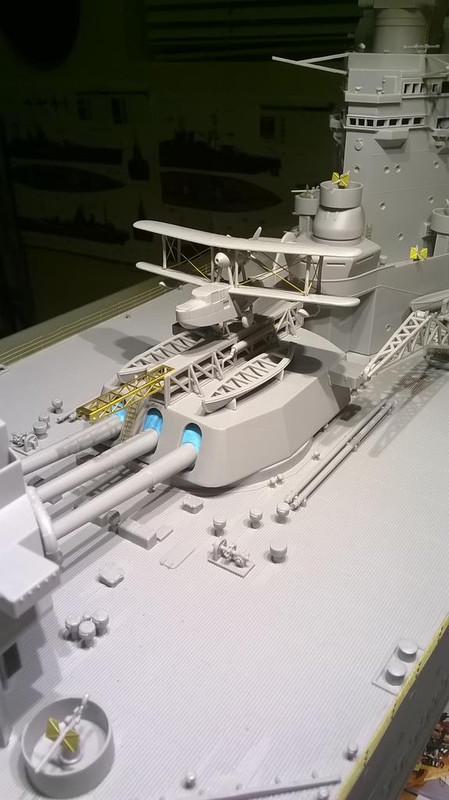
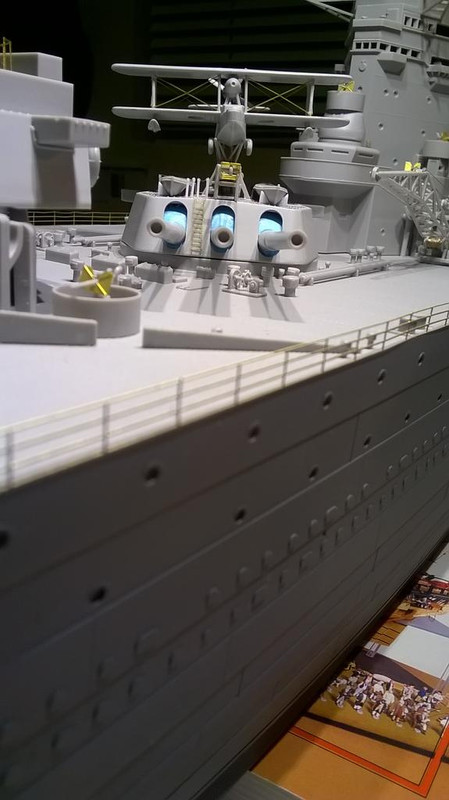
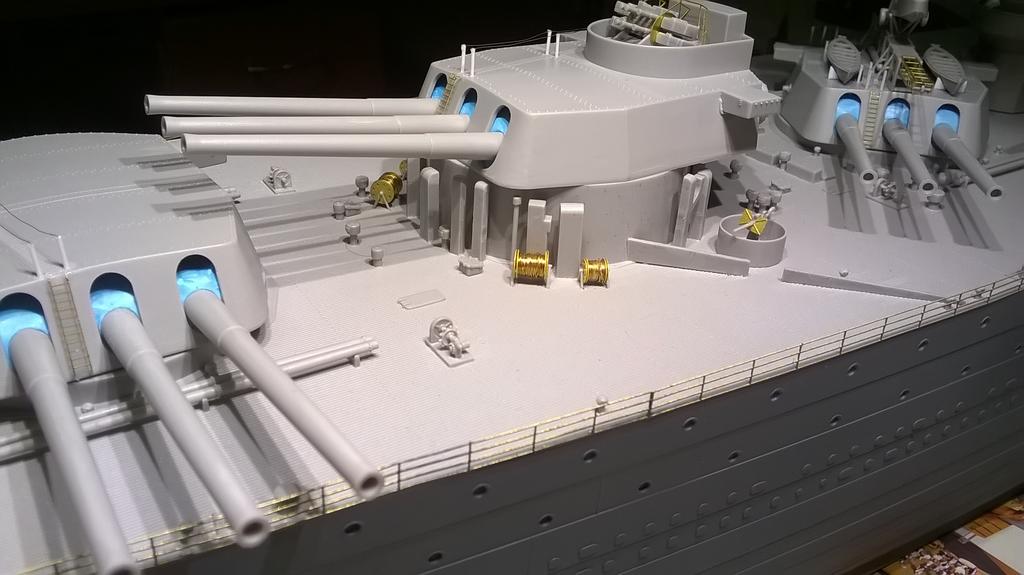
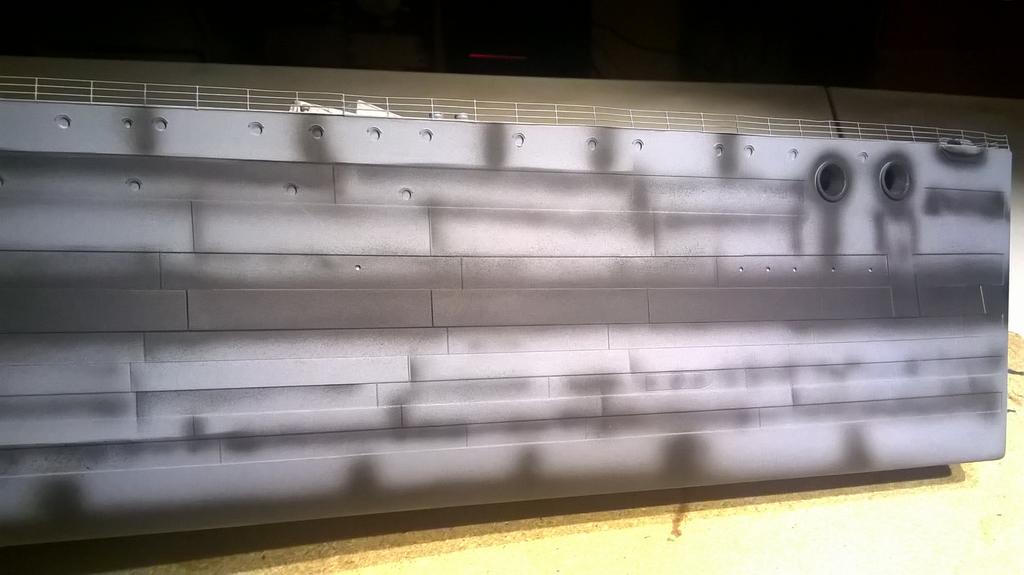
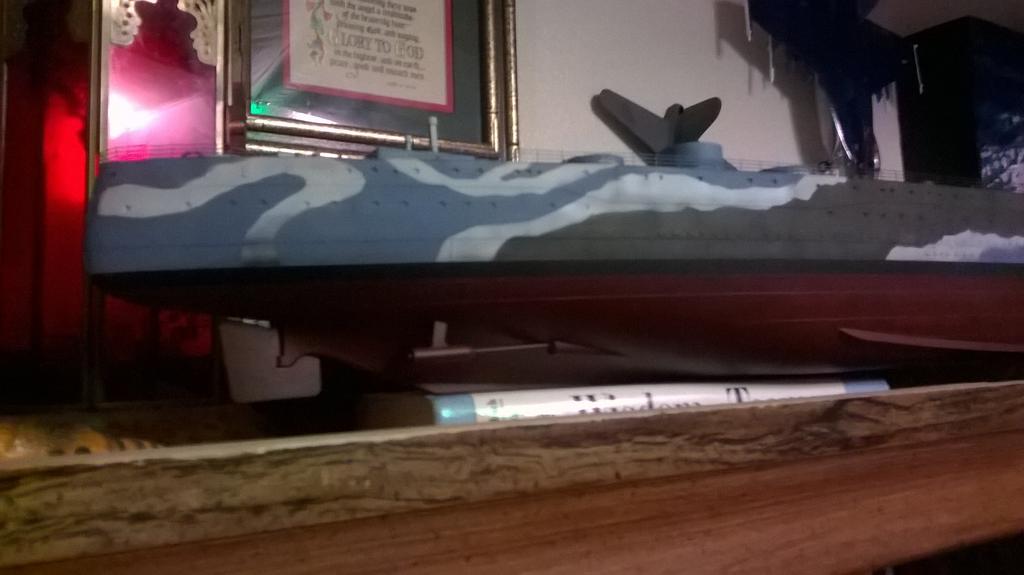
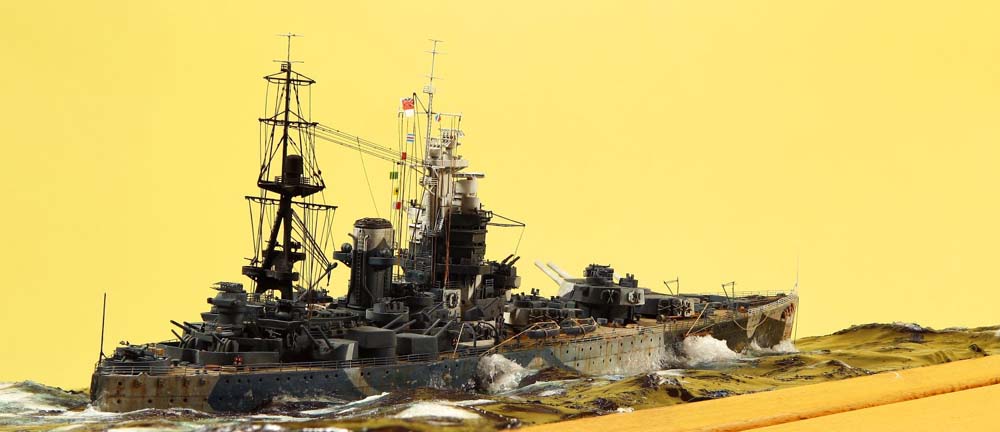
The camouflage scheme for Rodney is a very interesting mix of four colors.

Now, there was some trouble deciding which shades to use as well as their specific positions on the ship.

Trumpeter provides two conflicting versions of the scheme.

The first, which is from the callout included in the box, is, aside from its light grey, a very dark, blue-centric version.

Image

The second, which is beautifully done portrait on the box, shows much lighter coloration with a very prominent green.

Image

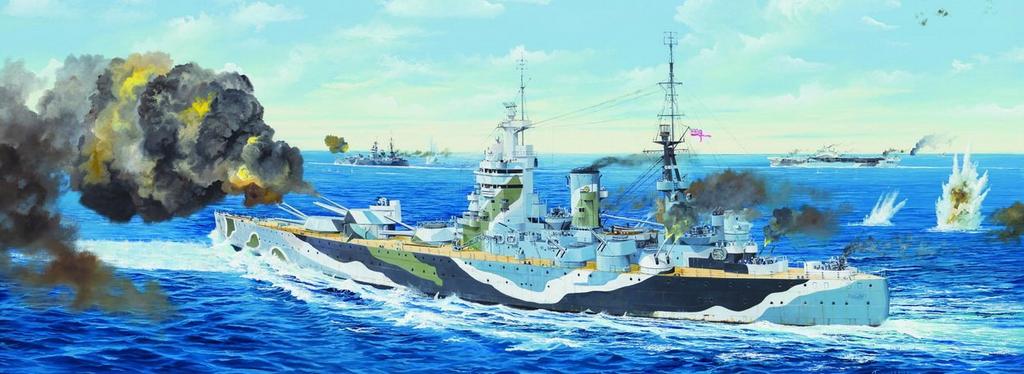
Well? Which is it? Probably neither...

There has been a lively discussion on this very subject (now decimated by the Photobucket Great Purge) on this very forum earlier this year:
http://www.shipmodels.info/mws_forum/viewtopic.php?f=2&t=164577

SovereignHobbies wrote:
Since we have the paint range, we're maintaining the reference page these days:

https://www.sovereignhobbies.co.uk/pages/british-royal-navy-colour-schemes

HMS Rodney

1942

Admiralty Disruptive Pattern Camouflage, using the following colours:

MS.1 Dark Blue-Black (RN 04);

MS.2 Dark Grey (RN 05);

B5 Blue (RN 07);

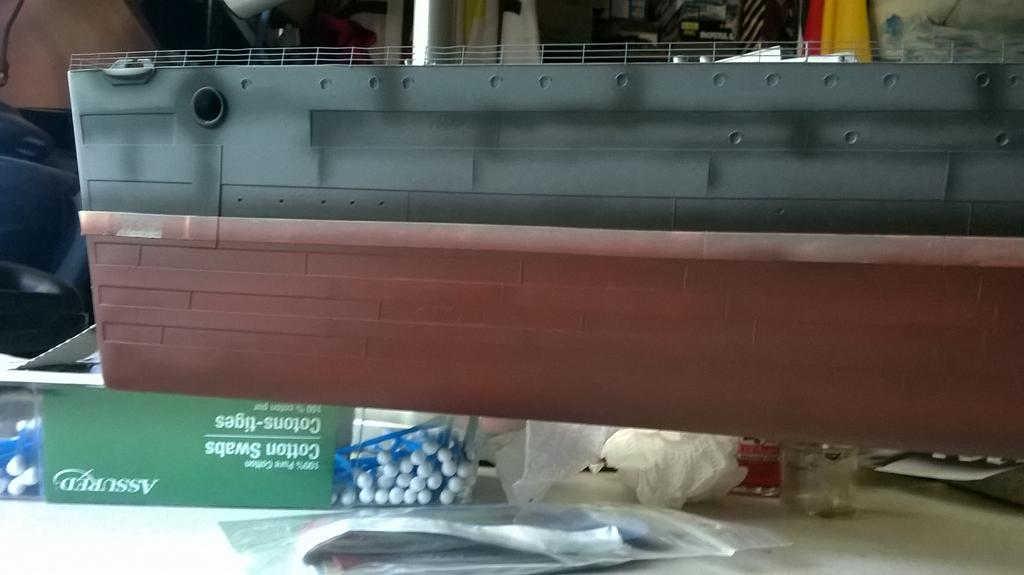
507C Admiralty Light Grey (RN 03);

Boot topping - Black (C03);

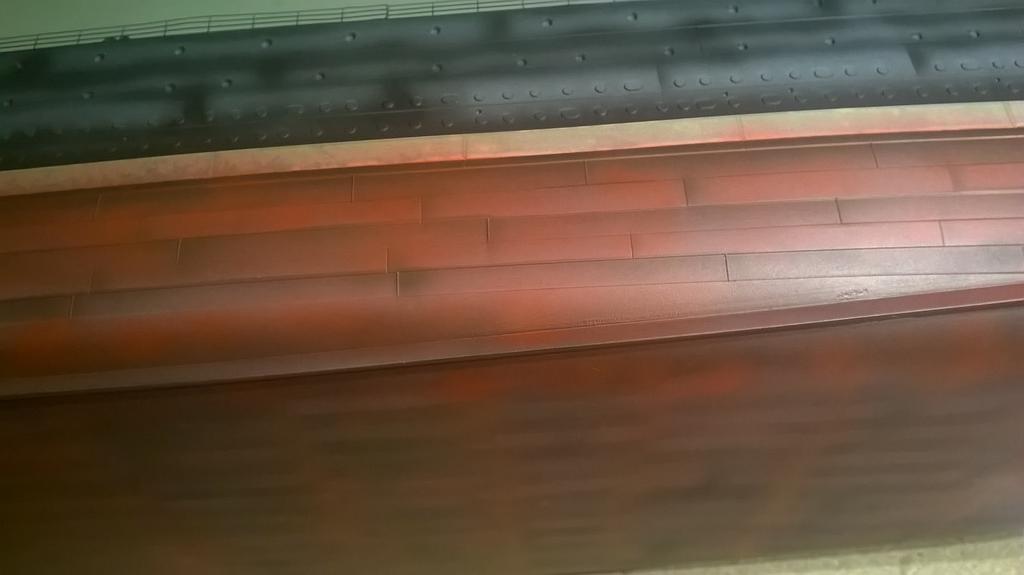
Underwater hull - Antifouling Red (RN19)


Thus speaks the voice of Sovereign Hobbies. Hmm, well this puts us in a situation without green. RN 04 is just what it sounds like, a kind of midnight blue. Maybe this is what odd tealish color on Trumpeter's callout is supposed to indicate.

Kostas Katseas made a very neat little build of Tamiya's Nelson in camouflage that seems to corroborate this color palette:

http://www.modelshipgallery.com/gallery/bb/hms/Nelson-700-kk/index.htm

Image

It looks pretty cool.

Christ Flodberg also seems to have gone with a mostly green-free scheme for his Howe:

http://www.modelshipgallery.com/gallery/bb/hms/Howe-350-cf/index.htm
Image

Looks very nice doesn't it?

But wait a minute! On our old CASF thread there used to be two very convincing looking illustrations! Which I saved, a long time ago.

Image

Image

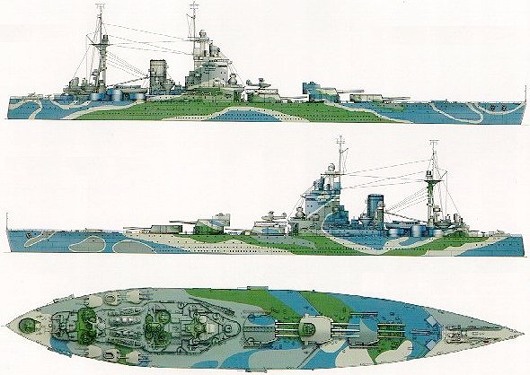
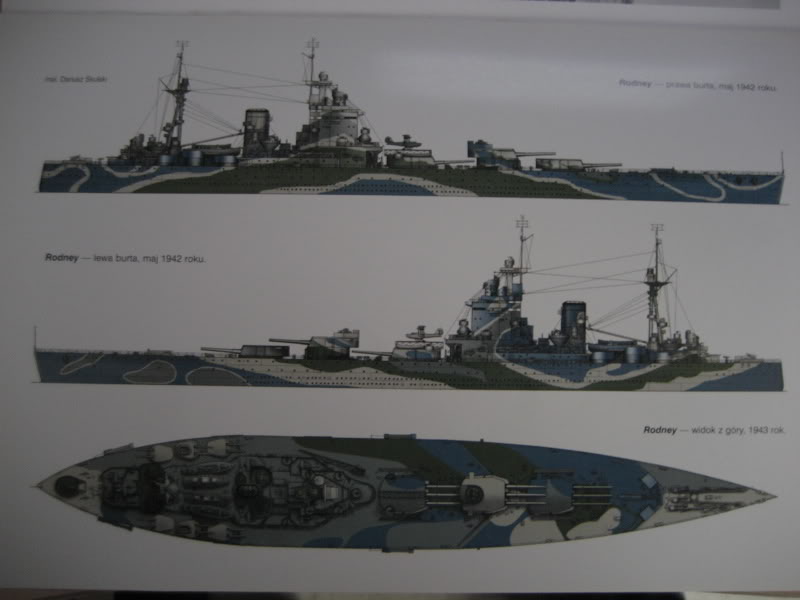
They have green!! What's up with that? And their green is inverted with the dark grey seen on the Trumpeter box art?

Huh. No decent color photograph exists of the prototype in camouflage to my knowledge. Looks like its time for modeler's discretion!

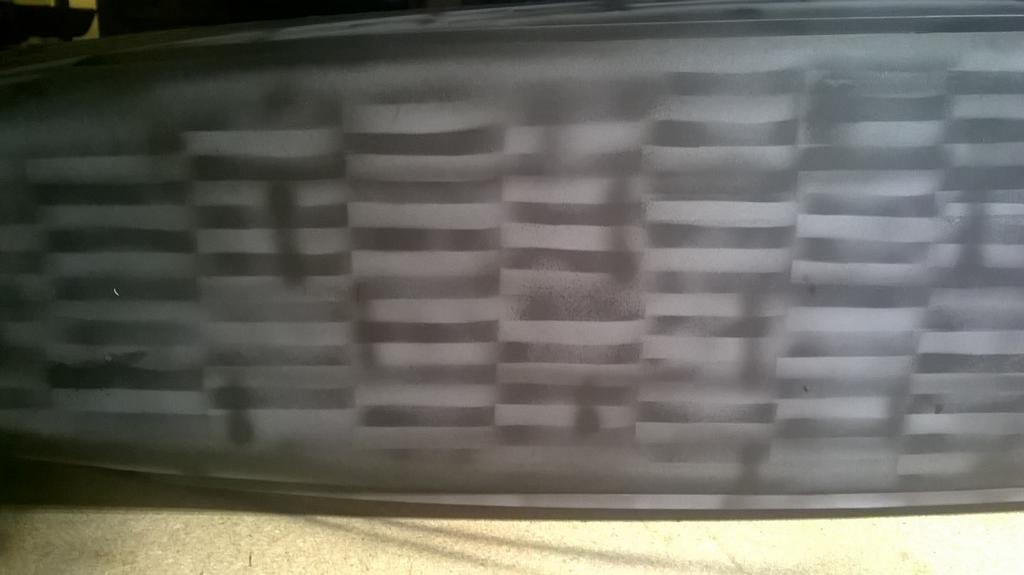
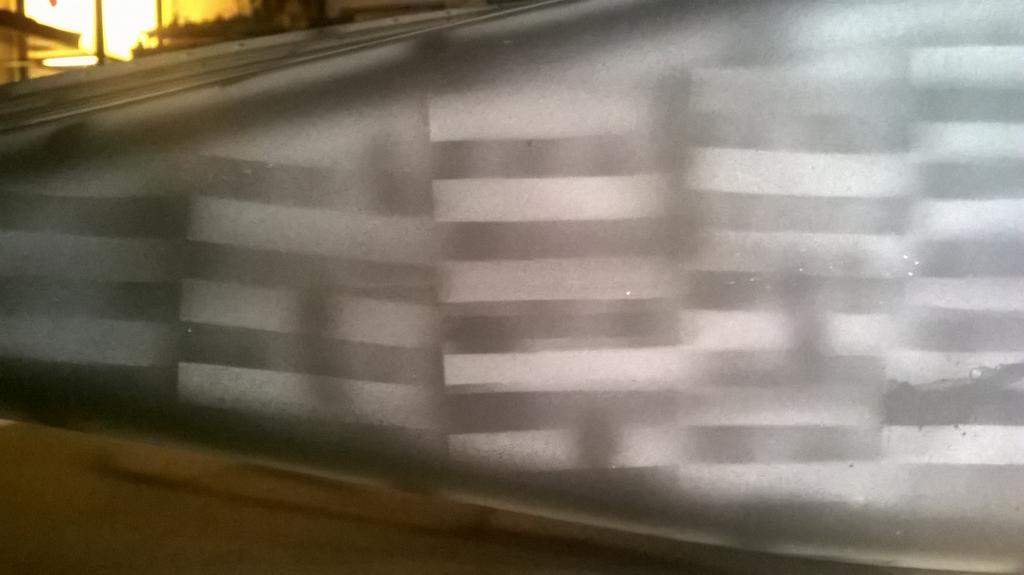
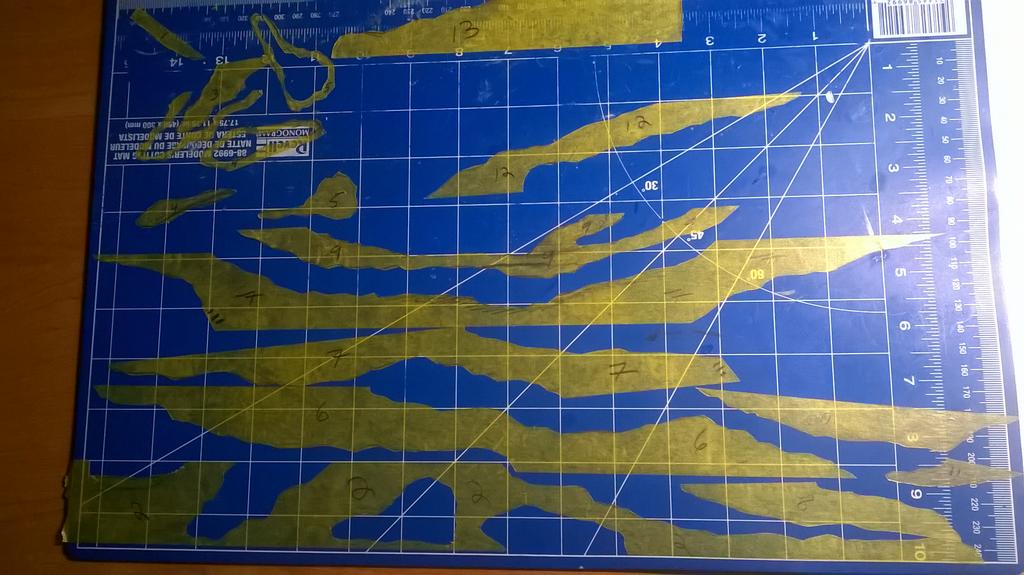
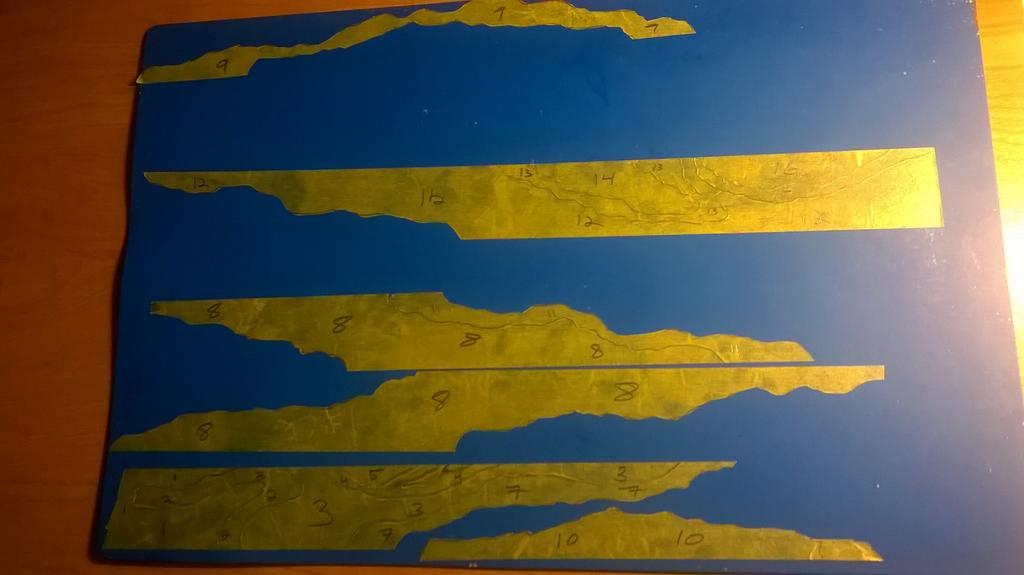
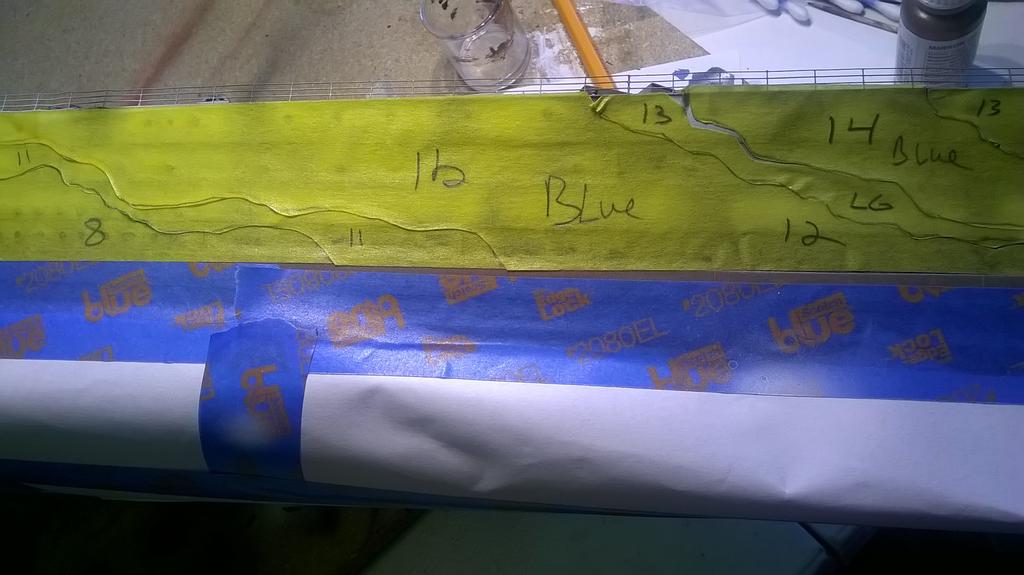
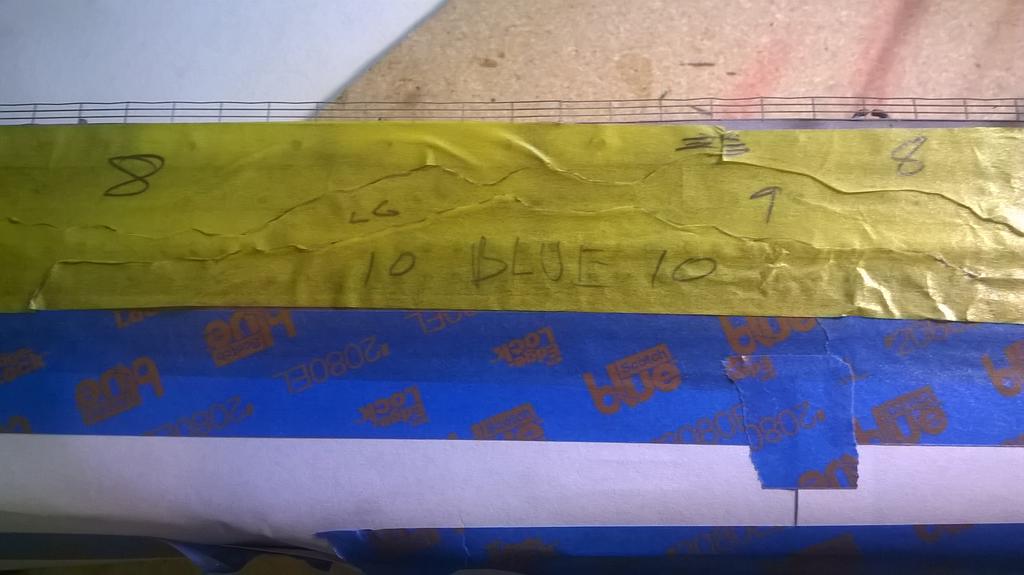
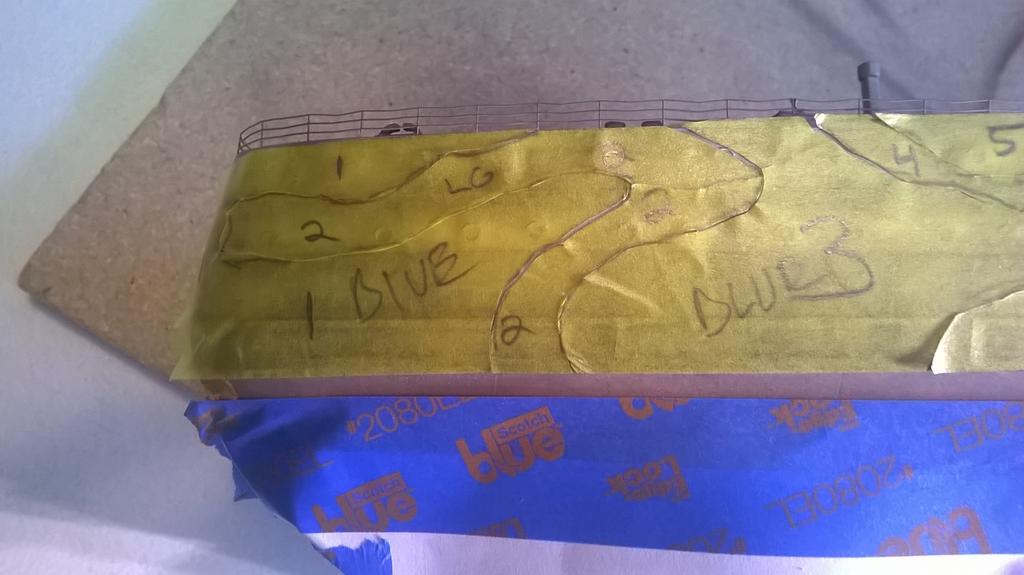
So I mixed up three sets of color.

Option 1: Halfway between Chris Flodberg's and Kostas Katseas interpretations. Essentially in concord with the suggestions from Sovereign Hobbies.

Option 2: A slightly lighter version of the Trumpeter callout. A nice dark teal in lieu of the blue-black or dark green.

Option 3: The green option from the Polish book.

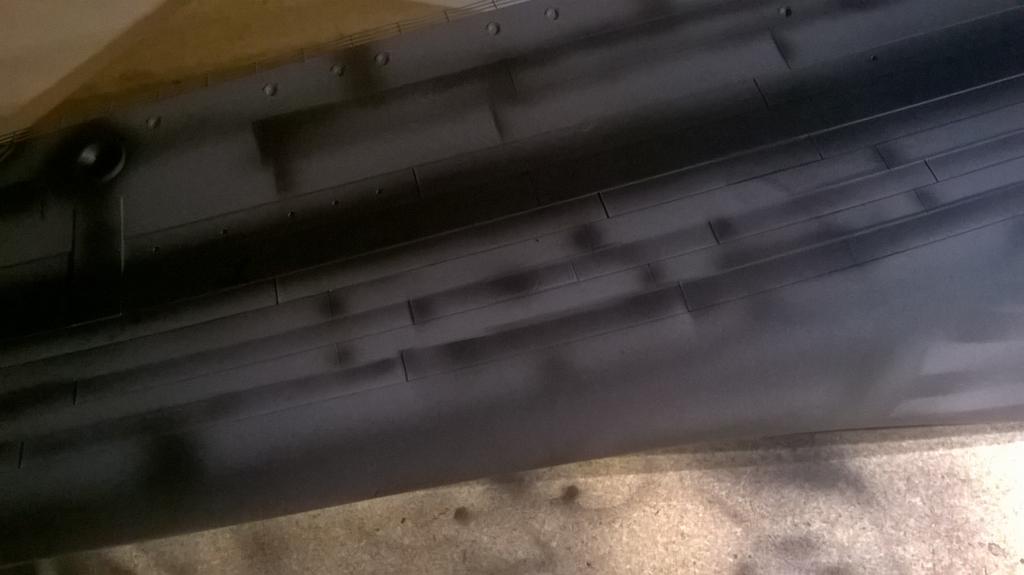
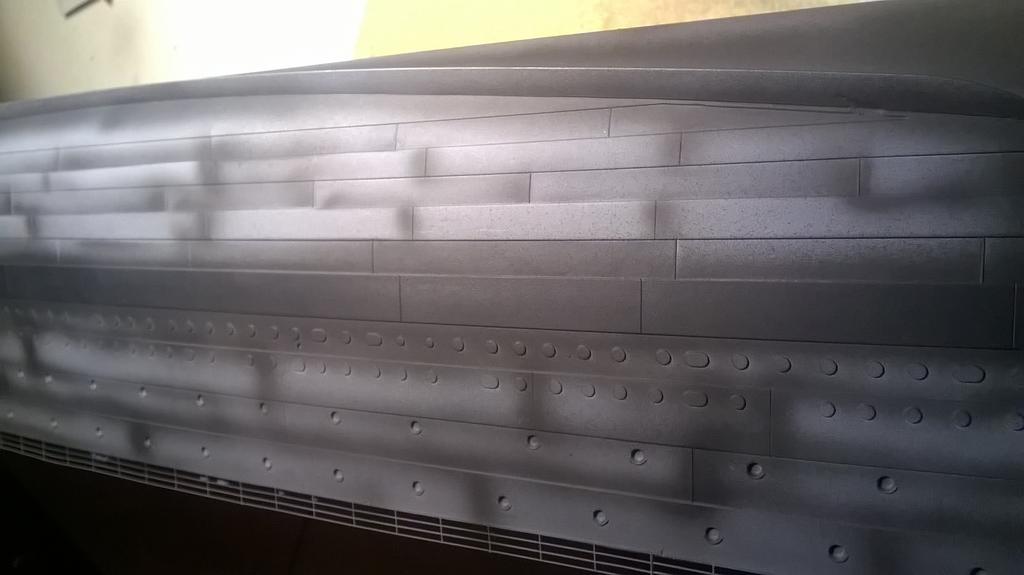
So, tie breaker. We probably can guess that Option 1 is most likely correct but we have to live with my handiwork so off to the wife we go!

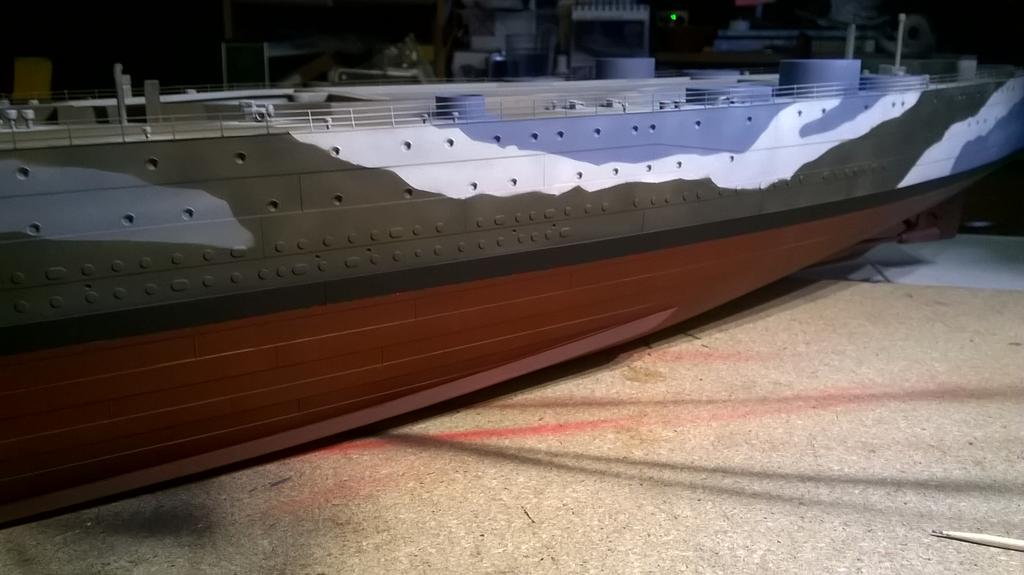
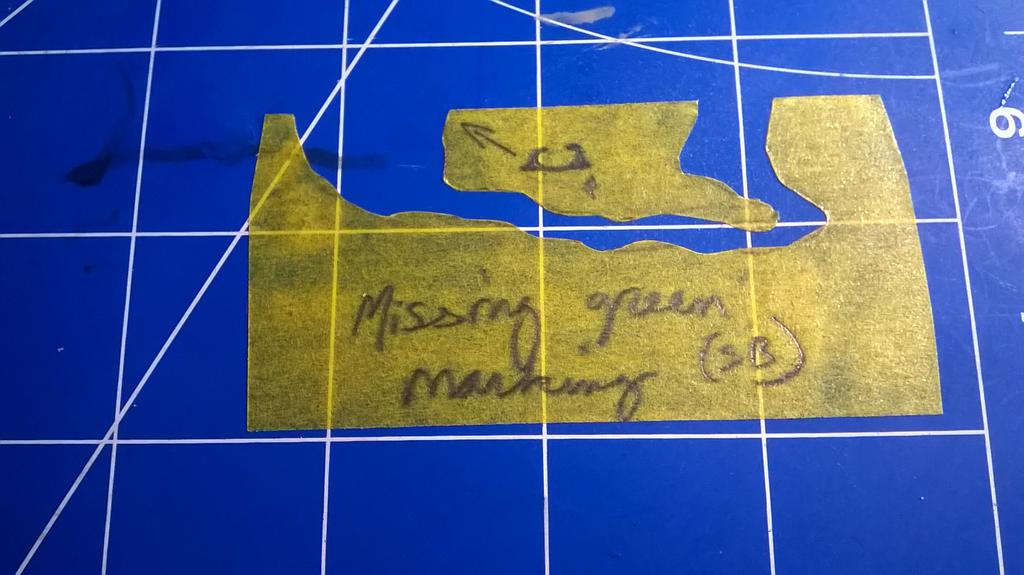
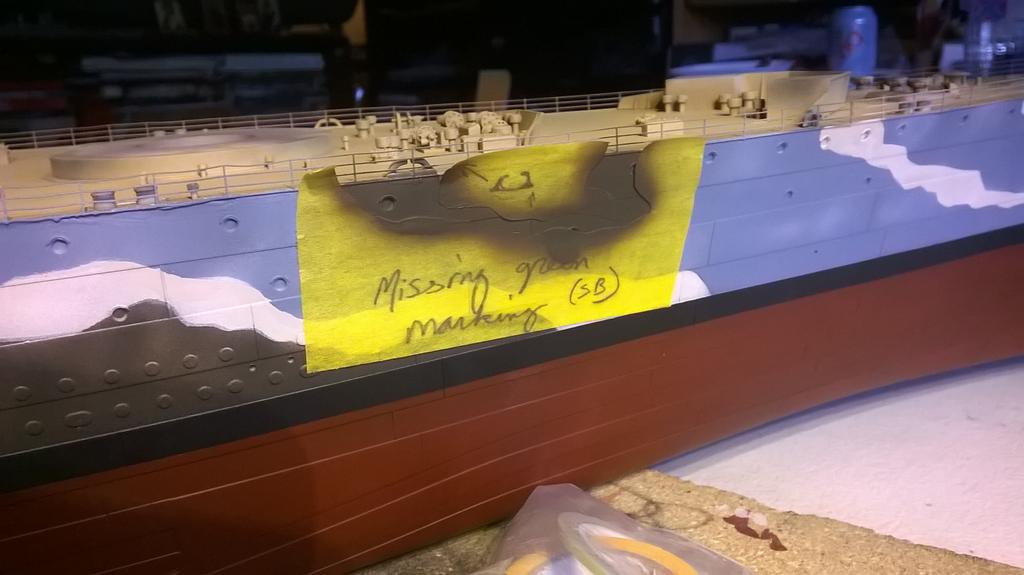
And after some deliberation......we like green I guess. A quick inventory of paints on hand and some time looking at spattered paint in the sun meant that my collection of Pollyscale GN Empire Green was selected for purpose. I have a great deal of it on hand, it looks nice, it's dark, and it has some yellow/brown tones.

I have also decided to invert the green and the dark grey on the box-art. The two line drawings I had on my hard-drive contradict the painting and are in agreement with each other. It just seems more credible I guess.

Well. Off we go!

_________________
Image
Si hortum in bibliotheca habes, nihil deerit.
- Consul Marcus Tullius Cicero


Last edited by Strategos Augustus on Sun Jun 16, 2019 6:15 pm, edited 1 time in total.

Report this post
Top
 Profile  
Reply with quote  
PostPosted: Thu Oct 26, 2017 4:11 pm 
Offline
User avatar

Joined: Sat Feb 08, 2014 1:58 pm
Posts: 537
Location: Idaho, United States
To give you a small idea of the size...here it is after priming the hull.

Image

Image

A little bit of cleanup to do.
Image

_________________
Image
Si hortum in bibliotheca habes, nihil deerit.
- Consul Marcus Tullius Cicero


Last edited by Strategos Augustus on Sun Jun 16, 2019 6:16 pm, edited 1 time in total.

Report this post
Top
 Profile  
Reply with quote  
PostPosted: Thu Oct 26, 2017 4:21 pm 
Offline
User avatar

Joined: Sat Feb 08, 2014 1:58 pm
Posts: 537
Location: Idaho, United States
How about a little bit of preshading? :big_grin:

I use paper cutouts to create the desired patterns.

I also use this opportunity to paint the boot stripe. Which on the Nelson class seems to be about halfway between gunwale and keel.

Image

Image

Image

Image

Image

Image

Image

Image

Image

Image

Image

Image

_________________
Image
Si hortum in bibliotheca habes, nihil deerit.
- Consul Marcus Tullius Cicero


Last edited by Strategos Augustus on Sun Jun 16, 2019 6:17 pm, edited 1 time in total.

Report this post
Top
 Profile  
Reply with quote  
PostPosted: Thu Oct 26, 2017 4:23 pm 
Offline
User avatar

Joined: Sat Feb 08, 2014 1:58 pm
Posts: 537
Location: Idaho, United States
I forgot one last one! This one shows the starboard hawseholes.

Image

_________________
Image
Si hortum in bibliotheca habes, nihil deerit.
- Consul Marcus Tullius Cicero


Last edited by Strategos Augustus on Sun Jun 16, 2019 6:18 pm, edited 1 time in total.

Report this post
Top
 Profile  
Reply with quote  
PostPosted: Fri Oct 27, 2017 11:14 am 
Offline
User avatar

Joined: Mon May 14, 2012 12:18 pm
Posts: 2068
Location: Salt Lake City, USA
This was fun to see go together... Strategos was kind enough to give me a sneak peak beforehand. Great work! :worship_1: :worship_1:

_________________
-Jason Channell

Current Project: 1/200 Bismarck


Report this post
Top
 Profile  
Reply with quote  
PostPosted: Fri Oct 27, 2017 12:22 pm 
Offline
SovereignHobbies
SovereignHobbies

Joined: Sat Feb 28, 2015 9:09 am
Posts: 1175
Location: Aberdeenshire, Scotland, UK
Hi,

Nice work! Before getting too far in, I need to point out that the colour call outs on our site haven't been updated in a while but our understanding of what B5 was definitely has.

I am 100% confident that B5 and later B15 were very bold blues and not the wishy-washy bluish greys that people believe it was. I am no longer confident that B5 was as prolific on capital ships as it was previously thought by the wider community. I have to admit that at this point I do know what B5 was but I don't know if that's what was on Rodney. I firmly believe that many nominations of B5 on large ships are a result of an erroneous understanding of what the colour actually was.

MS3 on the other hand is well understood with all extant samples, recorded data and descriptions corroborating and giving a slightly greenish grey - nothing like the bright greens on that profile above which would be more at home on a steam train!

_________________
James Duff
Sovereign Hobbies Ltd
http://www.sovereignhobbies.co.uk

Current build:
HMS Imperial D09 1/350
http://www.shipmodels.info/mws_forum/viewtopic.php?f=59&t=167151


Report this post
Top
 Profile  
Reply with quote  
PostPosted: Fri Oct 27, 2017 3:39 pm 
Offline

Joined: Wed Aug 22, 2012 6:19 pm
Posts: 581
Location: Finland
Good stuff so far! Nice to see someone actually going straight out of the box!
Something I haven't been able to do for years. Like everytime I try it all the kits sits there looking unfinished in some corner haha

:thumbs_up_1:


Report this post
Top
 Profile  
Reply with quote  
PostPosted: Sun Oct 29, 2017 8:18 pm 
Offline
User avatar

Joined: Sat Feb 08, 2014 1:58 pm
Posts: 537
Location: Idaho, United States
Channell wrote:
This was fun to see go together... Strategos was kind enough to give me a sneak peak beforehand. Great work! :worship_1: :worship_1:


Thanks for riding along. I don't remember giving you much a choice, but it is a lot more fun to build 'together'.

Looking forward to the next installment of the Great Hood Chronicles! One of these days I want to have a crack at that kit myself.

SovereignHobbies wrote:
Hi,

Nice work! Before getting too far in, I need to point out that the colour call outs on our site haven't been updated in a while but our understanding of what B5 was definitely has.

I am 100% confident that B5 and later B15 were very bold blues and not the wishy-washy bluish greys that people believe it was. I am no longer confident that B5 was as prolific on capital ships as it was previously thought by the wider community. I have to admit that at this point I do know what B5 was but I don't know if that's what was on Rodney. I firmly believe that many nominations of B5 on large ships are a result of an erroneous understanding of what the colour actually was.

MS3 on the other hand is well understood with all extant samples, recorded data and descriptions corroborating and giving a slightly greenish grey - nothing like the bright greens on that profile above which would be more at home on a steam train!


That's the rub isn't it? It's really, really hard to figure out the details of some of the colors these RN ships had. I've seen some very contradictory and very attractive interpretations out there.

I am curious to know what sort of primary source material is out there on the subject of RN camouflage. Granted I have not invested any real work outside the internet in my hunt.

Well, you will be happy to know that the blue that has been splattered all over my hull is very bright indeed!

My green grey choice is maybe a little far out but you will have to tell me what you think.

Koppalakki wrote:
Good stuff so far! Nice to see someone actually going straight out of the box!
Something I haven't been able to do for years. Like everytime I try it all the kits sits there looking unfinished in some corner haha

:thumbs_up_1:


Thanks for checking in! Huge fan of your style of work. Been following you since your North Carolina.

I am at the stage of life where I can afford either the kit or the aftermarket! :big_grin:

So I like it when I can get away with skimping.

_________________
Image
Si hortum in bibliotheca habes, nihil deerit.
- Consul Marcus Tullius Cicero


Report this post
Top
 Profile  
Reply with quote  
PostPosted: Sun Oct 29, 2017 8:23 pm 
Offline
User avatar

Joined: Sat Feb 08, 2014 1:58 pm
Posts: 537
Location: Idaho, United States
So, as I mentioned earlier, this is blitz and pictures are secondary to 'Just Build It'.

So here is my very small hull painting collage.

I preshaded as you saw earlier in black. Now I preshade below the boot with bright red:
Image

And then, a nice mix of various browns, crimsons, and a touch of orange and grey to finalize the basecoat.

On the left: finished; on the right: merely preshaded.
Image

And here is a horrible quality shot of the finished product where you can see all of the blurriness and none of the beautiful rich depth of color.
Image

By the way this was all very time consuming and extraordinarily tedious.

_________________
Image
Si hortum in bibliotheca habes, nihil deerit.
- Consul Marcus Tullius Cicero


Last edited by Strategos Augustus on Sun Jun 16, 2019 6:19 pm, edited 1 time in total.

Report this post
Top
 Profile  
Reply with quote  
PostPosted: Sun Oct 29, 2017 8:35 pm 
Offline
User avatar

Joined: Sat Feb 08, 2014 1:58 pm
Posts: 537
Location: Idaho, United States
Guess what time it is??!

Camouflage time!

So, to start I finished up the preshading with a countershade of white. Much like I did with the bright red underwater.

Image

Image

I have a nice roll of 40mm Tamiya tape...this is a about the distance from the top of the boot stripe and the gunwale. Stretched it along the length of the ship and marked in the desired pattern.

Then removed it to a safe cutting area and delicately separated the individual sections for later use:

Port:
Image

Starboard:
Image

Each piece is numbered in order from left of the view to right and marked for the color to apply underneath.


Reapplication:

Image

Image

Image

Presto!!

Image

Image

Turns out I missed a spot.

Image

Image

There was a bit of strategy determining the optimal and most efficient order of painting. Additionally there was a bit of touch up.

I will say it can be very easy to miss small but crucial areas. I would recommend marking the tape as you finish in an easy to identify manner to improve quality control during the process. I failed to to do this and had three significant areas that slipped under the radar. (The most egregious was the missing green I showed.)

_________________
Image
Si hortum in bibliotheca habes, nihil deerit.
- Consul Marcus Tullius Cicero


Last edited by Strategos Augustus on Sun Jun 16, 2019 6:20 pm, edited 1 time in total.

Report this post
Top
 Profile  
Reply with quote  
PostPosted: Sun Oct 29, 2017 8:53 pm 
Offline
User avatar

Joined: Sun Mar 18, 2012 7:31 pm
Posts: 1287
Location: Macclesfield NC
Strategus Augustus,

Your RODNEY is looking fantastic, this is one of my planned future projects once I finish everything else I need to do before I jump in on a monster like this.

_________________
Jim Varnell
ABH2 USN/RET.
89-00

Eastern NC Modelworks

Up coming projects:
1/700 scale rebuild of diorama project 960 square feet.
(Table 1 underway)Feb.2017
1/350 USS ALASKA CB-1(started Aug. 2017) 70% completed


Report this post
Top
 Profile  
Reply with quote  
PostPosted: Sun Oct 29, 2017 9:05 pm 
Offline
User avatar

Joined: Sat Feb 08, 2014 1:58 pm
Posts: 537
Location: Idaho, United States
JimVarnellABH2USN wrote:
Strategus Augustus,

Your RODNEY is looking fantastic, this is one of my planned future projects once I finish everything else I need to do before I jump in on a monster like this.


I will say that I was surprised at just how much paint this thing absorbs. I am a moderately committed devotee of 1/350 scale. This is a massive jump in terms of physical area to be finished.

I had a pretty confident feeling I could brute force this thing quickly. I have been trying to develop a reputation for quick, lighting builds with a fairly complex set of of finishing techniques. Granted, I use a minimum of aftermarket. This project really slows down the rate of progress. The size is too great to comfortably wield in one hand. It is difficult to see the entire ship all at once. It is very necessary I find to stay on top of the organization of parts and the strategy for completion. It is very easy to forget something and leave it behind. I can't imagine how much fun the Pontos builders are having. I managed to find homes for over 1,550 parts on this project. This was a very great ordeal just out of the box. Imagine the challenge of working with the full aftermarket. :lol_3:

I will say that the instructions are very well laid out and very easy to follow. I did meander a bit to suit my preferred order of work but I find, increasingly, that Trumpeter's style of presentation is my preferred. Only Zvezda's and Tamiya's have elucidated similar warm fuzzies for me and even then those two styles are not as clean as Trumpeter's. I can scribble notes all over the Trumpeter booklets and not feel bad. Of course this is a subjective matter of taste for sure.

_________________
Image
Si hortum in bibliotheca habes, nihil deerit.
- Consul Marcus Tullius Cicero


Report this post
Top
 Profile  
Reply with quote  
Display posts from previous:  Sort by  
Post new topic Reply to topic  [ 78 posts ]  Go to page 1, 2, 3, 4  Next

All times are UTC - 6 hours [ DST ]


Who is online

Users browsing this forum: Janssen and 21 guests


You can post new topics in this forum
You can reply to topics in this forum
You cannot edit your posts in this forum
You cannot delete your posts in this forum
You cannot post attachments in this forum

Jump to:  
Powered by phpBB® Forum Software © phpBB Group