The Ship Model Forum

The Ship Modelers Source
It is currently Thu Apr 18, 2024 8:36 am

All times are UTC - 6 hours [ DST ]


Post new topic Reply to topic  [ 31 posts ]  Go to page 1, 2  Next
Author Message
PostPosted: Sun May 05, 2013 1:18 pm 
Offline
User avatar

Joined: Mon Oct 24, 2011 6:01 am
Posts: 254
Location: the Netherlands
Hi all,

I have decided for myself to start the build of my Revell 1:350 Bismarck kit. The thing lies here around for several years and all it does is collecting dust. So to start her building some extra stuff is needed and ordered yesterday:

A Pontos wooden deck:

ImagePontosdeck by Ronald-45, on Flickr

And a superset from Lion Roar:

http://www.armorama.com/modules.php?op= ... e&sid=5531

Image

The set has all the modeller wants and to let his heart beating faster :big_grin: 17 PE frames, all the gun barrels in brass, a set of resin parts, tube and brass wire and a )hopefullly) good instruction manual. I think it will make the already good kit from Revell even better! My goal is a showpiece for in my livingroom.

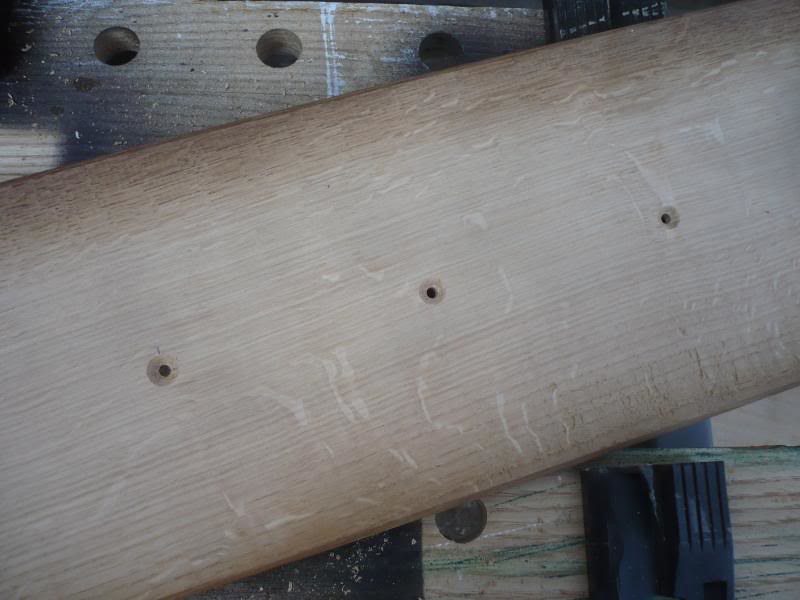
Because I have to wait for the pieces (the superset is ordered from China) I decided to start with the ships stand. My idea is to make that in oak. I have leftover floor parts from more than 10 years ago who are perfect for that. They are 6 inches wide and perfect for Bismarck. I cut the base part on 32 inch (82 cm) length.

Both pieces, the bottom is the base, the top is for the beams to be cut out:

Imagebm1 by Ronald-45, on Flickr

The beams (the first 5) 1cm wide (0,4 inch):

Imagebm2 by Ronald-45, on Flickr

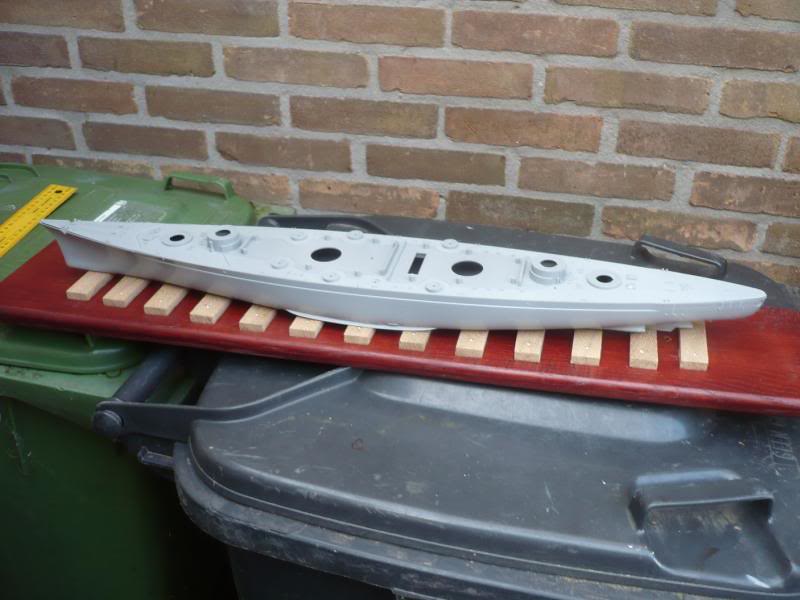
On the base (loose):

Imagebm3 by Ronald-45, on Flickr

And the result I'm aiming for:

Imagebm4 by Ronald-45, on Flickr

The Bismarck halves of the hull are taped together for this try-out. Tomorrow I will cut the rest of the beams and will sand the base to get it in even colour.

So, we are officially started! The build will be long, I estimate one year. Hopefully faster but we will see :smallsmile:

EDIT 16 december 2019; new Flickr photos becaus of invalid Photobucket links

_________________
Greetz, Ronald from the Netherlands.

My Blog: http://metusajunction.blogspot.com

My photos: https://www.flickr.com/people/52307730@N06/


Last edited by Ronald47 on Thu Jan 18, 2024 5:10 am, edited 3 times in total.

Report this post
Top
 Profile  
Reply with quote  
PostPosted: Sun May 05, 2013 5:20 pm 
Offline
User avatar

Joined: Mon May 14, 2012 12:18 pm
Posts: 2068
Location: Salt Lake City, USA
All right! Good luck and happy building! :cool_1:

_________________
-Jason Channell

Current Project: 1/200 Bismarck


Report this post
Top
 Profile  
Reply with quote  
PostPosted: Mon May 06, 2013 2:03 pm 
Offline
User avatar

Joined: Mon Oct 24, 2011 6:01 am
Posts: 254
Location: the Netherlands
Thanks Jason!

Today the weather was good to build the stand. First I cut some beams out of a piece of Oak floorboard:

Imagebm5 by Ronald-45, on Flickr

Thia is what we want:

Imagebm6 by Ronald-45, on Flickr

Roughly cut out:

Imagebm7 by Ronald-45, on Flickr

And sanded:

Imagebm8 by Ronald-45, on Flickr

At this point I decided to use two boards for stability and looks. To get these two right on each other I screw and glue 'm. Top is already sanded with grit 80 and 180:

Imagebm9 by Ronald-45, on Flickr

The glue is called here construction glue. It has to be under pressure to set at the right conditions.

Here the glue is put on:

Imagebm10 by Ronald-45, on Flickr

Here on top of each other, screwed and glued:

Imagebm11 by Ronald-45, on Flickr

Drying:

Imagebm12 by Ronald-45, on Flickr

You can see here how the glue is drying and pressed out between the two pieces, and that is good this way

Later more!

EDIT photos repaired on 16 december 2019

_________________
Greetz, Ronald from the Netherlands.

My Blog: http://metusajunction.blogspot.com

My photos: https://www.flickr.com/people/52307730@N06/


Last edited by Ronald47 on Mon Dec 16, 2019 5:23 pm, edited 1 time in total.

Report this post
Top
 Profile  
Reply with quote  
PostPosted: Wed May 08, 2013 1:25 pm 
Offline
User avatar

Joined: Mon Oct 24, 2011 6:01 am
Posts: 254
Location: the Netherlands
After sanding off the glue I went to my dad this afternoon. He has the tool to make the edges round so he did that for me:

Imagebm13 by Ronald-45, on Flickr

Ready:

Imagebm14 by Ronald-45, on Flickr

After that I went to the home depot and got me some fine mahony stain. Just before that I sanded for a last time:

Imagebm15 by Ronald-45, on Flickr

The round edge from close view:

Imagebm16 by Ronald-45, on Flickr

After the first stain, I'm happy with the colour:

Imagebm17 by Ronald-45, on Flickr

Tomorrow the second layer goes on.

EDIT photos repaired on 16 december 2019

_________________
Greetz, Ronald from the Netherlands.

My Blog: http://metusajunction.blogspot.com

My photos: https://www.flickr.com/people/52307730@N06/


Last edited by Ronald47 on Mon Dec 16, 2019 5:25 pm, edited 1 time in total.

Report this post
Top
 Profile  
Reply with quote  
PostPosted: Thu May 09, 2013 4:26 am 
Offline
User avatar

Joined: Mon Oct 24, 2011 6:01 am
Posts: 254
Location: the Netherlands
Good weather today so I sanded and got a second layer of stain on it:

EDIT 16 december 2019; this photo is no longer existing.

Tomorrow the final layer and than it has to be good of colour and shine. If not it gets a layer of glossy sealant.

_________________
Greetz, Ronald from the Netherlands.

My Blog: http://metusajunction.blogspot.com

My photos: https://www.flickr.com/people/52307730@N06/


Last edited by Ronald47 on Mon Dec 16, 2019 5:26 pm, edited 1 time in total.

Report this post
Top
 Profile  
Reply with quote  
PostPosted: Thu May 09, 2013 2:03 pm 
Offline
User avatar

Joined: Mon Oct 24, 2011 6:01 am
Posts: 254
Location: the Netherlands
Sanded tonight with wet paper and applied the 3rd layer:

Imagebm19 by Ronald-45, on Flickr

And ready:

Imagebm20 by Ronald-45, on Flickr

Hopefully good tomorrow, if not I will seal it with clear coat.

EDIT photos repaired on 16 december 2019

_________________
Greetz, Ronald from the Netherlands.

My Blog: http://metusajunction.blogspot.com

My photos: https://www.flickr.com/people/52307730@N06/


Last edited by Ronald47 on Mon Dec 16, 2019 5:27 pm, edited 1 time in total.

Report this post
Top
 Profile  
Reply with quote  
PostPosted: Fri May 10, 2013 12:45 pm 
Offline
User avatar

Joined: Wed Apr 03, 2013 7:05 pm
Posts: 235
Location: Netherlands
Nice job on the display stand Ronald.

I keep postponing that part of the build...shame on me!

A 1/350 Bismarck is on my...long term...to do list also (I skipped the 1/200 idea), I'm looking forward to see your build with the Lion Roar set.

Groetjes (greetings),

Rob :wave_1:

_________________
Image
WIP:
-1/72 Revell flower class corvette,with GLS PE and lots of Evergreen.
-1/350 Dragon Scharnhorst, Artwox wooden decks, CyberHobby PE, Master brass barrels.


Report this post
Top
 Profile  
Reply with quote  
PostPosted: Fri May 10, 2013 2:18 pm 
Offline
User avatar

Joined: Mon Oct 24, 2011 6:01 am
Posts: 254
Location: the Netherlands
Dank je (Thanks), Rob :thumbs_up_1:

_________________
Greetz, Ronald from the Netherlands.

My Blog: http://metusajunction.blogspot.com

My photos: https://www.flickr.com/people/52307730@N06/


Report this post
Top
 Profile  
Reply with quote  
PostPosted: Tue May 14, 2013 4:41 pm 
Offline
User avatar

Joined: Mon Oct 24, 2011 6:01 am
Posts: 254
Location: the Netherlands
Tomorrow I go on with the build, today I had a new idea that I want to give a try. I also have a 1:700 Trumpeter kit that I want to join with this one. The big one as the ship is deliverd, the small one in "1941 operation Rheinubung". My idea was to do it this way:

Image

What do you think about that idea?

_________________
Greetz, Ronald from the Netherlands.

My Blog: http://metusajunction.blogspot.com

My photos: https://www.flickr.com/people/52307730@N06/


Last edited by Ronald47 on Mon Dec 16, 2019 5:28 pm, edited 1 time in total.

Report this post
Top
 Profile  
Reply with quote  
PostPosted: Tue May 14, 2013 5:25 pm 
Offline
User avatar

Joined: Sun Feb 01, 2009 3:55 pm
Posts: 3125
Location: Hawaii
I like the idea of the differing scales in one presentation but how you have it laid is bothering me. As it sits right now the whole display is VERY cramped and a no no from a design perspective. If you want to do is this way you need to get a bigger base. I'd suggest simply displaying the 1/700 version front and center directly next to the 1/200 and possibly lower on its own set of scale keel blocks and have both facing the same direction. This would leave a rather large amount of empty space fore and aft of the 1/700 that would need to be filled at least with something. Keep it simple yes but such a large amount of negative space would need to be addressed.

From the photos it looks like 2 1/700 would fit nicely alongside the 1/200. I'd think that would look rather nice but only if you could find a different fit/scheme to justify another version. I don't think Bismarck really had one. Tirpitz however....:twisted: I digress though. The negative space would be great for some plaques, photos, memorabilia, etc... Doesn't the kit come with a stand alone 15"/52 turret with all of the innards visible? Would make for a great addition. Not sure about space but a larger scale version of one of her Ar-196s would make a nice addition as well. Always thought a larger scale float plane displayed alongside a smaller scale of its mother ship would make a nice display. There's some nice 1/72 and 1/48 Arados out there and plenty of aftermarket stuff to detail them out the wazoo if so desired. Think there's even some same scale cats for em too.

That's just my 2 cents man. Not trying to get you to do something you don't want to do. I'm a graphic designer and approached it from that perspective.

_________________
Drawing Board:
1/700 Whiff USS Leyte and escorts 1984
1/700 Whiff USN Modernized CAs 1984
1/700 Whiff ASW Showdown - FFs vs SSGN 1984

Slipway:
1/700 Whiff USN ASW Hunter Killer Group Dio 1984


Report this post
Top
 Profile  
Reply with quote  
PostPosted: Tue May 14, 2013 5:51 pm 
Offline
User avatar

Joined: Mon May 14, 2012 12:18 pm
Posts: 2068
Location: Salt Lake City, USA
I would do the two models on separate bases. It would look weird to put them both together like that.

My $.02 anyway. :thumbs_up_1:

_________________
-Jason Channell

Current Project: 1/200 Bismarck


Report this post
Top
 Profile  
Reply with quote  
PostPosted: Wed May 15, 2013 4:37 am 
Offline
User avatar

Joined: Mon Oct 24, 2011 6:01 am
Posts: 254
Location: the Netherlands
@Cliffy: You are so right. After a good night of sleep I think it is better to do it the way I pretended first. Your idea of presenting a waterplane next to it sounds appealing to me. My plan now is the big one in the middle, the small one next to one side on its own base, and a Arado in one of the mentioned scales next to it on the other side. In which the 1:32 OOB has my preference because of the good looks of it. However; I think the 1:72 Airfix is a better choice because of size, but also because tha one has the right set of decals with it.

@Jason: Yep, totally agree :thumbs_up_1:

Thanks guys for thinking with me :smallsmile: I'm on my way building.

_________________
Greetz, Ronald from the Netherlands.

My Blog: http://metusajunction.blogspot.com

My photos: https://www.flickr.com/people/52307730@N06/


Report this post
Top
 Profile  
Reply with quote  
PostPosted: Wed May 15, 2013 1:39 pm 
Offline
User avatar

Joined: Mon Oct 24, 2011 6:01 am
Posts: 254
Location: the Netherlands
Well, we go on with the fresh ideas. One ship on one base. I made new wider beams of 1 inch. The middle 5 are the same length, to the ends they get shorter.

The first middle five:

Imagebm30 by Ronald-45, on Flickr

This is how I work:

Imagebm31 by Ronald-45, on Flickr

All beams are spiked and glued down:

Imagebm32 by Ronald-45, on Flickr

With ship, looks good I think:

Imagebm34 by Ronald-45, on Flickr

And the first layer of colourcoat:

Imagebm35 by Ronald-45, on Flickr

Now it has to dry, tomorrow the second coat!

EDIT photos repaired on 16 december 2019

_________________
Greetz, Ronald from the Netherlands.

My Blog: http://metusajunction.blogspot.com

My photos: https://www.flickr.com/people/52307730@N06/


Last edited by Ronald47 on Mon Dec 16, 2019 5:30 pm, edited 1 time in total.

Report this post
Top
 Profile  
Reply with quote  
PostPosted: Wed May 15, 2013 3:17 pm 
Offline
User avatar

Joined: Sun Feb 01, 2009 3:55 pm
Posts: 3125
Location: Hawaii
Sounds like a plan man! Glad we could help :thumbs_up_1:

Here's some very nice and detailed builds of some 1/72, 1/48, and 1/32 Arados:
http://www.arcair.com/Gal-Archives/prop/Ar-196/01.shtm

The 1/32 build with the engine all opened up is rather nice!

Here's a nice build/review of the Airfix 1/72 kit:
http://modelingmadness.com/review/axis/luft/ewald196.htm

The Revell 1/32:
http://modelingmadness.com/review/axis/cleaver/g/tmc196.htm
http://www.aeroscale.co.uk/modules.php?op=modload&name=Reviews&file=index&req=showcontent&id=5845

Airfix 1/72: Lacking details and rather old vs the others but looks solid. Would need to address the old "toy like" movable features though. Some detailing would make it shine.
http://modelingmadness.com/review/axis/luft/michaels196preview.htm

The new Revell 1/72: Actually the older Heller kit just re-boxed and NOT a scaled down version of the 1/32 kit :-? .
http://www.britmodeller.com/forums/index.php?/topic/80431-ar-196-a3/

Heller 1/72:
http://modelingmadness.com/review/axis/luft/attard196.htm

Hope those help some. If you need help deciding and/or sourcing kits/detail parts let me know man :wave_1:

-Mike

_________________
Drawing Board:
1/700 Whiff USS Leyte and escorts 1984
1/700 Whiff USN Modernized CAs 1984
1/700 Whiff ASW Showdown - FFs vs SSGN 1984

Slipway:
1/700 Whiff USN ASW Hunter Killer Group Dio 1984


Report this post
Top
 Profile  
Reply with quote  
PostPosted: Wed May 15, 2013 4:16 pm 
Offline
User avatar

Joined: Mon Oct 24, 2011 6:01 am
Posts: 254
Location: the Netherlands
Thanks Mike! A few I had already found and also I found out that the Revell is really the older Heller kit. A little strange because Heller and Airfix had there time together before Airfix went down a few years ago.

I will look into your links :thumbs_up_1:

_________________
Greetz, Ronald from the Netherlands.

My Blog: http://metusajunction.blogspot.com

My photos: https://www.flickr.com/people/52307730@N06/


Report this post
Top
 Profile  
Reply with quote  
PostPosted: Wed May 15, 2013 5:15 pm 
Offline
User avatar

Joined: Sun Feb 01, 2009 3:55 pm
Posts: 3125
Location: Hawaii
No problem man! Forgot the Italeri 1/48 kit though:

http://www.cybermodeler.com/hobby/kits/it/kit_it_2675.shtml

Seems to be the best one of the bunch save for the 1/32 kit. Has some nice French Navy and what looks like IJN markings as well.

_________________
Drawing Board:
1/700 Whiff USS Leyte and escorts 1984
1/700 Whiff USN Modernized CAs 1984
1/700 Whiff ASW Showdown - FFs vs SSGN 1984

Slipway:
1/700 Whiff USN ASW Hunter Killer Group Dio 1984


Report this post
Top
 Profile  
Reply with quote  
PostPosted: Thu May 16, 2013 3:45 pm 
Offline
User avatar

Joined: Mon Oct 24, 2011 6:01 am
Posts: 254
Location: the Netherlands
Oke! Did some little work on the first deck, chimney and fire bunker in front:

Imagebm36 by Ronald-45, on Flickr

All stands loose. Tomorrow more!

EDIT photos repaired on 16 december 2019

_________________
Greetz, Ronald from the Netherlands.

My Blog: http://metusajunction.blogspot.com

My photos: https://www.flickr.com/people/52307730@N06/


Last edited by Ronald47 on Mon Dec 16, 2019 5:31 pm, edited 1 time in total.

Report this post
Top
 Profile  
Reply with quote  
PostPosted: Tue May 21, 2013 10:59 am 
Offline
User avatar

Joined: Mon Oct 24, 2011 6:01 am
Posts: 254
Location: the Netherlands
Didn't do much this week untill this afternoon. Spend a good hour with Bismarck. Here the aft part, the hangar door part sits loose as for the rest. I build the batch-wise because I still don't know what has to be adjusted for the LR set::

Imagebm37 by Ronald-45, on Flickr

Front; it still needs some work. The Revell kit fits nicely but not superb:

Imagebm38 by Ronald-45, on Flickr

And a little error, I will fix that as some other "flaws":

Imagebm39 by Ronald-45, on Flickr

Hopefully in a few days more progress!

EDIT photos repaired on 16 december 2019

_________________
Greetz, Ronald from the Netherlands.

My Blog: http://metusajunction.blogspot.com

My photos: https://www.flickr.com/people/52307730@N06/


Last edited by Ronald47 on Mon Dec 16, 2019 5:33 pm, edited 1 time in total.

Report this post
Top
 Profile  
Reply with quote  
PostPosted: Tue May 21, 2013 12:51 pm 
Offline
User avatar

Joined: Mon May 14, 2012 12:18 pm
Posts: 2068
Location: Salt Lake City, USA
It's starting to look like a Bismarck! Keep up the good work! :cool_1:

_________________
-Jason Channell

Current Project: 1/200 Bismarck


Report this post
Top
 Profile  
Reply with quote  
PostPosted: Sat May 25, 2013 11:50 am 
Offline
User avatar

Joined: Mon Oct 24, 2011 6:01 am
Posts: 254
Location: the Netherlands
Thanks Jason! Today my package arrived from China:

EDIT 16 december 2019, phots no longer available.

Hopefully my WEM order (wooden deck, Arado's) will go out soon so that the build can really start!

_________________
Greetz, Ronald from the Netherlands.

My Blog: http://metusajunction.blogspot.com

My photos: https://www.flickr.com/people/52307730@N06/


Last edited by Ronald47 on Mon Dec 16, 2019 5:33 pm, edited 1 time in total.

Report this post
Top
 Profile  
Reply with quote  
Display posts from previous:  Sort by  
Post new topic Reply to topic  [ 31 posts ]  Go to page 1, 2  Next

All times are UTC - 6 hours [ DST ]


Who is online

Users browsing this forum: No registered users and 88 guests


You can post new topics in this forum
You can reply to topics in this forum
You cannot edit your posts in this forum
You cannot delete your posts in this forum
You cannot post attachments in this forum

Jump to:  
Powered by phpBB® Forum Software © phpBB Group