The Ship Model Forum

The Ship Modelers Source
It is currently Fri Apr 19, 2024 2:29 pm

All times are UTC - 6 hours [ DST ]


Post new topic Reply to topic  [ 30 posts ]  Go to page Previous  1, 2
Author Message
PostPosted: Mon Mar 08, 2021 8:28 am 
Offline

Joined: Sat Jul 23, 2016 8:26 am
Posts: 48
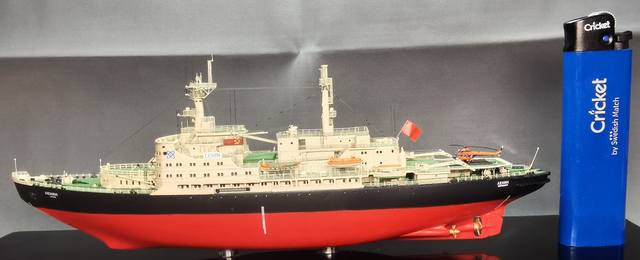
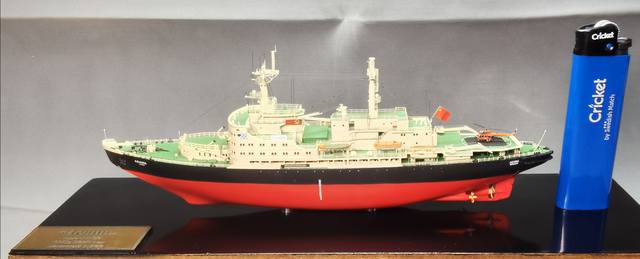
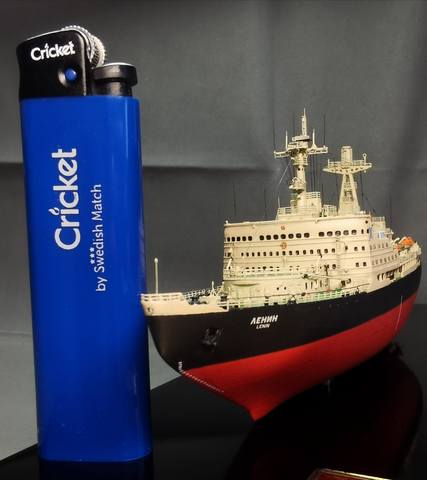
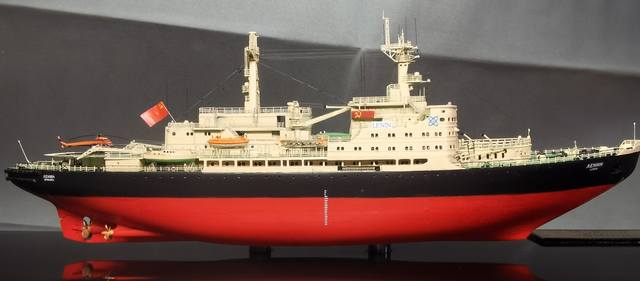
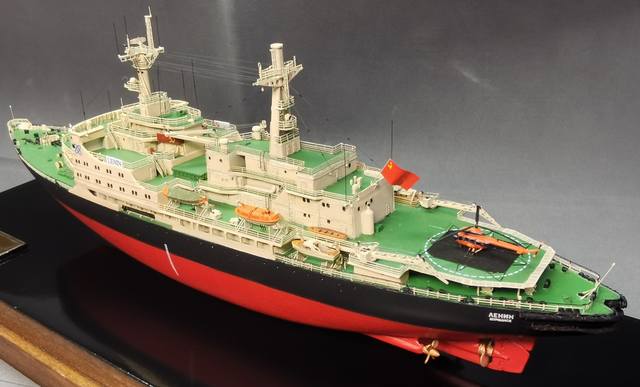
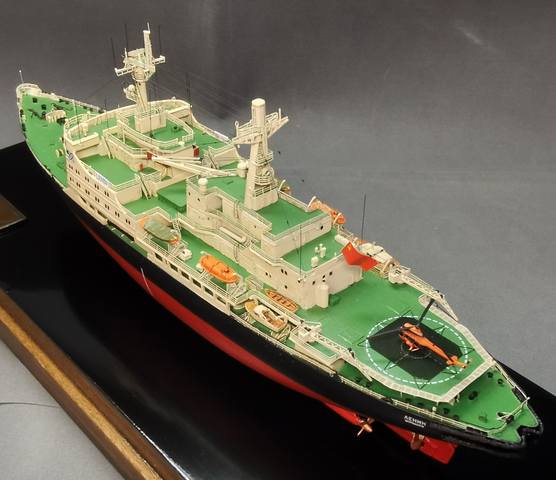
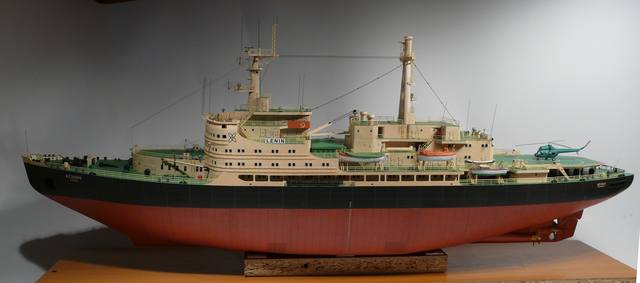
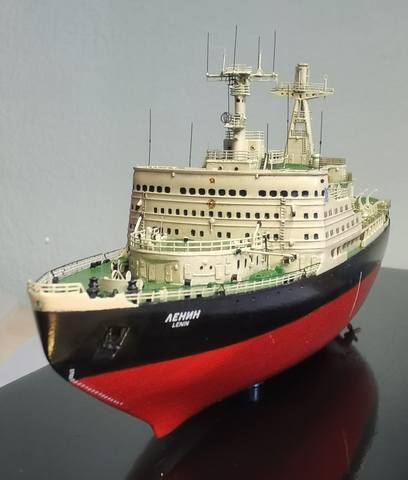
Hello, colleagues. Just today I finished the model of the first nuclear icebreaker and I hasten to share the results. I will focus on the model itself, the modifications and my own jambs made during the construction.
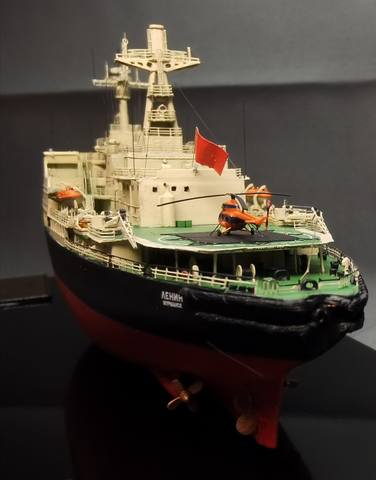
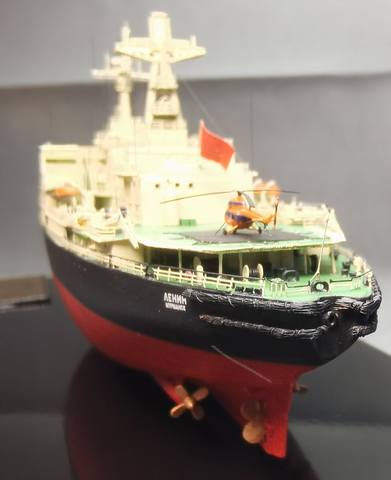
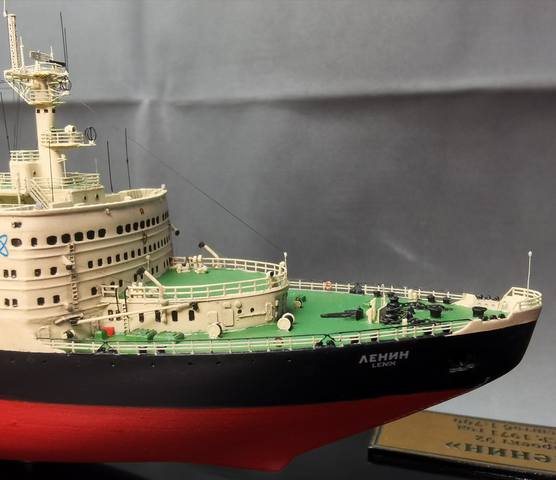
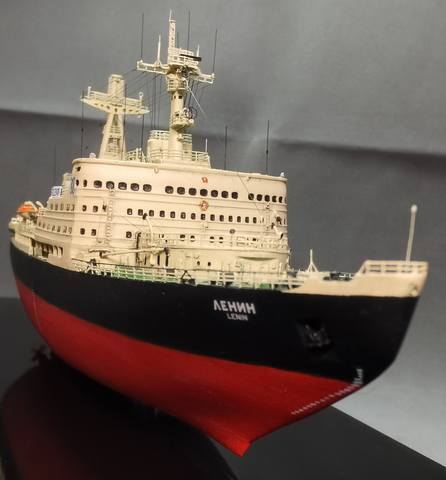
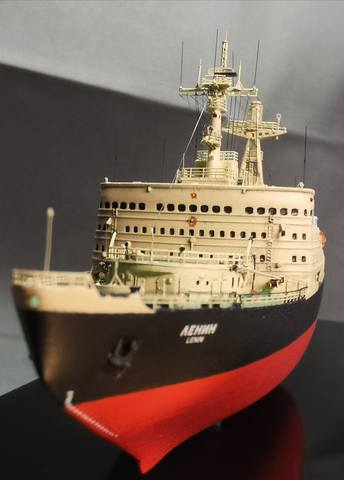
By itself, the model is very pleased with the quality of the details, the quality of the casting and the absence of defects. The model is given by the manufacturer for the period after the modernization, when the icebreaker "picked up", received another tier of the superstructure on the stern, but has not yet lost its boats. Therefore, when building, it should be borne in mind that the division into halves of the hull there does not reflect the location of its waterline. This truth came to me late and I had to make up the underwater part.
The model is assembled very easily and pleasantly, but there are also some points that I wanted to redo and improve during the construction.

Improvements:
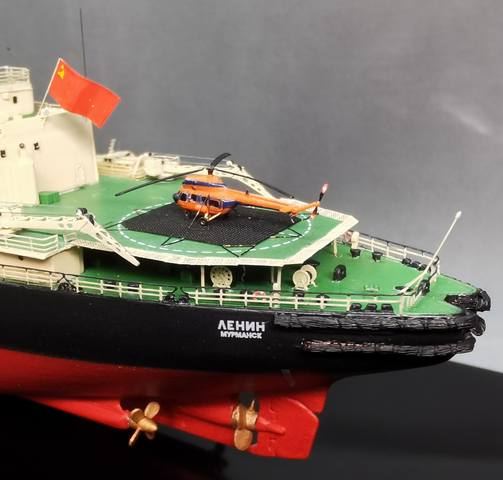
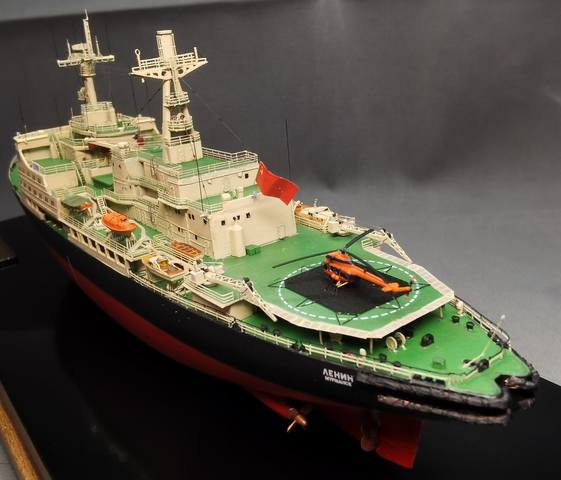
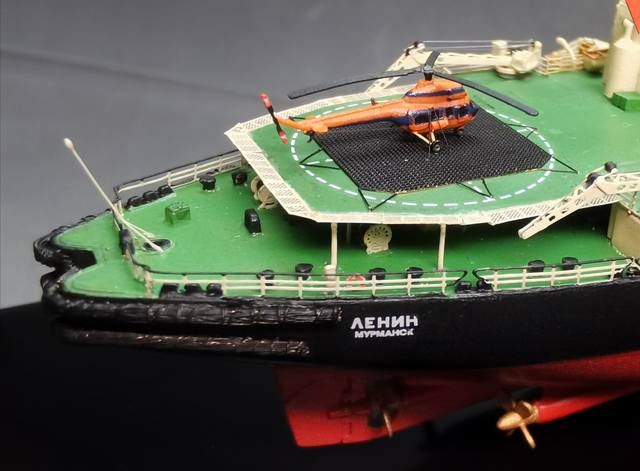
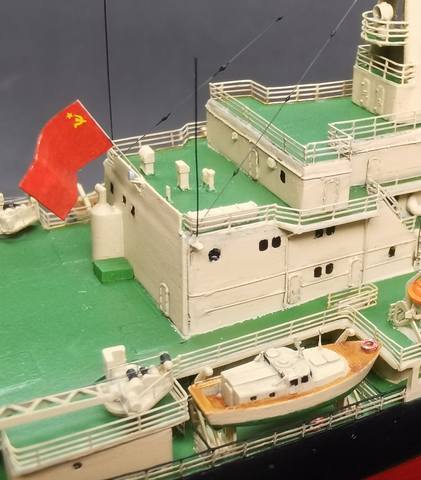
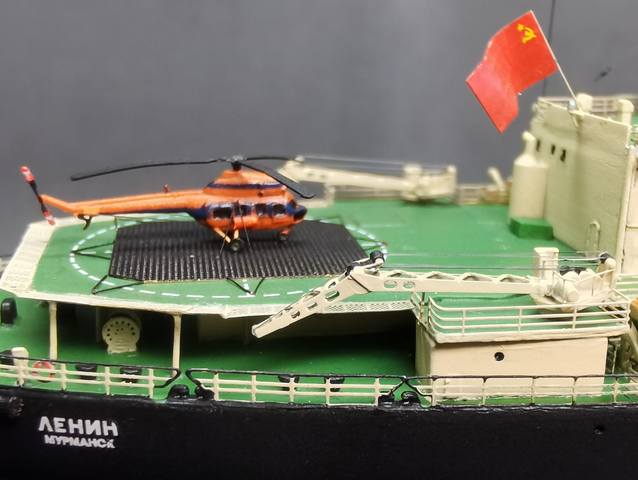
- probably the most noticeable thing in the set is the complete absence of decals. The first thing that was immediately ordered was a set of decals with the name, home port, stamps of the recess (with Arabic and Roman meanings), the markings of the helipad, the coats of arms on the superstructure, the peaceful atom (which turned out to be the wrong color), the flag (which turned out to be very over-sized, but for this I will ask not to kick hard) and the order on the nose superstructure. Later I realized that it would be possible to order an Aeroflot decal and a flight number for a helicopter, but it was too late to rush around....
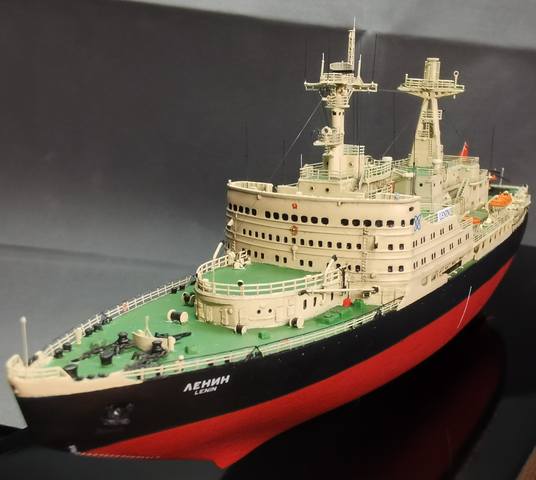
- the flagstaffs, the small bow crane booms, and the bow and stern looms were replaced.
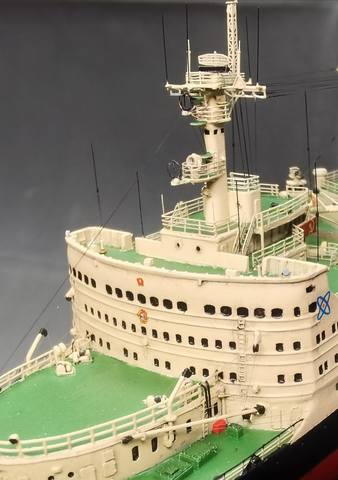
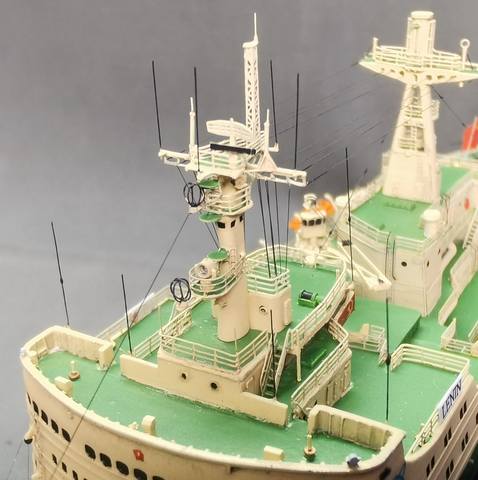
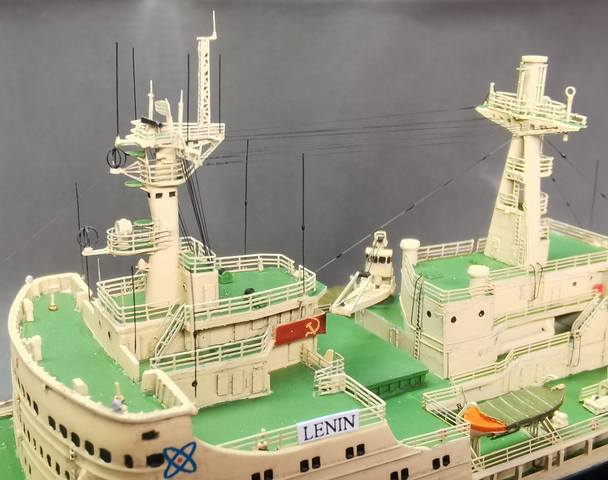
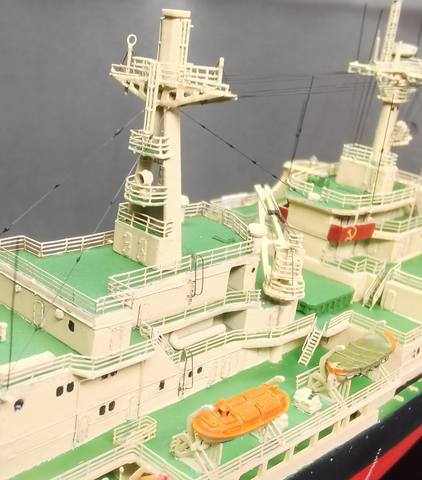
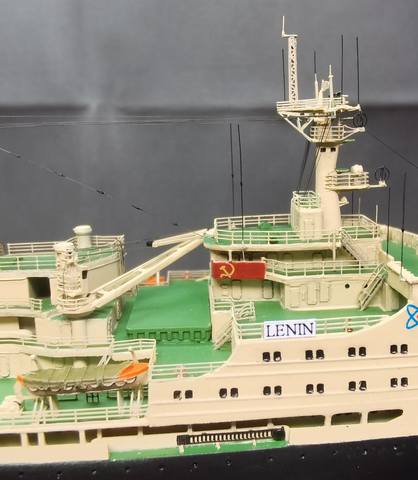
-from the photos, I modified the masts, as they seem too bare from the set.
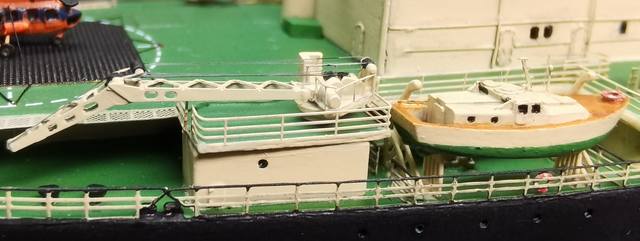
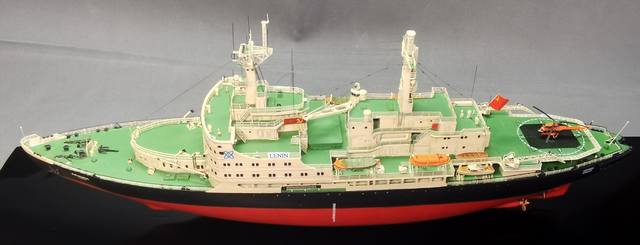
- I re-made the deck of the second tier,I had a little bit of it and was not very satisfied with its thickness. As a result, we had to make decks for the side stern cranes.
- based on the photos, the details of the central superstructure were added.
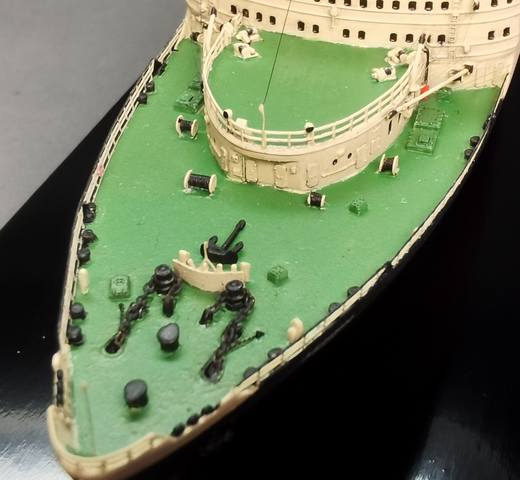
- all cranes have been improved, namely the missing blocks and rigging of cargo booms have been added
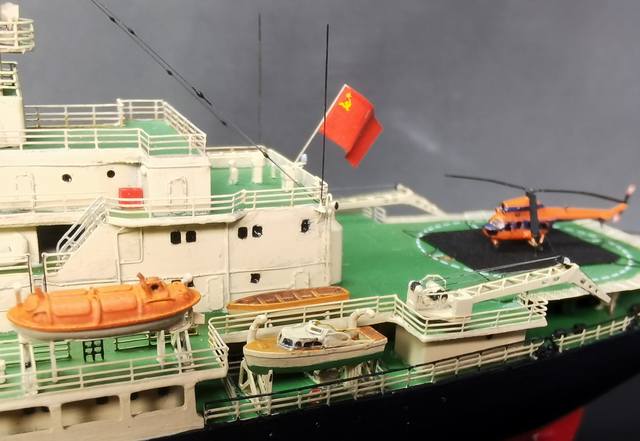
- deflectors and handrails were added to the lifeboats, the motorboats were covered with tarpaulins and an imitation of their strapping was made, the boats were almost not modified.
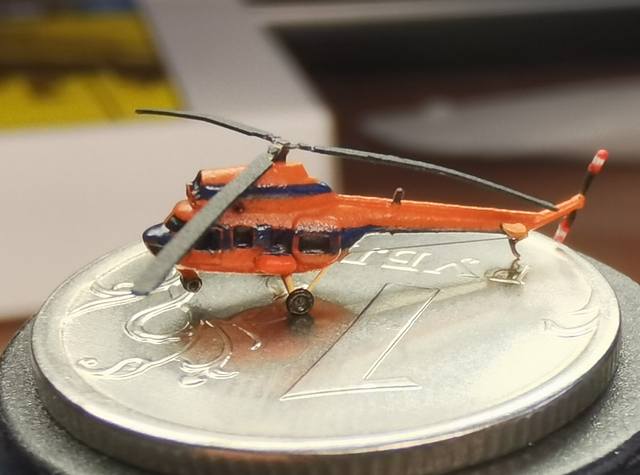
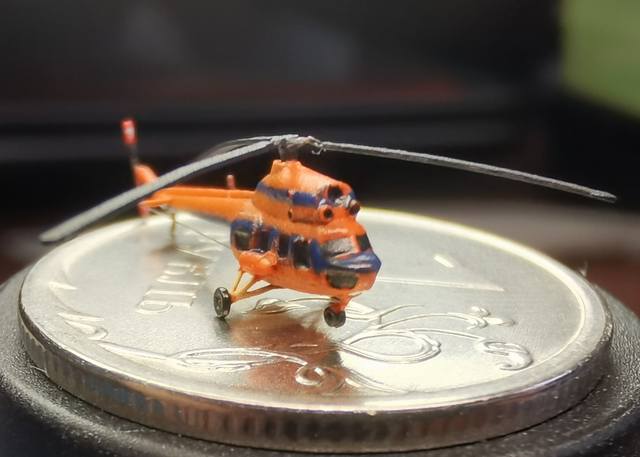
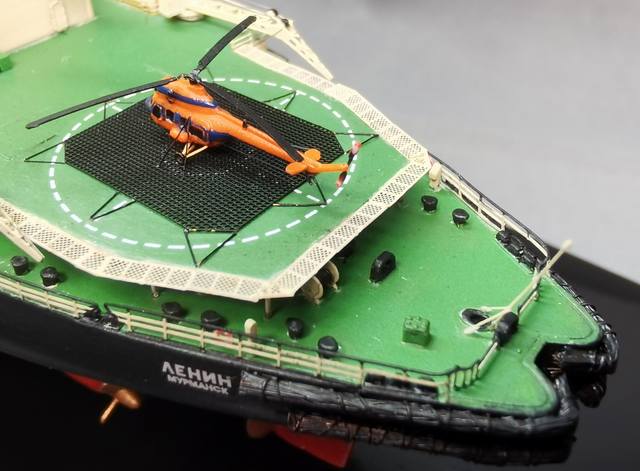
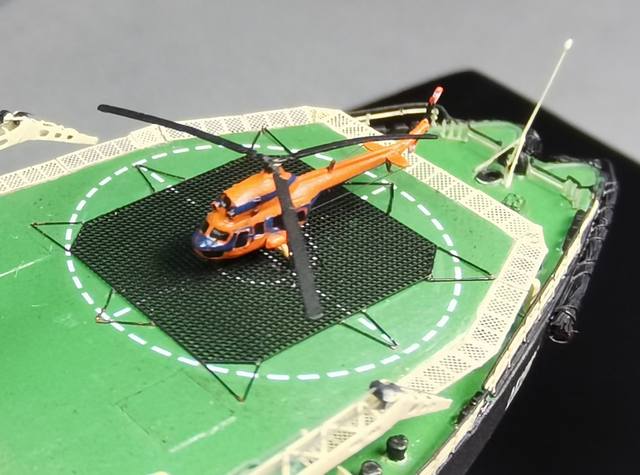
- the helicopter itself has been slightly modified. I added tanks to it, replaced the nose landing gear, added stops for the aft racks, stretched the antennas on the sides, drilled a place for the headlight on the nose and redesigned the tail stop.
- added from photos of pin antennas made of thin wire.
- added imitation fenders made of twisted braid to the stern.
-added a safety net made from etching to project 1164 to the helipad.


Disadvantages:
- traditionally already, but I still have a limp color on both legs...sometimes there is a noticeable carelessness.
- the symbol of the peaceful atom is the wrong color, as well as the flag is over-sized.
-I could not fully show the rigging of the ship.
-at some viewing angles, the line of the old boundary between the underwater and surface parts of the ship is visible.
"the helicopter's paint job wasn't very good. And if it is not obvious in person because of the size and distance, then it is immediately noticeable on the macro. It would also be possible to saturate it with details in the form of decals in the tail number, the inscriptions "AEROFLOT" and "MI-2".
-some photos show that some of the portholes are uneven-this is an attempt to make new ones instead of those that managed to be demolished when grinding and fitting the parts of the superstructure.

I seem to have listed all my shortcomings, but if you find more, then poke your nose.

Image Image Image Image Image Image Image Image Image Image Image Image


Report this post
Top
 Profile  
Reply with quote  
PostPosted: Mon Mar 08, 2021 9:56 am 
Offline

Joined: Tue Jun 14, 2005 6:23 am
Posts: 3698
Location: Bonn
Really great work! :thumbs_up_1:

I have started my own model and have really problems to make the rear part of the superstructure, e.g. the rear wall facing to the helicopter deck. Here the parts do not fit well. I see why you modified that and why you had replaced the deck.

It appears that there is no hangar for the helicopter, right?

You mentioned that there is something wrong with the division of the lower and upper hull relative to the waterline. Can you describe the problem and your solution in more detail?

_________________
Image


Report this post
Top
 Profile  
Reply with quote  
PostPosted: Mon Mar 08, 2021 2:56 pm 
Offline

Joined: Sat Sep 17, 2005 9:19 am
Posts: 1483
Nice and clean build and a very nice subject.


Report this post
Top
 Profile  
Reply with quote  
PostPosted: Wed Mar 10, 2021 8:55 am 
Offline

Joined: Sat Jul 23, 2016 8:26 am
Posts: 48
I am very glad that I liked the model, thank you very much! Yes, there was no hangar, the helicopter was always on the site. About the waterline. If you look closely at the photos of the prototype, it is noticeable that its waterline is much closer than the division into halves of the hull. You can just sand them well and then paint the waterline where it was.

Image Image Image Image


Report this post
Top
 Profile  
Reply with quote  
PostPosted: Wed Mar 10, 2021 11:22 am 
Offline

Joined: Tue Jun 14, 2005 6:23 am
Posts: 3698
Location: Bonn
Thank you very much for the answers! Very helpful! :thumbs_up_1:

_________________
Image


Report this post
Top
 Profile  
Reply with quote  
PostPosted: Wed Mar 10, 2021 1:27 pm 
Thanks for sharing your photos. You did a great job on your model.


Report this post
Top
  
Reply with quote  
PostPosted: Wed Mar 10, 2021 3:02 pm 
Offline

Joined: Sun Jun 30, 2019 1:59 pm
Posts: 47
Fantastic work! Really well done, congratulations!


Report this post
Top
 Profile  
Reply with quote  
PostPosted: Mon Jun 06, 2022 6:47 pm 
I just got the kit and am very curious about where you got the decals. Thank you!


Report this post
Top
  
Reply with quote  
PostPosted: Wed Jun 08, 2022 10:41 am 
Offline

Joined: Thu Jan 26, 2017 8:30 am
Posts: 202
Very nice and impressive model


Report this post
Top
 Profile  
Reply with quote  
PostPosted: Sun Aug 28, 2022 10:56 am 
Offline

Joined: Sat Jul 23, 2016 8:26 am
Posts: 48
Nahshon wrote:
I just got the kit and am very curious about where you got the decals. Thank you!


Hello! Thank you so much for appreciating the work so highly. Yes, unfortunately, decals are not included in the set. I had to order from a third-party manufacturer, presenting photos of the elements of interest.


Report this post
Top
 Profile  
Reply with quote  
Display posts from previous:  Sort by  
Post new topic Reply to topic  [ 30 posts ]  Go to page Previous  1, 2

All times are UTC - 6 hours [ DST ]


Who is online

Users browsing this forum: No registered users and 91 guests


You can post new topics in this forum
You can reply to topics in this forum
You cannot edit your posts in this forum
You cannot delete your posts in this forum
You cannot post attachments in this forum

Jump to:  
Powered by phpBB® Forum Software © phpBB Group