The Ship Model Forum

The Ship Modelers Source
It is currently Wed Apr 24, 2024 7:26 pm

All times are UTC - 6 hours [ DST ]


Post new topic Reply to topic  [ 56 posts ]  Go to page 1, 2, 3  Next
Author Message
PostPosted: Thu Dec 24, 2020 5:52 am 
Offline

Joined: Sun Jan 15, 2012 6:09 am
Posts: 95
My current project is this Hasegawa 1/700 IJN Aoba in her final state at the end of WWII.

The inspiration came from Marijn van Gils' excellent IJN Amagi which blew me away (his USS Lexington already dropped my jaw before that.). I had a chance of seeing both pieces and met the man at SMC 2019. I decided I have to do this project and hopefully I can put it next to his Amagi someday. The pandemic obviously changed everything that was supposed to happen in 2020. I'm trying to complete my Aoba for the better 2021, fingers crossed.

As mentioned, the base kit is Hasegawa. Rainbow models issued a very nice detailed set for the kit and another set of brass deck plate. I decided not to go with not to buy the metal deck, staying with the kit's plastic deck. More modifications were needed to make the wrecked Aoba.

Image

Image

Image

Image

Image

Image

Image

Nanond


Report this post
Top
 Profile  
Reply with quote  
PostPosted: Thu Dec 24, 2020 8:11 am 
Offline

Joined: Tue Nov 08, 2016 6:08 pm
Posts: 240
Location: Yorktown, Indiana, USA
Beautiful work!

_________________
https://inchhighguy.wordpress.com/


Report this post
Top
 Profile  
Reply with quote  
PostPosted: Thu Dec 24, 2020 8:23 am 
Offline

Joined: Tue Jan 11, 2005 10:56 am
Posts: 8577
Location: New York City
Agreed!


Report this post
Top
 Profile  
Reply with quote  
PostPosted: Thu Dec 24, 2020 9:29 am 
Offline

Joined: Sat Jul 30, 2016 5:33 pm
Posts: 1772
Location: Stockholm, Sweden
Love it. Having built a piece of Haruna from Kure, I was also inspired by Marijn's work. Really like that take you have on the cruiser, should be awesome when ready!

Quick question - what are these things (green pointing to?). Many Japanese ships have it...


Attachments:
KJ48hhx (1) (1).jpg
KJ48hhx (1) (1).jpg [ 62.35 KiB | Viewed 3115 times ]

_________________
- @Shipific on IG
my gallery


Last edited by pascalemod on Sat Dec 26, 2020 9:57 am, edited 1 time in total.
Report this post
Top
 Profile  
Reply with quote  
PostPosted: Thu Dec 24, 2020 3:17 pm 
Offline
User avatar

Joined: Tue Sep 25, 2012 8:11 am
Posts: 647
Location: Elyria, Ohio USA
Outstanding work so far. Looking forward to following this :thumbs_up_1:

_________________
Just finished:
1/350 USS Santee 1944

Current projects:
1/700 USS Catamount 1960
1/350 USS Columbia 1945
1/350 USS San Francisco 1944


Report this post
Top
 Profile  
Reply with quote  
PostPosted: Sat Dec 26, 2020 2:25 pm 
Offline

Joined: Sun Jan 15, 2012 6:09 am
Posts: 95
InchHigh wrote:
Beautiful work!


Dan K wrote:
Agreed!

Thank you!

pascalemod wrote:
Love it. Having built a piece of Haruna from Kure, I was also inspired by Marijn's work. Really like that take you have on the cruiser, should be awesome when ready!

Quick question - what are these things (green pointing to?). Many Japanese ships have it...


I've been wondering too. Some kinds of stiffener for torpedo bulge? Maybe someone more knowledgeable can help.

medicmike wrote:
Outstanding work so far. Looking forward to following this :thumbs_up_1:


Thank you!


Report this post
Top
 Profile  
Reply with quote  
PostPosted: Sat Dec 26, 2020 2:33 pm 
Offline

Joined: Sun Jan 15, 2012 6:09 am
Posts: 95
I got more work done to the aft superstructure. Rainbow models PE parts are quite good here.
The only thing I had to rebuild is the main tripod mast. The PE part for this is made from a rather soft material which got damaged very early on. I don't know why they didn't just do it in brass. Of course it is very thin and delicate. However, the strength is also sacrificed in the process.

Anyway, some brass rods are much better at representing the real mast.

Image

Image

Image

Image


Report this post
Top
 Profile  
Reply with quote  
PostPosted: Sat Dec 26, 2020 4:40 pm 
Offline
User avatar

Joined: Wed Nov 27, 2013 7:06 am
Posts: 3154
Location: Vancouver, Canada
watching this thread with interest!!! :heh:

_________________
"Haijun" means "navy" in Mandarin Chinese.

"You have enemies? Good. It means you stood up for something in your life."- Winston Churchill


Report this post
Top
 Profile  
Reply with quote  
PostPosted: Sun Dec 27, 2020 3:03 am 
Offline

Joined: Tue Jun 14, 2005 6:23 am
Posts: 3699
Location: Bonn
Very interesting!

What do you think about the colours Aoba was painted with?

There appear to be remains of a two-colour camouflage patterns on the portside of the bridge turret - but otherwise the colours appear uniform (but heavily weathered on most photos).

_________________
Image


Report this post
Top
 Profile  
Reply with quote  
PostPosted: Sun Dec 27, 2020 6:45 am 
Offline

Joined: Sun Jan 15, 2012 6:09 am
Posts: 95
maxim wrote:
Very interesting!

What do you think about the colours Aoba was painted with?

There appear to be remains of a two-colour camouflage patterns on the portside of the bridge turret - but otherwise the colours appear uniform (but heavily weathered on most photos).


This bit about her color is a difficult one but also very interesting to me.
From the film taken in 1946, there is glimpse of colors for reference, although not the best. It's still hard to tell if she had green color on the hull or they were just patches of different grey colors. I'm leaning towards then being faded grey with some touch-up. What do you think? There are tons of dark patches, almost like touch-up for splinter damage holes. What could they be? Then there is a thick band along the lower hull, above the dark oil stain along the water line. From black and white photos, this band appears almost fleshly painted on top. It also had some wavy patterns on the starboard bow, interesting. The color in the film appears to be of a reddish brown or even faded red.

I'll be happy to hear more opinions.

Image

Image

Image


Report this post
Top
 Profile  
Reply with quote  
PostPosted: Sun Dec 27, 2020 8:04 am 
Offline

Joined: Tue Jun 14, 2005 6:23 am
Posts: 3699
Location: Bonn
Here is some pattern visible on the bridge - see especially the rail of the upper platform:

Image
https://www.history.navy.mil/content/history/nhhc/our-collections/photography/numerical-list-of-images/nara-series/80-g/80-G-350000/80-G-351755.html

I think it is very difficult, because on these photos the colours are so heavily weathered. Some of the colours could be caused by the tide (e.g. the "redish colour" in parallel to the water), but e.g. the wavy pattern on the starboard bow appears to be part of a camouflage pattern.

_________________
Image


Report this post
Top
 Profile  
Reply with quote  
PostPosted: Sun Dec 27, 2020 10:19 am 
Offline

Joined: Sun Jan 15, 2012 6:09 am
Posts: 95
Yes, the superstructure camouflage is quite clear. Apart from the bridge, the funnels received some very small parallel lines of light color. That will be very difficult to do in this scale, although Sasahara Dai achieved nearly a perfect rendition on his Aoba. I will have a hard time replicating his result.

Here is my interpretation of the hull color.

1. The base color of the hull was light, faded color. It was either the standard IJN grey, heavily weathered and faded, or it could as well be over painted with some camouflage green color.
2. There were a large number of dark color patches. Could it be paint touch-up? Fresh IJN grey? Or it was the light color flaking off, revealing darker color underneat? I'm more leaning towards it being the former.
3. On top of 1 and 2, there was a large band of paint covering about lower half of the hull. The upper edge of the band is noticeably overlapping some patches(2). The band appears to be in some kind of reddish brown.
4. The dark parallel layers at the waterline are residual of oil slick deposited by the tide.


Report this post
Top
 Profile  
Reply with quote  
PostPosted: Sun Dec 27, 2020 8:32 pm 
Offline

Joined: Tue Jan 11, 2005 10:56 am
Posts: 8577
Location: New York City
Quote:
what are these things (green pointing to?). Many Japanese ships have it...


I believe those are scupper drains. Early ships seem tohave many more of them.

Quote:
although Sasahara Dai achieved nearly a perfect rendition on his Aoba.


Completely agree. Navy Yard vol. #40.


Most photos of Aoba's hull postwar were taken some time after the end of hostilities. She is very heavily weathered; I think most patches are just where the paint has peeled off, though it could be camouflage paint that has peeled off first.

There are some color films around somewhere that may be helpful.


Report this post
Top
 Profile  
Reply with quote  
PostPosted: Mon Dec 28, 2020 12:22 pm 
Offline

Joined: Tue Feb 06, 2007 10:24 am
Posts: 2498
Location: Belgium
Hello Nanond,

That's a fantastic project! And the executions looks first class so far! I will be following with great interest! :thumbs_up_1: :thumbs_up_1: :thumbs_up_1:
I'm very happy and humbled that my model could give you inspiration for this. :woo_hoo:

You have some very interesting painting challenges there. That should make for a fun project! ;)

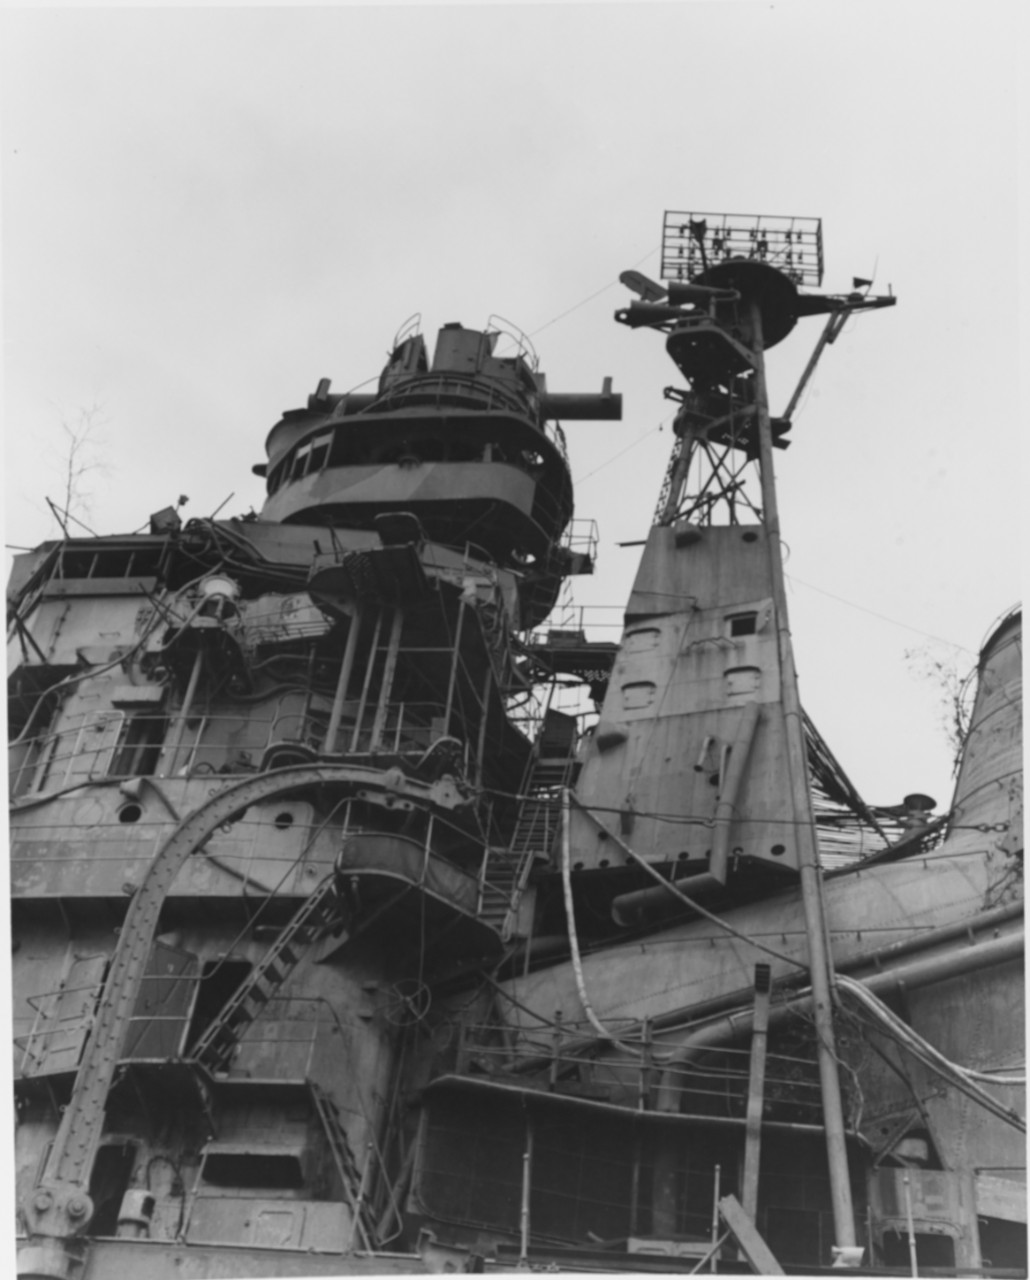
In the close-ups, the dark patches look too regular and square-sided to me to be peeling paint. On the other hand, close-ups of the bomb damage shows dark spots as well that look about the same value... So I don't know...

The red-brown band is puzzling, I haven't seen anything like it. If it is dirt, it should have stuck to the ship before it sunk, as it seems to be more parallel to the ship in it floating state. But when it was floating, tides could never have caused such a broad band as the ship would move up and down with the water level... The wavy patterns don't look natural to me too; certainly that doesn't fit with the very strait oil slick band. Also, in the B&W photo's the redbrown band looks very smooth and regular. Maybe it is painted? Maybe with some of the antifouling paint intended for lower hulls? On Amagi this looked quite faded and a similar reddish brown; the strip that was above the waterline before she sank was even very sunbleached, almost looking a salmon pink.

Anyway, if you can't figure out what something is exactly, it is still possible to paint it as you see it. Just copy as good as possible from the photo's...
I did the same with some elements of Amagi, especially on the flight deck.
It is a pity the colour film is not sharper! It would help so much if you could see more detail on that...

Also very interesting to see remnants of the camouflage with real vegetation and bamboe structures and mats. Those should be fun to reproduce as well!

Nanond wrote:
hopefully I can put it next to his Amagi someday.

I would love that very much! I hope we can meet again somewhere in 2021. :thumbs_up_1:


Report this post
Top
 Profile  
Reply with quote  
PostPosted: Wed Dec 30, 2020 1:37 pm 
Offline

Joined: Sun Jan 15, 2012 6:09 am
Posts: 95
Thank you all for you comments.

While I was figuring out how to paint her, I found a report with details of her damage and I decided to rework the hole on the bow and add another large wound on her port side. My first attempt with aluminium foil, although very thin, made it difficult to control the shape of damaged steel plates. This time I switched to thinned down 0.13mm Evergreen plastic sheet which offered better shape control at a cost of being thicker in appearance. I also realised that a large section of the stern was visible during the low tide. Fortunately, I saved the cut-off stern piece. A large section of deck surface was also blown over, hanging to the port side.

Image

Image

Image

Image

Image

Image


Report this post
Top
 Profile  
Reply with quote  
PostPosted: Wed Dec 30, 2020 3:00 pm 
Offline
User avatar

Joined: Mon Feb 21, 2011 6:38 am
Posts: 708
Location: Czech Republic
Hello Nanond,

looking good! I really like the way you modelled the pierced bow!

Hopefully it´s not too late for you to depict also the forecastle deck plates buckled from the blast, see 80-G-351758 at this link. Also 80-G-351753 is very useful.

Have you also seen the photos I post below? I downloaded them some time ago from FB and I have not been able to find them there again later. They may be useful when doing details of the main bridge.

Fingers crossed!


Attachments:
19451009 Aoba sunk near Kure Navy Yard bow2 from LIFE 3 - FB WW2 Radio.jpg
19451009 Aoba sunk near Kure Navy Yard bow2 from LIFE 3 - FB WW2 Radio.jpg [ 137.91 KiB | Viewed 2846 times ]
19451009 Aoba sunk near Kure Navy Yard bow3 from FB Radio.WW2.jpg
19451009 Aoba sunk near Kure Navy Yard bow3 from FB Radio.WW2.jpg [ 111.25 KiB | Viewed 2846 times ]
19451009 Aoba sunk near Kure Navy Yard bow3 from FB Radio.WW2.jpg
19451009 Aoba sunk near Kure Navy Yard bow3 from FB Radio.WW2.jpg [ 111.25 KiB | Viewed 2846 times ]
19451009 Aoba sunk near Kure Navy Yard bow4 from FB Radio.WW2.jpg
19451009 Aoba sunk near Kure Navy Yard bow4 from FB Radio.WW2.jpg [ 168.99 KiB | Viewed 2846 times ]

_________________
Battle of Savo Island Collection (all 1/700)
Recently completed: USS Wilson DD-408
At works: USS Astoria CA-34 | USS Patterson DD-392 & USS Bagley DD-386
Prep stage: USS Vincennes CA-44 | HMAS Australia | Yubari | Kako
Report this post
Top
 Profile  
Reply with quote  
PostPosted: Sun Jan 03, 2021 10:19 am 
Offline
User avatar

Joined: Sat Mar 26, 2016 2:58 am
Posts: 225
Location: Belgium
What a great and interesting projects, and I completely understand where the inspiration is coming from indeed. I really like how you are detailing this one, looking forward how this further unfolds...


Report this post
Top
 Profile  
Reply with quote  
PostPosted: Sun May 23, 2021 7:46 am 
Offline

Joined: Sun Jan 15, 2012 6:09 am
Posts: 95
GewoonWouter wrote:
What a great and interesting projects, and I completely understand where the inspiration is coming from indeed. I really like how you are detailing this one, looking forward how this further unfolds...


Thank you! After a few months away, the progress update is resumed now.

Nanond


Report this post
Top
 Profile  
Reply with quote  
PostPosted: Sun May 23, 2021 7:53 am 
Offline

Joined: Sun Jan 15, 2012 6:09 am
Posts: 95
I'm back at Aoba. I actually painted the main color back in January but didn't feel like doing much after that.

Last night I found new inspiration to continue with painting and got the deck pretty much done. I even applied camouflage on the upper works. The stripes around the funnels are extremely small and tight that my skill can't really keep up with the demand. I'll have to be satisfied with the best I can do.

The next fun will be the hull. Painting will be so much fun.

Nanond

Image

Image

Image

Image

Image


Report this post
Top
 Profile  
Reply with quote  
PostPosted: Sun May 23, 2021 10:51 am 
Offline
User avatar

Joined: Mon Jan 10, 2005 5:30 pm
Posts: 5386
Location: Nr Southampton England
I do like a sinker.... :thumbs_up_1: :thumbs_up_1: :thumbs_up_1:

JIM B :wave_1:

_________________
....I buy them at three times the speed I build 'em.... will I live long enough to empty my stash...?
http://www.modelshipgallery.com/gallery ... index.html

IPMS UK SIG (special interest group) www.finewaterline.com


Report this post
Top
 Profile  
Reply with quote  
Display posts from previous:  Sort by  
Post new topic Reply to topic  [ 56 posts ]  Go to page 1, 2, 3  Next

All times are UTC - 6 hours [ DST ]


Who is online

Users browsing this forum: cruiz and 75 guests


You can post new topics in this forum
You can reply to topics in this forum
You cannot edit your posts in this forum
You cannot delete your posts in this forum
You cannot post attachments in this forum

Jump to:  
Powered by phpBB® Forum Software © phpBB Group