The Ship Model Forum

The Ship Modelers Source
It is currently Sun Apr 28, 2024 5:46 am

All times are UTC - 6 hours [ DST ]


Post new topic Reply to topic  [ 89 posts ]  Go to page Previous  1, 2, 3, 4, 5
Author Message
PostPosted: Tue Feb 21, 2023 5:55 am 
Offline
User avatar

Joined: Mon Mar 12, 2012 11:13 am
Posts: 904
Location: Ludwigsburg/Germany
And also contemporary pictures of repairs in the 1:1 originals look quaite the same :-)

Short interlude, "What if."

I wonder what the Constitution would look like with a 12 cylinder sports engine?

Image

A contemporaneous anchor nozzle from HMS Royal George at Thorsminde actually still survives. A lead pipe with the ends flanged around.

Image

So new hawse inlays printed, with 3 mm inside, 4 outside and the curves at the flang.

Image

Hawse holes drilled out to the nea diameter, inlets pushed in ...

Image

... and inside still another fake flange put on.

Image

Now the whole area is also neatly wallpapered in one piece, the closed port is no longer visible, and the intersection of the plastic strips is in the middle of the port and will be covered by the gun :-)

XXXDAn

_________________
To Victory and beyond ...
viewtopic.php?f=59&t=99050&start=60

See also our german forum for the age of Sail and History:
http://www.segelschiffsmodellbau.com


Report this post
Top
 Profile  
Reply with quote  
PostPosted: Mon Feb 27, 2023 5:32 am 
Offline
User avatar

Joined: Mon Mar 12, 2012 11:13 am
Posts: 904
Location: Ludwigsburg/Germany
A short excursus.

The printer has once again spit out something, a small collaborative work from http://www.segelschiffsmodellbau.com

Image

A small iron swivel for older ships.

Faramir had built the original file of the barrel, with me making a few more adations.

Interesting are the dimensions of the trunnions with 0.3 mm and the matching eyebolt of the holder. This actually results in a fully movable gun even in this scale :-)

All modern drawings known to me show the powder chamber handle always pointing upwards. After the first test prints I saw a Life-Fire video and realised that the handle was turned to the side and so the fuse hole was on top, otherwise the fuse would not have been able to reach it. So I turned the handle and inserted the fuse hole.

And there they were, the new prints. For painting, I put the barrels on a needle and noticed that the difference in diameter is not very big. With a very dry brush I brushed them with black paint, which doesn't put to much volume on and rubbed them carefully with graphite on a Q-tip.

Image

I was most surprised that the firing hole is actually visible :-)

Image

And because it is so beautiful, different views.

Image

Image

Image

Image

Image

Image

There you go, the bad boys may finally come ;-)

Image

XXXDAn

_________________
To Victory and beyond ...
viewtopic.php?f=59&t=99050&start=60

See also our german forum for the age of Sail and History:
http://www.segelschiffsmodellbau.com


Report this post
Top
 Profile  
Reply with quote  
PostPosted: Sun Mar 05, 2023 6:05 pm 
Offline
User avatar

Joined: Mon Mar 12, 2012 11:13 am
Posts: 904
Location: Ludwigsburg/Germany
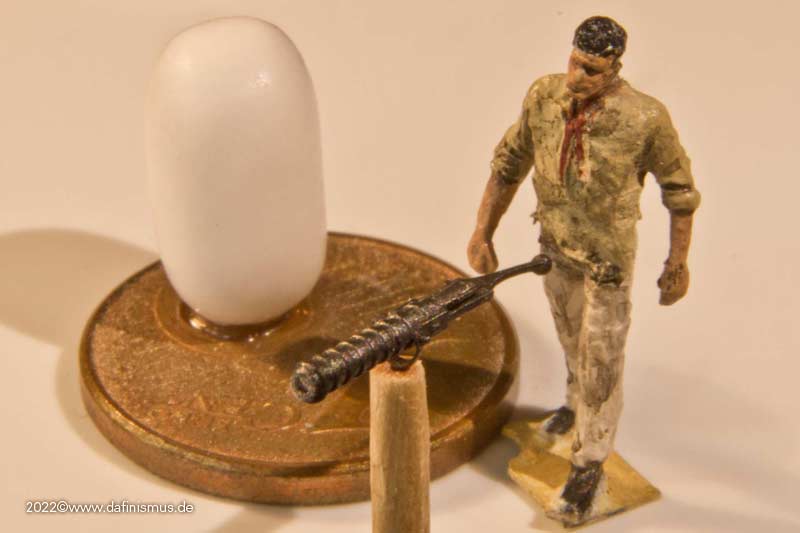
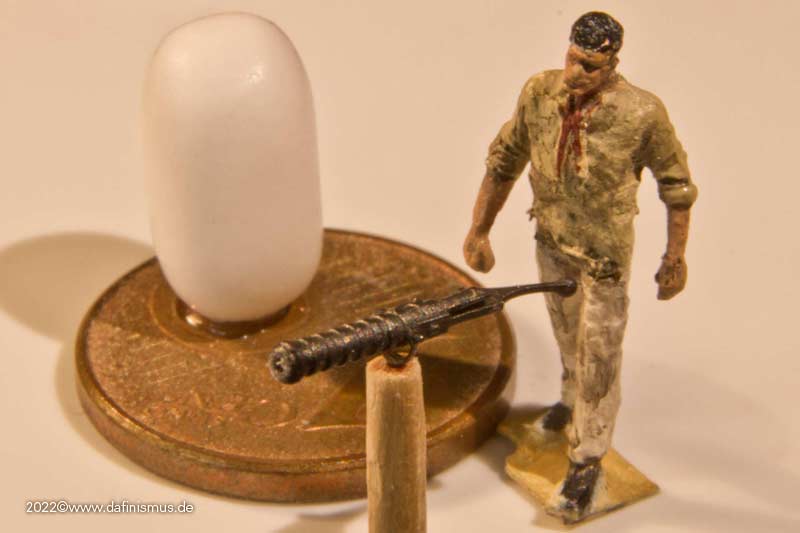
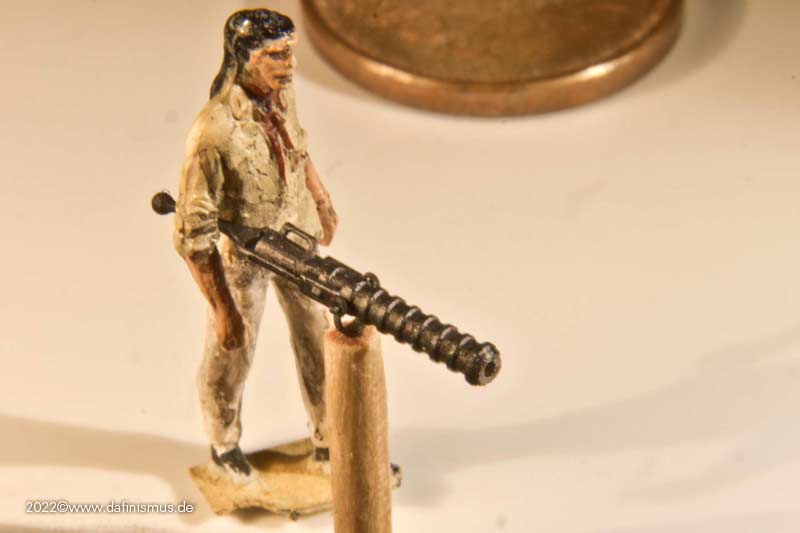
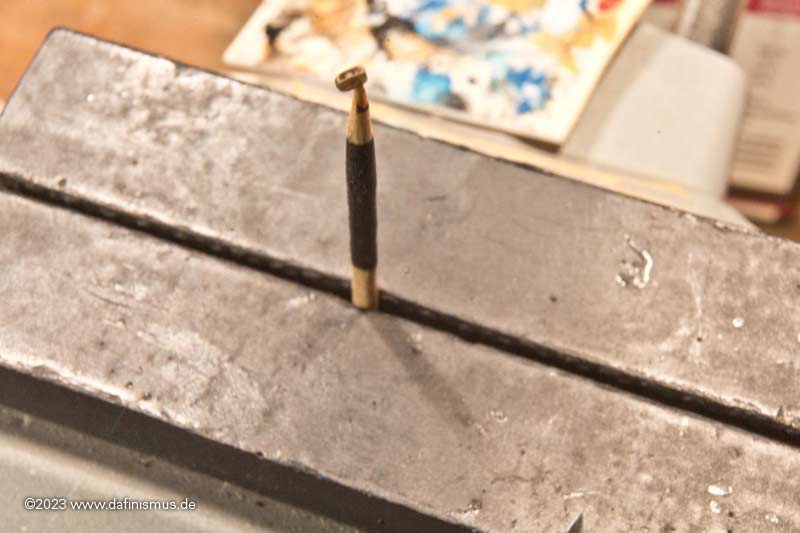
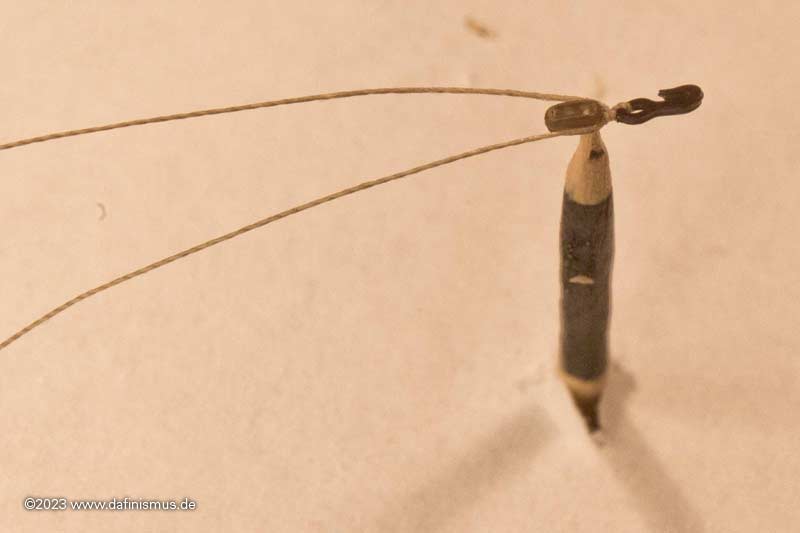
And now on to new adventures. After I was once again amazed by the print results of the iron swivel gun, I wanted to try out something I had been thinking about for a while.

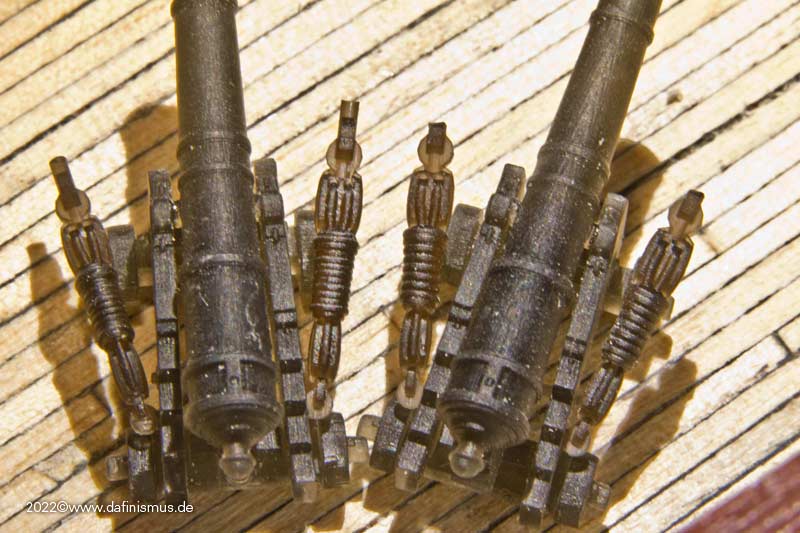
One of the most time-consuming parts of the gun deck is the gun rigging, especially the side tackles. And you don't see much of it. Why not try something new there? A quick test shot ...

Image

... which showed that in principle it fits :-)

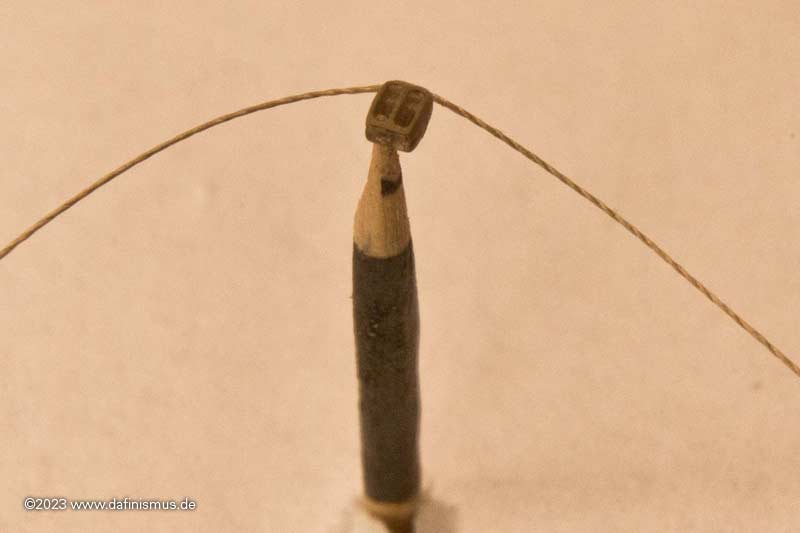
So I made it a bit more precise and quickly installed it.

Image

Image

Image

Image

Image

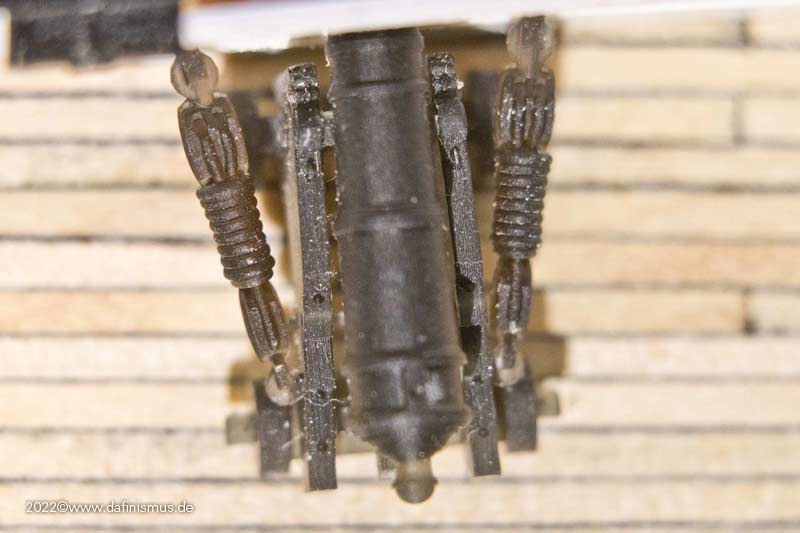
Still a bit much spiral spring, but I think something is possible.


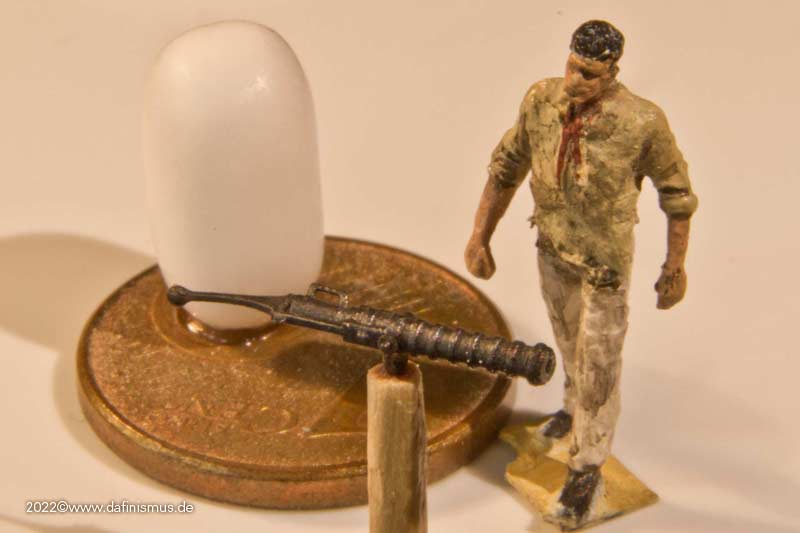
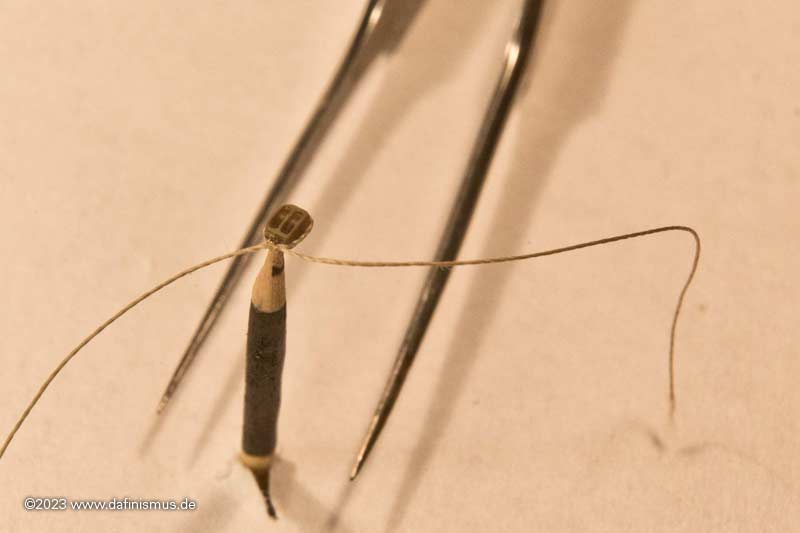
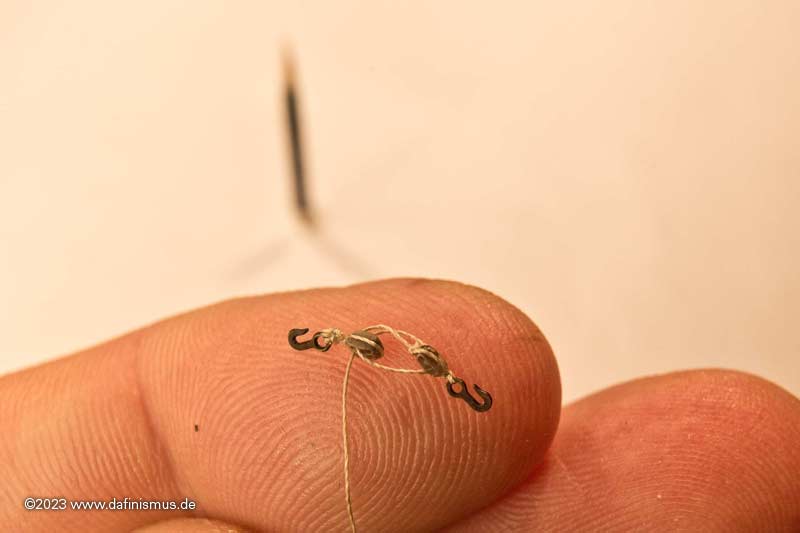
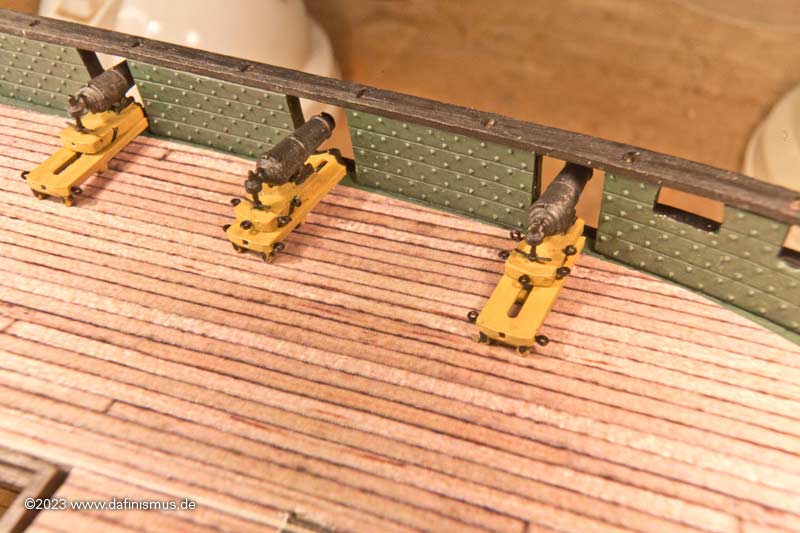
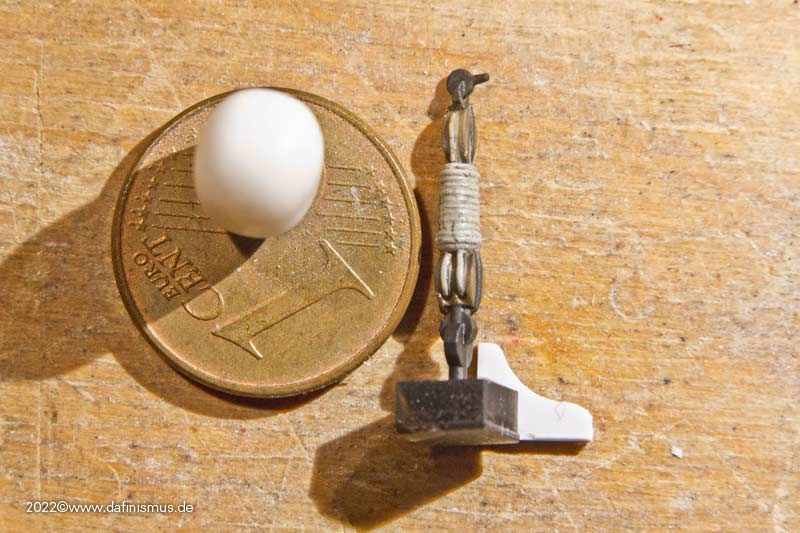
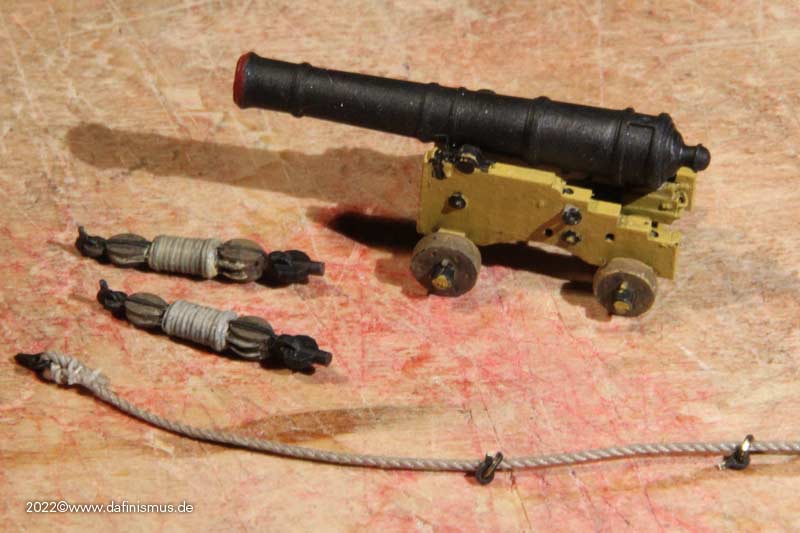
As a next step I made the ropes of the rigging a bit thinner, 0.3 mm instead of 0.4 mm diameter. I also broke up the uniformity a bit and added minimal variances. Old on the right, new on the left.

Image

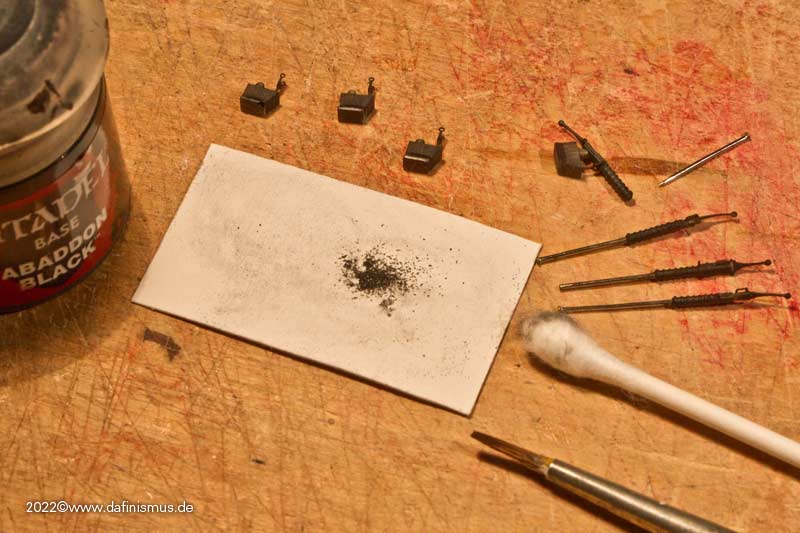
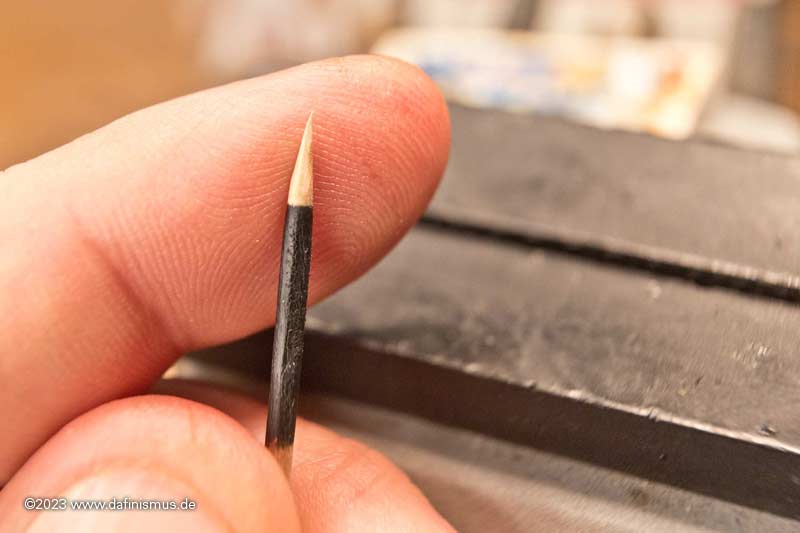
Then I swung the brush, added shading to each colour as usual, and added some ink to the whole thing.

Image

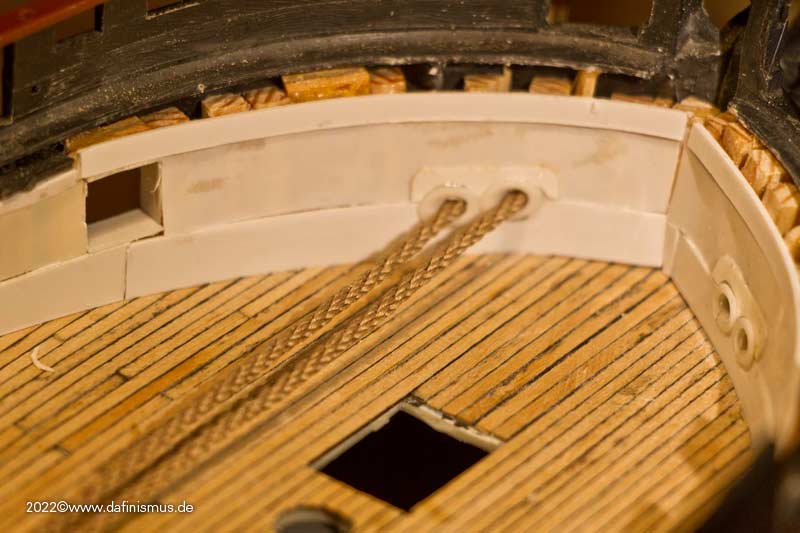
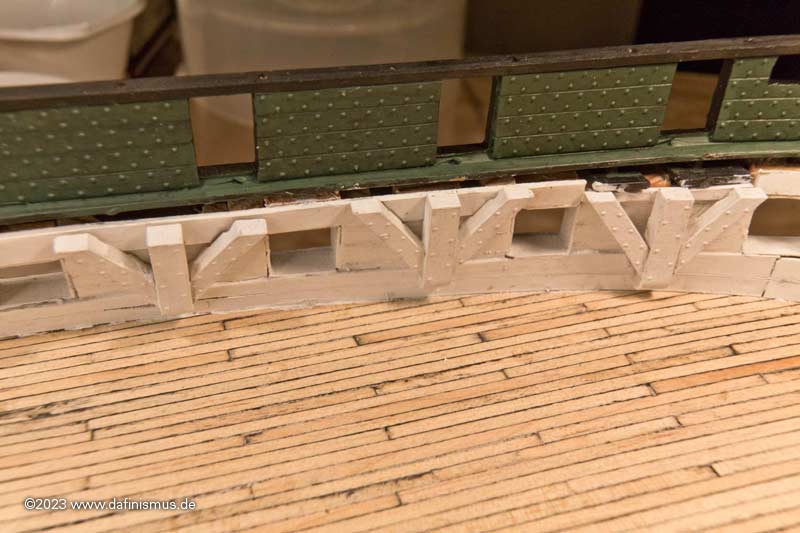
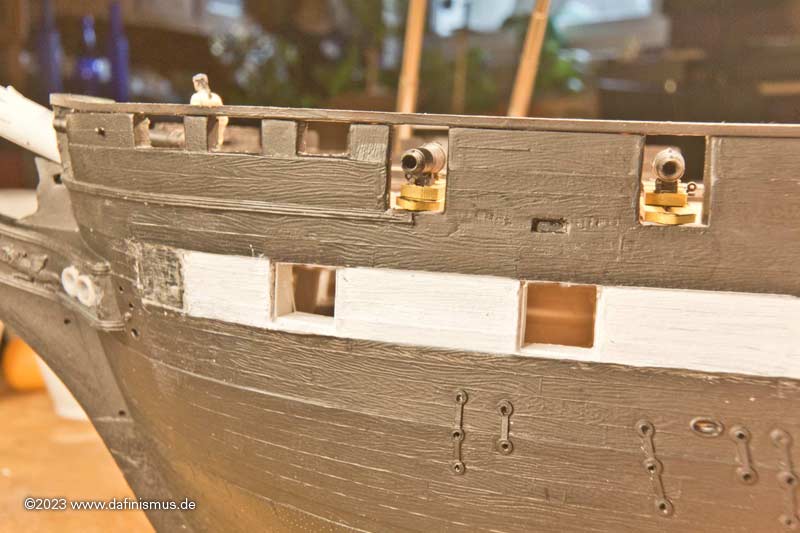
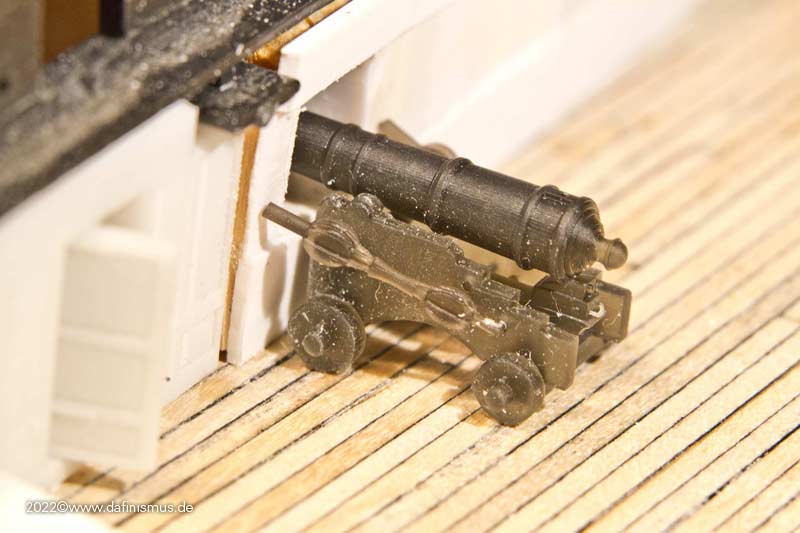
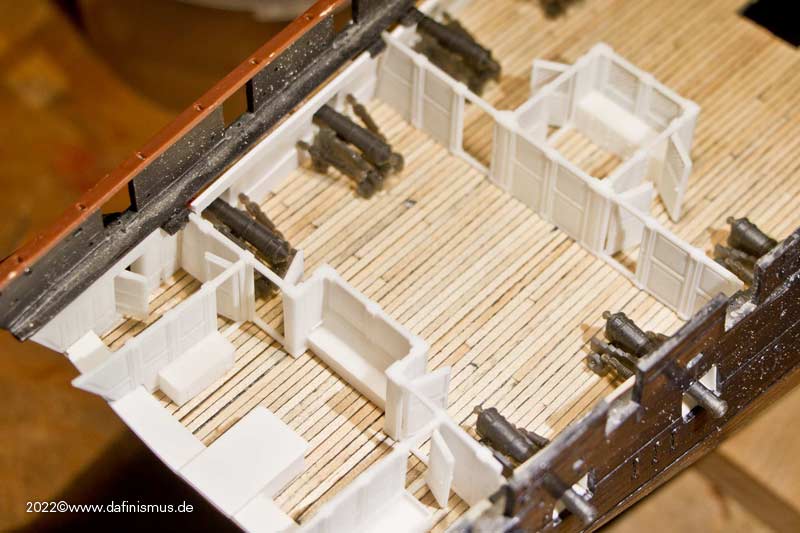
This was the time for a little setting test. The inner planks were marked with a pencil, the knees were glued on and I noticed that the holes for the bolts were still missing...

Image

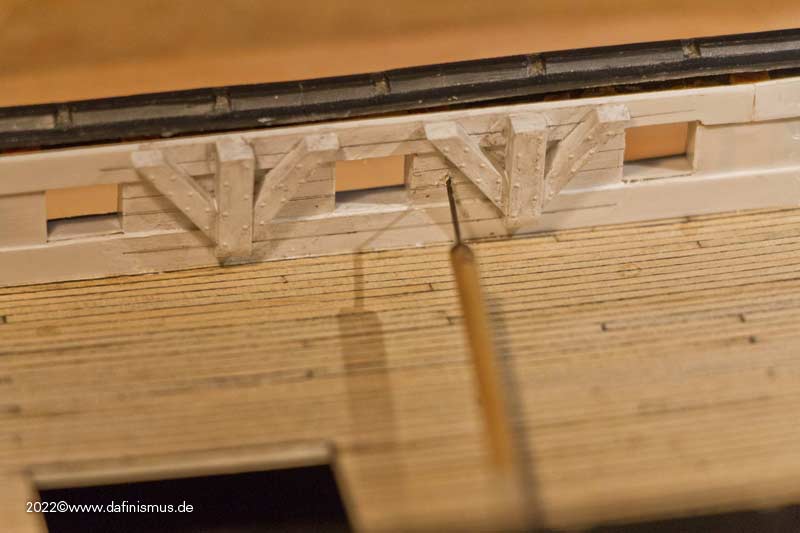
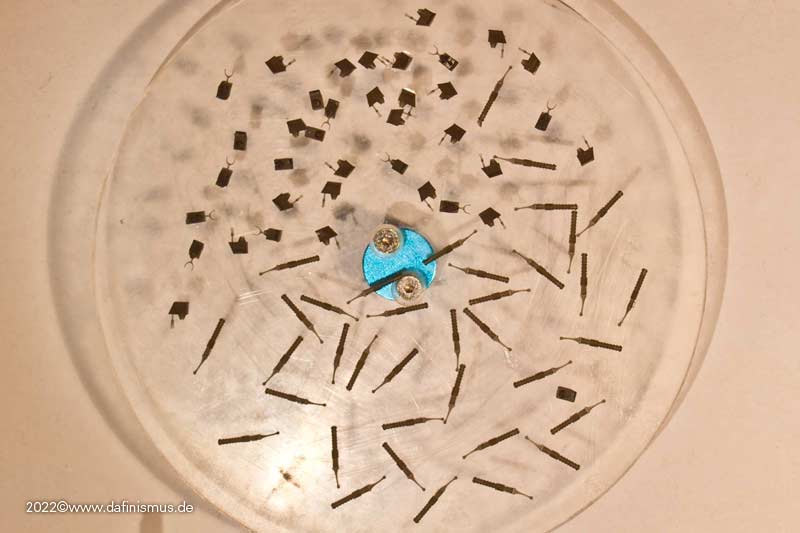
... so I got out the shish kebab skewers with the incorporated drills and ...

Image

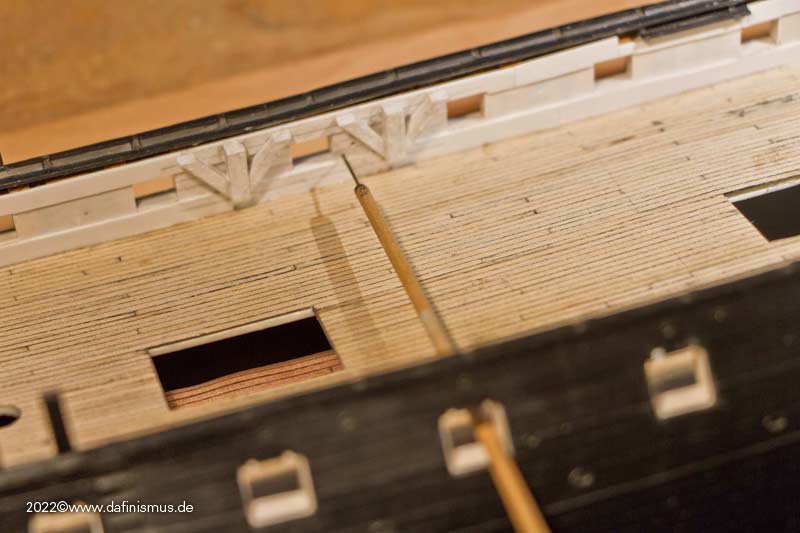
... drilled all the way through the ship :-)

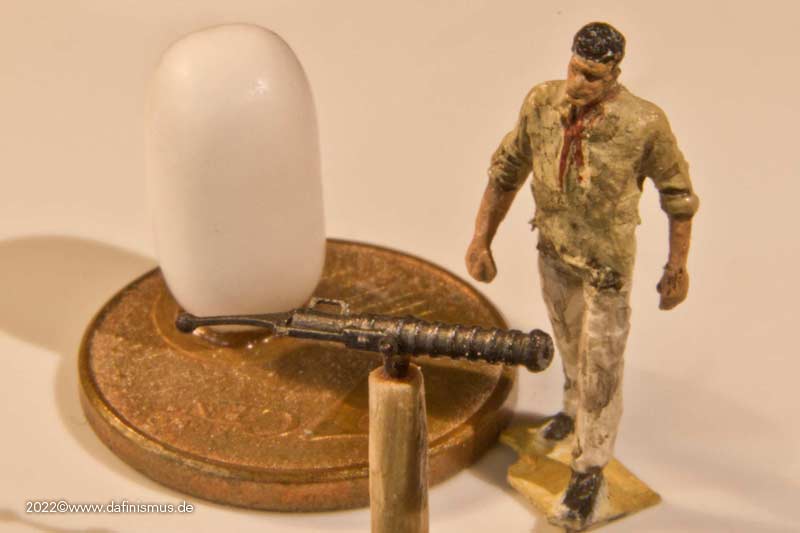
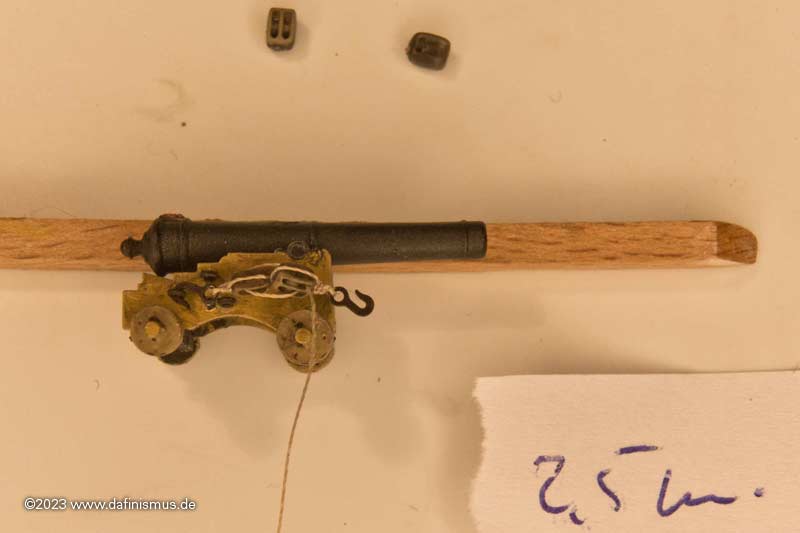
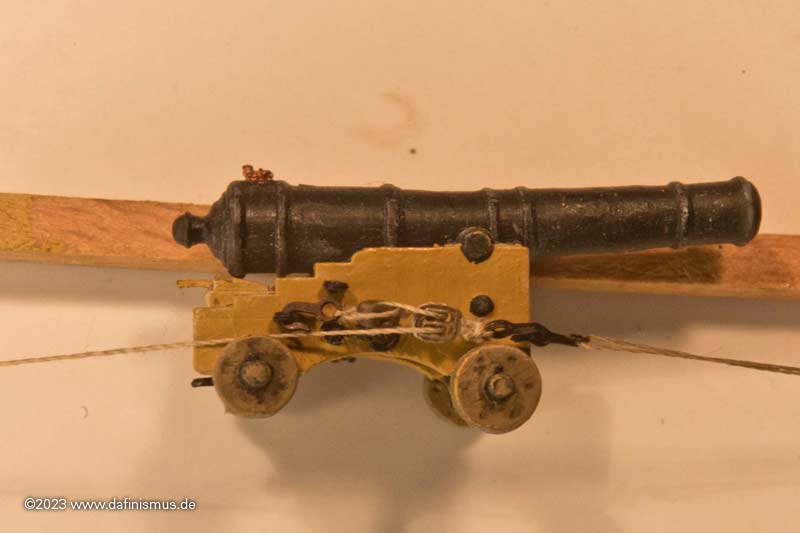
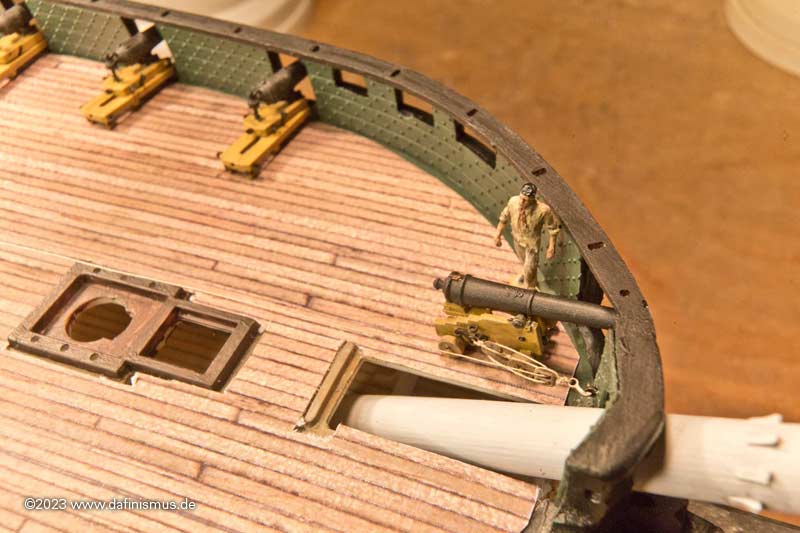
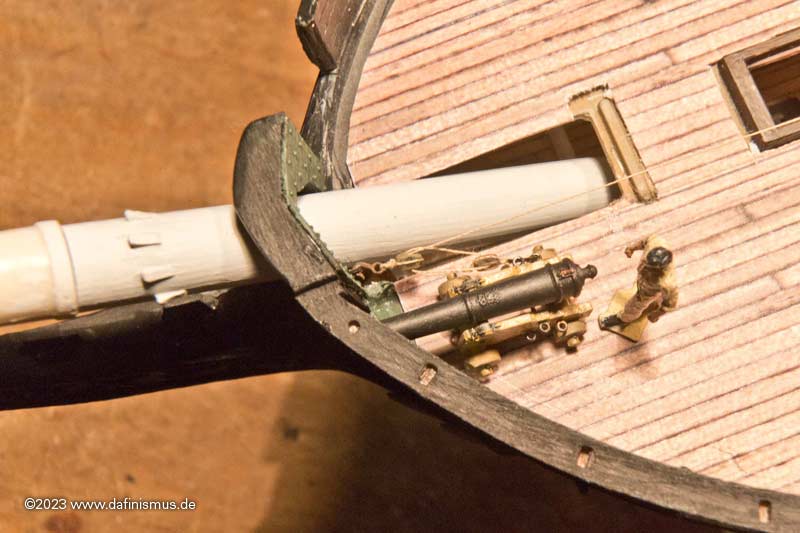
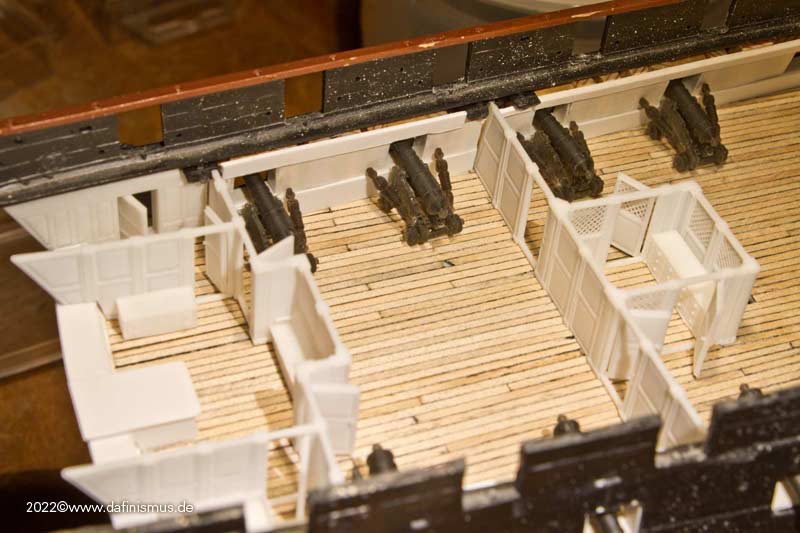
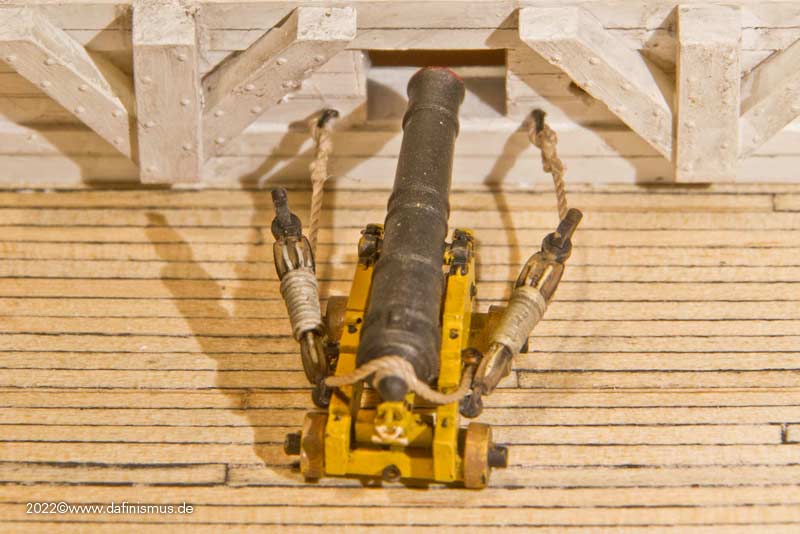
Attached the side rigging to the gun and tested the position.

Image

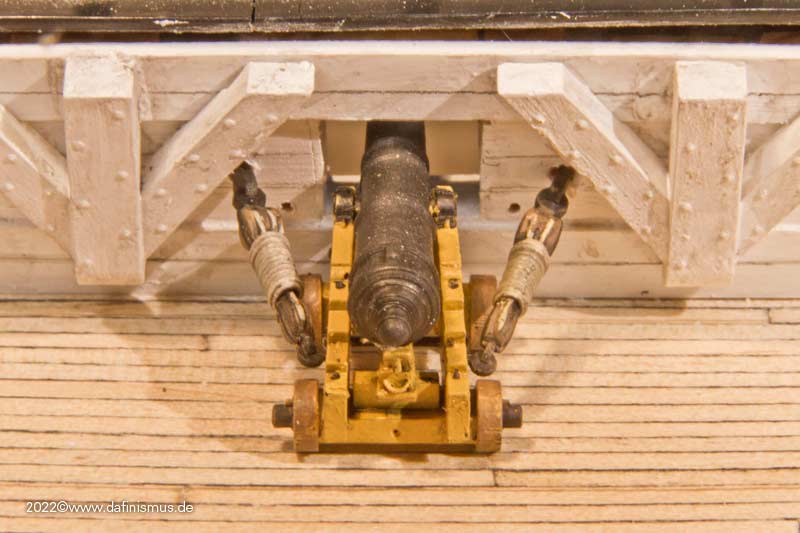
Fits, only the breech rope is missing.

Image

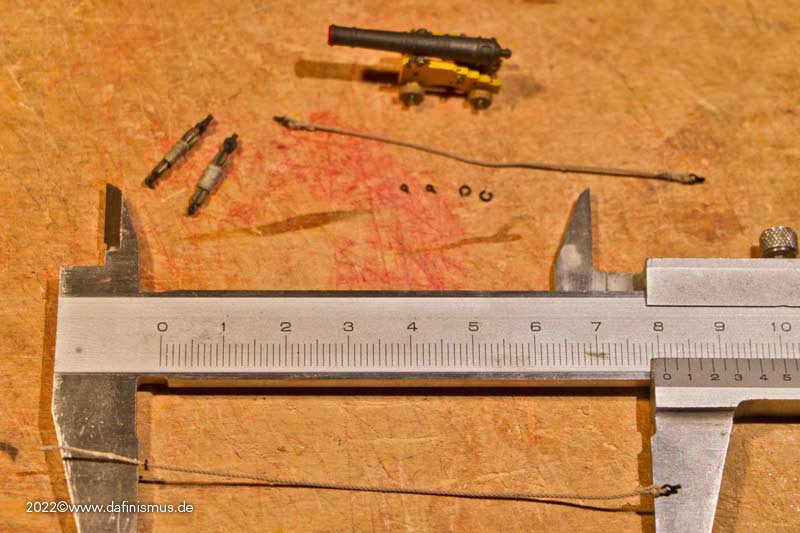
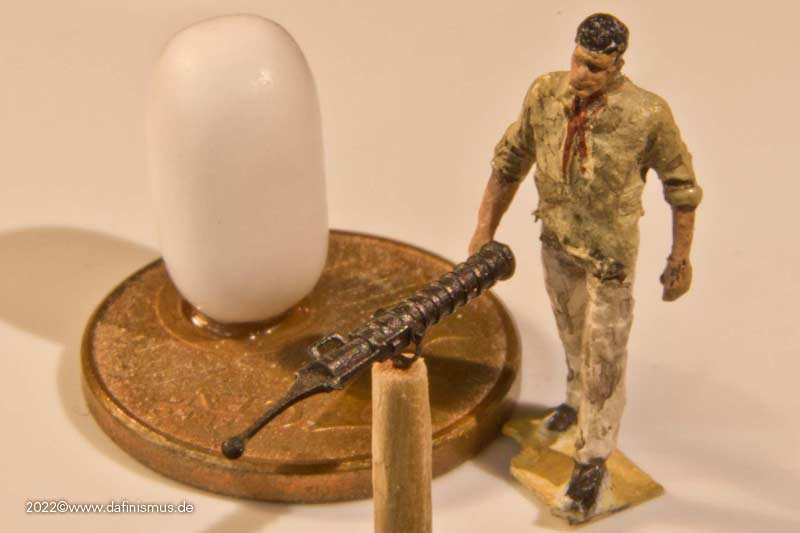
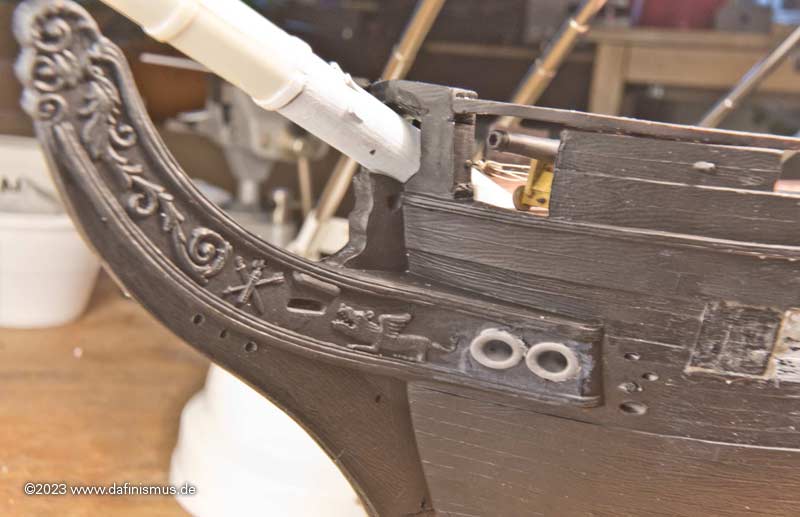
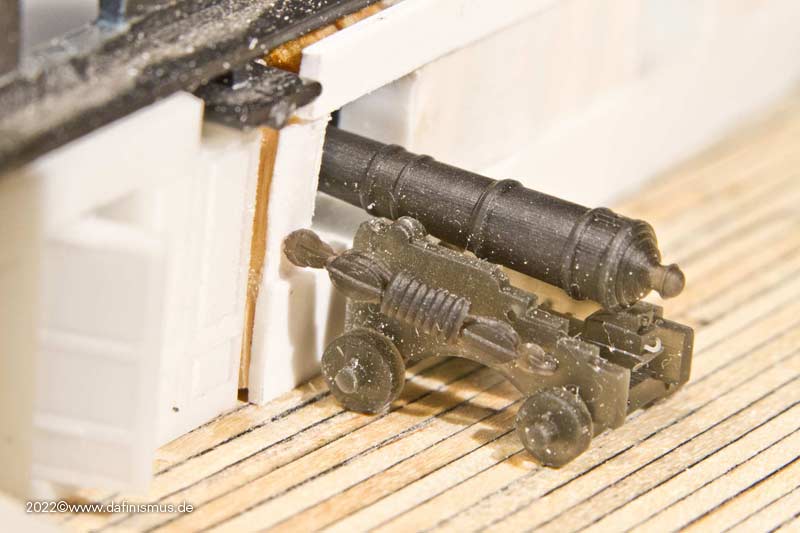
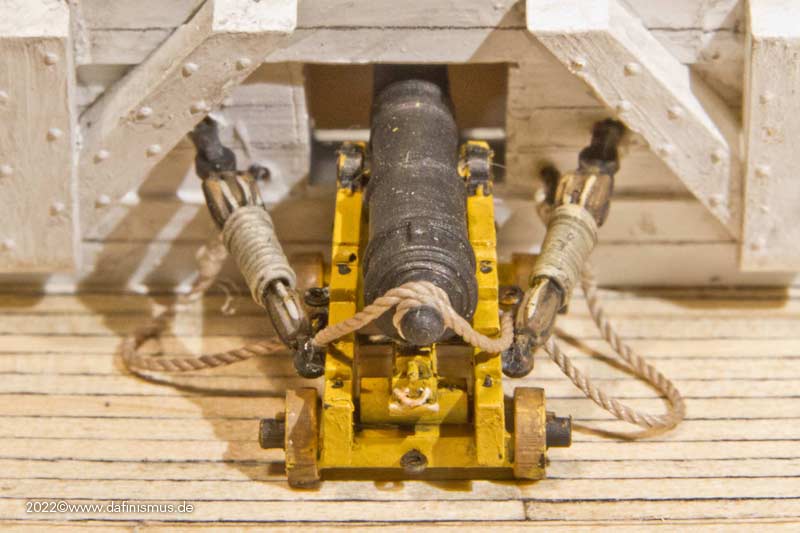
The length is determined, all fittings are attached and ...

Image

... wrapped the rope around the grape as in the Constitution.

Image

Since the breech rope is longer than the rest, this could be glued in place without any finger knotting ...

Image

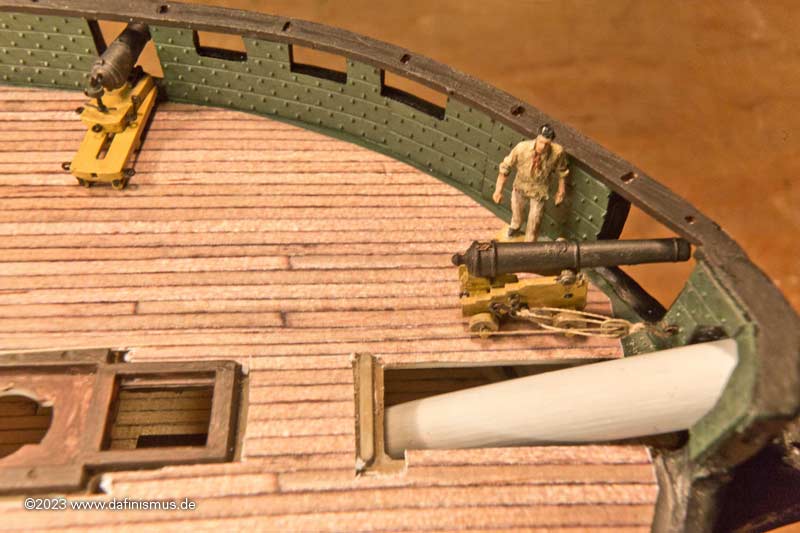
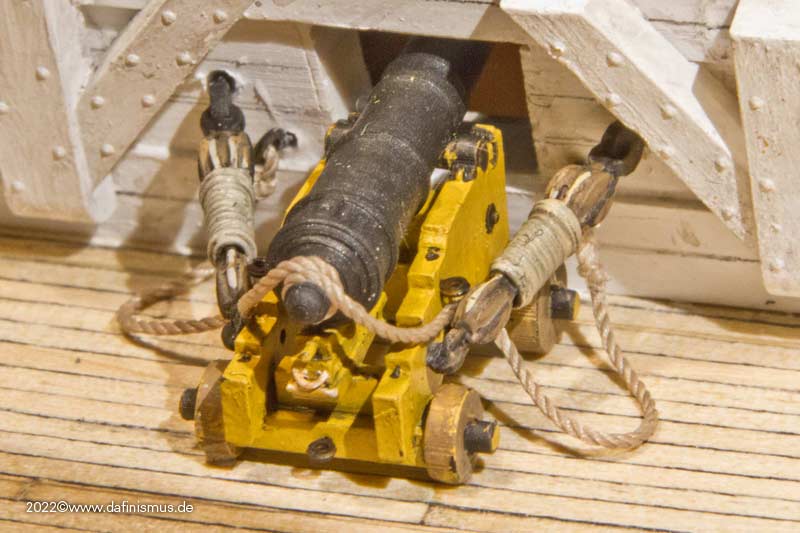
... and then the gun is pushed towards the ship's side, the guide rails are guided into the glued holes and the gun is placed, a little glue with the toothpick under the wheels and done :-)

Image

Image

Image

XXXDAn

_________________
To Victory and beyond ...
viewtopic.php?f=59&t=99050&start=60

See also our german forum for the age of Sail and History:
http://www.segelschiffsmodellbau.com


Report this post
Top
 Profile  
Reply with quote  
PostPosted: Mon Mar 06, 2023 3:35 am 
Offline

Joined: Tue Feb 06, 2007 10:24 am
Posts: 2498
Location: Belgium
Wow, that looks fantastic Daniel! :thumbs_up_1: :thumbs_up_1: :thumbs_up_1:


Report this post
Top
 Profile  
Reply with quote  
PostPosted: Mon Mar 06, 2023 4:16 am 
Offline
User avatar

Joined: Wed Sep 28, 2011 12:04 pm
Posts: 1821
Location: Paris
Well, we are close to relegate our traditional tools to the back of the cupboard ...

_________________
Eberhard

Former chairman Arbeitskreis historischer Schiffbau e.V. (German Association for Shipbuilding History)

--------------------------------------------------------------------------------------------------------------------------------------------------------------------------------------------

Image Image Image Image


Report this post
Top
 Profile  
Reply with quote  
PostPosted: Mon Mar 06, 2023 3:37 pm 
Offline

Joined: Tue Jan 11, 2005 10:56 am
Posts: 8579
Location: New York City
Truly impressive work.


Report this post
Top
 Profile  
Reply with quote  
PostPosted: Mon Mar 06, 2023 3:45 pm 
Offline

Joined: Mon Apr 17, 2017 2:43 am
Posts: 196
Jawdropping dafi! Simply outstanding :woo_hoo:

_________________
http://www.3xblackcats.wordpress.com


Report this post
Top
 Profile  
Reply with quote  
PostPosted: Sat Jan 06, 2024 8:17 am 
Offline
User avatar

Joined: Mon Mar 12, 2012 11:13 am
Posts: 904
Location: Ludwigsburg/Germany
Thank you Sirs!

Somehow it was time to do something to this little USS chick again. The infamous gunnade in the bow was still missing.

Image

Image

Even if it has already been questioned, I decided in favour of the variant with the GRIII crest.

Then I prepared the space on deck for it, fitted the lower deck knees and printed the nailed interior bulkward ...

Image

... and glued it in.

Image

Then checked the size of the blocks. The 2.5 mm were too long after all.

Image

So it became the 2 mm blocks :-)

Image

I now also have a technique that works quite well. You sharpen a toothpick well ...

Image

... and clamp it in a vice.

Image

Then put a piece of paper over it to make it easier to see, and press the block onto the tip.

Image

First check which side you need to start on so that the rolls are on the right side. Then apply 2 mm of superglue to the yarn and press it onto the correct side, ...

Image

... pull the ends forwards, tie a knot and secure with glue. Then knot the hook, secure it, cut it to length and the double block is finished.

Image

For the single block, first knot in a hook, apply some superglue to the hook´s knot ...

Image

... and as with the other one ...

Image

... with a little superglue at the back and tighten the ends to the front.

Then tie a knot, secure and cut to length.

Now comes the most difficult part in my eyes: the correct run through the blocks so that nothing crosses over :-)

And that's it.

Image

It also looks good on the 24-pounder :-)

Image

And then it was time for the trial fitting.

Image

Image

Image

Image

Image

Image

Image

XXXDAn

_________________
To Victory and beyond ...
viewtopic.php?f=59&t=99050&start=60

See also our german forum for the age of Sail and History:
http://www.segelschiffsmodellbau.com


Report this post
Top
 Profile  
Reply with quote  
PostPosted: Sat Jan 06, 2024 2:00 pm 
Offline

Joined: Mon Apr 17, 2017 2:43 am
Posts: 196
Great Progress dafi! :thumbs_up_1:

_________________
http://www.3xblackcats.wordpress.com


Report this post
Top
 Profile  
Reply with quote  
Display posts from previous:  Sort by  
Post new topic Reply to topic  [ 89 posts ]  Go to page Previous  1, 2, 3, 4, 5

All times are UTC - 6 hours [ DST ]


Who is online

Users browsing this forum: Majestic-12 [Bot] and 6 guests


You can post new topics in this forum
You can reply to topics in this forum
You cannot edit your posts in this forum
You cannot delete your posts in this forum
You cannot post attachments in this forum

Jump to:  
Powered by phpBB® Forum Software © phpBB Group