
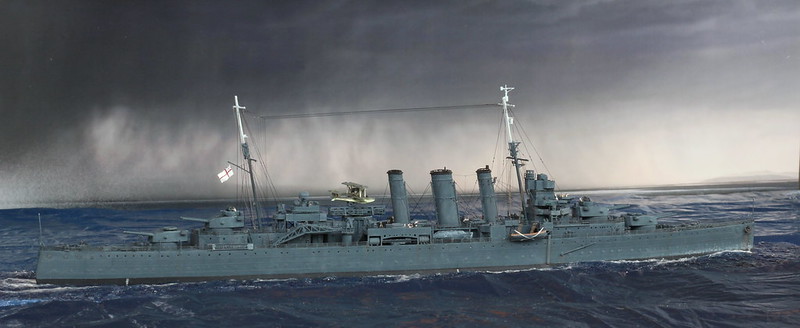
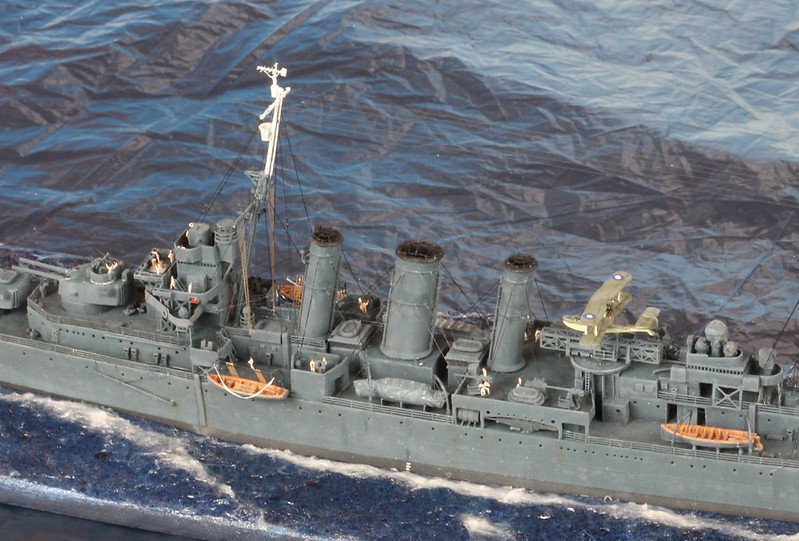
75 years ago, the heavy cruiser HMAS Canberra lead the Southern Group of Allied heavy cruisers on guard off the invasion harbour at Guadalcanal after midnight on August 9, 1942, when she became the first target of a column of seven Japanese cruisers “crossing the T” of the Allies. She maneuvered violently to starboard but before she was able to fire her guns she was hit in a quick succession by at least 27 heavy Japanese shells to port and by 2 torpedoes to starboard, fired most probably by USS Bagley. Left burning without steam she was scuttled by US destroyers the next morning.The biggest challenge in building Canberra at Savo Island is the largely incomplete reference about her final fit in summer 1942. There are many excellent, hi-res photos available on the internet from various stages of her and her sister´s pre-war careers but only handful photos mostly of mediocre quality showing her from May 1942 onwards, and none of them taken from above. I tried my best in finding more resources but even with a great help from RAN specialists Brett Morrow and Michael Brown it was not possible to resolve with certainty all of the issues that emerged. Nevertheless, I tried to make my Canberra appear as close to photos available as I could while keeping the amount of speculation at the unavoidable minimum.
The famous
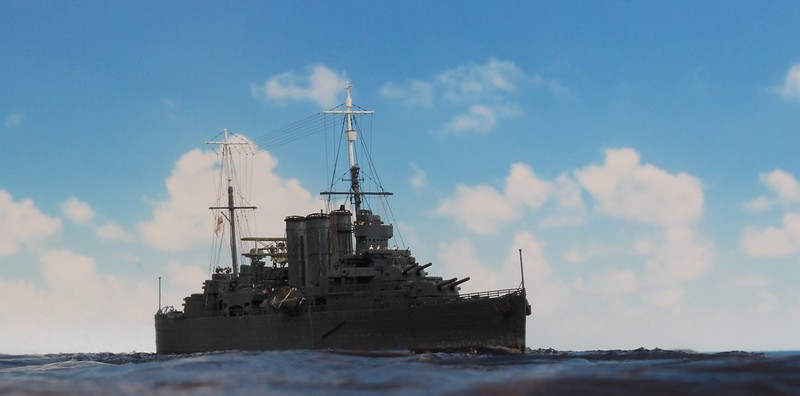
photo of Canberra leaving Wellington for her last voyage on the Combrig box seemed to suggest the kit represented her as-lost fit. In reality, the kit is a mixture of how various parts of Canberra looked like in various periods of her career, mostly resembling her early war (from 1938 till her 1942 refit) fit. As a result, modifications are needed to depict Canberra at any moment of her career, but the kit can be also used for HMAS Australia before 1939 because they were almost identical until then (there is a separate Combrig kit for Australia after her 1939 refit, sharing the same hull and a few other parts).
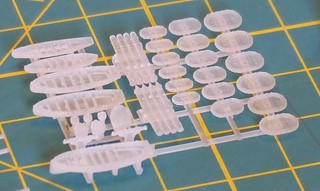
She was also my first resin kit – not a bad one to start with but none of the easiest, so another challenge for me. To my surprise, I did not find prepping resin parts to be of a particular problem, but there were other issues of course. First of all there is the known issue mentioned
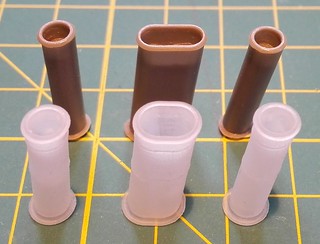
e.g. by Norbert Thiel that the deck aft of the X turret is noticeably sloped upwards while it should be parallel to the waterline – thanks to Jon Iverson for explaining me how to correct this! The kit details in general are quite good, but the main turrets looked quite weird and far too simplified. When I was in the middle of my build I noticed the mid funnel´s cross-section was really wrong (too long & too narrow) so it made me taking my first steps in designing parts for 3D printing, of which I took advantage also in creating modified 20mm gun platforms on the side of the funnel. Finally, when I was very near to start spraying her I realized there was something wrong about the shape of her bow, too – it should be straight (not curved) and more vertical. Two pieces of sheet styrene and a lot of sanding made for it.
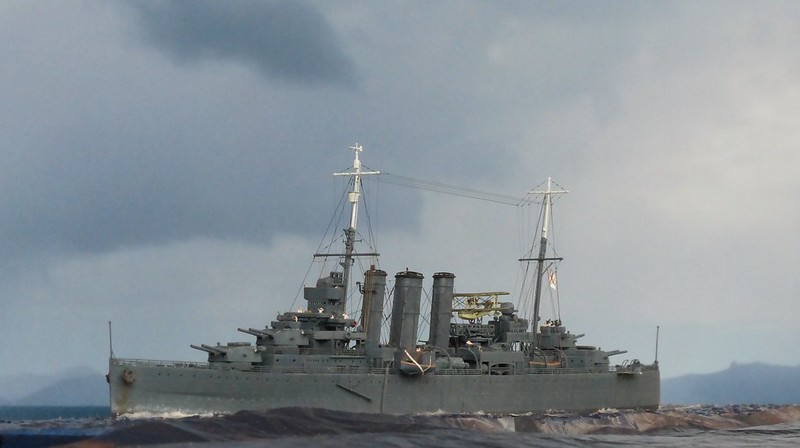
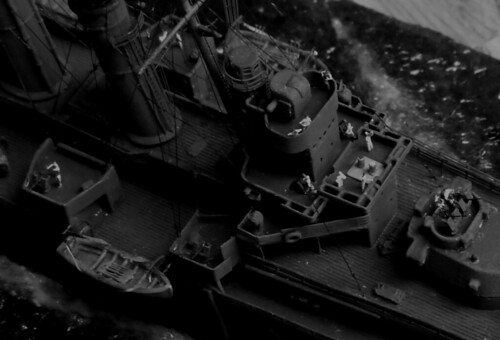
The hull shows Canberra´s lower level of portholes open but these were plated over and her side chutes were moved forward in early 1942, when also her midship gun platforms were modified and 20mm guns added on top of them. 20mm tubs for tops of turrets B and X are included in the kit, but these are too small and incorrectly shaped as each of them should carry two Oerlikon guns instead of one. One of them can nevertheless be used for the single Oerlikon bin on the quarterdeck. The kit´s bridge is most similar to its original appearance before it was modified in ca 1930. Indeed, it also lacks the Type 271 radar lantern that she received in early 1942.
Here´s a summary of other more important modifications and replacements in my build:
Hull & deck• Only two anchors in place, the second starboard hawse pipe plated over
• Quarterdeck rearranged according to photos (the original resembled more Australia´s than Canberra´s), added accommodation ladders, single 20mm gun tub, PE depth charge rack and smoke generators
• Numerous small deck vents have been added as well as slightly larger vents attached to the superstructure (my own 3D printed models)
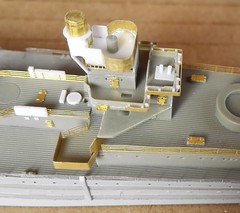
Main bridge• Bridge „wings“ at level 2 cut narrower, their solid sides replaced by PE railings covered by PVA glue for “canvas”
• Wind baffles added to bridge level 3
• Top bridge level scratchbuilt to include large rounded lookouts typical for the ship´s appearance after 1930
• Type 271 radar housing with octagonal „lantern“ added to the back side (parts from LionRoar RN Radar PE set and scratchbuilt)
• Various supports added
 Superstructure
• Aft bridge – smaller superstructure parts added in the walk-through one level below and under the bridge, modified with various PE parts
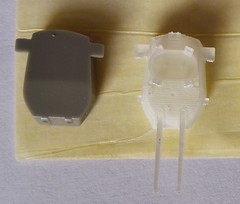
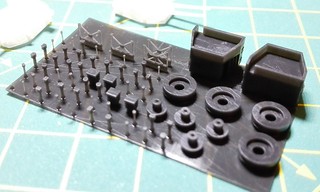
• 8“ turrets, HACS director aft, searchlights, uncovered boats, torpedo tubes and Carley floats replaced with 3D printed by Micro Master – see
here for more details• 8” gun barrels replaced with turned brass (NNT)
• 4“ and 20mm gun mounts replaced with 3Dmodelparts, 4” barrels replaced with turned brass and 20mm guns by Flyhawk PE
• Funnels, midships 20mm gun platforms and pressure tanks at the torpedo deck replaced with my own 3D printed models
• WEM County-class PE set used for crane, catapult and some other minor parts; PE from LionRoar, Gold Medal, Flyhawk and Rainbow used for railings, doors, hatches, davits, funnel grills etc.
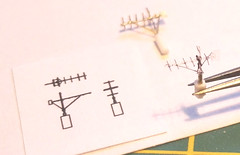
• Masts replaced with soldered brass
• Type A290 radar (scratchbuilt) on the foremast (there is a story of its own about this almost unknown early radar set locally built in Australia)
 Paint scheme
Another interesting research concerned colours worn into her final battle. It turned out she probably carried three (!) different colour schemes within the few weeks of emerging from her refit in May 1942 till loss. According to the latest research by Michael Brown her vertical surfaces were painted USN 5-N Navy Blue with original paint from paint lockers of USS Chicago. Mast tops were painted RAAF Sky Blue K3/195. We found no evidence about colour of her horizontal surfaces, however I consider highly unlikely that her decks were left bare wood in a situation of imminent Japanese aerial attacks. More obvious choice would have been 507A which e.g. Australia wore at Coral Sea, so I guess that was how Canberra´s decks were likely painted after her May refit and she might have carried it over to the Solomons. However, as the main reason for using 5-N on vertical surfaces was to put her (and Australia and Hobart) in line with US ships in the Task Force, it would seem logical that USN 20-B Deck Blue was used for horizontal surfaces, and I have chosen this option. I know it may be found controversial, but until more evidence is discovered I think this option is as likely as any other.
Edit 24.2.2020: I would now consider more correct to use 507A for her topside colours instead of 20-B. Also check my USS Chicago build for my thoughts about her early 1942 vertical colour that might have consequences for RAN ships.I used Lifecolor paints and I did the weathering with diluted artist´s oil paints.
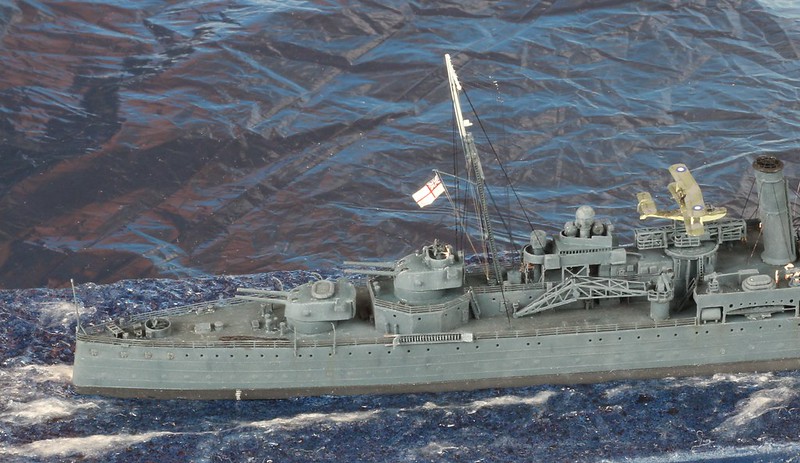
My Canberra´s Supermarine Walrus comes from Flyhawk 1/700 WW2 British Royal Navy Aircraft II and sports a 3-colour Temperate Sea scheme (Extra Dark Sea Grey, Dark Slate Grey, Sky) with no shadow-shading. Insignia centres were painted over with white on upper wings and yellow surround was painted over on fuselage sides.
Canberra´s extensive rigging was done by 0.06mm fishing line for the thicker rigging (standing wires, funnel supports etc.) and UNI Caenis 20 den monofilament, black for antennae and white stained with medium brown acrylic marker for halliards.
I am not sure what I enjoyed more – the build itself or the all research and discussions with fellow enthusiasts, but it was probably the latter. I am happy I was able to finish her just in time for the 75th anniversary of her sinking, so I dedicate my build to the memory of all souls lost in the battle.
References• Modelwarships.com:
Calling all RN County class fans thread • Pre-war and wartime photography from various online sources, especially
Naval History and Heritage Command,
Australian War Memorial,
Imperial War Museum and
Horatio J. Kookaburra profile on Flickr• Primary documents from the
National Archives of Australia researched by Michael Brown
• Slawomir Brzezinski: British heavy cruiser HMS KENT (Profile Morskie No. 77)
• Bruce Loxton: The Shame of Savo: Anatomy of a Naval Disaster
SPECIAL THANKS TO• First of all - Brett Morrow for all his research, opinion and advice, prompt and friendly replies to my never-ending stream of questions and for keeping me up at times when I got stuck or down
• Michael Brown for his archival research about Canberra´s paint scheme
• Simon Percival (Micro Master) for redoing his amazing 3D 8“ turrets (originally created for HMS Exeter) into the earlier Mk I* variant carried by the Kent-class and even including the 20mm gun tubs specific for Canberra & Australia! Also thanks for Simon´s help with my first steps in 3D modeling
• Carl Allsup (3Dmodelparts) for prototype preview of his 4” QF Mk V guns
• Randy Short and Jon Iverson for their help and advice in early stages of my project
• Mac Gregory (R.I.P.), Officer of the Watch onboard Canberra during her last battle, for his interest and advice
• Participants in ModelWarships.com and Britmodeller.com forums who submitted references and ideas on the subject
• My son Vojtech who helped me with making the photos, and my whole family for enormous understanding and patience
Please see
my Flickr album for more hi-res photos of my build.


