The Ship Model Forum

The Ship Modelers Source
It is currently Sun Jul 13, 2025 11:02 am

All times are UTC - 6 hours [ DST ]


Post new topic Reply to topic  [ 142 posts ]  Go to page Previous  1, 2, 3, 4, 5, 6 ... 8  Next
Author Message
PostPosted: Sat Nov 12, 2011 11:15 pm 
Offline
User avatar

Joined: Thu Nov 20, 2008 10:52 pm
Posts: 377
Location: Tuscon, AZ
I think I will trow my hat in the ring, with a 1/350 Virginia. Class USS. New Mexico SSN-776 and Tug.

_________________
In Port: Building
1/350 USS. Conway DD-507
1/350 USS. Jenkins DD-447. 50%
In the Yard: Planned
1/350 USS. Claxton DD-571
1/350 USS. Watts DD-567


Report this post
Top
 Profile  
Reply with quote  
PostPosted: Mon Nov 14, 2011 9:38 am 
Offline
User avatar

Joined: Thu Feb 24, 2011 3:06 am
Posts: 17
Location: Kiev, Ukraine
D-Boy wrote:
Can you say more about your painting on the Typhoon to date - are you pre-shading with white as the counter-color?

D-Boy


This is a primer. I used it, that would see how accurately the place of gluing of parts will look like after painting. But in bow it's really something like pre-shading for anti-fouling red at this place.

_________________
Max Sh.


Report this post
Top
 Profile  
Reply with quote  
PostPosted: Mon Nov 14, 2011 5:04 pm 
Offline
User avatar

Joined: Sun Feb 01, 2009 3:55 pm
Posts: 3125
Location: Hawaii
I'm in gents with a 1/700 Hobby Boss Type IXC U-Boat.

Image

Image

Image

Sail is glued to the hull with a nasty pit around it. I've brushed in some white glue to fill the void but more will be needed. There is a cutout in the hull for the sail but is about 1.5mm too wide all the way around and even in 1/700 that's too wide. Didn't notice it until I added the main deck railings so I had to bend around the corner to get the gap filled. I also managed to snap off the periscope while I was removing the molded on railings on the sail so I replaced it with some round stock. Oh well, live and learn :big_grin:

I grabbed some 2-bar railing from a GMM set for the deck and sail. I'll add the weaponry later tonight and hit her with some primer. These little HB kits are real gems and full of surface detail. Well worth the few bucks they cost.

Its on a little 8x10 basswood base with some 1/4" basswood topped with 300lb cold pressed water color paper.

The dio will feature the little sub landing a weather station team on the snowy shores of Iceland via some rubber boats. Some light pack ice will be floating around as well as a light dusting of snow to simulate active precipitation during the operation. My little Eduard figures are just going to have to cold and wet :big_grin:

In regards to the paint scheme, I want to try and replicate something similar to a USN Ms 16 or an RN Western Approaches scheme. I have a list of all the colors the Kriegsmarine used and there a few that would work perfectly for this. I figure if the Germans were inserting teams in the Arctic Circle where there isn't exactly a sunset every 12 hours, then a paint scheme similar to the Allied ones would be rather beneficial seeing as how they'd need to remain on the surface for a bit of time. I'll see what I can come up with. I want the sub to be a bit more visually interesting than just drab dark gray.

Any thoughts, questions, comments, etc... are appreciated as always.

-Mike

_________________
Drawing Board:
1/700 Whiff USS Leyte and escorts 1984
1/700 Whiff USN Modernized CAs 1984
1/700 Whiff ASW Showdown - FFs vs SSGN 1984

Slipway:
1/700 Whiff USN ASW Hunter Killer Group Dio 1984


Report this post
Top
 Profile  
Reply with quote  
PostPosted: Tue Nov 15, 2011 9:59 pm 
Offline
User avatar

Joined: Fri Apr 08, 2005 9:41 am
Posts: 2215
Location: Monson, MA.
Nice job Cliffy! :thumbs_up_1: :thumbs_up_1:


Bob Pink. :wave_1:


Report this post
Top
 Profile  
Reply with quote  
PostPosted: Tue Nov 15, 2011 10:18 pm 
Offline
User avatar

Joined: Fri Apr 08, 2005 9:41 am
Posts: 2215
Location: Monson, MA.
This is where I'm at the moment. Hull first layer painted in 507B. Conning towers rear section has been added on using scrap photoetch. Hull details added at the bow. Anchor well added , starboard side. Glitches in hull were patched up with Mr Surfacer 1000. Finger print on port side :censored_2: 
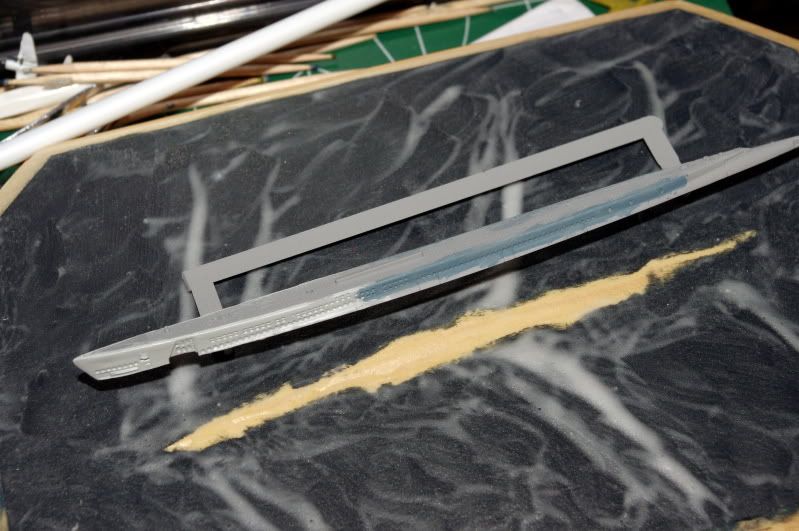
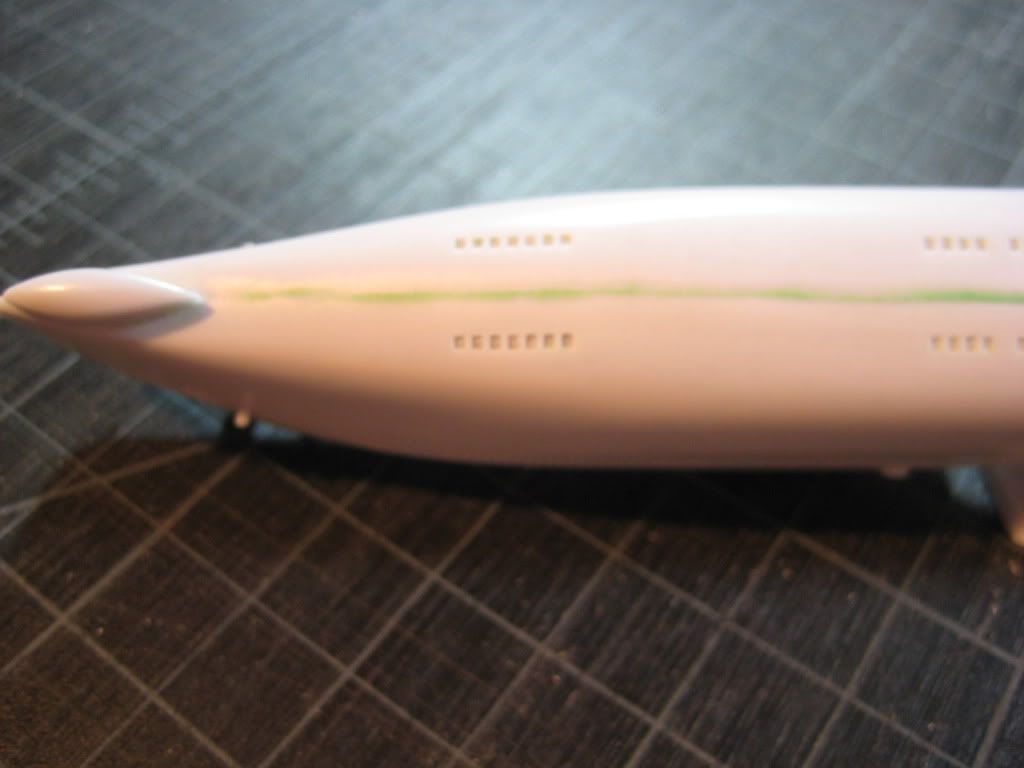
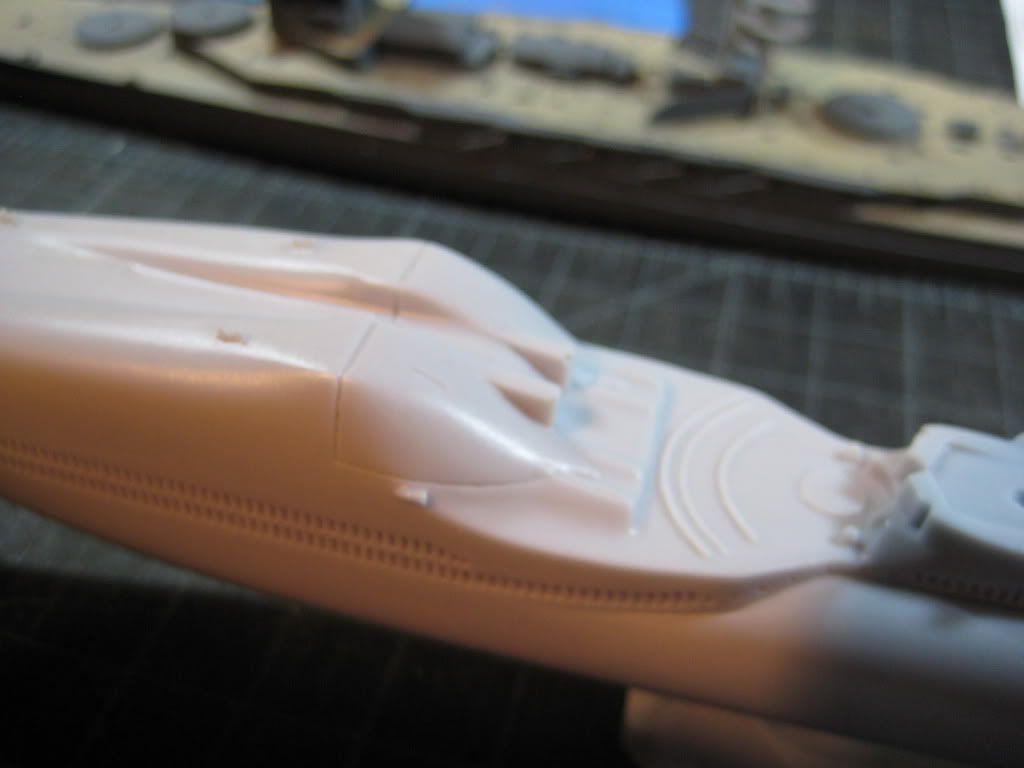
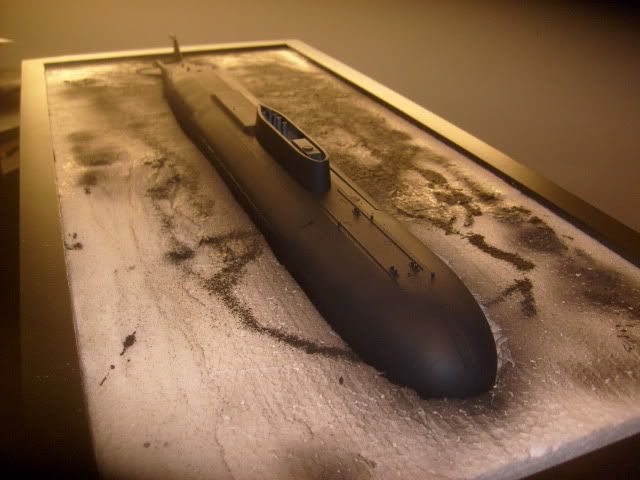
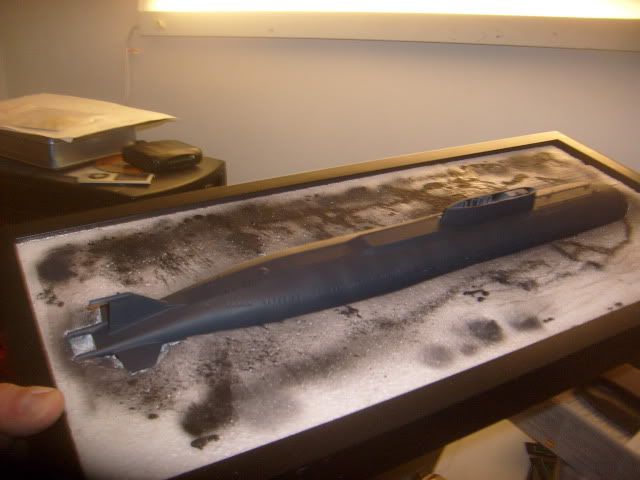
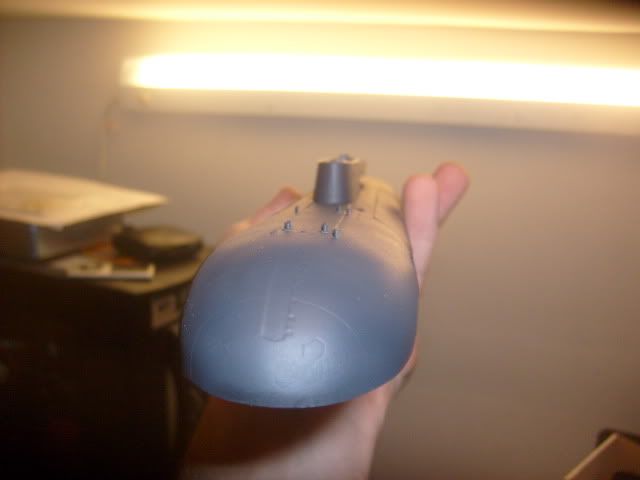
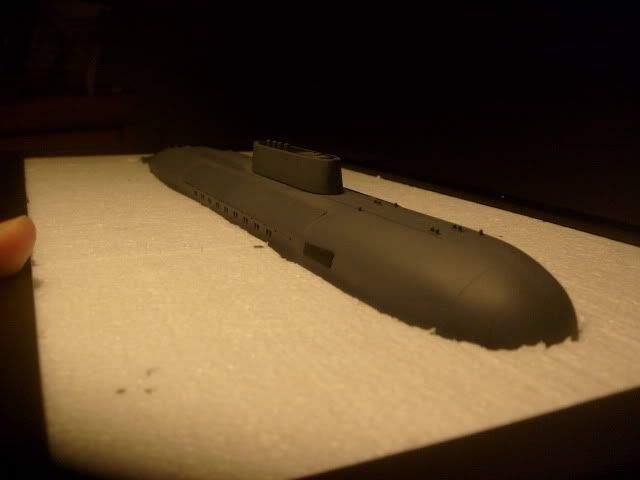
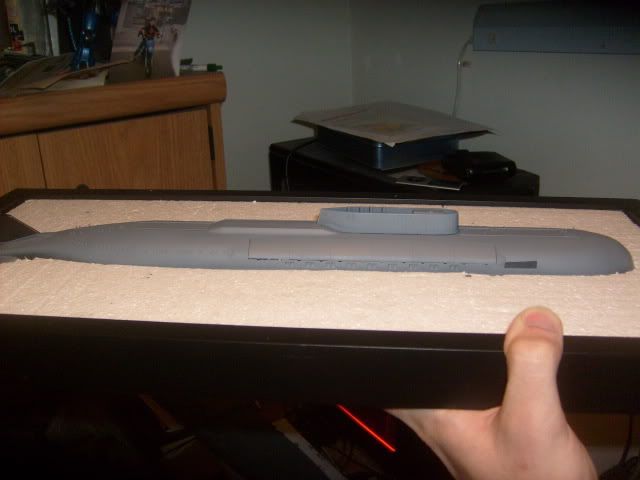
will have to be dealt with when paint cures fully. That it for now.

Image

Image

Image

Image

Image

Bob Pink. :wave_1:


Report this post
Top
 Profile  
Reply with quote  
PostPosted: Sat Nov 19, 2011 5:10 am 
Offline

Joined: Sun Aug 15, 2010 6:19 pm
Posts: 709
Location: Seattle Area
Gato and base coming together. Must say, the kit has no more than about 10 pieces, not much I can mess up. Im liking submarines :big_grin:

Image

_________________
"Also we will never see a 1/350 late war Enterprise from Dragon due to a paralyzing fear of success...." - Heavy Melder

Lots of unfinished model ships + attention issues = A busy slipway where nothing gets done!


Report this post
Top
 Profile  
Reply with quote  
PostPosted: Sun Nov 20, 2011 1:07 pm 
Offline
User avatar

Joined: Fri Apr 08, 2005 9:41 am
Posts: 2215
Location: Monson, MA.
I have added the dive planes and Toms US SUB diveplane photoetch guards. These were close to the Dutch design that I had on hand. I have to order an IJN set for the net cutter. I also added the searchlight on the forward upper bridge. I used a clear IJN set for this. Its so small, and subtle it fit perectly according to photo sources. I also added hatch covers using Lion Roar hose reels to simulate them. I painted the sub with a second light coat of 507B and the deck was painted in G10. I will weather the deck with pastels to tone it down alot. I still have to do touchups on the paint job overall. The black streaks are not camouflage but, my goofs not having a fine tip brush. Hobby Lobby here I come! :big_grin: Here are the 1st photo installments.

Image

Image

Image

Image


Bob Pink. :wave_1:


Report this post
Top
 Profile  
Reply with quote  
PostPosted: Sun Nov 20, 2011 1:12 pm 
Offline
User avatar

Joined: Fri Apr 08, 2005 9:41 am
Posts: 2215
Location: Monson, MA.
2nd installment of pics. I added a Lion Roar IJN chock on the very stern of the vessel. Forgot to mention that before.

Image

Image

Image


Bob Pink. :wave_1:


Report this post
Top
 Profile  
Reply with quote  
PostPosted: Sun Nov 20, 2011 10:23 pm 
Offline
User avatar

Joined: Sun Jun 12, 2011 10:37 am
Posts: 1500
Location: Massachusetts.
Looking good so far Bob. Glad to see that fingerprint gone. :smallsmile:

_________________
On the Bench
1/350 Independence
1/350 Dunkerque
1/350 Shimakaze
1/350 Sharnhorst Dragon
1/350 Belfast


Report this post
Top
 Profile  
Reply with quote  
PostPosted: Tue Nov 22, 2011 9:12 pm 
Offline
User avatar

Joined: Sun Nov 27, 2005 8:45 pm
Posts: 373
Location: West Chester, PA
Hey Quincy! Looking good so far! How's everything out there? :wave_1:

_________________
Bob Cicconi


Report this post
Top
 Profile  
Reply with quote  
PostPosted: Wed Nov 23, 2011 9:37 am 
Offline
User avatar

Joined: Fri Apr 08, 2005 9:41 am
Posts: 2215
Location: Monson, MA.
Hi ya Bob. Things are fine out here. I found some pics of the RO-35 class for you and Scott. I'll have to send it to you after the holidays. We are flying east for Thanksgiving to see the relatives. Hope you have a great holiday! :thumbs_up_1: :thumbs_up_1:


Bob Pink. :wave_1:


Report this post
Top
 Profile  
Reply with quote  
PostPosted: Wed Nov 23, 2011 10:35 am 
Offline
User avatar

Joined: Fri Oct 19, 2007 2:25 pm
Posts: 778
Location: Phoenix, AZ
Hi Bob - Thanks for the photo help. I've got the hull together and opened up the hatches with a drill bit, but haven't done much else. Need to fix the joint at the bow next.

Mostly been doing resin work for the past week or so.

Safe travels and Happy Thanksgiving to all.

--Scott

_________________
-- Scott


Report this post
Top
 Profile  
Reply with quote  
PostPosted: Wed Nov 23, 2011 12:20 pm 
Offline
User avatar

Joined: Wed May 26, 2010 1:57 pm
Posts: 1298
Location: Schodack Landing, NY
Well, I've been lurking to date, but am now throwing my hat in with a build of Waveline's resin and white-metal casting of the USN SSG-574 Grayback, the lead ship of an attack submarine class converted early in her career to carry and launch the Regulus II missile. As such, the Grayback and sister subs were the first submarines to carry nuclear missiles, and served on deterrant patrols in the Pacific from 1958 to 1964, when the Regulus missile program ended. Grayback was then decommissioned, but recommissionedand and converted in 1964 to serve as a specialized transport submarine, in which capacity she served until 1984.

Box top:

Image

This kit should prove straightforward in assembly. The hull is a one-piece casting, with little evidence of pour stubs.

Image

There is some resin flash clean-up required in a few locations, and a few places where panel lines and details could be sharpened, such as you can see in this stern topside photo:

Image

Here is a photo of bow details. The bow profile, dramatically changed to accomodate hanger space for the missiles, will be a focal point of the model:

Image

Here's what clean-up looks like on the resin pour stub on the underside of the bow. Squadron putty (for color contrast with the light grey resin) and a Flex-i-file do the trick here:

Image

White-metal details for the stern. The shapes of the prop guards are accurate, bust I suspect these pieces could be thinned a bit for greater accuracy:

Image

Periscopes and radars for the sail. Archival photos indicate further masts and details that I'll have to consider adding, but the scale and detail of these parts is strong:

Image

Image

Here are the hatches and launch ramp area; casting is crisp and reasonably detailed here, so this won't get too much attention from me:

Image

Photo from NavSource, to give you an idea of the busy-ness of the launch rails and missile. My photo of these resin parts is rather blurry, so not posted here. The missile is cast in three parts (body and wings) and is missing some JATO-style booster rockets underneath. The resin parts for the launch ramp have been simplified, and are a spot to give some thought to adding some suggestive detailing.

Image

I'm sanding and parts-fitting at the moment. Will assemble and paint the missile and detail the launcher first, then address the masts, then assemble hull and sail for painting and weathering, and then add details of launcher, sail planes, masts, and props. If folks have suggestions as to an alternative sequence, I'd welcome them. I also need to plan early for how this is to be mounted for display.

I'm liking the look of the builds posted to date, and am looking forward to sharing my own. Hoping the holiday ahead provides some good building time on this (and a long-delayed IJN Amagi)!

- D-Boy


Report this post
Top
 Profile  
Reply with quote  
PostPosted: Sat Nov 26, 2011 4:08 am 
Offline

Joined: Sun Aug 15, 2010 6:19 pm
Posts: 709
Location: Seattle Area
^Thats cool


Im almost there with mine...we'll see if I add p/e or not...

Image

_________________
"Also we will never see a 1/350 late war Enterprise from Dragon due to a paralyzing fear of success...." - Heavy Melder

Lots of unfinished model ships + attention issues = A busy slipway where nothing gets done!


Report this post
Top
 Profile  
Reply with quote  
PostPosted: Sun Nov 27, 2011 12:55 am 
Offline
User avatar

Joined: Wed Dec 14, 2005 4:42 am
Posts: 654
Location: Staffordshire Moorlands UK
this group build is really coming along :thumbs_up_1:
Telford over and about to have a few days off after a week of nights so will attempt and i say attempt to make some loop arial spreaders :eyes_spinning:

Hey D-Boy love that sub, never seen a kit of that class anywhere ever
i'm really really envious.

Got my hands on an Odin class in 1/350 too late for this build but i'm looking forward to doing her in the new year sometime.

Hope all across the great pond have had or are going to have a nice holiday break :thumbs_up_1:

Roy


Report this post
Top
 Profile  
Reply with quote  
PostPosted: Sun Nov 27, 2011 7:23 pm 
Offline
User avatar

Joined: Wed May 26, 2010 1:57 pm
Posts: 1298
Location: Schodack Landing, NY
roy allen wrote:
Hey D-Boy love that sub, never seen a kit of that class anywhere ever
i'm really really envious.

Roy


I purchased this 1:350 kit from Hobby Link Japan about a year ago - it was/is listed as "out-of-stock." Nonetheless, I ordered and it only took about three weeks for it to ship (was cautioned it could take 4-6 weeks to receive from the manufacturer). So, still available.

Pit Road also makes a pre-assembled full-hull 1:700 SSG Growler and Grayback, one of which comes with a Regulus 1 missile, and the other with a Regulus II. These are out of production (but occassionally found on Ebay). I've waterlined both for my 1:700 WL collection:

Image

As the SSG intrigues you, here's another Pit Road 1:350 Combat Subs release, which is even more hard to find ( I was lucky enough to grab it quickly on Ebay). Soviet India Class rescue sub with two DSRVs:

Image

It is butt-ugly overall but has highly distinctive lines:

Image

Here's a close-up of one of the DSRV's:

Image

Perhaps momentum on the Grayback will carryover to the India Class!


Last edited by D-Boy on Fri Dec 09, 2011 10:15 am, edited 1 time in total.

Report this post
Top
 Profile  
Reply with quote  
PostPosted: Mon Nov 28, 2011 8:37 am 
Offline
User avatar

Joined: Thu Feb 24, 2011 3:06 am
Posts: 17
Location: Kiev, Ukraine
Hull is fully painted and marked with all decals.
Image Image Image
Image Image Image
And remains the last step - painting and installing periscopes and antennas. :whistle:

_________________
Max Sh.


Report this post
Top
 Profile  
Reply with quote  
PostPosted: Thu Dec 01, 2011 11:54 pm 
Offline
User avatar

Joined: Wed Apr 23, 2008 7:40 pm
Posts: 1157
Location: New Jersey
Image
Image
Image
Image
Image

Update. Anyone have a good suggestion for a clear agent to adhere smashed up plaster of paris onto the hull?

_________________
Image


Report this post
Top
 Profile  
Reply with quote  
PostPosted: Thu Dec 01, 2011 11:55 pm 
Offline
User avatar

Joined: Mon Jan 10, 2005 6:00 pm
Posts: 12331
Location: Ottawa, Canada
Acrylic gel dries as a clear gloss and has significant adhesion properties.

_________________
De quoi s'agit-il?


Report this post
Top
 Profile  
Reply with quote  
PostPosted: Fri Dec 02, 2011 1:02 am 
Offline
User avatar

Joined: Sat Nov 25, 2006 11:14 pm
Posts: 571
Location: San Diego, California
OK, I'm in.....
I will be building the Bronco models 1/350th, Chinese "Sung" class SSN.
Pictures to follow.....

_________________
Dan
Field Artillery, King of Battle
Please check out the Secret Society of Model Builders on facebook.


Report this post
Top
 Profile  
Reply with quote  
Display posts from previous:  Sort by  
Post new topic Reply to topic  [ 142 posts ]  Go to page Previous  1, 2, 3, 4, 5, 6 ... 8  Next

All times are UTC - 6 hours [ DST ]


Who is online

Users browsing this forum: No registered users and 2 guests


You can post new topics in this forum
You can reply to topics in this forum
You cannot edit your posts in this forum
You cannot delete your posts in this forum
You cannot post attachments in this forum

Jump to:  
Powered by phpBB® Forum Software © phpBB Group