Bob Dedmon wrote:
Here is the latest update on my 1/700 Chicago January 1943
Bob,
She sure is looking good! I thought some of these parts were small in 1/350, but in 1/700 I would be bald in no time.
JTninja wrote:
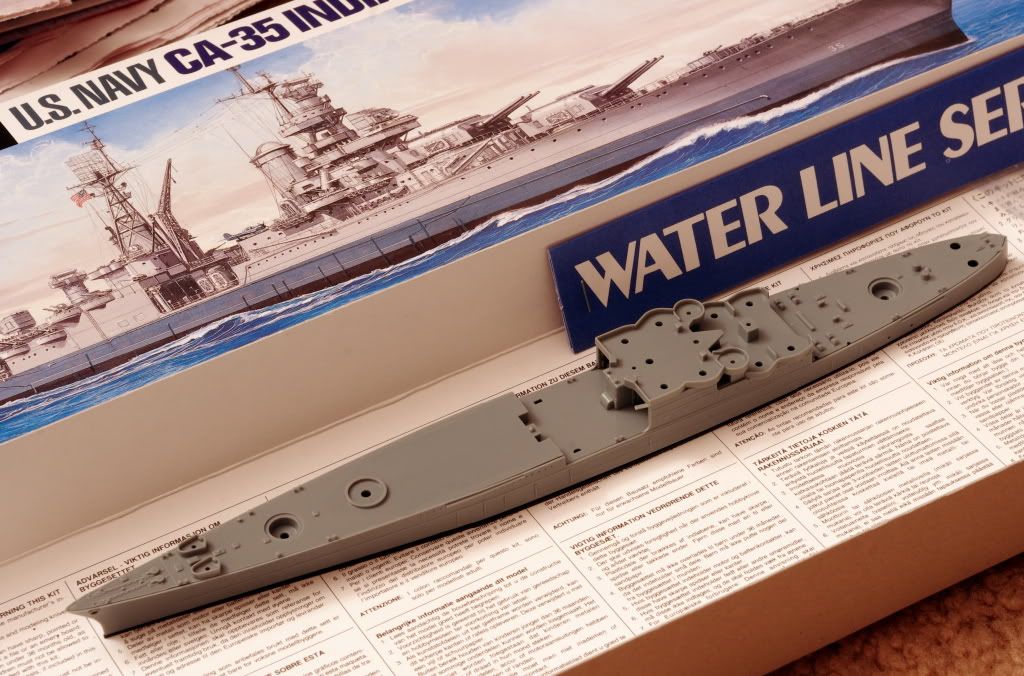
The Indy arrived at Christmas, PE soon after. Orders the warship pictorial for it, will arrive soon. Couldnt resist a mock up..
JT,
Good kit, I started it many years ago with the Tom's PE but it was just too small for me. Hey who doesn't enjoy a good mock up to get them motivated?
Quincy wrote:
I think I'm going to go with either the Tsugaru or Okinoshima for my minelaying cruiser build.
Bob P.
Either way should look good!
Bob Cicconi wrote:
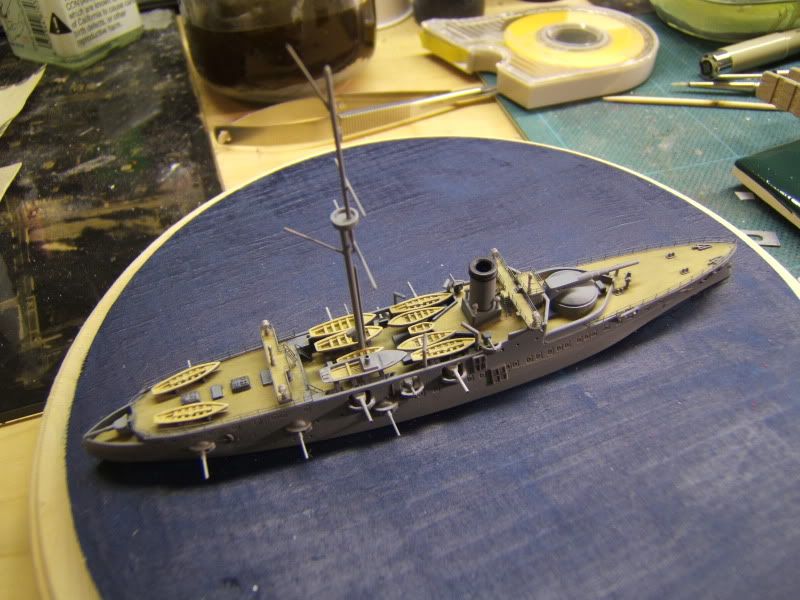
Here are two in-progress shots of the Itsukushima, and an initial photo of the Iron Shipwrights 1/700 Brooklyn (armored cruiser) that I'm also building for the group build. The Brooklyn will keep me busy for a while, as almost everything needs to be scratchbuilt, cast, or modified!
Bobby C.
Looking good as usual!
drdoom1337 wrote:
Mark McKinnis wrote:
drdoom1337 wrote:
I found my '44 Indianapolis resin kit and I have a big question. How do you fix a banana warp that keeps coming back? I baked this hull three times and screwed it down to a wood board but it's just banana'd again. This is frustrating.
That sounds bad!
If it stays straight with it screwed down on the board, then cut the board to size and build it up from the start as a diorama. Maybe you can do your water first and paint the Hull at the waterline and go from there.
Just a thought.
Good Luck,
Mark
Mark,
I gave this a shot, still no dice, the stern starts to pop up. I might just ebay the kit I'm not a huge fan of Indy to be honest, and I could probably pick up a Richelieu with the money.
DrDoom,
That sucks about the Indy, wish I would have caught that Ebay auction as that was a steal. Have you settled on a Cruiser yet?
Dave Hill wrote:
Great start Matt!...Lookin' good
Dave
Thanks Dave, this is very encouraging words coming from you! I hold your builds to be very inspirational!
Ok now onto the update, Christmas kind of slowed me down a bit but I think I am back on track now.
I started the long process of filling portholes.
Attachment:
 chicago6.jpg [ 143.87 KiB | Viewed 971 times ]
Very simple process but just tedious and time consuming
Some of the windows on the bridge were cast as solid resin
Attachment:
 chicago8.jpg [ 138.2 KiB | Viewed 971 times ]
So I decided to try my luck at removing them
Attachment:
 chicago9.jpg [ 132.56 KiB | Viewed 971 times ]
Luckily, they came out pretty easy except for the last one that I tried. That one came out easy too along with a piece of my finger

Attachment:
 chicago12.jpg [ 134.68 KiB | Viewed 971 times ]
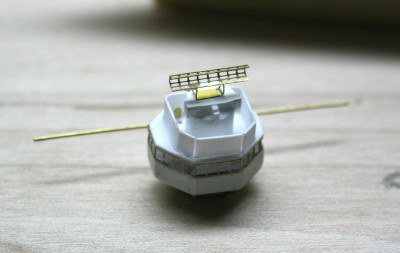
So here is what the assembly looks like now with the windows removed.
What do you suppose this is going to become?
Attachment:
 chicago5.jpg [ 85.41 KiB | Viewed 971 times ]
I wasn't too happy with the white metal gun director that sits atop the fighting top, so I tried my hand at scratchbuilding a new one and voila!
Attachment:
 chicago14.jpg [ 115.9 KiB | Viewed 971 times ]
Please disregard the "Glue Booger" stuck to the botom of the Mk.3, I didn't notice this until after the photos were taken but will come off easy
Here is the answer to the question earlier
Attachment:
 chicago10.jpg [ 143.76 KiB | Viewed 971 times ]
The white metal fighting top was just being a nightmare to clean and it was solid so it didn't look right. So I put together a new one, it may not be perfect but I think it looks better than the kit piece.
Attachment:
 chicago11.jpg [ 137.59 KiB | Viewed 971 times ]
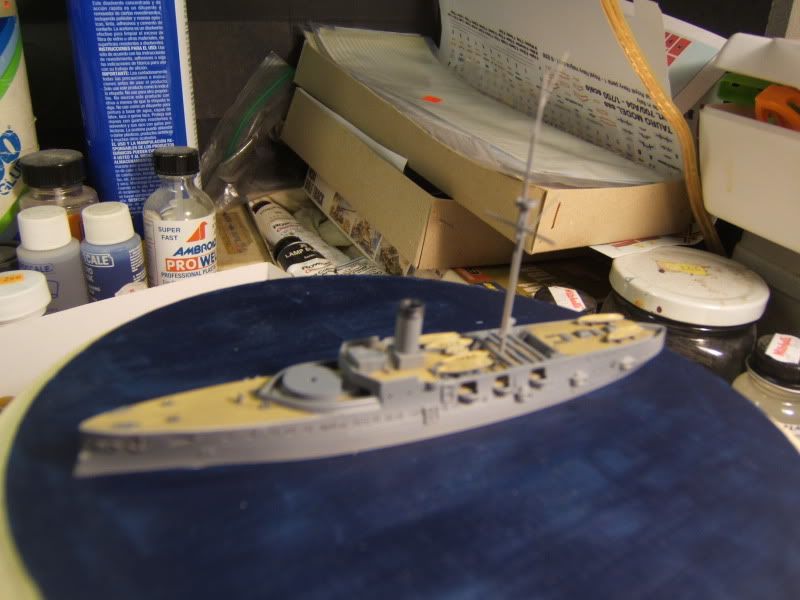
So here is an overall shot of where I stand today. I did go and cut out her display base and secure her via a screw through the #1 barbette.
Attachment:
 chicago13.jpg [ 119.87 KiB | Viewed 971 times ]


 Optical illusion maybe? Still I invested the money in them and it took me 20 minutes to get them set up vs the week or so having to straighten and file and sand the white metal ones, which when I was done would probably look just as thin as the brass ones. Oh well, still think yours turned out good and looking forward to updates.

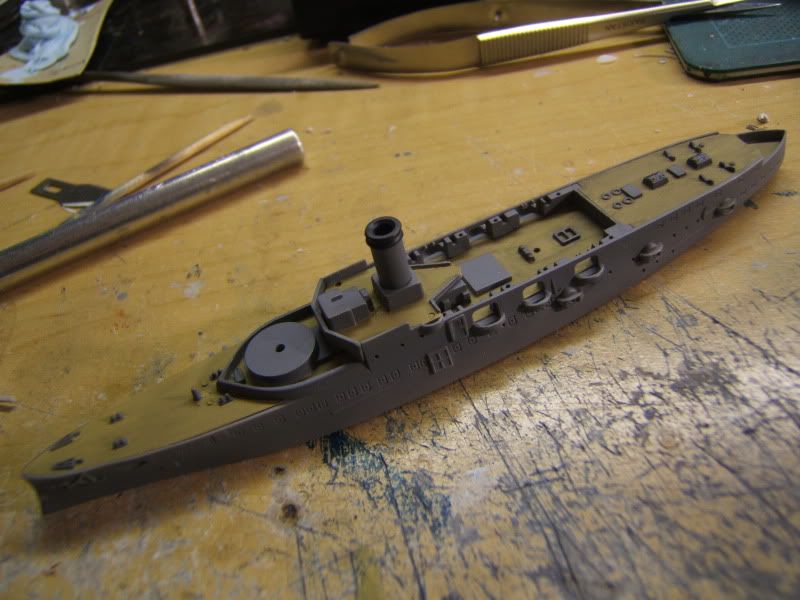
 Anyway, here are a couple of shots of where I stand now with the Chicago, everything is just dryfitted at the the moment. The portholes in the hull all look filled in but this is not the case, they have just filled with dust from when I was sanding the Hull to get rid of some rough spots. I will be filling a bunch in but the Chicago still had quite a few of them in August of 42.


