The Ship Model Forum

The Ship Modelers Source
It is currently Fri Apr 19, 2024 12:29 am

All times are UTC - 6 hours [ DST ]


Post new topic Reply to topic  [ 142 posts ]  Go to page Previous  1, 2, 3, 4, 5, 6, 7, 8  Next
Author Message
PostPosted: Sat Dec 03, 2011 9:55 am 
Offline

Joined: Sat Sep 17, 2005 9:19 am
Posts: 1483
Almost month since my last update so it's time to add something to my Surcouf.
The 'sail' is a beautiful casting and seems to be close to the early 1930's configuration of Surcouf. I only had to build a new periscope platform. I did decide to open the hangar so the hangar door was cut off with a razor saw and I cut away some resin in the hangar's inside. Then it was time to tackle the guns. They seemed to be nice looking castings but they were attached to the carrier resin by a piece of resin that was almost as thick as the guns themselves. As the resin used in early HP kits is very brittle this means I lost both of them. So I raided the spares box and came up with two ridiculously over scale 100mm guns from the skywave soviet navy set. These were trimmed down a bit and glued to the turret. The turret looks way too large for a submarine but this does seem to have been the real looks of this vessel.
Attachment:
sail1.JPG
sail1.JPG [ 136.05 KiB | Viewed 2105 times ]

Attachment:
sail2.JPG
sail2.JPG [ 139.52 KiB | Viewed 2105 times ]


Report this post
Top
 Profile  
Reply with quote  
PostPosted: Sun Dec 04, 2011 5:18 pm 
Offline
User avatar

Joined: Wed May 26, 2010 1:57 pm
Posts: 1296
Location: Schodack Landing, NY
One of the focal points of the USN SSG Grayback will be the missile launching platform. The Waveline kit represents this in two pieces, one of which swiveled to either side of center to angle the missile horizontally for launch, the second of which provided the vertical angle for launch:

Image

I was in NYC for a business trip earlier in the week and made time at the end of the day in fading daylight and heavy rain to take pictures of the Grayback's sister-ship, the SSG Growler, a museum submarine at the Intrepid Sea, Air, and Space Museum at 12th Avenue and 46th Street. Staff was kind enough to allow pier-only access for free, and I was able to photograph the sub's exterior from stern to bow. I passed my camera to a museum staffer on board the ship for some angles of the Regulus launcher not available from the pier:

Image

Image

I'll start dressing up my resin launcher a bit from these photos, with the intent of matching some of the shape and form of details depicted here, but with the end goal of simply creating some relief and details for the simple resin forms. I'll be drawing from miscellaneous PE, mostly in 1:700 scale - several navies and eras might end up on this Cold War sub! Hope to post the resulting photos later this evening.

Keep those photos and details coming on your builds - I learn from every post on this forum.


Report this post
Top
 Profile  
Reply with quote  
PostPosted: Sun Dec 04, 2011 9:01 pm 
Offline
User avatar

Joined: Wed May 26, 2010 1:57 pm
Posts: 1296
Location: Schodack Landing, NY
Some nice progress this evening on the Regulus launcher. As you'll see, I'm not going for absolute accuracy (I admire those efforts in any scale, but in 1:700 and 1:350, it has not yet been a priority for me), but suggestive realism. What are the key shapes and areas of attention that might need a bit of dressing up?

Here are the results. The PE used here is all from my 1:700 scale stash, plus a few miscellaneous pieces of metal found here and there around the house or office. As a result, on this 1:350-scale Regulus launcher are IJN machine guns, gun shields, anti-skid deck and gunbases from LionRoar and IJN ladder segments from GMM, as well as heavy duty staple segments from the photocopier at work.

Why 1:700 scale parts on a 1:350 model? Scale does not really matter since the parts are not being used in their intended context, and I think the anti-skid deck in 1:700 still looks over-scale in 1:350 anyway.

When all was said and done, I was a bit worried that these pieces would look much busier on the deck than the rest of the hull... (it was out of sight with primer drying) but the cast-resin hull has a fair amount of detail and I think this enhancements will look in keeping with the existing details.

Here are the resin pieces as provided:

Image

Here is the result of the PE, metal, and piano cord enhancements:

Image

Image

This shot lets you see the treatment to the underside of the launcher:

Image

The anti-skid plate, mounted outside and between the launcher rails, was cut to rough shape, and then trimmed to size in place with a fresh x-acto blade after the glue dried.

His what the launcher looks like dry-fitted to the deck. I'll trim the launcher rail walkways to angled points and deal with burrs on these parts once the glue is strongly set. I've got to dress up the piano cord a bit, as well as mount pistons on either side of the launcher - used to rotate the launcher off center:

Image

Good progress for me amidst a busy weekend!


Last edited by D-Boy on Mon Dec 05, 2011 7:49 am, edited 1 time in total.

Report this post
Top
 Profile  
Reply with quote  
PostPosted: Sun Dec 04, 2011 9:37 pm 
Offline
User avatar

Joined: Wed May 26, 2010 1:57 pm
Posts: 1296
Location: Schodack Landing, NY
Pieter wrote:
Almost month since my last update so it's time to add something to my Surcouf.
The 'sail' is a beautiful casting and seems to be close to the early 1930's configuration of Surcouf. Then it was time to tackle the guns. They seemed to be nice looking castings but they were attached to the carrier resin by a piece of resin that was almost as thick as the guns themselves. As the resin used in early HP kits is very brittle this means I lost both of them. So I raided the spares box and came up with two ridiculously over scale 100mm guns from the skywave soviet navy set. These were trimmed down a bit and glued to the turret. The turret looks way too large for a submarine but this does seem to have been the real looks of this vessel.
Attachment:
sail1.JPG


Attachment:
sail2.JPG


I'm no expert on the Surcouf, but she has always intrigued me, so I've been watching your progress with this kit with interest.

This is a very streamlined casting of the sail... and as a result, shows no lines where the gun turret rotated to fire at an angle off centerline. Are you going to seek to demarcate the joint between sail and gun-casing?

I do think your replacement barrels look very good. The photos I've looked up of Surcouf, however, show deep holes/pockets where the gun barrels exist the sail. Too late to addess how to adapt the sail for that distinctive feature?

D-Boy


Report this post
Top
 Profile  
Reply with quote  
PostPosted: Mon Dec 05, 2011 7:57 am 
Offline

Joined: Tue Jan 11, 2005 10:56 am
Posts: 8572
Location: New York City
Nice detail work, D-Boy. I see your excursion paid benefits. :smallsmile:


Report this post
Top
 Profile  
Reply with quote  
PostPosted: Mon Dec 05, 2011 11:55 am 
Offline
User avatar

Joined: Wed May 26, 2010 1:57 pm
Posts: 1296
Location: Schodack Landing, NY
Dan K wrote:
Nice detail work, D-Boy. I see your excursion paid benefits. :smallsmile:


Between the museum ship visit and a visit to singularly unique Red Caboose Hobbies on 45th Street that left me gob-smacked, I got a lot of hobby time out of a business trip to New York!


Report this post
Top
 Profile  
Reply with quote  
PostPosted: Tue Dec 06, 2011 1:44 pm 
Offline
User avatar

Joined: Wed May 26, 2010 1:57 pm
Posts: 1296
Location: Schodack Landing, NY
Minor progress on the SSG Grayback last night:

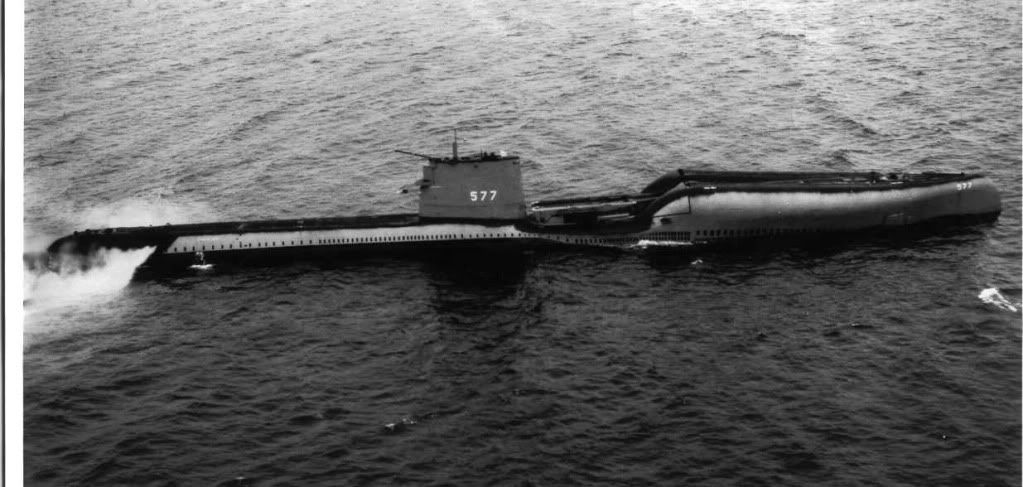
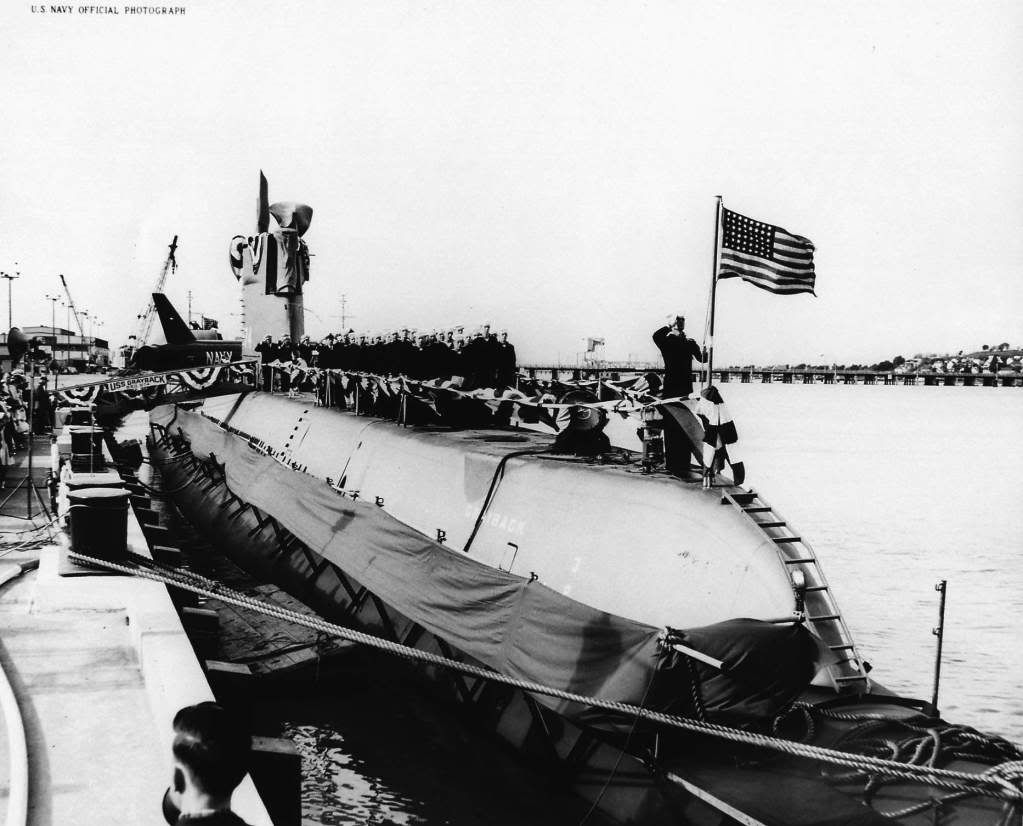
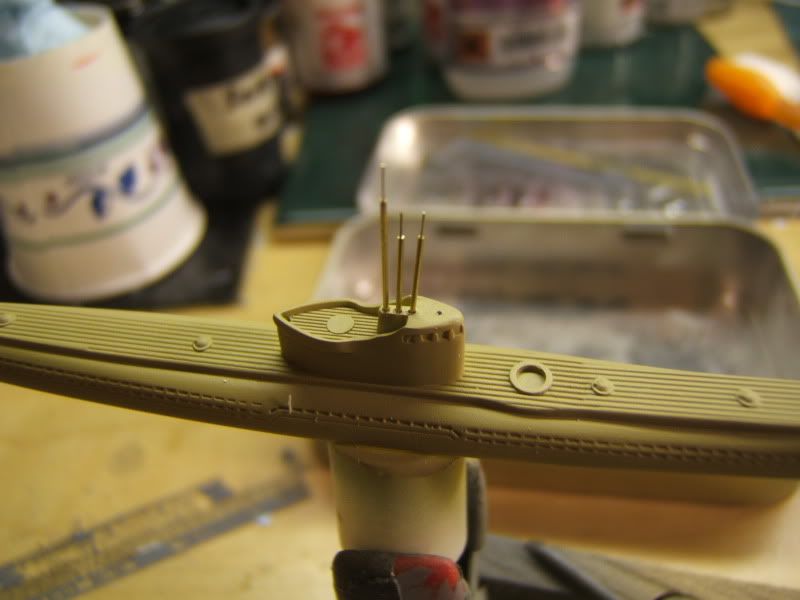
1) All white-metal parts sanded to eliminate molding lines, and prop guards thinned in thickness. Been examining photos of the Grayback/Growler sails (although they were different heights) for other indications of antennas and scope/radar details.

Any suggestions for what best to use to prime these white metal parts for painting with acrylics?

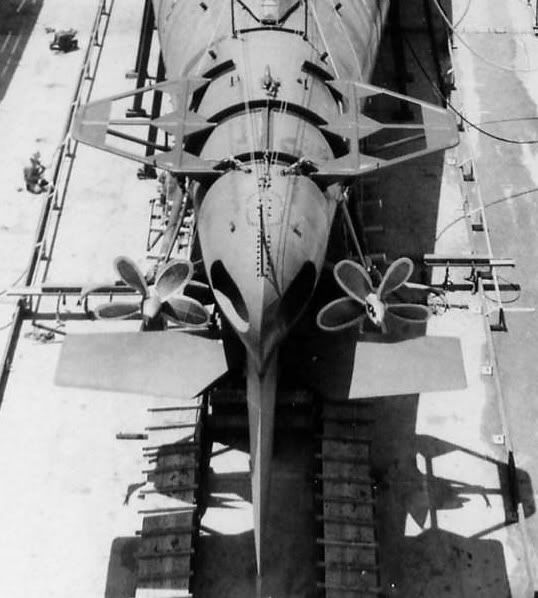
2) Ordered alternative props and propeller shafts and bracing from YMW via Freetime Hobbies. The kit requires scratchbuilding of the prop-shaft bracing as it does not include parts for such (although does give dimensions in the instructions. The YMW parts will serve as templates for scratchbuilding or direct replacements. I'll be interested to compare the propeller shaft dimensions between the kit parts (wire that must be cut to length) and the YMW parts.

3) Sanded the bow and stern fins to prepare for priming. With the missile on deck, archival photos show the bow planes always stowed in the raised position. Most full hull displays show submerged submarines.

Do I get cute and display one side of the model plane up, the other plane down? I'm leaning toward planes up. One of the resin planes has a small ding in it, now puttied and drying for sanding to form.

4) Measured the hull for mounting lamp risers for a pedestal mount display. I still need to secure two lamp risers and prep a base for display.

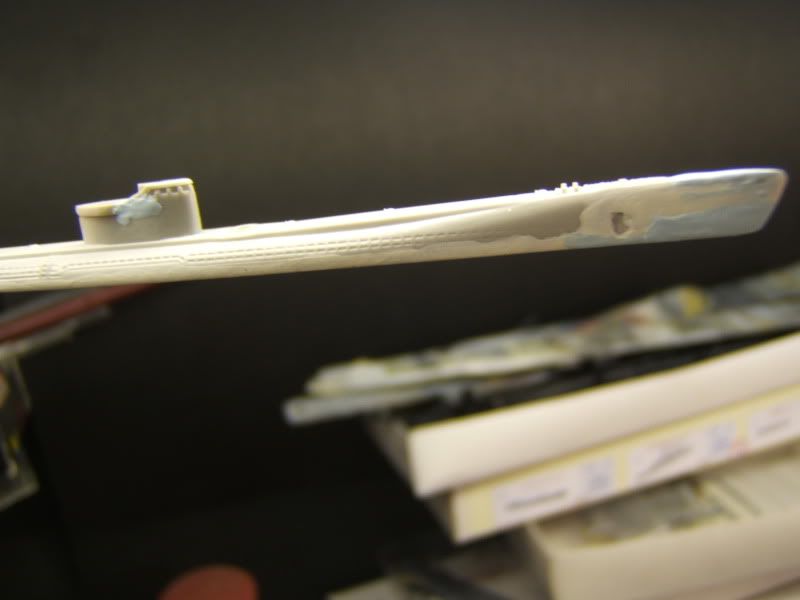
5) Continued to treat the molding line on the top deck and the pour stub line on the hull bottom. Both have now received two coats of Mr. Surfacer 1000, heavily thinned, with fine grit sanding in between. It is an odd place to find a mold line, and given the other details on deck, has required some patience to address:

Image

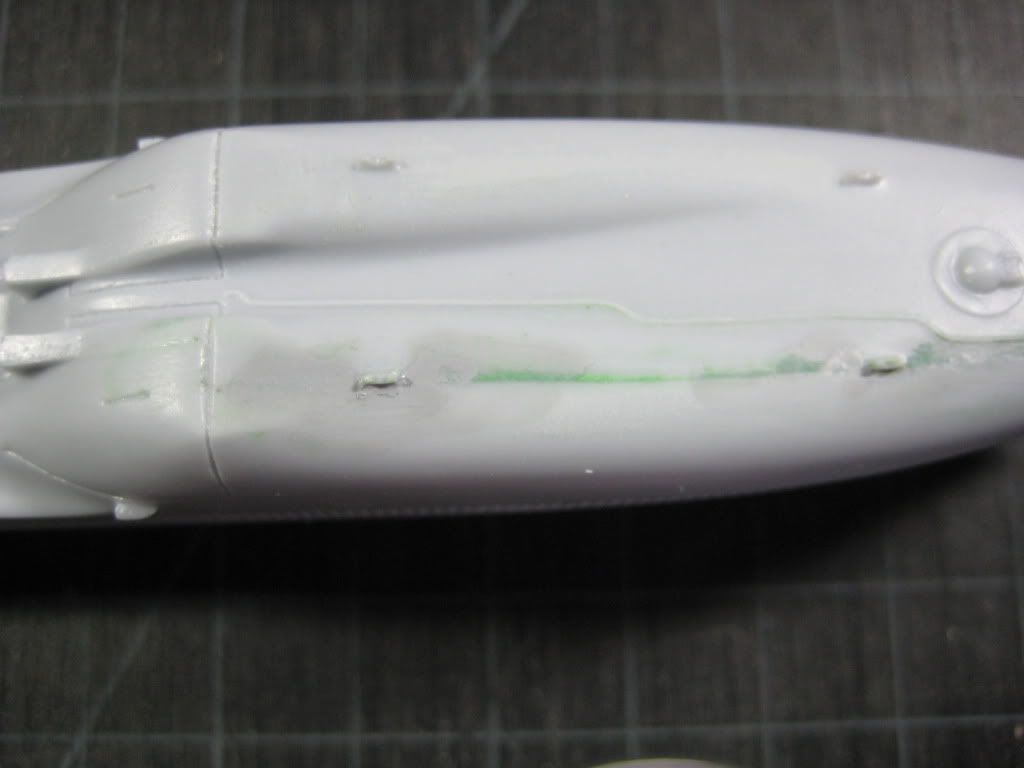
A note on the above - I bought Mr. Surfacer 1000 liquid putty with high hopes, and have not really figured out how best to use it until this build. It requires a great deal of thinner to really spread and cover; unthinned, it spreads some but not absolutely flat, and hardens to a glossy sheen that is difficult to sand smooth. I apply it with a brush over the seams on this build, let dry a minute, and then hit and smooth with multiple coats of thinner. Seems to finally be working as I expected. I'd welcome any other users thoughts on best way to apply...

6) Made plans to reattach the rudder to the hull - identifying the best way to clamp and brace while drying. The rudder is molded in place - I had thinned out some of the lines and shape as part of my initial sanding of the model. A chipmunk that found its way into my basement was spied and eviscerated by our cat, but not before the chase made hash out of my modeling area - a cascade of model boxes had been pushed down from storage above the model bench, knocking the sub hull to the floor, and snapping the rudder. Relatively clean break, but I'd like the repair to be as strong as possible.

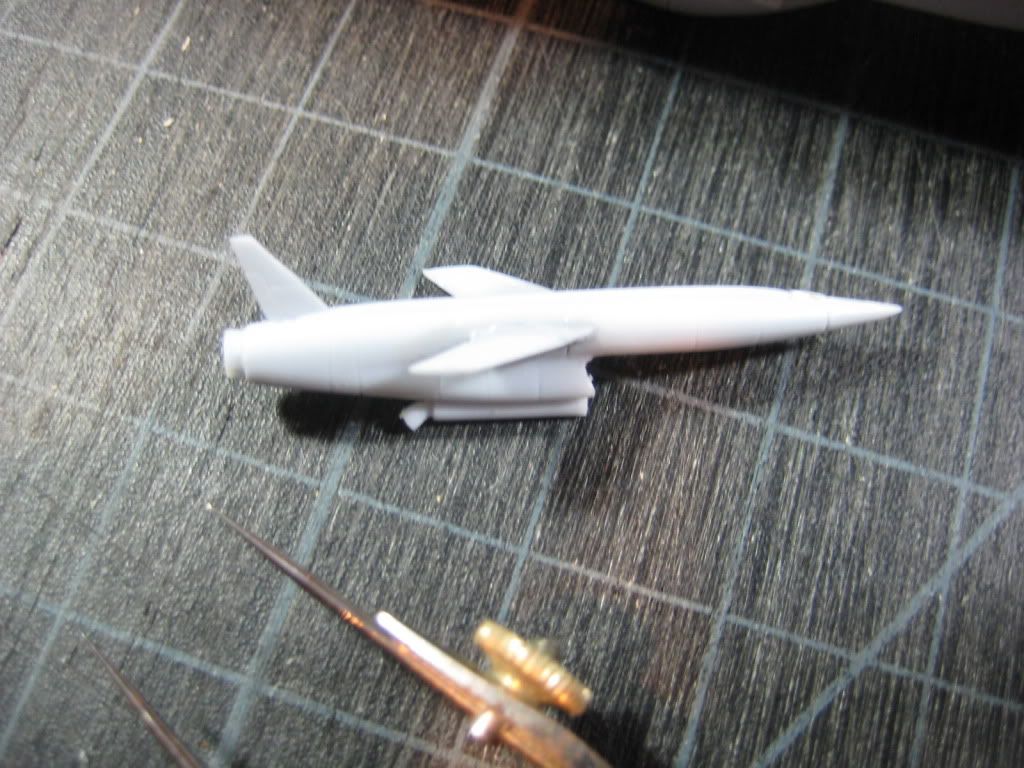
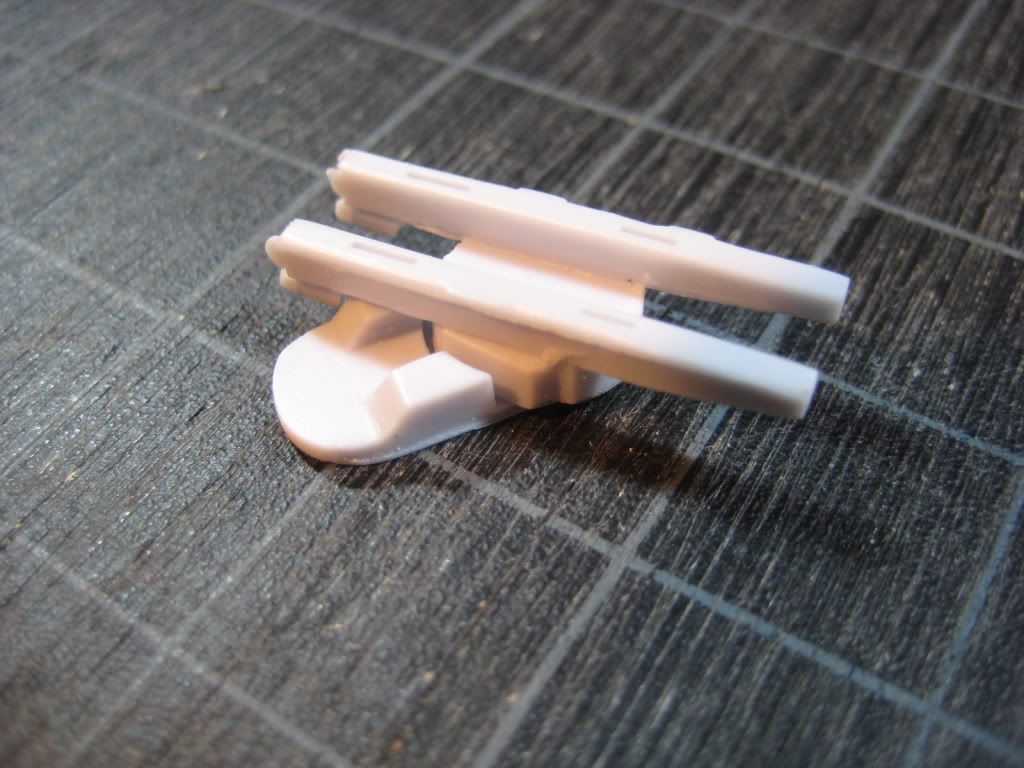
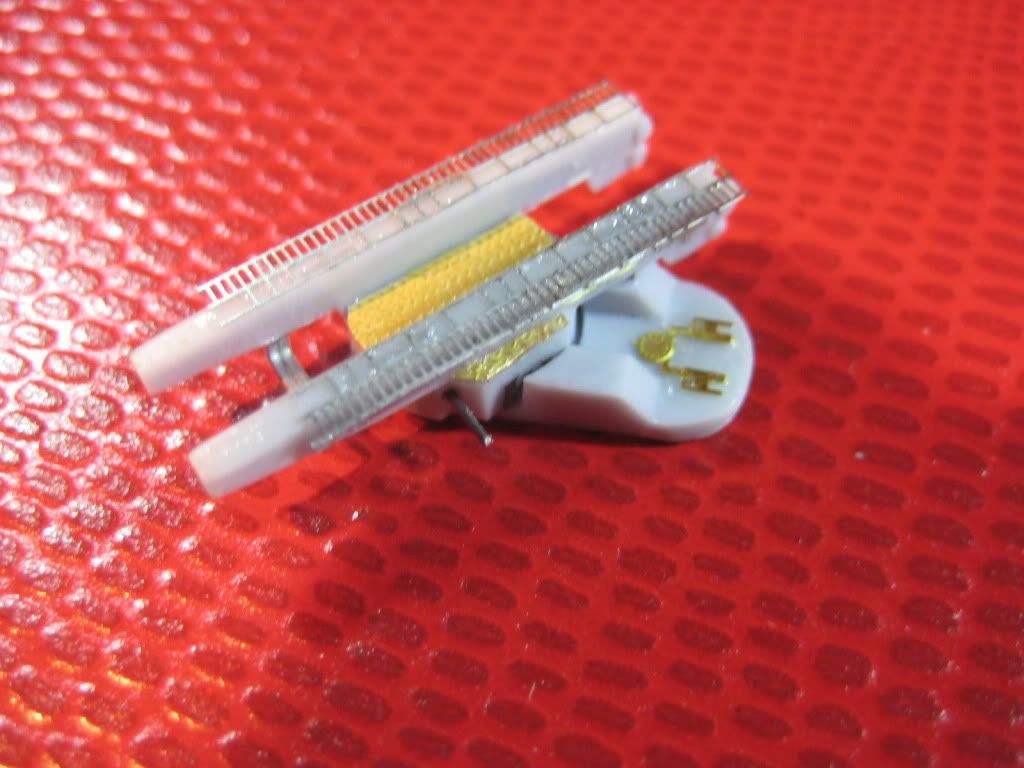
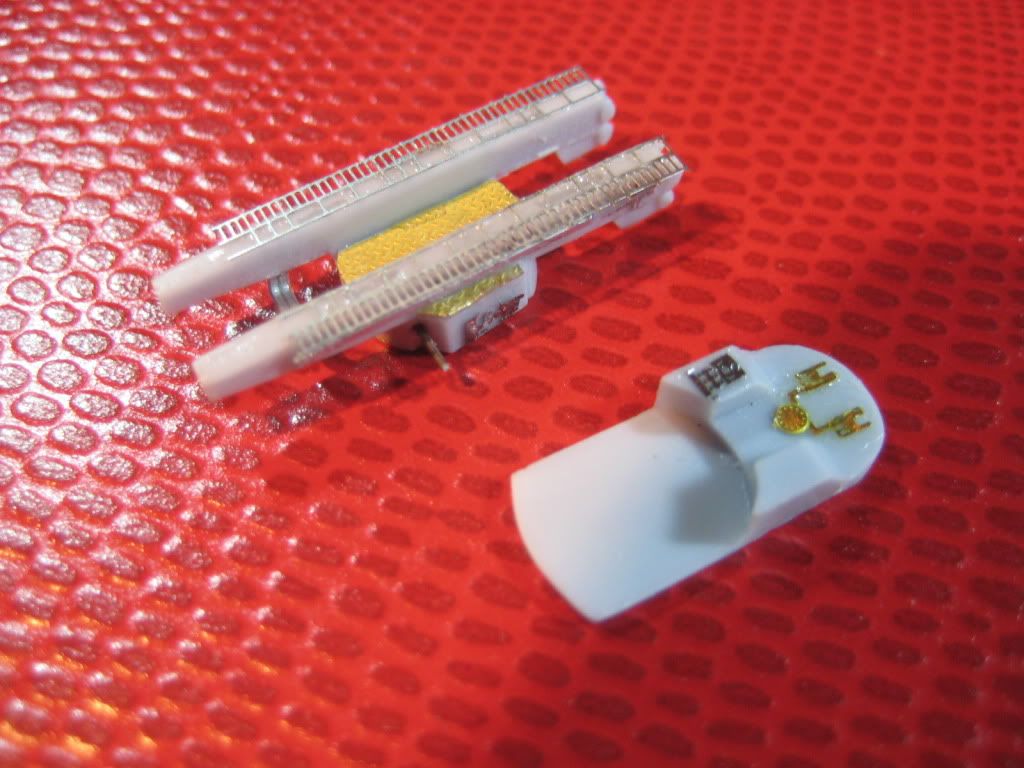
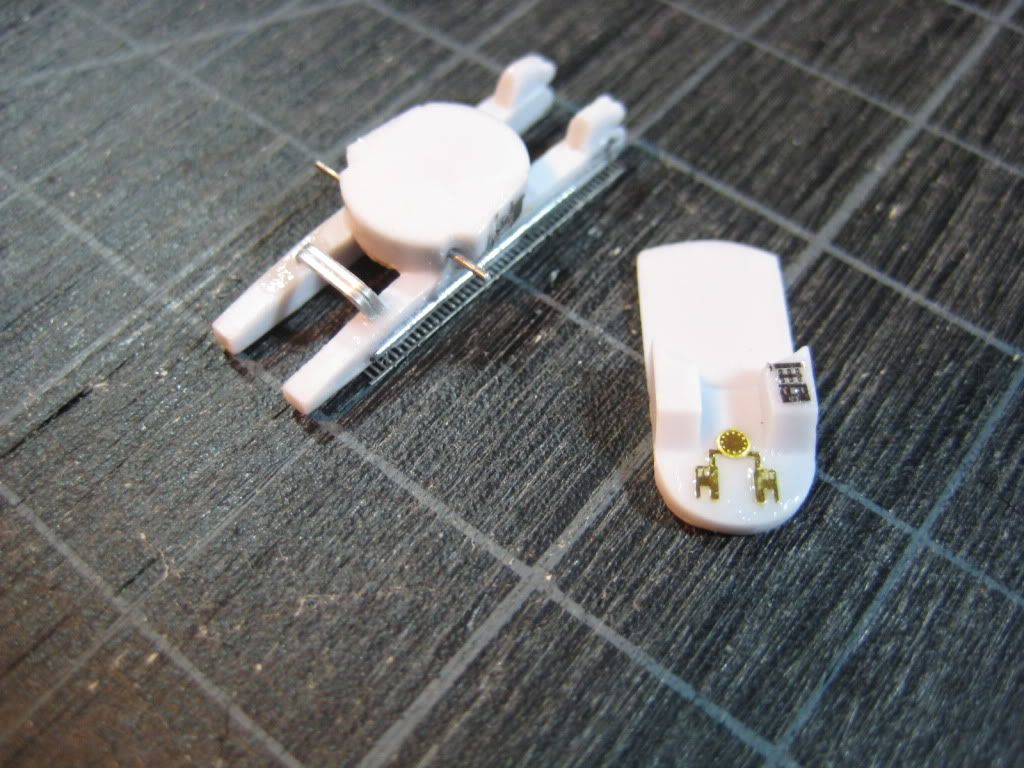
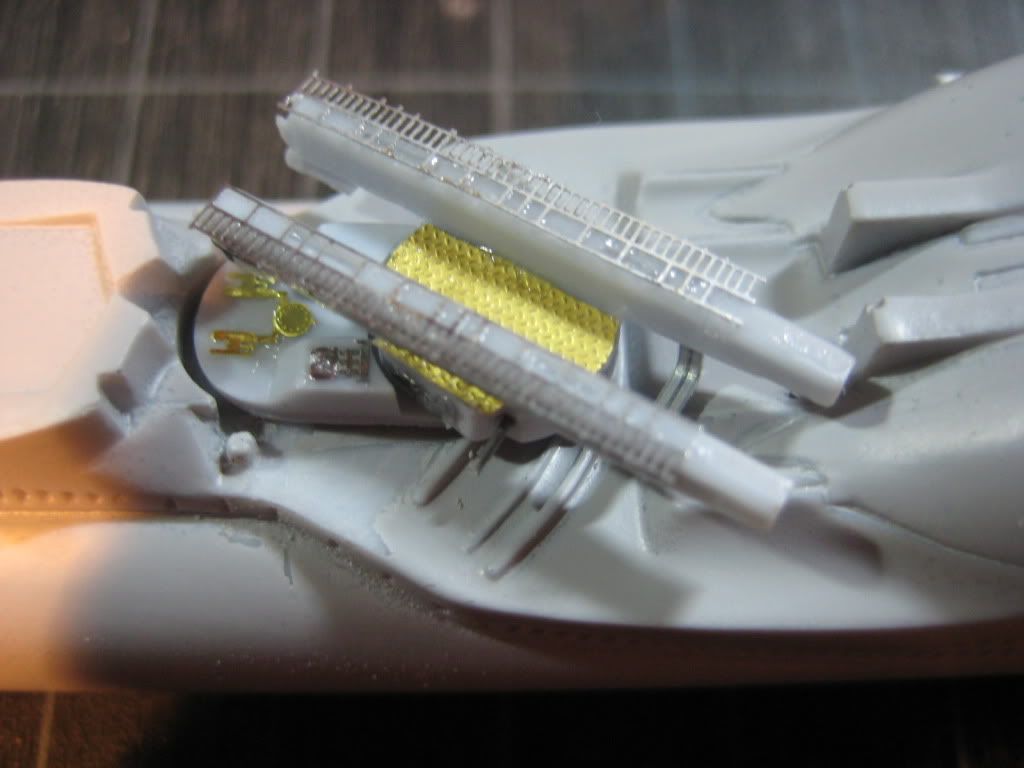
7) Finished assembly of the Regulus II missile. There's a small piece of piano wire that extends through the missile body and provides stronger mounts for the wings than the resin - resin pin to hole connection provided by Waveline:

Image

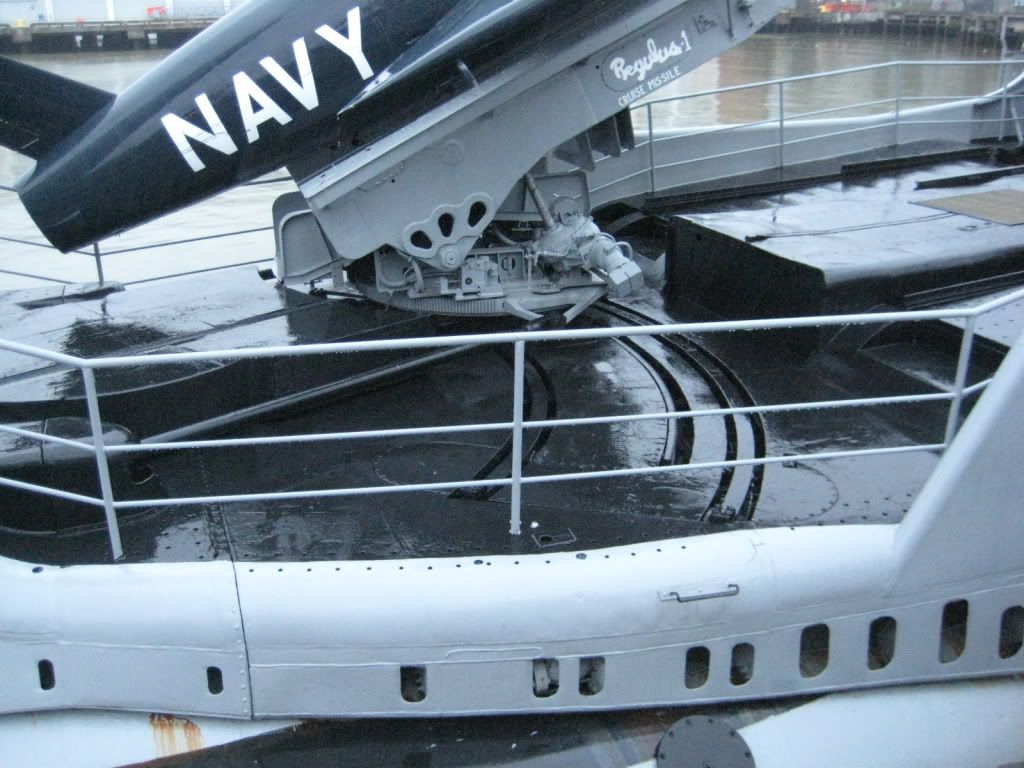
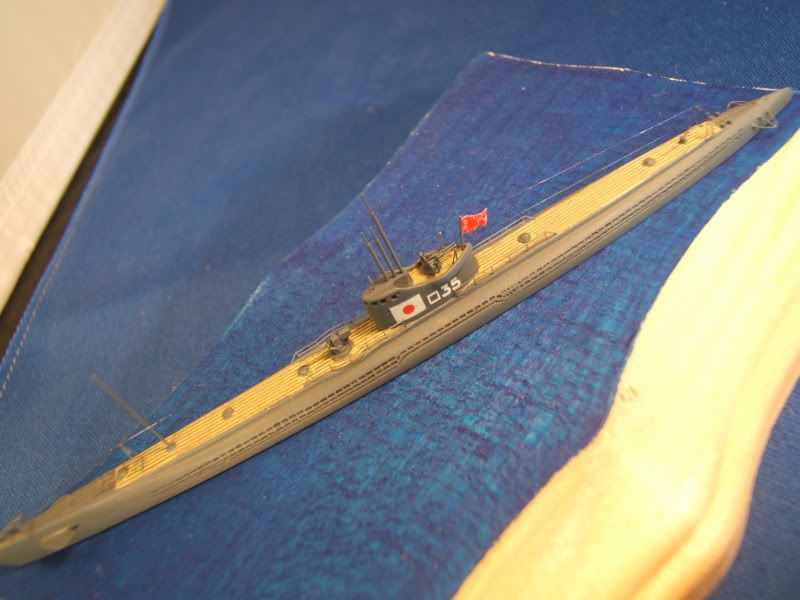
7) Thinking ahead to paint schemes, since that stage is not too far off. My visit to the Growler documents one option, intriguing for its black on classic gray on the work deck, as well as some black closer to the waterline on the pressure hull bulge. But here's an alternative scheme that will most likely win the day, notable for the black cut line on the stern and the soft edging between black and gray on missile deck bulge and the work decks (Photo is from NavSource.org):

Image


Last edited by D-Boy on Fri Dec 09, 2011 10:22 am, edited 1 time in total.

Report this post
Top
 Profile  
Reply with quote  
PostPosted: Tue Dec 06, 2011 11:03 pm 
Offline
User avatar

Joined: Fri Apr 08, 2005 9:41 am
Posts: 2207
Location: Monson, MA.
Great progress everyone! :thumbs_up_1: :thumbs_up_1:


Bob C, and Scott:

I will try to send you pics of the RO-35 class boats. I just got my laptop back tonight. :woo_hoo:

I'll try to post some pics of my WIP as well. I have to admit that, it was nice not to have a computer for a couple of days. I actually got alot of things done for a change around the house. :heh: :heh:


Bob Pink. :wave_1:


Report this post
Top
 Profile  
Reply with quote  
PostPosted: Wed Dec 07, 2011 3:47 pm 
Offline
User avatar

Joined: Sun Feb 01, 2009 3:55 pm
Posts: 3125
Location: Hawaii
Small update for me; she's ready for paint! Really pushed the macro setting on my Nikon to the limit here.

Image

Added the guns, an RDF loop, the small surface radar (FuMO something or other), and the periscopes (dry-fitted for now, will glue after I populate the bridge). The guns all came from the 1/700 Hasegawa U-boat Combo kit (Type VII and IX). They looked more accurate to me than the HB ones did. I thinned the barrels on the 20mms and added some shoulder braces from a Lion Roar Oerlikon PE sheet. The RDF loop and radar came from Tom's Gato PE. The radar is supposed to be an early model USN SJ but looks very close to the FuMO sets carried by some of the Type IXs.

After looking through a bunch of U-Boat books I came across a seldom mentioned Arctic camo scheme consisting of Hellgrau on the hull and pure white on the sail. I think I'm going to use those colors but apply them in a splinter pattern. We'll see how that goes :big_grin:

D-Boy, looking forward to see Grayback done! I'm glad to see such an oddity being built especially with a Regulus deployed :thumbs_up_1:

Looking good gentlemen, looking good. Only 19 days left so pour on the steam!

_________________
Drawing Board:
1/700 Whiff USS Leyte and escorts 1984
1/700 Whiff USN Modernized CAs 1984
1/700 Whiff ASW Showdown - FFs vs SSGN 1984

Slipway:
1/700 Whiff USN ASW Hunter Killer Group Dio 1984


Report this post
Top
 Profile  
Reply with quote  
PostPosted: Wed Dec 07, 2011 4:35 pm 
Offline
User avatar

Joined: Wed May 26, 2010 1:57 pm
Posts: 1296
Location: Schodack Landing, NY
Cliffy B wrote:
After looking through a bunch of U-Boat books I came across a seldom mentioned Arctic camo scheme consisting of Hellgrau on the hull and pure white on the sail. I think I'm going to use those colors but apply them in a splinter pattern. We'll see how that goes :big_grin:

D-Boy, looking forward to see Grayback done! I'm glad to see such an oddity being built especially with a Regulus deployed :thumbs_up_1:

Looking good gentlemen, looking good. Only 19 days left so pour on the steam!


Thanks, good sir. The Grayback has been an interesting build so far. There's a lot more research that I'd like to do on it - the model will clearly only be a representation/amalgamation. The launcher detailing is entirely speculative/suggestive in nature - the SSG Growler museum ship in NY has a Regulus 1 deployed, and the launcher is distinctly different than the scant photos I've found of the Regulus II launcher, which the kit is intended to depict. Seems all the Navy press officers preferred photos of the deck shrouded in post-launch smoke.

This Waveline kit does offer some interesting scratchbuilding opportunities... the Growler sail is taller, and the launcher different, as noted. At some point in these ships careers, they both lost their prop guards - my build will retain its guards for visual interest.

Love the idea of a splinter scheme on your hull! I think the photos look very sharp; the added detailing looks very clean and spot-on.


Last edited by D-Boy on Fri Dec 09, 2011 10:23 am, edited 1 time in total.

Report this post
Top
 Profile  
Reply with quote  
PostPosted: Wed Dec 07, 2011 5:32 pm 
Offline
User avatar

Joined: Sun Feb 01, 2009 3:55 pm
Posts: 3125
Location: Hawaii
Thanks man! Can't wait to try my hand at painting the camo. Weathering it should be fun none the less :big_grin:

In regards to the screw guards, I don't know if this was the trend postwar or not, but I remember reading that the WWII fleet boats' guards were removable. They only installed them when in port and promptly removed them when they put to sea. Don't know when they did away with for good though. They must of taken a similar approach to photographing the Regulus II launchers as they did for seaplane hangars and for helo hangars today :big_grin:

_________________
Drawing Board:
1/700 Whiff USS Leyte and escorts 1984
1/700 Whiff USN Modernized CAs 1984
1/700 Whiff ASW Showdown - FFs vs SSGN 1984

Slipway:
1/700 Whiff USN ASW Hunter Killer Group Dio 1984


Report this post
Top
 Profile  
Reply with quote  
PostPosted: Wed Dec 07, 2011 7:31 pm 
Offline
User avatar

Joined: Wed May 26, 2010 1:57 pm
Posts: 1296
Location: Schodack Landing, NY
Cliffy B wrote:
Thanks man! Can't wait to try my hand at painting the camo. Weathering it should be fun none the less :big_grin:

In regards to the screw guards, I don't know if this was the trend postwar or not, but I remember reading that the WWII fleet boats' guards were removable. They only installed them when in port and promptly removed them when they put to sea. Don't know when they did away with for good though. They must of taken a similar approach to photographing the Regulus II launchers as they did for seaplane hangars and for helo hangars today :big_grin:


Am I allowed to ask where they stowed them when at sea... or were they left dockside?


Report this post
Top
 Profile  
Reply with quote  
PostPosted: Wed Dec 07, 2011 8:21 pm 
Offline
User avatar

Joined: Sun Feb 01, 2009 3:55 pm
Posts: 3125
Location: Hawaii
Sure you're allowed to ask but, that doesn't mean I know the answer :big_grin: It was described in a photo caption but I can't remember the book title. Let me dig a bit.

Edit: I found the book; Floating Drydock's "Fleet Submarines of World War II" By: Thomas Walkowiak page 28. There is a photo (stern shot, close up of the screw guards) of the USS Skate (SS-305) under construction (practically finished) dated July 1943 at Mare Island. The caption states, "During inport periods, the boats were equipped with propeller guards. But, these were removable and were taken off before going on war patrol."

Here is said photo on NavSource: http://www.navsource.org/archives/08/0830511.jpg NavSource credits the book for the photo and quotes the caption as well.


So.....does anyone know the details about where the stinking things were kept; on board or pier side or on board the tender? I seriously doubt they were kept aboard due to their size and rigidity, IE you couldn't break them down at least best I can tell. They're not included in plans of the subs either that I've seen, not even their positions on the hull. Anybody?

BTW, did you see these plans of Growler? They're listed as from 1962 and I think Regulus I is still installed but they might be of some use to you.

http://www.hnsa.org/doc/plans/ssg577.pdf

Found them here: http://www.hnsa.org/doc/plans/index.htm

_________________
Drawing Board:
1/700 Whiff USS Leyte and escorts 1984
1/700 Whiff USN Modernized CAs 1984
1/700 Whiff ASW Showdown - FFs vs SSGN 1984

Slipway:
1/700 Whiff USN ASW Hunter Killer Group Dio 1984


Report this post
Top
 Profile  
Reply with quote  
PostPosted: Wed Dec 07, 2011 9:07 pm 
Offline
User avatar

Joined: Wed May 26, 2010 1:57 pm
Posts: 1296
Location: Schodack Landing, NY
Cliffy B wrote:
Sure you're allowed to ask but, that doesn't mean I know the answer :big_grin: It was described in a photo caption but I can't remember the book title. Let me dig a bit.

Edit: I found the book; Floating Drydock's "Fleet Submarines of World War II" By: Thomas Walkowiak page 28. There is a photo (stern shot, close up of the screw guards) of the USS Skate (SS-305) under construction (practically finished) dated July 1943 at Mare Island. The caption states, "During inport periods, the boats were equipped with propeller guards. But, these were removable and were taken off before going on war patrol."

Here is said photo on NavSource: http://www.navsource.org/archives/08/0830511.jpg NavSource credits the book for the photo and quotes the caption as well.

So.....does anyone know the details about where the stinking things were kept; on board or pier side or on board the tender? I seriously doubt they were kept aboard due to their size and rigidity, IE you couldn't break them down at least best I can tell. They're not included in plans of the subs either that I've seen, not even their positions on the hull. Anybody?


Well, I threw this question out to the main forum, so we'll have to both keep an eye there for facts and opinions... also wrote a website dedicated to the Growler, but just got a bounce-back on that email:

CliffyB, thanks for looking into this... such a quick response. Here's a photo of the Growler underconstruction at the Wikipedia listing for the boat:

Image

These guards look removeable... they seem to have some type of spring clip or eyebolt in the foreground on each side holding the guard in mounted position...

No photos I just looked back through seem to show either the Growler or Grayback at sea with prop guards. But most photos are not focused on the stern, or close enough to absolutely determine this.

I also note in this photo that she sports 5-blade propellers, not the 3-blade included in the kit (or just ordered from Freetime Hobbies)!

What did come up in some photos new to me online was a ladder from the sea deck down to the prop-guard level. See photo below:

Image

Anyone have ideas if this was a permanent mount, or pierside only mount? The bottom of this ladder may be visible in the propguard photo above. If permanent, anyone on this build who'd be willing to send me 12 rungs of 1:350 scale ladder!?

D-Boy


Report this post
Top
 Profile  
Reply with quote  
PostPosted: Wed Dec 07, 2011 10:30 pm 
Offline
User avatar

Joined: Sun Feb 01, 2009 3:55 pm
Posts: 3125
Location: Hawaii
Alright, after banging around on the net for awhile I haven't been able to find much at all sadly. The general consensus is that people are aware that "could" have been removable but no one can confirm it. I wonder where FD got the info? One other bit I was able to dig up was that US boats were rarely seen at sea with their screw guards, especially later in the war. For what reasons I can only guess but, I don't know for sure. This seems to reinforce the bit that they were possibly removable. Were boats built late in the war even built with them? I found an article about a sunken sub being discovered (turned out to be the Grunion) and that they found screw guards installed and noted that that was extremely rare. Apparently it was one of the "smoking gun" characteristics that allowed to ID the sub.

They were all pulled from the remaining boats sometime postwar in order to streamline their hulls similar to the new sails the GUPPY program implemented.

I remember you asked what they were used for as well. Generally they are in place to keep any other ships/boats (mainly tugs) for fowling the screws IE damaging them and themselves.

Wish I had known about this back in April. I could of asked around on the Bowfin when I was out there :doh_1:

Wish I could be more helpful :scratch:

_________________
Drawing Board:
1/700 Whiff USS Leyte and escorts 1984
1/700 Whiff USN Modernized CAs 1984
1/700 Whiff ASW Showdown - FFs vs SSGN 1984

Slipway:
1/700 Whiff USN ASW Hunter Killer Group Dio 1984


Last edited by Cliffy B on Wed Dec 07, 2011 10:42 pm, edited 1 time in total.

Report this post
Top
 Profile  
Reply with quote  
PostPosted: Wed Dec 07, 2011 10:32 pm 
Offline
User avatar

Joined: Mon Jan 10, 2005 6:00 pm
Posts: 12143
Location: Ottawa, Canada
I imagine the guards would produce significant amounts of noise as well, further encouraging their non-use during deployments.

_________________
De quoi s'agit-il?


Report this post
Top
 Profile  
Reply with quote  
PostPosted: Thu Dec 08, 2011 10:24 am 
Offline
User avatar

Joined: Wed May 26, 2010 1:57 pm
Posts: 1296
Location: Schodack Landing, NY
Cliffy B wrote:
Alright, after banging around on the net for awhile I haven't been able to find much at all sadly. The general consensus is that people are aware that "could" have been removable but no one can confirm it. I wonder where FD got the info? One other bit I was able to dig up was that US boats were rarely seen at sea with their screw guards, especially later in the war. For what reasons I can only guess but, I don't know for sure. This seems to reinforce the bit that they were possibly removable. Were boats built late in the war even built with them? I found an article about a sunken sub being discovered (turned out to be the Grunion) and that they found screw guards installed and noted that that was extremely rare. Apparently it was one of the "smoking gun" characteristics that allowed to ID the sub.

They were all pulled from the remaining boats sometime postwar in order to streamline their hulls similar to the new sails the GUPPY program implemented.

I remember you asked what they were used for as well. Generally they are in place to keep any other ships/boats (mainly tugs) for fowling the screws IE damaging them and themselves.

Wish I had known about this back in April. I could of asked around on the Bowfin when I was out there :doh_1:

Wish I could be more helpful :scratch:


Well, you put a big effort into this last night - thanks for that. Given that I'm modeling her with Regulus deployed, I think I will omit the prop guards for the final build. That will require some modest putty and sanding work on the stern to cover up the molded indentations for mounting.


Report this post
Top
 Profile  
Reply with quote  
PostPosted: Thu Dec 08, 2011 2:34 pm 
Offline
User avatar

Joined: Sun Nov 27, 2005 8:45 pm
Posts: 373
Location: West Chester, PA
Finished the RO-35! Here are a few in-progress shots and one of the finished model. I'll send more photos in to the submissions site. I actually finished it faster than I thought I would. This is great fun, and I can't wait to see all the other builds, as they look great so far! :wave_1: :thumbs_up_1:
Image
Image
Image
Image

_________________
Bob Cicconi


Report this post
Top
 Profile  
Reply with quote  
PostPosted: Thu Dec 08, 2011 2:46 pm 
Offline
User avatar

Joined: Wed May 26, 2010 1:57 pm
Posts: 1296
Location: Schodack Landing, NY
Bob Cicconi wrote:
Finished the RO-35! Here are a few in-progress shots and one of the finished model. I'll send more photos in to the submissions site. I actually finished it faster than I thought I would. This is great fun, and I can't wait to see all the other builds, as they look great so far! :wave_1: :thumbs_up_1:
Image


OMG - a completed model, with no apparent angst, technical problems, or lack of documentation!


Last edited by D-Boy on Fri Dec 09, 2011 10:27 am, edited 1 time in total.

Report this post
Top
 Profile  
Reply with quote  
PostPosted: Thu Dec 08, 2011 3:36 pm 
Offline
User avatar

Joined: Wed May 26, 2010 1:57 pm
Posts: 1296
Location: Schodack Landing, NY
Bob Cicconi wrote:
Finished the RO-35! Here are a few in-progress shots and one of the finished model. I'll send more photos in to the submissions site. I actually finished it faster than I thought I would. This is great fun, and I can't wait to see all the other builds, as they look great so far!


Bob -

All kidding aside, lovely build! Some questions:

What color is your base coat/primer? Is the camera flash throwing it off? Flourescent lights in your workshop? It is an intriguing tone. Intentional as a base coat to the rest of the paint job?

What paint line and color are you using to get the wood deck color? Looks spectacular - the way I want my IJN decks to look. Can you share?

Can you relate some of your weathering technique/process?

What is the PE source for this build?

Daniel


Report this post
Top
 Profile  
Reply with quote  
Display posts from previous:  Sort by  
Post new topic Reply to topic  [ 142 posts ]  Go to page Previous  1, 2, 3, 4, 5, 6, 7, 8  Next

All times are UTC - 6 hours [ DST ]


Who is online

Users browsing this forum: No registered users and 14 guests


You can post new topics in this forum
You can reply to topics in this forum
You cannot edit your posts in this forum
You cannot delete your posts in this forum
You cannot post attachments in this forum

Jump to:  
Powered by phpBB® Forum Software © phpBB Group