To HMS Victory and beyond

Moderators: BB62vet, MartinJQuinn, JIM BAUMANN, Jon, Dan K

User avatar
dafi
Posts: 996
Joined: Mon Mar 12, 2012 11:13 am
Location: Ludwigsburg/Germany
Contact:

Re: To HMS Victory and beyond

Post by dafi »

As I have wrecked the sails, there is a forced break at this point to �reweave� them. Since my day-to-day business leaves little time for this, it is taking longer than expected.

Therefore, I am continuing with a rowed version as an interim action to build. According to the armament list, the Victory had a 24-pounder carronade for the big launch, for landing operations and similar tasks. It is time to continue with this little vignette. To this end, I have acquired a 24-pounder from my Constitution model, removed the first thwart, reinforced the second one, and already have a passable support. I have also added the swivel guns from the fighting tops of the my Constitution.


First, I checked the length of the breech rope.

Image

Image

The green underlay is good for rigging the small blocks, as you can push two needles into it as holding points. The blocks themselves were slotted into the vice as already described.

Image

And then it was finished :-)

Image

Image

Image

Image

Image

Image

The tools for the carronade are already included, shortened in comparison to the other guns. The cannonballs are stowed deep in the boat in the rack. All that's missing are the small salt boxes for the powder cartridges and a toolbox.

Enjoy, Daniel
To Victory and beyond ...
viewtopic.php?f=59&t=99050&start=60

See also our german forum for the age of Sail and History:
http://www.segelschiffsmodellbau.com
User avatar
dafi
Posts: 996
Joined: Mon Mar 12, 2012 11:13 am
Location: Ludwigsburg/Germany
Contact:

Re: To HMS Victory and beyond

Post by dafi »

And I am always delighted by the fine structures that are now possible in printing. Once again, parts whose diameter is half as wide as my papillary ridges, these are some of the finest parts of my products :-)
Image

XXXDAn
To Victory and beyond ...
viewtopic.php?f=59&t=99050&start=60

See also our german forum for the age of Sail and History:
http://www.segelschiffsmodellbau.com
User avatar
wefalck
Posts: 2075
Joined: Wed Sep 28, 2011 12:04 pm
Location: Paris
Contact:

Re: To HMS Victory and beyond

Post by wefalck »

:cool_1:
Eberhard

Former chairman Arbeitskreis historischer Schiffbau e.V. (German Association for Shipbuilding History)

--------------------------------------------------------------------------------------------------------------------------------------------------------------------------------------------

Image Image Image Image
marijn van gils
Posts: 2686
Joined: Tue Feb 06, 2007 10:24 am
Location: Belgium

Re: To HMS Victory and beyond

Post by marijn van gils »

Wonderful! :thumbs_up_1: :thumbs_up_1: :thumbs_up_1:


That boat, with crew, would make for a wonderful action vignette on its own: close to the shore, trying to land a party of marines, while gunshot splashes around it in the water!
User avatar
dafi
Posts: 996
Joined: Mon Mar 12, 2012 11:13 am
Location: Ludwigsburg/Germany
Contact:

Re: To HMS Victory and beyond

Post by dafi »

Thanks Eberhard and Marijn: Psssst ;-)

I was in model-building deprivation, with no time to do anything and not even to document what I had already built.

The version of the Launch with sails has to be stored in the back for now, as martens have damaged it by chewing on the sails ...

That's why I continued with the version equipped with a davit for anchoring and fishing. Here some pictures last stage.

Image

Image

Image

First, there was the question of where to put the cable that had been hauled up. Instinctively, I had stowed it in the bow during the first test.

Image

But in order to attach a pulley to the capstan that can only be attached forwards to the stem and the cable accordingly had to go to the rear. So I decided to store it in the middle of the boat, which is also better balanced, and you can see that this is a good solution.

Image

But first, a little bit of small stuff, which also makes a difference ;-)

The pulleys are pre-assembled; this one should hang loosely, so I shaped it with wallpaper glue.
Image

The grapnel anchor and ladles have also arrived.

Image

To tie in the anchor rope, I clamped a pair of tweezers in my vice.

Image

Image

And then I built a nice bunch with the rest of the rope. Image

And here it is the small menagerie.

Image

And now it got pleasantly exciting, but see for yourself...

Image

Image

Image

Image

Image

Image

Image

Image

Image

Image

Image

While two lads secure the pulley, the capstan bar is being changed on the other side. The lieutenant keeps a watchful eye on the whole process, while one man checks to see if anything is happening at the back end at the cable. In the middle, one man holds the cable taut and clears it neatly. That setup certainly wouldn't have worked with the rope at the front in the bow, as crowded as it already is there.

Cheers, Daniel
To Victory and beyond ...
viewtopic.php?f=59&t=99050&start=60

See also our german forum for the age of Sail and History:
http://www.segelschiffsmodellbau.com
Dan K
Posts: 9031
Joined: Tue Jan 11, 2005 10:56 am
Location: New York City

Re: To HMS Victory and beyond

Post by Dan K »

It's just superb work.
SG1
Posts: 396
Joined: Mon Apr 17, 2017 2:43 am
Contact:

Re: To HMS Victory and beyond

Post by SG1 »

Dan K wrote: Fri Oct 31, 2025 3:46 pm It's just superb work.
I second that! Well done dafi figures poses are superb, excellent surgery and tailoring work :cool_2:
User avatar
dafi
Posts: 996
Joined: Mon Mar 12, 2012 11:13 am
Location: Ludwigsburg/Germany
Contact:

Re: To HMS Victory and beyond

Post by dafi »

Thank you Sirs!

Captain Dafi, personal logbook, addendum:

Recently, it was time once again for public tinkering at the game fair in Stuttgart. I had brought quite a bit of material with me again.

Image

A little reminder of Èvian :-)

Image

Image

And my Soleil in full sun—simply BEAUTIFUL!

Image

Image

One of my topics was the comparison between the parts that come from the kit and what you can make from them. Here is a comparison of the two upper decks.

Image

Image

Image

Image

And as usual, there was plenty of delicacies to enjoy: pumpkin-sweet-potato-carrot-potato-ginger-soup special recipe dafi — yum!

Image

Enjoy, Daniel
To Victory and beyond ...
viewtopic.php?f=59&t=99050&start=60

See also our german forum for the age of Sail and History:
http://www.segelschiffsmodellbau.com
User avatar
dafi
Posts: 996
Joined: Mon Mar 12, 2012 11:13 am
Location: Ludwigsburg/Germany
Contact:

Re: To HMS Victory and beyond

Post by dafi »

Before heading to the trade show, things were naturally crazy for me – splinters were flying once again.

Image

One of the things I wanted to show was a comparison between the original kit parts and what you can actually make out of them. To do this, the decks had to be prepared.

First, the old gratings had to be removed. Then the good parts of the deck were protected with gaffer tape and the old coamings were sanded down with a coarse file ...

Image

... and the remains were removed with a blade ...

Image

... or helped along with a fine file.

Image

For the finishing touches, I sawed a batten to the right width and covered it with sandpaper, which allowed me to achieve a nice even surface.

Image

Since the new coamings are also supposed to cover the thickness of the decks, I had to cut larger the openings of the companionways a little. A red pencil line serves as a mark.

Image

This was trickier on the upper deck, as the deck is not divided in half. But here too, I first had to cut out the grating ...

Image

... cut out the coamings with the flat blade and finish them in the same way as the lower deck.

Image

For the wide openings at the rear with the thicker coamings, I made a 45° relief cut with the scalpel, which meant there was less material to remove horizontally.

Image

This made it much easier to work with the blade.

Image

And then again, enlarging the section by the width of a pencil.

Image

For this exhibit, I deliberately chose not to use a purchased wooden deck or one built one like on the other model, but to experiment with what could be achieved with paint.

Now it was getting exciting ...
To Victory and beyond ...
viewtopic.php?f=59&t=99050&start=60

See also our german forum for the age of Sail and History:
http://www.segelschiffsmodellbau.com
SG1
Posts: 396
Joined: Mon Apr 17, 2017 2:43 am
Contact:

Re: To HMS Victory and beyond

Post by SG1 »

Wise use of the gaffer tape, dafi. nice take-home technique :thumbs_up_1: :thumbs_up_1:
User avatar
dafi
Posts: 996
Joined: Mon Mar 12, 2012 11:13 am
Location: Ludwigsburg/Germany
Contact:

Re: To HMS Victory and beyond

Post by dafi »

Next, I had to come to terms with the not *quite* correct planking pattern. A few beers later, I was fine ...

Then I realised that the plank gaps were much too wide and would be far too prominent for my liking when filled with paint or wash. So I came up with the following plan: I sprayed the deck black ...

Image

... and then scraped off with a blade so that the black paint remained in the depths like preshading. As always with my best plans, it ended up being a big mess.

Then I tried out different shades of brown, both solvent-based, acrylic and water-based, in various opacities. It resulted in a pretty patchwork.

Image

The forecastle in particular was quite colourful ...

Image

...which is why grey tones were used on the gangway.

Image

But what can I say, I really didn't have such a grimy deck in mind. So I sprayed it again and stripped it off again.

Image

In the meantime, I had remembered the other moulded parts, especially the gratings, which I had tuned to wood. That was the specification it had to match. And even though there are usually no major colour differences in the wood on original decks, except for traces of moisture, preshading with black prevents it from looking too much like a painted steel deck. You just have to throw your imagination a few little treats now and then to keep it happy. It was just a matter of finding the right balance. So I applied three glazed coats of paint until the black was only very faintly visible.

Image

Image

Image

Interestingly, the plastic of the upper deck was a light beige, while the lower deck was reddish brown. This was easily remedied by applying a grey glaze under the brown glazes.

Image

This technique also brings the area under the forecastle, which has no plank engraving, to life so well that engraving was not necessary and simple pencil strokes can substitude the engraving. I think that, given the limited visibility of this area, this is a good effort-appearance ratio.

So, quickly in with the printed parts...

Image

...and take some beauty shots.
To Victory and beyond ...
viewtopic.php?f=59&t=99050&start=60

See also our german forum for the age of Sail and History:
http://www.segelschiffsmodellbau.com
User avatar
dafi
Posts: 996
Joined: Mon Mar 12, 2012 11:13 am
Location: Ludwigsburg/Germany
Contact:

Re: To HMS Victory and beyond

Post by dafi »

Oups, and I forgot to tell you that before the planned mess, we first had to test fit the new parts.

Non-existent openings in the admiral's quarters were marked...

Image

... cut out ...

Image

... and adjusted to the bulkheads.

Image

Image

The coamings and gratings were also adapted to their openings, or vice versa.

Image

And at some point, the upper battery deck was completely covered with coamings.

Image

The same procedure was followed for the forecastle and aft deck.

Image

The coamings are not as high here, as there were open decks underneath.

Image

In the area of the main mast, the gratings can be taken out, as there are some ropes leading to the bits in the deck below. This makes it easier to belay them.

Image

I also installed those bits and, as a little treat, a new hand pump was also installed there.

Image

Image

Then the coamings were given their colour. The gratings were then masked off and painted light brown, then inked very thinly with black ink and brushed with white.

Image

Image

And then there was the slave labour: gluing in the cannonballs...

Image

...and securing them on the underside with thin-flow superglue.

Image

Finally, I doped the railing with the net holders...

Image

... and add some thickness to the gangway with white Evergreen on the underside ...

Image

... and this part of the task is finished.
To Victory and beyond ...
viewtopic.php?f=59&t=99050&start=60

See also our german forum for the age of Sail and History:
http://www.segelschiffsmodellbau.com
User avatar
JIM BAUMANN
Posts: 5675
Joined: Mon Jan 10, 2005 5:30 pm
Location: Nr Southampton England

Re: To HMS Victory and beyond

Post by JIM BAUMANN »

Wooooooooooooooo !!
I am veeeery impressed with your continued and fearless manipulation of all media to get the result you desire !!

I feel your pan with cannon balls...

On my Bretagne
http://www.modelwarships.com/reviews/sh ... /index.htm

I made the ball racks also--but 7 x smaller :wave_1: ( 0.20 mm solderballs )


Image


MFG JIm Baumann
....I buy them at three times the speed I build 'em.... will I live long enough to empty my stash...?
http://www.modelshipgallery.com/gallery ... index.html

IPMS UK SIG (special interest group) www.finewaterline.com
User avatar
dafi
Posts: 996
Joined: Mon Mar 12, 2012 11:13 am
Location: Ludwigsburg/Germany
Contact:

Re: To HMS Victory and beyond

Post by dafi »

@JIM BAUMANN

:-) :-) :-)

XXXDAn
To Victory and beyond ...
viewtopic.php?f=59&t=99050&start=60

See also our german forum for the age of Sail and History:
http://www.segelschiffsmodellbau.com
User avatar
dafi
Posts: 996
Joined: Mon Mar 12, 2012 11:13 am
Location: Ludwigsburg/Germany
Contact:

Re: To HMS Victory and beyond

Post by dafi »

And this was the result of what I was able to complete during the public crafting session at the trade fair.

Image

Image

Image

Image

Image

The gratings also have the correct different thicknesses for the longitudinal and transverse battens on the underside.

Image

Image

The admiral's quarters area was given a chequerboard floor.

Image

Here you can also clearly see the rollers of the bitts in the deck below.

Image

Image

Image

And the forecastle looks much more structured and tidier too.

Image


Well, that's it for now :-)

XXXDAn
To Victory and beyond ...
viewtopic.php?f=59&t=99050&start=60

See also our german forum for the age of Sail and History:
http://www.segelschiffsmodellbau.com
User avatar
Bill Code
Posts: 679
Joined: Mon May 02, 2005 10:00 am
Location: Michigan

Re: To HMS Victory and beyond

Post by Bill Code »

superb workmanship !
User avatar
dafi
Posts: 996
Joined: Mon Mar 12, 2012 11:13 am
Location: Ludwigsburg/Germany
Contact:

Re: To HMS Victory and beyond

Post by dafi »

Thank you Bill!

And once again, we're well into the new year, Christmas and New Year are over, and there's still no time for contemplativeness.

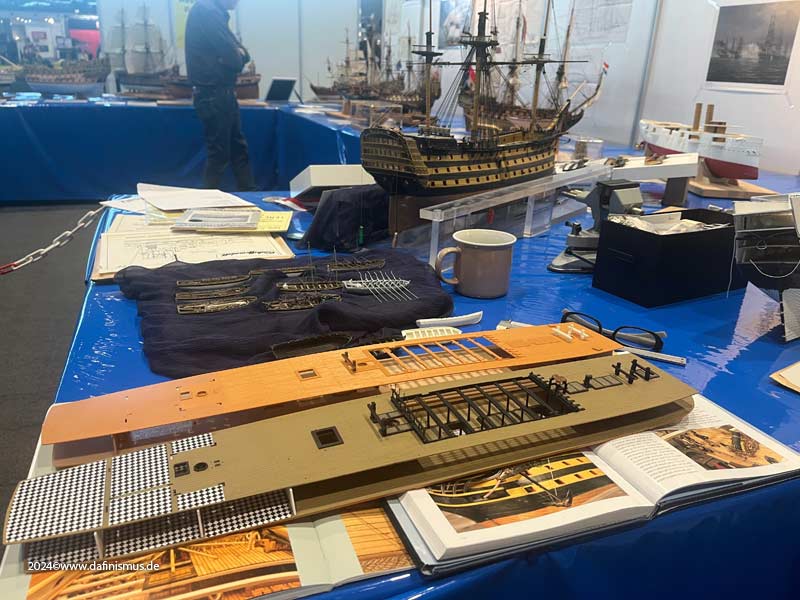
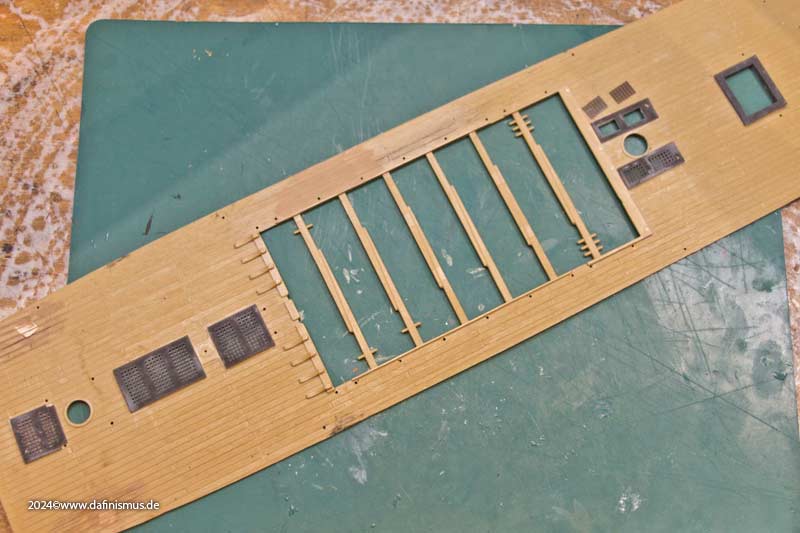
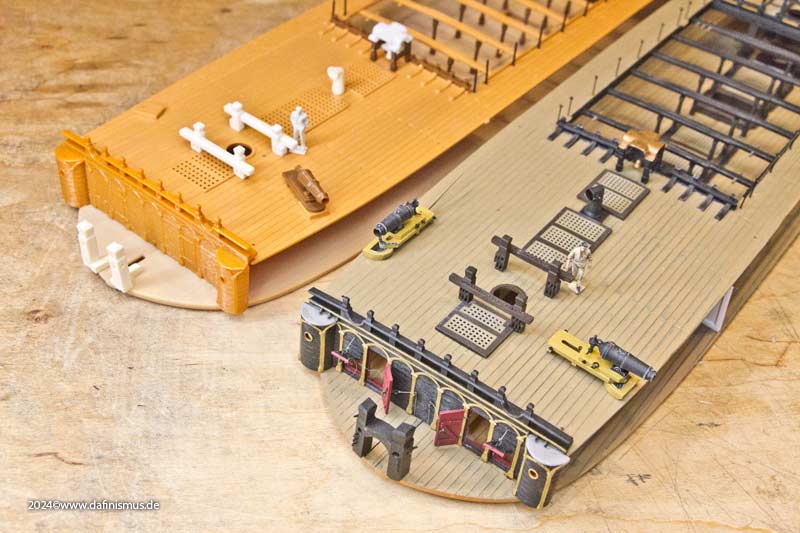
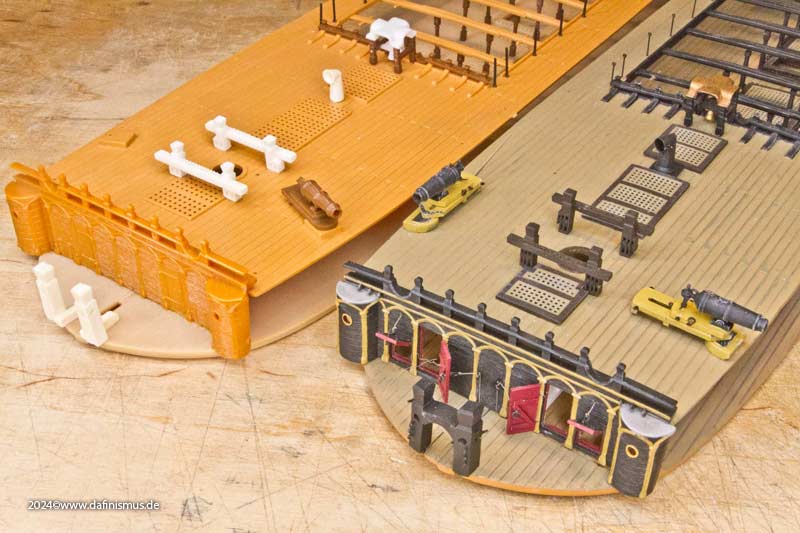
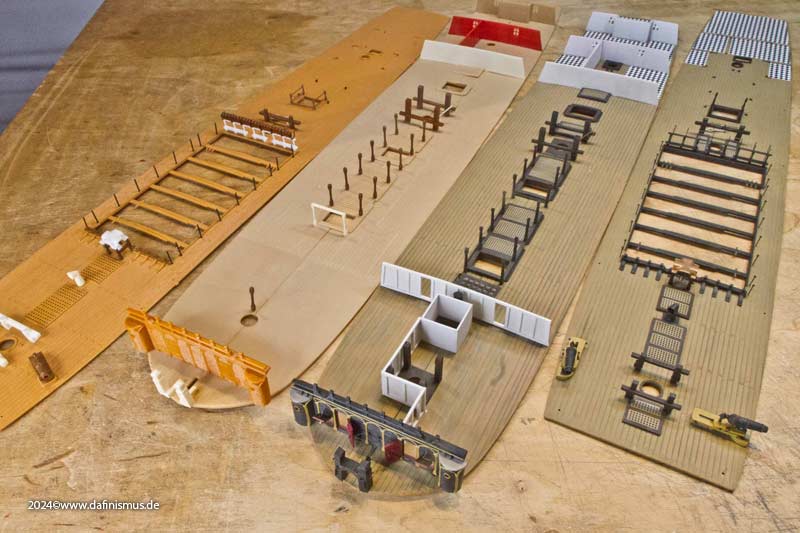
Nevertheless, I managed to secure a little time for myself and at least finish Victory´s deck comparison.

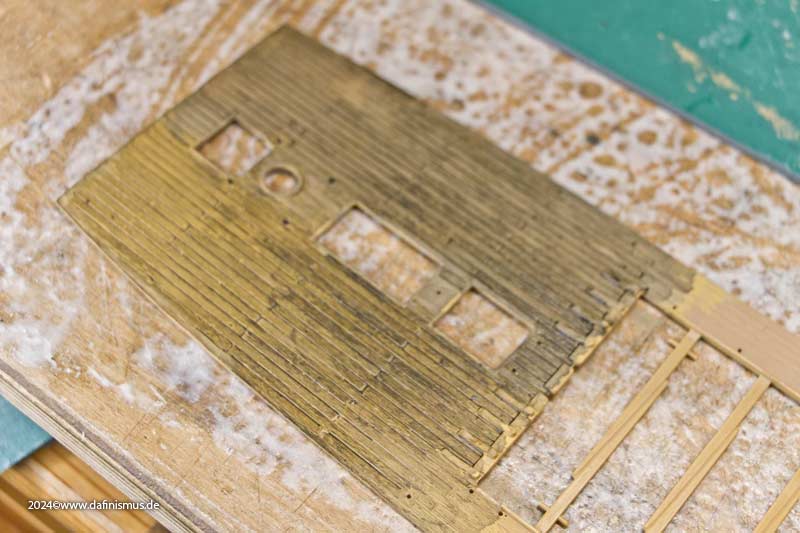
First, I jazzed up the beakhead bulkhead a bit. Since all contemporary models from around 1800 show this in black, I also decided to forego the usual blue colour.

Image

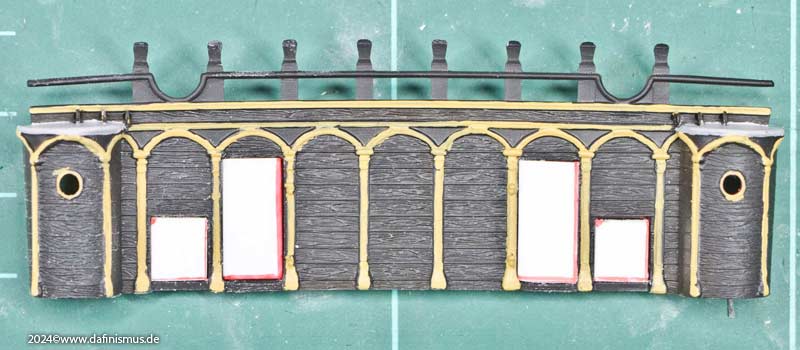
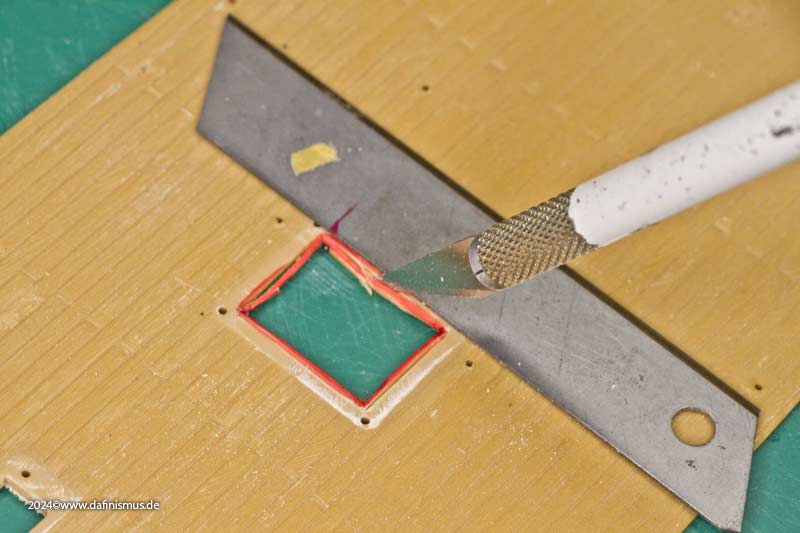
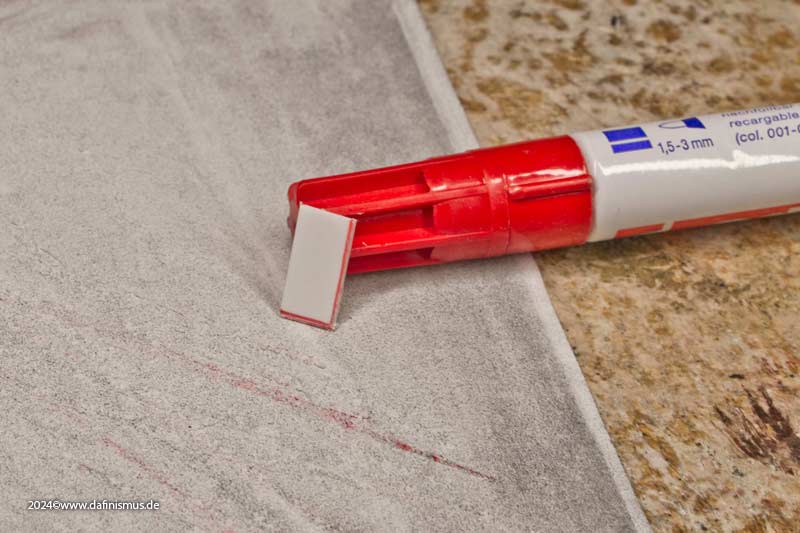
To fit in the doors, I used the old trick of applying a thin coloured strip to the side, which provides a good visual check when sanding in the tenth of a millimetre range.

Image

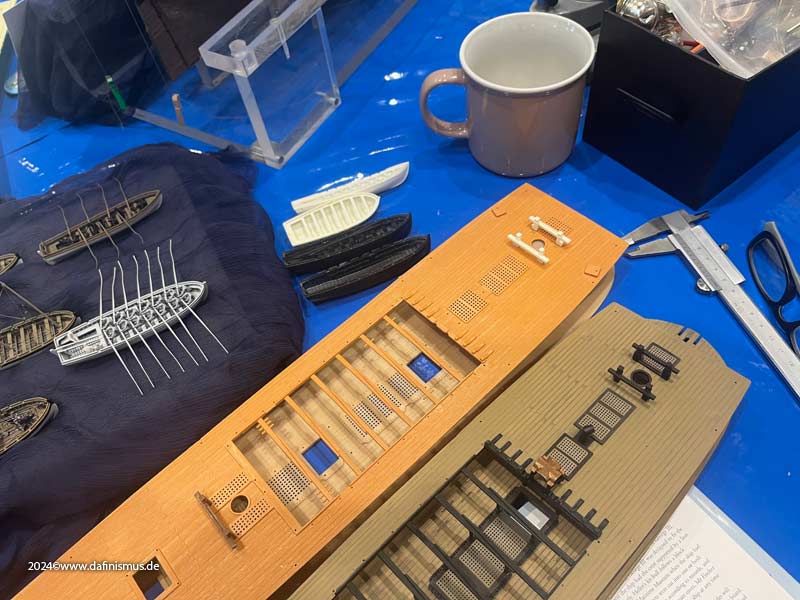
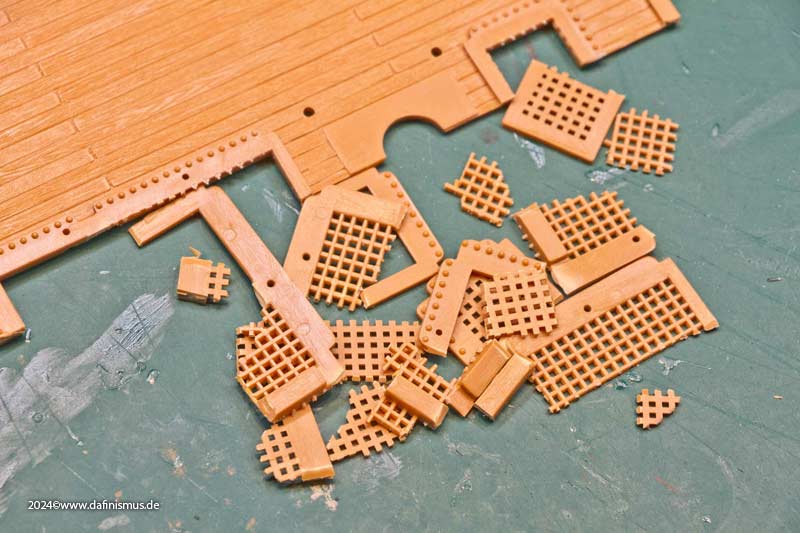
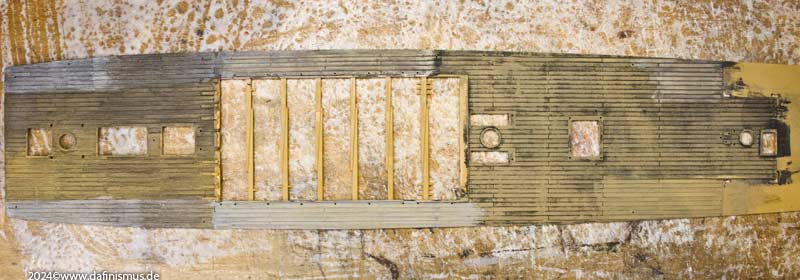
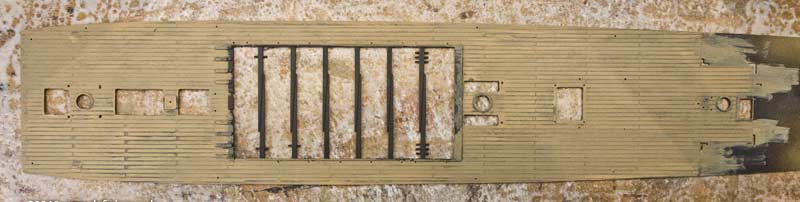
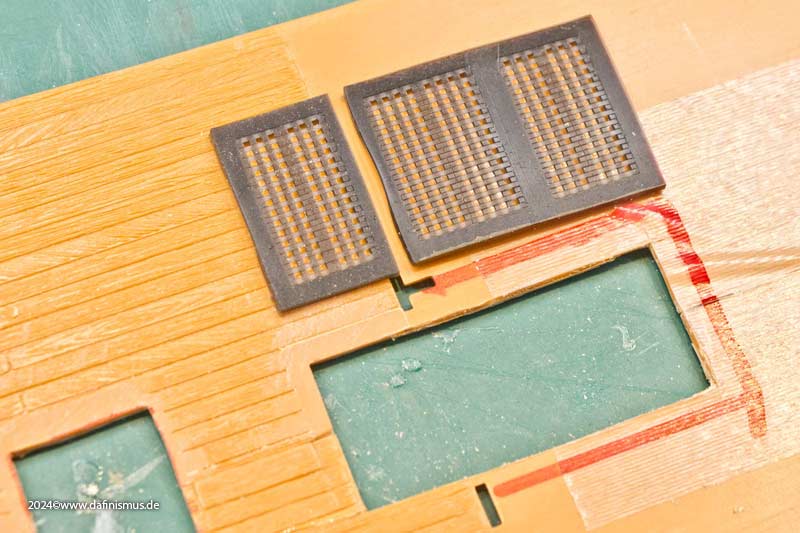
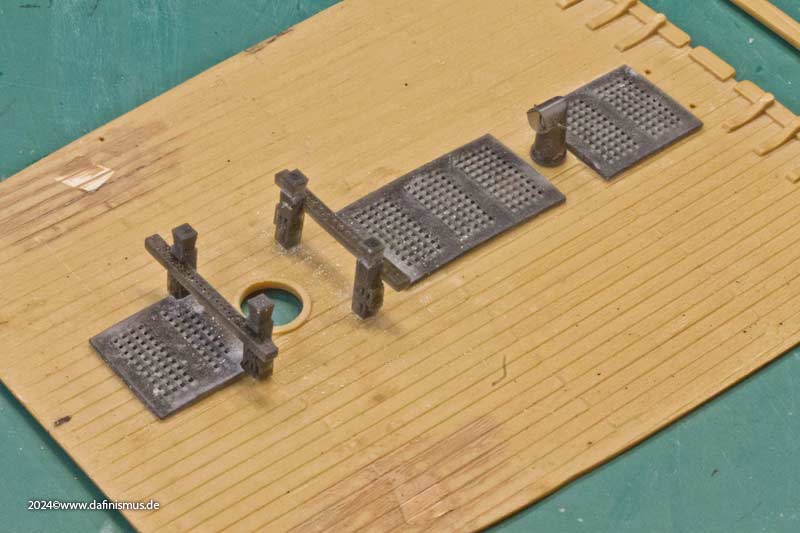
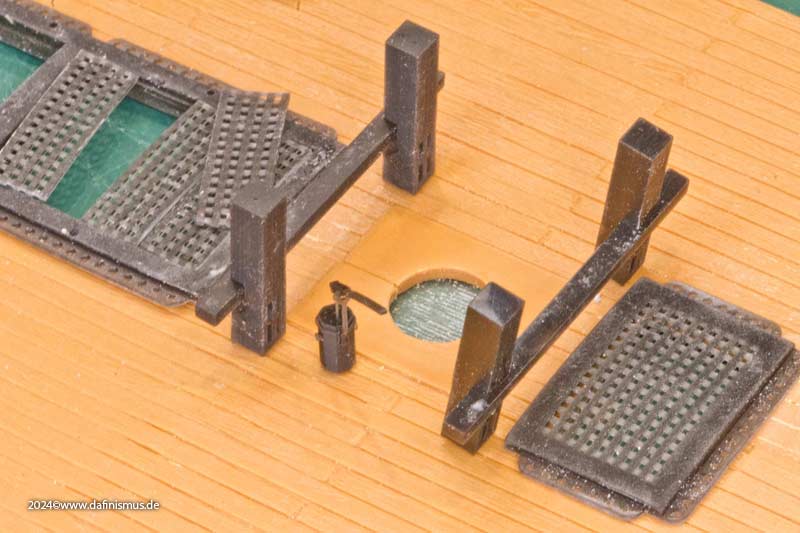
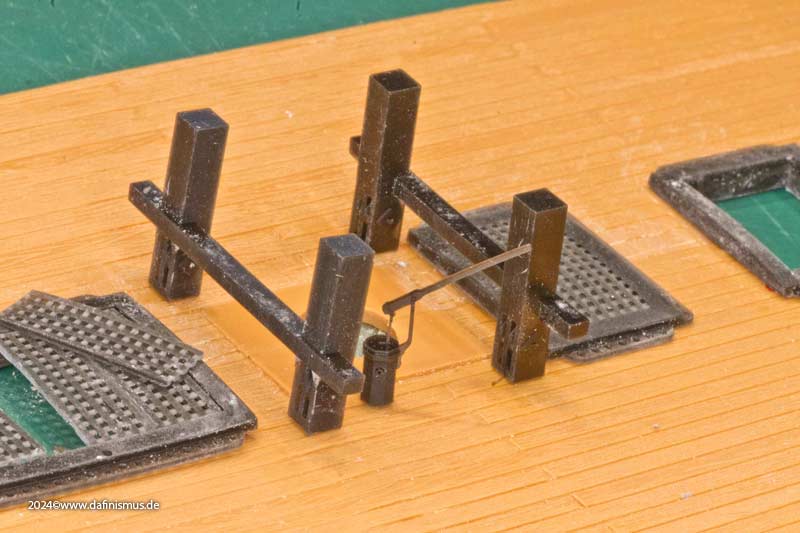
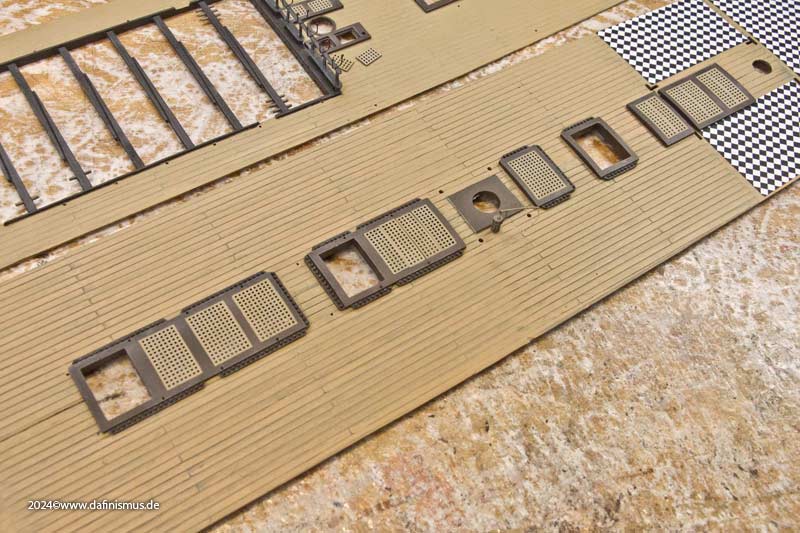
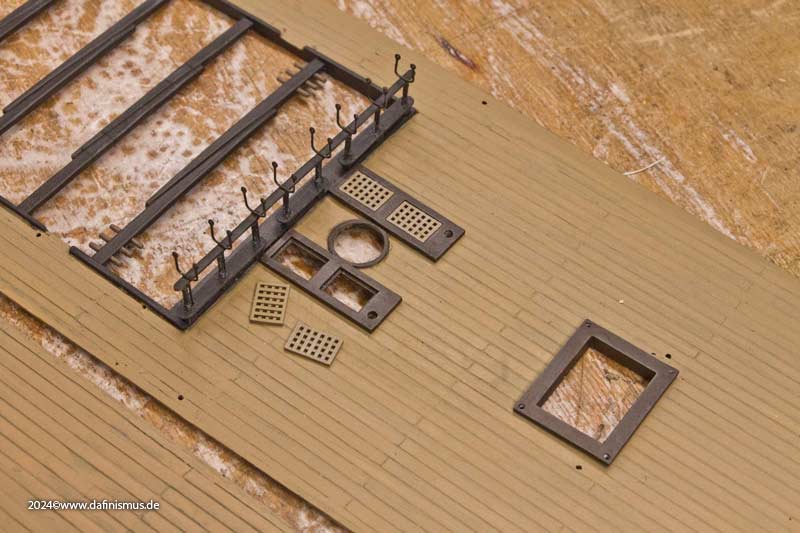
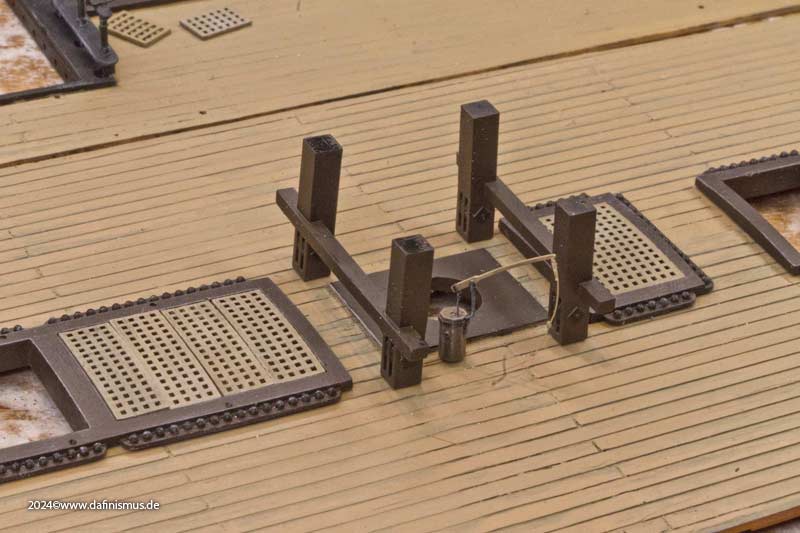
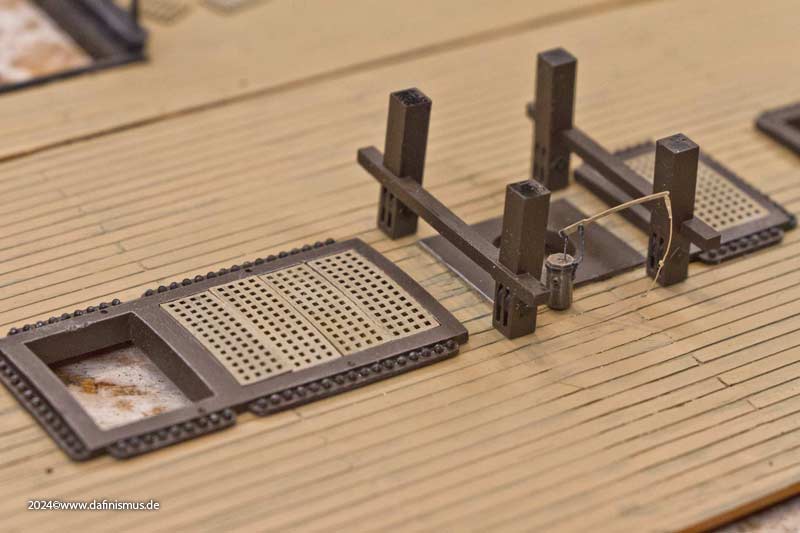
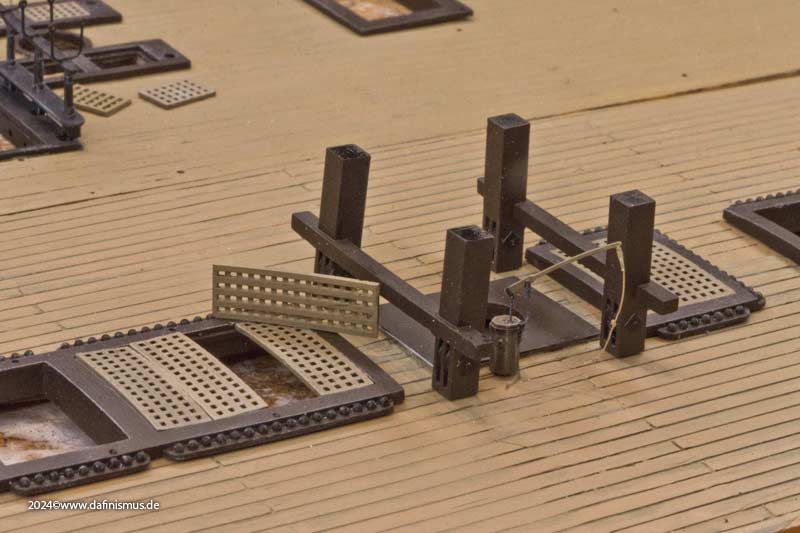
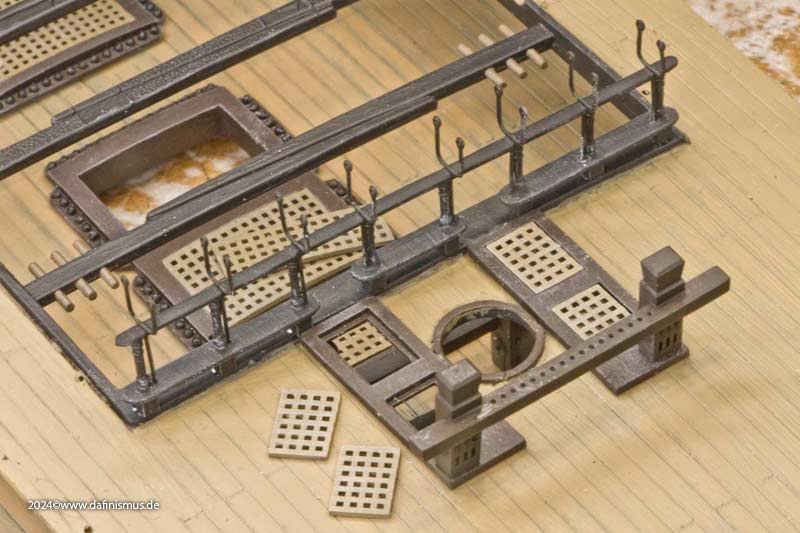
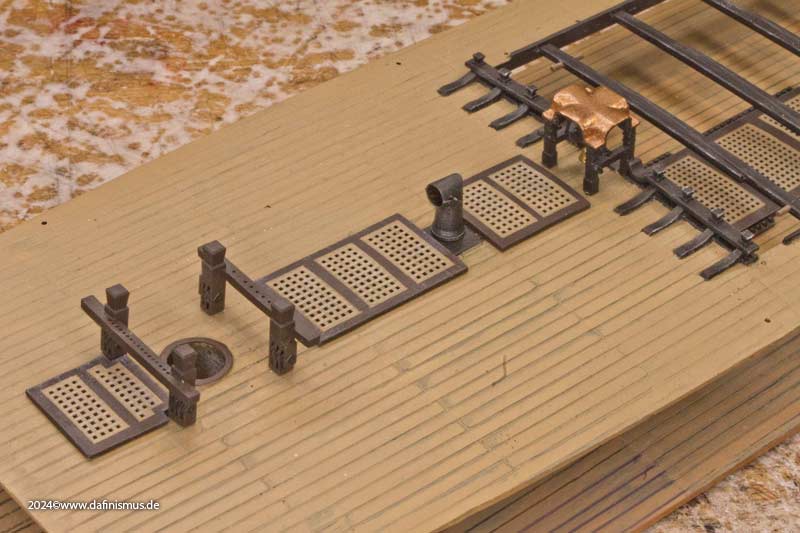
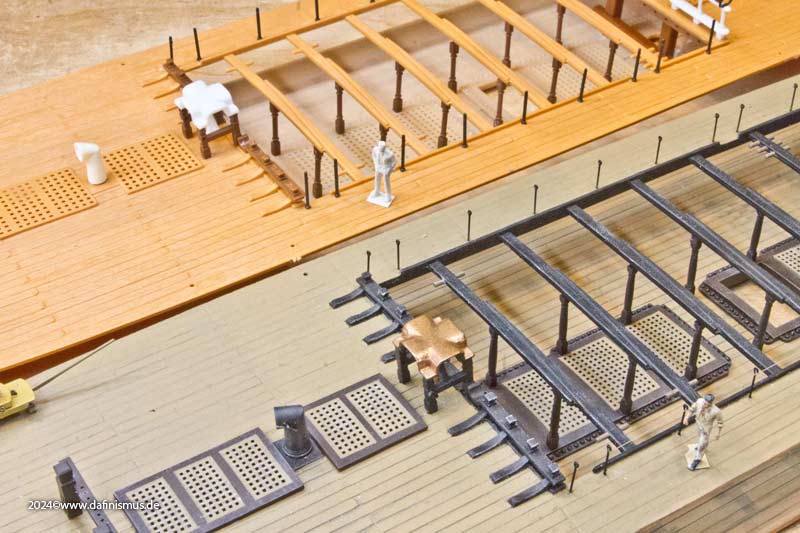
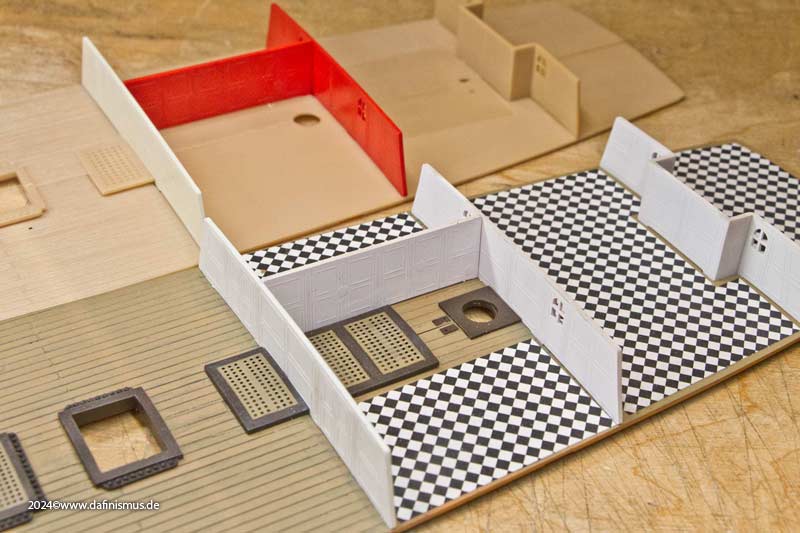
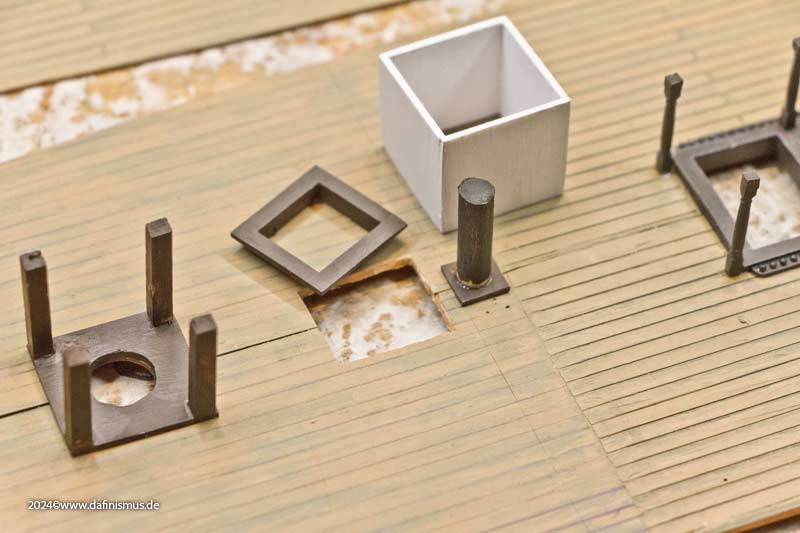
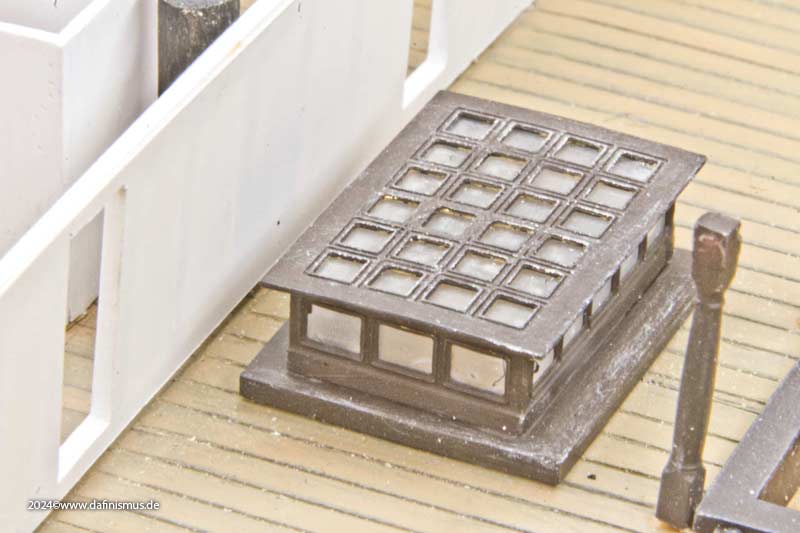
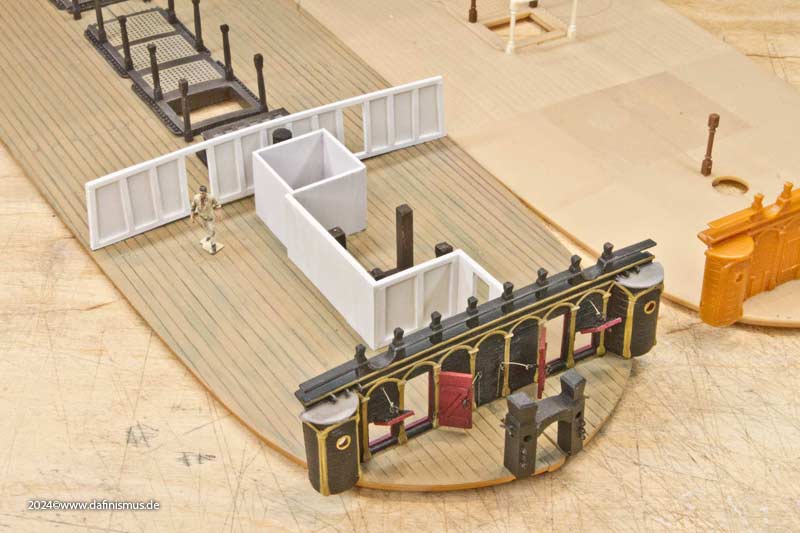
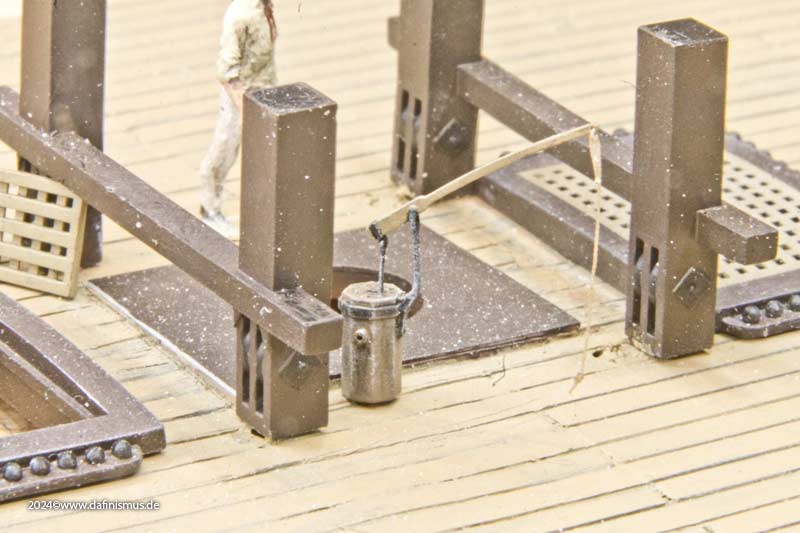
Then came the first additions in the freerunning section. In addition to the four supports for the foremast bitts and the stovepipe, the steam truck was added, which diverted the steam from the Brodie stove over the gratings on the forecastle.

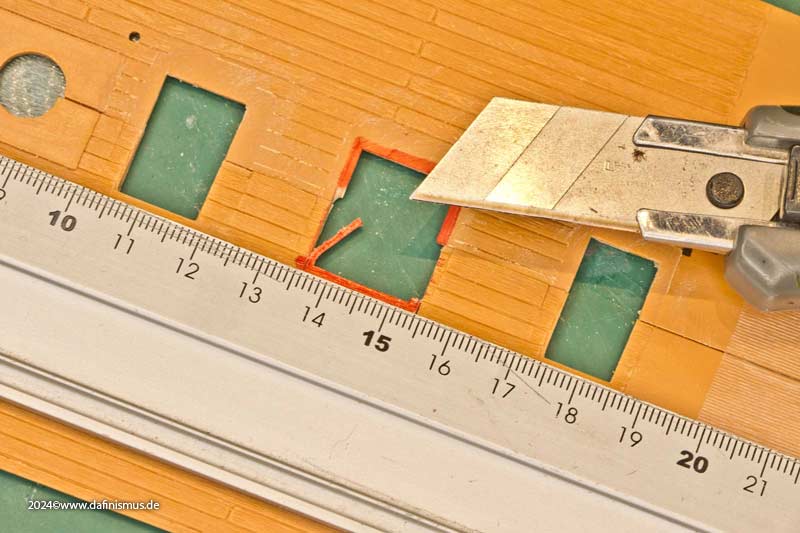
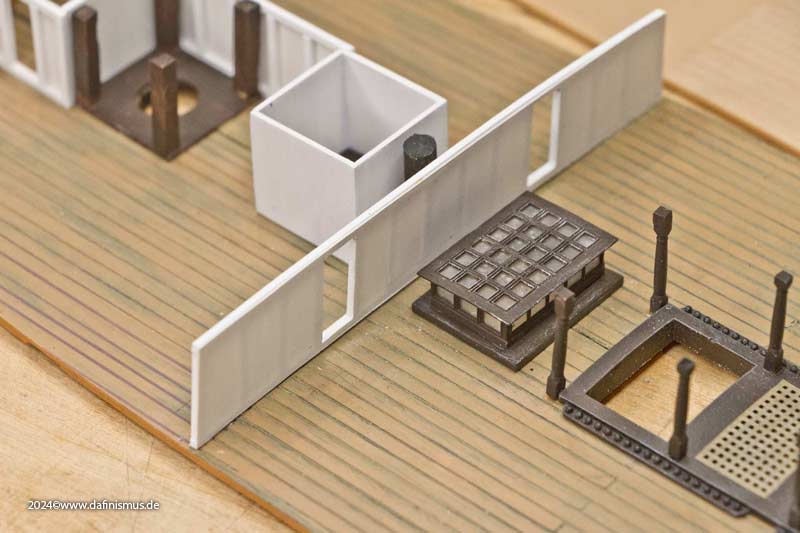
This required another open-heart surgical procedure, as another breakthrough was needed. The trunk consisted of a solidly constructed box sitting above a coaming. It was a bit tricky to position it so that the box was only under two parts of the triple grating on the forecastle and the partition wall was covered exactly.

Image

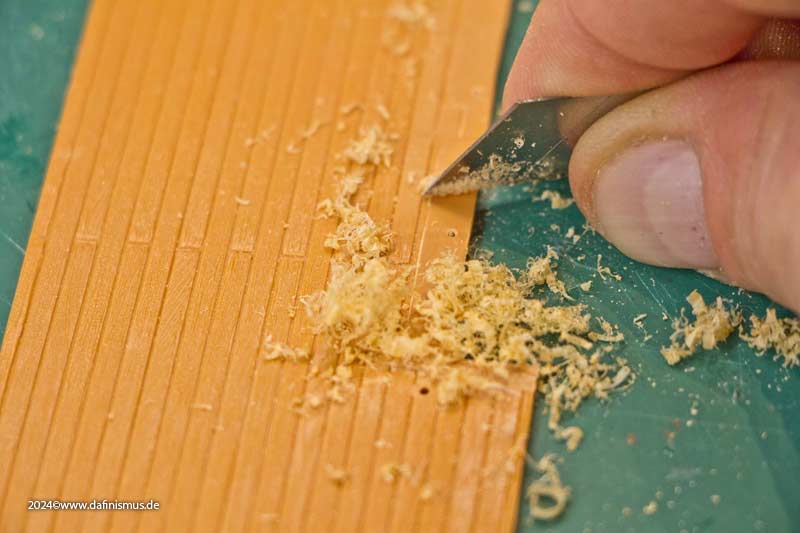
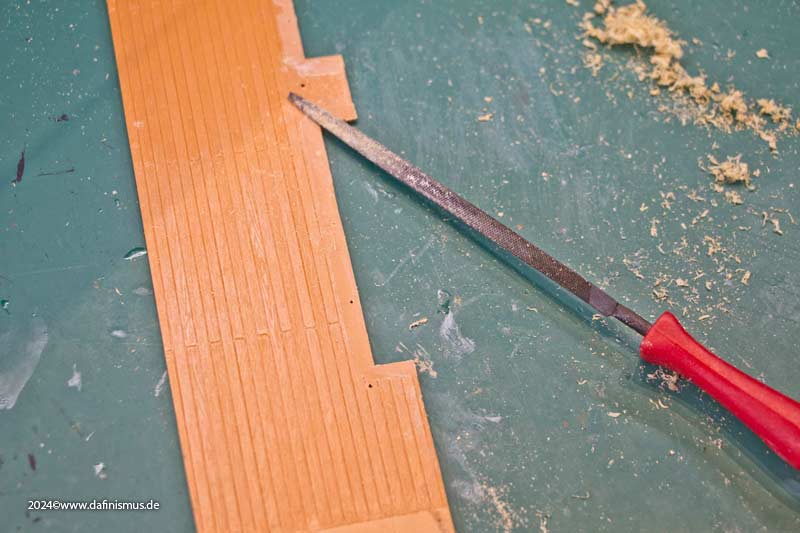
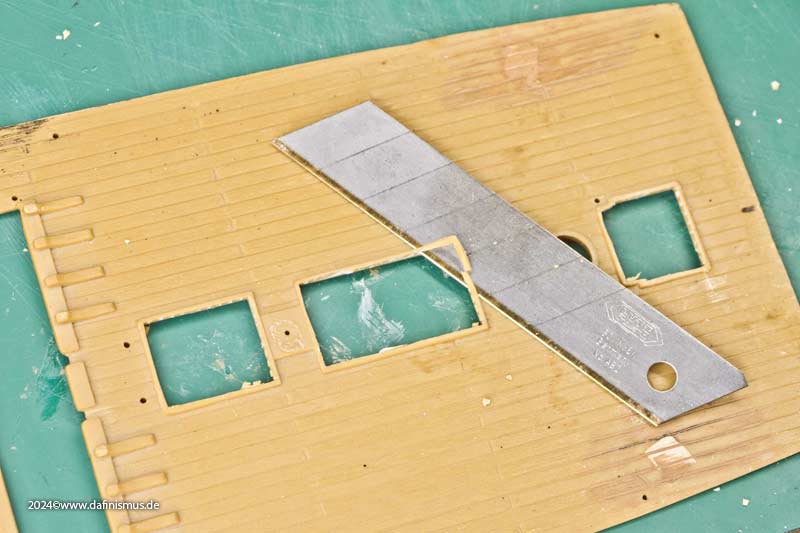
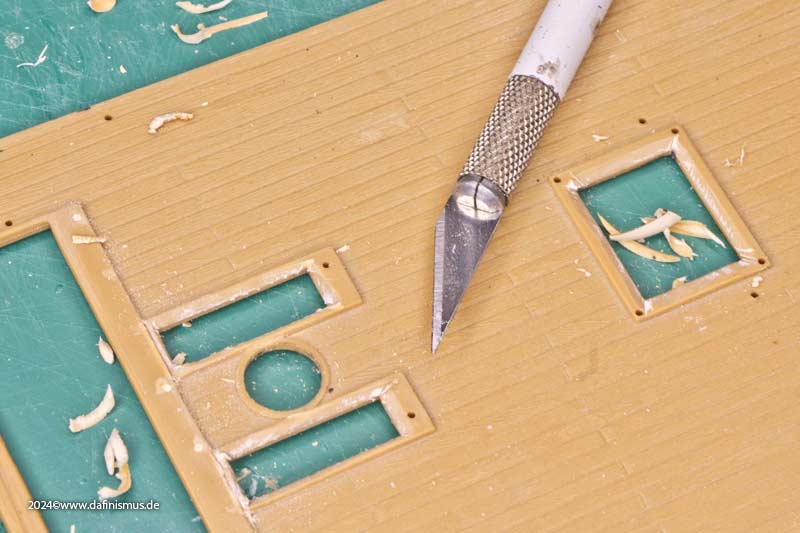
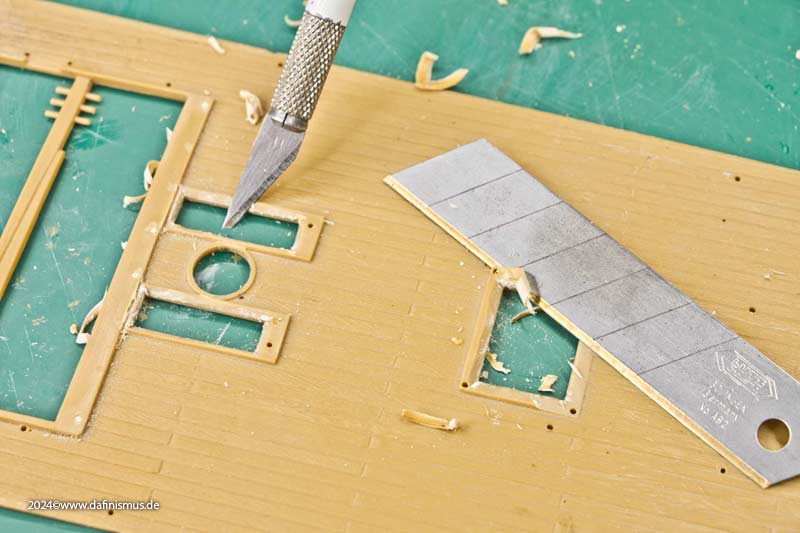
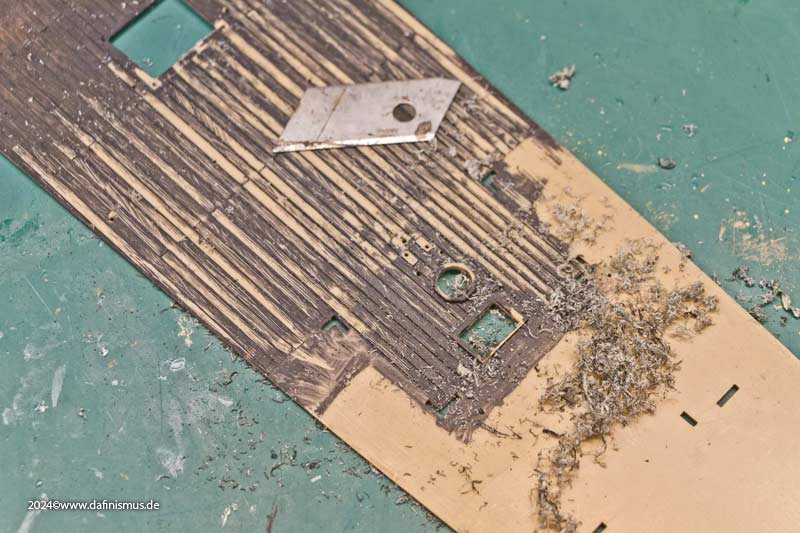
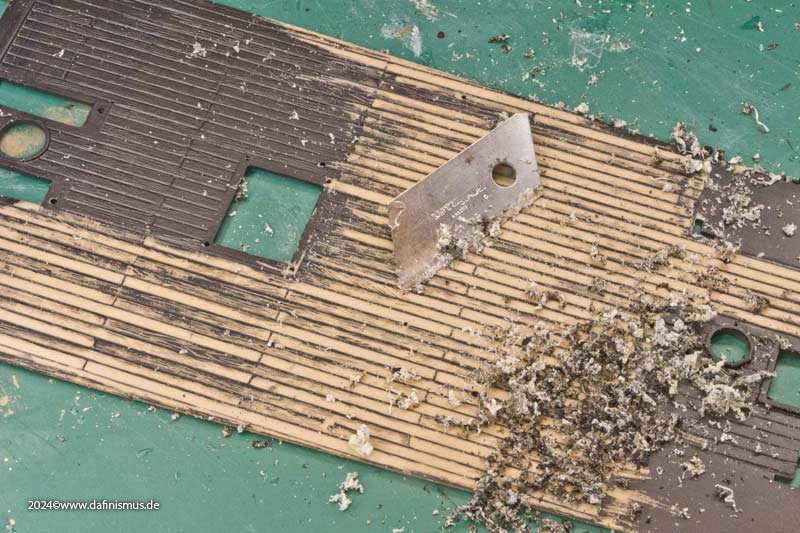
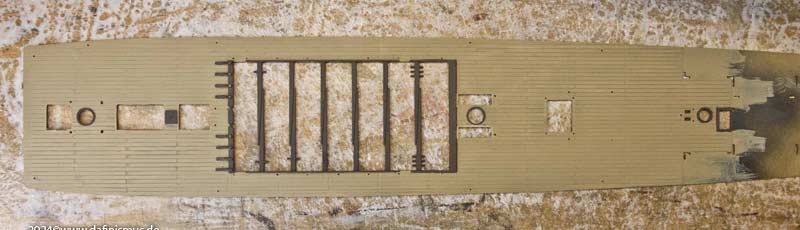
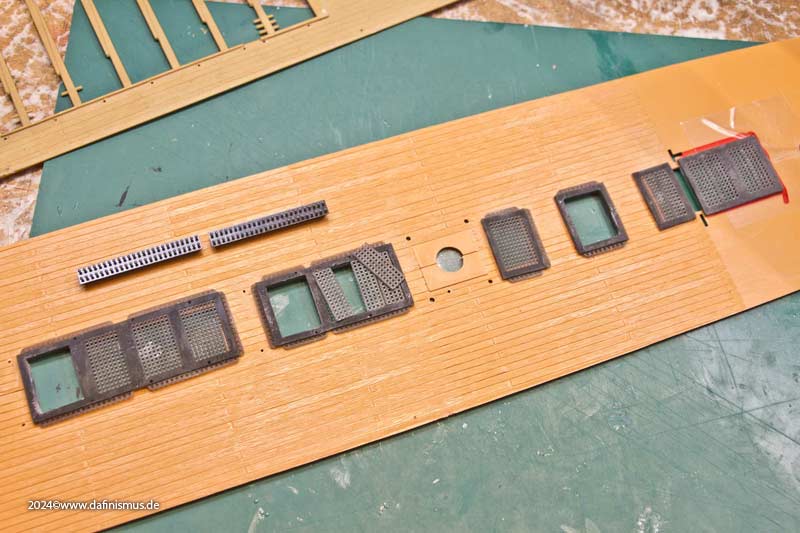
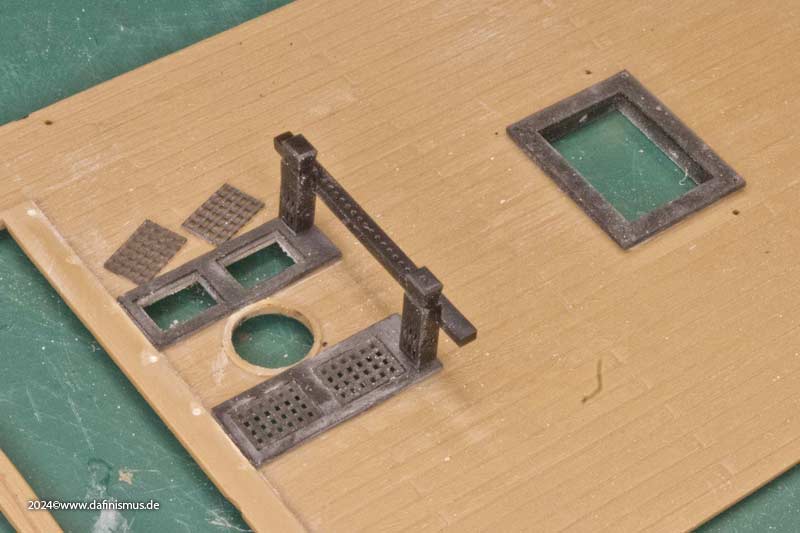
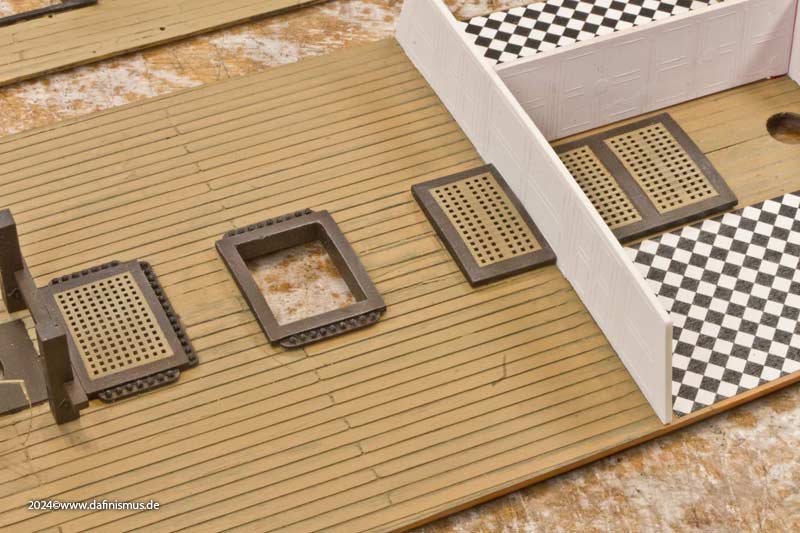
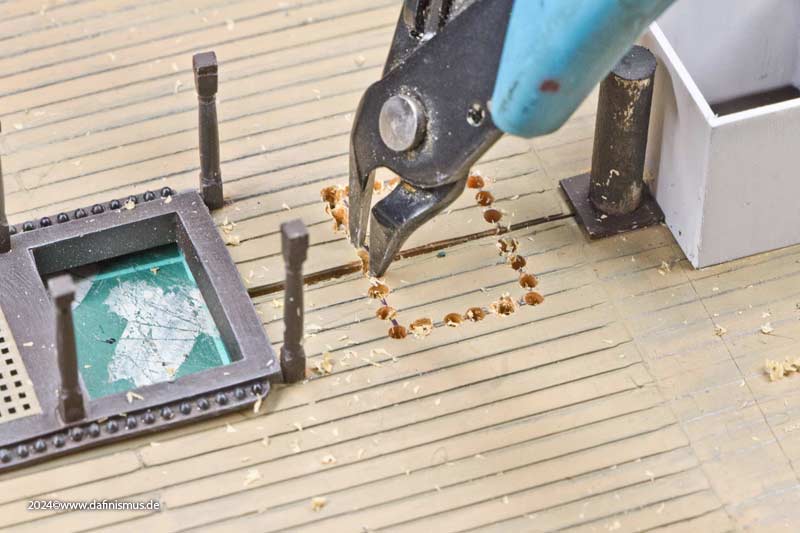
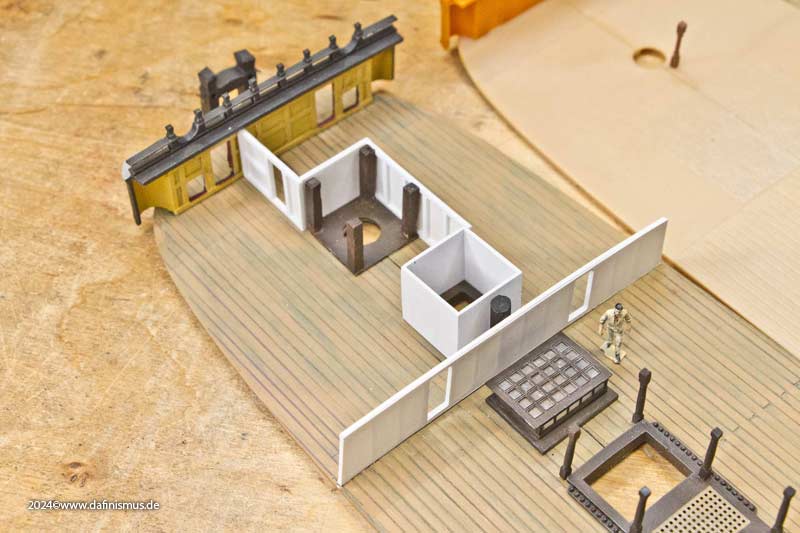
And that wasn't all, yet another hole had to be made: the kitchen skylight. So that the cooks have at least some daylight when preparing meals. To do this, the deck was perforated and opened with heavy clearing tools. Then a little scalpelling and sanding and the next hole was in.

Image

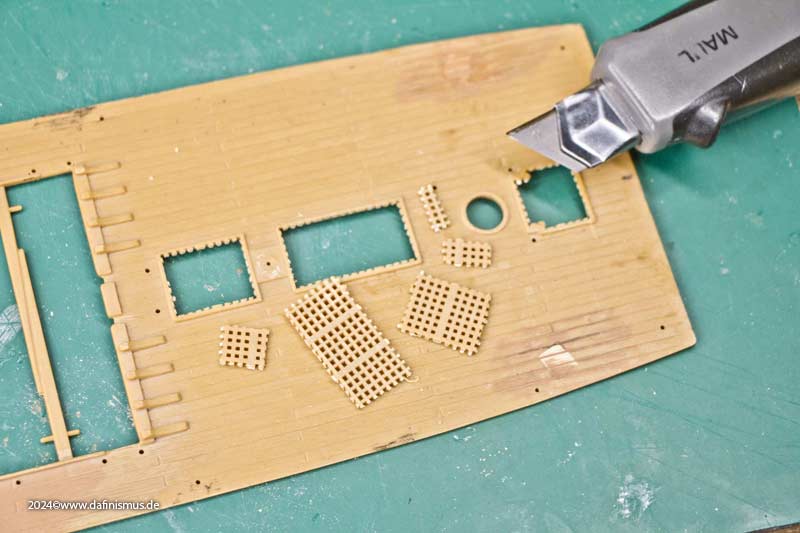
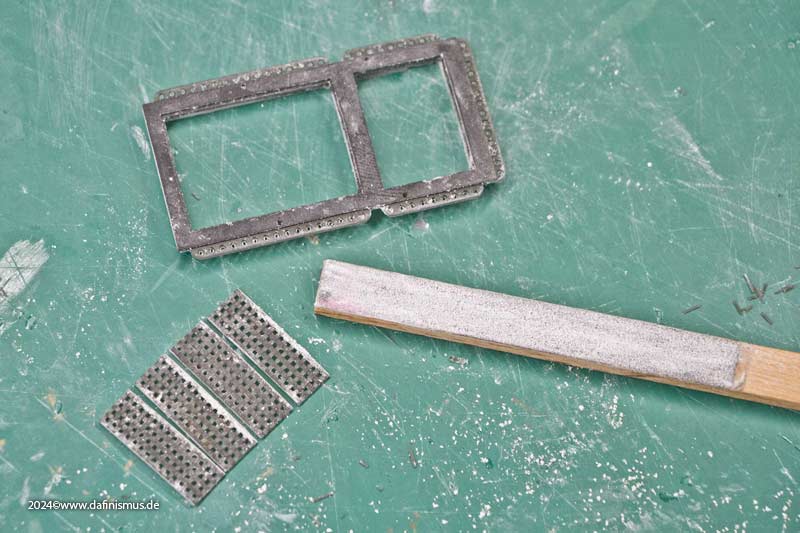
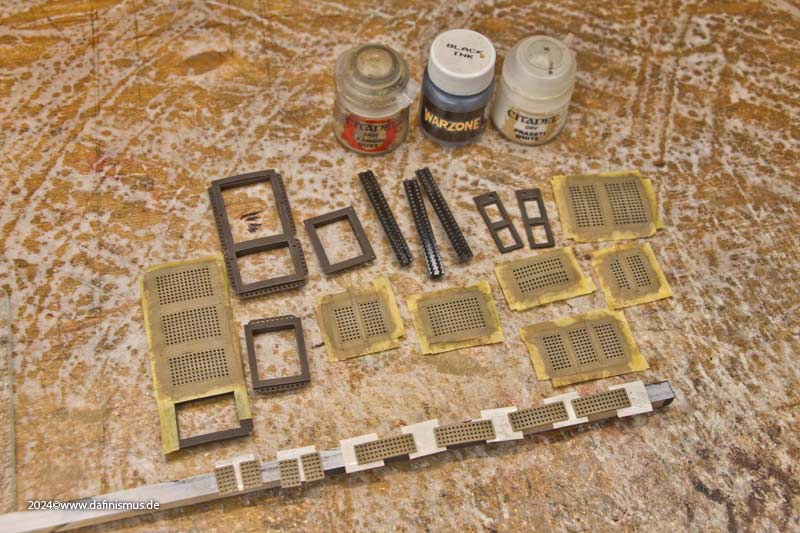
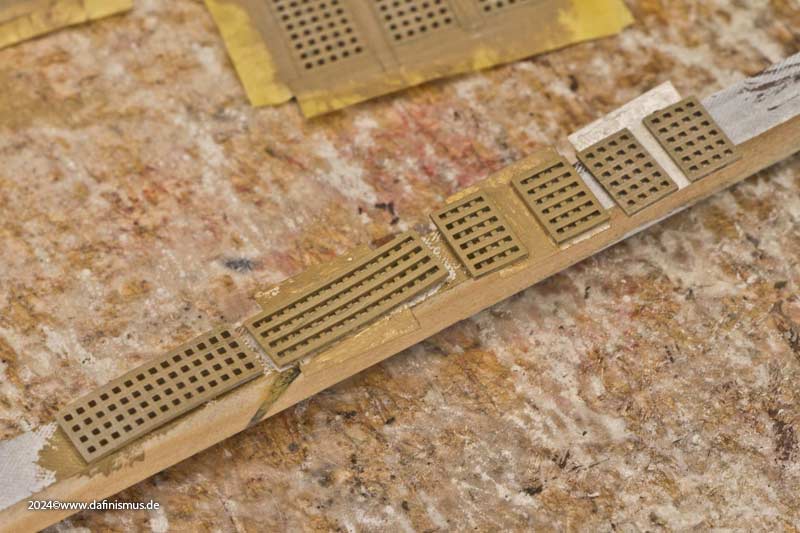
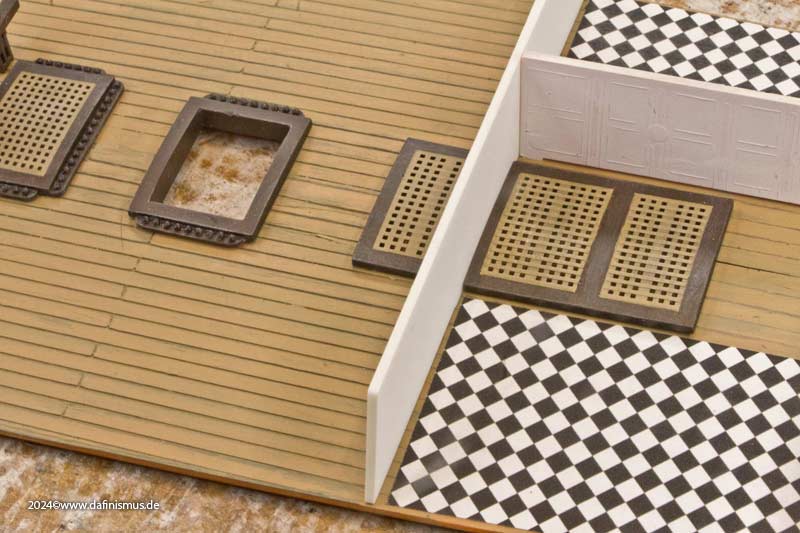
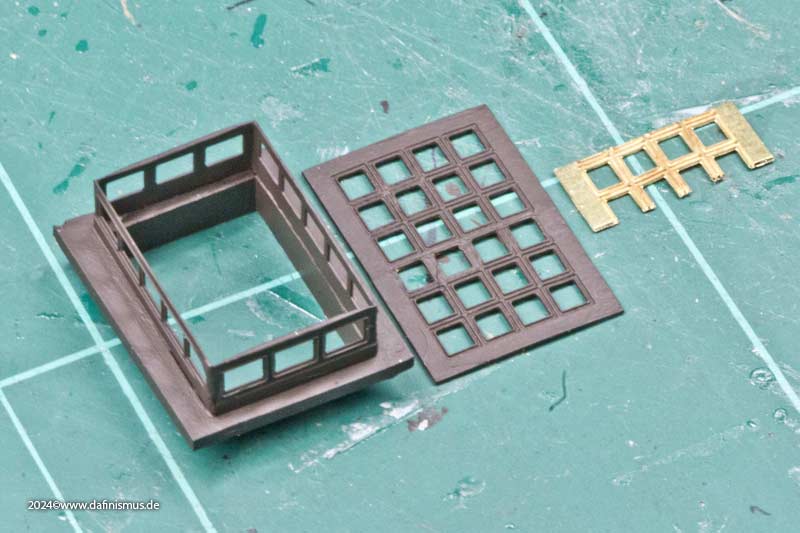
The skylight itself was a bit tricky. The part from my etch kit is two window grids too long, respectively too wide. So I cheekily cut out two grids and, after sanding the cuts down well, simply glued the remains back together with superglue. And, believe it or not, it worked :-)

Image

Image

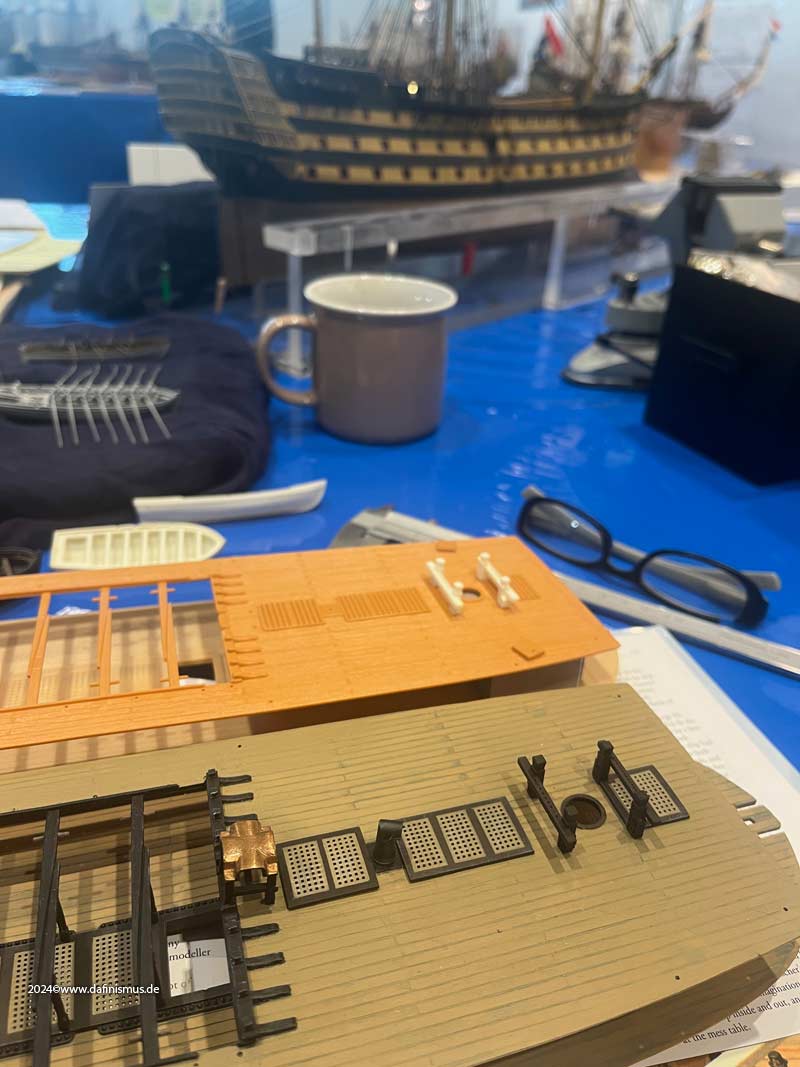
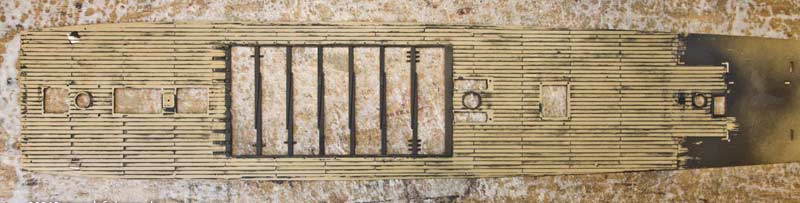
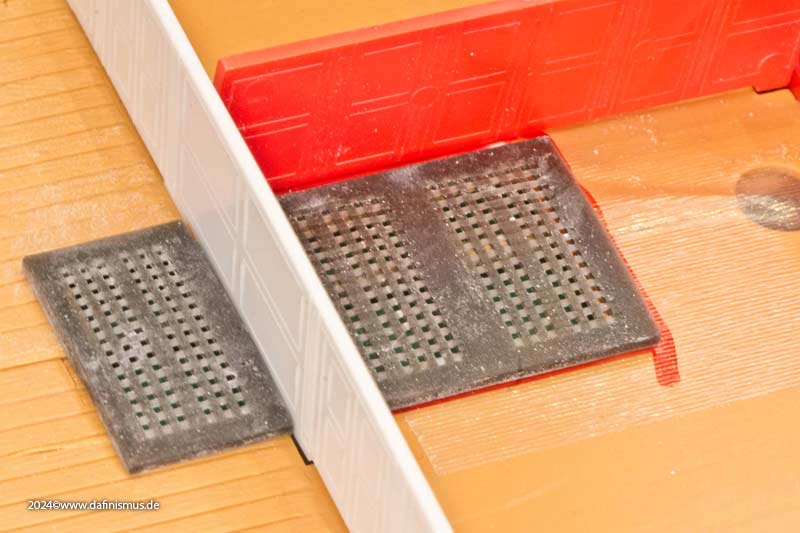
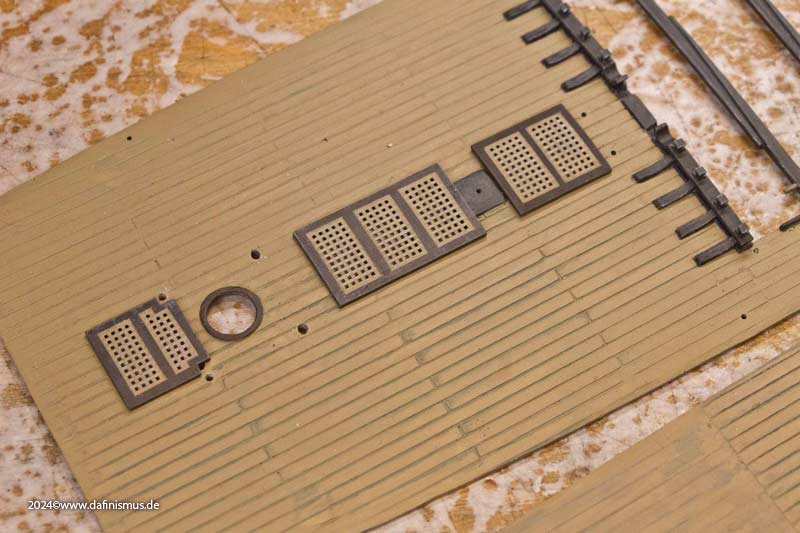
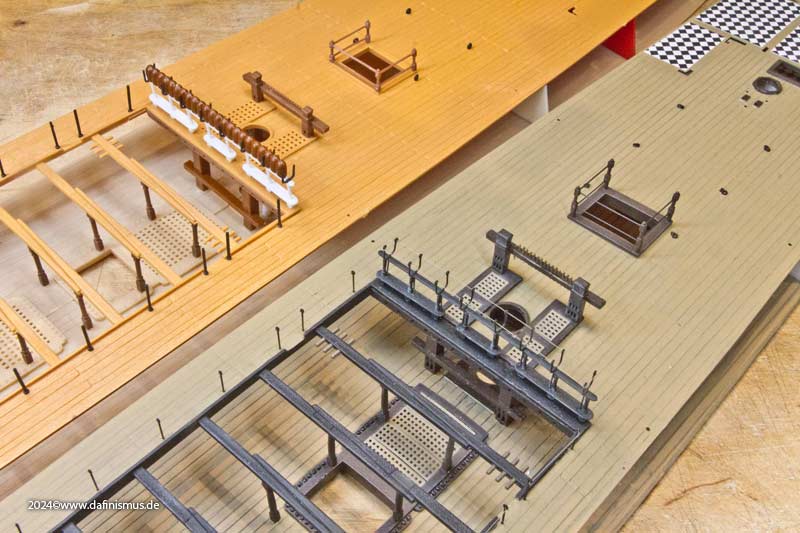
And this is what it looks like in place, and you can also see what it's for.

Image

Image

Image

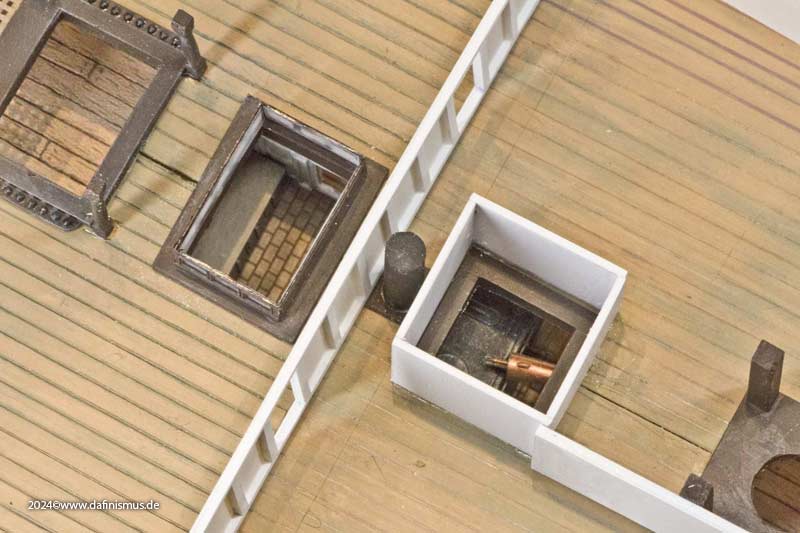
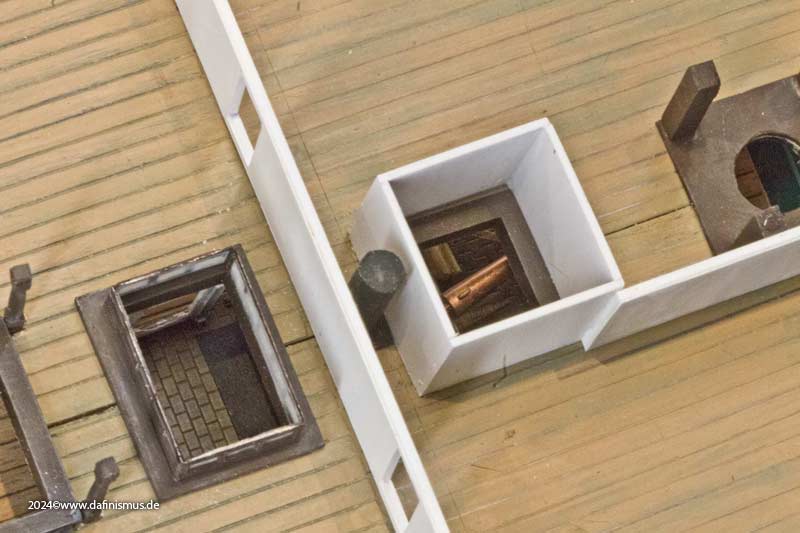
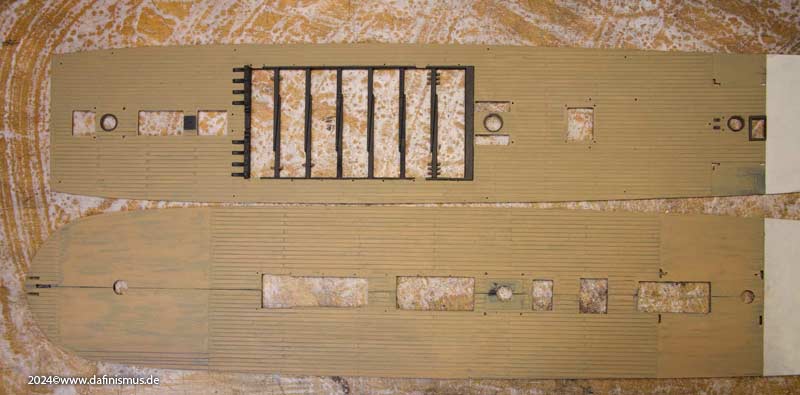
These two openings were missing from the museum ship for a long time, and I don't even know if they have been reinstalled there in the meantime...

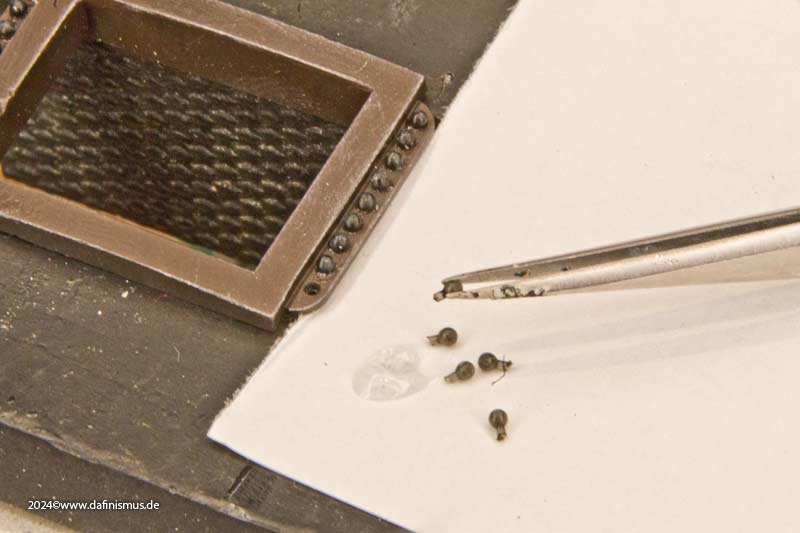
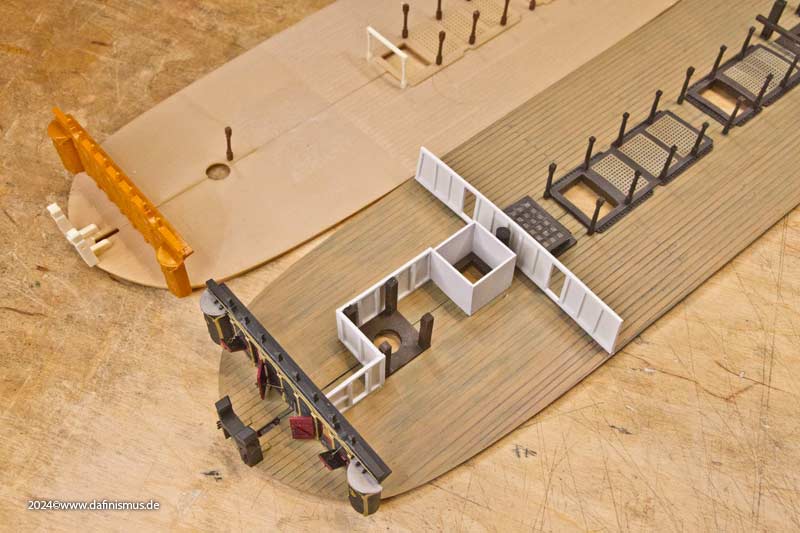
But you can already see the other addition: the area under the forecastle was also used as a sick bay, for which light temporary bulkheads were used, in this case painted canvas on wooden frames. If necessary, these could be quickly knocked down in the original.

Image

Image

The lower parts of the mainmast bitts were already presented earlier. But I had to rework the positioning so that they were directly below the extensions on the aft deck.

Image

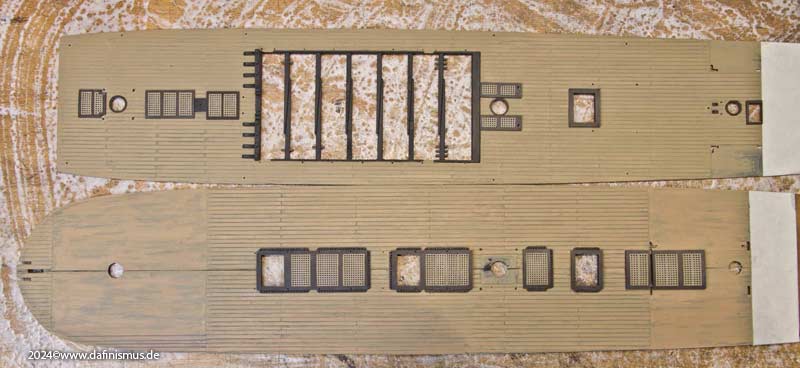
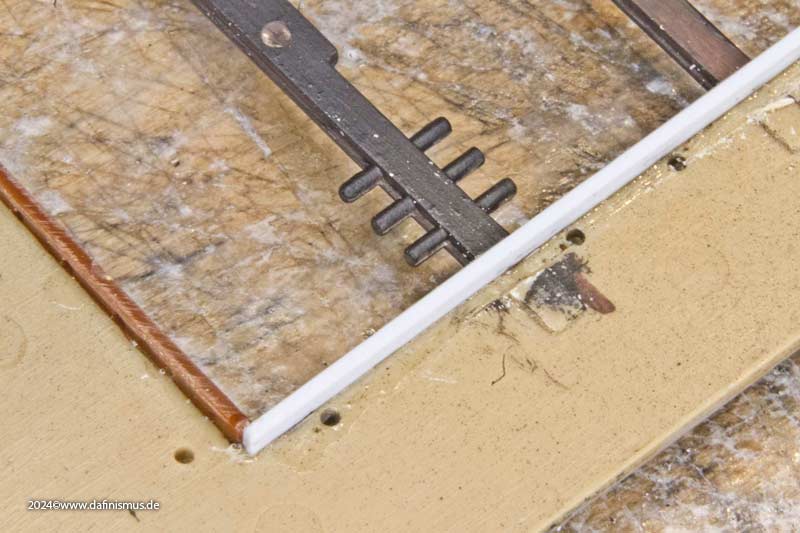
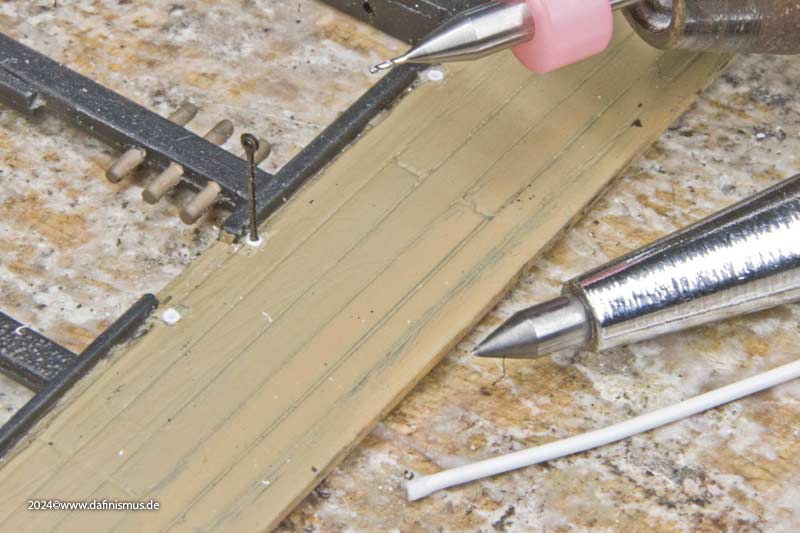
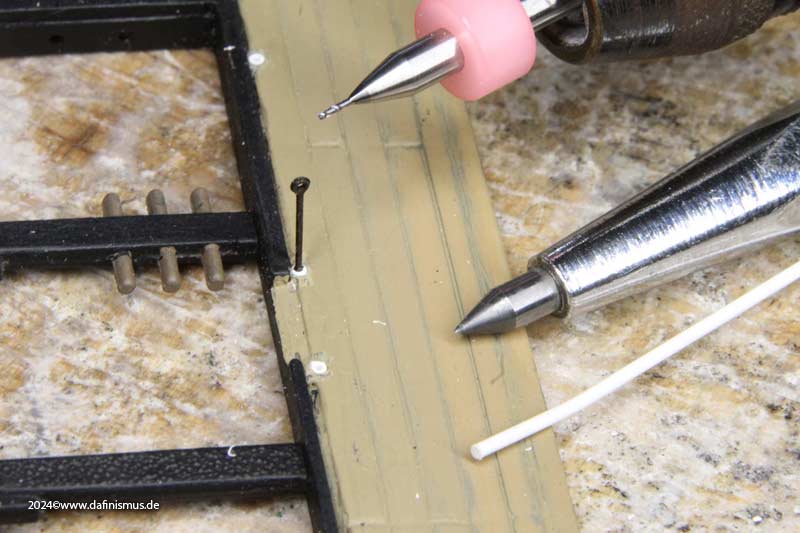
Another popular activity was sealing the old holes on the deck, as the etched parts have a smaller diameter than the standard 1 mm holes in the kit. So 1 mm plastic rods are glued in...

Image

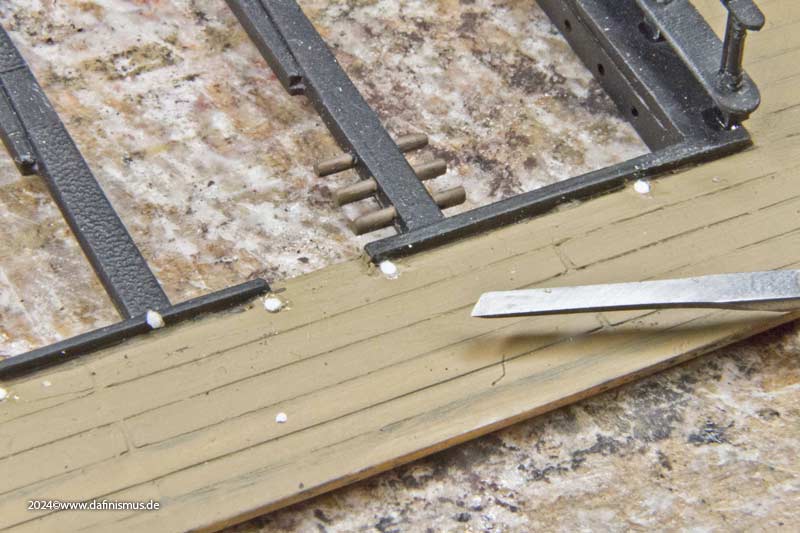
... levelled, centred with a scriber and re-drilled with 0.5 mm.

Image

Image

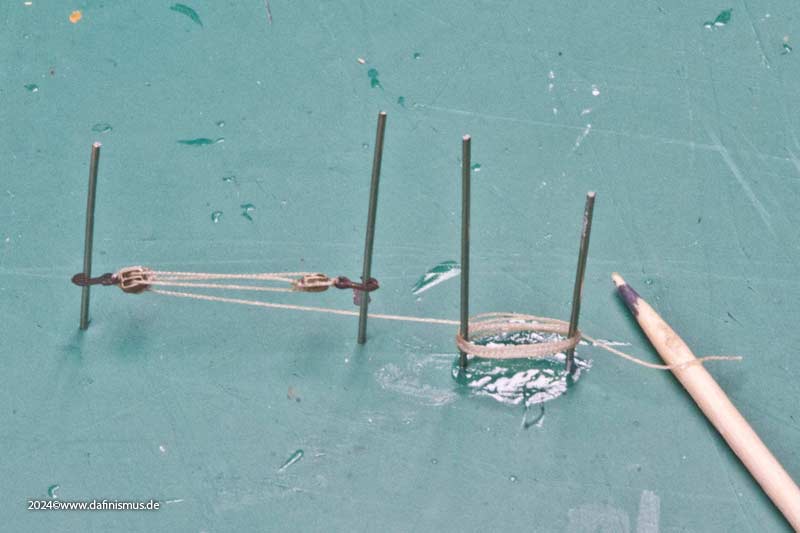
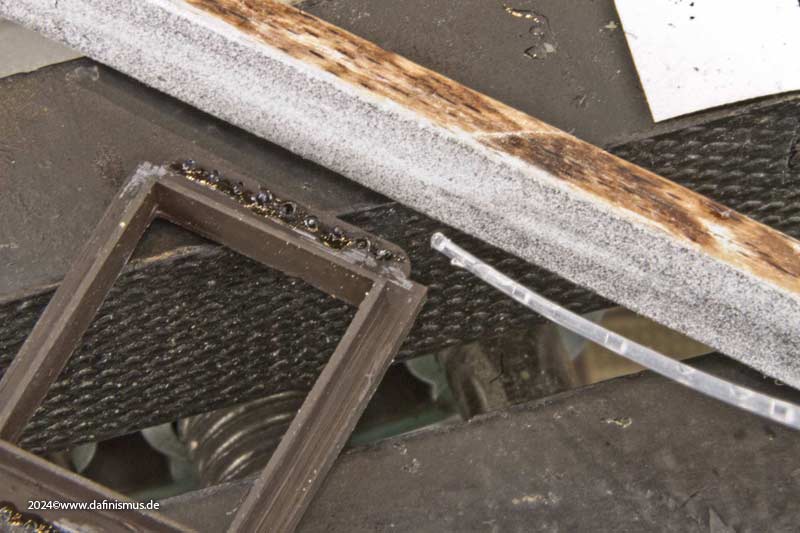
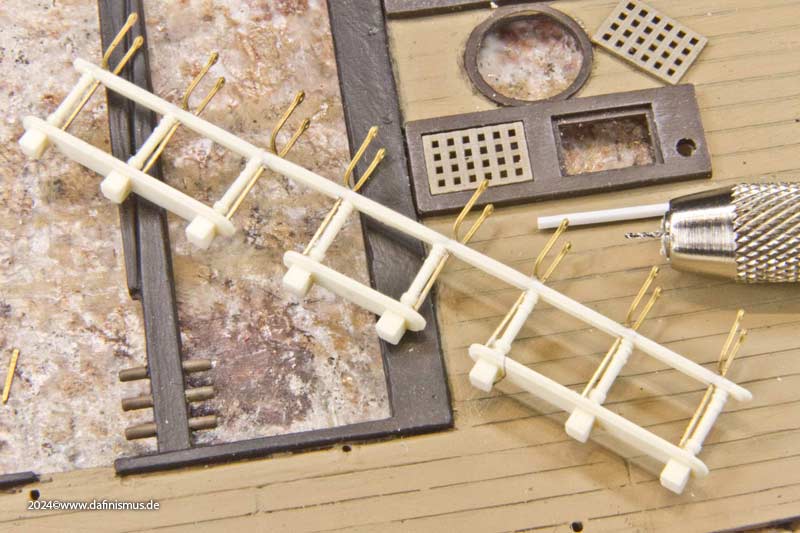
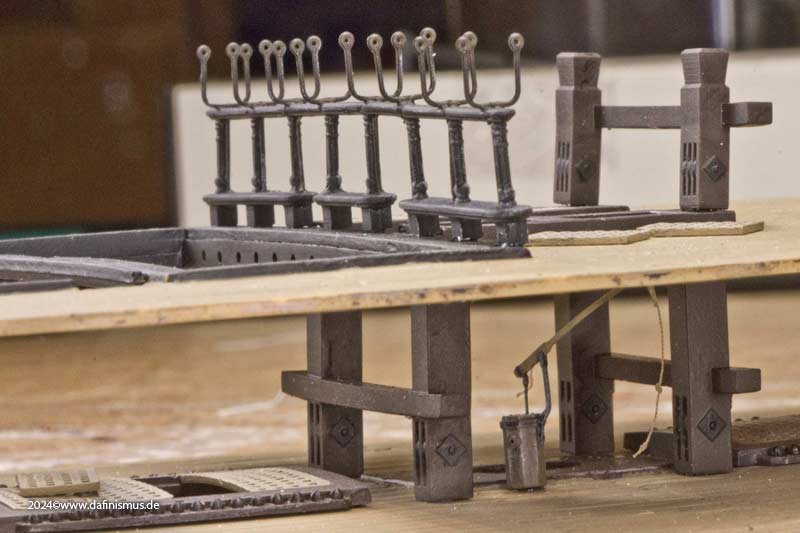
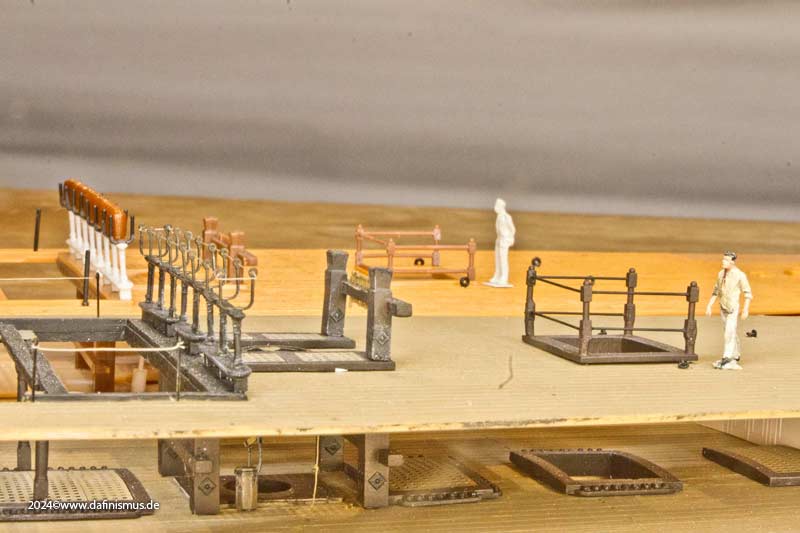
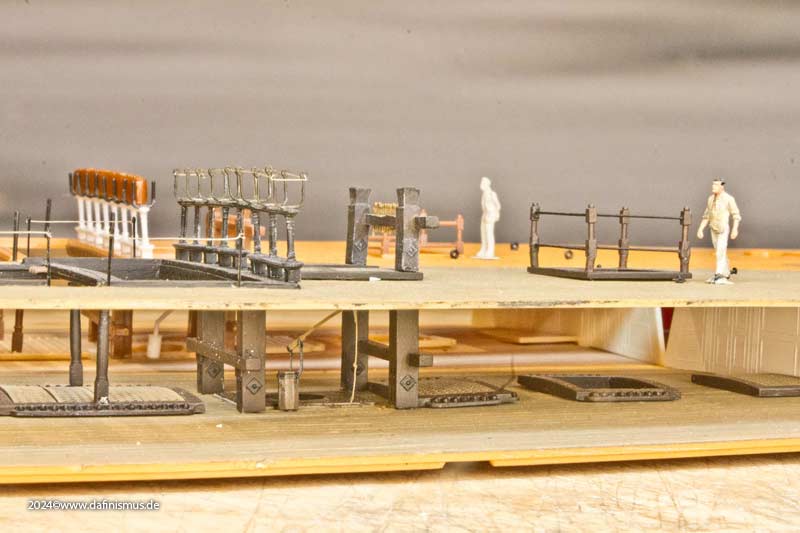
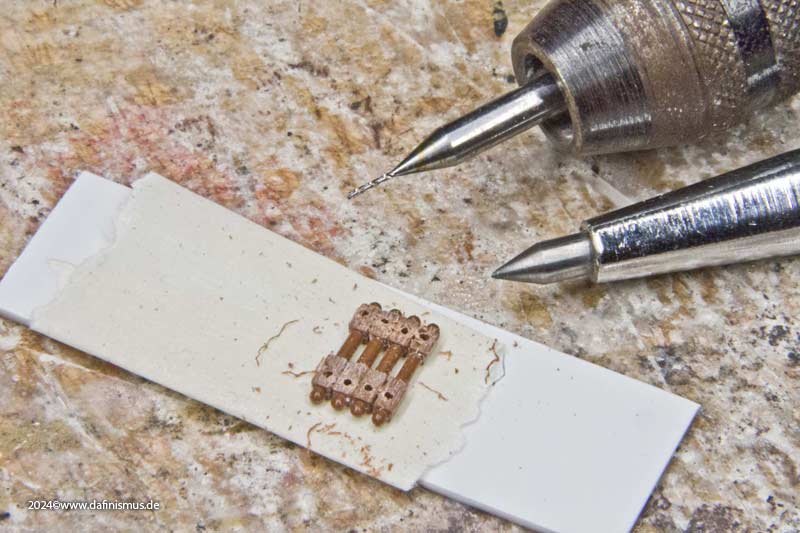
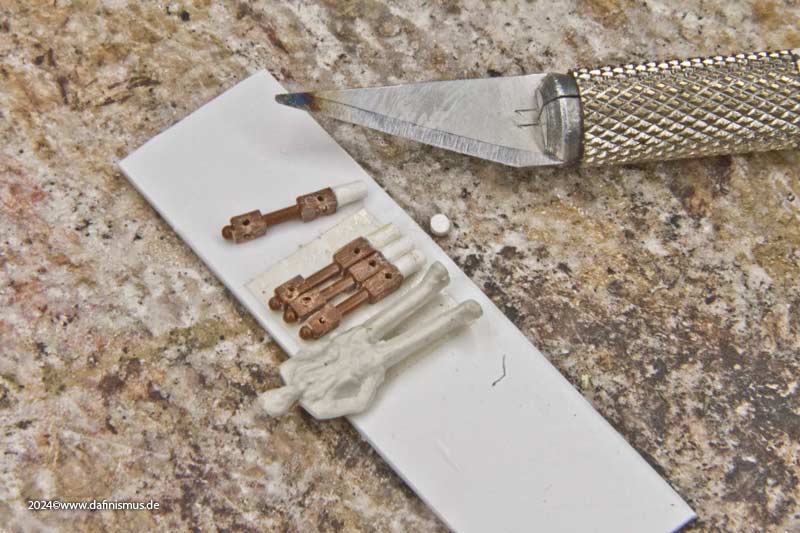
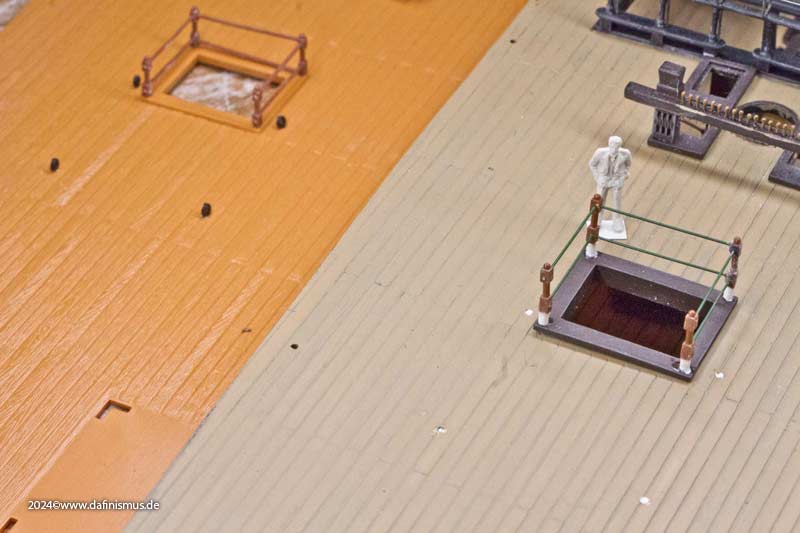
The supplied railing around the rear companionway also proved to be suboptimal. According to contemporary models, the principle is correct, wooden posts with iron bars, but the proportions are wrong: much too low and the bars much too thick. So a quick reworking to thinner wire bars...

Image

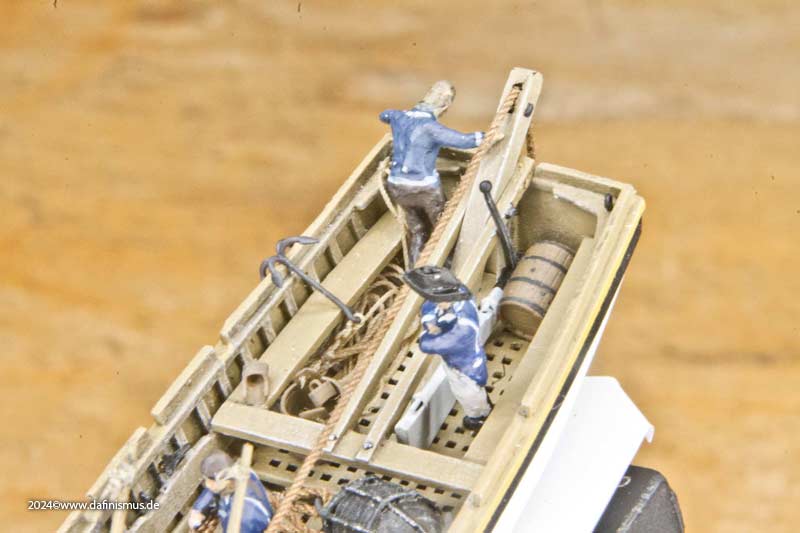
... and raising the posts, with the figure serving as a guide for the height.

Image

Image

This completed the preparations and we were ready to take photos.

Happy tinkering in the New Year from your dafi!
To Victory and beyond ...
viewtopic.php?f=59&t=99050&start=60

See also our german forum for the age of Sail and History:
http://www.segelschiffsmodellbau.com
User avatar
dafi
Posts: 996
Joined: Mon Mar 12, 2012 11:13 am
Location: Ludwigsburg/Germany
Contact:

Re: To HMS Victory and beyond

Post by dafi »

And here's a comparison between out of the box and something crafted with a little dedication ;-)

First, the upper decks.

Image

Image

Image

Image

Image

Image

Image

And the upper battery deck.

Image

Image

Image

Okay – the comparison isn't entirely fair, but it looks good what you can conjure up with it ;-)

XXXDAn
To Victory and beyond ...
viewtopic.php?f=59&t=99050&start=60

See also our german forum for the age of Sail and History:
http://www.segelschiffsmodellbau.com
User avatar
JIM BAUMANN
Posts: 5675
Joined: Mon Jan 10, 2005 5:30 pm
Location: Nr Southampton England

Re: To HMS Victory and beyond

Post by JIM BAUMANN »

aha!
I am convinced now....., it is the ' journey' for you ..!! ( so far a short 14 years! ) :big_grin:
Not the completed model ( is it ever complete?)

BRAAAAVO !!!!! :thumbs_up_1: with the meticulous research and building of all the differing launches....( laden with barrels !...)

but!!!!!!!!!!!
>>The version of the Launch with sails has to be stored in the back for now, as martens have damaged it by chewing on the sails ... <<

also martens ie wasch baeren? ( racoons )? how did they get access to your sails?
intrigued
greetings from JIM Baumann
....I buy them at three times the speed I build 'em.... will I live long enough to empty my stash...?
http://www.modelshipgallery.com/gallery ... index.html

IPMS UK SIG (special interest group) www.finewaterline.com
User avatar
dafi
Posts: 996
Joined: Mon Mar 12, 2012 11:13 am
Location: Ludwigsburg/Germany
Contact:

Re: To HMS Victory and beyond

Post by dafi »

The Martians must have eaten their own ‘i’, or maybe that was the raccoons.

In any case, the Martians have a long tradition of stealing parts and tools from my workplace for testing and study purposes, and usually – if at all – returning them only after a long delay.

Sometimes they try to eat the stuff, one never will know, even the Fox did not get it to be proven ;-)

:-)

XXXDAn
To Victory and beyond ...
viewtopic.php?f=59&t=99050&start=60

See also our german forum for the age of Sail and History:
http://www.segelschiffsmodellbau.com
Post Reply

Return to “Works in Progress”