The Ship Model Forum

The Ship Modelers Source
It is currently Tue Apr 23, 2024 1:56 am

All times are UTC - 6 hours [ DST ]


Post new topic Reply to topic  [ 41 posts ]  Go to page 1, 2, 3  Next
Author Message
PostPosted: Sat Dec 22, 2012 9:47 pm 
Offline

Joined: Mon Dec 08, 2008 8:58 pm
Posts: 203
As planned, I managed to get some fair pictures of my Trumpeter 1/200 U.S.S. Arizona completed just this morning. My intent was to build her at in a paint scheme that I knew she wore and was as accurate as possible. As such, I made no effort portray her on December 7 and chose 5-D Dark Gray. This was a kit I was going to only build once, so I threw everything at the kit. This included the KA Models wood deck and photoetch set, G-factor screws and Master Models barrels. I also wished to portray her in her glory and as such did not make any effort to weather or make her any worse for the wear. I must thank Mr. White, Mr. Bell and all others who helped a ship novice make it through this build. The pictures...
Image

Image

Image

Image

Image

Image

Image

Image

Image

Image

Image

Image

Image

Image

Image

Image

Image

Image

Image

...and to give everyone and idea of what a leap forward this was for me in ship buildings, here's the entirety of my completed fleet. The U.S.S. Arizona is no more than my 5th ship, and 3 modern subs isn't exactly pushing the limits.

Image

Thanks for looking and I'm happy to hear any comments good or bad.


Report this post
Top
 Profile  
Reply with quote  
PostPosted: Sat Dec 22, 2012 9:57 pm 
Offline
User avatar

Joined: Sat Jan 08, 2005 7:29 pm
Posts: 1284
Location: Tempe, Arizona
:thumbs_up_1: :thumbs_up_1: Excellent work!

_________________
-Abram


Report this post
Top
 Profile  
Reply with quote  
PostPosted: Sat Dec 22, 2012 11:54 pm 
Offline
User avatar

Joined: Wed Jun 27, 2012 8:29 pm
Posts: 175
Location: Philadelphia, PA
That is just downright stunning. I'll be studying these pictures when I finally start building mine. Museum-quality work...thanks for sharing!

But a quick question about the KA kit: Are you happy with it regarding the results & price? I'm mainly interested in how the deck turned out.

_________________
I would like to have seen Montana...


Report this post
Top
 Profile  
Reply with quote  
PostPosted: Sun Dec 23, 2012 12:52 am 
Offline

Joined: Mon Dec 08, 2008 8:58 pm
Posts: 203
Thank you both for the compliments.!

Jim21680 wrote:
But a quick question about the KA kit: Are you happy with it regarding the results & price? I'm mainly interested in how the deck turned out.


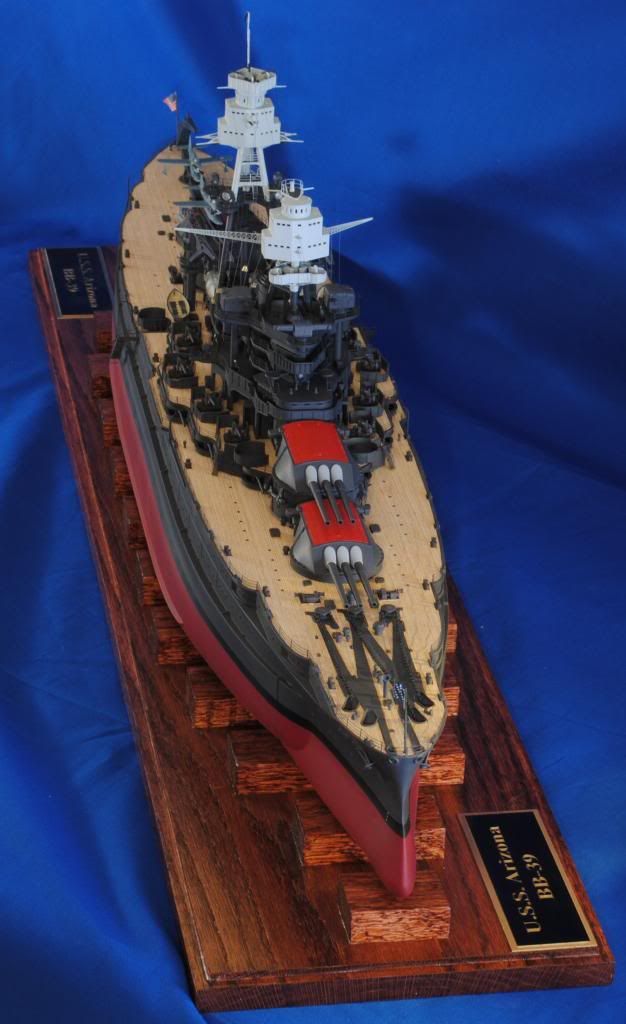
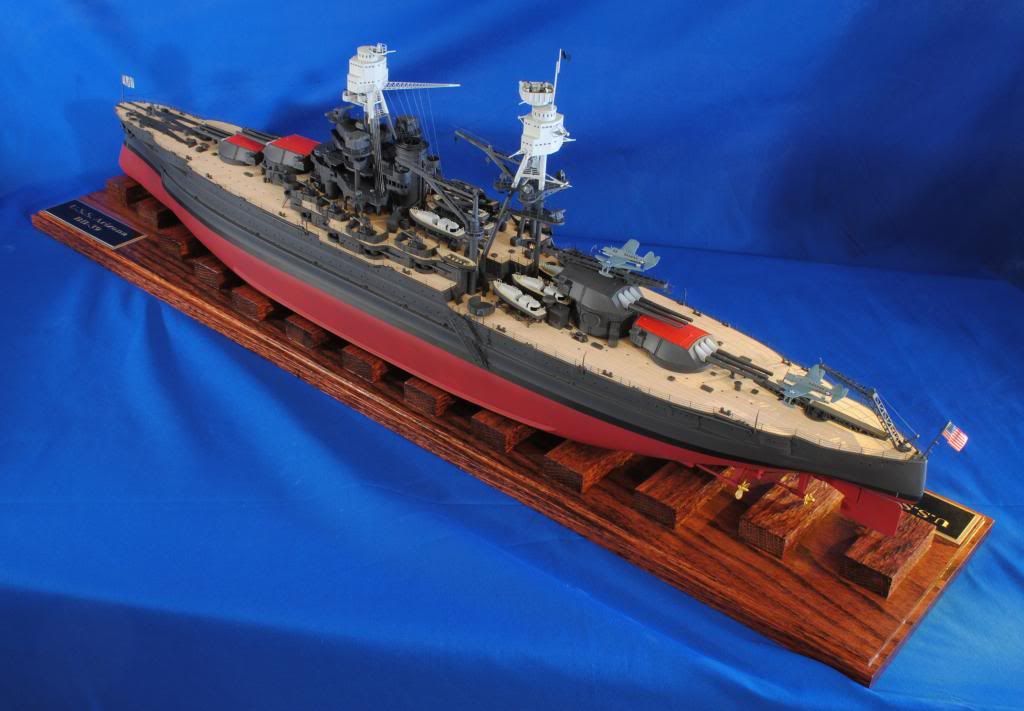
Overall, I am happy with the KA kit. At the time I was looking, there were 3 wood decks out and only 2 I could readily aquire. The Artwox was out, but out-of-stock perpetually. The other (forget who it was even) was not well recieved. So I went for the KA Models set. Since it came with photoetch, I stopped shopping for any further etch parts. While I'm happy, the kit does have some weakness.

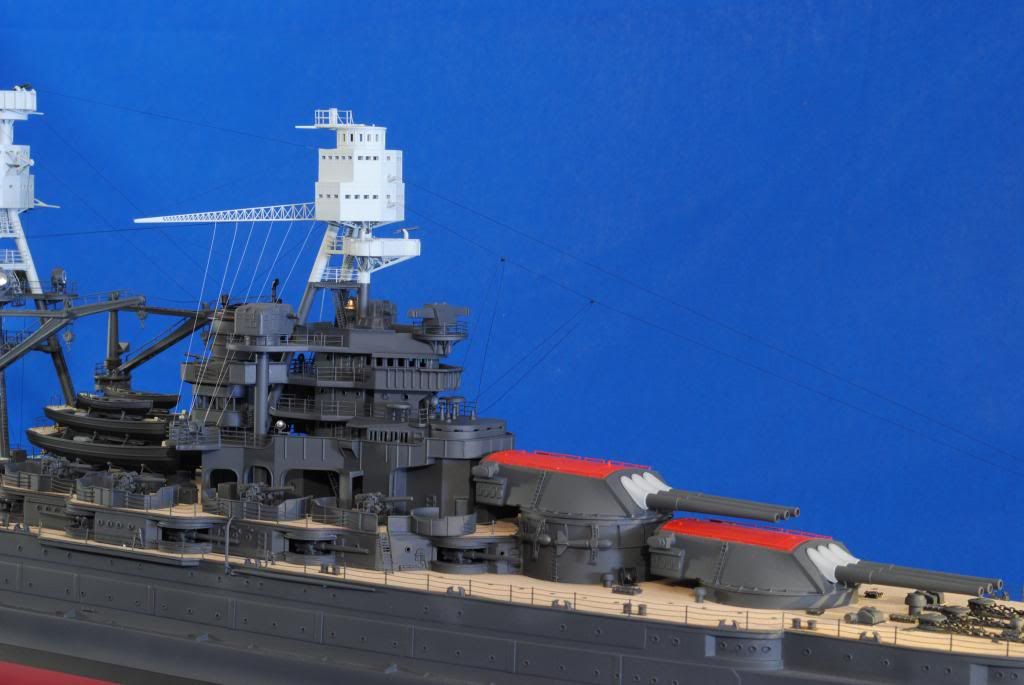
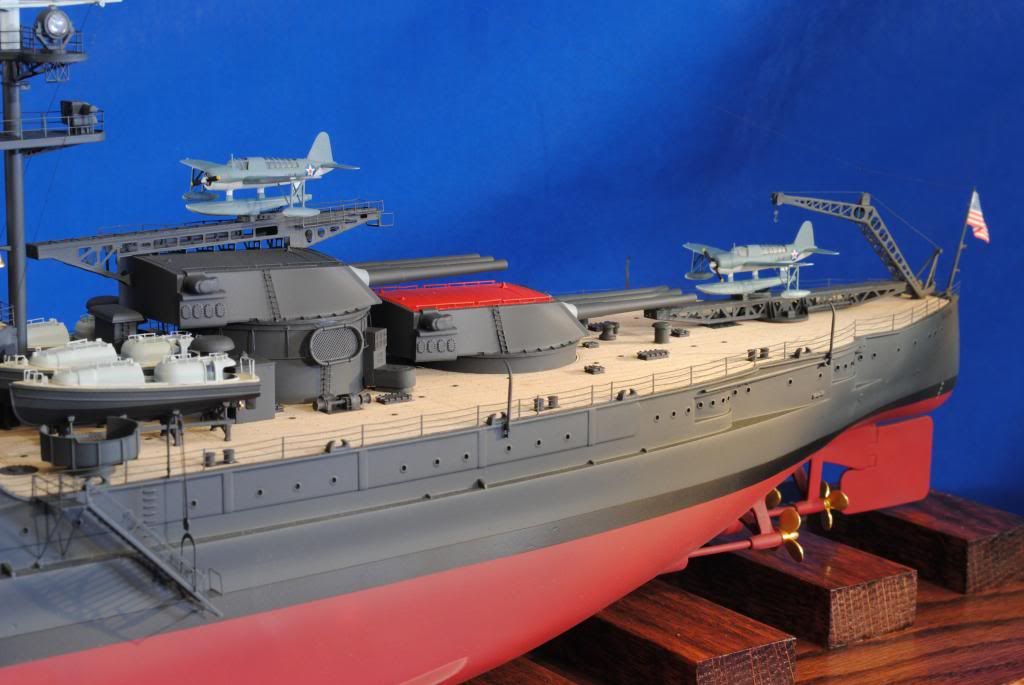
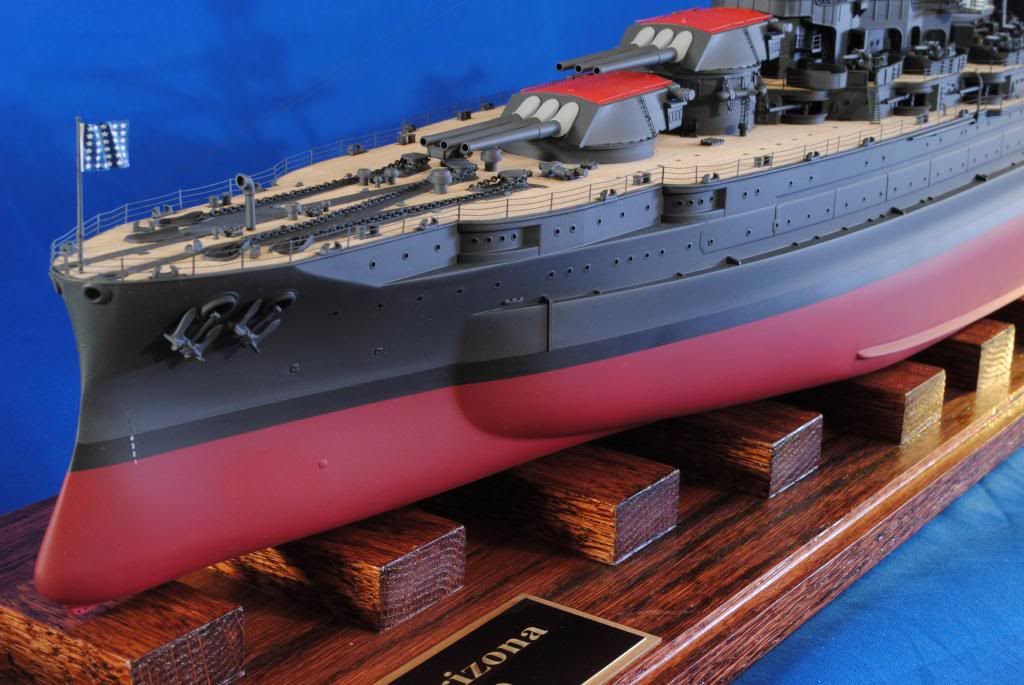
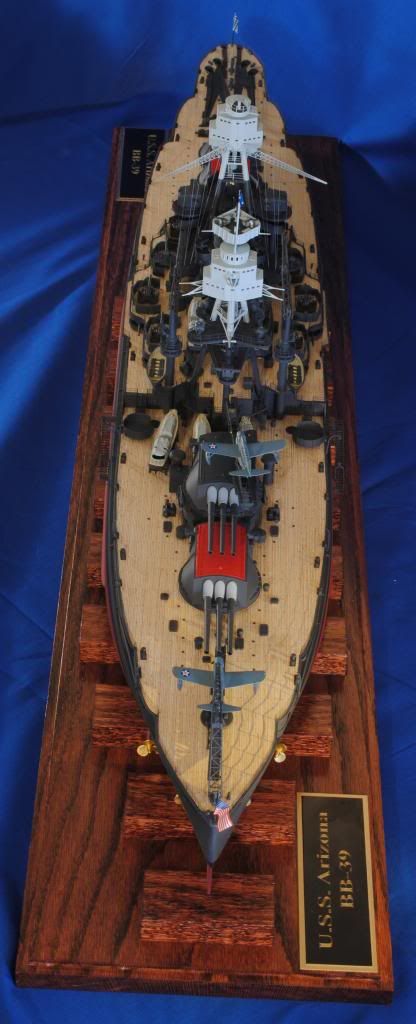
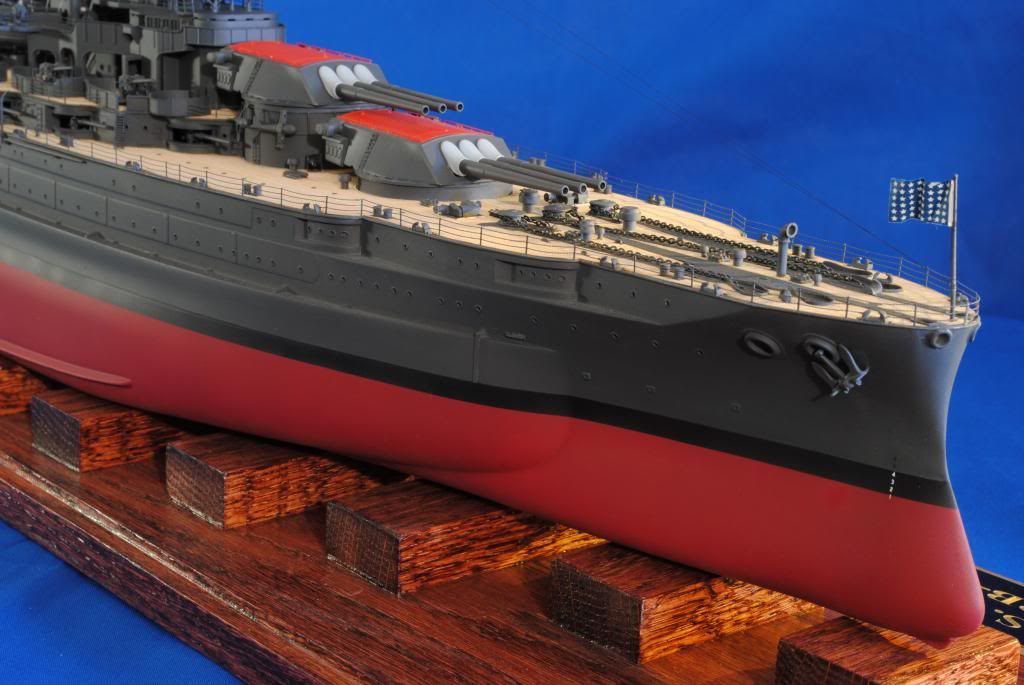
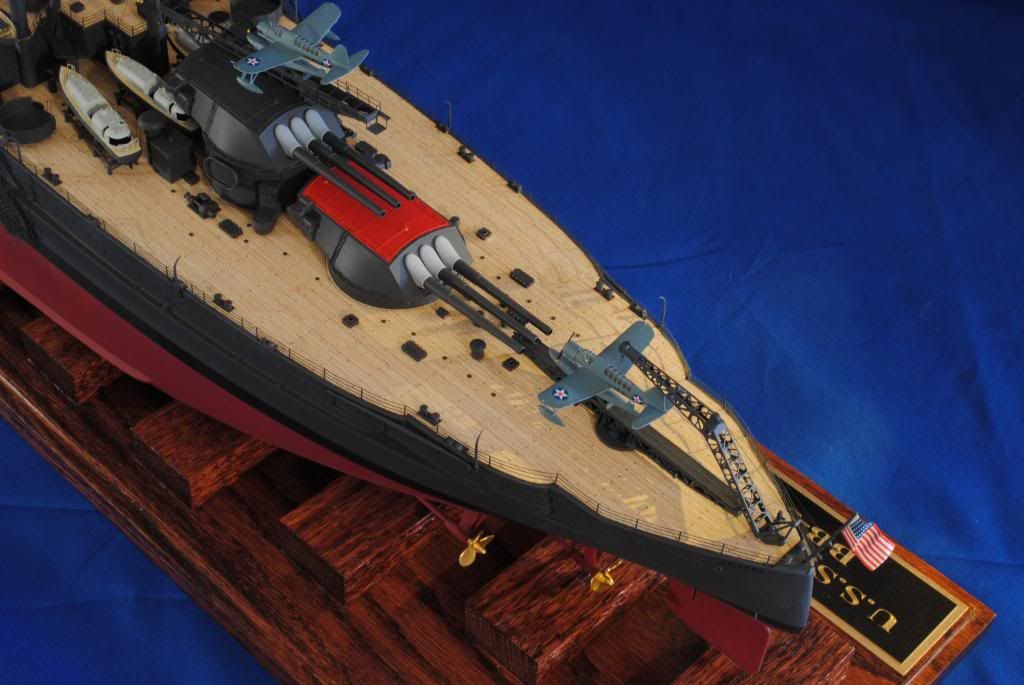
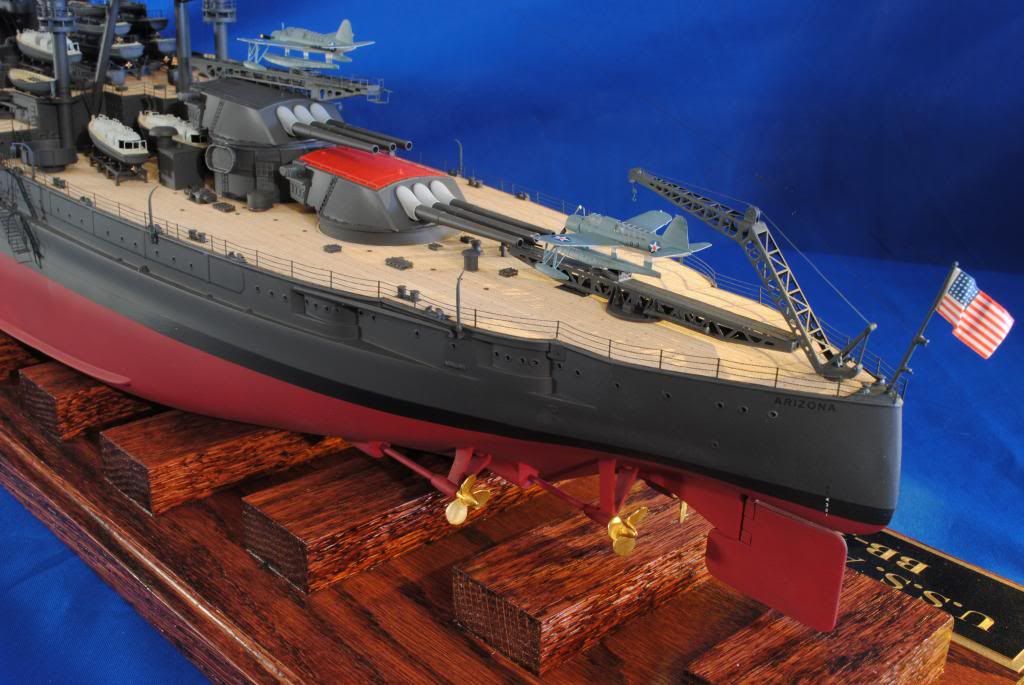
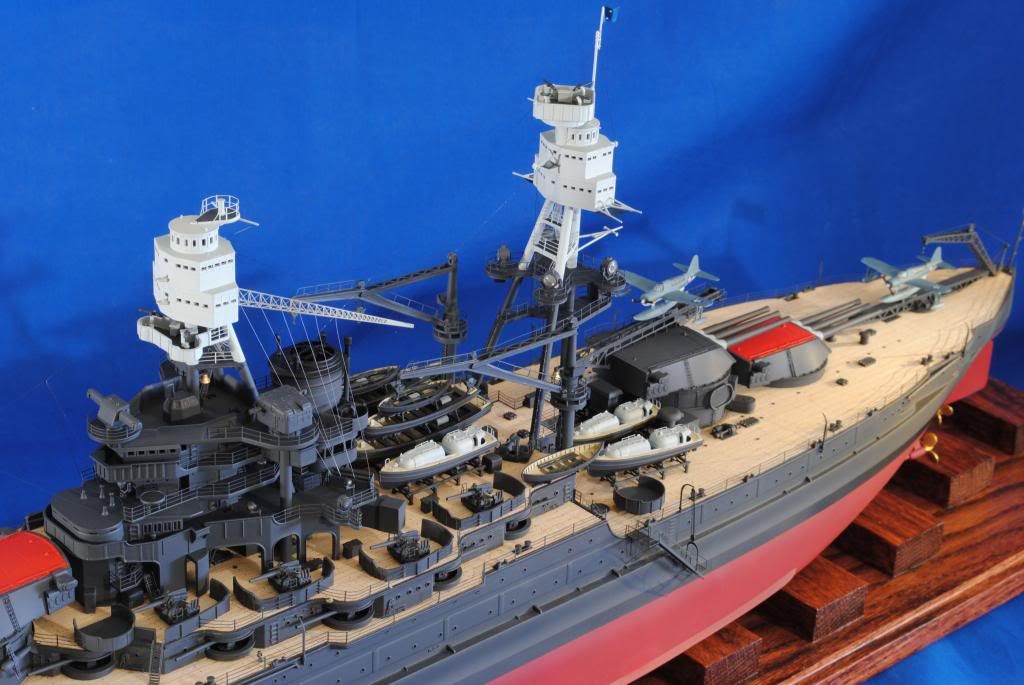
The wood deck is not one of them. The fit of the deck is excellent and I have had no problems with adhesion using the self-adhesive that it came with and nothing else. I understand it has the proper planking pattern (I wouldn't know it if it jumped out and bit me...comes with being an airplane guy). It can be criticized for not having the perimeter board for drainage built in (Artwox has it I understand). A minor point to me, but others care more. It does have some of the perimeter boards around the turrets and the aft deck access panels. I did run an 11 blade around many of the cut out slots for locating just to make the fit a little less snug, but this was not completely necessary.

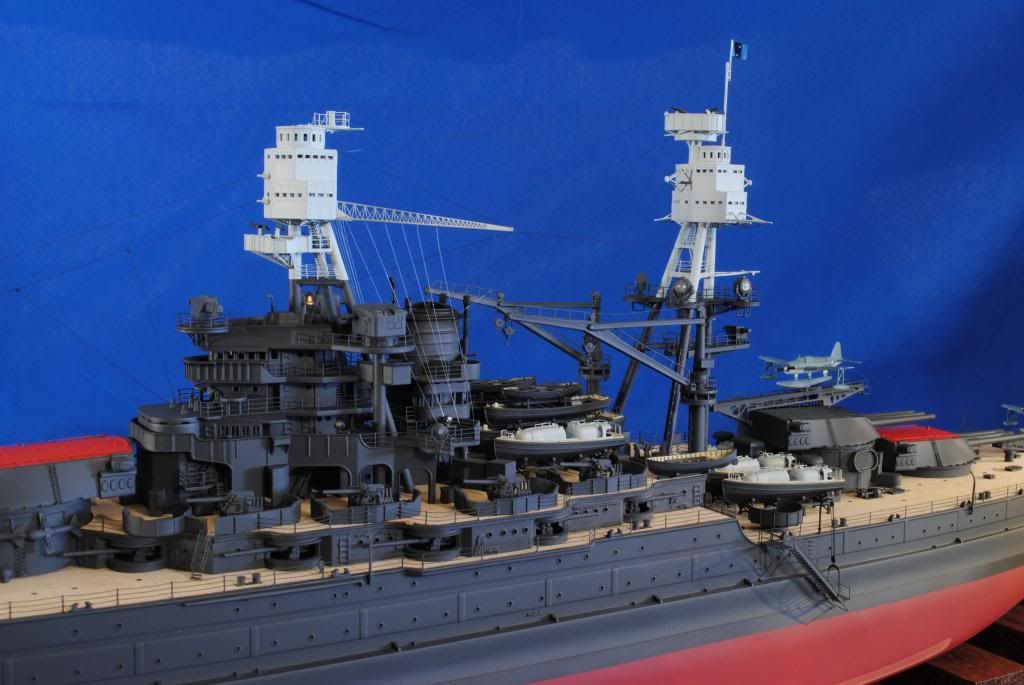
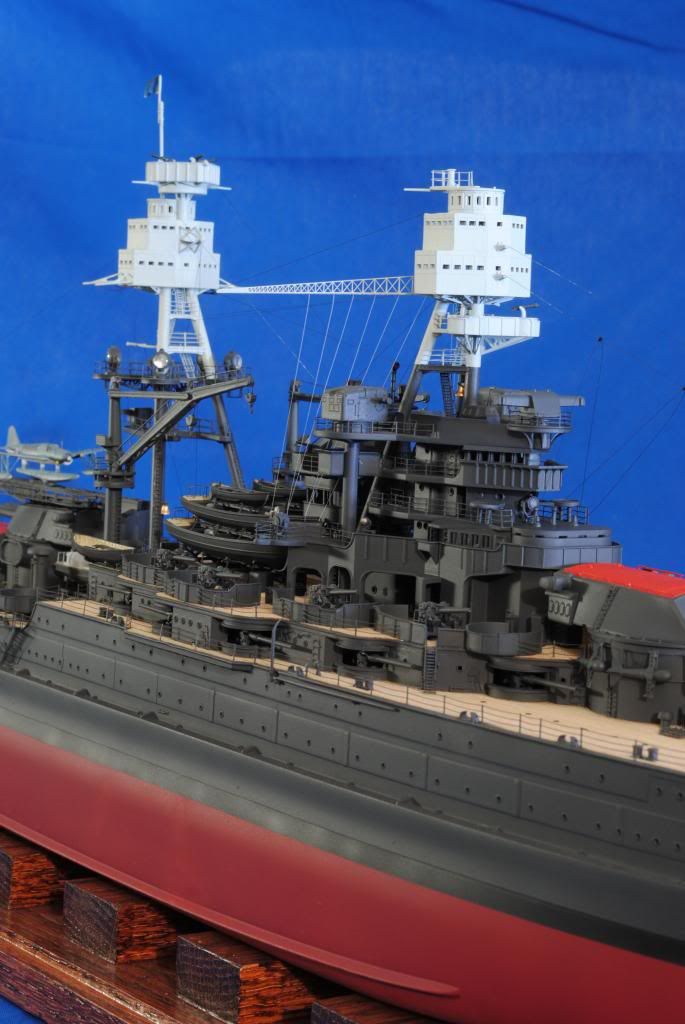
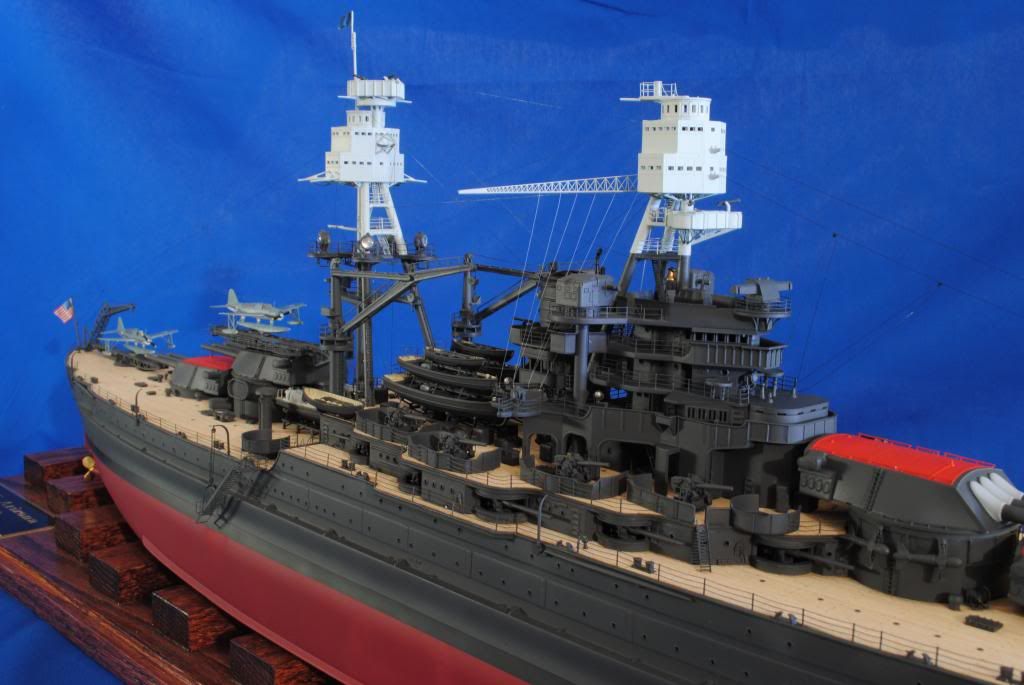
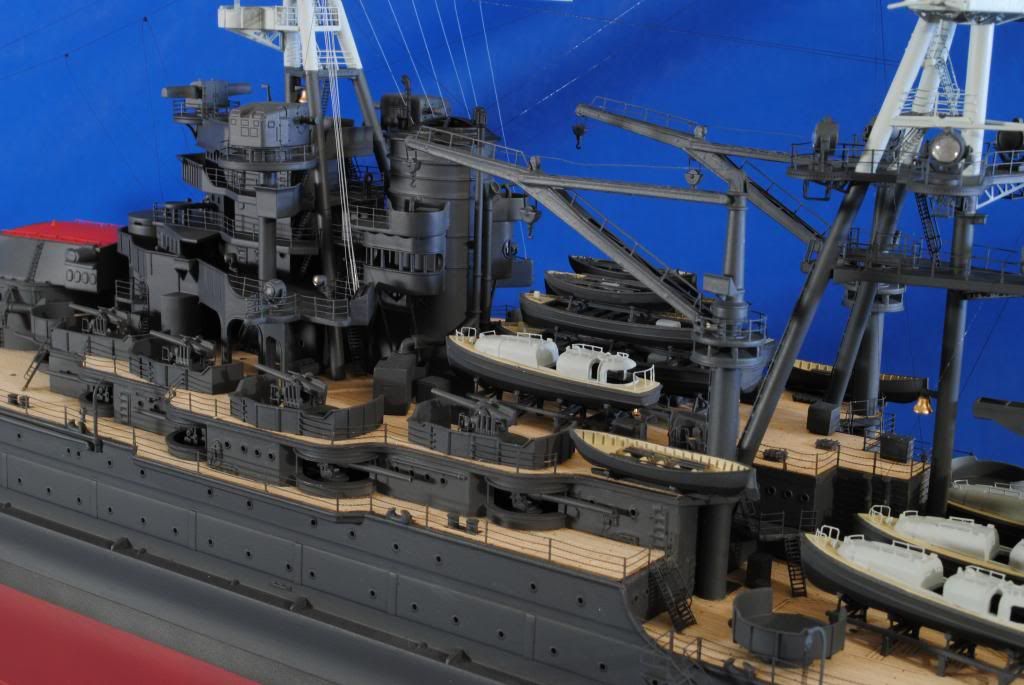
The photoetch that is present is excellent to work with. It is a strong brass, but bends easily and holds the bend. Parts are well designed to fold up from a single piece rather than assemblying multiple pieces with glue. I suspect WEM is a more complete set, as they usually are. However, pretty much everything I expected to be there was. I do have a few criticisms of the etch though. The bend lines in the railings are accurately placed, however they also have bend lines at the start of a curved section. This means the railing has a tendency to bend at a sharp angle rather than a curve. It can be worked with, but annoying. The railings are also measured to fit on/at the lip around the superstructure decks. This means you either need to remove this lip or make some small adjustments to fit it inside the lip (I chose the latter for ease of assembly). The instructions simply consist of a series of pictures with the parts installed. It works well 95% of the time, but there are a couple places I spent some time scratching my head to figure out just how to make the 5 or 6 pieces look like the picture. I am a bit suprised they did not include any detail pieces for the OS2U Kingfishers (sway braces for the floats, radar antenna masts, etc.). This is one of the places I wouldn't be surprised if WEM includes a bit more. The final is my pet peeve with almost all photoetch companies, but there are no extras of anything. You have exactly enough railing, but if you need to make any patches (I had to make a couple to the stanchions around the deck perimeter), you have nothing to work with. I fashioned what I needed form the kit photoetch. A couple of the very small things like the grab irons on the launches took great care to ensure I didn't lose a single one while trying to glue a ridiculously tiny piece. There are a few of these where I would have preferred to see the design such that you drill locating holes and pass the grab iron in to these holes. However, the KA design is such that you simply glue the photoetch filament (to give the image of how small they are) directly on the surface while hoping you have enough glue to hold it in place. There is no extra length to be able to insert in to a drill hole.

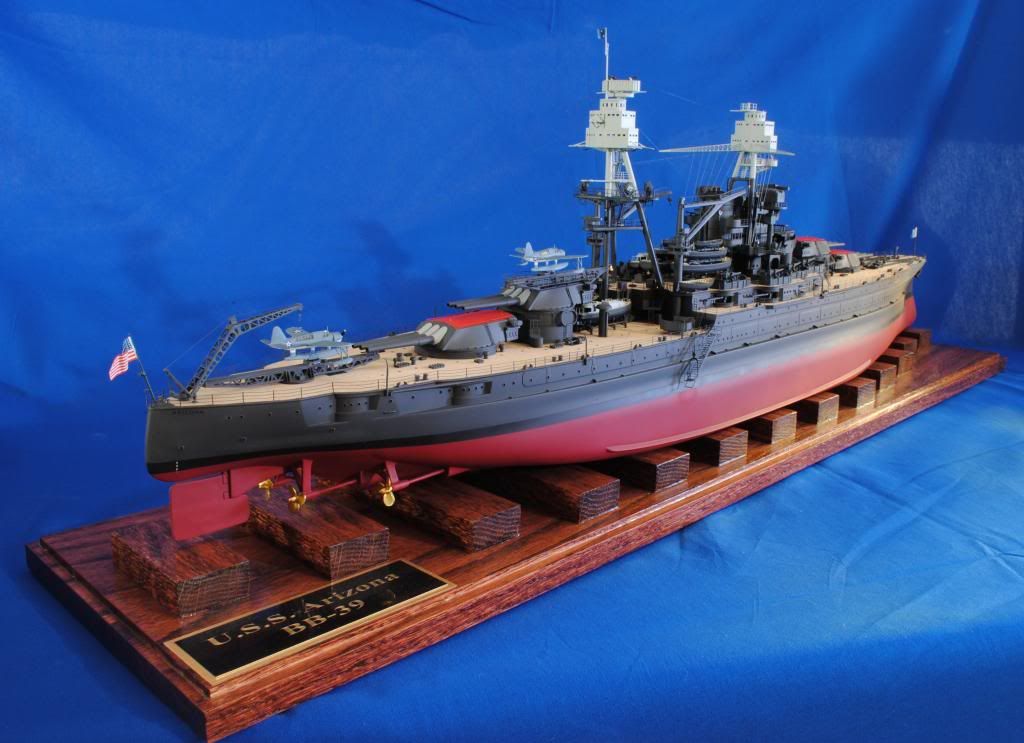
All-in-all though, it's a pretty good kit and works well. It comes in at roughly the cost of a seperate wood deck and photoetch kit, so price is reasonable. If I purchased things seperately, I might have gotten a bit more from the WEM set.


Report this post
Top
 Profile  
Reply with quote  
PostPosted: Sun Dec 23, 2012 6:27 am 
Offline
User avatar

Joined: Thu Aug 20, 2009 6:52 pm
Posts: 1038
Location: Y-town Ohio
From stem to stern she is a work of art!
Your PE work is clean for sure. Did her brass bell come with the PE or the kit?

_________________
God grant me the courage not to give up what I think is right even though I think it is hopeless.
~ Chester W. Nimitz ~
My Builds ~ http://ussnorthcaroilna.shutterfly.com/


Report this post
Top
 Profile  
Reply with quote  
PostPosted: Sun Dec 23, 2012 9:05 am 
Offline
User avatar

Joined: Thu May 03, 2007 10:39 pm
Posts: 769
Location: Westminster, Colorado
Beautiful model and from what I can see in the pictures extremely well constructed. Very nice work! Thanks for sharing her with us.
Dave


Report this post
Top
 Profile  
Reply with quote  
PostPosted: Sun Dec 23, 2012 1:44 pm 
Beautiful looking model. Bravo!


Report this post
Top
  
Reply with quote  
PostPosted: Sun Dec 23, 2012 7:07 pm 
Offline

Joined: Mon Dec 08, 2008 8:58 pm
Posts: 203
As always, thanks for the compliments.

Bigdaddy Mark wrote:
...Did her brass bell come with the PE or the kit?


The bells are the plastic kit parts painted with good old testors gold enamel (the 1/4 oz. ones in the square jars).


Report this post
Top
 Profile  
Reply with quote  
PostPosted: Sun Dec 23, 2012 8:39 pm 
Offline
User avatar

Joined: Tue May 01, 2012 4:38 pm
Posts: 1082
Location: The Buckeye State
You should be very proud of that. It is without a doubt the best example I have seen of this subject. Superb. :thumbs_up_1:

_________________
_________________
James

http://www.modelshipgallery.com/gallery/users/James-Guard/user-index.html


Report this post
Top
 Profile  
Reply with quote  
PostPosted: Sun Dec 23, 2012 9:24 pm 
Offline
User avatar

Joined: Sun Jul 19, 2009 10:33 am
Posts: 381
Location: Yorkshire, Great Britain
Outstanding build, you should be proud of what you've achieved.
Regards
Richard :thumbs_up_1:

_________________
SI VIS PACEM,
PARA BELLUM


Report this post
Top
 Profile  
Reply with quote  
PostPosted: Sun Dec 23, 2012 10:02 pm 
Offline
User avatar

Joined: Fri Oct 01, 2010 5:44 pm
Posts: 641
Gorgeous specimen of a build. You're making me wish I had waited long enough for the wood deck kits to come out before building mine. Painting it instead took a long time and was very frustrating at times. Also, what did you use for the 5-D? I used Gunmetal Grey from Hobbymaster for mine, and while it looks nice it came out closer to the controverial 5-S blue than grey.

One other question, how did you make the rigging? What did you use for the attachment points between cables?


Report this post
Top
 Profile  
Reply with quote  
PostPosted: Sun Dec 23, 2012 10:34 pm 
Offline

Joined: Mon Dec 08, 2008 8:58 pm
Posts: 203
dsk wrote:
Gorgeous specimen of a build. You're making me wish I had waited long enough for the wood deck kits to come out before building mine. Painting it instead took a long time and was very frustrating at times. Also, what did you use for the 5-D? I used Gunmetal Grey from Hobbymaster for mine, and while it looks nice it came out closer to the controverial 5-S blue than grey.

One other question, how did you make the rigging? What did you use for the attachment points between cables?


I used LifeColor 5-D Dark Gray. I've heard this isn't a perfect match. However, to my knowledge, that is based on a single aged specimen that is described as "blacker than black". To me that sounds like age has changed the color and I'm quite happy the results here. Obviously, I have no idea what 5-D really looked like back in the day. While LifeColor has a good product line including naval colors, be advised that you will need to add some retarder to prevent LifeColor from drying in the airbrush tip. I've seen many others reporting this as well.

For rigging, I used transparent thread from the sewing department in a craft store. It comes in clear and smoke, which after a flat coat looks white and black. The diameter is 0.004", which scales out to 0.8" in 1/200...a perfect inbetween the 1/2-1" that rigging would be. The thread will kink and hold a bend, so at areas joining between cables I made such a kink. I then used a small bit of superglue to tack it temporarily in place. After finishing, I used a drop of white glue to simulate the insulators on some rigging. I'm not sure if these belong at all the joins, but did it anyway. When it was dry, I painted it black. I chose not to model the tie downs for any of the rigging. While feasible in 1/200, I considered it barely so. Instead, wherever there wasn't a mast to wrap it around and secure, I drilled a #80 hole, inserted the thread and fixed it with superthin CA. This overall scheme worked quite well with only about 1/3 to 1/2 of the rigging available at any angle, fitting in well with real life rigging.

There is little information I could find on the rigging for the U.S.S. Arizona. Tracy White linked a page (http://www.researcheratlarge.com/Ships/ ... ights.html) that has a side view of teh rigging in what looks like an early to mid 1941 configuration. I used this as the main guide with some models built by others to fill in the blanks. I just could not find much trace of any rigging that showed in real life pictures. I'm sure I have some errors in the configuraiton.

As a side note, I originally planned to use EZ line for rigging. It's an elastic line that stretches at least 3-4 times it's length, making it more durable (stretching instead of breaking). It is sold in black and white, as well as 0.003" and 0.006". It seemed like a perfect thing. Turns out the diameter is dubious. I got a sample of 0.006" and it's diameter measured approximately 0.045-0.050" without any stretching. It's not until fully stretching it out that it gets to the advertised diameter, which then defeats the purpose. Just a word of warning for others. It's good stuff if you're working in a large enough scale to use the large diameter.


Report this post
Top
 Profile  
Reply with quote  
PostPosted: Mon Dec 24, 2012 11:10 am 
Offline
User avatar

Joined: Thu Apr 03, 2008 10:48 pm
Posts: 2612
Location: Connecticut, USA
Very very nice, especially for only being your 5th ship, and your first "real" delve into major ship modeling! PE work looks perfect,a nd thanks for the mini- review of the KA brass! :thumbs_up_1:

_________________
Enlisted men are stupid, but very cunning and deceitful and bear considerable watching." - Marine Corps Officers Manual, 1894

http://www.modelshipgallery.com/gallery ... index.html


Report this post
Top
 Profile  
Reply with quote  
PostPosted: Tue Dec 25, 2012 1:58 am 
Offline
User avatar

Joined: Sun Jul 25, 2010 5:13 am
Posts: 403
Location: Tucson, Arizona
ESzczesniak - Kudos on an excellent build! This build looks as clean as any I have seen so far, regardless of whether it is your 5th build, or 500th, it is beautiful. I hope mine will come out at least half as good as this one. I like that shade of 5-D. It may not be as dark as the real thing, but it looks good. It doesn't seem to have the blue tint that so many greys have, at least on my screen.

I thank you also for the review on the KA PE and Deck. I had already bought the WEM set before I heard about KA. I am still waiting for JohnD to finish the ScaleDeck 1/200 Arizona, but there have been no updates to their website in months (not since April 22, 2012). I hope everything is OK with them. Anybody know?

Also, thanks for the warning about EZ Line. After reading about it here I was thinking of adding it to my collection of supplies, but you point out a very important factor about it. Stretch it far enough to look realistic and it will pull half your ship apart. Now if it was like parafilm and stayed where it stretched, that might be a different story. But then you lose the springiness that lets it recover from a bump. Maybe they will come out with some smaller diameters. Oh well.....

Anyway, that is a beautiful build. Please put a cover over it! It would be a shame to have to dust it now and then. I fear it would not survive!


Report this post
Top
 Profile  
Reply with quote  
PostPosted: Tue Dec 25, 2012 10:33 am 
Offline

Joined: Mon Dec 08, 2008 8:58 pm
Posts: 203
BFR4570 wrote:
Anyway, that is a beautiful build. Please put a cover over it! It would be a shame to have to dust it now and then. I fear it would not survive!


Thank you for the compliments and trust me, it has had a cover since day once of the build. I knew this one was going to take me a while and even the dust build up during the build could be a problem. The ship itself spent most of it's time on the bench under the case while I worked on sub-assemblies. That routed recess along the base of the display board isn't just decorative. The display case fits snuggly over the recess.


Report this post
Top
 Profile  
Reply with quote  
PostPosted: Tue Dec 25, 2012 6:18 pm 
Offline
User avatar

Joined: Sun Jul 25, 2010 5:13 am
Posts: 403
Location: Tucson, Arizona
Cool! You REALLY planned ahead on this! :thumbs_up_1: :thumbs_up_1: I thought you probably had with all the thought you had put into the rest of this model.


Report this post
Top
 Profile  
Reply with quote  
PostPosted: Wed Dec 26, 2012 10:12 am 
Offline

Joined: Sun Dec 09, 2012 1:37 am
Posts: 6
ESzczesniak wrote:
BFR4570 wrote:
Anyway, that is a beautiful build. Please put a cover over it! It would be a shame to have to dust it now and then. I fear it would not survive!


Thank you for the compliments and trust me, it has had a cover since day once of the build. I knew this one was going to take me a while and even the dust build up during the build could be a problem. The ship itself spent most of it's time on the bench under the case while I worked on sub-assemblies. That routed recess along the base of the display board isn't just decorative. The display case fits snuggly over the recess.


The base looks awesome as well ! Did you have the top portion made for you? I'm shopping around for just what you have done.


Report this post
Top
 Profile  
Reply with quote  
PostPosted: Wed Dec 26, 2012 10:15 am 
Offline
User avatar

Joined: Mon May 14, 2012 12:18 pm
Posts: 2068
Location: Salt Lake City, USA
Excellent work! One of my all-time favorite kits. :thumbs_up_1:

_________________
-Jason Channell

Current Project: 1/200 Bismarck


Report this post
Top
 Profile  
Reply with quote  
PostPosted: Wed Dec 26, 2012 1:52 pm 
Offline

Joined: Mon Dec 08, 2008 8:58 pm
Posts: 203
Krupp Steel wrote:
The base looks awesome as well ! Did you have the top portion made for you? I'm shopping around for just what you have done.


Yes, I ordered a custom acrylic case from http://www.casesforcollectibles.com. They were by far the most reasonably priced. I think it ended up around $170 shipped and I'm happy with the quality. I actually originally planned to use the black acrylic base that came with the case. However, as the ship got more and more built up, it was clear the scale of the ship just didn't fit with a 1/8" thick piece of acrylic. So I improvised and made the word base myself from Red Oak, a trusty circular saw and a Dremel in a router attachment.


Report this post
Top
 Profile  
Reply with quote  
PostPosted: Wed Dec 26, 2012 2:38 pm 
Offline
User avatar

Joined: Wed Nov 29, 2006 12:22 pm
Posts: 2013
Location: Calif
Truly an amazing work of art!! :thumbs_up_1: :thumbs_up_1: :thumbs_up_1:

_________________
If ya lose yer sense of humor...
You've lost everything...

On the Bench:
1/720 Italeri CVN-68 ca 1976/77
1/800 ARii 1/800 CV-59 backdating to 1961 (CVA-59)
1/700Trumpy USS Hornet CV-8 "Doolittle Raiders"


Report this post
Top
 Profile  
Reply with quote  
Display posts from previous:  Sort by  
Post new topic Reply to topic  [ 41 posts ]  Go to page 1, 2, 3  Next

All times are UTC - 6 hours [ DST ]


Who is online

Users browsing this forum: No registered users and 48 guests


You can post new topics in this forum
You can reply to topics in this forum
You cannot edit your posts in this forum
You cannot delete your posts in this forum
You cannot post attachments in this forum

Jump to:  
Powered by phpBB® Forum Software © phpBB Group