The Ship Model Forum

The Ship Modelers Source
It is currently Fri Jun 13, 2025 5:02 pm

All times are UTC - 6 hours [ DST ]


Post new topic Reply to topic  [ 456 posts ]  Go to page Previous  1, 2, 3, 4, 5 ... 23  Next
Author Message
PostPosted: Mon Dec 02, 2013 10:09 pm 
Offline

Joined: Mon Jan 07, 2008 10:15 pm
Posts: 999
One more small update for today. Working some more on the case mate area. Although this is a nice touch by Trumpeter to add these fire hoses and I guess some sort of water supply line which everyone seems to be painting red as if it is a fire hydrant, I don't believe they ever existed on the real ship like this. I think Trumpeter got the idea from Don Preul's model. So off they must go!
Image
Image

There was only one hose reel that I can find that was in this area and that was just forward of the #1 case mate seen here. As you can see, it looks nothing like what is on the model.
Image


Report this post
Top
 Profile  
Reply with quote  
PostPosted: Wed Dec 04, 2013 9:57 pm 
Offline

Joined: Mon Jan 07, 2008 10:15 pm
Posts: 999
Slowly making progress on the case mates. I've constructed new fire hoses by bashing the ones that I scraped off and located them in the proper places.
Image
Image

Then I decided to improve the look of these electrical boxes and lines.
Image

Here is a Starboard side closeup of what they actually looked like.
Image

And my version of what I'm seeing. For some reason I did Port side first so its a mirror image of the above pic.
Image
Image


Report this post
Top
 Profile  
Reply with quote  
PostPosted: Thu Dec 05, 2013 5:20 am 
Offline
User avatar

Joined: Sat Oct 06, 2012 4:34 pm
Posts: 967
Location: Cologne / Germany, sometimes Poznan/ Poland and Chessington/ UK
Well ... with your building report here, you make me really wanting to make the big Arizona too! :thumbs_up_1:

But before I have some other vessels in the yard :-)

_________________
The advantage of wisdom is that you can play dumb; conversely, it is more difficult.


Report this post
Top
 Profile  
Reply with quote  
PostPosted: Thu Dec 05, 2013 11:58 am 
Offline
User avatar

Joined: Thu Aug 27, 2009 11:05 am
Posts: 2261
Location: Paris France
Hello Jeff

good attention into the détails :thumbs_up_1: I Like this "philosophy"
cheers
nicolas

_________________
https://ladiagonaledubosco.blogspot.fr/


Report this post
Top
 Profile  
Reply with quote  
PostPosted: Sat Dec 07, 2013 7:14 pm 
Offline

Joined: Mon Jan 07, 2008 10:15 pm
Posts: 999
Finally finished up the case mate area. I added a bit more detail to the 5" 51's and cleaned things up a bit.
Image
Image
Image

Now time to cover it all up and work on the splinter shields, the 5" 25's and gun tubs.
Image

I am eliminating the steel deck on the forward tubs so the teak deck shows. Then I will reconstruct a new steel deck in the area that overhangs. I believe this is how it actually was on the ship. Here is a pic of the forward tub. Notice the teak deck inside the tub.
Image
Image
Image

While researching the gun tubs both forward and aft, I noticed that Trumpy got the dip in the shields in the wrong place. The lower portion of the shields are too narrow. Looking at the above photo of the forward tub you can see the proper place where the dips should be. The dips are not equal distance from the back opening like the kits dips are.
Image

I believe the aft tubs did have an equal distance for the dip on both sides but, the dip was much wider than the kit represented.
Image
Image
Image


Report this post
Top
 Profile  
Reply with quote  
PostPosted: Sun Dec 08, 2013 1:13 pm 
Offline

Joined: Thu Jul 19, 2012 10:16 am
Posts: 25
Jeff. I'm surprised you didn't thin the walls/openings around the "5" guns. They really need it.Image


Report this post
Top
 Profile  
Reply with quote  
PostPosted: Sun Dec 08, 2013 2:45 pm 
Offline

Joined: Mon Jan 07, 2008 10:15 pm
Posts: 999
Leftie wrote:
Jeff. I'm surprised you didn't thin the walls/openings around the "5" guns. They really need it.


I definitely overlooked that. Oh well! I'll know to do it on the next one. Maybe on the next one I'll open up the doors as well. That also would require some thinning.

Small update. Here are couple of pics of the completed forward tubs.

Image
Image


Report this post
Top
 Profile  
Reply with quote  
PostPosted: Thu Dec 26, 2013 9:17 am 
Offline

Joined: Mon Jan 07, 2008 10:15 pm
Posts: 999
Been constructing the 5" 25's. I eliminated the 3 shells from each gun rack. I believe the only time these racks were filled with shells was when the crews were firing them during battle practice.
Image

Image

Image

Also been working on the wood deck. I used KA's wood deck for this build. This decking definately has it's pluses and minuses. One glaring minus is the overscale end joints that are very distracting to the eye.
I am softening these joints by applying a drop of WEM's teak color paint in each joint. In this pick the top 2 rows of joints have been painted, the bottom 2 have not.
Image

Here is a view of the finished quarter deck. No more distracting end joints.
Image


Report this post
Top
 Profile  
Reply with quote  
PostPosted: Tue Dec 31, 2013 9:06 am 
Offline

Joined: Mon Jan 07, 2008 10:15 pm
Posts: 999
Things are slow going right now. Finally got all the end joints on the teak deck filled in with 2 coats of paint in each joint. They are now virtually invisible from a distance. Then I decided to backtrack a bit and revisit the casemates. I took Lefties advise again and thinned down the bulkheads under the 5" 51's. Here's a few picks of this and the improved deck.
Image
Image
Image
Image


Report this post
Top
 Profile  
Reply with quote  
PostPosted: Thu Jan 09, 2014 10:32 pm 
Offline

Joined: Mon Jan 07, 2008 10:15 pm
Posts: 999
Time for me to start doing a little rivet counting (and bit counting).
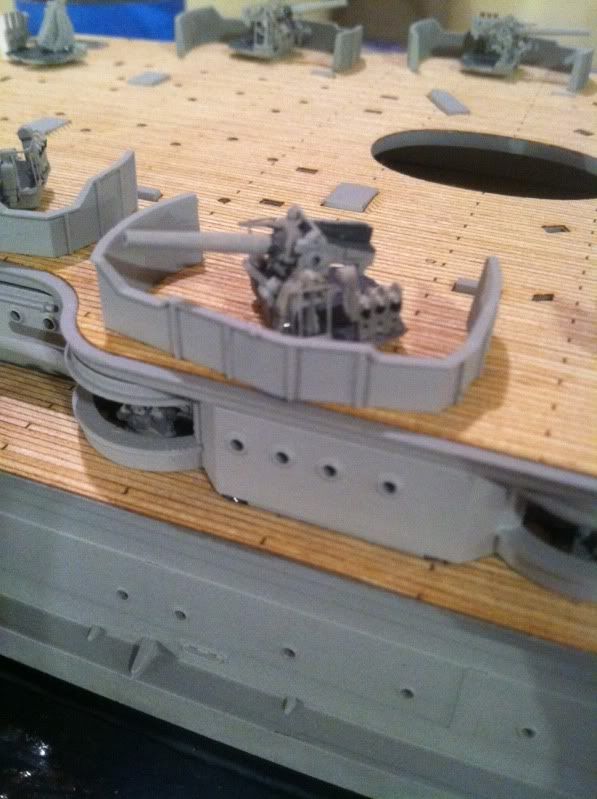
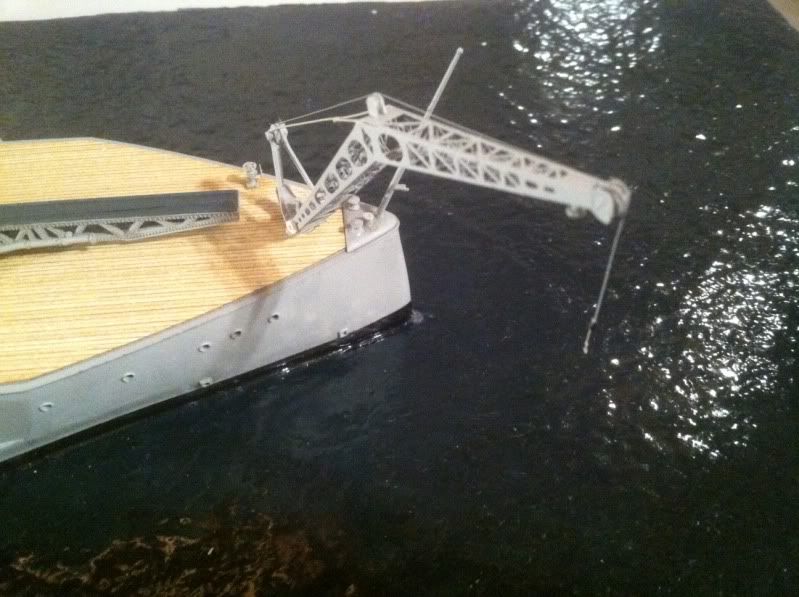
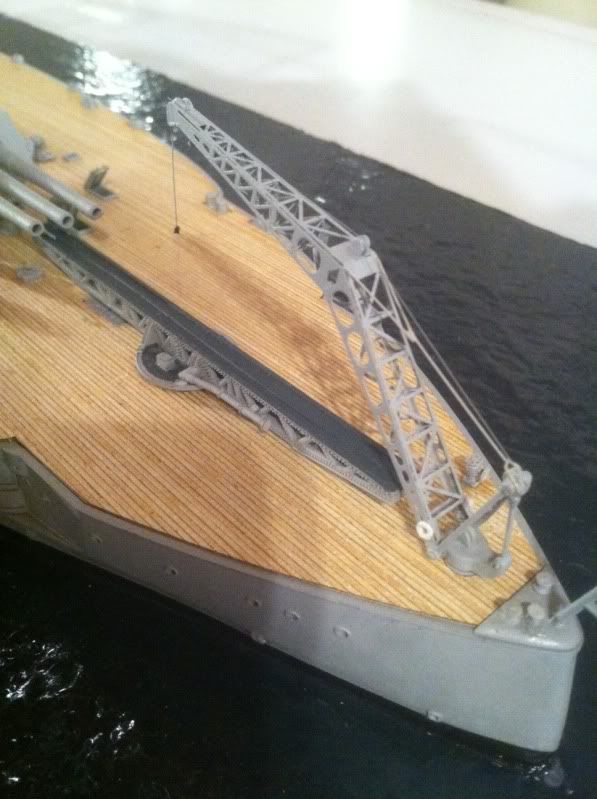
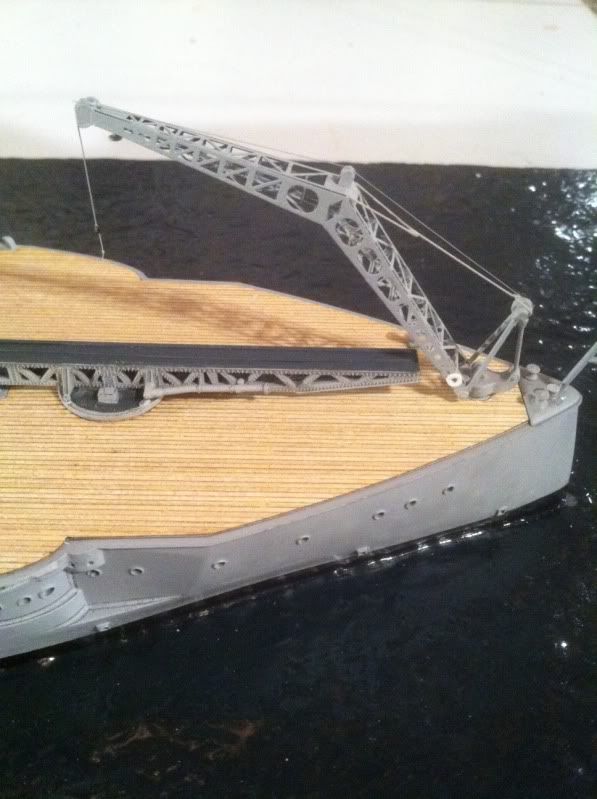
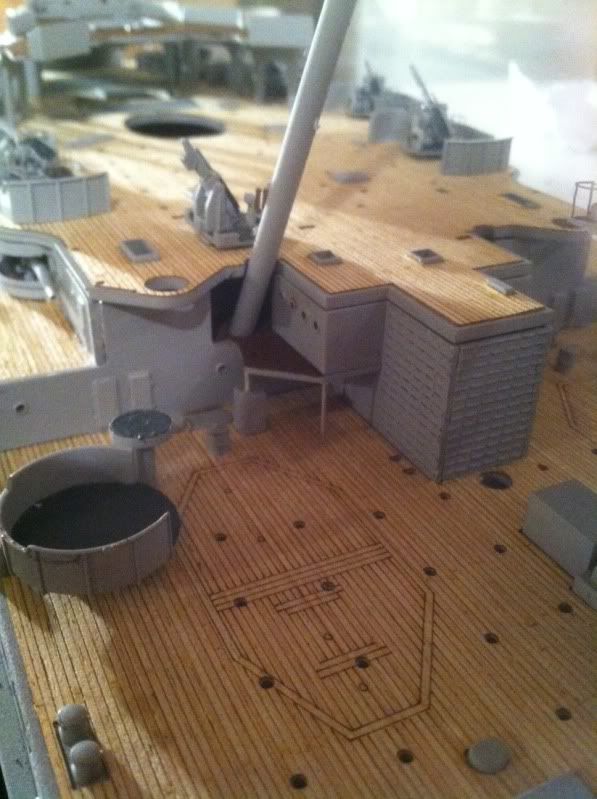
Before I work on everything above deck level, I wanted to add some detail to the quarter deck. I decided to use the kit supplied stern catapult instead of the PE one from KA. I simply like the rivet detail on the kit's catapult that the photo etched one lacks.
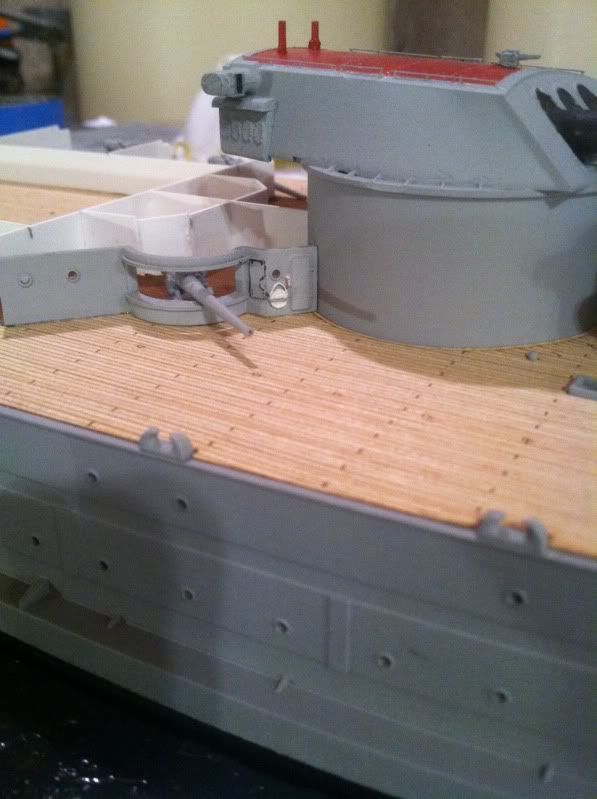
I added some extra detail to it, like the pulley on the underside seen here.
Image
Image

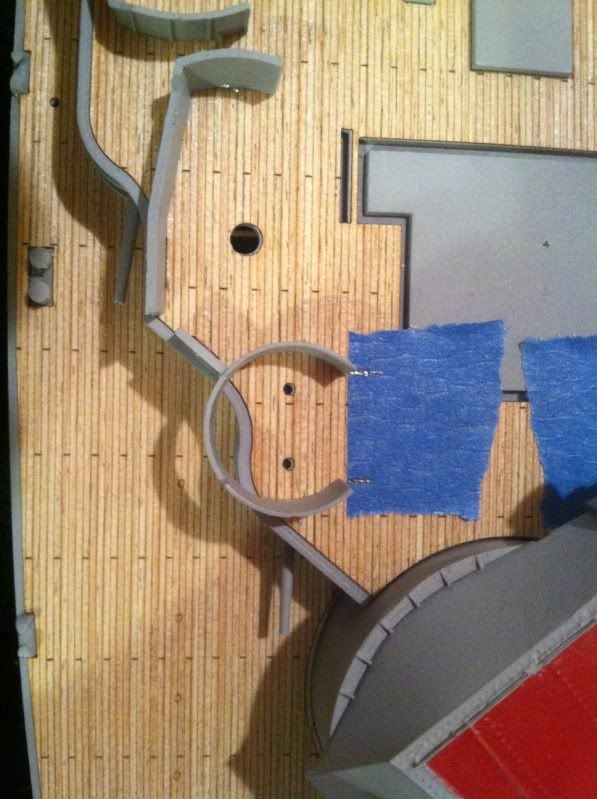
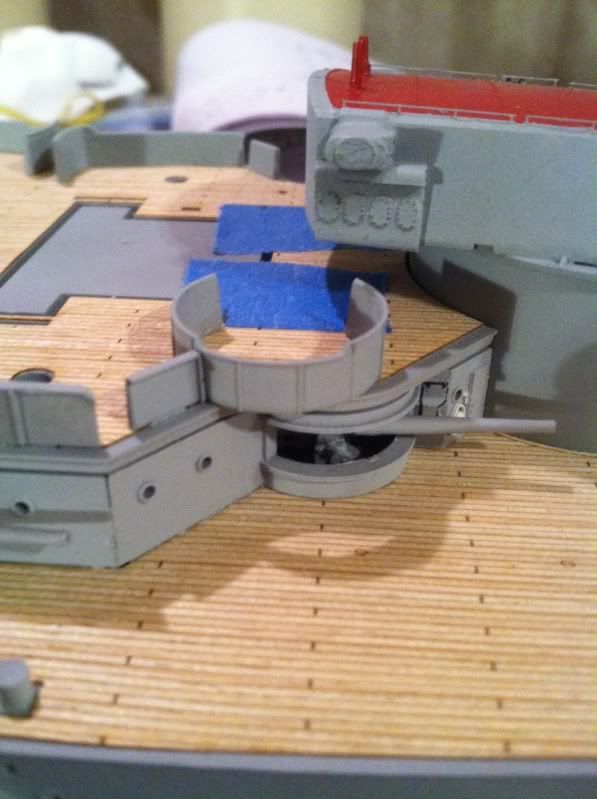
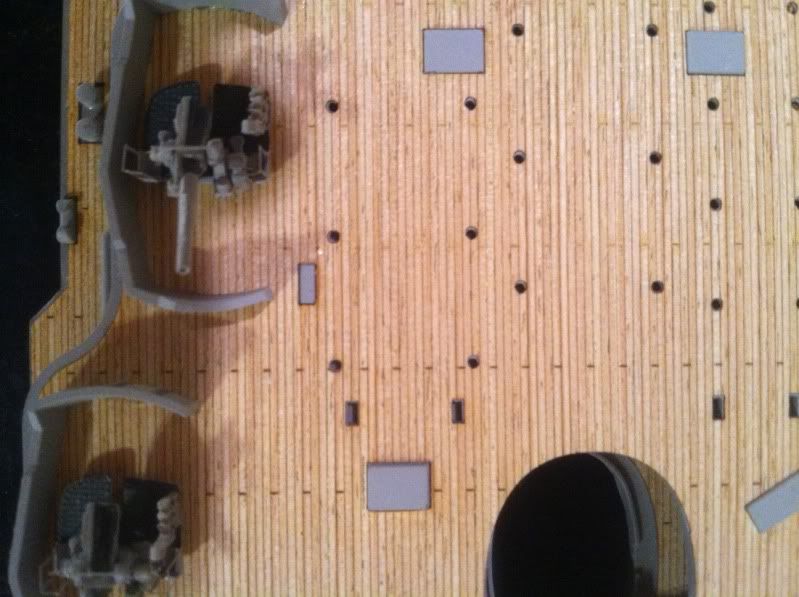
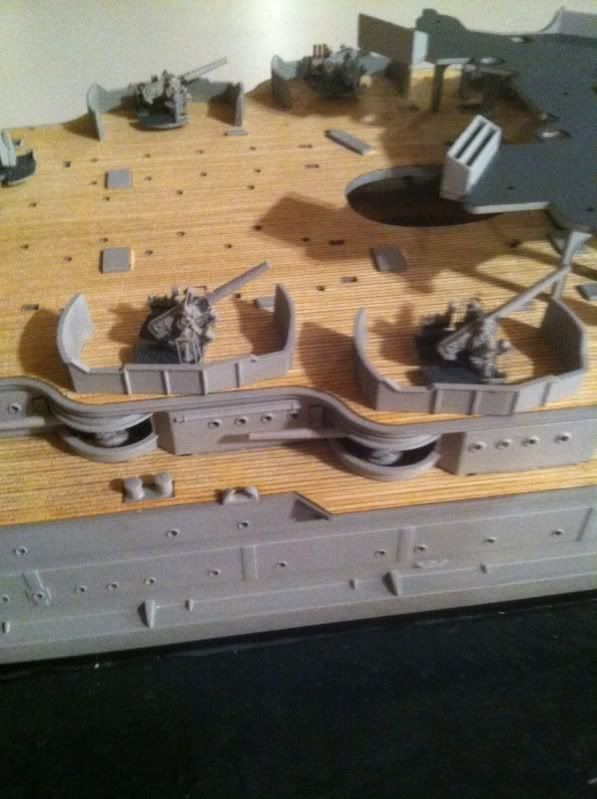
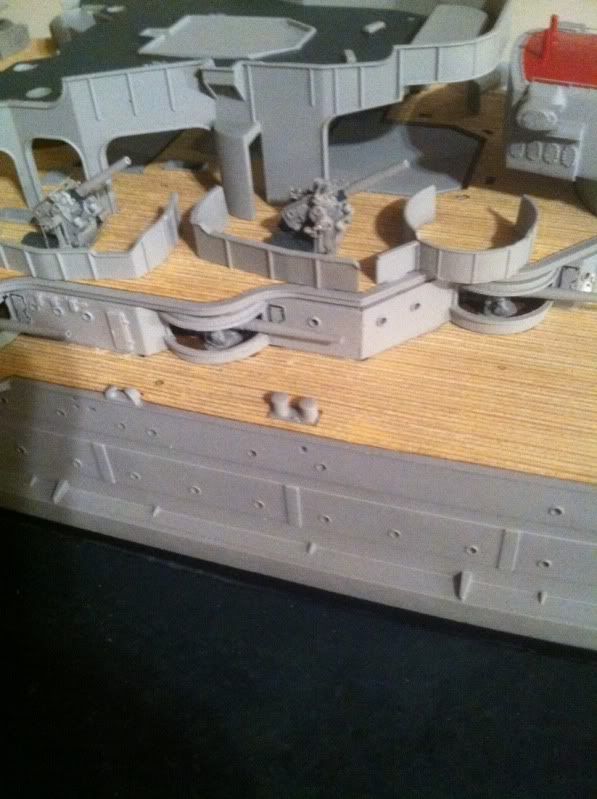
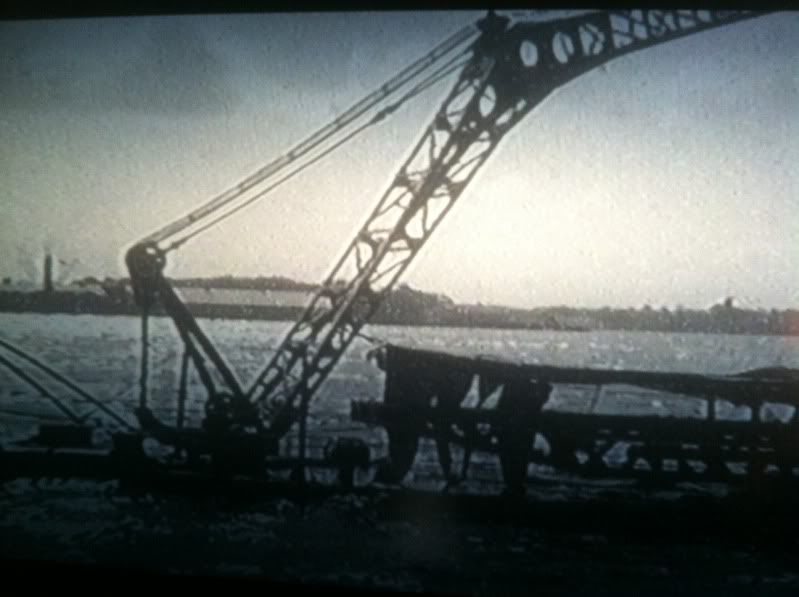
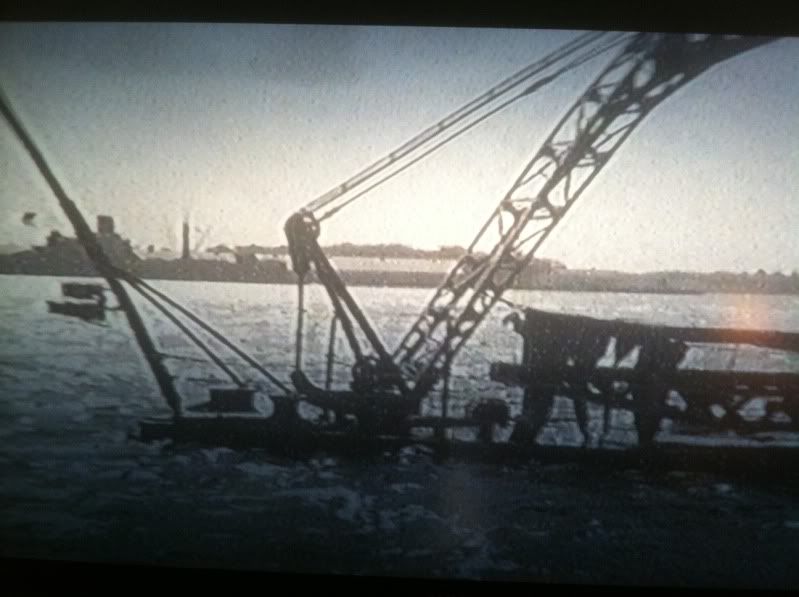
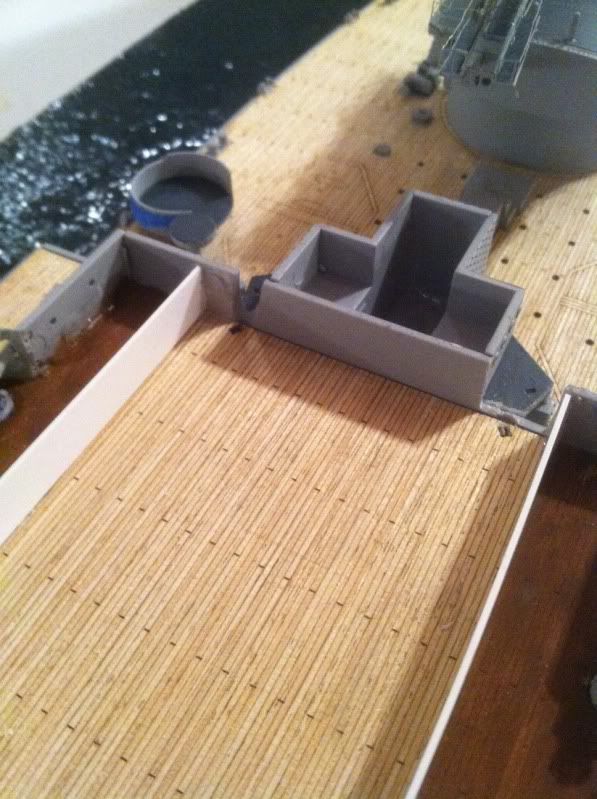
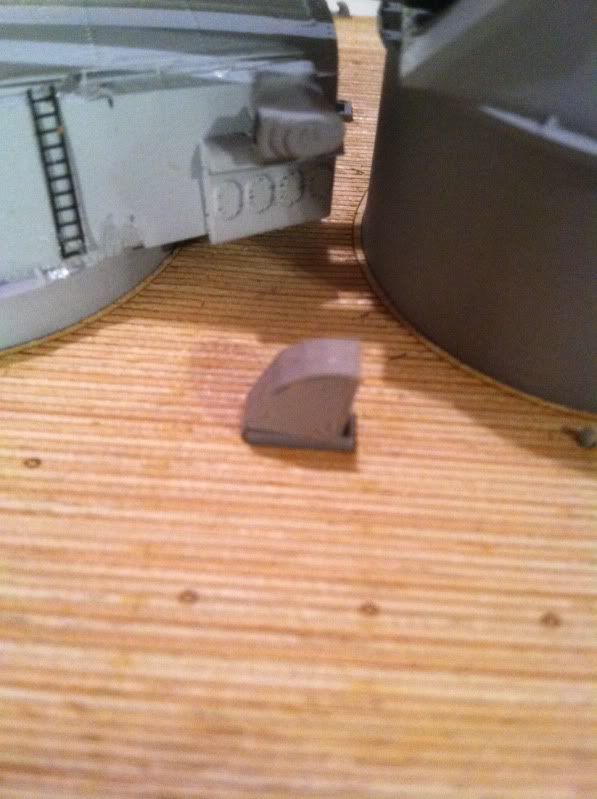
Then I added hand wheels to this piece that is located aft of the catapult on the starboard side. Not sure what this thing is. Maybe it controls the cat or the stern crane? The plans simply have it labeled as "W.T.S." I have no idea what that stands for. Here's a couple pics of what I'm talking about. Did this thing actually have hand wheels? I have no idea but I like the look.
Image
Image
Image
Image

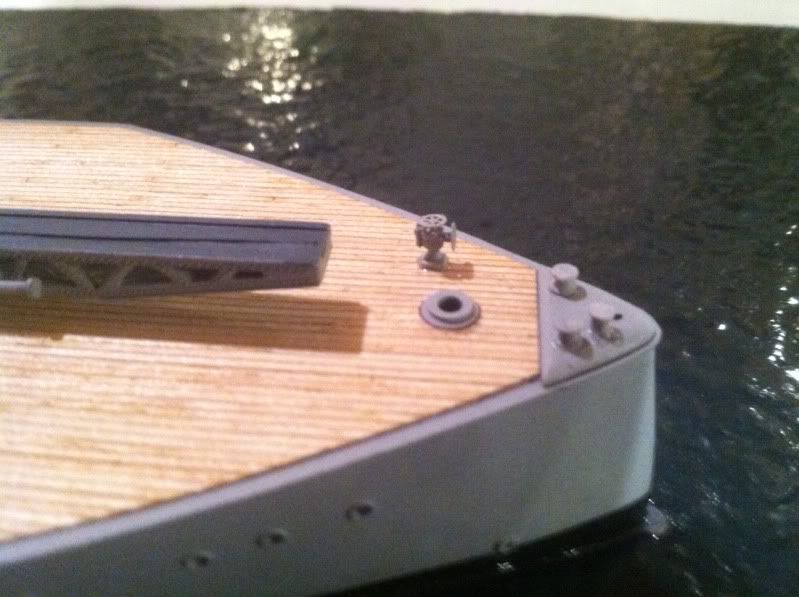
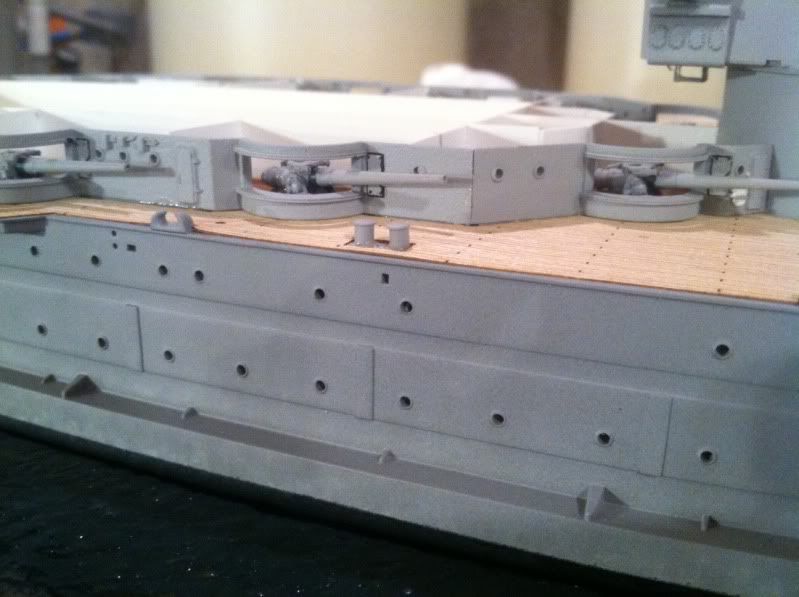
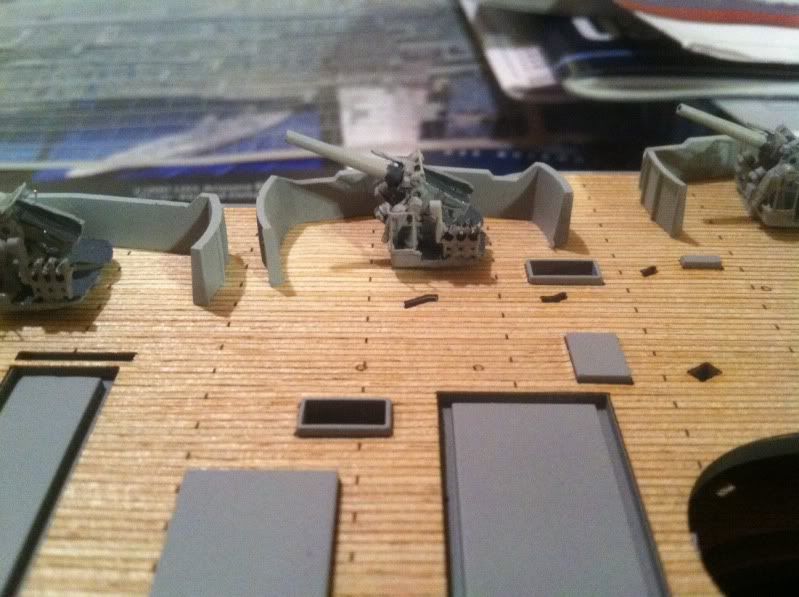
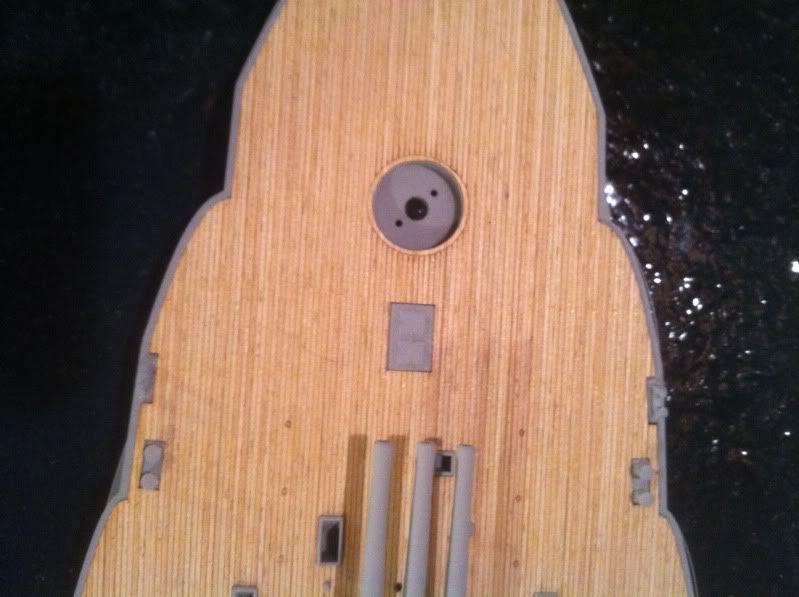
As you can see, I also added a third bit on the stern as seen in this photo.
Image

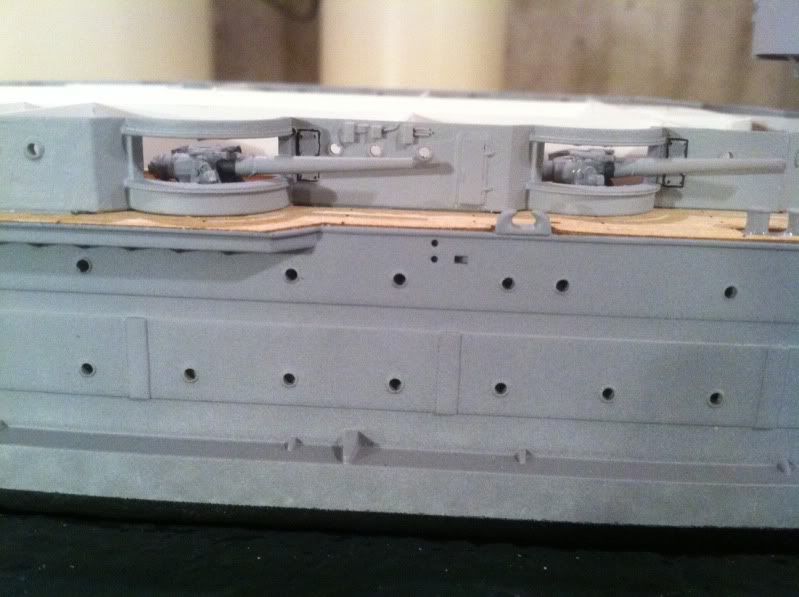
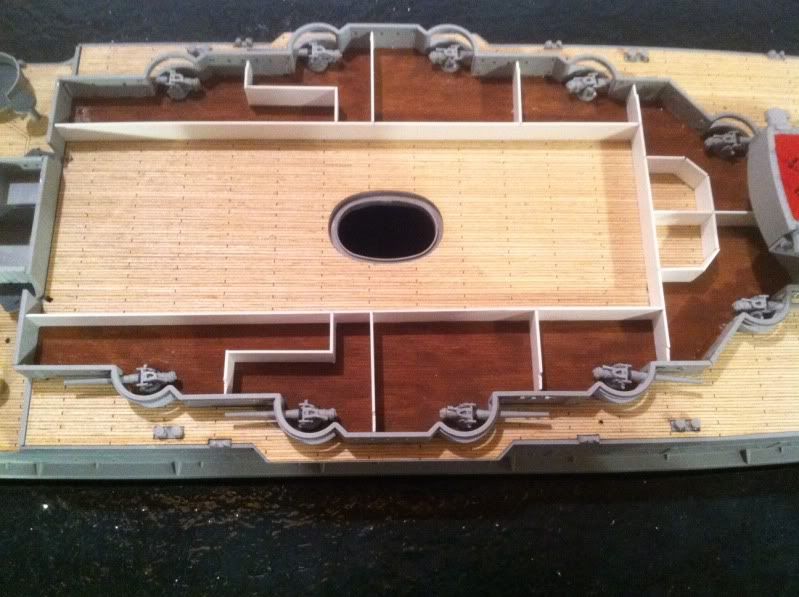
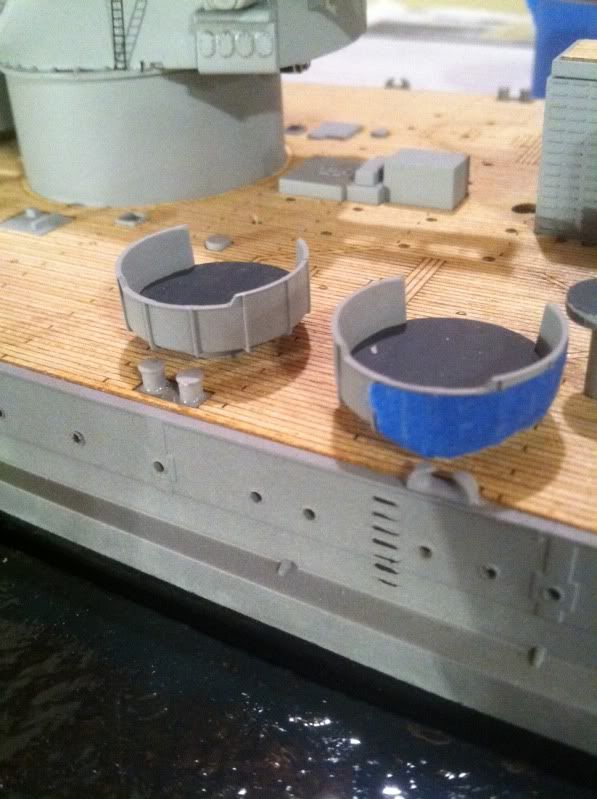
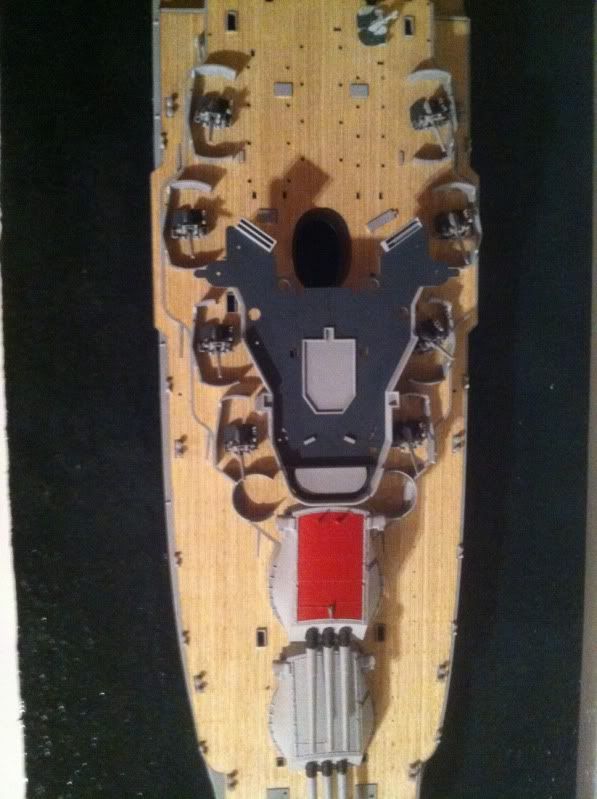
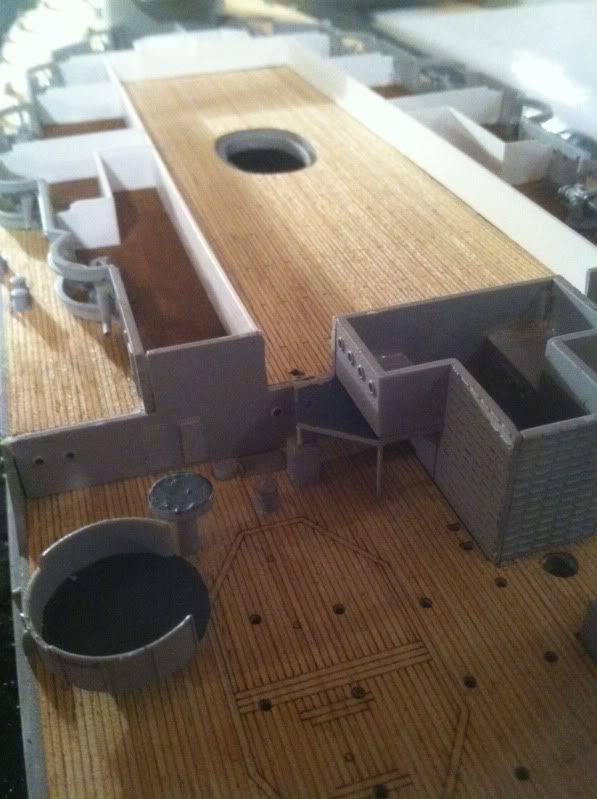
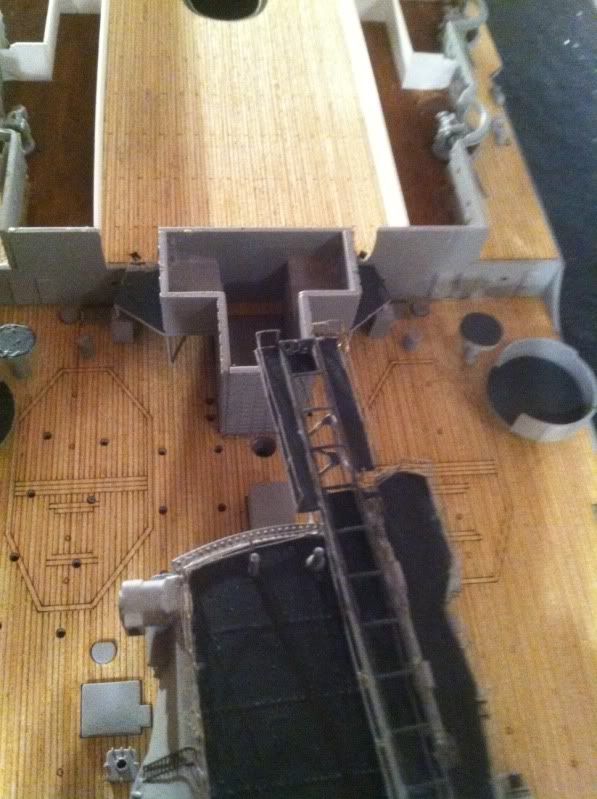
Then I started to detail up the hatches on the deck.
I also have WEM's PE set for this kit. I was excited to see it included awnings that covered the deck hatches.
Image

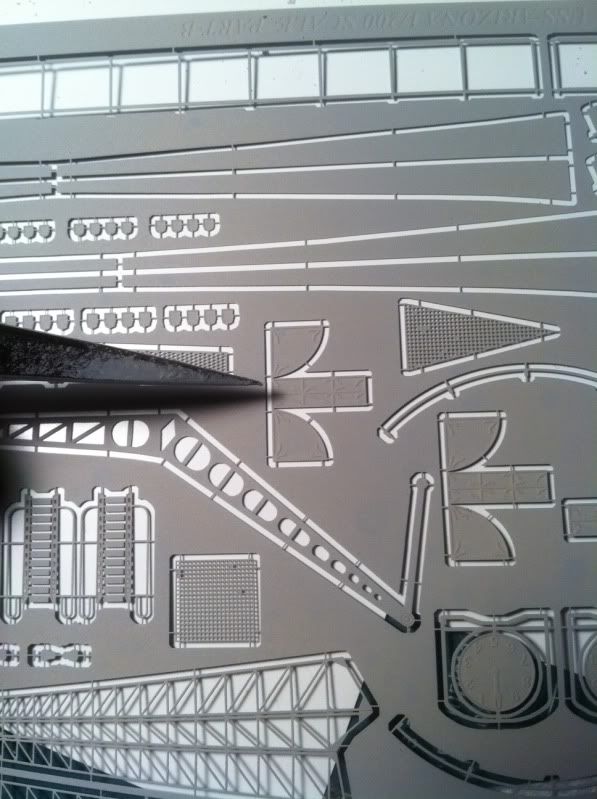
Unfortunately the shape and size is all wrong! It is too small to fit over the hatch if the hatch is in the open position. And the back is rounded. These awnings cannot be used!! I'll have to scratch some if I decide to add awnings to some of the hatches.
Image
Image

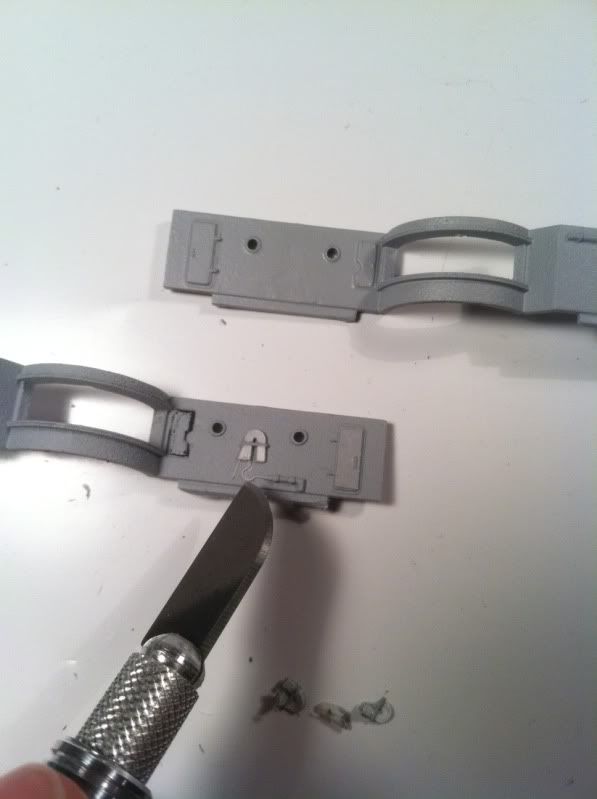
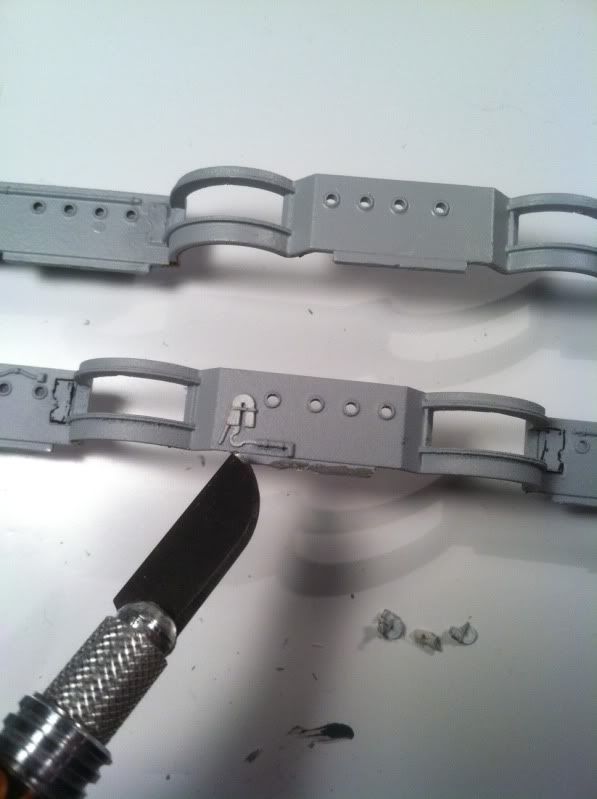
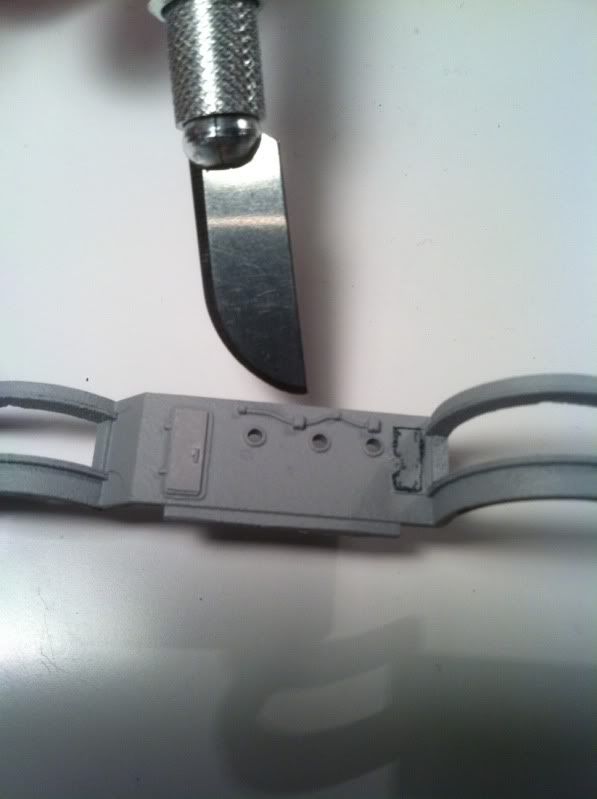
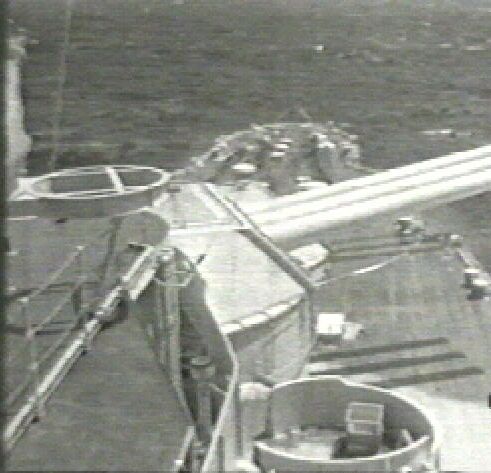
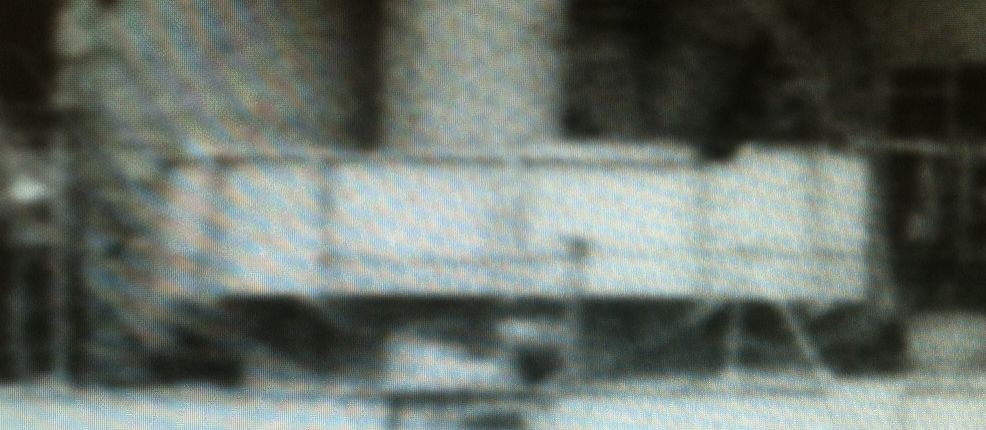
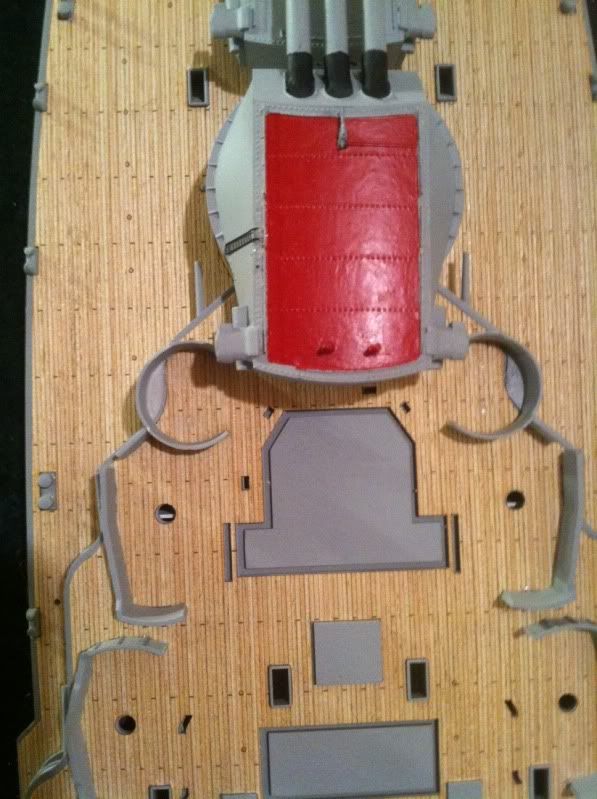
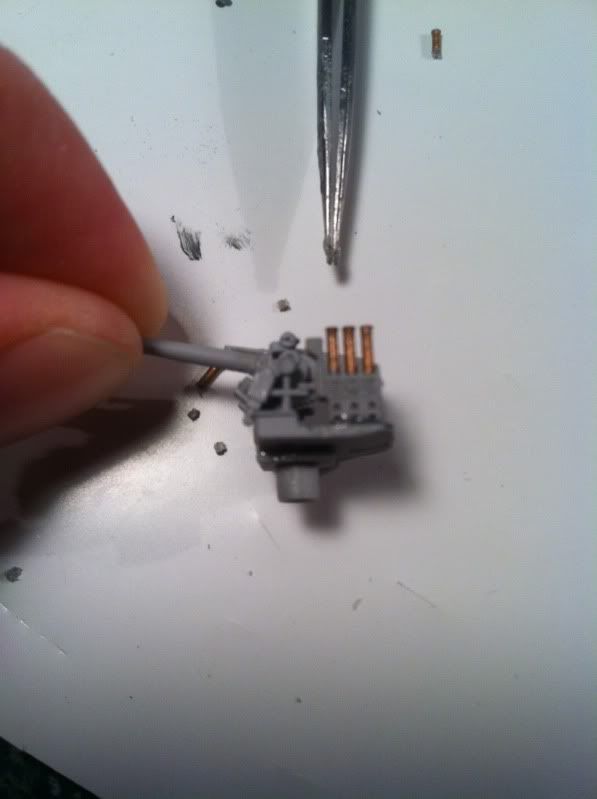
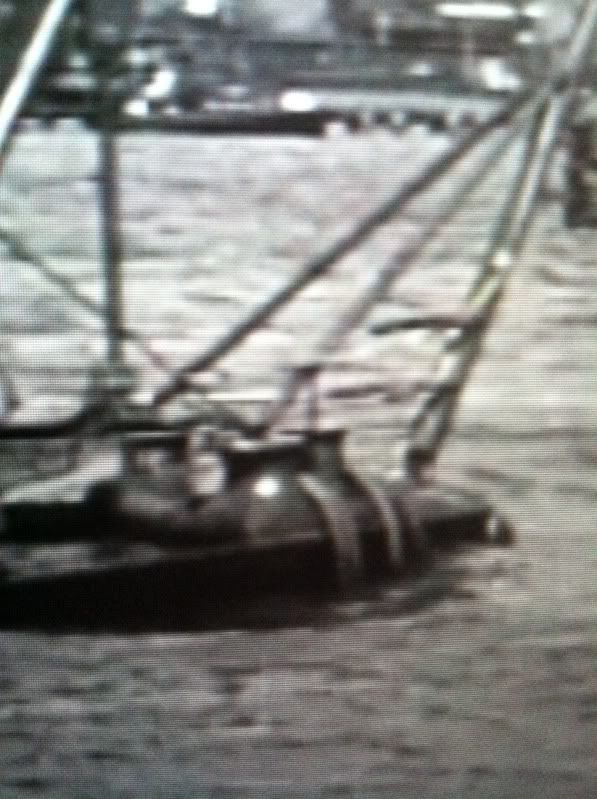
All of the hatches at the time had this three bar setup that flipped over the top of the hatch and acted as an extender to attach the awnings to. When not in use, it was simply stowed in this fashion.
Image

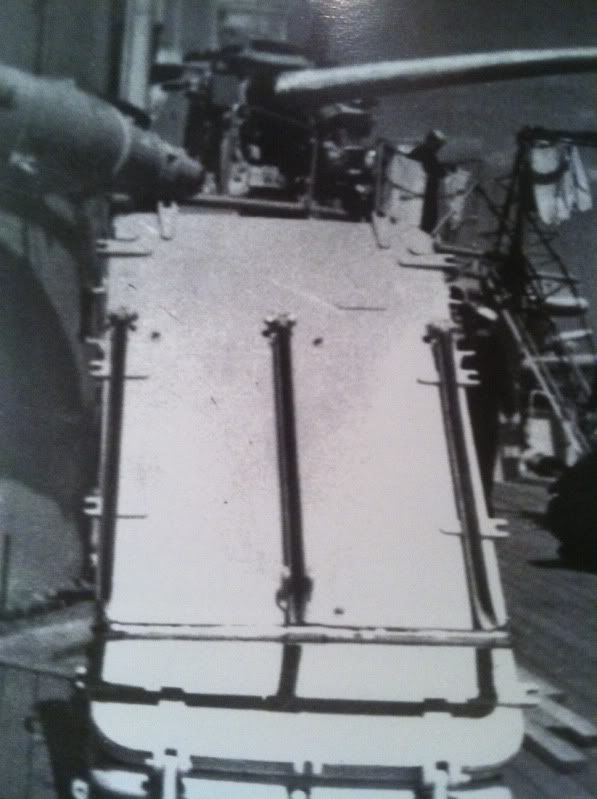
Often times the awning was rolled up and stowed on top of this extender.
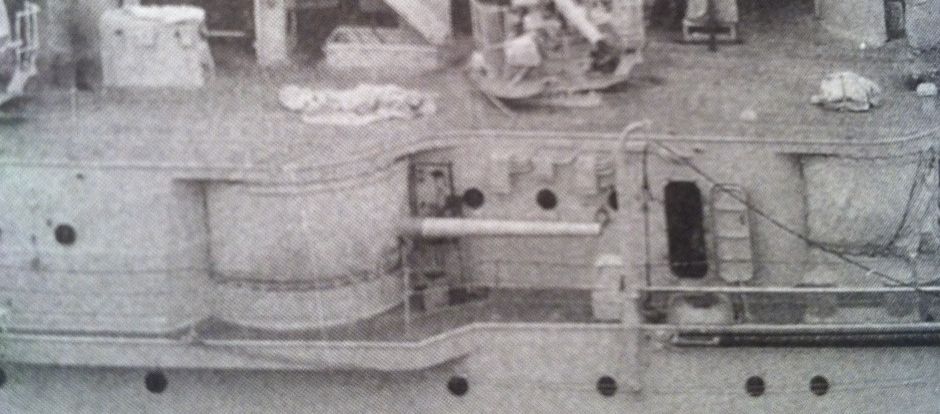
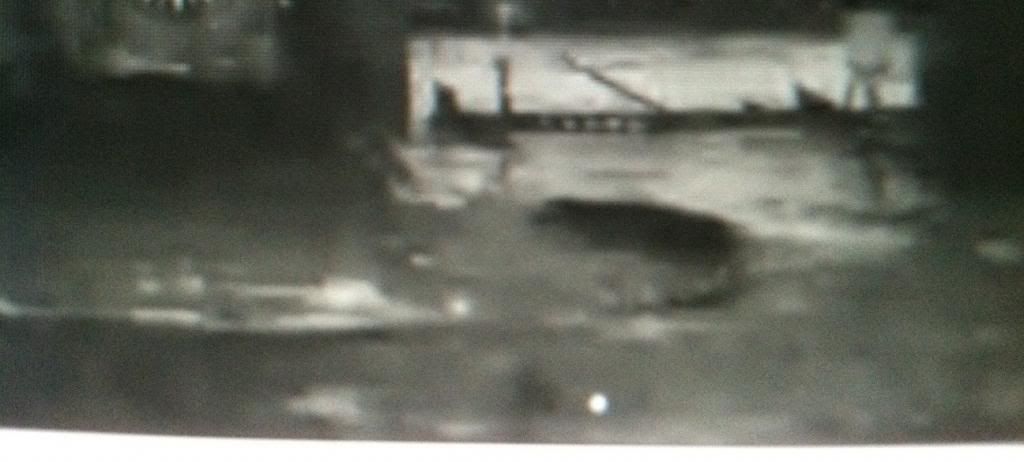
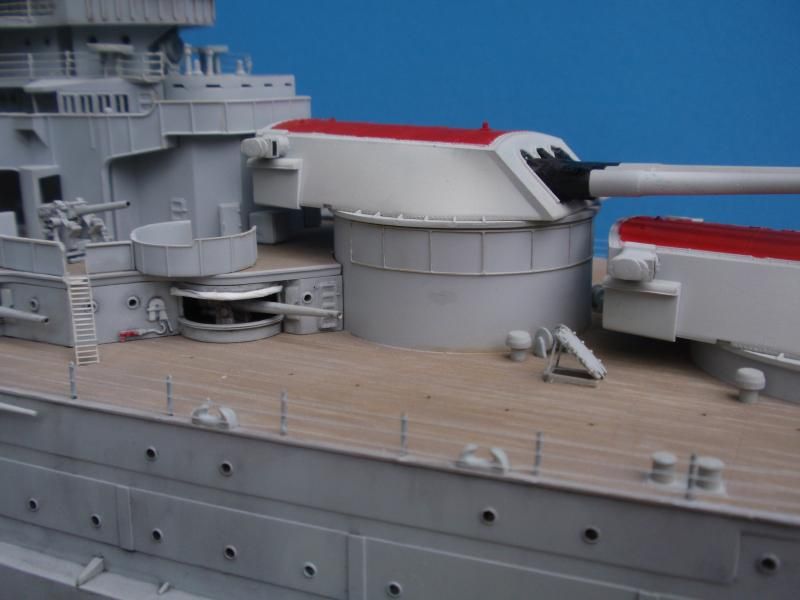
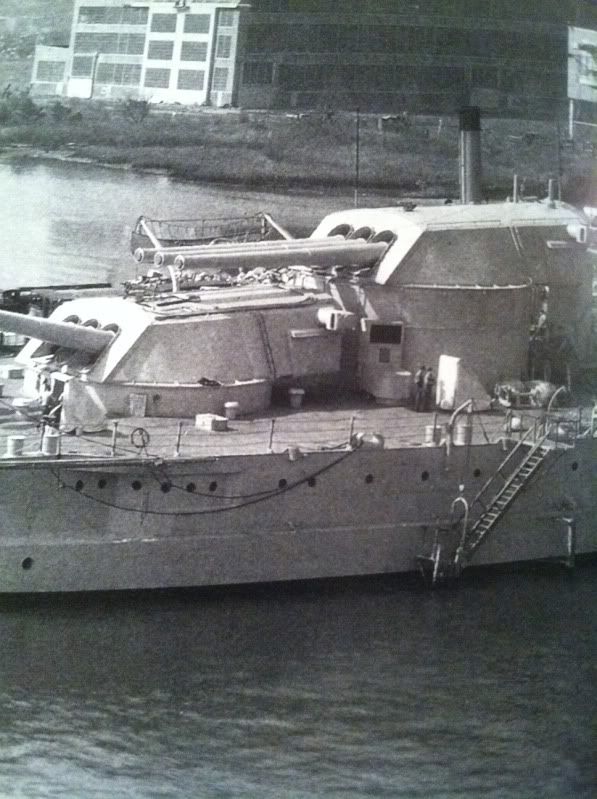
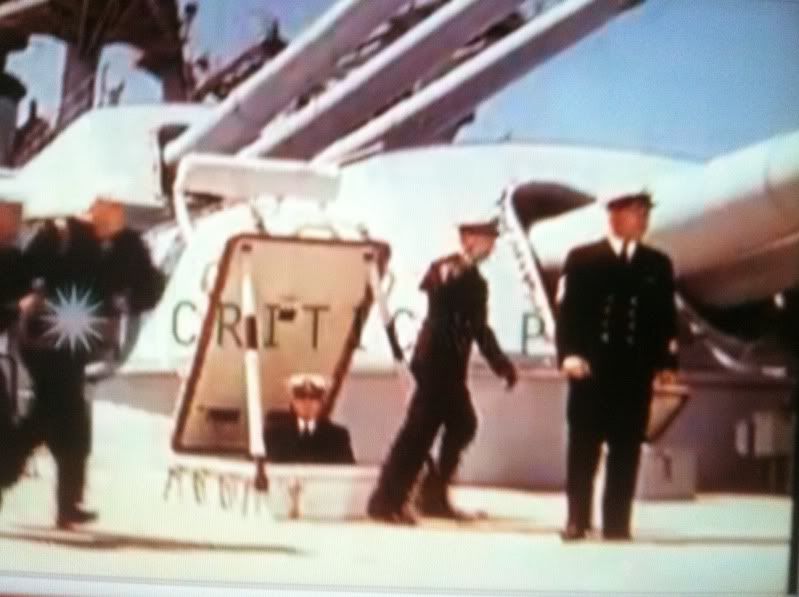
In this Pennsylvania photo you can see the extender stowed in a curious position with the rolled up awning. Note to self! Notice also Pennsy had railing around the parameter of turret 3.
Image

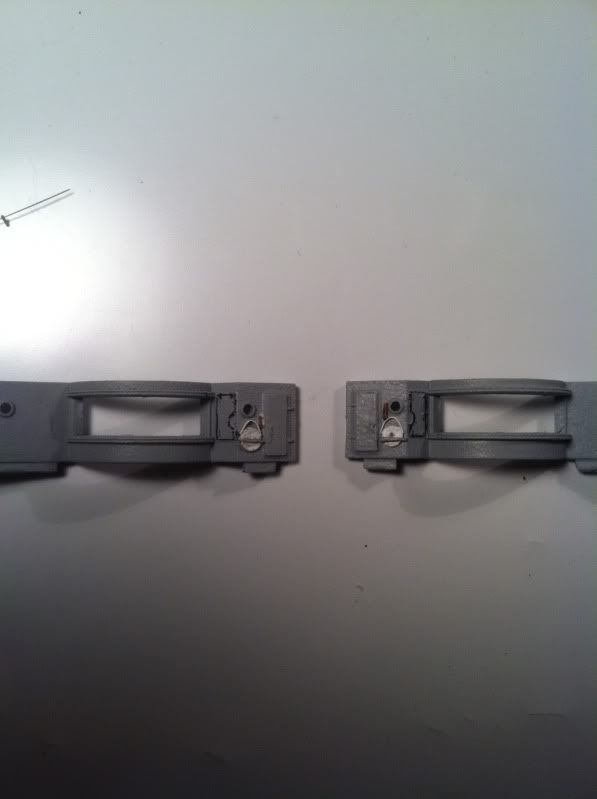
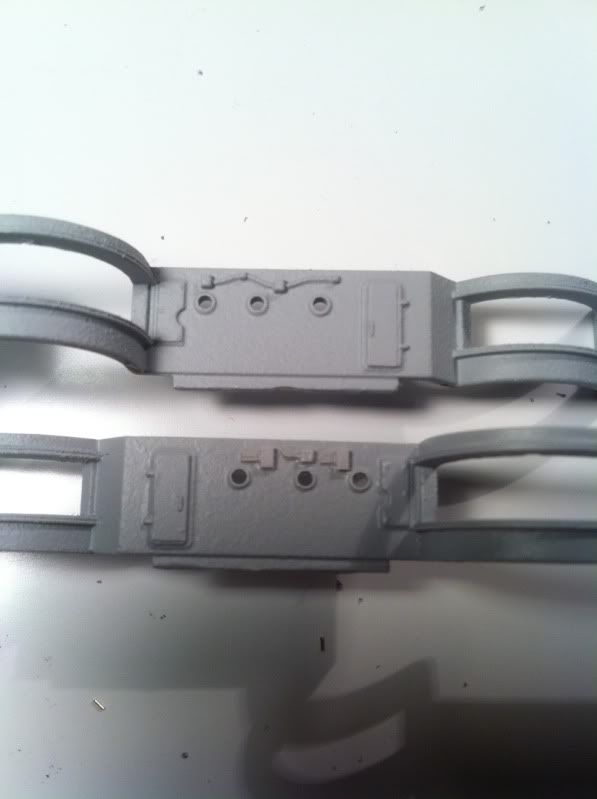
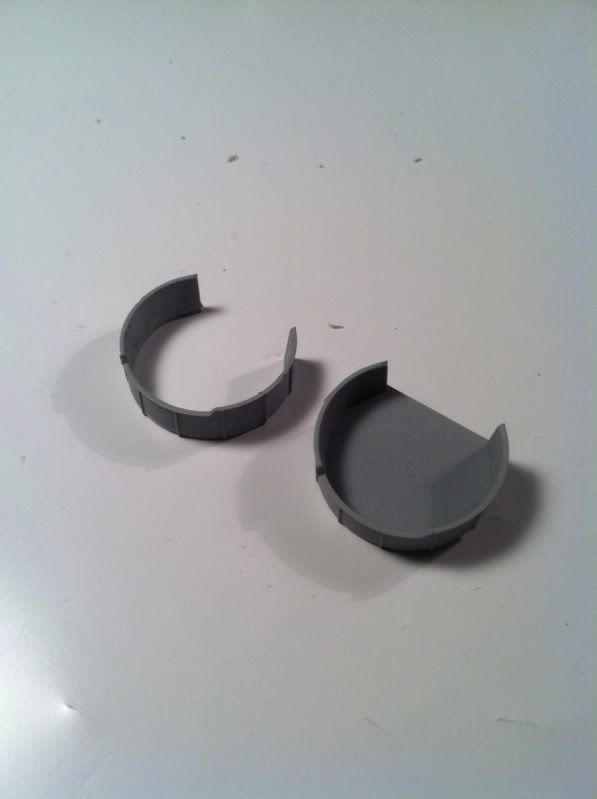
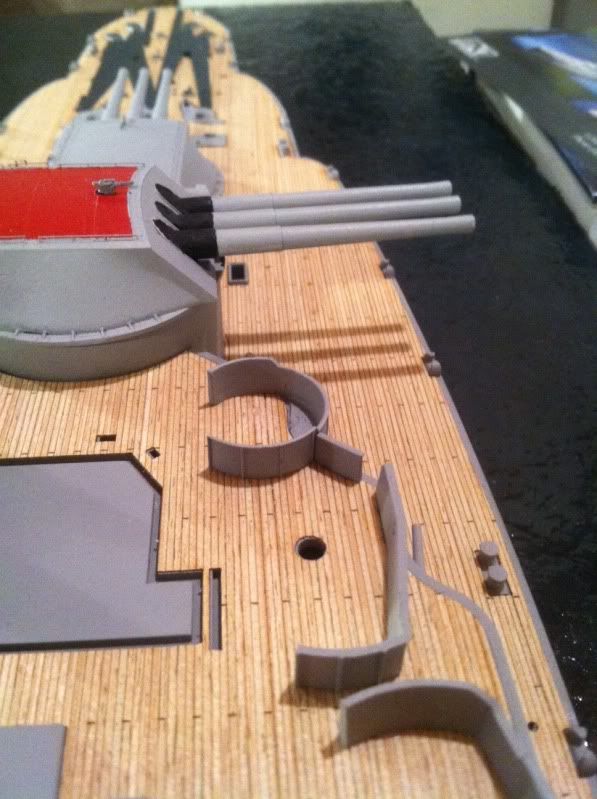
Here is a look at my first attempt to replicate this extender.
Image
Image


Report this post
Top
 Profile  
Reply with quote  
PostPosted: Thu Jan 09, 2014 10:43 pm 
Offline

Joined: Wed Jan 02, 2013 1:15 am
Posts: 5060
As to the "racks" on the port side of the 5" mounts is probably for the fuse setter. As these were dual purpose weapons, a time fuse setting was used for AA work.

Cheers: T


Report this post
Top
 Profile  
Reply with quote  
PostPosted: Thu Jan 09, 2014 11:16 pm 
Offline
User avatar

Joined: Mon May 21, 2007 5:49 pm
Posts: 1608
Location: The beautiful PNW
I'm sure you've heard this before, but very Sharp build :heh: :thumbs_up_1:

Matt

_________________
In the yards right now:
USS Utah AG-16
On Hold
1/350 USS Portland CA-33 1942
1/350 Trumpeter Texas with a twist


Report this post
Top
 Profile  
Reply with quote  
PostPosted: Fri Jan 10, 2014 7:21 am 
Offline
User avatar

Joined: Sat May 11, 2013 4:58 pm
Posts: 4
Location: Aston, PA
Wonderful detail. Thanks for taking the time to post these improvements.

Happy modeling,
Len


Report this post
Top
 Profile  
Reply with quote  
PostPosted: Fri Jan 10, 2014 7:47 am 
Offline
User avatar

Joined: Sat Oct 06, 2012 4:34 pm
Posts: 967
Location: Cologne / Germany, sometimes Poznan/ Poland and Chessington/ UK
You make really feel to "wanna build the Arizona in 1/200" too here! But I have to maintain discipline and to finnish These ships I have currently in Yard first ... but that remindes very hard!

Great Job and for me a clear building instruction for the future! :thumbs_up_1:

_________________
The advantage of wisdom is that you can play dumb; conversely, it is more difficult.


Report this post
Top
 Profile  
Reply with quote  
PostPosted: Fri Jan 10, 2014 9:49 am 
Offline

Joined: Mon Jan 07, 2008 10:15 pm
Posts: 999
Thanks guys! This one is definately fun for me! This scale is perfect for all this added detail stuff.


Report this post
Top
 Profile  
Reply with quote  
PostPosted: Sat Jan 11, 2014 2:39 am 
Offline

Joined: Sun Jan 05, 2014 11:33 am
Posts: 43
Location: San Antonio, TX
This is fantastic! 1/200 is a bit big for me to try right now, I just got back into this for the first time since I was in middle school, so a 12 year break haha. I want to get a 1/350 fleet going, and your build is inspiring to say the least.


Report this post
Top
 Profile  
Reply with quote  
PostPosted: Wed Jan 15, 2014 12:03 am 
Offline

Joined: Mon Jan 07, 2008 10:15 pm
Posts: 999
Just finished assembling the stern crane. I had 3 options to choose from, the kits, WEM's, or KA's crane. By far, KA's is the best option! It has very nice interior detail. Only a few small modifications were necessary for this crane. One mod was the pulley on top of the crane at the knuckle. I scratch built a smaller one because all of the supplied options were way too large. I also added a couple of lifebuoys. There is a '41 pic that shows the buoys there. Now I'll have to somehow add this info onto the buoys.
Image

Here's a few pics of the actual crane and mine. I don't have the rigging quite right yet.
Image

Worth noting! Check out the stern lights on the ensign staff. There is a lot more going on there then just a couple of lights.
Image
Image
Image
Image


Report this post
Top
 Profile  
Reply with quote  
PostPosted: Wed Jan 15, 2014 12:12 am 
Offline
User avatar

Joined: Mon Nov 11, 2013 11:01 pm
Posts: 1257
Location: Detroit area
Looking good, and it blends nicely with that seascape—or rather, harborscape?

_________________
Sean Nash, ACG (aircraft camo gestapo)

On the ways:
1/200 Trumpeter HMS Nelson
1/700 Tamiya USS Yorktown CV-5

In the stash:
1/35 Italiari PT-109
1/35 Tamiya "Pibber" Patrol Boat
1/350 Trumpeter USS Yorktown CV-10


Report this post
Top
 Profile  
Reply with quote  
PostPosted: Wed Jan 15, 2014 11:01 am 
Offline

Joined: Mon Jan 10, 2005 11:02 am
Posts: 10568
Location: EG48
Jeff Sharp wrote:
Worth noting! Check out the stern lights on the ensign staff. There is a lot more going on there then just a couple of lights.


For what it's worth, the Booklet of General Plans (sheet 2, outboard profile) shows the lights and their colors.

_________________
Tracy White -Researcher@Large

"Let the evidence guide the research. Do not have a preconceived agenda which will only distort the result."
-Barbara Tuchman


Report this post
Top
 Profile  
Reply with quote  
PostPosted: Thu Jan 16, 2014 9:51 am 
Offline

Joined: Mon Jan 07, 2008 10:15 pm
Posts: 999
Just when things seem to be rolling along with all minor obsticles out of the way........SCREEEEETCH! Back the bus up! Time to revisit the case mate area again with another modification. The credit for this mod goes to Mr. Tracy White for bringing this one to my attention.
At the point on the ship where the deck breaks, the kit has two of the mainmast tripod legs passing through the bulkhead. Problem is, there was no bulkhead there. It was actually an open passageway that lead to the crews galley and vent grills were on the bulkhead next to the open space.
Here are a few pics of my initial attempt at the mod in progress. Still pretty rough but it gives you an idea of what I'm trying to accomplish.
Image
Image
Image
Image
Image


Report this post
Top
 Profile  
Reply with quote  
Display posts from previous:  Sort by  
Post new topic Reply to topic  [ 456 posts ]  Go to page Previous  1, 2, 3, 4, 5 ... 23  Next

All times are UTC - 6 hours [ DST ]


Who is online

Users browsing this forum: Majestic-12 [Bot] and 5 guests


You can post new topics in this forum
You can reply to topics in this forum
You cannot edit your posts in this forum
You cannot delete your posts in this forum
You cannot post attachments in this forum

Jump to:  
Powered by phpBB® Forum Software © phpBB Group