
Jeff,
One question for you since you have the video. Can you tell if there are three anchors and chains? I only know of the two that are on display but all kits show the ship as having three. I wonder if there is any chance that some one could work the video over so that is has better clarity.
1/200 Arizona finally DONE!
Moderators: MartinJQuinn, JIM BAUMANN, Jon, Dan K
-
Jeff Sharp
- Posts: 1056
- Joined: Mon Jan 07, 2008 10:15 pm
Re: 1/200 Arizona finally
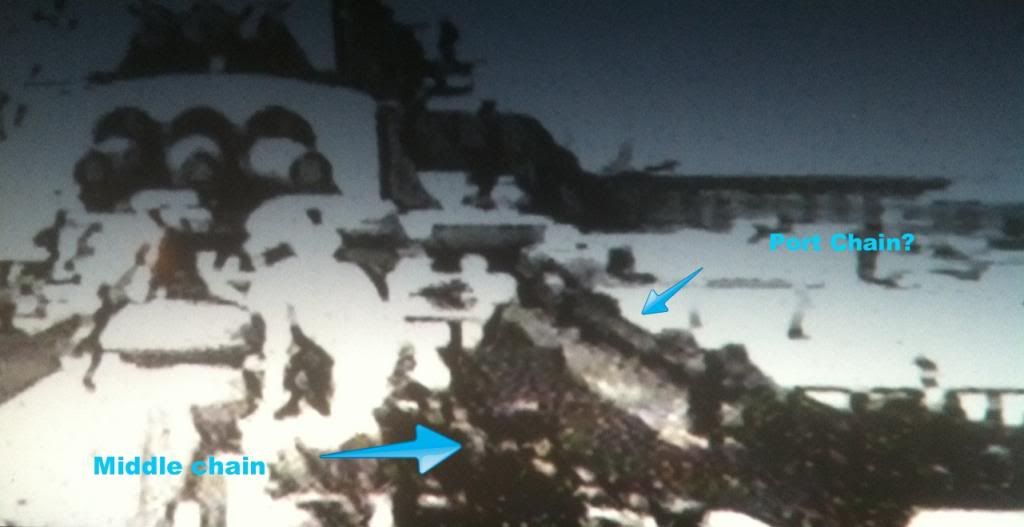
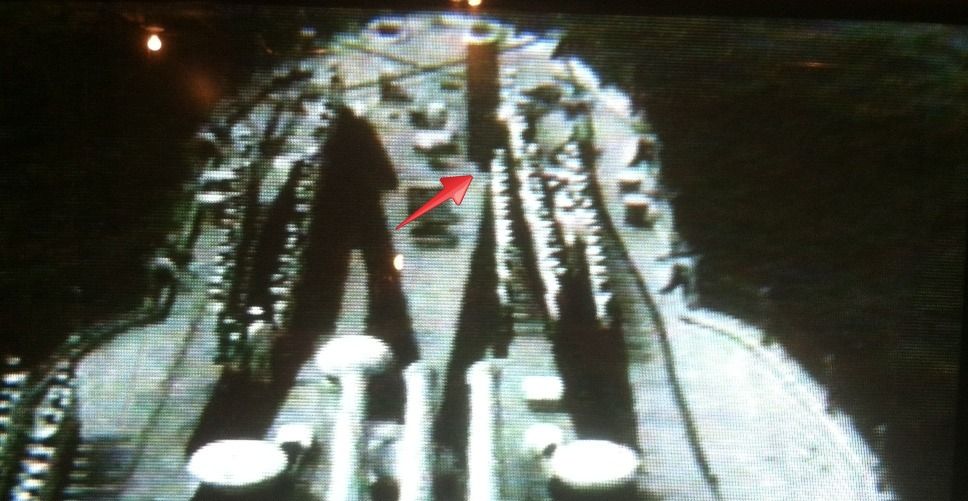
Jon, I can tell you that there is definitely one chain on the starboard side and one chain that runs from the middle windlass to the port side. My copy of this film is too poor to tell for sure but this pic shows something going to the port windlass. As the crew runs to battle stations they jump over it. To me it doesn't look like an anchor chain, it looks more like a solid rod or pole. What it could possibly be, I have no idea.Jon C Ryckert wrote:Jeff,
One question for you since you have the video. Can you tell if there are three anchors and chains? I only know of the two that are on display but all kits show the ship as having three. I wonder if there is any chance that some one could work the video over so that is has better clarity.
-
Jeff Sharp
- Posts: 1056
- Joined: Mon Jan 07, 2008 10:15 pm
Re: 1/200 Arizona finally
Matthew,MuseumGeek wrote:Jeff,
Just having had to go through all sorts of fun trying to find brass wire long enough to make the av gas line with, what did you make yours with? I was playing with .025 music wire, but it turned out to be way too stiff to follow the curves of the hull with. I finally found three foot sections of brass wire that I could use. Thanks, Amazon!
Also, while you are working on the foc'sle, don't forget to replace the small brackety things near the chain plates. I will post a picture of my replacements when I get home tonight.
Matthew
I used .015 wire that I got from my local hobby shop. Don't go any bigger than that.
What "small brackets things" are you referring to? I'm not sure what you mean.
-
Christian M.

- Posts: 967
- Joined: Sat Oct 06, 2012 4:34 pm
- Location: Cologne / Germany, sometimes Poznan/ Poland and Chessington/ UK
Re: 1/200 Arizona finally
Hi,
this image shows here still with cage masts in 1924, but the anchor chain system didn't change as far as I know. maybe it helps ...

this image shows here still with cage masts in 1924, but the anchor chain system didn't change as far as I know. maybe it helps ...
The advantage of wisdom is that you can play dumb; conversely, it is more difficult.
-
MuseumGeek

- Posts: 25
- Joined: Fri Jan 17, 2014 12:11 am
- Location: Colorful Colorado
Re: 1/200 Arizona finally
Jeff,
I snapped this picture this morning with the old iPhone so forgive the rather iffy image quality. Anyway, these are the small brackets I removed and replaced with sheet styrene. I believe that it is where the anchor chain was attached at times.
I snapped this picture this morning with the old iPhone so forgive the rather iffy image quality. Anyway, these are the small brackets I removed and replaced with sheet styrene. I believe that it is where the anchor chain was attached at times.
- Attachments
-
-
Leftie
- Posts: 25
- Joined: Thu Jul 19, 2012 10:16 am
Re: 1/200 Arizona finally
Jeff,
Excellent build and research. You've show everyone many details that have been overlooked(especially by me). But I have a few questions, and please don't take these as hostile. You've question the large vent and wondered if it should be there. Wasn't it installed and removed at will? Much like one would open a window for ventilation? And you asked in one photo, where's the chain plate? You are showing many photos from old movies and newsreels, can you verify that these are actually the Arizona? And exact time frame? And with all this Arizona discussion, I find it interesting Tracy hasn't chimed in. I'd like to hear his take on your discoveries.
Keep up the amazing work. You have more guts than I.
Excellent build and research. You've show everyone many details that have been overlooked(especially by me). But I have a few questions, and please don't take these as hostile. You've question the large vent and wondered if it should be there. Wasn't it installed and removed at will? Much like one would open a window for ventilation? And you asked in one photo, where's the chain plate? You are showing many photos from old movies and newsreels, can you verify that these are actually the Arizona? And exact time frame? And with all this Arizona discussion, I find it interesting Tracy hasn't chimed in. I'd like to hear his take on your discoveries.
Keep up the amazing work. You have more guts than I.
-
Jeff Sharp
- Posts: 1056
- Joined: Mon Jan 07, 2008 10:15 pm
Re: 1/200 Arizona finally
Hi Leftie. No worries!Leftie wrote: please don't take these as hostile.
As far as the vent goes, I have no idea if it could be put up and taken down easily. Why would they need to? I find it odd that I can find no photos with the vent after 1936. If anyone can, I'd love to see it.
As far as the clips I'm showing, I have studied this film for many years. It is not many old films and newsreels spliced together. Don't let the sample clip on Military Traditions website fool you. That clip is splicing three films together to give you examples of what you will get. There is one promotional film entitled "American Seapower" that was filmed in 1941 exclusively on USS Arizona and one cruiser that I have not bothered to identify. Arizona was at sea with BatDiv 1 which at the time was Nevada and Pennsylvania. All three ships have the lattice yard arms on the foretop which we know was installed in January 1941. Every clip that I am showing from this particular film I am 100% positive is Arizona 1941. Tracy and I have had discussions about these clips before. If he cares to chime in I'm sure he will agree that these clips are of Arizona 1941.
-
Jeff Sharp
- Posts: 1056
- Joined: Mon Jan 07, 2008 10:15 pm
Re: 1/200 Arizona finally
Matthew,
Are your ears ringing? Cuz right about now I'm cursing you! These damn "brackety things" are so small!
I've got 11 more to do and the first one is still too big! Ugh!
Just kidding! Thanks for the tip. I'm gonna have to break out the old optivisor for these!
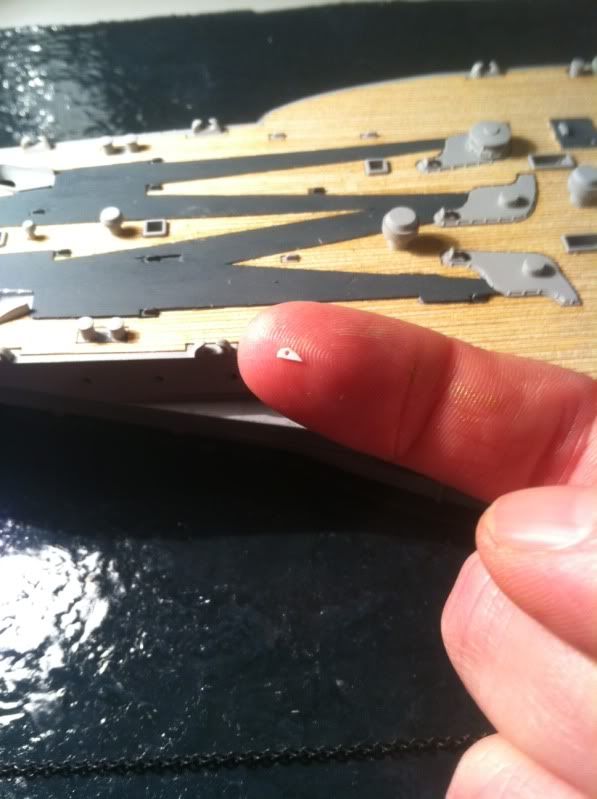
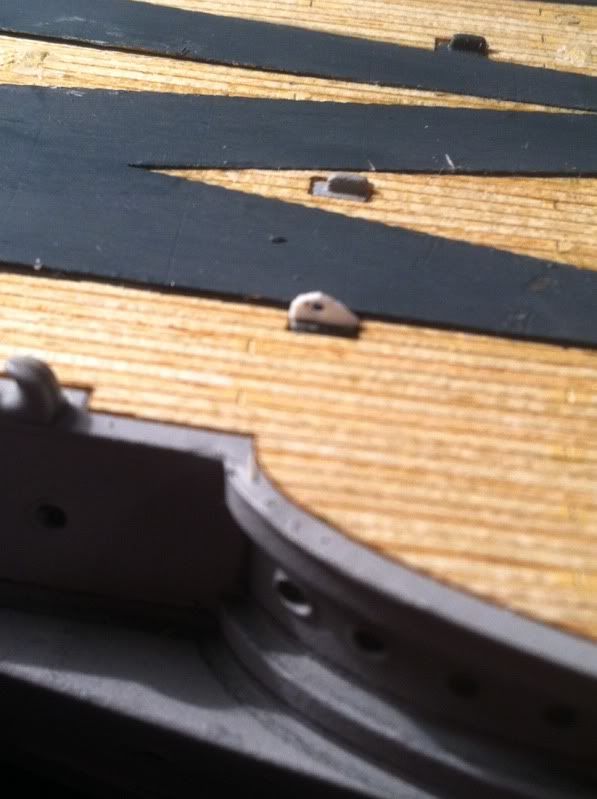
I also changed my mind about fixing the elbow location on the anchor plate. Here is how it should look if indeed they ever put it back in place before Dec. 7th.
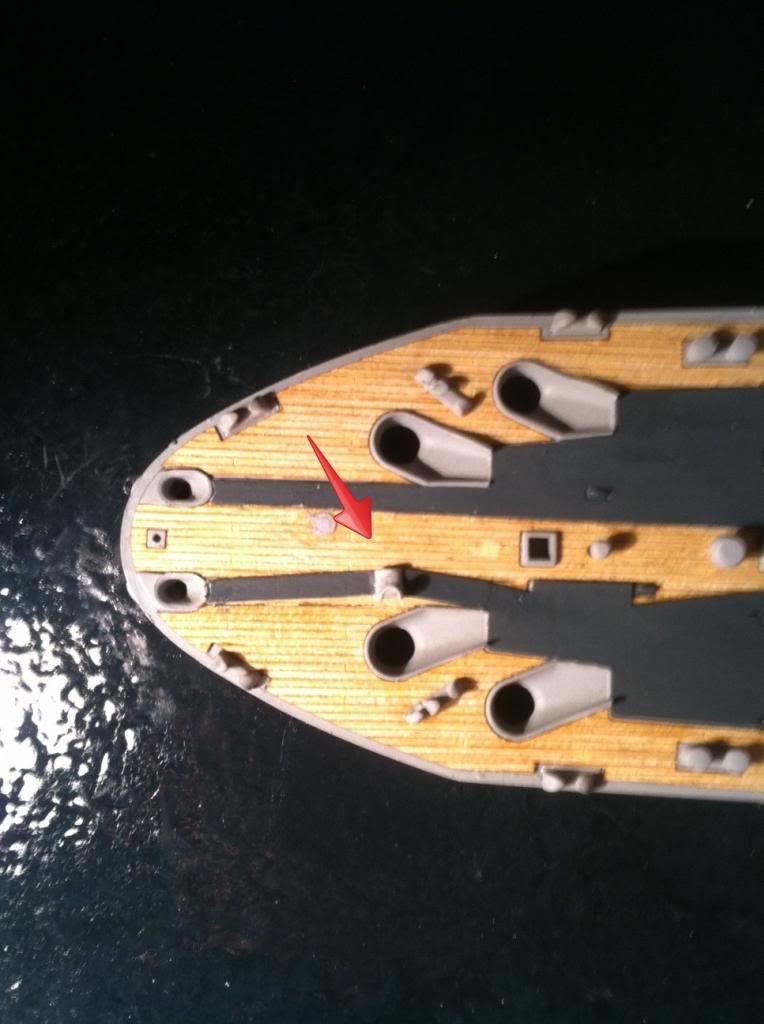
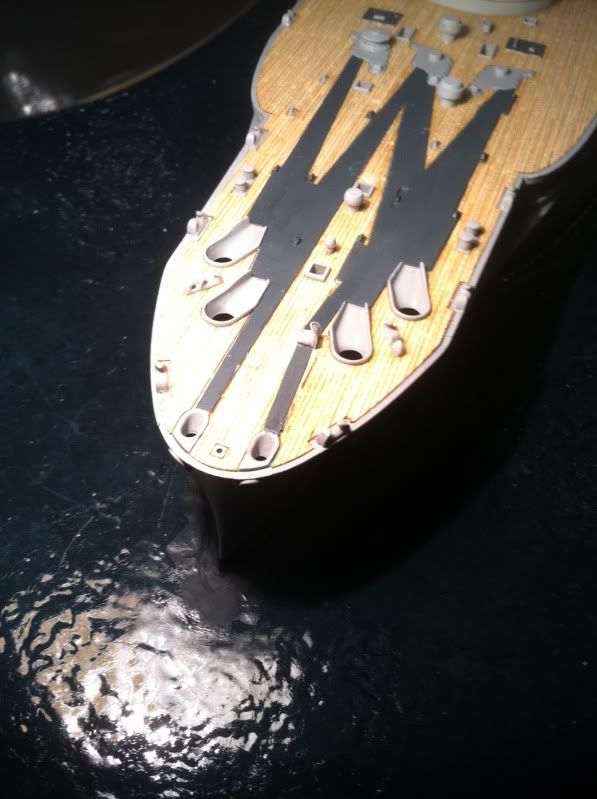
Are your ears ringing? Cuz right about now I'm cursing you! These damn "brackety things" are so small!
I've got 11 more to do and the first one is still too big! Ugh!
Just kidding! Thanks for the tip. I'm gonna have to break out the old optivisor for these!
I also changed my mind about fixing the elbow location on the anchor plate. Here is how it should look if indeed they ever put it back in place before Dec. 7th.
Last edited by Jeff Sharp on Sat Mar 01, 2014 9:39 pm, edited 1 time in total.
-
Jeff Sharp
- Posts: 1056
- Joined: Mon Jan 07, 2008 10:15 pm
Re: 1/200 Arizona finally
Thanks Christian. One thing this photo does give me is a good look at the "Y" shaped fire port that is up against the hatch. I've been looking for a good shot of this thing. Now I can put it on the kit.Christian M. wrote:Hi,
this image shows here still with cage masts in 1924, but the anchor chain system didn't change as far as I know. maybe it helps ...
-
MuseumGeek
- Posts: 25
- Joined: Fri Jan 17, 2014 12:11 am
- Location: Colorful Colorado
Re: 1/200 Arizona finally
Jeff,
Turn about is fair play, my friend. You have made me spend a lot of hours adding things to my build. Now I have to find something smaller to bps how you!!
Why do you suppose they put that dog leg in the chain plate?
mrb
Turn about is fair play, my friend. You have made me spend a lot of hours adding things to my build.
Now I have to find something smaller to bps how you!!Why do you suppose they put that dog leg in the chain plate?
mrb
-
Jeff Sharp
- Posts: 1056
- Joined: Mon Jan 07, 2008 10:15 pm
Re: 1/200 Arizona finally
I have no idea why they did that. I've never seen any photos that show how or why they used that large Captain Hook looking chock that is as the dog leg either.MuseumGeek wrote:Why do you suppose they put that dog leg in the chain plate?
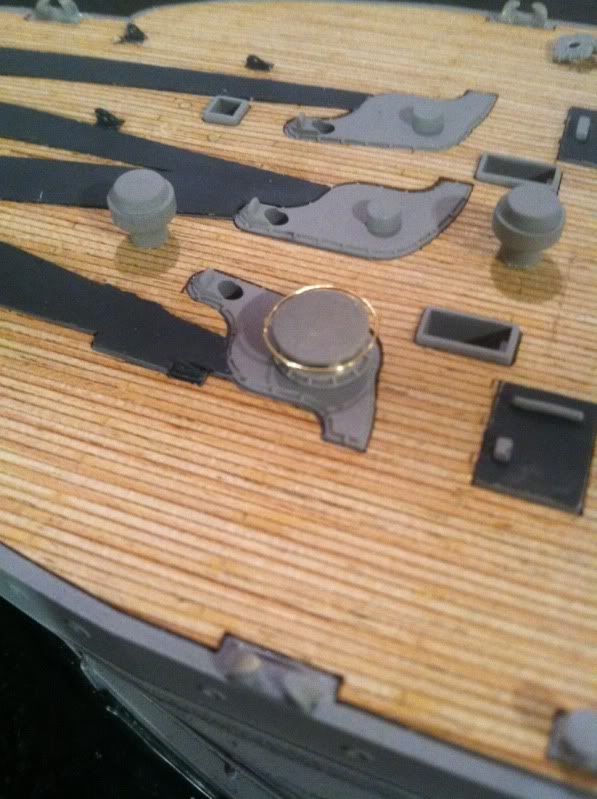
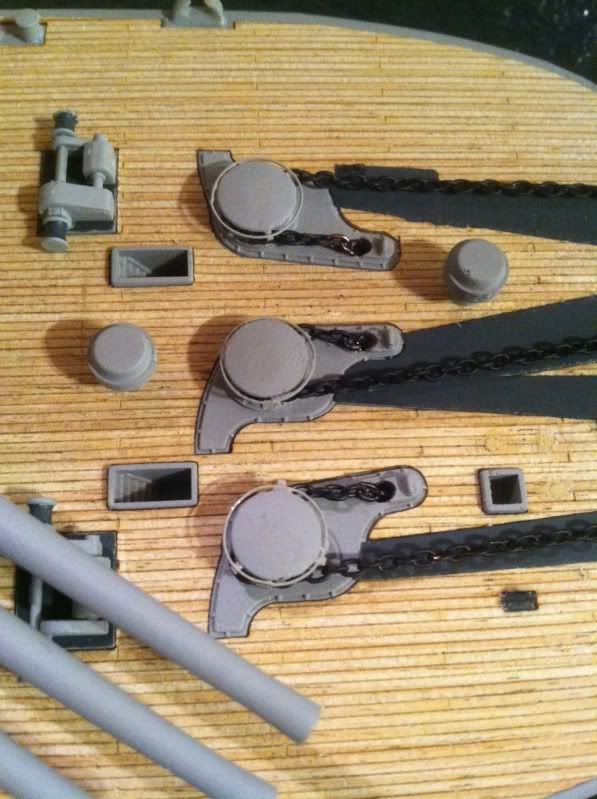
Now, as I ponder the construction of the fire port, I am improving the look of the three windlasses. Each windlass had what I'm guessing was a hand rail around the top parameter. Here is where a good photo etch piece would come in handy. But since there is none currently available, I have to construct the rings using brass wire. Have you ever tried to make a perfect circle out of brass wire? Not the easiest thing in the world to do.
Here are a couple of pics.
The first one shows a birds eye view of the top of the windlass.
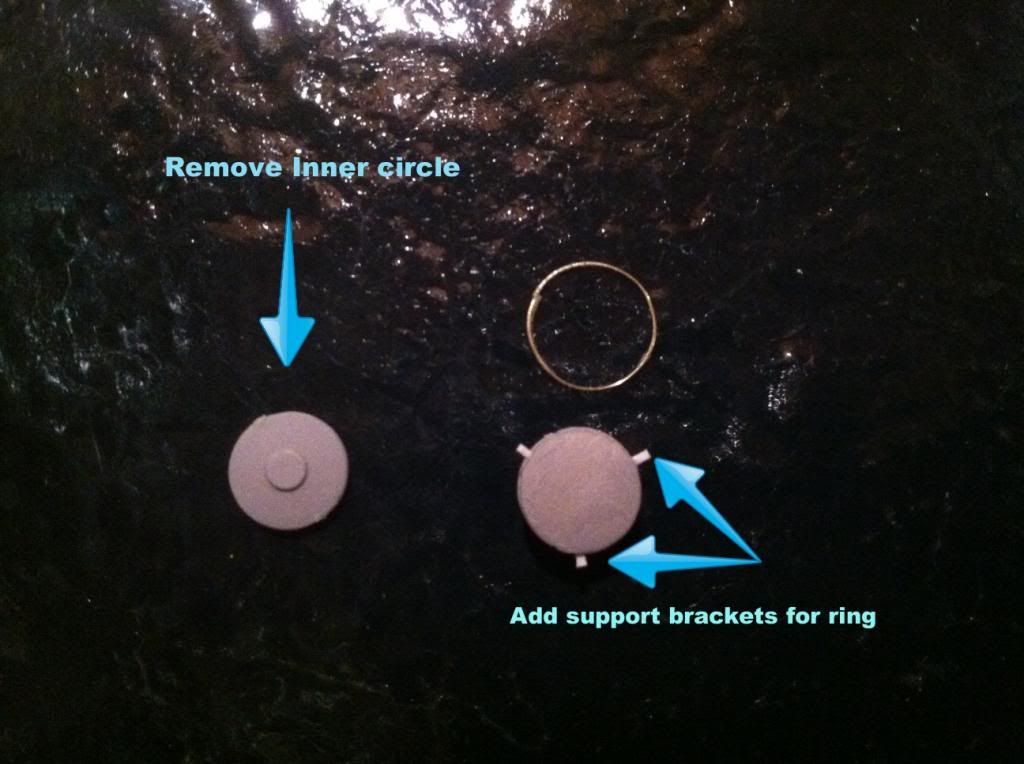
This one shows the ring in place.
The final product:
-
MuseumGeek
- Posts: 25
- Joined: Fri Jan 17, 2014 12:11 am
- Location: Colorful Colorado
Re: 1/200 Arizona finally
Grrrrrr. At the rate you keep showing me details to add I figure I will complete this model in approximately 2024! 
-
Jeff Sharp
- Posts: 1056
- Joined: Mon Jan 07, 2008 10:15 pm
Re: 1/200 Arizona finally
I know right!MuseumGeek wrote:Grrrrrr. At the rate you keep showing me details to add I figure I will complete this model in approximately 2024!
Believe it or not but there are a few more changes that I'm going to make on foc'sle.

-
MuseumGeek
- Posts: 25
- Joined: Fri Jan 17, 2014 12:11 am
- Location: Colorful Colorado
Re: 1/200 Arizona finally
Arrrgh! More?!
Actually, I enjoy seeing what you have spotted and I have missed.
Actually, I enjoy seeing what you have spotted and I have missed.
-
Jeff Sharp
- Posts: 1056
- Joined: Mon Jan 07, 2008 10:15 pm
Re: 1/200 Arizona finally
Just a small update for tonight.
The next thing I am focusing on are these two large vents around the windlasses.
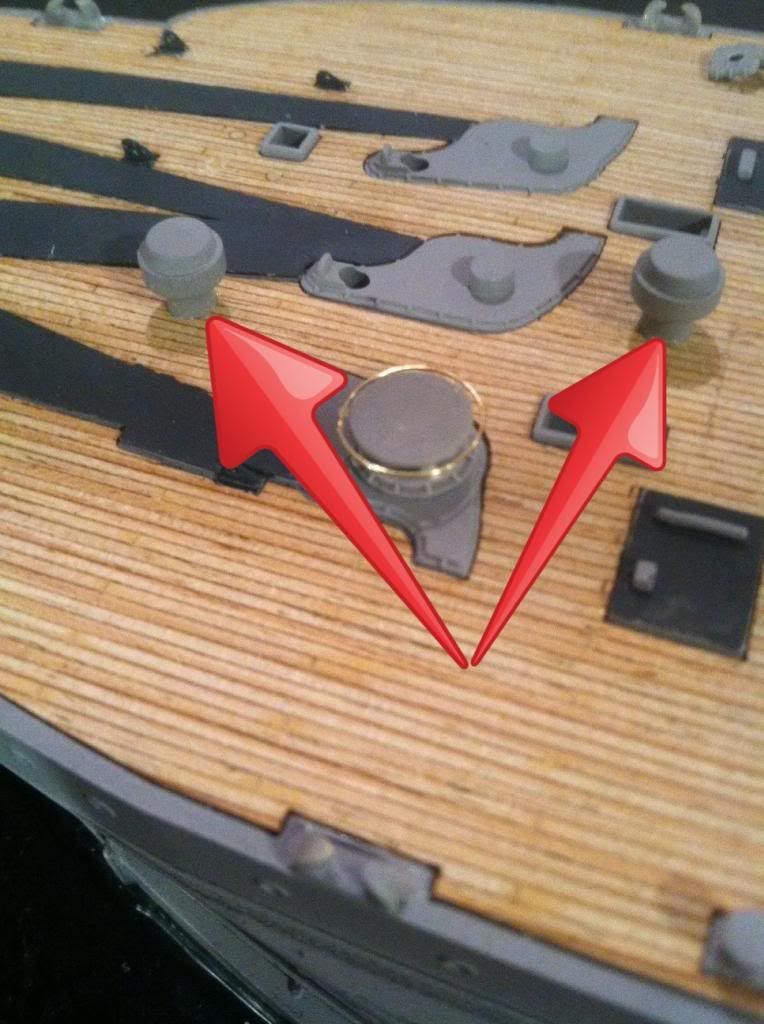
The size and shape of these two vents are correct for Arizona throughout the 1930's. By 1941 however, these vents were replaced with mushroom vents seen here:
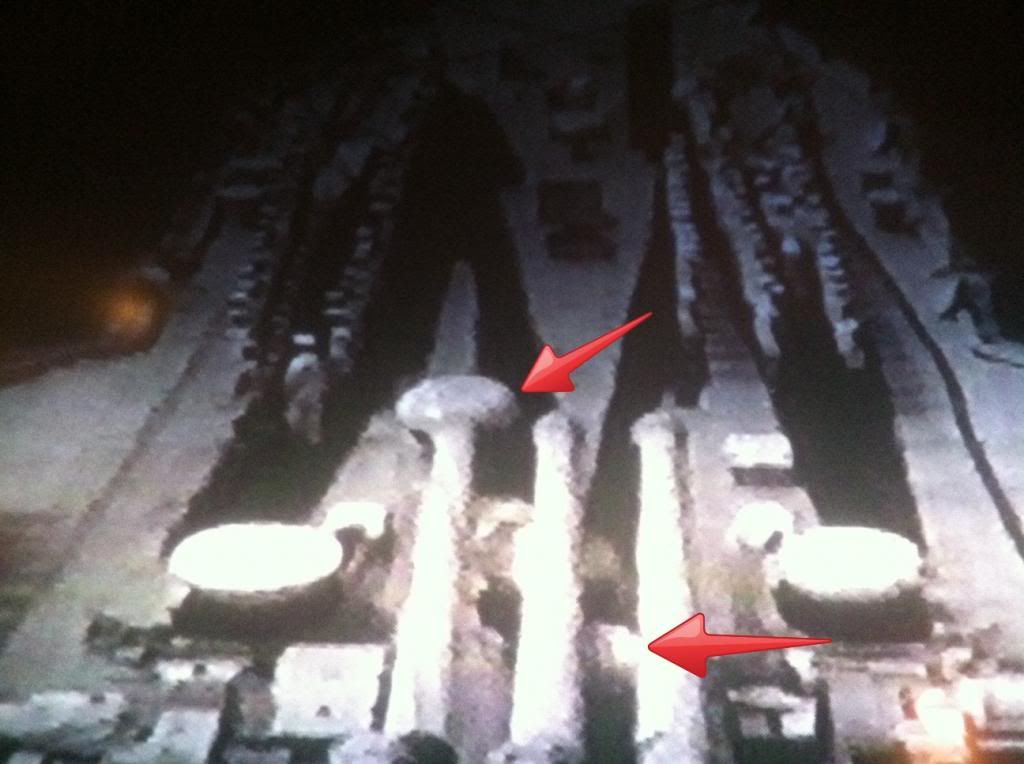
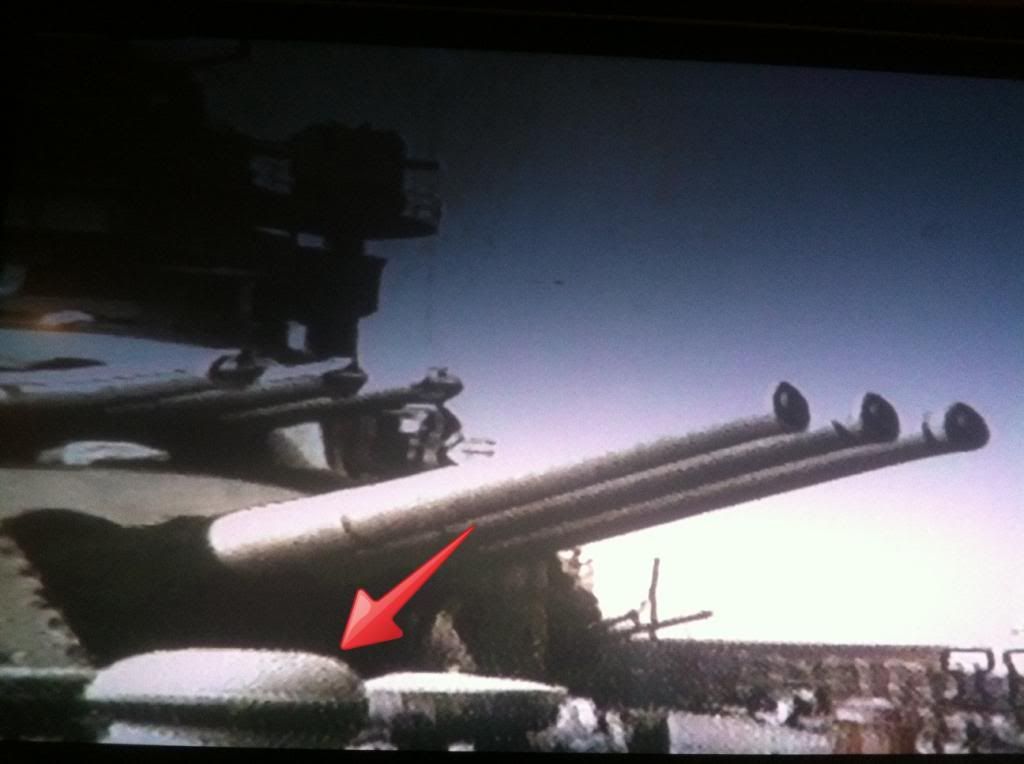
So, using these vents as a starting point, I bashed a couple of mushroom vents together.
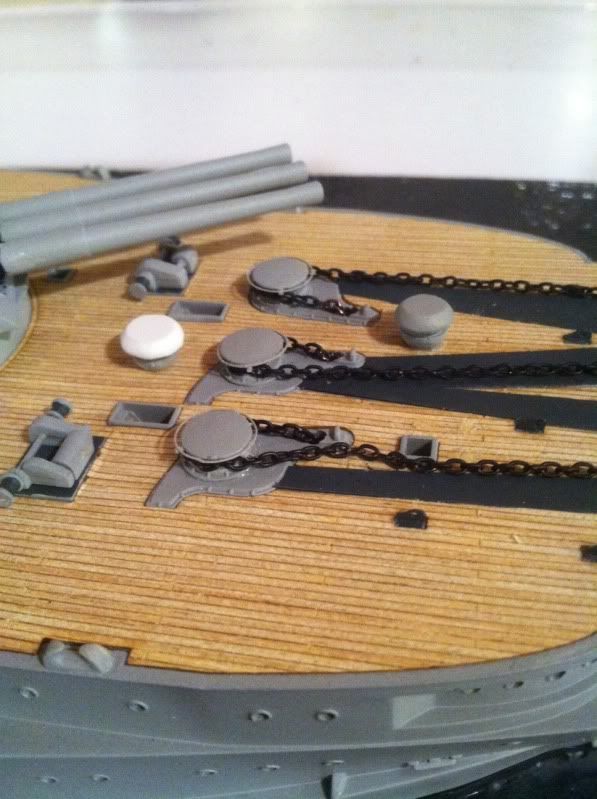
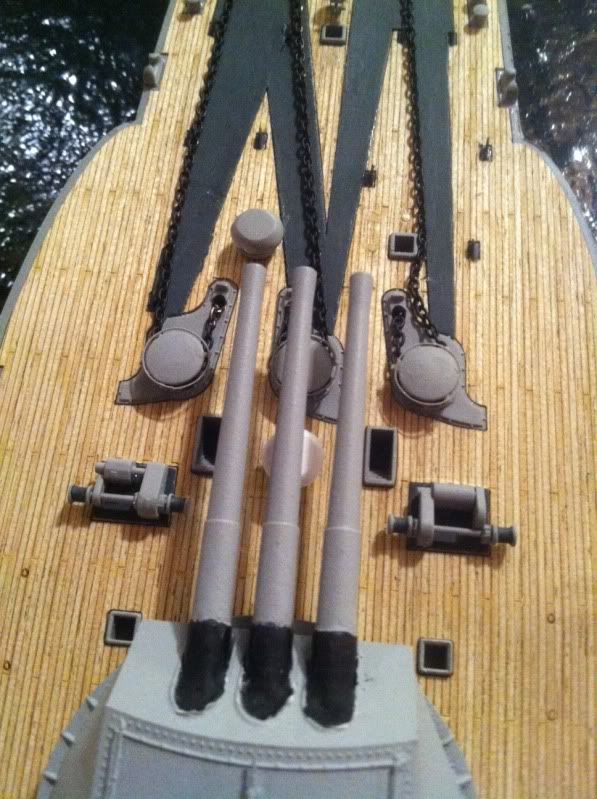
Thanks for looking'!
The next thing I am focusing on are these two large vents around the windlasses.
The size and shape of these two vents are correct for Arizona throughout the 1930's. By 1941 however, these vents were replaced with mushroom vents seen here:
So, using these vents as a starting point, I bashed a couple of mushroom vents together.
Thanks for looking'!
-
DWD

- Posts: 365
- Joined: Sat Oct 27, 2012 12:37 am
- Location: Idaho
Re: 1/200 Arizona finally
Jeff, great job on the build. I have been following your thread and checking the progress of your build. All of your additions are looking great and will go a long way in adding a ton more detail to her. Keep that detail coming. 
Doug
Currently building:
Tamiya 1/350 CVN-65 USS Enterprise 2001
viewtopic.php?f=59&t=120496
http://modelshipgallery.com/gallery/use ... index.html
Currently building:
Tamiya 1/350 CVN-65 USS Enterprise 2001
viewtopic.php?f=59&t=120496
http://modelshipgallery.com/gallery/use ... index.html
-
MuseumGeek
- Posts: 25
- Joined: Fri Jan 17, 2014 12:11 am
- Location: Colorful Colorado
Re: 1/200 Arizona finally
Jeff,
Will you shoot a side view of the mushroom vents? I would like to know what teh profile looks like before I start scratching.
Thanks!
Matthew
Will you shoot a side view of the mushroom vents? I would like to know what teh profile looks like before I start scratching.
Thanks!
Matthew
-
Jeff Sharp
- Posts: 1056
- Joined: Mon Jan 07, 2008 10:15 pm
Re: 1/200 Arizona finally
This view give us a decent look at one of them.MuseumGeek wrote:Jeff,
Will you shoot a side view of the mushroom vents? I would like to know what teh profile looks like before I start scratching.
Thanks!
Matthew
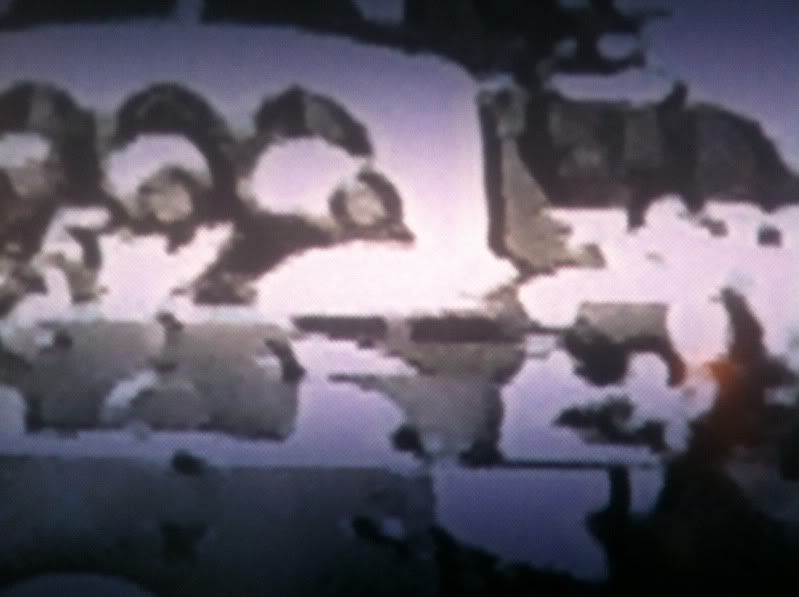
-
MuseumGeek
- Posts: 25
- Joined: Fri Jan 17, 2014 12:11 am
- Location: Colorful Colorado
Re: 1/200 Arizona finally
Thanks, Jeff. I can build that.
-
Jeff Sharp
- Posts: 1056
- Joined: Mon Jan 07, 2008 10:15 pm
Re: 1/200 Arizona finally
Ok, time for some more changes to the foc'sle!! Going back to Matthew's "Brackety things" I decided to do a head count and try to match them up with the film. Well, thats when things became painfully obvious to me that not only did a few brackets have to be removed but also the entire anchor plate had to be reshaped.
I'll try to describe what I did by focusing on the starboard side first and then the port side.
First, all of these brackets that seem to be floating in no mans land is the reason I started to question what was going on.
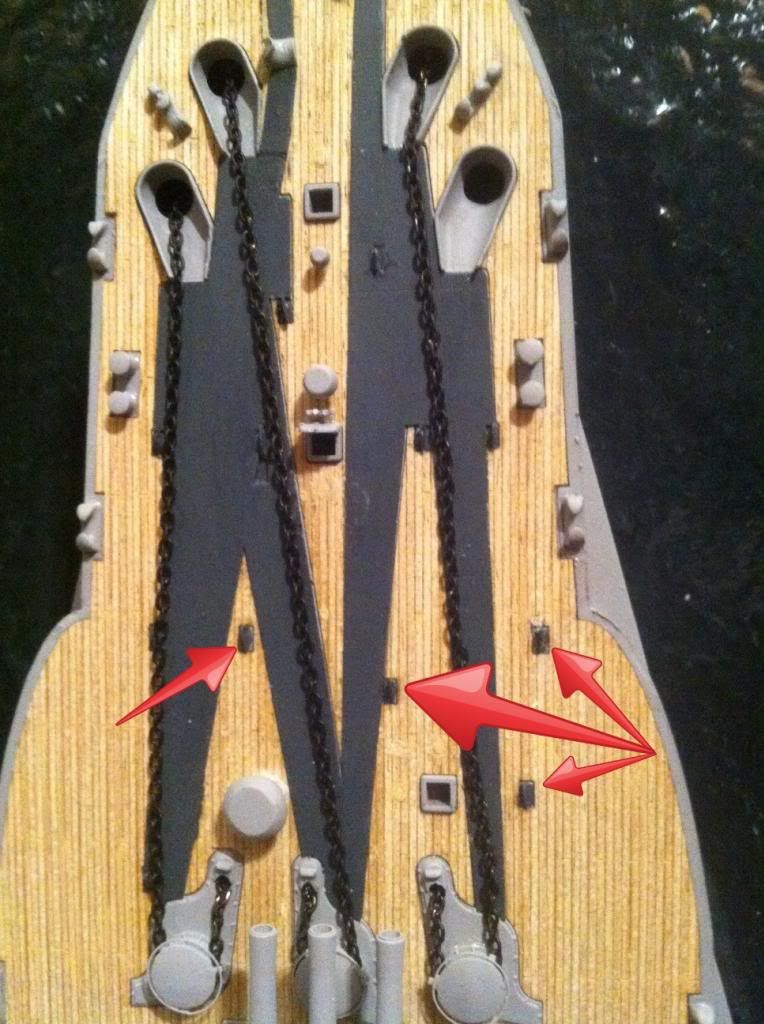
Comparing the above pic with this shot of the ship you can see the two brackets on the far right are no longer there in 1941. The other two are there but not quite like the kit (and plans) show. Anchor plate is behind each bracket which extends up to the bow.
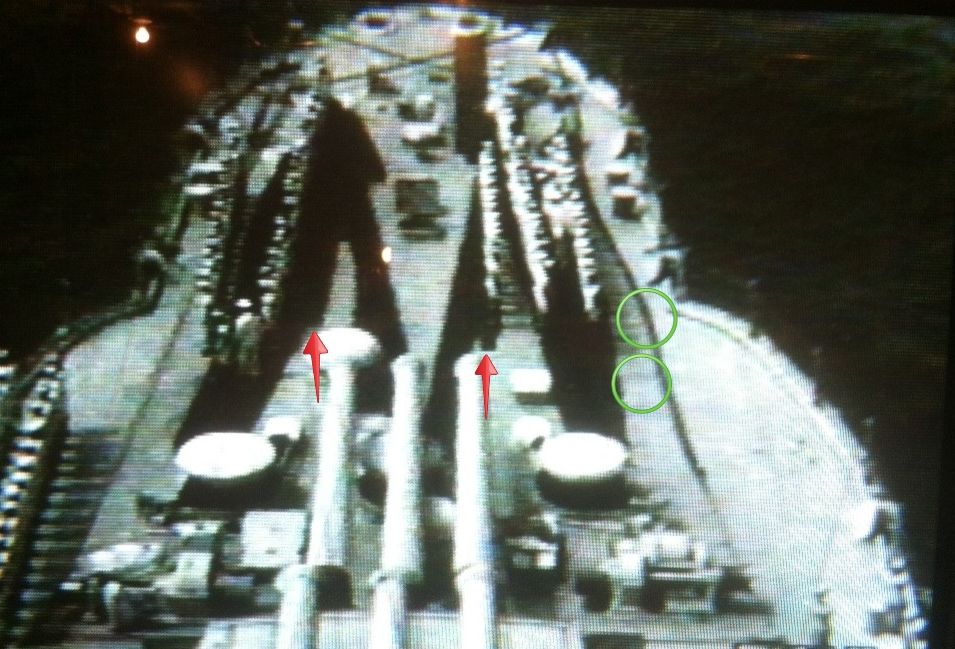
On the starboard side, the fix was easy. I just added a strip of styrene as seen here.
Now, notice the location of this bracket and notice the shape of the anchor plate around this bracket.

Compared to this, it is obvious the plate is wrong on the kit.
Time to rip up the plate and start cutting. This is how the starboard plate should look.
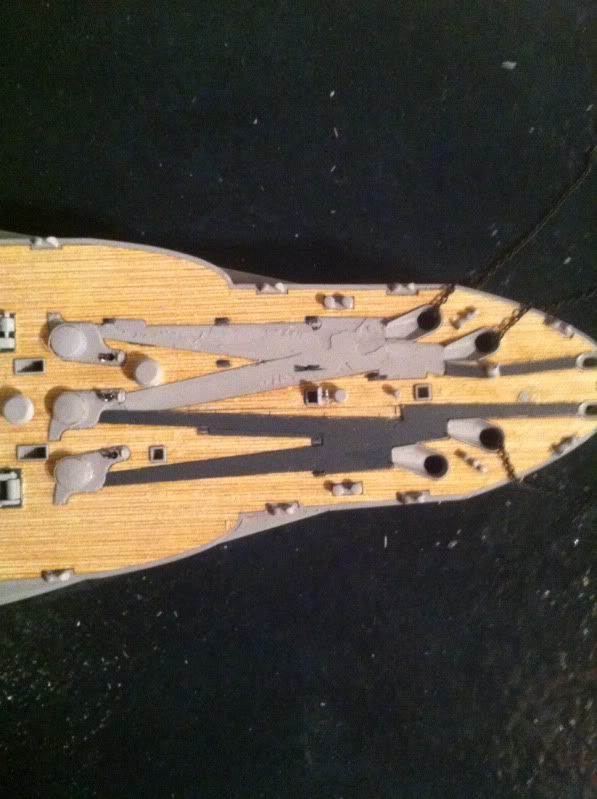
The port side has issues as well.
Notice how high the cutout on the plate goes up to the bow. It almost goes up as high as the hatch.
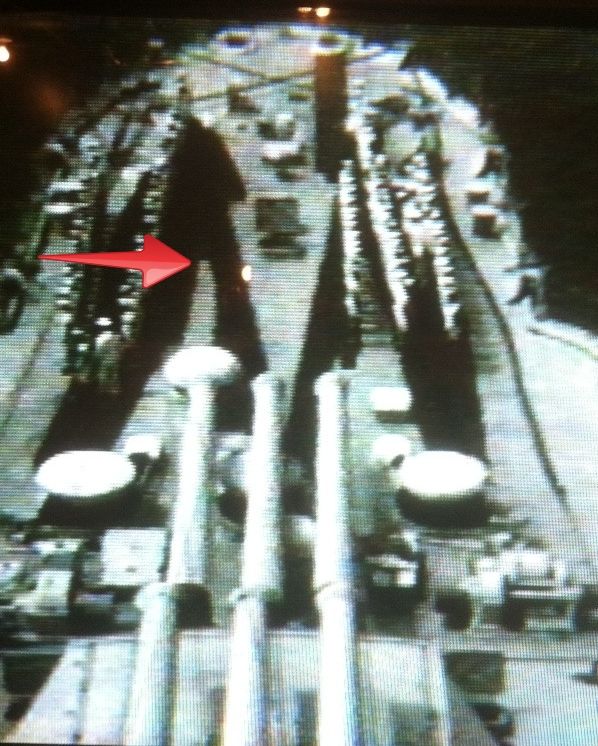
So, more cutting of the port side plate and this is how both sides should look.
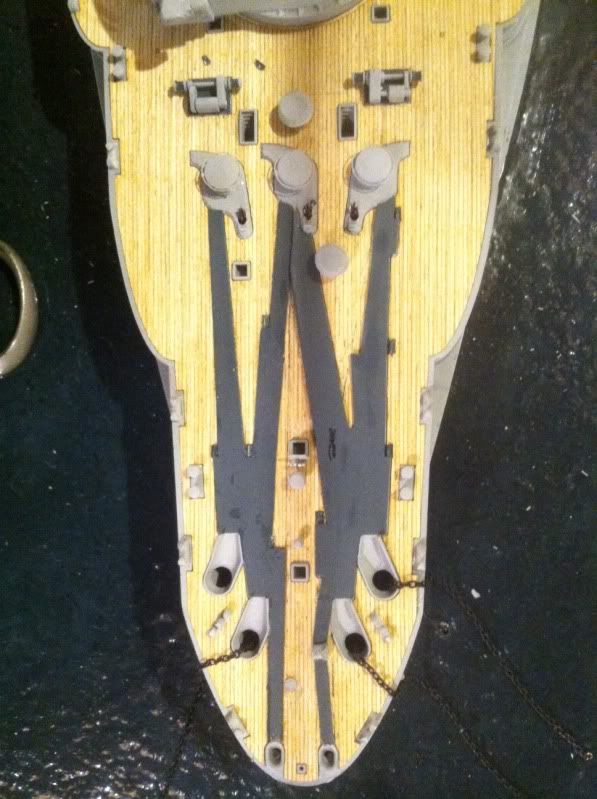
It is interesting that the plans do not show these changes to the plates. The plans still show the original configuration of the plates after the ship was modernized in the 30's.
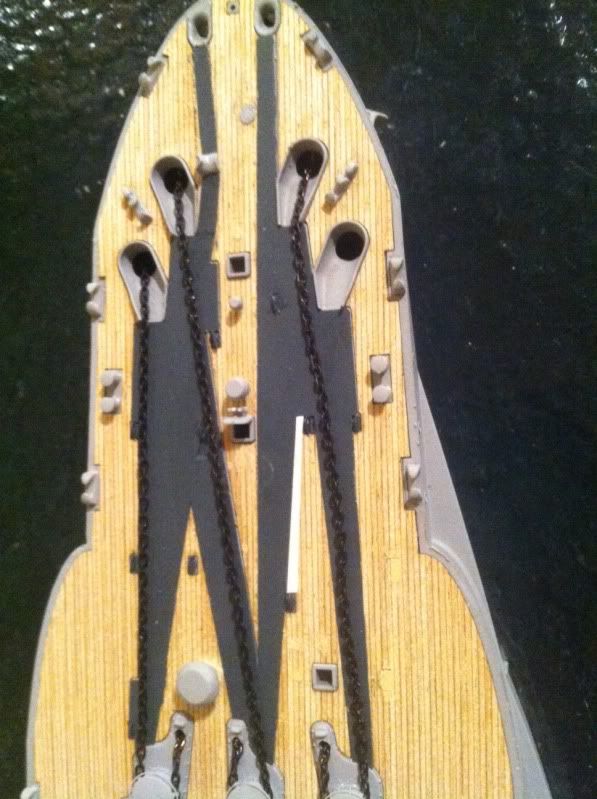
Now, if I can only find some studded anchor chain! It should all go back together nicely.
Thanks for looking!
I'll try to describe what I did by focusing on the starboard side first and then the port side.
First, all of these brackets that seem to be floating in no mans land is the reason I started to question what was going on.
Comparing the above pic with this shot of the ship you can see the two brackets on the far right are no longer there in 1941. The other two are there but not quite like the kit (and plans) show. Anchor plate is behind each bracket which extends up to the bow.
On the starboard side, the fix was easy. I just added a strip of styrene as seen here.
Now, notice the location of this bracket and notice the shape of the anchor plate around this bracket.
Compared to this, it is obvious the plate is wrong on the kit.
Time to rip up the plate and start cutting. This is how the starboard plate should look.
The port side has issues as well.
Notice how high the cutout on the plate goes up to the bow. It almost goes up as high as the hatch.
So, more cutting of the port side plate and this is how both sides should look.
It is interesting that the plans do not show these changes to the plates. The plans still show the original configuration of the plates after the ship was modernized in the 30's.
Now, if I can only find some studded anchor chain! It should all go back together nicely.
Thanks for looking!