The Ship Model Forum

The Ship Modelers Source
It is currently Wed Apr 24, 2024 8:14 pm

All times are UTC - 6 hours [ DST ]


Post new topic Reply to topic  [ 33 posts ]  Go to page 1, 2  Next
Author Message
PostPosted: Sat Feb 28, 2015 5:26 am 
Offline

Joined: Sun Aug 15, 2010 6:19 pm
Posts: 700
Before I begin, let me just say

:woo_hoo:


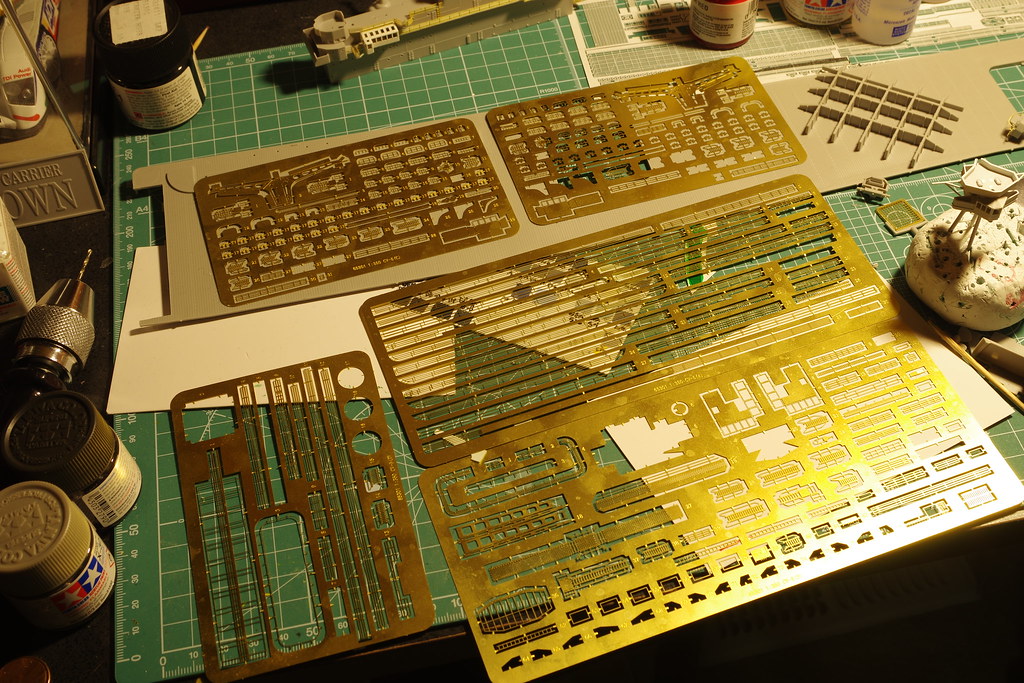
Anyways, like many others, the idea of a new Yorktown class plastic kit in 1/350 (to replace the horror that is the Trumpeter Hornet) has been not only of logic, but also of hope and desire. Any finally at the end of last year, Merit answered our prayers. It should be noted that the kit itself is not perfect (are any?), and one of its errors is pretty noticeable. That said, its a light and day difference to the Trumpeter Hornet that was released like 10 years ago. Naturally, as a fan of a the Yorktown class carriers, I was quick to preorder this kit. While my Portland awaits better weather for construction to continue, I am able to start my Yorktown. I made a promise that this kit would be built strictly Out of the Box. And in the spirit of doing that, I decided I would not be sanding down the hull. Im sure you'll see plenty of that from everybody else, and most likely myself in the future. But until then, heres a very long (and slow!) build of my USS Yorktown.

Here's what I was able to do in January

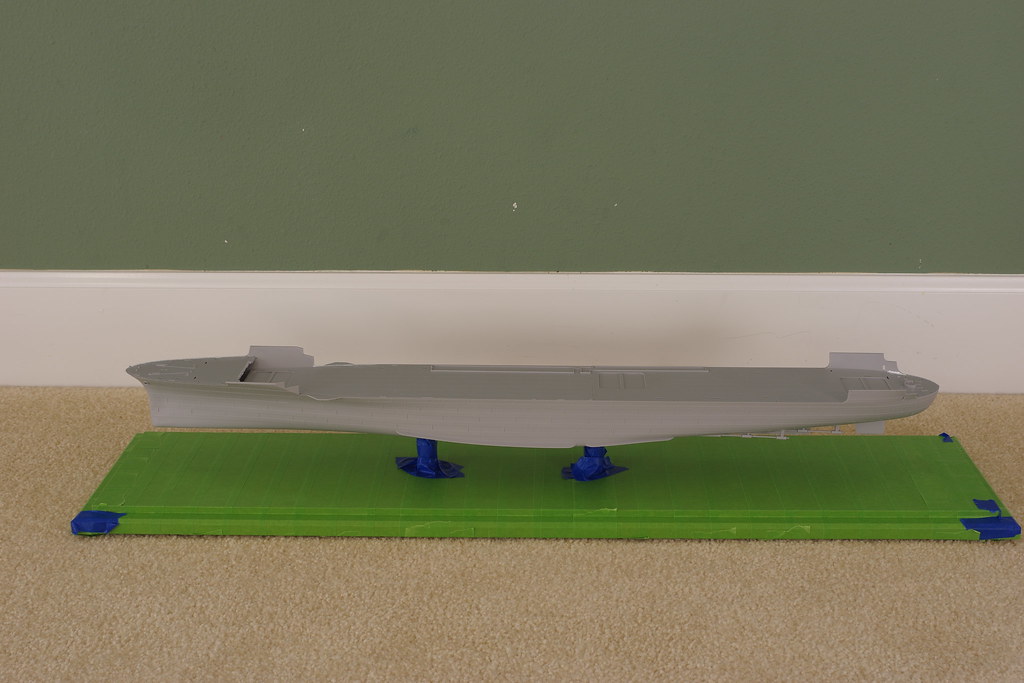
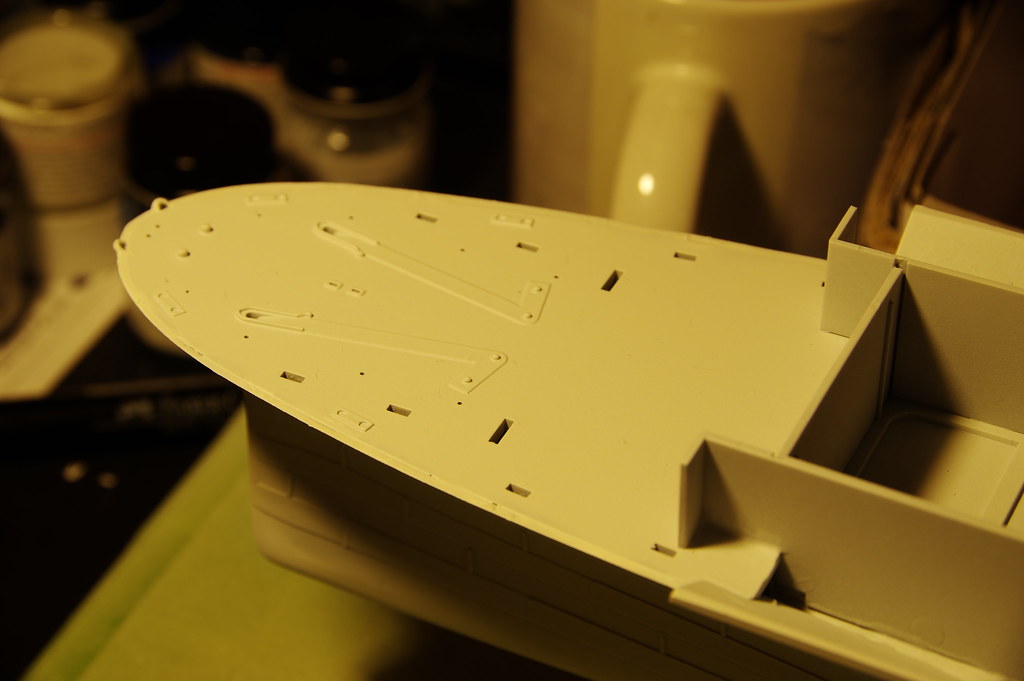
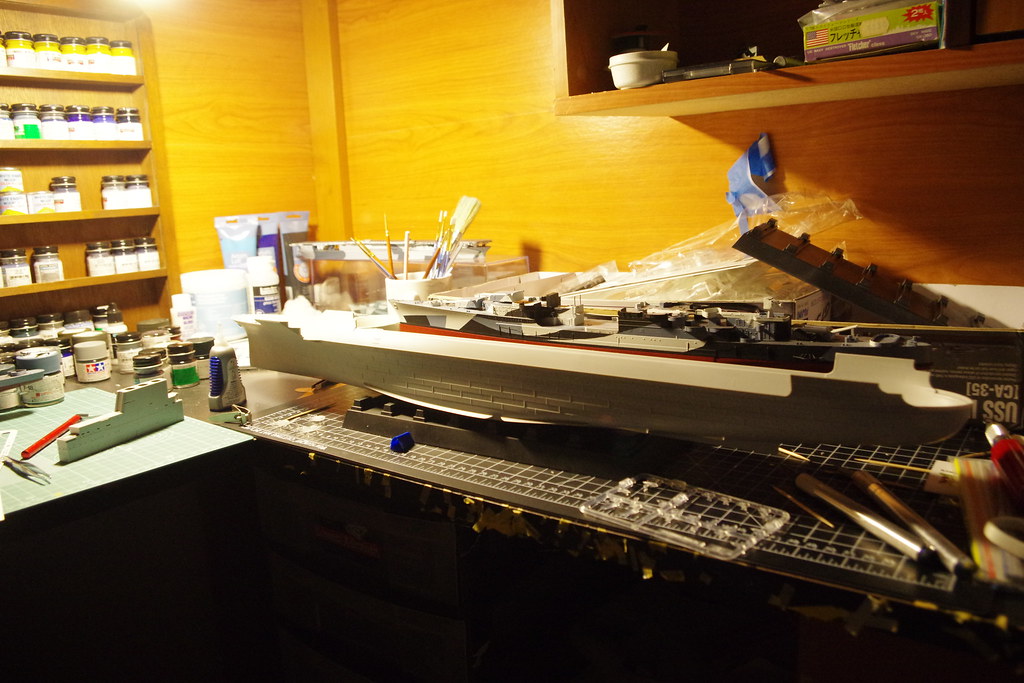
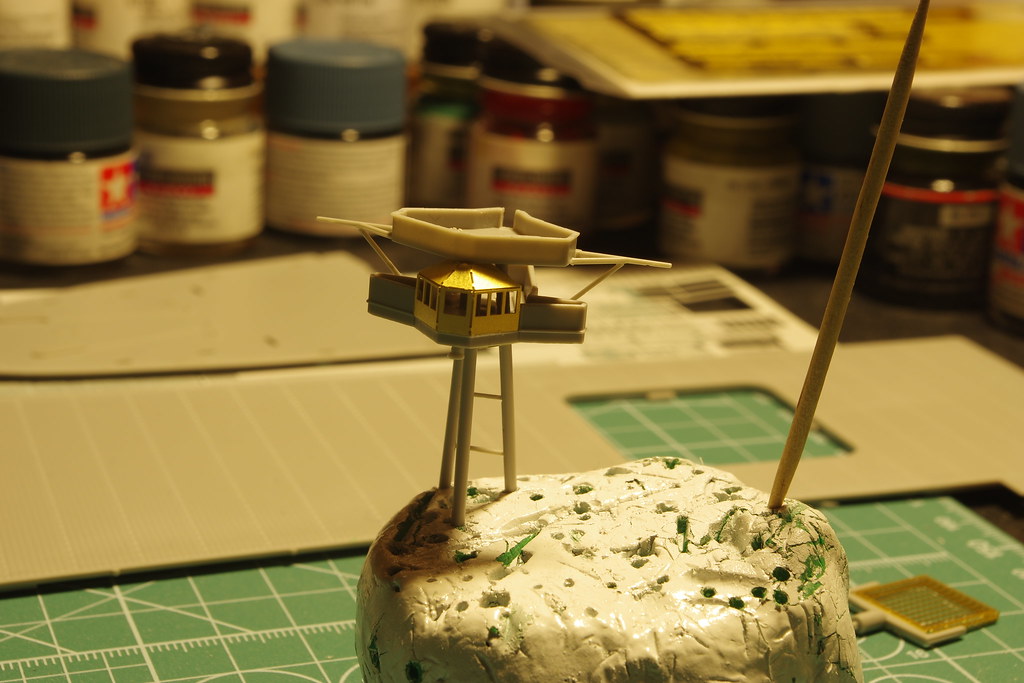
Hull planted to included tray while awaiting proper base. The shape is beautiful, despite the surface covered with chicken pox.
Image

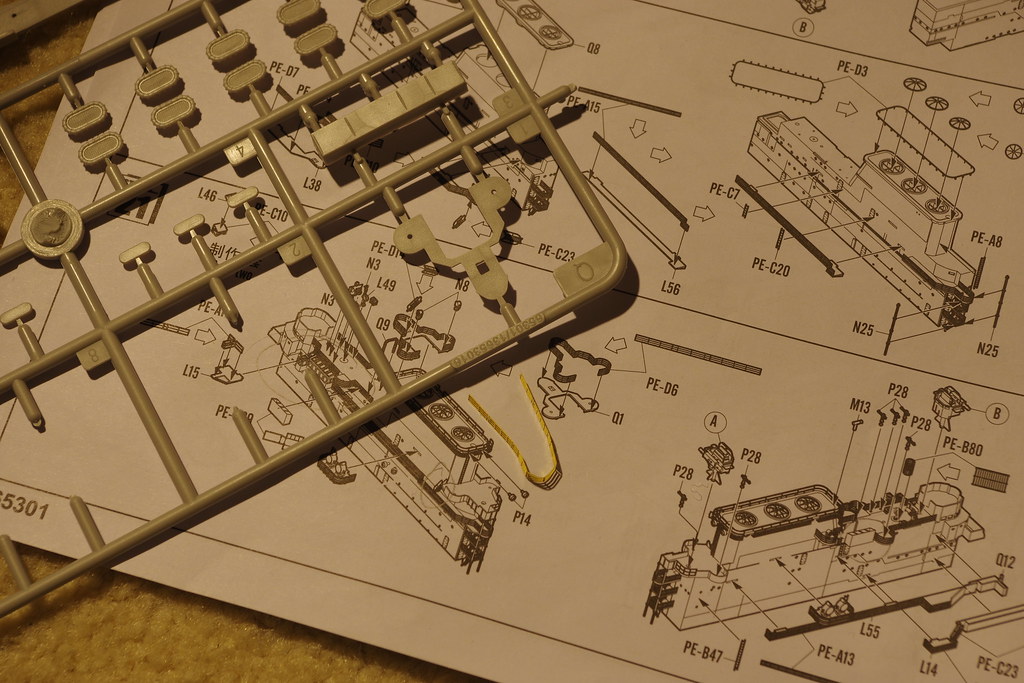
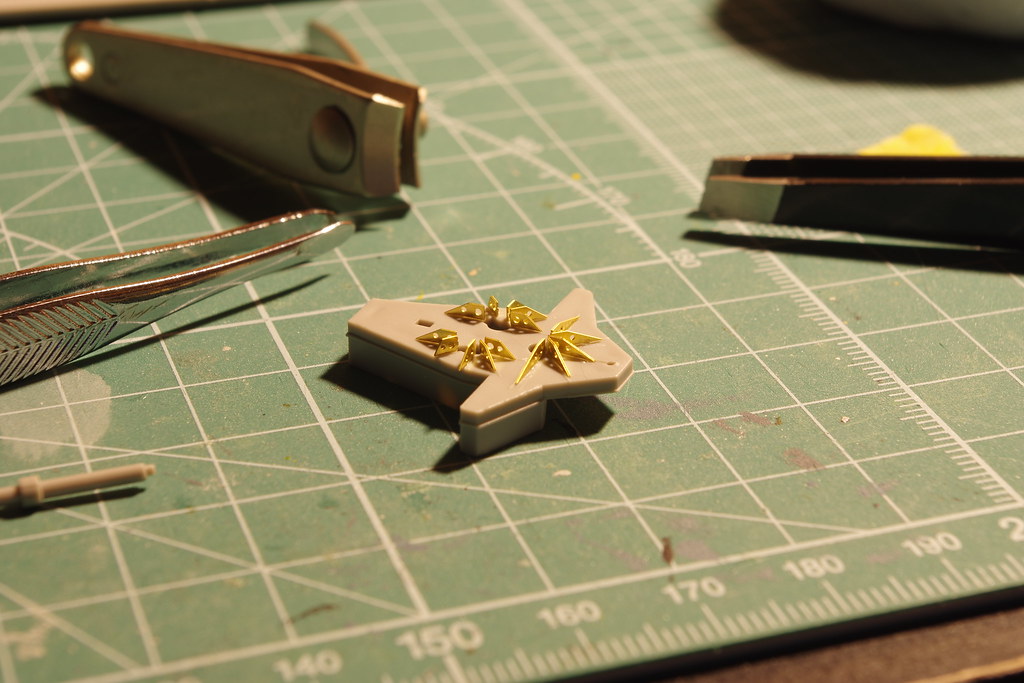
Directions made assembling the Mk 34 (?) Directors a bit hard, trying to figure out the exact placement for the kit supplied p/e
Image

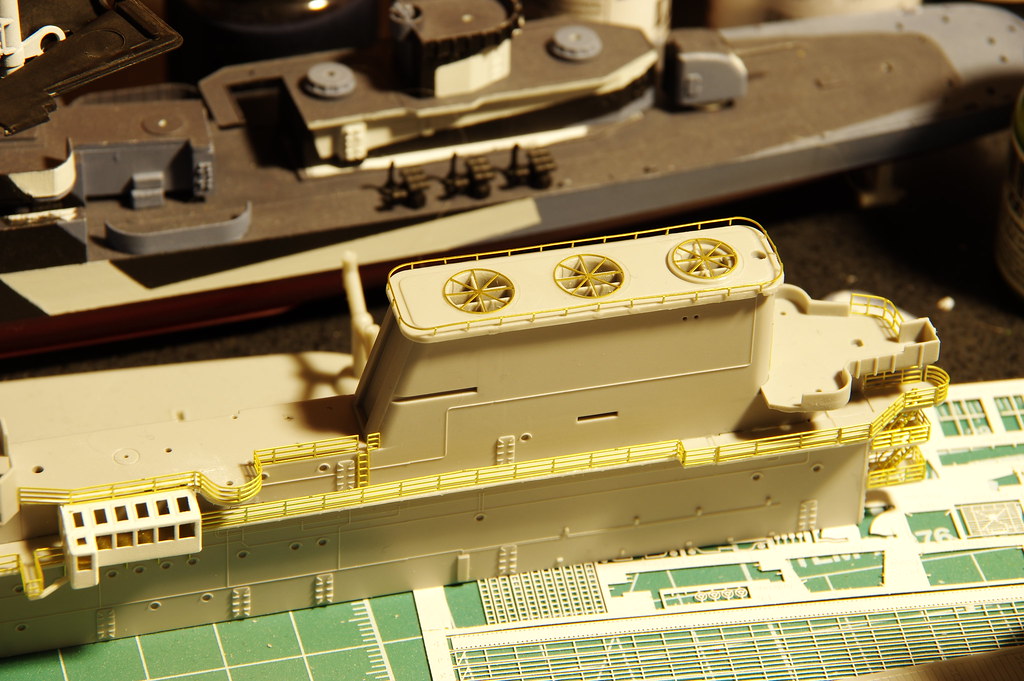
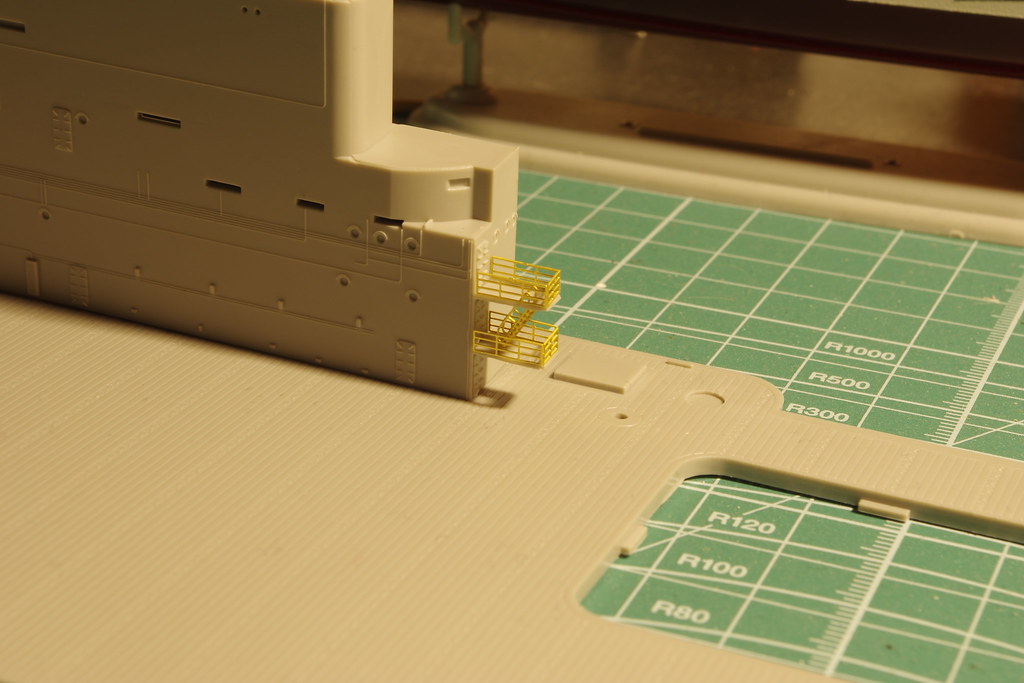
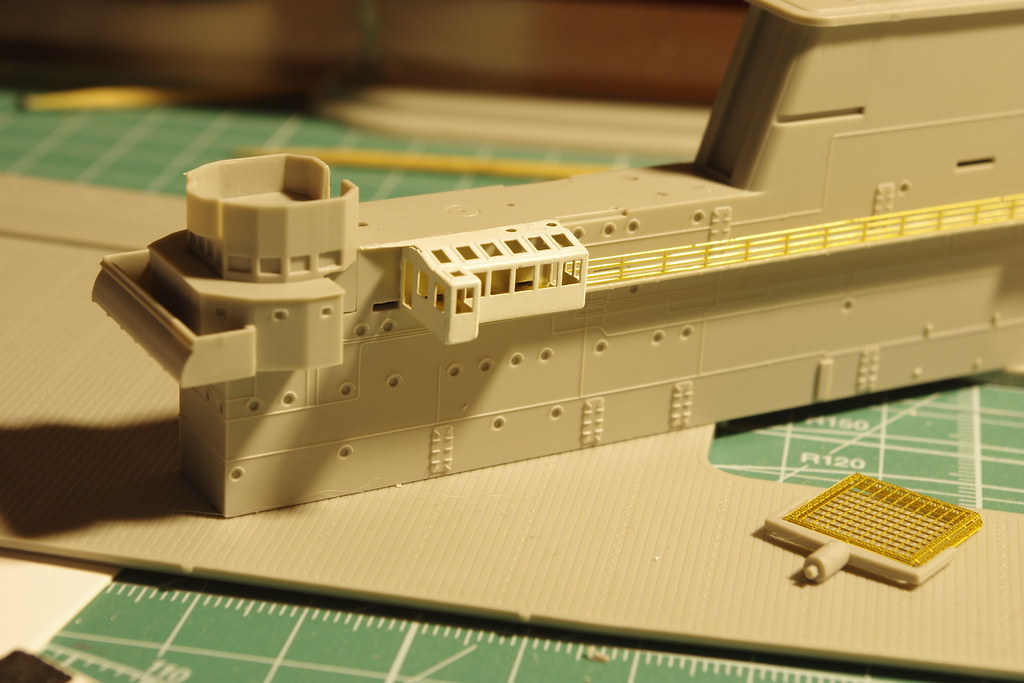
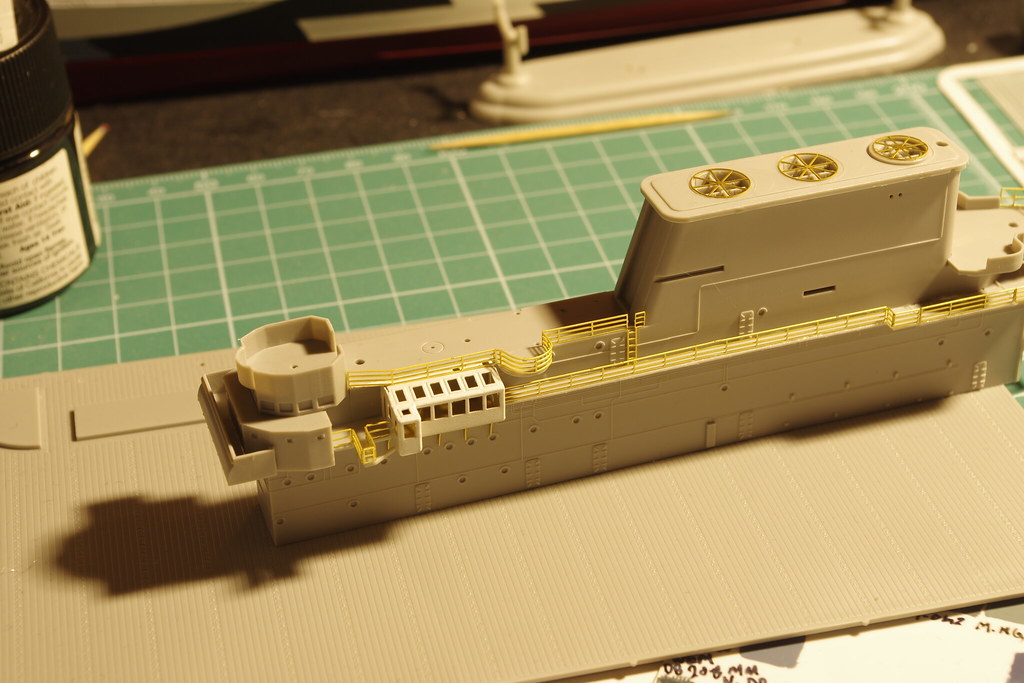
Starting with the supports to the Fire Control Platform. Placement is marked in the directions (though not very well)
Image

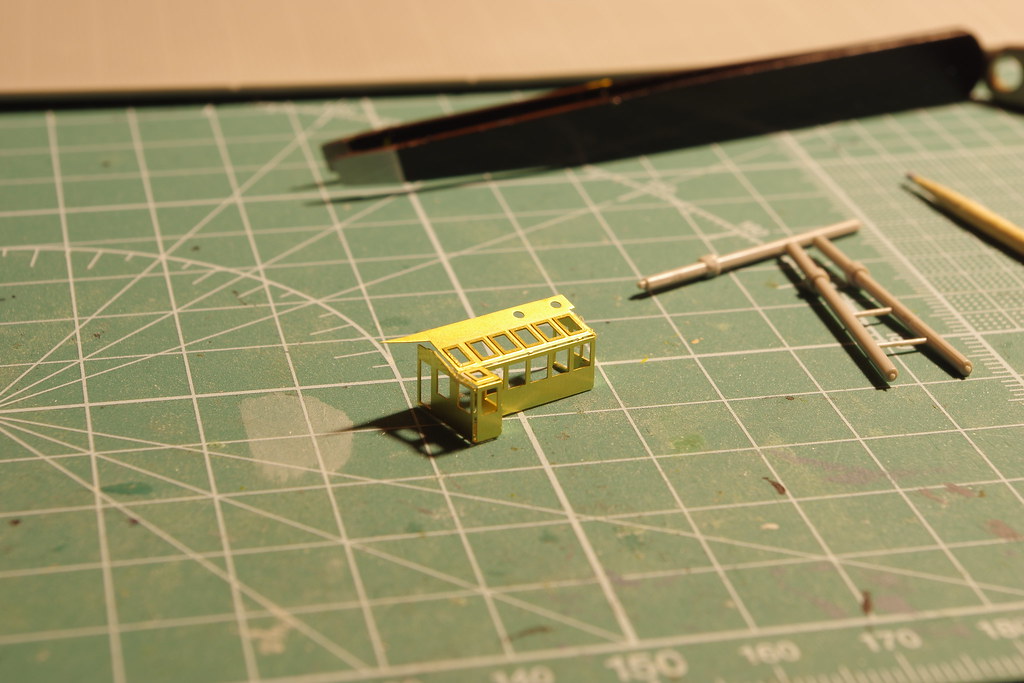
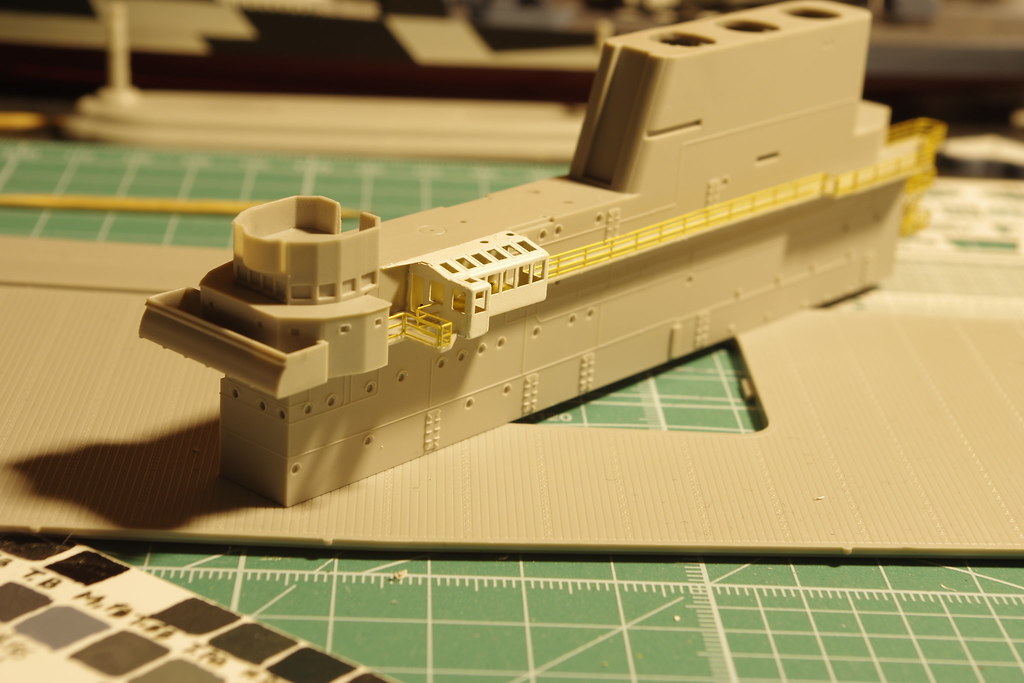
Here's the front part of the platform, which is p/e and attached. Notice that when the p/e is bent into position, there are still gaps present, which will require filling
Image

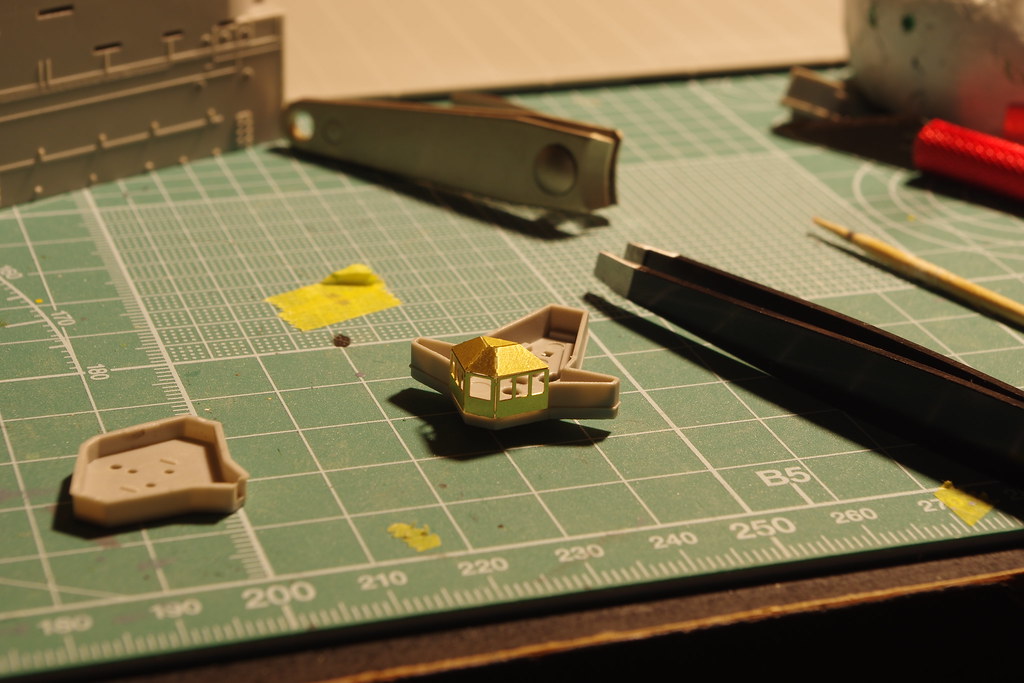
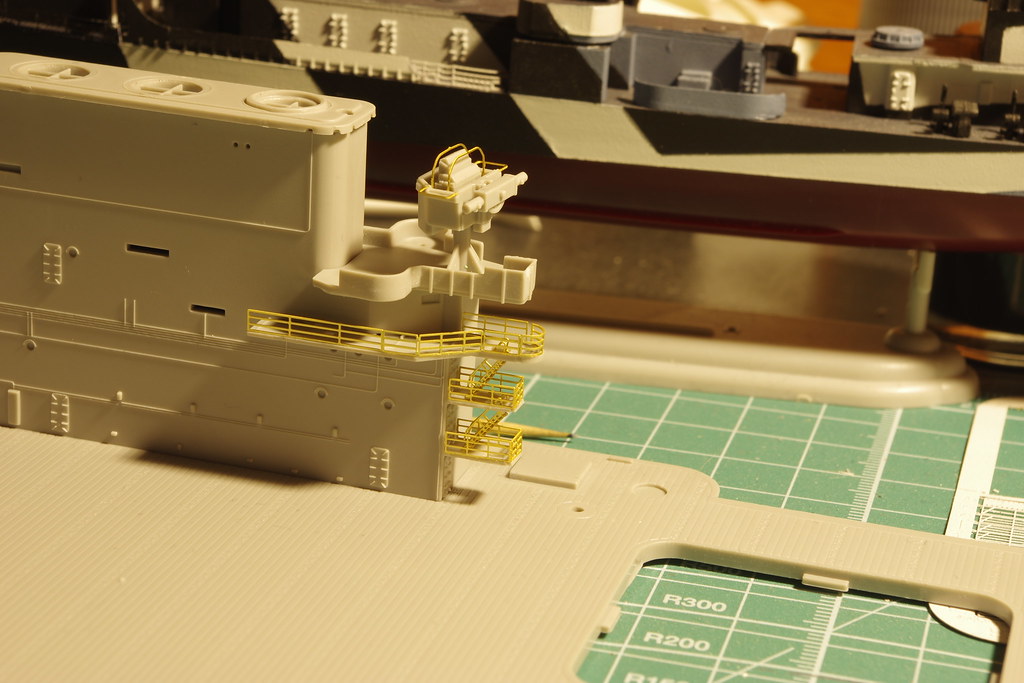
Speaking of the gaps and filling, they will be required with the Primary Flight Control Room.
Image
Image

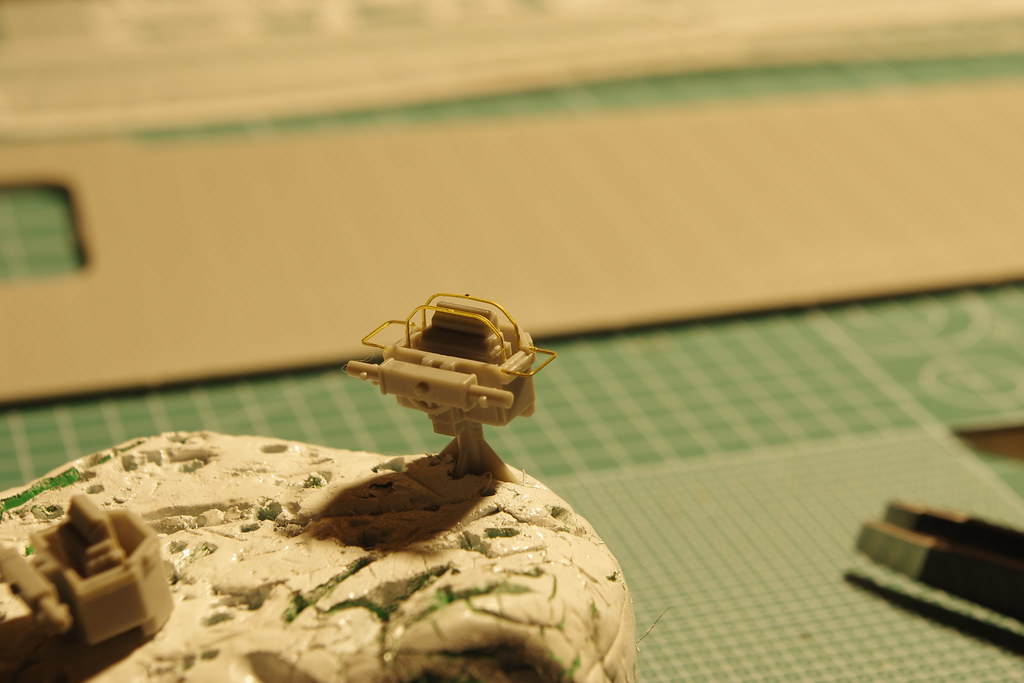
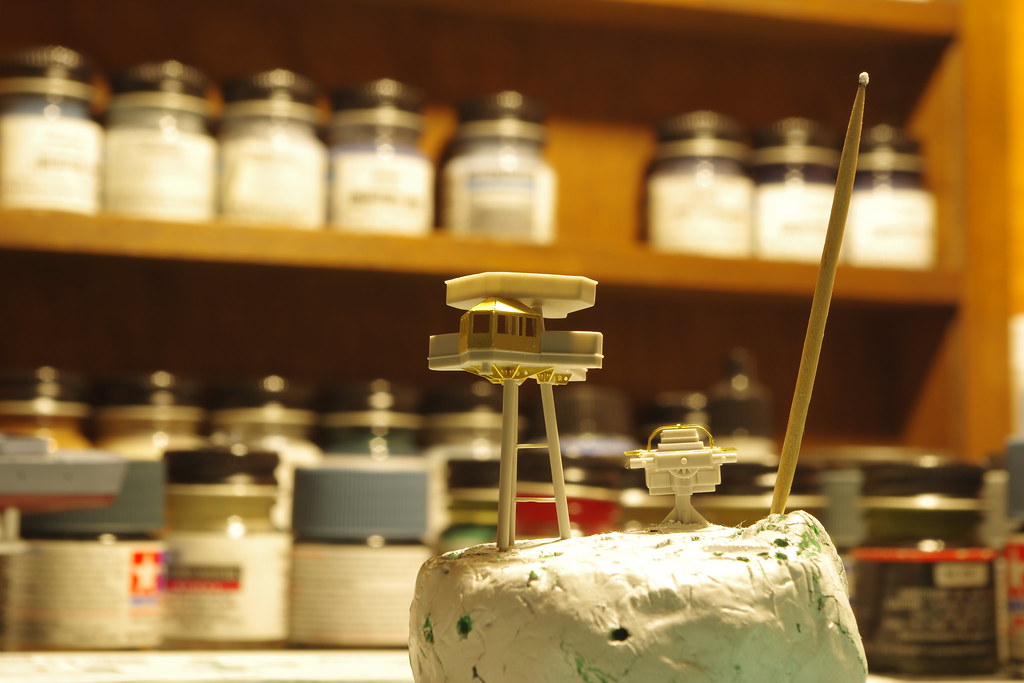
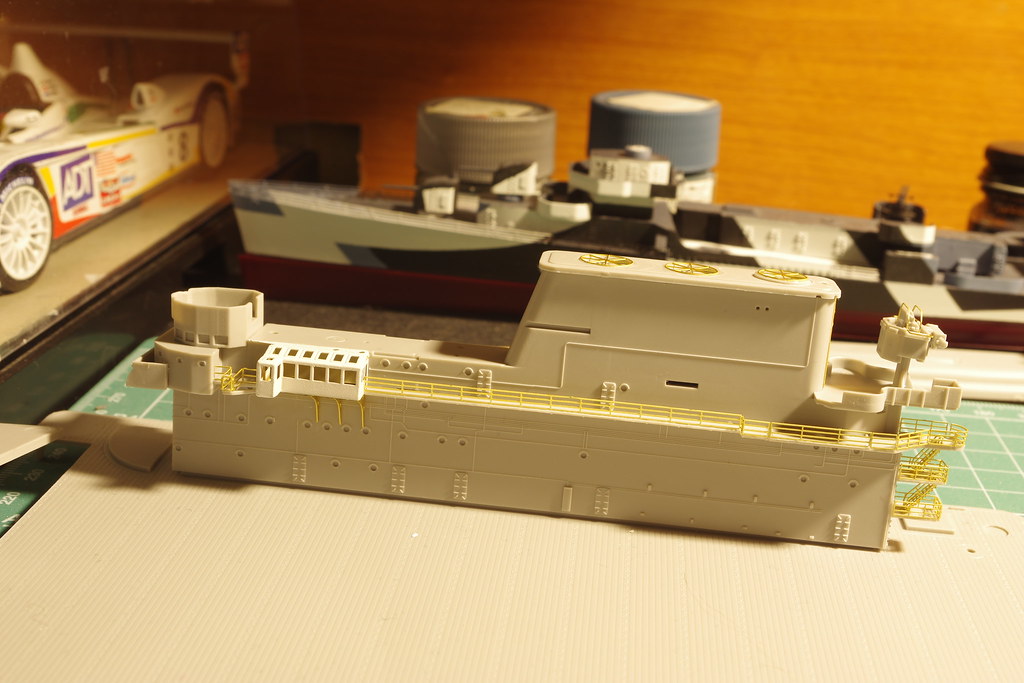
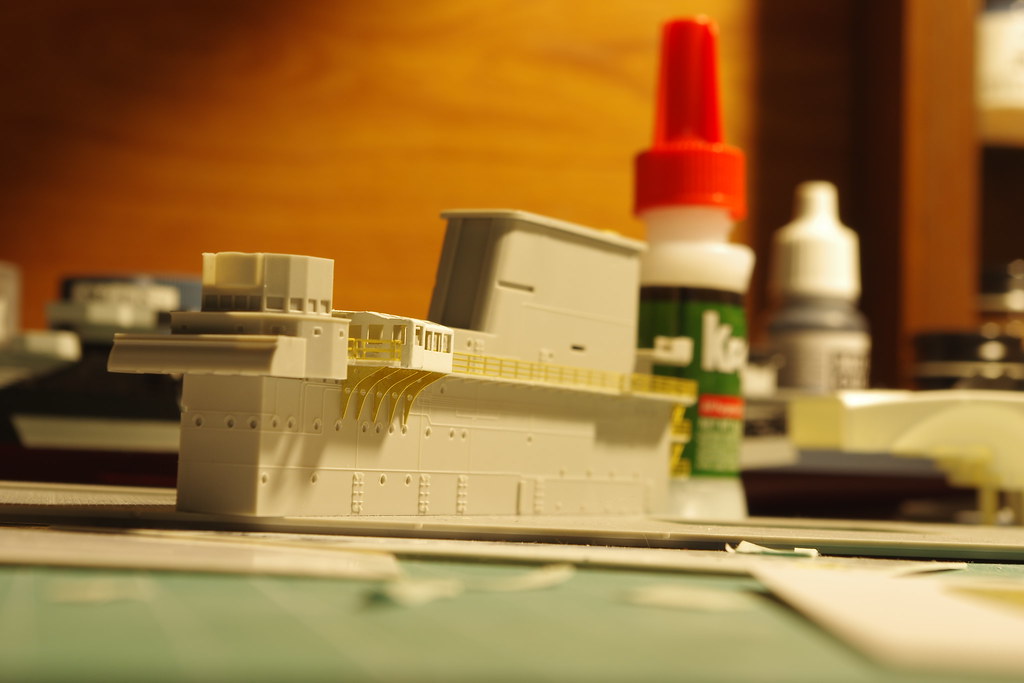
Once you start attaching the tripod to the FC Platform, I noticed that the placement of 2 supports blocked the rear legs, and had to be moved. Also, 2 supports stick out of the side of the platform
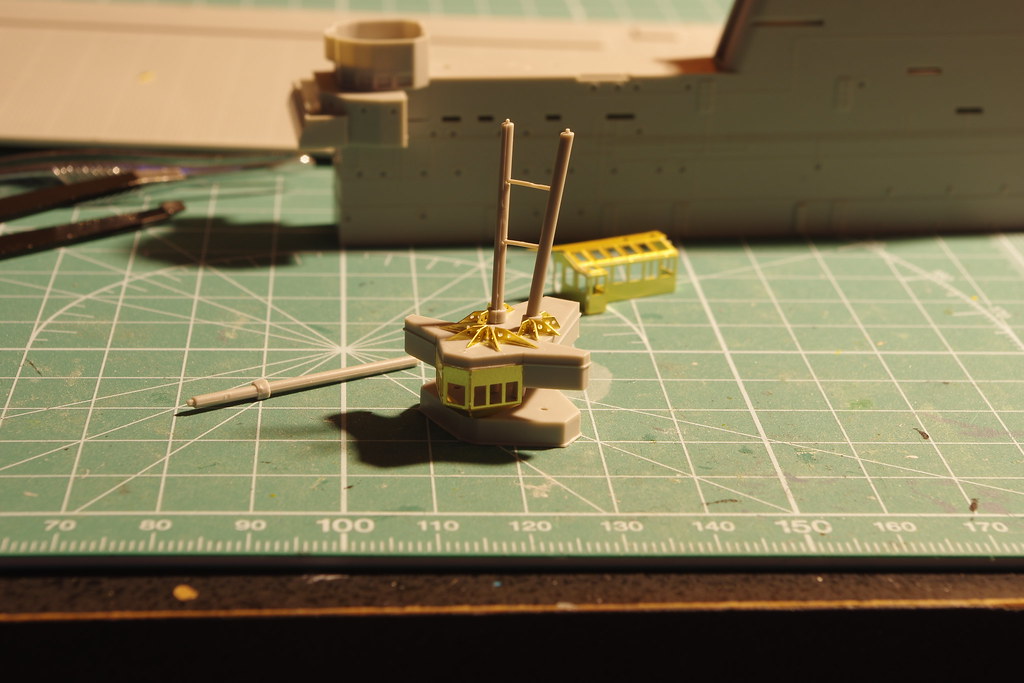
Image

There we go
Image

Started on the air wing. The kit include 5 F4F Wildcats, 5 SBD Dauntless, and 5 TBD Devastators
Image

_________________
"Also we will never see a 1/350 late war Enterprise from Dragon due to a paralyzing fear of success...." - Heavy Melder

Lots of unfinished model ships + attention issues = A busy slipway where nothing gets done!


Report this post
Top
 Profile  
Reply with quote  
PostPosted: Sat Feb 28, 2015 5:35 am 
Offline

Joined: Sun Aug 15, 2010 6:19 pm
Posts: 700
More progress began with the island itself. One of the trickiest p/e builds for this kind of carrier are the rear stairs and rails. I had struggled with it in 1/700, so wasn't exactly looking forward to it in 1/350. However, Merit made it pretty easy, kudos to them.
Image

Image

Wings added to the Fire Control Platform
Image

With most of the gaps filled in, the PryFly was attached
Image

The railing infront required a bit of trimming, came very close to ruining the p/e, but after an hour managed to make it look decent
Image

A good side view to show the p/e added, all supplied from the kit. The stuff is great to work with for the most part
Image

PryFly Supports added
Image

Now adding the p/e above the PryFly (hate curving p/e), and starting to get the hull ready for primer prep, as its now firmly attached to its new base.

_________________
"Also we will never see a 1/350 late war Enterprise from Dragon due to a paralyzing fear of success...." - Heavy Melder

Lots of unfinished model ships + attention issues = A busy slipway where nothing gets done!


Report this post
Top
 Profile  
Reply with quote  
PostPosted: Sat Feb 28, 2015 6:58 am 
Offline

Joined: Tue Sep 17, 2013 12:16 pm
Posts: 350
Very nice start! I was waiting to see a construction thread of this one. It seems to be a very nice kit.

_________________
CV-8: http://www.shipmodels.info/mws_forum/viewtopic.php?f=59&t=153851
DD-436: http://www.shipmodels.info/mws_forum/viewtopic.php?f=59&t=157123
CVL-24 http://www.shipmodels.info/mws_forum/viewtopic.php?f=59&t=158455


Report this post
Top
 Profile  
Reply with quote  
PostPosted: Sat Feb 28, 2015 9:02 am 
Offline
User avatar

Joined: Wed Mar 30, 2011 9:38 am
Posts: 1381
I did not realize the kit included that much PE. Looking good so far!

_________________
Gabriel


Report this post
Top
 Profile  
Reply with quote  
PostPosted: Sat Feb 28, 2015 12:59 pm 
Offline

Joined: Tue Jan 11, 2005 10:56 am
Posts: 8577
Location: New York City
Nice clean work. Makes it look very good.


Report this post
Top
 Profile  
Reply with quote  
PostPosted: Sat Feb 28, 2015 1:14 pm 
Offline
User avatar

Joined: Tue Jan 22, 2008 5:55 pm
Posts: 320
Location: Hoover, Alabama
Very nice build thus far!! :thumbs_up_1:

I'm looking forward to seeing your progress as I am still in the process of sanding down the hull whenever I have time.

TOMLABEL

_________________
Image


Report this post
Top
 Profile  
Reply with quote  
PostPosted: Sat Feb 28, 2015 3:22 pm 
Offline
User avatar

Joined: Mon Oct 13, 2014 5:39 pm
Posts: 668
Location: San Tan Valley Arizona
Nice to see a build log on this. Looking forward to your next update.

_________________
Mark
Master Gunnery Sergeant USMC (Ret.)
http://www.modelshipgallery.com/gallery ... index.html

On the bench:

1/200 USS Enterprise, CV-6


Report this post
Top
 Profile  
Reply with quote  
PostPosted: Sat Feb 28, 2015 3:41 pm 
Offline
Model Monkey
Model Monkey

Joined: Sat Aug 20, 2005 9:27 pm
Posts: 3954
Location: USA
Angeliccypher wrote:
I did not realize the kit included that much PE. Looking good so far!


Hear, hear. Included PE definitely makes the price of the kit look better, too.

Looks great.

_________________
Have fun, Monkey around.™

-Steve L.

Complete catalog: - https://www.model-monkey.com/
Follow Model Monkey® on Facebook: - https://www.facebook.com/modelmonkeybookandhobby


Report this post
Top
 Profile  
Reply with quote  
PostPosted: Sat Feb 28, 2015 9:49 pm 
Offline
User avatar

Joined: Mon Jan 24, 2005 8:53 am
Posts: 154
Location: Southern New Jersey
Your off to a great start!


Report this post
Top
 Profile  
Reply with quote  
PostPosted: Sat Feb 28, 2015 11:50 pm 
Offline
User avatar

Joined: Tue Jan 11, 2005 1:40 pm
Posts: 8179
Location: New Jersey
Great start!

_________________
Martin

"Tomorrow is the most important thing in life. Comes into us at midnight very clean. It's perfect when it arrives and it puts itself in our hands. It hopes we've learned something from yesterday." John Wayne

Ship Model Gallery


Report this post
Top
 Profile  
Reply with quote  
PostPosted: Sun Mar 01, 2015 4:40 am 
Offline

Joined: Sun Aug 15, 2010 6:19 pm
Posts: 700
Thanks all

You do get a good amount of p/e, enough to finish the carrier. All rails are premeasured and for the most part, fit.
Image

More rails on the island, god I hate curving p/e...
Image

_________________
"Also we will never see a 1/350 late war Enterprise from Dragon due to a paralyzing fear of success...." - Heavy Melder

Lots of unfinished model ships + attention issues = A busy slipway where nothing gets done!


Report this post
Top
 Profile  
Reply with quote  
PostPosted: Mon Mar 02, 2015 9:31 am 
Offline
User avatar

Joined: Thu Feb 16, 2012 10:00 am
Posts: 121
Location: Neenah
Thanks for this, JTninja. It'll be nice to have a reference like this when I start mine. There are lots of talented builders here who see things which aren't obvious to me.

Having all the PE included is what pushed me over the edge to get it. I'm torn about how far to go (if at all) with replacing the kit armament.

I did get an aftermarket decal set for the air group, but I am happy with this kit.

The graded Ms 12 will be a nice change of scenery in my cabinet too. :smallsmile: 
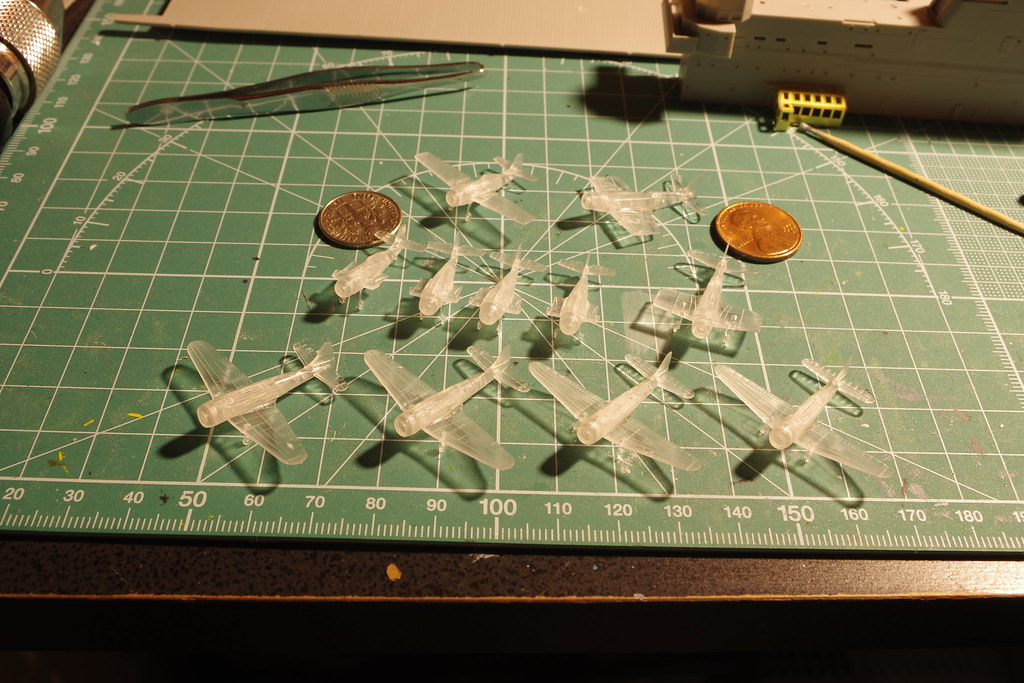
Too much Ms 21 makes me go blind.

Ed


Report this post
Top
 Profile  
Reply with quote  
PostPosted: Mon Mar 02, 2015 10:59 am 
Offline
User avatar

Joined: Mon Jan 10, 2005 10:46 am
Posts: 2411
Location: Hoboken, NJ
Outstanding work so far. Really glad to see that the PE is going together well with the island. I know that was one of the questions they had at Merit as they didn't have time to do a full test build before the kit went to production.

I'm hoping to start sanding and cutting my hull either this coming weekend or next: I'm removing the plating and cutting her down to waterline.

_________________
We like our history sanitized and theme-parked and self-congratulatory, not bloody and angry and unflattering. - Jonathan Yardley


Report this post
Top
 Profile  
Reply with quote  
PostPosted: Mon Mar 02, 2015 11:17 am 
Offline
User avatar

Joined: Sun Mar 13, 2011 12:19 am
Posts: 313
Location: Fredericton NB, Canada
Very, very nice! And I also wanted to compliment you on the picture quality, which is outstanding. If you don't mind, may I ask what kind of camera you are using and if you are employing any special settings? -Tim


Report this post
Top
 Profile  
Reply with quote  
PostPosted: Mon Mar 02, 2015 9:39 pm 
Offline
User avatar

Joined: Tue Sep 25, 2012 8:11 am
Posts: 647
Location: Elyria, Ohio USA
Great looking build so far. I don't do much 1/350 but I love the Yorktown so I am watching this build with interest. I may have to grab one of these for myself!!

_________________
Just finished:
1/350 USS Santee 1944

Current projects:
1/700 USS Catamount 1960
1/350 USS Columbia 1945
1/350 USS San Francisco 1944


Report this post
Top
 Profile  
Reply with quote  
PostPosted: Wed May 06, 2015 7:25 pm 
Offline
User avatar

Joined: Mon Oct 13, 2014 5:39 pm
Posts: 668
Location: San Tan Valley Arizona
All the bru ha ha over this model and no posts in over two months. What's up with that?

_________________
Mark
Master Gunnery Sergeant USMC (Ret.)
http://www.modelshipgallery.com/gallery ... index.html

On the bench:

1/200 USS Enterprise, CV-6


Report this post
Top
 Profile  
Reply with quote  
PostPosted: Thu May 07, 2015 2:05 pm 
Offline

Joined: Sun Aug 15, 2010 6:19 pm
Posts: 700
Thanks everyone for the nice words :)

ComfortablyNumb wrote:
If you don't mind, may I ask what kind of camera you are using and if you are employing any special settings? -Tim


I use a Pentax K-3 with a 18-135mm lens on a tripod, and shoot on a timer so I can have a longer shutter to get more detail :)

Mgunns wrote:
All the bru ha ha over this model and no posts in over two months. What's up with that?


Little progress and have been rather busy. With our local IPMS show in April, I spent much more time on my model cars and the ship, mainly because those were nearly finished and could be in time for the show. Also have 2 different weeks when I was out of state. So lots of time lost. Now I have a bit of time to keep working until Mid-June. The hull has been primered and will be painted over the next week and a half. Once thats done I can get the hanger deck going well. Heres some shots of the hull and gap filling.

Image

Image

Image


One area I ran into trouble was the forward railing that cuts into the front of the what I think are the exhaust funnels. The directions on mention 1 piece of railing is used, but in reality that single piece is not long enough. After doing a bit of research, I found a picture of Merit's built model shows they used a different railing around the spot lights. Wish the instructions could tell me what to use, but alas, thats something I'll have to figure out later.

Image

Image

Also worth noting, the top railing to the funnels is terrible. You're supposed to be the struts downwards and attach to the funnel cover. Good idea, except in this case, the struts are strong that the rail itself, so every time I attempted to bend a strut downwards, the entire rail became bent and twisted. This single rail took me about 2 weeks to complete due to lack of patience and frustration.

Image

_________________
"Also we will never see a 1/350 late war Enterprise from Dragon due to a paralyzing fear of success...." - Heavy Melder

Lots of unfinished model ships + attention issues = A busy slipway where nothing gets done!


Report this post
Top
 Profile  
Reply with quote  
PostPosted: Thu May 07, 2015 10:21 pm 
Thank you for the info you have shared on your OOB build!!! It will be invaluable to the rest of us who are planning different approaches to building this kit! :worship_1:

I see you have run into the same type of difficulties as me. I should have had the hull sanded smooth by now, but the Indy races at Barbers Motor Speedway, work/friends/life/etc recently, all seem to interject themselves at the most in-opportune moments.

I will be posting some pics of a sanded hull very soon the the Merit Yorki Hull thread soon (hopefully)!!! But......

TOMLABEL


Report this post
Top
  
Reply with quote  
PostPosted: Fri May 08, 2015 5:44 am 
Offline
User avatar

Joined: Wed Mar 30, 2011 9:38 am
Posts: 1381
Those funnel railings were just as ugly using aftermarket on the CV-8. Although the engineering was not the issue. It was the kindergarten level drawings they used for the instructions. You on the other hand I applaud. Your work result is very good.

_________________
Gabriel


Report this post
Top
 Profile  
Reply with quote  
PostPosted: Fri May 08, 2015 2:54 pm 
Offline
User avatar

Joined: Mon Oct 13, 2014 5:39 pm
Posts: 668
Location: San Tan Valley Arizona
Thanks for sharing your work and frustration with the PE railings. What you have done is noteworthy. Maybe the aftermarket guys will come up with something better PE wise than the kit PE. I have this kit and it is on the list, but now the 1/200 Arizona occupies my time.
I'm glad you posted and I look forward to your updates on this model.

_________________
Mark
Master Gunnery Sergeant USMC (Ret.)
http://www.modelshipgallery.com/gallery ... index.html

On the bench:

1/200 USS Enterprise, CV-6


Report this post
Top
 Profile  
Reply with quote  
Display posts from previous:  Sort by  
Post new topic Reply to topic  [ 33 posts ]  Go to page 1, 2  Next

All times are UTC - 6 hours [ DST ]


Who is online

Users browsing this forum: No registered users and 133 guests


You can post new topics in this forum
You can reply to topics in this forum
You cannot edit your posts in this forum
You cannot delete your posts in this forum
You cannot post attachments in this forum

Jump to:  
Powered by phpBB® Forum Software © phpBB Group