Many thanks guys!

Rui, well spotted! I put a metal shine on the top of the tracks with pencil, but it doesn't really show in in the photo's. I still have a railcar to place on it, so it must still be in use...
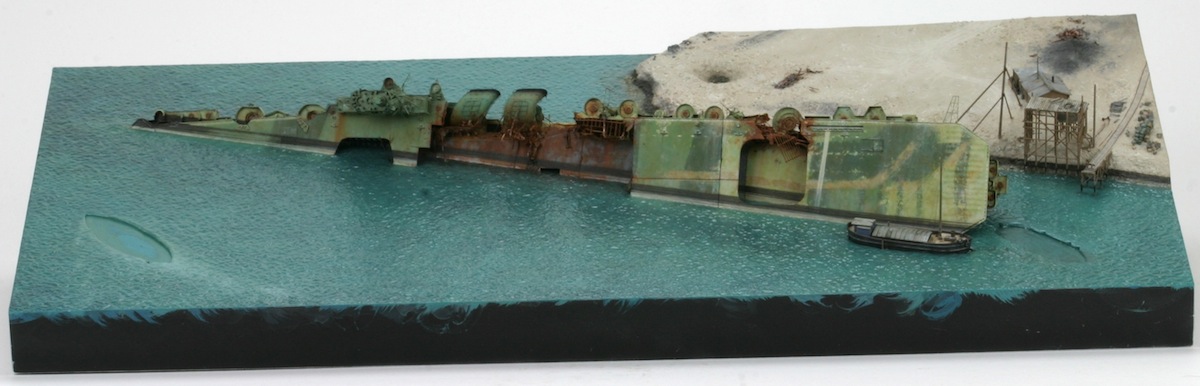
Meanwhile, I started the seascape. I find this to be one of the most difficult challenges in small-scale ship modelling. But that makes it fun too, no?
For the colour, I took inspiration from the youtube-video, which has some variation of blueish and greenish tones.
I started by applying a slightly too light and bright basecoat by brush on the textured watercolour paper I used for the sea:
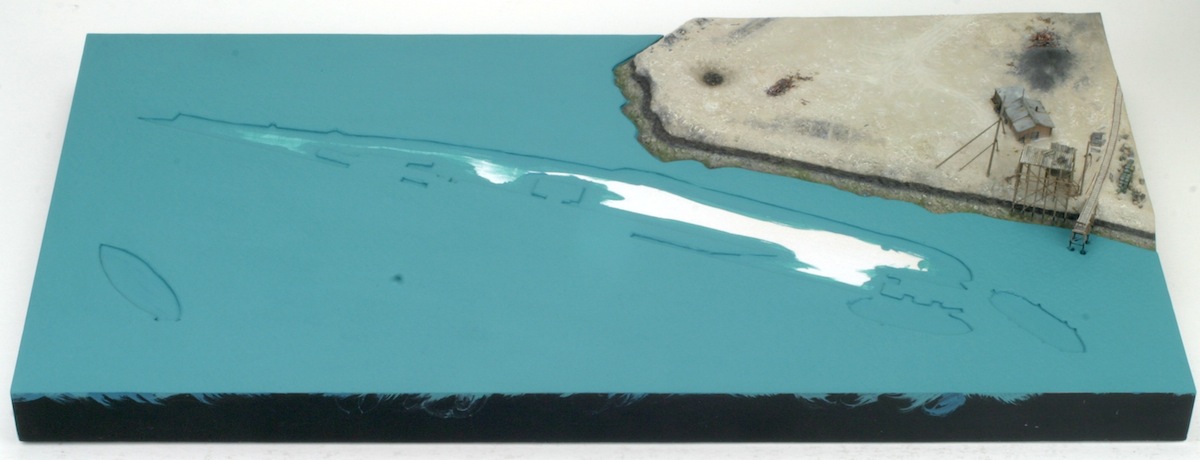
Next, I applied multiple layers of paint to locally change this basecoat, and to get more depth and variation.
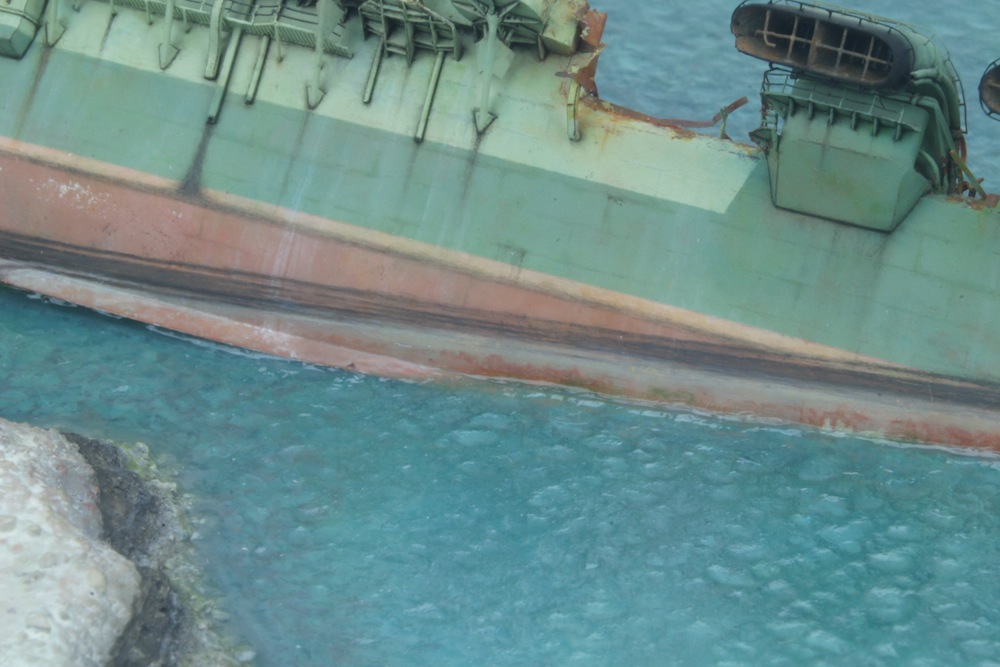
Close to the ship and the island, I worked the colours of the ship and the island into the sea-colours for the illusion of depth and translucency. The process is hard to describe as I had to mess around a lot to get the result I was after, constantly test-placing Amagi in position so I could judge the colours by eye. I used acrylic paints by brush, usually heavily diluted and applied as washes or glazes. I often wetted the surface with plain water before applying the paints so I could blend the edges.
In close-up, it is easier to see the effect. Basecoat:
And fully painted. Multiple greens and blues were added for depth, often letting them flow in the texture of the paper. Brown tones were added near the island. Keep in mind that this surface is still matt.
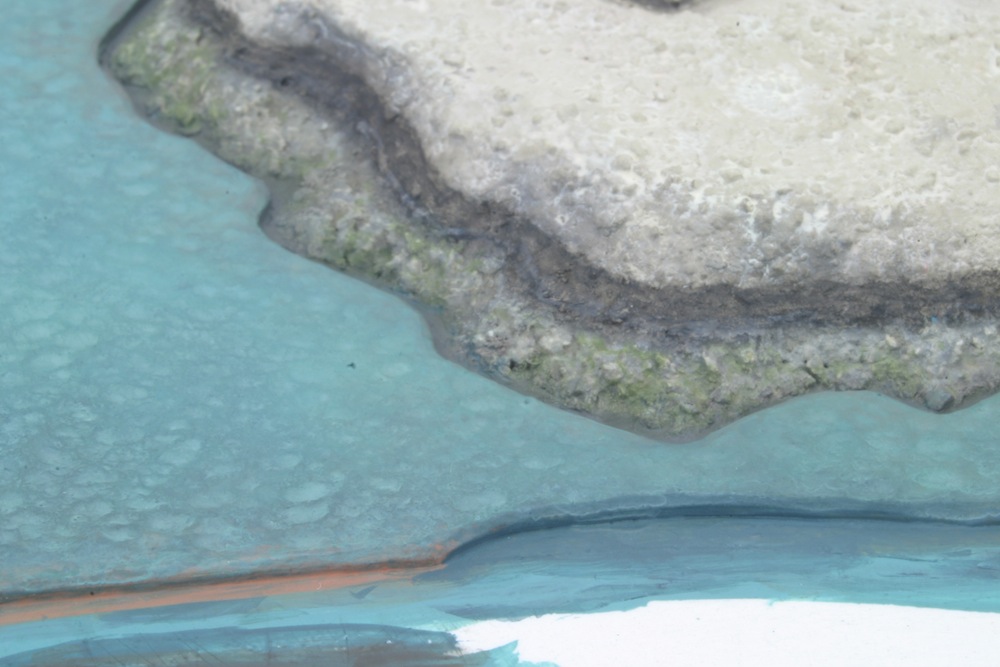
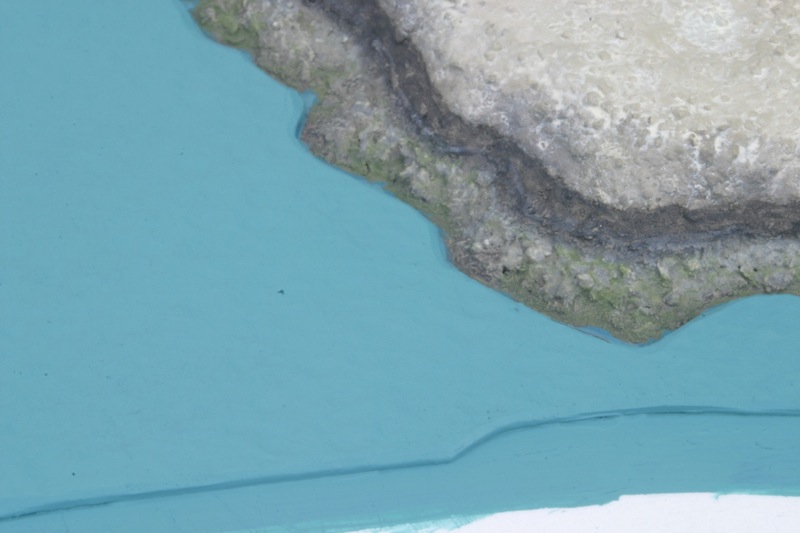
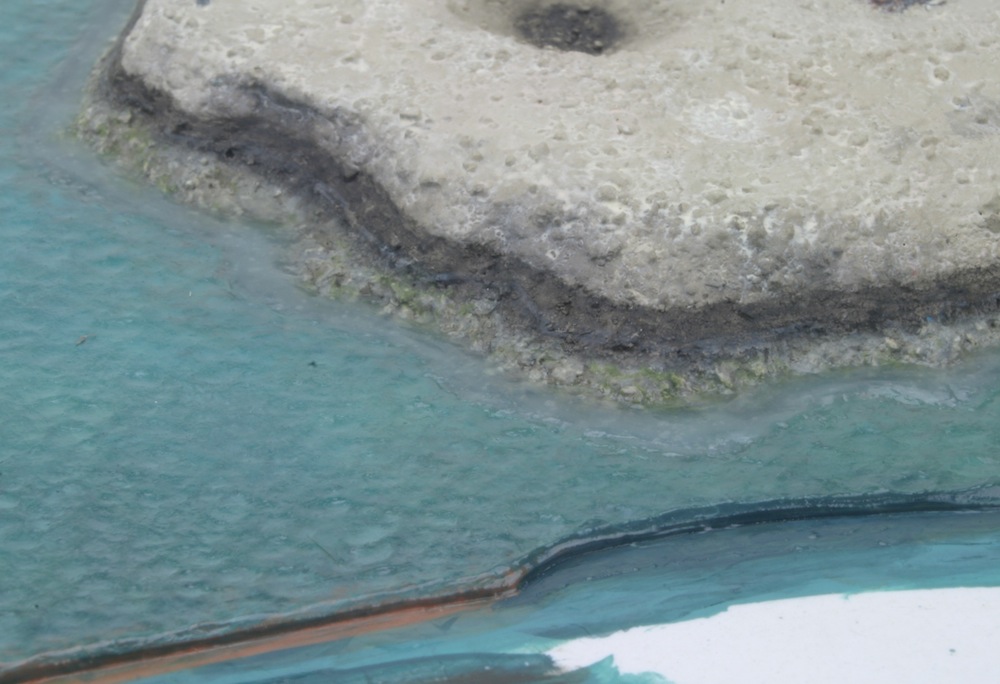
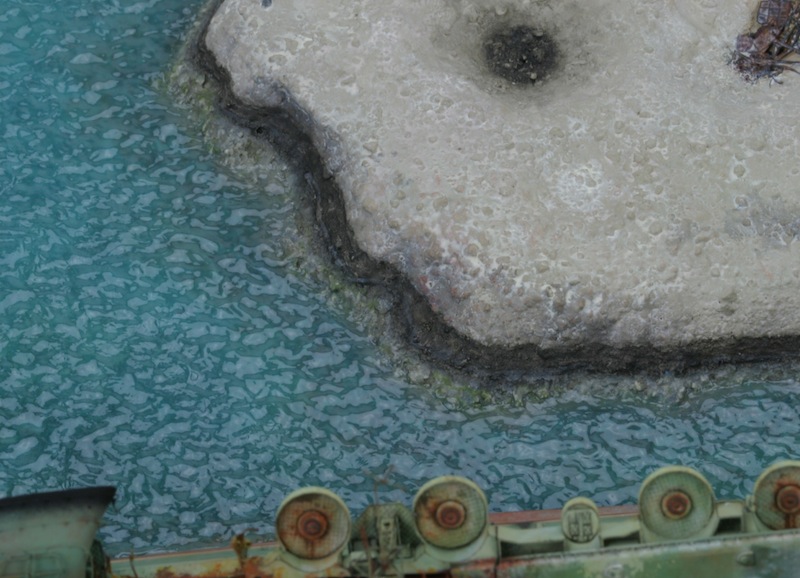
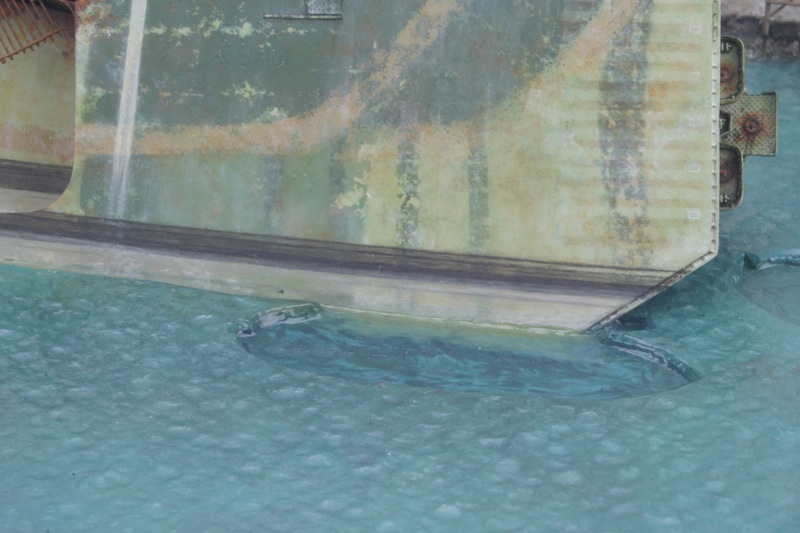
Next, gloss varnish was brushed on top of this. After drying, the gap between the watercolour paper and the island was filled with a mixture of AK 8002 Water Gel (transparent) and acrylic paint. This provides a slightly transparent depth effect near the island. The stuff shrinks, so it took 5 or 6 layers to fill the gap completely.
Next, the border of the paper and the filling was disguised with some more paint. The conspicuous difference in surface texture will be eliminated by the next step.
And that step is the application of pure transparent AK water gel in a thin layer, dappling the gel with a brush to create wavelets. I always liked the effect David Griffith gets, but my own experiments with acrylic gels always resulted in too sharp wavelets. I tried different brands, but even with the softest gels I wasn’t happy. But then I followed the advice Won Hui Lee gives in his water tutorial to try the AK water gel, and it works perfectly! I think the stuff is also an acrylic gel, but thinned down (the smell has a hint of vinegar to it?) just enough so the wavelets settle down without showing obvious brush-marks.
The watercolour paper can also give a nice wavelet-texture by itself, but the gel gives more sense of depth and looks simply more ‘watery’.
I will apply one or two coats of gloss varnish on top of it to tone down the texture of the wavelets further (also did some tests with that), but I can only do that after everything is integrated in the seascape.
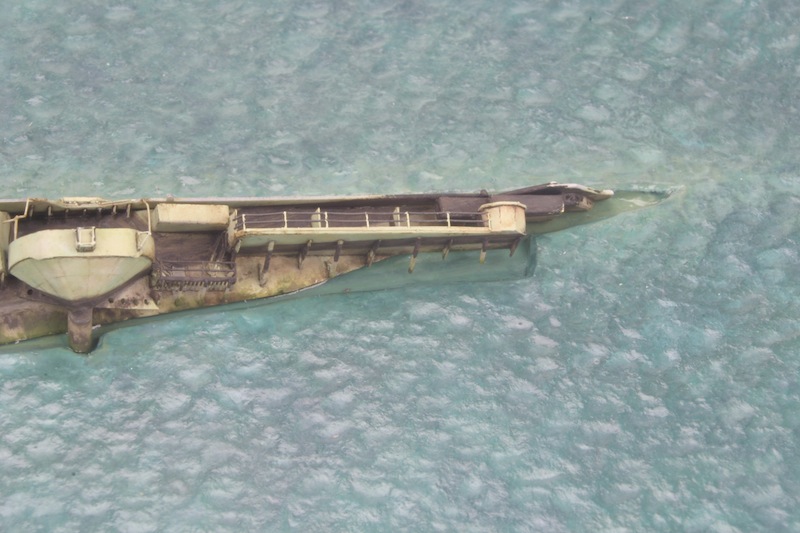
Before the wavelets were added, I glued Amagi in her final position:

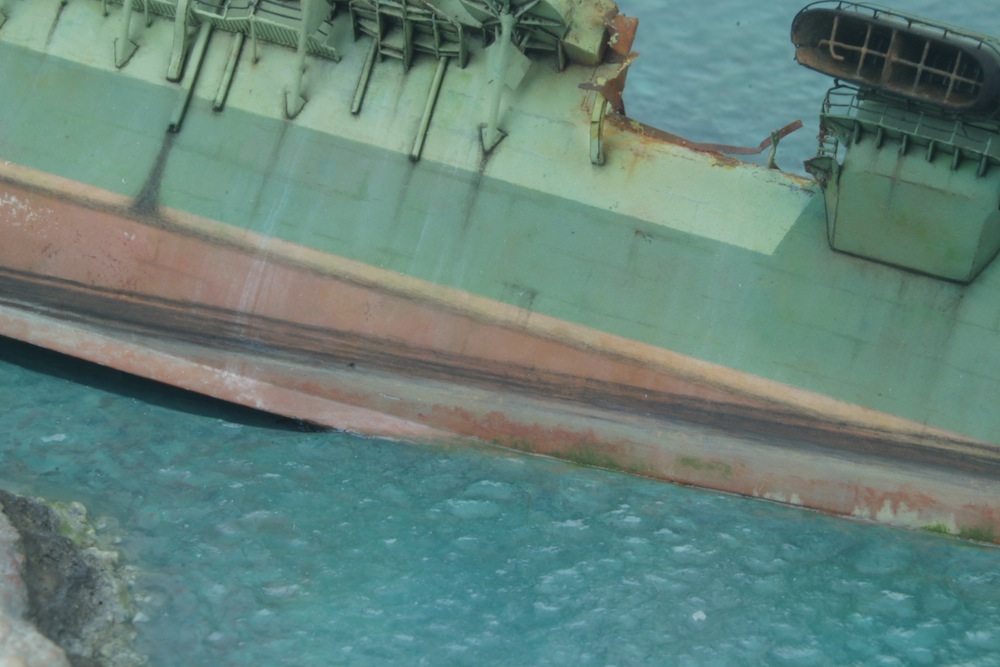
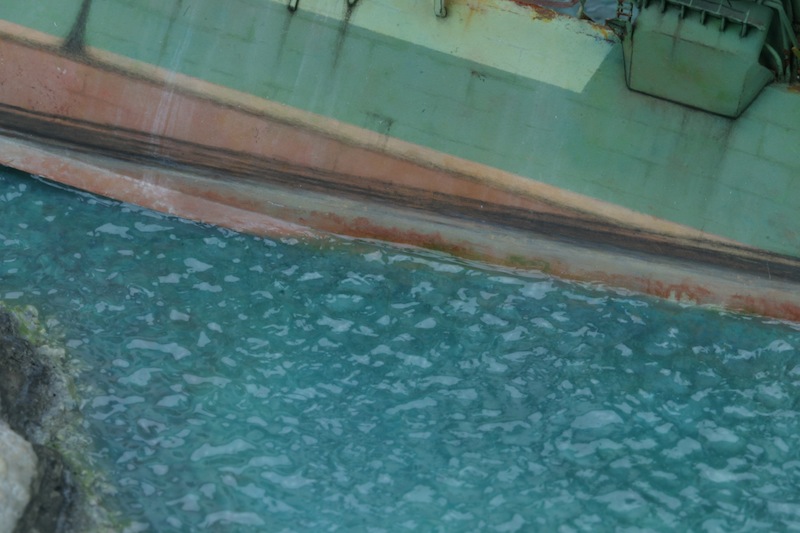
Unfortunaltely, I had not taken enough care to get everything perfectly level at the sea-level. But I have to admit that that was very difficult to achieve, because the deck sections remained separate during construction and painting. Anyway, the result is gaps in need of filling:
I filled the gaps with Magic Sculp. The bilge keel was also extended with this two part putty. As I had cut the front edge of the ship a bit too optimistically, I had to extend this a bit too, which I did with some left-over flight deck edge from the plastic kit.
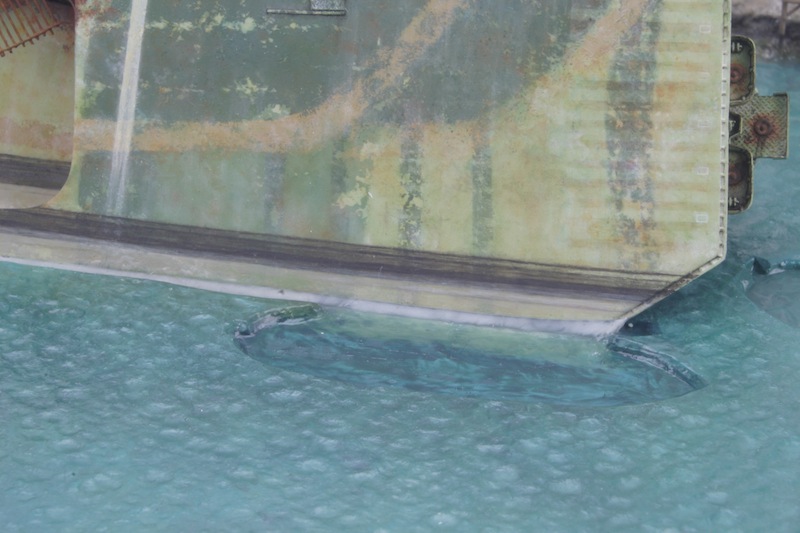
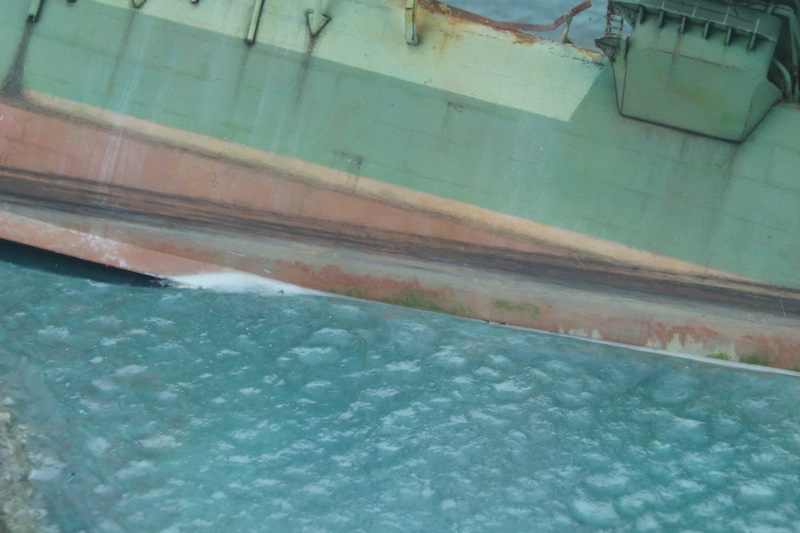
The filled gaps of course needed to be painted:

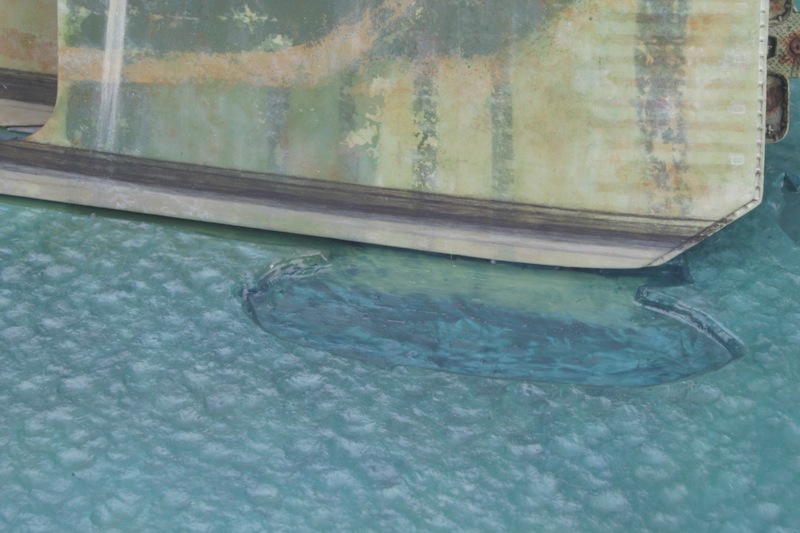
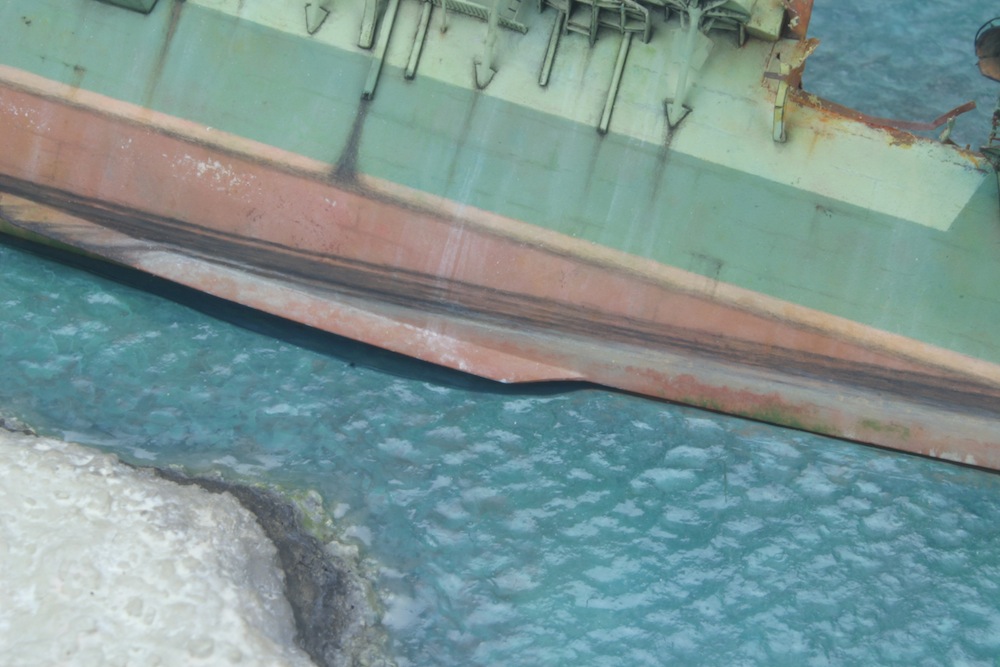
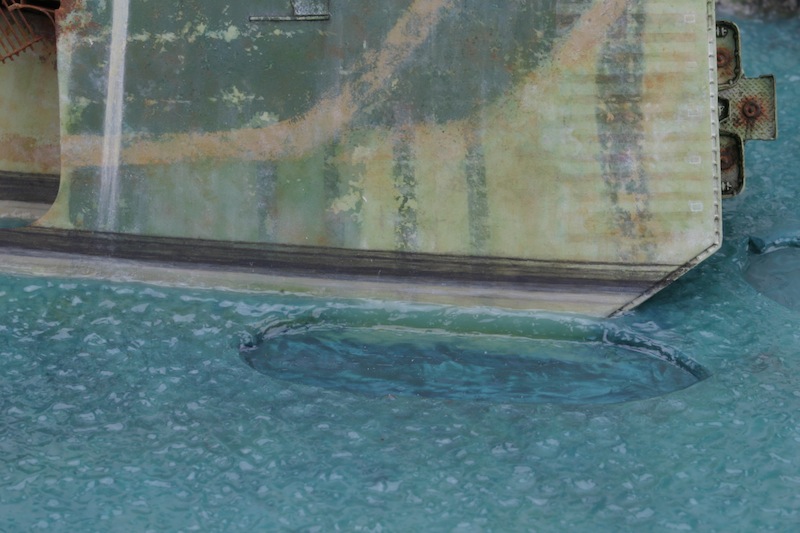
Now, the gaps between paper and ship could be filled like described above:
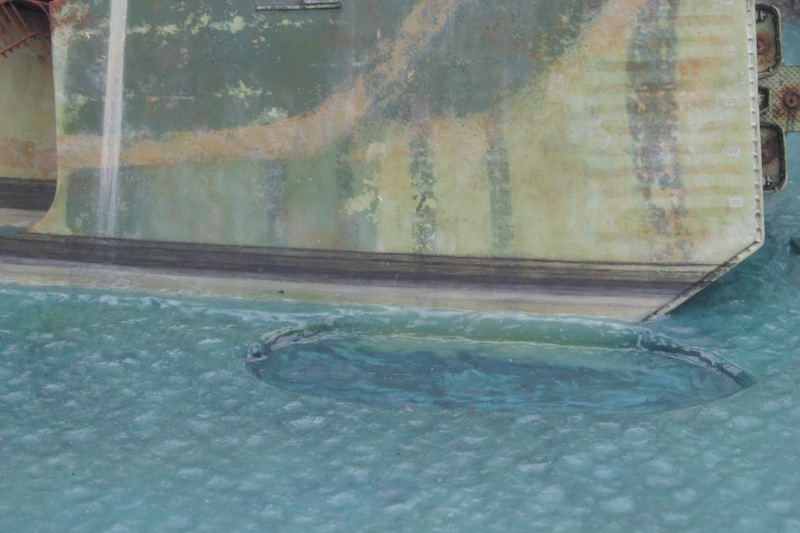
And finally wavelets were added. As mentioned before, their texture will still be toned down a bit with one or more layers of gloss varnish.
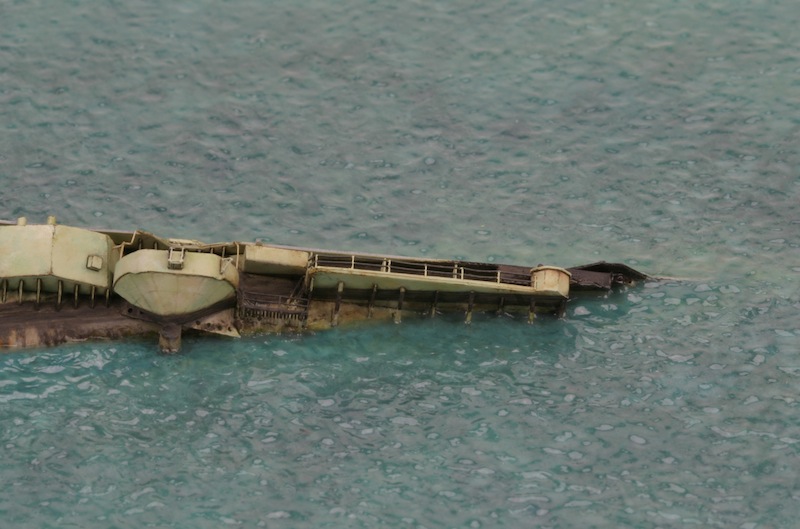
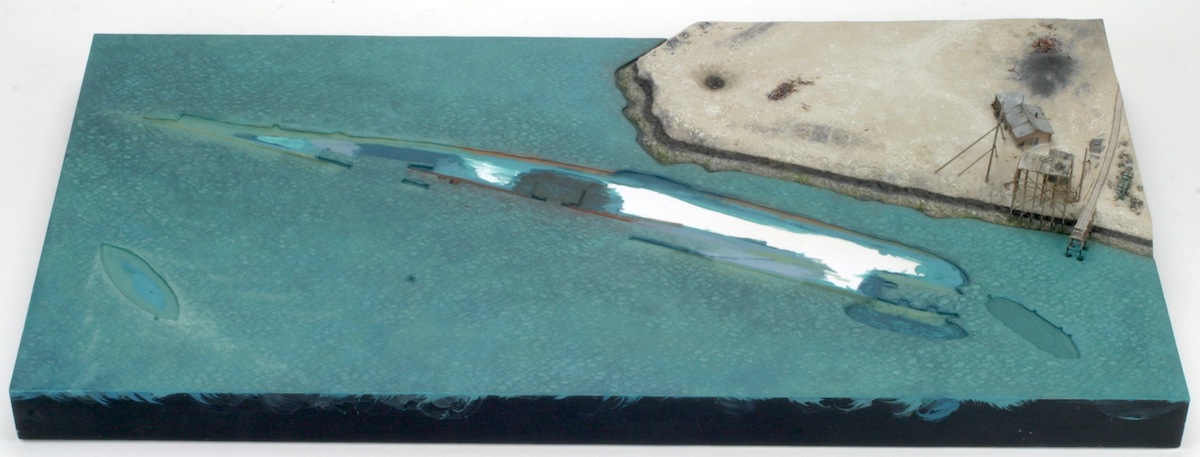
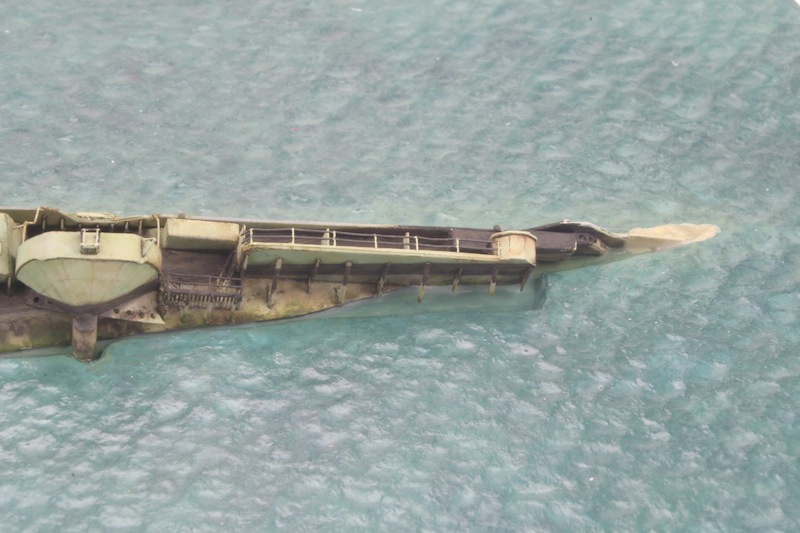
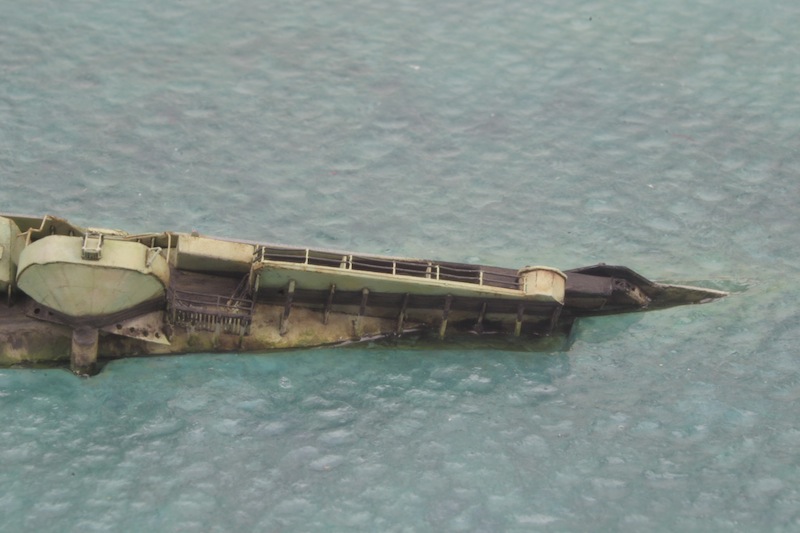
And an overview. The lighter still needs to be integrated further.
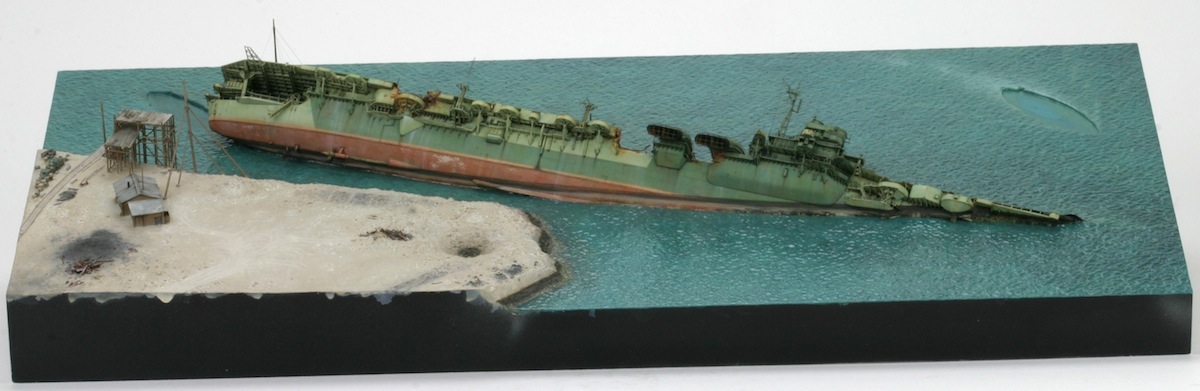
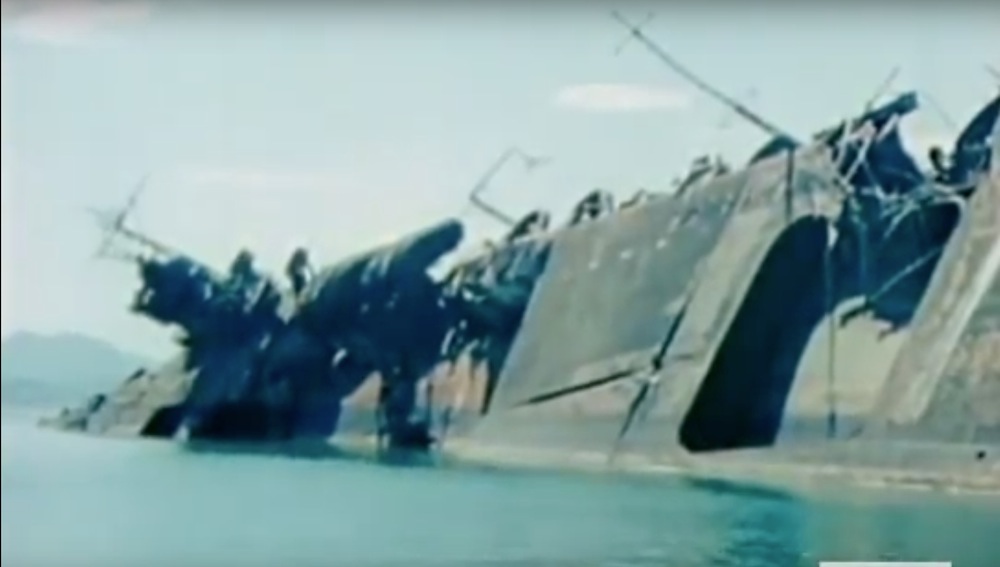
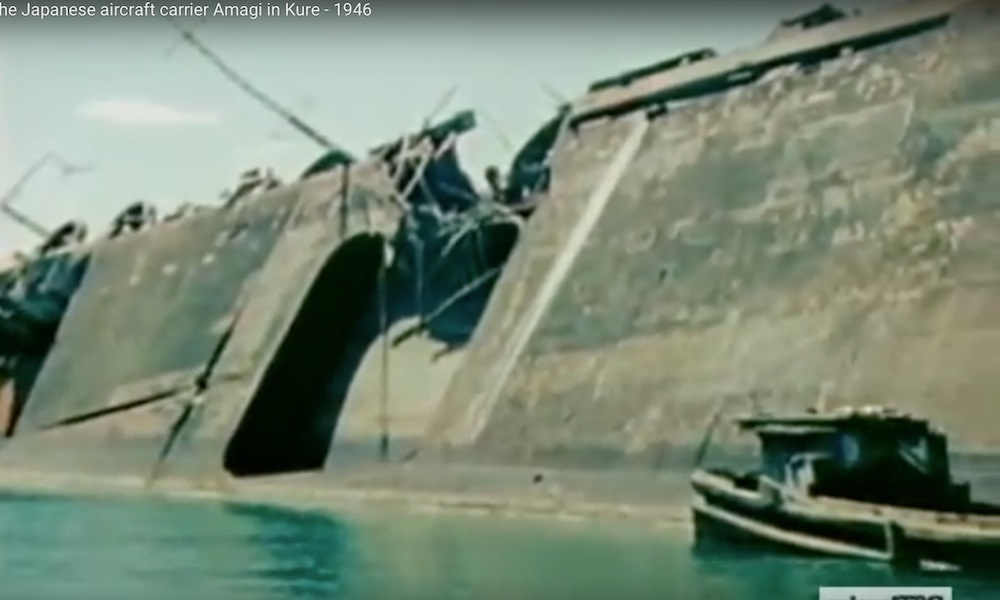
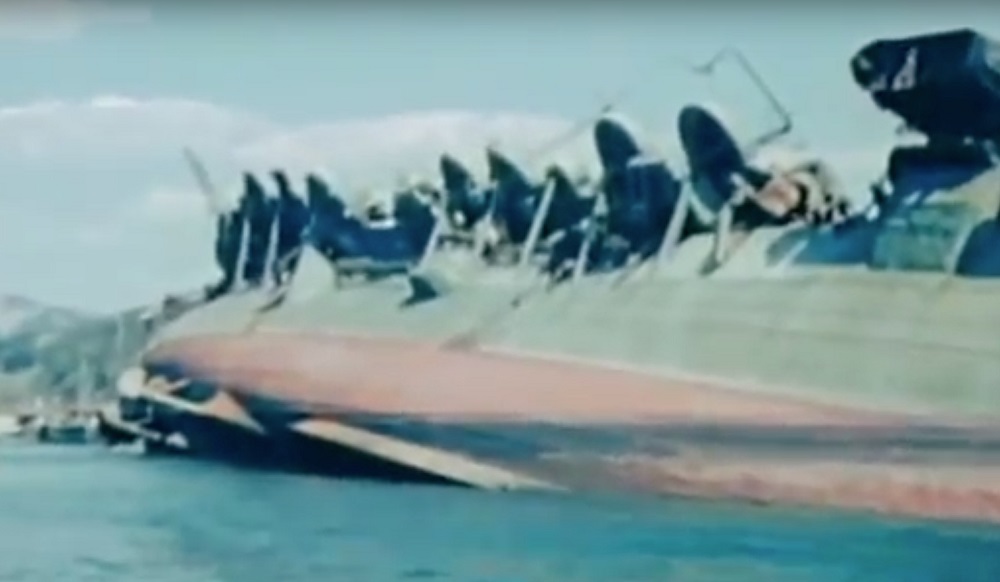
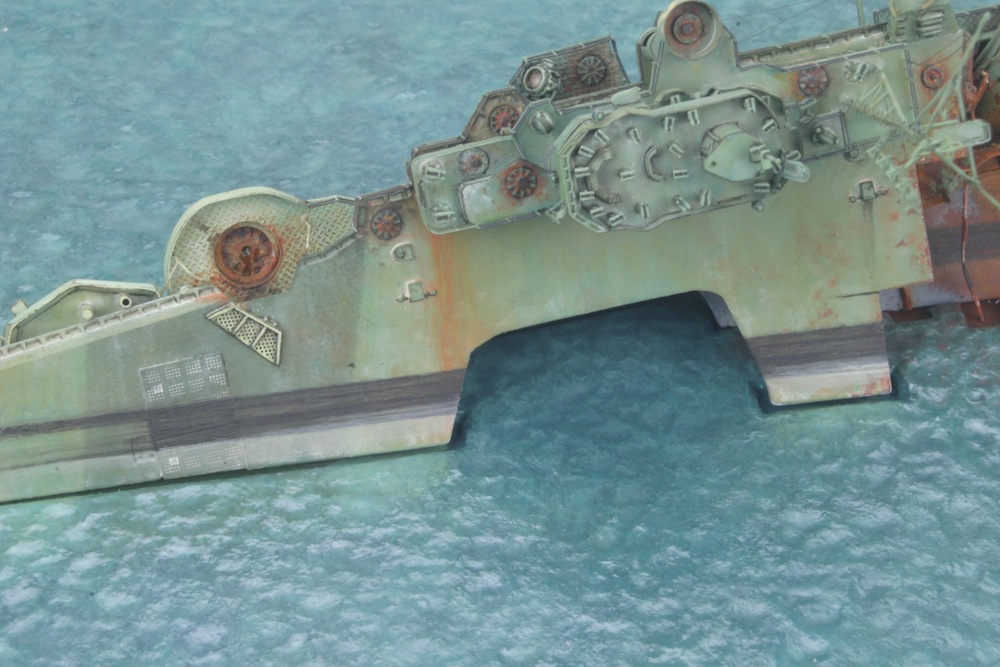
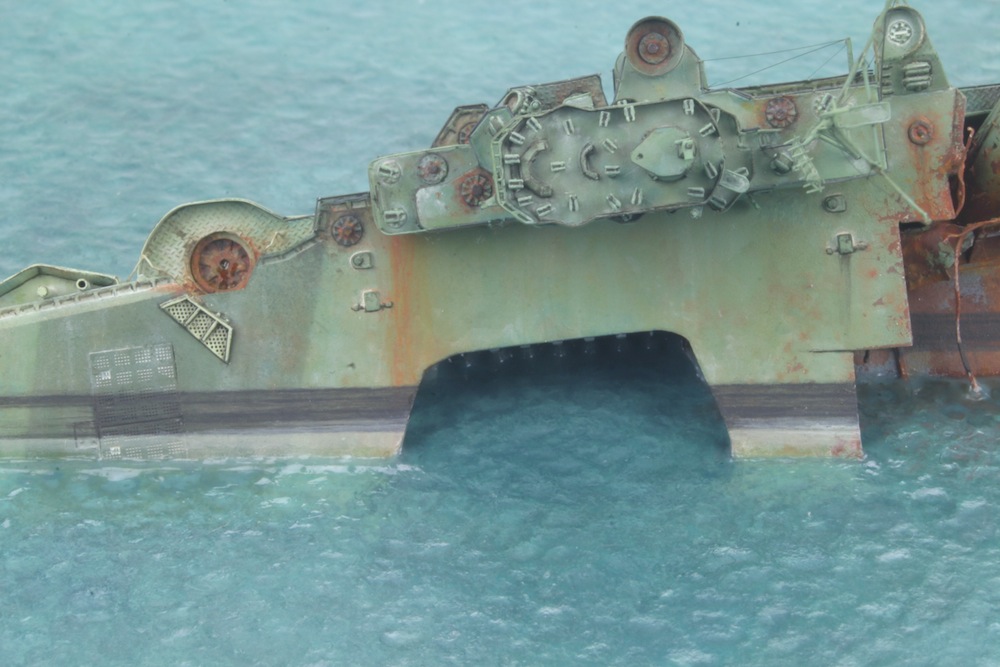
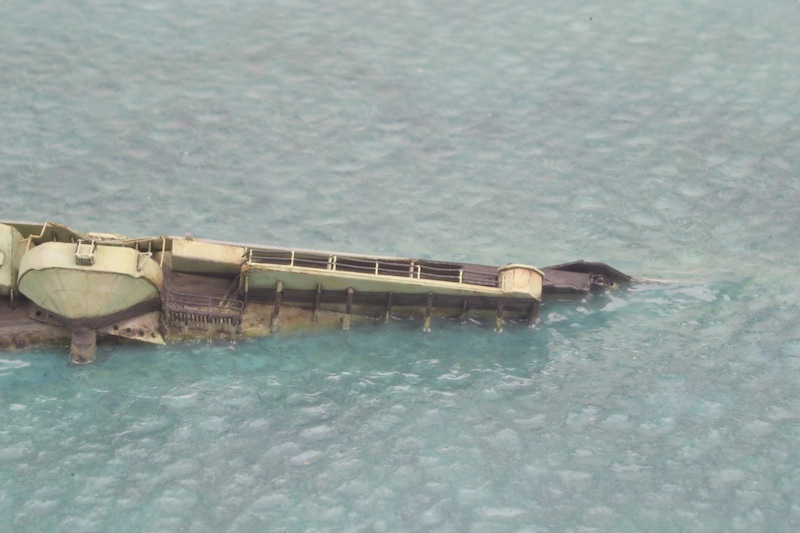
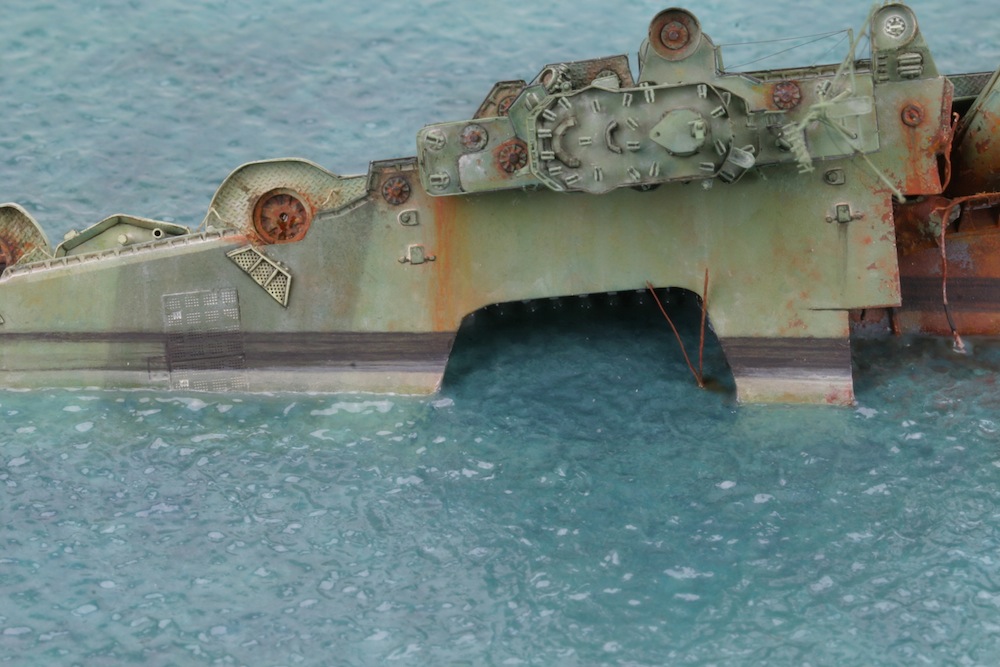
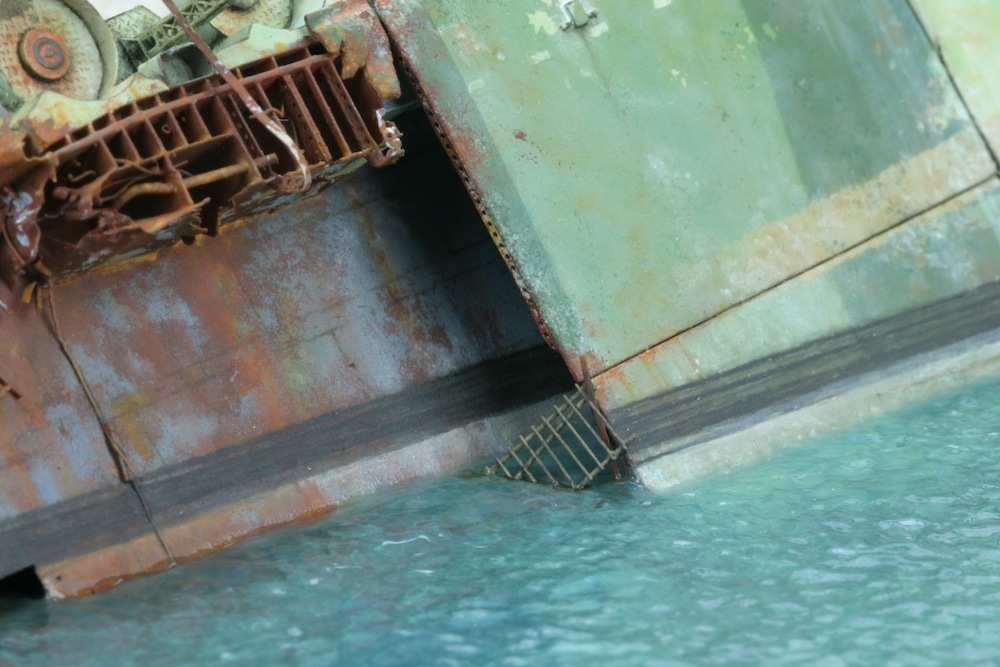
As you can see in the photo’s above, I added a couple of strips of wreckage to the sea in the forward elevator area at this point, following the period photographs. I also added another structure against the aft flight deck section, according to these photographs:
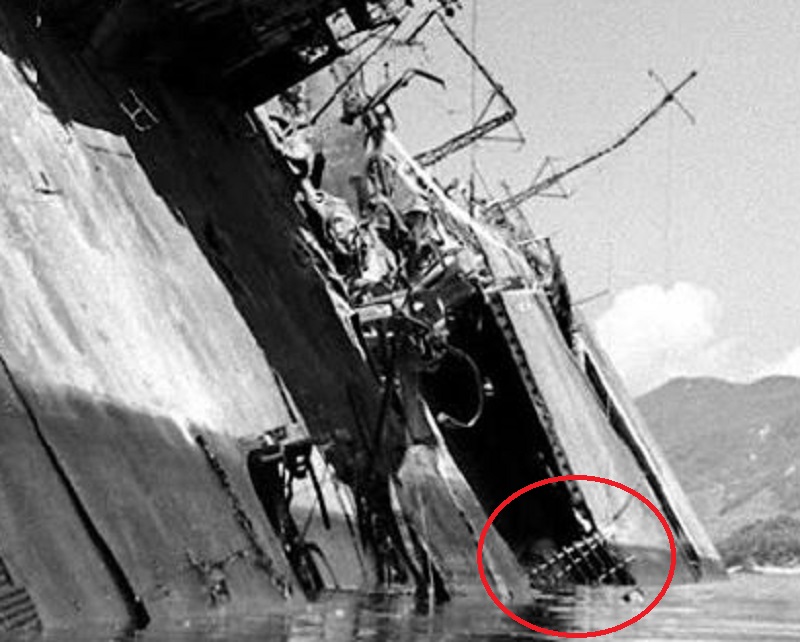
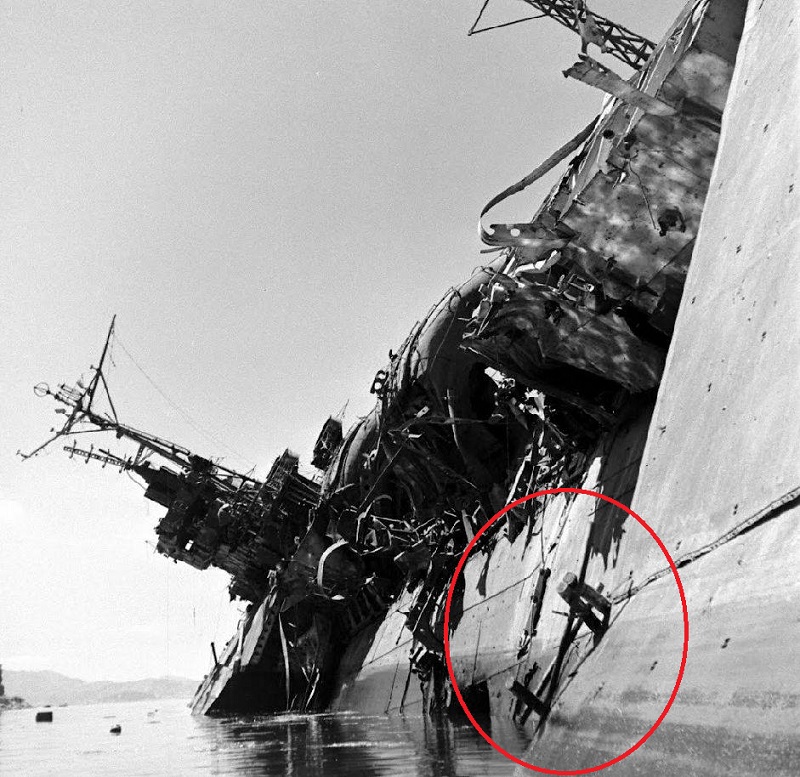
I’m not sure what it is, but the last photo indicates it is made from wood. Is it a kind of ladder, placed in this position after the first air raid, when the flight deck was blown out but the ship was still floating upright? Or is it a piece of one of the fake houses or other structures which were used on the flight deck as camouflage?
Whatever it is, I just tried to copy the photo’s:
I have been working on the small ships too, so I hope to post them soon.
Cheers!
Marijn


 Incredible model-making on so many levels. Bravo!