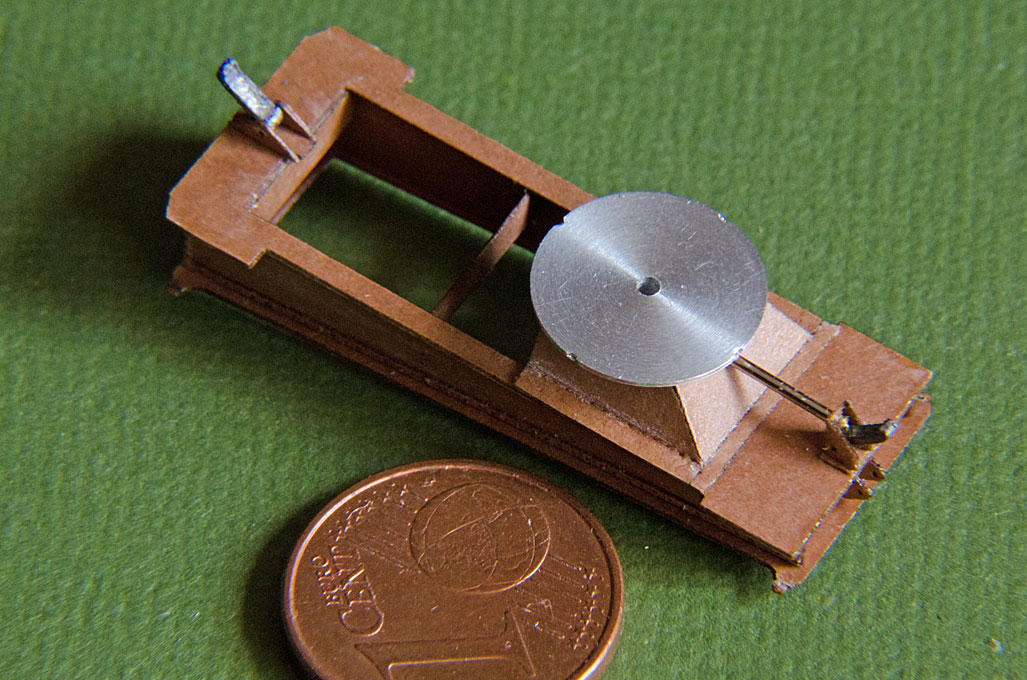
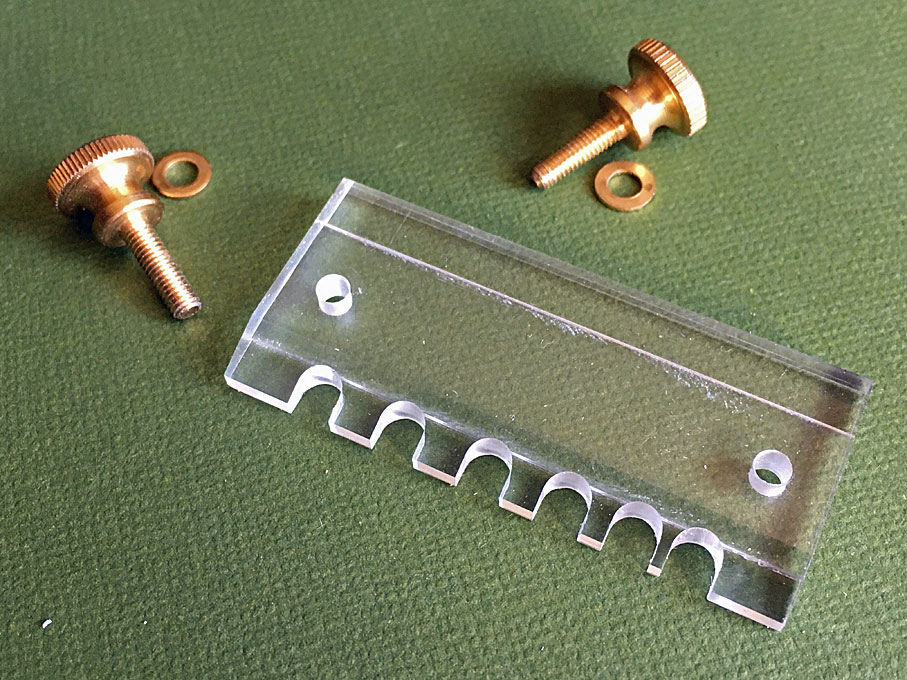
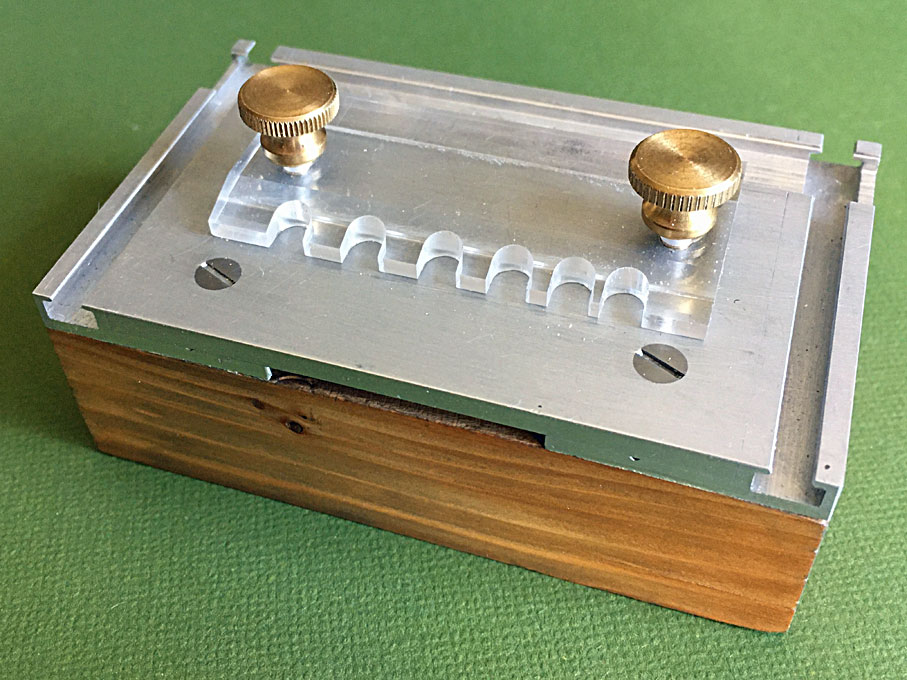
The Ship Model Forum

The Ship Modelers Source
It is currently Tue Apr 16, 2024 2:53 am

All times are UTC - 6 hours [ DST ]


Post new topic Reply to topic  [ 384 posts ]  Go to page Previous  1 ... 3, 4, 5, 6, 7, 8, 9 ... 20  Next
Author Message
PostPosted: Fri Mar 27, 2020 6:31 am 
Offline

Joined: Tue Feb 06, 2007 10:24 am
Posts: 2490
Location: Belgium
Your last post in my thread made me realise I have been neglecting the scratchbuilding forum badly, and I missed this project completely. :Mad_5: :Oops_1:

It was a pleasure to read through it from the beginning now! Extremely educational!
What a spectacular build; true engineering in miniature! :thumbs_up_1: :thumbs_up_1: :thumbs_up_1:


Report this post
Top
 Profile  
Reply with quote  
PostPosted: Sat Mar 28, 2020 11:38 am 
Online
User avatar

Joined: Wed Sep 28, 2011 12:04 pm
Posts: 1815
Location: Paris
Thanks for the kind words !

****************************

Buffer beams

In order to limit the recoil and the running out of the gun, buffer beams are installed at both ends of the frame of the lower carriage. Each beam carries four buffers against which the front cross-beam of the upper carriage runs. The buffers are designed as pistons with piston rods screwed to the back of the beam. It is not completely clear what the elastic elements were. The drawings seem to indicate rubber discs with metal separating discs. On some of the guns at Suomenlinna fortress there are remains of rubber discs, while the demonstration model of the Danish navy seems to have spiral springs.

Image
Buffer beams on the lower carriage

The bodies of the buffers were turned from 1 mm soft steel wire. The spring element was simulated by winding around it several turns of 0.15 mm tinned copper wire. Whether this is meant to meant to represent rubber discs or springs I will decide, when it comes to the painting stage.

Image
One buffer dry-mounted

The nuts that keep the buffers to the beam were also turned from 1 mm soft steel wire. First, the hexagon for a 0.6 mm spanner width was milled on in the dividing head of the micro-mill. On the lathe a 0.4 mm hole was drilled and 0.3 mm long nuts parted off. And no, I didn’t cut a 0.4 mm thread ;)

Image
Buffers and fastening nuts

The parts of the buffer beams were laser-cut from 0.15 mm thick Canson paper and soaked in wood-sealer. They were folded and assembled using zapon varnish. In order to make folding more precise, a row of tiny holes were ‘punched’ along the folding lines with the laser-cutter, which weakens the material there. The rivetting was simulated by tiny drops of acrylic gel that was applied with a syringe and a fine injection needle. The needle was ground flat at the end for this purpose.

Image
Buffers and fastening nuts – the buffer have a diameter of 1 mm

More details were added to the lower carriage. A heavy forged claw at each end of the frame hooks under the rail on which the carriage trucks run to prevent the carriage from lifting off the pivot. The profile of the hooks was taken off the original drawings and cut in multiple copies from Canson paper. These were glued together as a stack and sanded smooth – not a 100% satisfying solution, but filing such tiny but wide claws from the solid I found too fiddly. The lugs that attach the claws to the frame were also cut from Canson paper.

Image
Safety claw, pivot plate and drive shaft

The gun is trained with the aid of a curved rack, a crown-wheel segment in fact. In to this rack made from bronze, a steel pinion engages that is driven by a shaft from a sort differential, which is powered by man-power from the deck below the barbette. After some consideration I decided not to make the pinion, though I would have liked the challenge, because it will not be visible once the gun has been installed on board. The driving shaft, which also is barely visible was fashioned in a simplified was from a clothes pin, the head of which was turned to shape.

To be continued ...

_________________
Eberhard

Former chairman Arbeitskreis historischer Schiffbau e.V. (German Association for Shipbuilding History)

--------------------------------------------------------------------------------------------------------------------------------------------------------------------------------------------

Image Image Image Image


Report this post
Top
 Profile  
Reply with quote  
PostPosted: Tue Apr 21, 2020 4:51 pm 
Online
User avatar

Joined: Wed Sep 28, 2011 12:04 pm
Posts: 1815
Location: Paris
Since the effective work surface on my workbench gradually had been reduced to around 20 cm x 20 cm, a decluttering action was urgently needed. On the now freed-up workbench I made two improvements to my workshop equipment that I had been planned for a long time:

Tilting model stand
Decades ago, together with some antique lathe parts, I had received a beautifully made cast-iron foot, the use of which had long been a mystery to me. At some point I found out that it was a table base for a small vice, that I unfortunately don't have. In my drawers there was lounging also one of these hand vices with a grid of holes to allow to clamp irregularly shaped parts with the help of short pins. I never had a proper use for it. But both parts together made a useful stand for models during construction. Unfortunately, this stand could not be tilted. In my treasure chest with 'scrap metal' was a clamp for tilting lamps in nicely cast brass. This piece offered itself to make the model stand tiltable. It was done with some modifications to the existing parts and a lathe-turned intermediate piece. Various M10 x 1 threads (standard lamp thread) were cut on the lathe for it. Fortunately, I also had such a tap.

Image

Image

Magnifier holder for the micro milling machine
It is handy to have a magnifying glass permanently installed on the milling machine. A suitable magnifying glass had come to me a long time ago as a promotional 'gift'. In the mentioned scrap treasure chest there was also the gooseneck of an old lamp and various lamp fittings. A connectiing piece to fit the magnifying glass with it M6 thread to gooseneck was turned on the lathe. The magnifying glass can now be rotated in the gooseneck.
Once we can reliably order again in China, I will get another 'angel eye', a ring equipped with LEDs, as they are sold for installation in car headlights. This makes for very nice ring light, as I had fabricated for the 'large' milling machine. Only that here the ring will be integrated into the magnifying glass, because there is not enough space around the milling spindle.

Image

Image

Work continued on the WESPE too, but of that later.

_________________
Eberhard

Former chairman Arbeitskreis historischer Schiffbau e.V. (German Association for Shipbuilding History)

--------------------------------------------------------------------------------------------------------------------------------------------------------------------------------------------

Image Image Image Image


Report this post
Top
 Profile  
Reply with quote  
PostPosted: Fri May 01, 2020 3:08 pm 
Online
User avatar

Joined: Wed Sep 28, 2011 12:04 pm
Posts: 1815
Location: Paris
Loading crane

Somehow I seem to move two steps forward and then one step back again. For one part completed there are several that jump off the table to be never found again or that are destroyed during subsequent steps of manipulation ...
Mechanically, the loading crane is a relatively simple affair, a rope winding drum driven through a pinion and cog-wheel, powered by a hand-crank, and for turning a worm-wheel drive equally powerd by a hand-crank. The console on which the crane rests is a quite complex part that was bolted together from several cast parts.

Image
The loading crane on the demonstration model in the former Naval Museum in Copenhagen

Image
The winding mechanism of the loading crane

My first thought was to mill the console from the solid or rather to solder it together from several milled parts. I finally decided to put the laser-cutter to work and fabricate it from several cardboard pieces. On the bottom line, this was the easiest solution and compatible with the rest of the under-carriage
The crane on the demonstration model in Copenhagen mainly consists of bright pieces of steel or cast-iron. Whether this was the case too originally on the prototype cannot be verified anymore, as no detail photographs exist. It is perhaps doubtful due to the continuous maintenance required to keep rust at bay. Although, the navy was not concerned about camouflage at that time, they were aware of the risk of early detection by the enemy due to bright metal part reflecting the sun. However, I allowed myself the artisanal-aesthetic license of bright metal, as I think it will be a nice contrast to the dark green of the gun carriage later.
The actual crane was milled from a 2.5 mm steel rod. To this end the thickness profiles in both dimensions were taken off the original drawings and ‚stretched’ out straight in the CAD software. After milling, the part was softened in the flame, so that it could be bent according to the drawing. The hole and slot for the pulley were machined afterwards, as the part could break there during bending. The final shaping was done with silicone-bound grinding bits.

Image
Milling of the crane in the dividing apparatus

Pulleys and forks form them are tiny parts machined on the lathe and the milling machine.

Image
Fork for the lower guiding pulley

The mechanism of the crane consists of a good dozen of lathe-turned parts, that were, apart from their minute size, were not particularly challenging.
The cog-wheel, the pinion, and the worm-wheel were turned together with their axes in one piece. On the photographs I counted 60 teeth on the large wheel, which gives, together with a diameter of 3 mm a module of 0.05. Making a single tooth mill seem to be too much work, so that I took the short-cut of just gashing the wheels with a 0.1 mm thick circular saw. It is only about the look and I did not intend to make these gears functional. Hobbing a worm-wheel of just 1 mm diameter was too big of a challenge, but at least I tilted the axis 20° when gashing it.

Image

Image

Image
Milling of the pinion and the cog-wheel

Image

Image
Partly assembled loading crane

The final assembly can only be done, once the crane-console has been attached to the carriage and the whole thing is painted.

To be continued ...

_________________
Eberhard

Former chairman Arbeitskreis historischer Schiffbau e.V. (German Association for Shipbuilding History)

--------------------------------------------------------------------------------------------------------------------------------------------------------------------------------------------

Image Image Image Image


Report this post
Top
 Profile  
Reply with quote  
PostPosted: Fri May 01, 2020 4:27 pm 
Offline
User avatar

Joined: Mon Jan 10, 2005 10:46 am
Posts: 2411
Location: Hoboken, NJ
Fantastic work.

_________________
We like our history sanitized and theme-parked and self-congratulatory, not bloody and angry and unflattering. - Jonathan Yardley


Report this post
Top
 Profile  
Reply with quote  
PostPosted: Sat May 02, 2020 1:22 am 
Offline
User avatar

Joined: Sun Mar 07, 2010 12:01 am
Posts: 1645
Location: Corvallis, Oregon, USA
The work is up to your excellent standards, as usual!

Phil

_________________
A collision at sea will ruin your entire day. Aristotle


Report this post
Top
 Profile  
Reply with quote  
PostPosted: Thu May 07, 2020 3:01 pm 
Online
User avatar

Joined: Wed Sep 28, 2011 12:04 pm
Posts: 1815
Location: Paris
Thanks, gentlemen !

*********************

Folding tool

As will be seen in the next post, quite a number of delicate laser-cut parts will need to be folded. Therefore, I thought a folding tool might come handy. A number of commercial gadgets are available, but considering that they essentially consist of a couple of milled-to shape pieces of aluminium and a thumb-screw, I find them rather overpriced at €20 to €70, depending on what you buy where. Also, if I have the right materials and tools, I prefer to make such things myself.
I did not have a suitable piece of flat aluminium in stock, so I decided to make it from some 4 mm thick Plexiglas off-cut. This has the added value that you can better see, where you place the folding edge. Plexiglas is more vulnerable than aluminium, but I can always make a replacement, should the need arise.

Image

A set of fingers ranging from 1 mm to 6 mm width were separated by notches made with a 4 mm cutter. The front was bevelled for better access to small parts. The opposite side was left straight for longer parts. For the moment, the front edges where milled at 90° degrees, but I can imagine that a slight overbending would be better. I am considering to mill on a 5° or 10° relief angle, but will first test the piece in practice. A more acute angle will make the edges more vulnerable to chipping. The underside is somewhat recessed over most of the width, so that tool really clamps with the front edge, where it is needed, and does not wobble.

Image

As I also did not have material for a base in stock, I decided to use the base of the sanding tool that I made a while ago. It has the added value that no extra gadget is floating around the workshop. The folding ruler was drilled and two corresponding holes in the base were drilled and tapped for M3 thumb-screws.

_________________
Eberhard

Former chairman Arbeitskreis historischer Schiffbau e.V. (German Association for Shipbuilding History)

--------------------------------------------------------------------------------------------------------------------------------------------------------------------------------------------

Image Image Image Image


Report this post
Top
 Profile  
Reply with quote  
PostPosted: Fri May 29, 2020 12:35 pm 
Online
User avatar

Joined: Wed Sep 28, 2011 12:04 pm
Posts: 1815
Location: Paris
Folding tool update
After the first use of the tool, I immediately made a couple of modifications, which however, I had expected to introduce anyway.
When working with cardboard or paper one needs to ‘overbend’ the folds somewhat, so that they stay at the desired angle. This is different to working with soft sheet-metal. Styrene sheet also will have this spring effect. Therefore, the folding edges were given a 10° clearance angle. An angle of 15° may have been even better, but it works with the 10°. The edges are not really weakened by this.
The second modification was to place a spring washer under the folding ruler. I had in mind to do this right away, but could not find them in the first place. The washers lift up the ruler a bit, so that it is easier to slip the material under it.
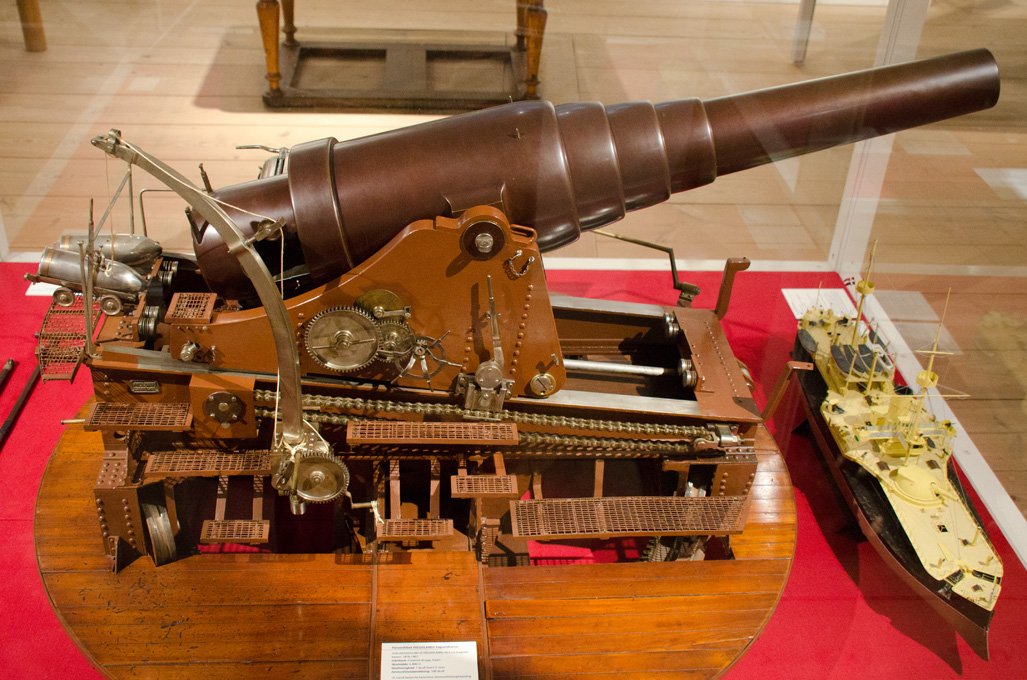
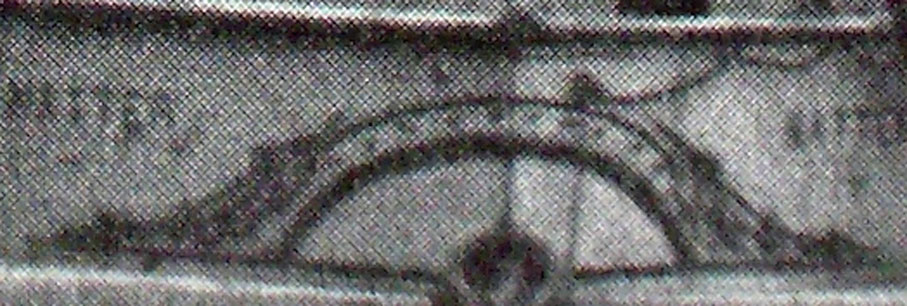
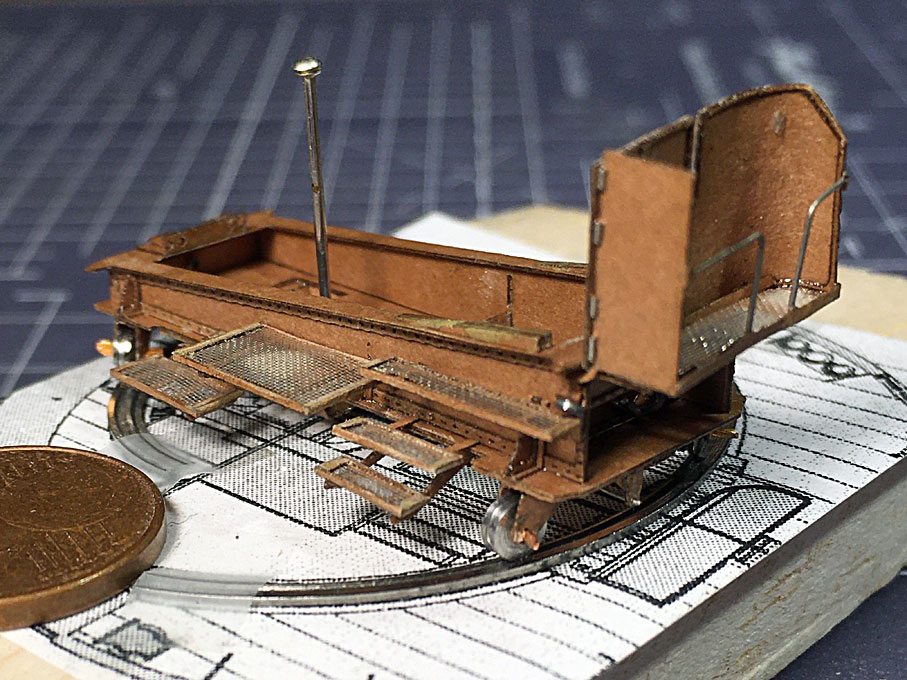
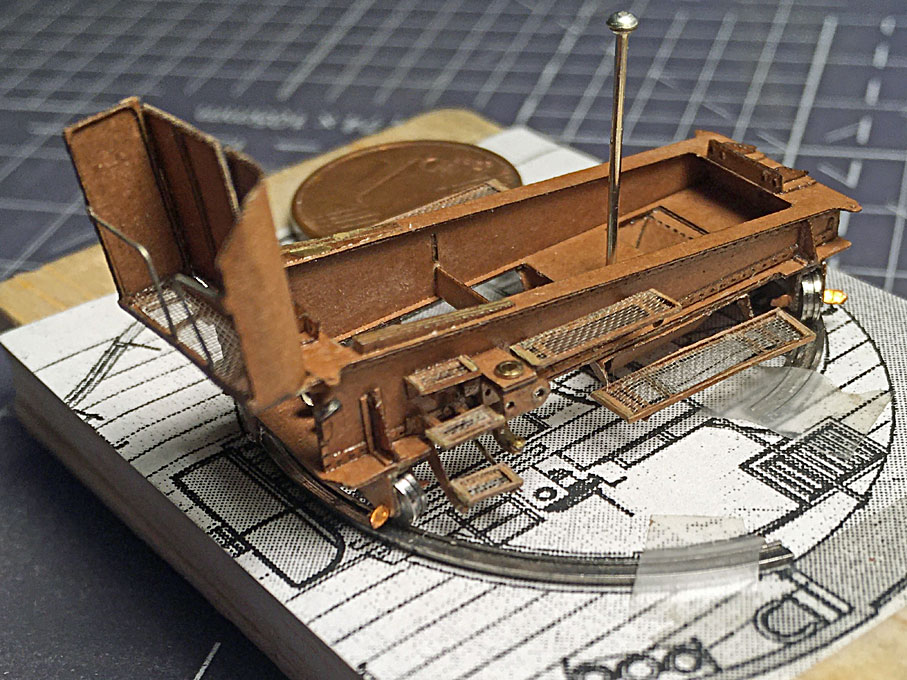
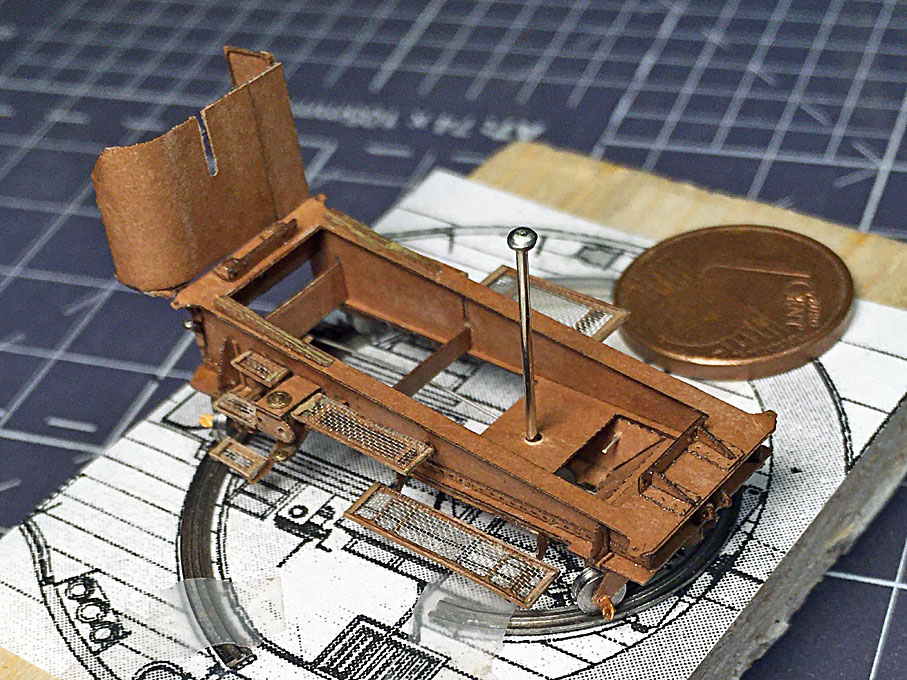
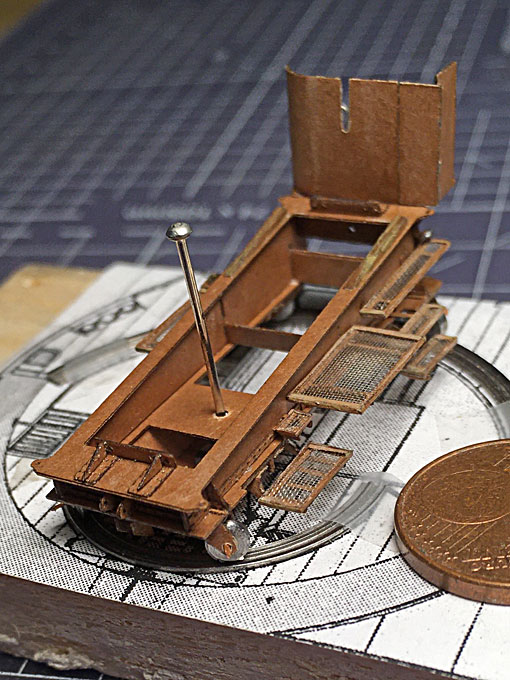
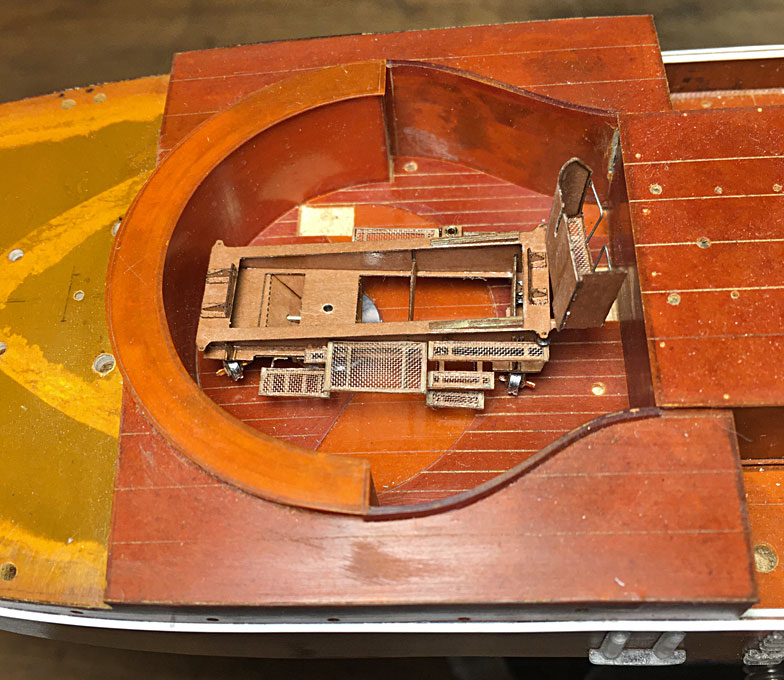
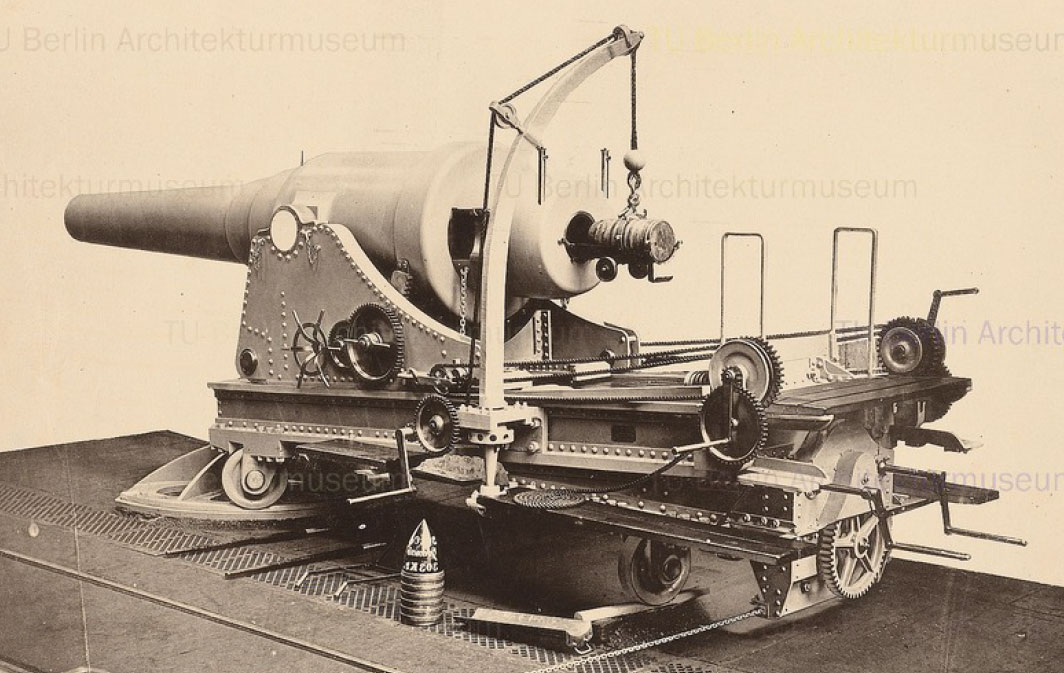
Gun operating platforms and gratings
The gun is mounted effectively on a turntable, so that platforms for crew are needed to give them access to the gun, while is being trained left or right. These platforms are made of wire gratings that are placed into angle-iron frames. The frames are suspended from the lower carriage by brackets. The pictorial evidence (photographs, drawings) is not detailed enough to fully understand what the brackets actually looked like and how and where exactly they were attached to the lower carriage frame. Some additional information is given by the Danish instruction model and the Russian clones in Suomenlinna fortress, but the carriages of these guns differ in detail from that on SMS WESPE. So the reconstruction of these platforms remains somewhat conjectural.

Image
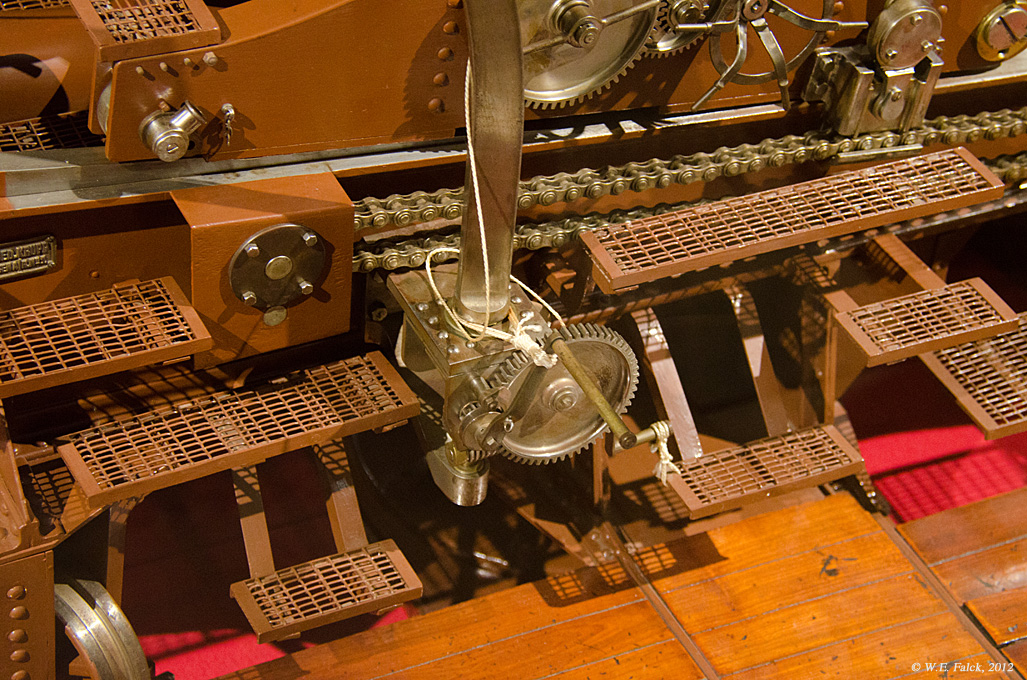
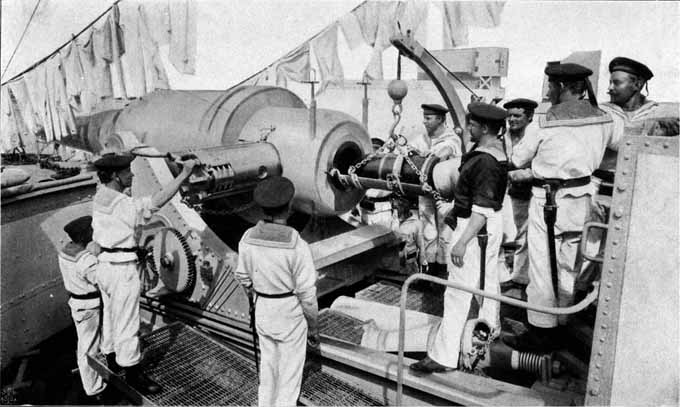
Crew standing on the gratings and operating the gun

Image
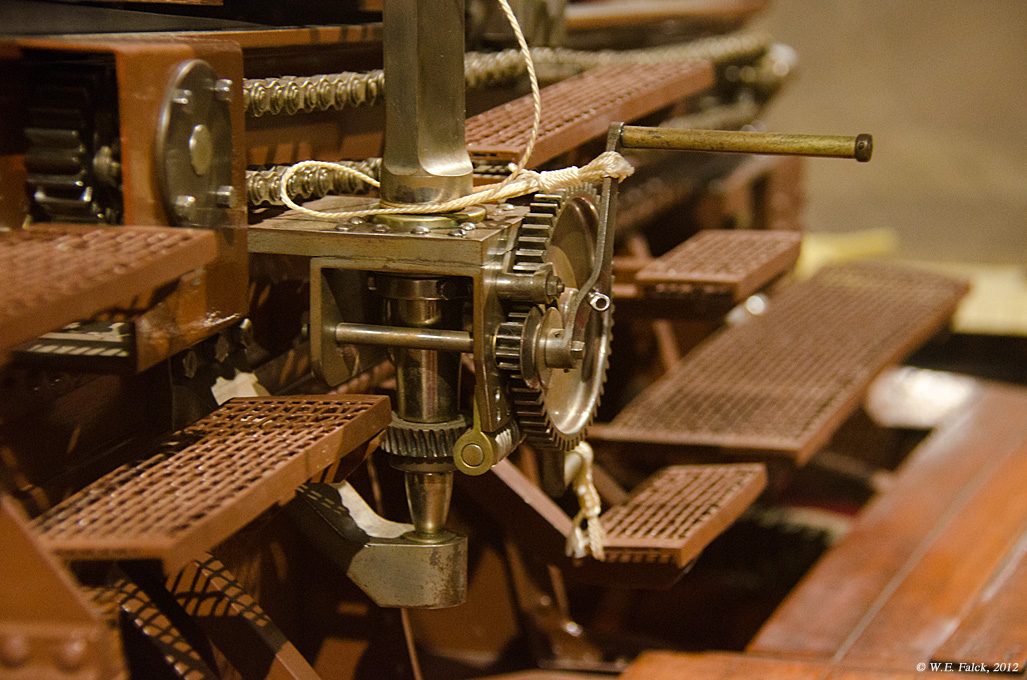
Gratings of the Danish instruction model

Image
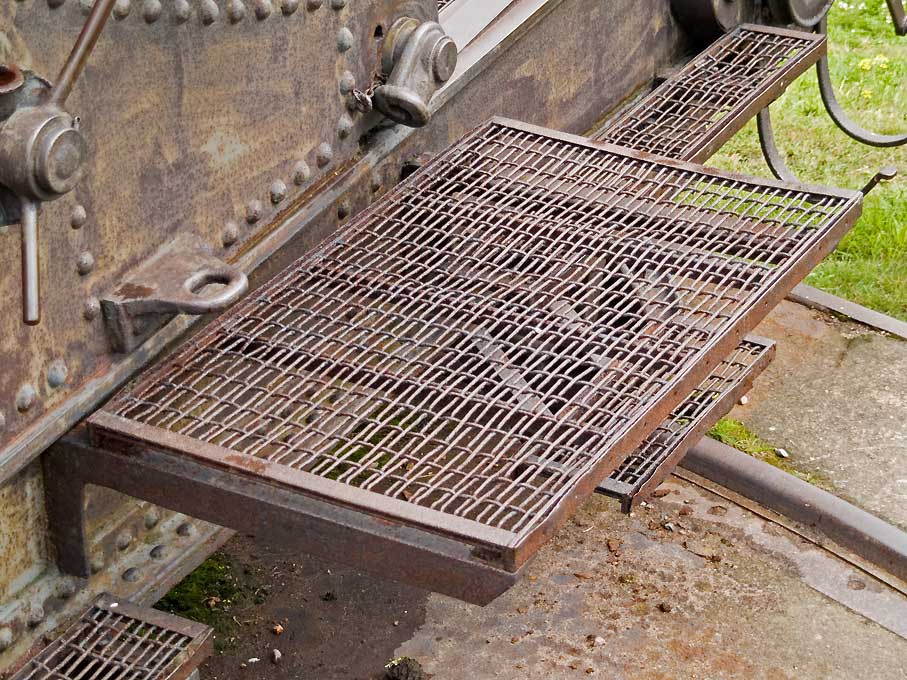
Detail of gratings on a gun in Suomenlinna fortress

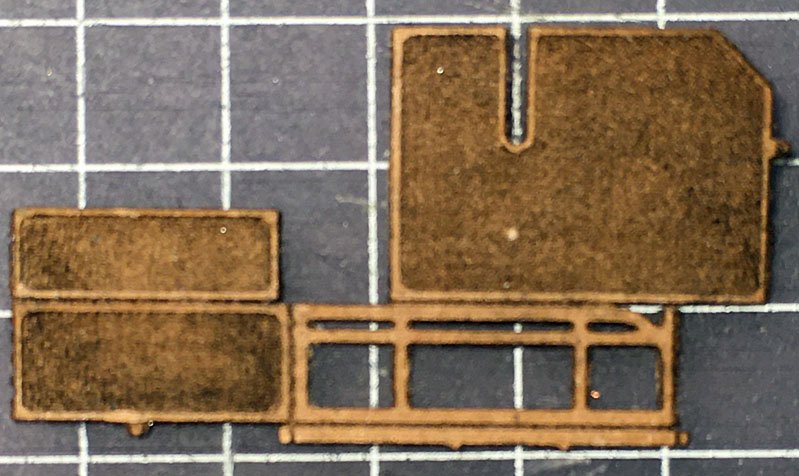
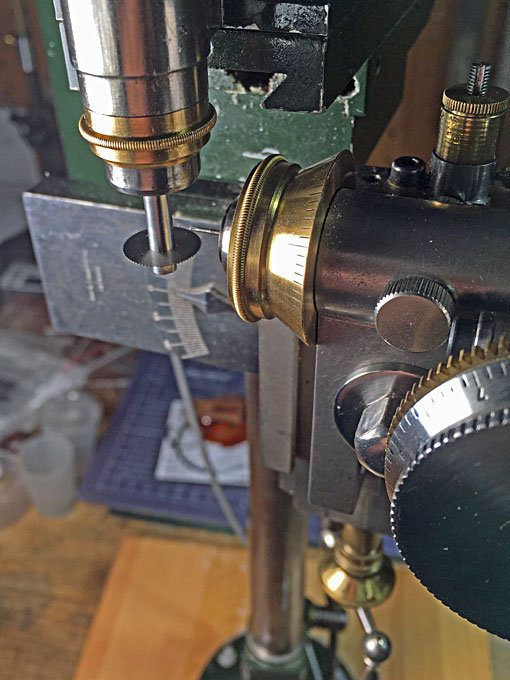
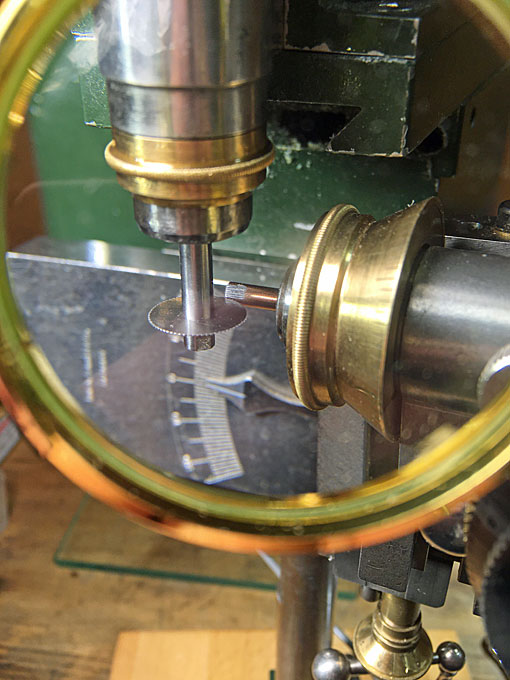
There are 13 gratings and steps in total, plus the platform for the gun-layer. The original plan was to photo-etch the frames from brass sheet, but with the arrival of the laser-cutter I changed this plan. The drawings were modified accordingly. The obvious solution to simulate the angle-iron frame was to design an open frame and then fold-up the vertical parts of the angle. However, it proved impossible to fold the narrow, 0.3 to 0.4 mm strips consistently and without distortions. Not sure this would have worked with the PE parts either. It was then decided to make the open frame and the vertical parts separately as narrow strips and glue them together with lacquer. After several iterations of drawings and laser-cutter settings to arrive a workable width of the strips etc. I arrived at an acceptable solution, albeit the ‘angle-irons’ are somewhat over-scale.

Image
Example of a drawing for the gratings and their supporting brackets

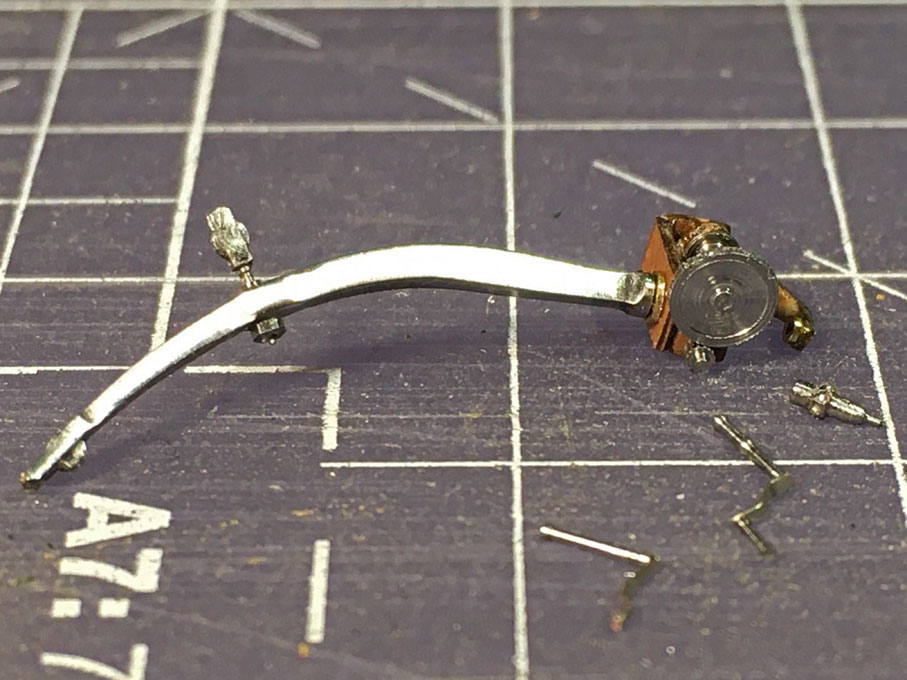
Assembly was a slow and nerve-wracking process. I did not manage to do more than one grating per evening and it involved a lot of (mental) foul language. Eventually, I got them all together. Zapon-varnish was used throughout the assembly. The finished parts are surprisingly strong

Image
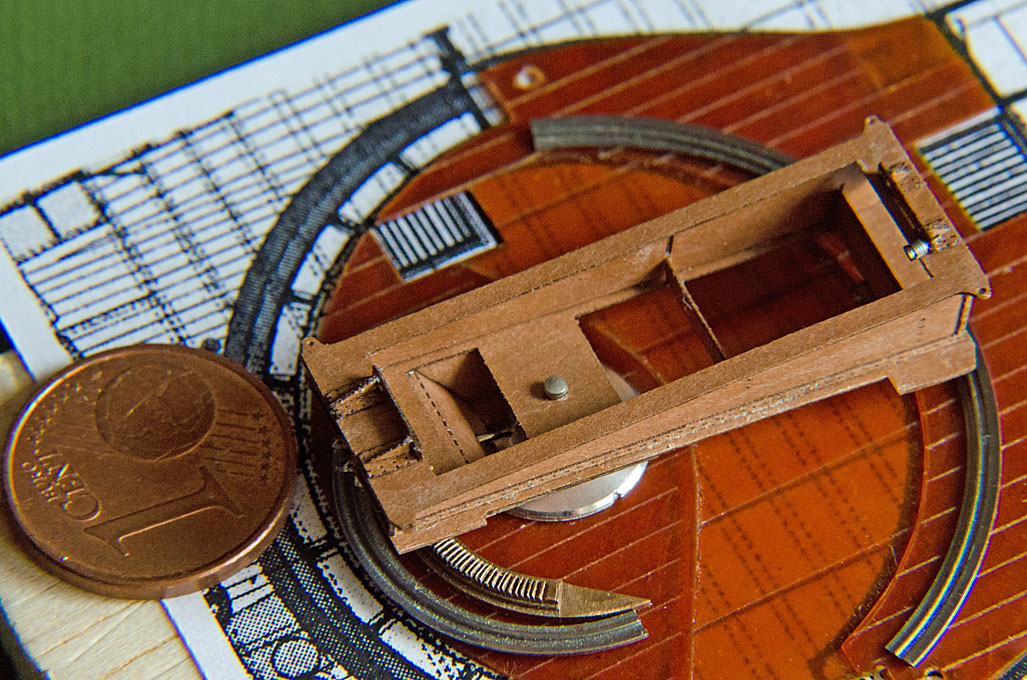
First Version with engraved surfaces of the platform for the gun-layer

Image
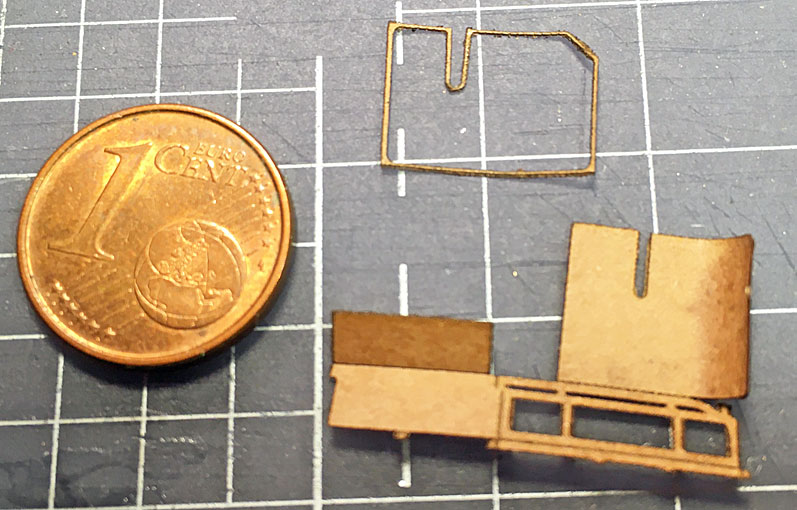
Final Version of the platform for the gun-layer (5 mm grid on the cutting-mat)

The original plan was to simulate the wire-mesh of the gratings by real wire-mesh and I obtained from wires.co.uk some really fine mesh in brass and steel. The idea was to pull every second wire in one direction, as the original mesh was rectangular. It proved, however, very difficult to cut such small pieces (sometimes only 1.5 mm wide) from the wire-mesh. Then a present to wife in form of a box with various (fruit) teas came to my rescue: some of the teas came in bags made from extremely fine but lightly woven fabric. I do not know what material it is, but as it dissolves in acetone, it is probably cellulose acetate silk or Rayon. Such fabrics are also used in silk-screen printing and I had not chanced upon the tea-bags, I would have looked there. This silk-screen or fabric can be precisely and easily cut with a new scalpel blade. The small pieces of fabric were dropped into the frames and fixed at the edges with a light touch of varnish.
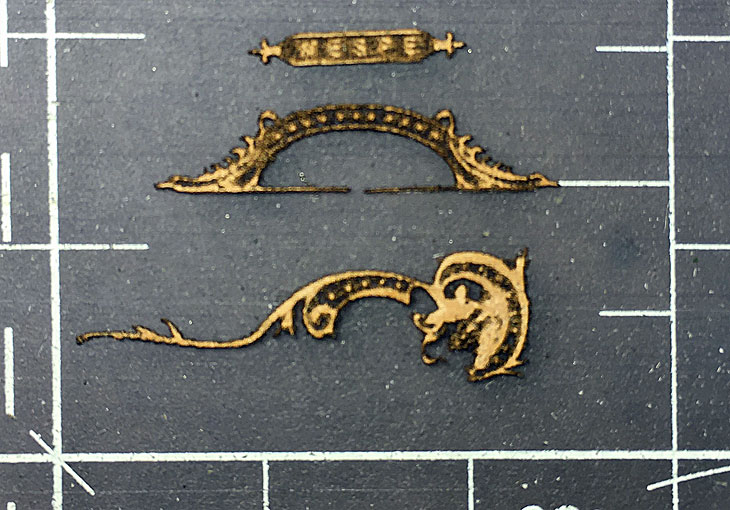
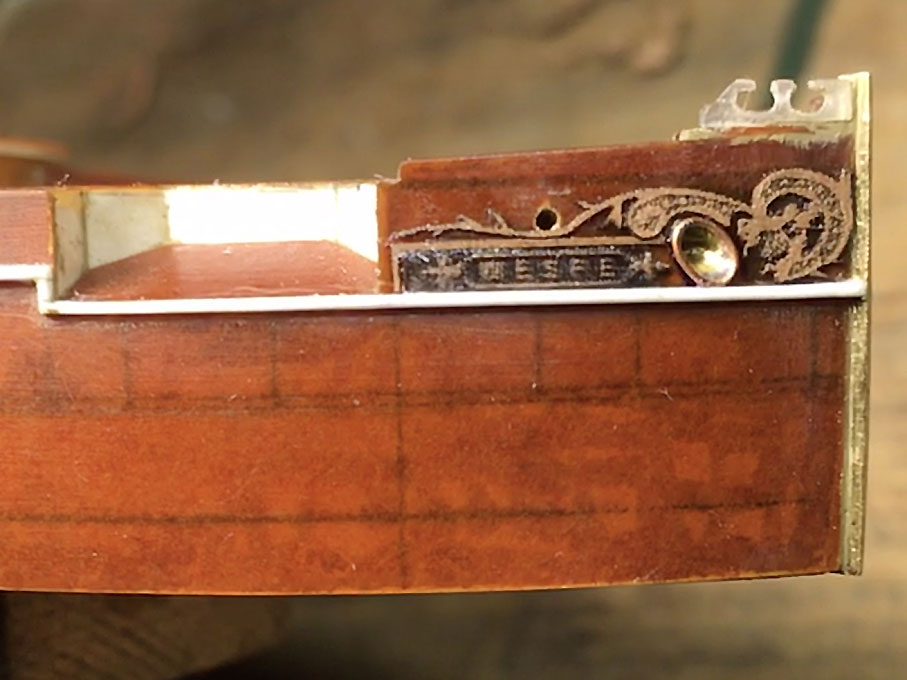
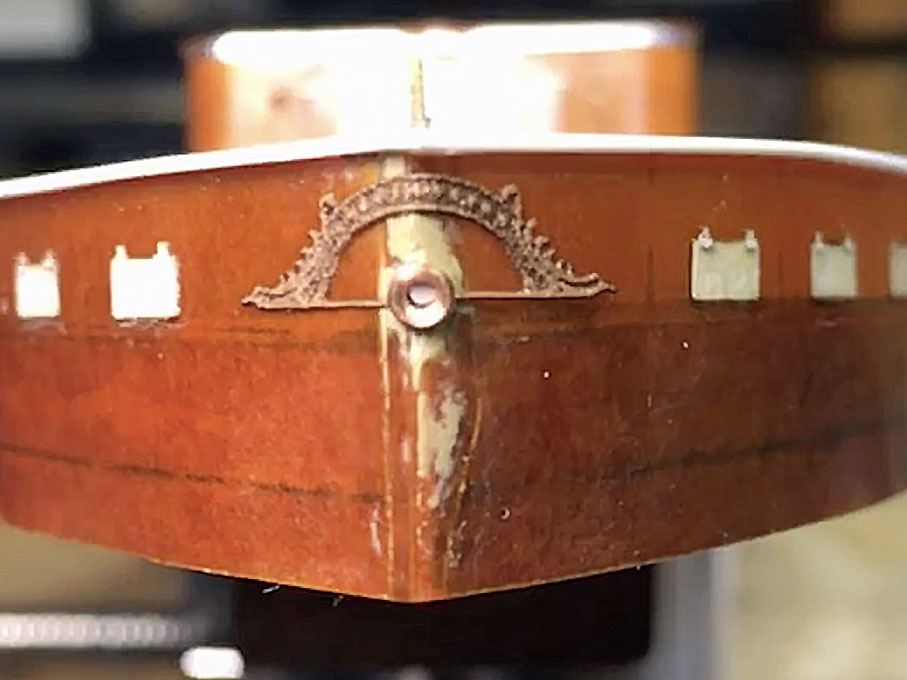
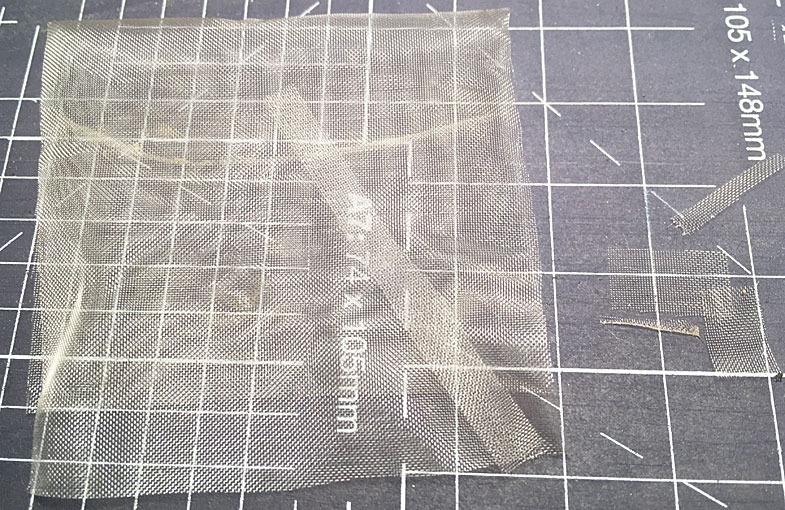
Image
Tea-bag fabric

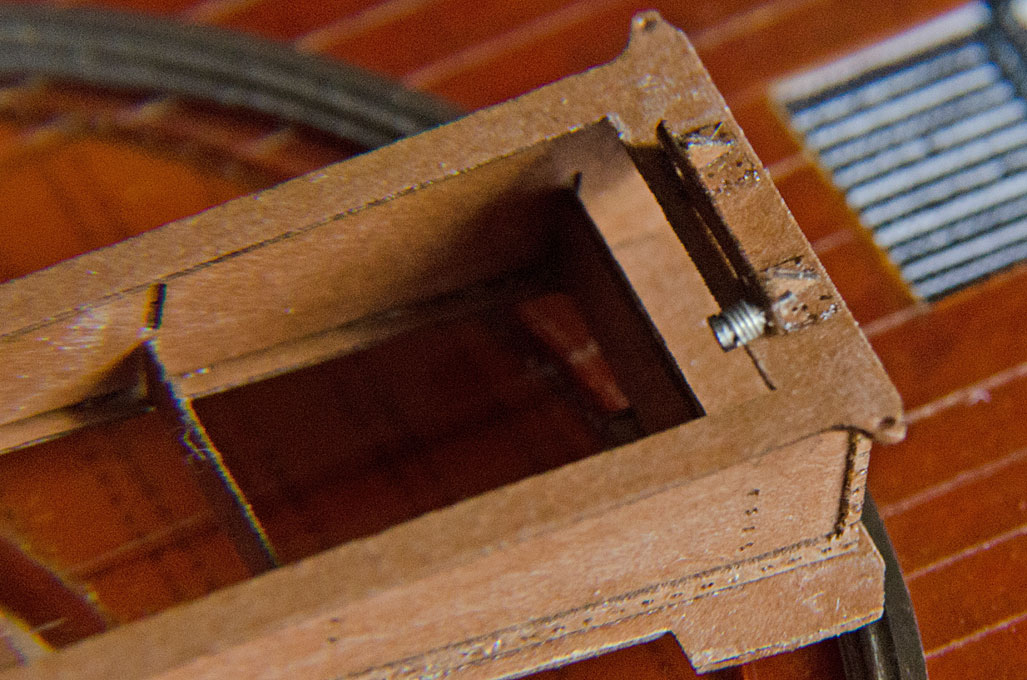
The platform for the gun-layer is a more complex structure. A 5 mm sheet-metal armour shield is meant to protect him from shrapnel and small-arms fire. The armour shield is reinforced at the edges with rivetted-on metal strips. The original plan was to produce this as a surface-etched part. I realised that the laser-cutter interprets half-tone images as instructions to modulate the laser power so that it does not cut all the way through. Laser-engraving in other words. It did produce the desired effect, albeit with the engraved surface being rather rough due to the digitising effect. However, this part then was so thin and flimsy, that it would not stay in shape, when attempting to shape the round corner. I reluctantly accepted that it would be somewhat over-scale in thickness and cut the armour shield and the reinforcing strips separately. They were glued on top of each other with varnish and then the round of the shield formed over a rod. Folding and gluing completed the process.

Image
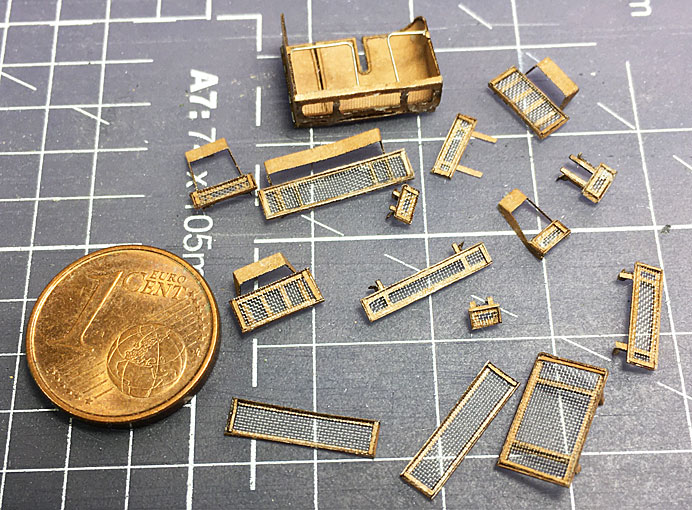
The collection of gratings and steps

I am not entirely happy with the result and tend to think, that etched parts may have looked finer. But then their assembly would have required a lot of very delicate soldering work – I don’t trust CA for metal/metal bonds too much. On the other hand, attaching the gratings to the lower carriage frame is likely to be easier for the cardboard parts than for brass parts. Before that can be done, I need to add the wheels, which requires a lot of handling ...

To be continued ...

_________________
Eberhard

Former chairman Arbeitskreis historischer Schiffbau e.V. (German Association for Shipbuilding History)

--------------------------------------------------------------------------------------------------------------------------------------------------------------------------------------------

Image Image Image Image


Last edited by wefalck on Wed Aug 26, 2020 8:22 am, edited 1 time in total.

Report this post
Top
 Profile  
Reply with quote  
PostPosted: Thu Jun 04, 2020 1:23 pm 
Online
User avatar

Joined: Wed Sep 28, 2011 12:04 pm
Posts: 1815
Location: Paris
Scrollwork and name-plates

As I had tried laser-engraving on cardboard for the gun-layer stand, I wanted to try out this technique also for the scrollwork and the name-plates. Originally, I had foreseen to develop the scrollwork by printing the design onto a decal-sheet and then build it up by sculpting it over the printed lines with acrylic gel. The name-plates could have been surface-etched in brass. One could have etched, of course also the scrollwork in brass and then complete it with acrylic gel.

Image
Best available image of the bow scrollwork and name-plate

It is not very clear what the scrollwork looked like when new and from what material it was made. The fact that it seems to have persisted intact over the whole life of these ships may indicate that it was actually cast in some metal, rather than carved in wood.
There are no close-up photographs of sufficient resolution in the black-white-yellow paint-scheme. Closer photographs are only available from a later period, when everything was painted over in grey and some of scrollwork may have been picked out in a darker grey. Originally it was probably painted in yellow-ochre with parts of gilded. In any case, available photographs are not clear enough to truly reconstract the scrollwork, so some interpretation was necessary.
In addition to the scrollwork per se, there was a shallow sculpture of the animal after which the ship was named, for SMS WESPE, of course, a wasp. Existing photographs only give a vague idea what these sculptures really looked like. In any case not for SMS WESPE.

Image
Only available image of the stern scrollwork

There has also been some scrollwork at the stern, but pictorial evidence for this is rather scarce. There is only one known photograph that gives a full view of the stern of this class of ships and this was taken at the very end of their service life. Available copies of this photograph are not clear enough to really discern what the scrollwork actually looked like, so a fair amount of imagination is needed to recreate it.
https://www.maritima-et-mechanika.org/m ... crolls.jpg
Artwork for the bow scrollwork

Creating the basic artwork for the decoration was a multiple-step process. First a photograph of the respective section of the model as built was taken in order to give the necessary proportions. In the next step the best available photograph with the least perspective distortions was chosen and fitted over the model photograph. In another layer of the graphics software (Graphic for iPad) the scrolls were drawn free-hand (with the iPen) using the paintbrush-function and a good amount of smoothing. This artwork was saved as a JPEG. On the Internet I found a nice drawing of a wasp and turned this into a pure b/w image with a good bit of editing in Photoshop. Both, the scrollwork and the wasp were saved as transparent GIF. In my favourite CAD-program (EazyDraw), the parts were mounted together. This could have been done also in Photoshop, but I did have a scaled drawing of the bow-section in EazyDraw to which I exactly fitted the artwork. There were also some addtional parts to be cut.

Image
Some examples of the (unused) laser-cut scrollwork and the name-plates

The scrollwork was cut/engraved with the laser-cutter using the ‘half-tone’ function, which means that the laser is modulated to emit less power when a grey pixel is encountered and full power, when a black pixel is encountered. I had to play in several iterations with the settings of the laser-cutter in order to arrive at a satisfactory result.

Image
Scrollwork and name-plate in place

In a first try the name-boards were made in the same way, but the half-depth engraving around the letters resulted in a somewhat fuzzy apearance of the letters. I, therefore, tried out a different idea. From previous trials it was know that the laser had no effect on transparent materials and very limited effect on translucent materials. Hence, I covered some cardboard with a thin layer of Pleximon 192 (essentially liquid, light-hardening Plexiglas). A thorough curing this sandwich was sanded flat and presented to the laser-cutter. The laser removes all the cardboard, but leaves the acrylic virtually untouched, with the exception of some light surface roughness. One ends up with a piece of thin acrylic sheet to which the letters and the scrollwork of the name-board are attached. Within the limits of the resolution (0.05 mm) of the laser-cutter the lettering turned out reasonably clear, perhaps not as crisp, as when photoetched though.

Image
Stern scrollwork in place

The scrollwork elements were attached to the hull using fast-drying varnish. The actual painting and guilding will be done, once the hull has been painted.

To be continued ...

_________________
Eberhard

Former chairman Arbeitskreis historischer Schiffbau e.V. (German Association for Shipbuilding History)

--------------------------------------------------------------------------------------------------------------------------------------------------------------------------------------------

Image Image Image Image


Last edited by wefalck on Wed Aug 26, 2020 8:23 am, edited 1 time in total.

Report this post
Top
 Profile  
Reply with quote  
PostPosted: Wed Jun 10, 2020 2:27 pm 
Online
User avatar

Joined: Wed Sep 28, 2011 12:04 pm
Posts: 1815
Location: Paris
Further work on the lower carriage

Back to the lower carriage. The (mor or less) central pivot determines its rotational axis, but the weight of the gun is actually supported by four (kind of) caster wheels running on cast-iron rails bolted to the bottom of the barbette.
The rails had been turned already a long time ago. The forks for the caster-wheels were fabricated from laser-cut cardboard. The wheels themselves are simple turned steel discs with a groove.

Image
Caster wheels prepared for assembly

For the assembly, the rails were taped down onto an appropriately scaled print-out of the original plan of the vessel and carriage fixed with a clothes pin. The wheels and forks are temporarly united by axels made from short lengths of copper wire. The casters then were cemented under the carriage in the correct position with respect to both, the rails and the carriage frame, using again varnish.

Image
Caster wheels in place

The wheels will have to be removed again before painting the carriage, because they will be left in bright steel. I do not know, whether this is correct for the flanges of the wheels, but it gives the whole arrangement are rather ‘technical’ look. The axles with cylindrical end-caps have already been prepared from steel rod and will be installed during the final assembly.

Image
Caster wheels in place

To be continued ...

_________________
Eberhard

Former chairman Arbeitskreis historischer Schiffbau e.V. (German Association for Shipbuilding History)

--------------------------------------------------------------------------------------------------------------------------------------------------------------------------------------------

Image Image Image Image


Last edited by wefalck on Wed Aug 26, 2020 8:23 am, edited 1 time in total.

Report this post
Top
 Profile  
Reply with quote  
PostPosted: Fri Jun 12, 2020 5:03 pm 
Offline
User avatar

Joined: Mon Jan 10, 2005 5:30 pm
Posts: 5385
Location: Nr Southampton England
as ever-- thi is simply STUNNING work!

truly-- most impressive!

JIM B :wave_1:

_________________
....I buy them at three times the speed I build 'em.... will I live long enough to empty my stash...?
http://www.modelshipgallery.com/gallery ... index.html

IPMS UK SIG (special interest group) www.finewaterline.com


Report this post
Top
 Profile  
Reply with quote  
PostPosted: Sun Jun 28, 2020 4:19 pm 
Online
User avatar

Joined: Wed Sep 28, 2011 12:04 pm
Posts: 1815
Location: Paris
Thanks, Jim !

**************

Two steps forward and one step backwards ...

... as I said somewhere above – on Friday the plastic globe on my 12W LED globe-bulb in my architect’s lamp fell out and dropped right onto the lower carriage on the workdesk :mad_2: 
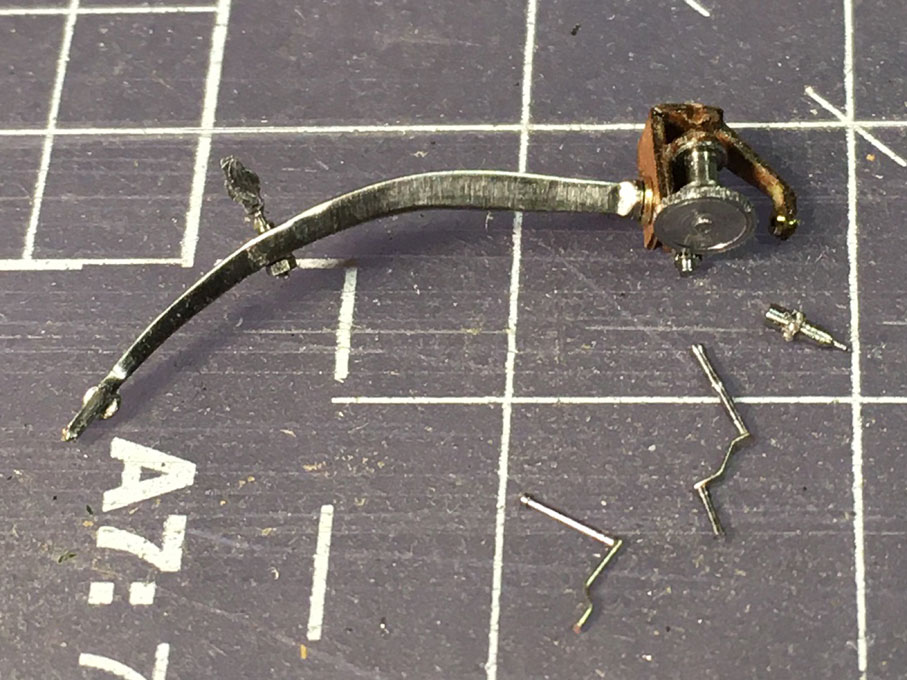
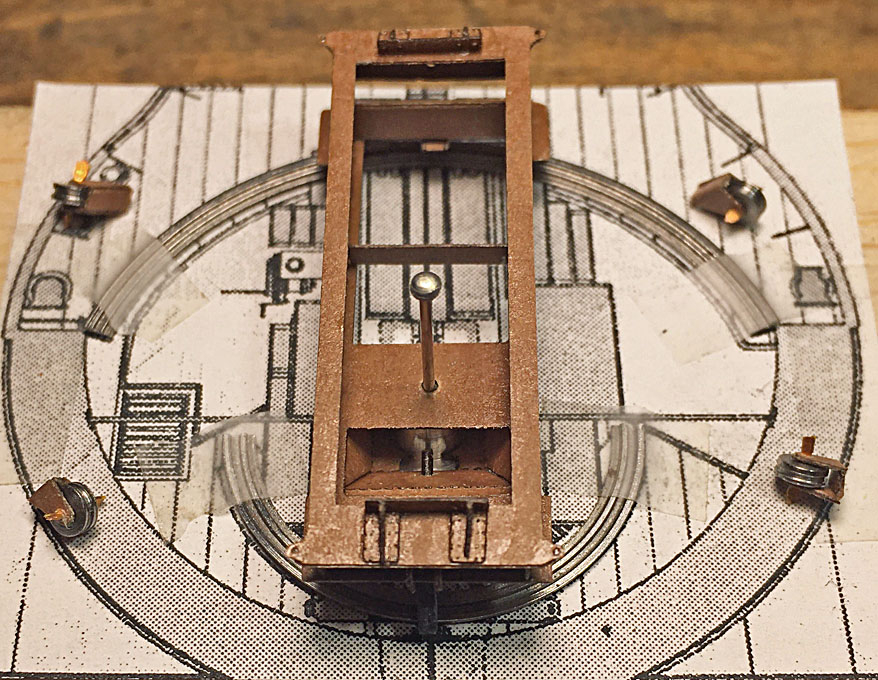
. One of the caster-roller snapped off and two others were loosened – then I spent an hour turning everything on the table upside-down and didn’t find the roller – then I sifted through the waste-bin nearby for another hour and still couldn’t find it :mad_2: – eventually I gave up, cut a new bracket on the laser-cutter, fitted it and then turned up a new roller. Perhaps should have done it like this in the first place, as one always spends more time in search of a part than it takes to make a new one, but I just could not believe that a part like that could have been ejected so far ...


Still work on the lower carriage ...

OK, the gun is the key feature of a gun-boat and its very raison d’être, but this gun and its carriage seem to develop into a model of its own right. Perhaps one day I should build a larger scale fully working (the mechanics, not the ballistics, which would be probably illegal over here in Europe) model, now that I have a pretty good understanding of its functioning.

While I was drawing some additional parts to be cut with the laser, I realised, that I had completely forgotten the stiffening brackets for caster wheels. They are essential elements in the construction, as the wheels each have to carry around 15 tons of the total weight of the gun. The brackets were fabricated from steel plates and forged(?) angles, fabricated on the model from tiny pieces of Canson-paper cut with the laser.

Image
Stiffening brackets added over the caster-rollers

There were also two brackets needed for the operating lever including connecting rod of the gun training mechanism and for the clutch that connects the cranks below the barbette with the gun. The latter allows to connect gears for two different speed ratios, a high ratio for fine weather and a low ratio through as self-locking worm-gear for foul weather. A quite sophisticated arrangement actually, but as nothing of it will be visible on the model, it was ignored.

Image
Supporting brackets and connecting rods for working the training gears

Connected to the gun training mechanisms is also a kind of capstan to help run-in the gun. A tackle is hooked into each side of the upper carriage and the runner lead by two guiding wheels into the lower carriage and onto the capstan. The wheels were turned from steel rod and their supporting brackets cut from Canson-paper. I meant to closely reproduce the original design, but in the end had to simplify it, because the parts were simply too small to laser-cut and handle. Because they are so flimsy that had to be put into place now and will have to painted over.

Image
Rollers in brackets to lead the running-in tackle

The next challenge will be the fitting of the eleven gratings distributed around the lower carriage.

To be continued ...

_________________
Eberhard

Former chairman Arbeitskreis historischer Schiffbau e.V. (German Association for Shipbuilding History)

--------------------------------------------------------------------------------------------------------------------------------------------------------------------------------------------

Image Image Image Image


Last edited by wefalck on Wed Aug 26, 2020 8:24 am, edited 1 time in total.

Report this post
Top
 Profile  
Reply with quote  
PostPosted: Fri Jul 03, 2020 3:51 pm 
Online
User avatar

Joined: Wed Sep 28, 2011 12:04 pm
Posts: 1815
Location: Paris
Attaching the gratings

The lower carriage was now ready for installing the gratings. For this purpose some flaps had been foreseen on the supporting brackets. They were cemented to the carriage using the zapon-lacquer which resulted in a surprisingly strong bond.

The stand for the gun-layer was put into place only temporarily for the photograph. The final fixation will be done, when the gun is being installed. It is rather exposed element that would make painting the gun rather difficult.

Image

Image

Image

Image
The lower carriage with gratings in place from various angles

Image
The lower carriage put temporarily into the barbette

To be continued ...

_________________
Eberhard

Former chairman Arbeitskreis historischer Schiffbau e.V. (German Association for Shipbuilding History)

--------------------------------------------------------------------------------------------------------------------------------------------------------------------------------------------

Image Image Image Image


Last edited by wefalck on Wed Aug 26, 2020 8:25 am, edited 1 time in total.

Report this post
Top
 Profile  
Reply with quote  
PostPosted: Sat Jul 04, 2020 12:56 am 
Offline
User avatar

Joined: Sun Mar 07, 2010 12:01 am
Posts: 1645
Location: Corvallis, Oregon, USA
The gratings look very nice!

Phil

_________________
A collision at sea will ruin your entire day. Aristotle


Report this post
Top
 Profile  
Reply with quote  
PostPosted: Sat Jul 04, 2020 5:34 am 
Offline
User avatar

Joined: Mon Jan 10, 2005 5:30 pm
Posts: 5385
Location: Nr Southampton England
all that fine detail... buried in a hole....

I guess its the journey that counts !! :thumbs_up_1: :wave_1:

_________________
....I buy them at three times the speed I build 'em.... will I live long enough to empty my stash...?
http://www.modelshipgallery.com/gallery ... index.html

IPMS UK SIG (special interest group) www.finewaterline.com


Report this post
Top
 Profile  
Reply with quote  
PostPosted: Thu Jul 30, 2020 4:37 pm 
Online
User avatar

Joined: Wed Sep 28, 2011 12:04 pm
Posts: 1815
Location: Paris
Quite a long journey actually for such a small boat ...

******************************************************

Completing the upper carriage 1

With the lower carriage basically ready for painting, I turned my attention back to the upper carriage. The structural elements made from photo-etched parts had already been constructed many years ago. Dito some of the details had been fabricated more than ten years ago, or at least partially.

Image
The previous state of the upper carriage

I had also turned and cut the gear wheels for the elevating mechanism, but they had not been finished. The back side, after parting off had not been shaped, which was done now and they were also chemically tinned after degreasing and pickling in citric acid.

Image
The gears as cut

The elevating mechanism consist of a double reduction gears and is driven by a deeply dished handwheel with six spokes. These reduction gears are duplicated on each side of the carriage. The last wheel in the drive has a pinion on the inside of the carriage, which acts on a gear segment that is attached to the gun barrel. How the gear segment is guided is not clear from the available drawings and the model in Copenhagen. On the Russian Krupp-clones the arrangement is slightly different.

Image
The elevating gear train in GALSTER (1885)

http://www.maritima-et-mechanika.org/ma ... 504-72.jpg
The elevating gears on the instruction model in Copenhagen

Image
The gear segment and its attachment to the barrel on a gun in the Suomenlinna fortress

Image
Krupp factory photograph of the same gun, but in coastal mount (from the collection of the Architekturmuseum TU Berlin)

There is a friction-brake on the axle of the last large wheel of the gear train, which is worked with a cross handle. How this functions is not clear, but it presumably just pull the gear onto the frame via a short thread that is cut onto the end of the axle.
On the starboard side of the gun there is a brass disc and an indicator lever that somehow shows the degree of elevation and presumably the range of the gun with different kinds of projectiles and charges. Again, how this indicator disc is coupled to the elevating gears is not clear, as I do not have any suitable photographs. In any case, the respective gear train will not be really visible on the model.
The dished handwheel started life as parts photoetched from 0.2 mm brass. In order be able to bend each spoke into the dished shape, a former was turned from some round steel and set up on the watchmakers ‘staking tool’. The spokes were pre-bend by hand and then finally pulled to shape using a hollow punch. The parts then were chemically tinned and soldered together with the aid of some flux.

Image

Image

Image
The step-wise forming of the dished handwheel

The remaining parts, such as the axles, are simple parts turned from steel rod for strength, as they are quite long compared to the diameter.

Image
(Almost) all the parts of the elevating gear laid out

Image

Image
The elevanting gear provisionally assembled

To be continued ...

_________________
Eberhard

Former chairman Arbeitskreis historischer Schiffbau e.V. (German Association for Shipbuilding History)

--------------------------------------------------------------------------------------------------------------------------------------------------------------------------------------------

Image Image Image Image


Report this post
Top
 Profile  
Reply with quote  
PostPosted: Fri Jul 31, 2020 11:27 pm 
Offline
User avatar

Joined: Sun Mar 07, 2010 12:01 am
Posts: 1645
Location: Corvallis, Oregon, USA
Beautiful work!

Phil

_________________
A collision at sea will ruin your entire day. Aristotle


Report this post
Top
 Profile  
Reply with quote  
PostPosted: Sat Aug 01, 2020 7:15 am 
Offline
User avatar

Joined: Mon Jan 10, 2005 5:30 pm
Posts: 5385
Location: Nr Southampton England
that is very painstaking...

and very fabulous ' proper' "engineery " modelling !!

:thumbs_up_1: :thumbs_up_1:

JIM B :wave_1:

_________________
....I buy them at three times the speed I build 'em.... will I live long enough to empty my stash...?
http://www.modelshipgallery.com/gallery ... index.html

IPMS UK SIG (special interest group) www.finewaterline.com


Report this post
Top
 Profile  
Reply with quote  
PostPosted: Mon Aug 24, 2020 3:06 pm 
Online
User avatar

Joined: Wed Sep 28, 2011 12:04 pm
Posts: 1815
Location: Paris
Thanks gentlemen !

What is quite strange actually, is that the building-logs seems to get quite a few visitors, but doesn't seem to raise any discussion items ...

********************

Completing the upper carriage 2

Owing to the lurking second Corona-wafe we cut our stay in Spain short and returned to Paris early in order not to get stuck at the border. The government were indeed pondering a renewed closure. Whether Paris was the better choice remains to be seen, as case numbers are soaring here too. At least I have my workshop here and I was able to spend some holiday time in it.

It continues to frustrate how little I have to show for a few hours of toiling in the workshop, but I keep telling myself that I am single fighter, while in real life large shipyard crews from various specialist trades would have worked on such a project ...

The gear segment for the elevating mechanism of the barrel was produced by turning a short piece of aluminium pipe that I happened to have in stock to the correct inside and outside diameter. The teeth then were cut on the micro milling-machine using the dividing head in a horizontal position. Then slots were sawn at the angular distance required and then a slice of the required thickness parted off. The ends of the segments were finally filed to shape. I did not take pictures of this process. Aluminium is a bit bright, but I will at the end tone it down with a soft pencil and it will also dull with age.

Image
Below one of the sections of the gear segments for the elevating mechanism

For the brackets with which the gear segment was attached to the reenforcement ring of the gun barrel a piece of brass rod was turned out to the correct inside diameter. On the mikro-mill with the dividing attachment in upright position the other faces were milled to shape. Finally, the individual bracket were sawn off with a circular saw at the correct thickness. The parts, which are just over 1 mm long, were chemically tinned to adapt them somewhat to the steel colour of the barrel. As they will not have to withstand any mechanical forces, they were glued to the reenforcement ring with zapon lacquer.

Image
Indicator disc for the elevating mechanism on the instruction model in Copenhagen

There were still a few details missing on the upper carriage, for instance the indicator disc for the elevating mechanism. How this indicator is coupled to the elevating mechanism I was not able to find out. It is not shown on the drawings, it is not visible on the model in Copenhagen, and the respective parts are missing from the guns in the Suomenlinna fortress. There was probably a gear train on the inside of the carriage. For this indicator disc a piece of 2 mm brass rod was faced off and a mock gradation engraved with a toolbit turned onto its side in 6° steps. There is a steel indictor lever (the function of which is not clear to me, either the disc turned or this lever, probably the former). For this a steel disc was turned with a short arbor and transferred to the micro-mill, where the shape of the lever was milled out. This indicator disc seems to have been fitted only to the starbord side of the carriage.

Image
Engraving the indicator disc for the elevating mechanism on the lathe

Furthermore the brake-handels for the elevating mechanism were missing. A short piece of 0.25 mm diametre copper wire was flattend in the middle with a 0.8 mm diametre punch in the watchmaker’s staking tool. The resulting round flat part was soldered to a short distancing bushing and turned cap glued on from the other side.

Image
The elevanting gear provisionally assembled

To be continued ...

_________________
Eberhard

Former chairman Arbeitskreis historischer Schiffbau e.V. (German Association for Shipbuilding History)

--------------------------------------------------------------------------------------------------------------------------------------------------------------------------------------------

Image Image Image Image


Report this post
Top
 Profile  
Reply with quote  
PostPosted: Wed Aug 26, 2020 7:18 am 
Offline

Joined: Thu Jan 26, 2017 8:30 am
Posts: 202
Very nice work.

Somehow the pics from the updates from May 29th, June 10th and June 28th don't show anymore... I know, bit late with that ;-)


Report this post
Top
 Profile  
Reply with quote  
Display posts from previous:  Sort by  
Post new topic Reply to topic  [ 384 posts ]  Go to page Previous  1 ... 3, 4, 5, 6, 7, 8, 9 ... 20  Next

All times are UTC - 6 hours [ DST ]


Who is online

Users browsing this forum: No registered users and 21 guests


You can post new topics in this forum
You can reply to topics in this forum
You cannot edit your posts in this forum
You cannot delete your posts in this forum
You cannot post attachments in this forum

Jump to:  
Powered by phpBB® Forum Software © phpBB Group