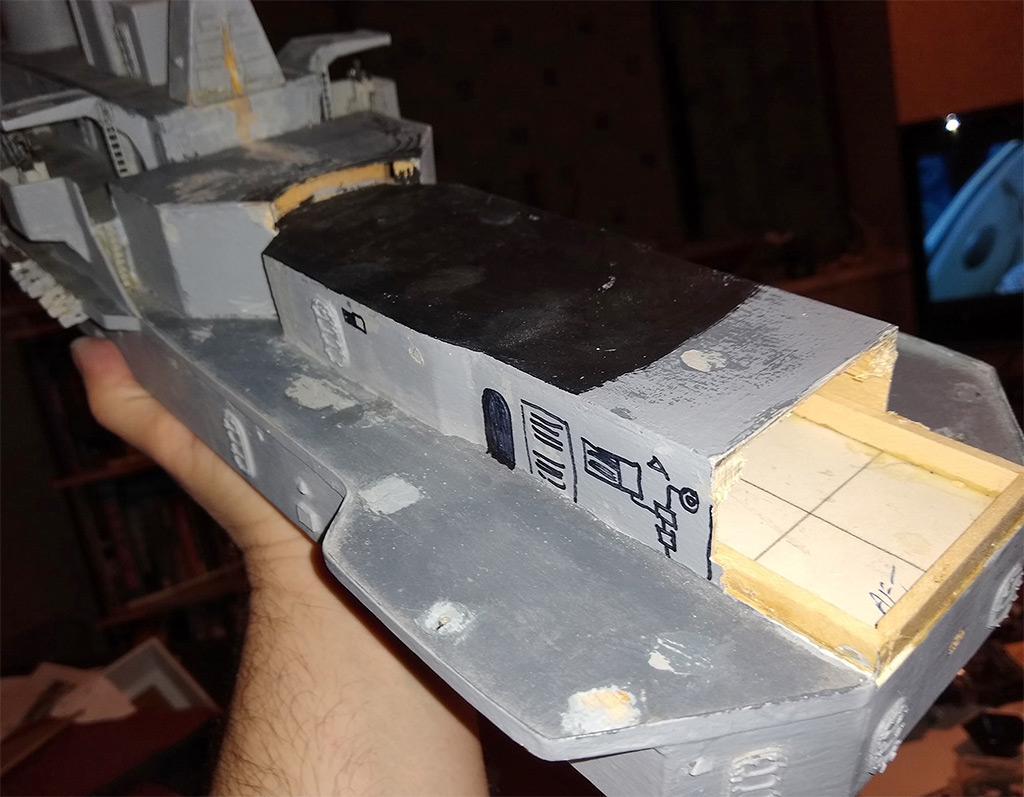
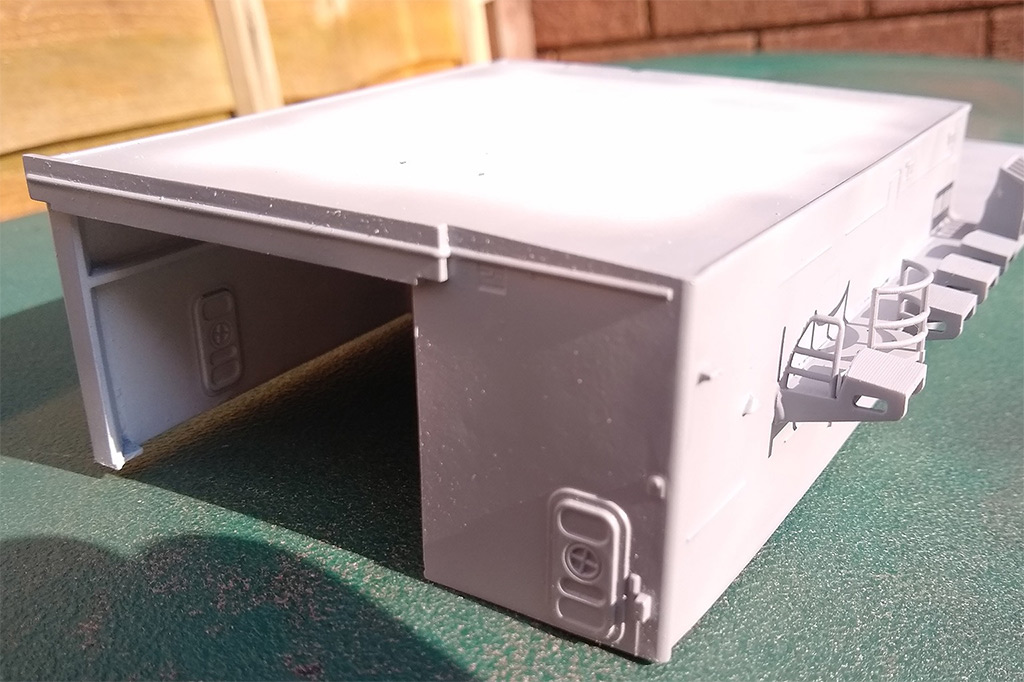
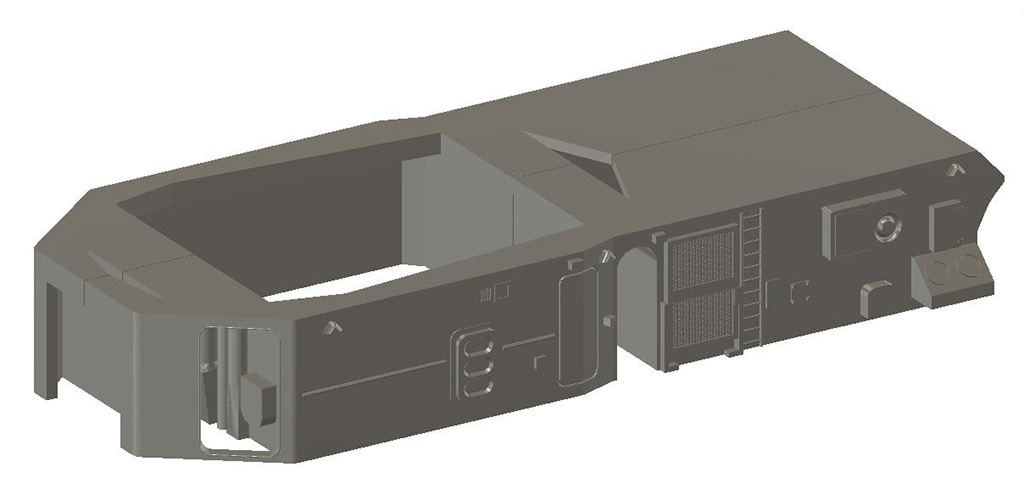
The model's existing bridge. You guessed it - it's not quite right. The bridge's windowed area should go up in line with the 'screen' area below, and not have a hand rail in front. The windows are just black painted bits of photo etched metal too.

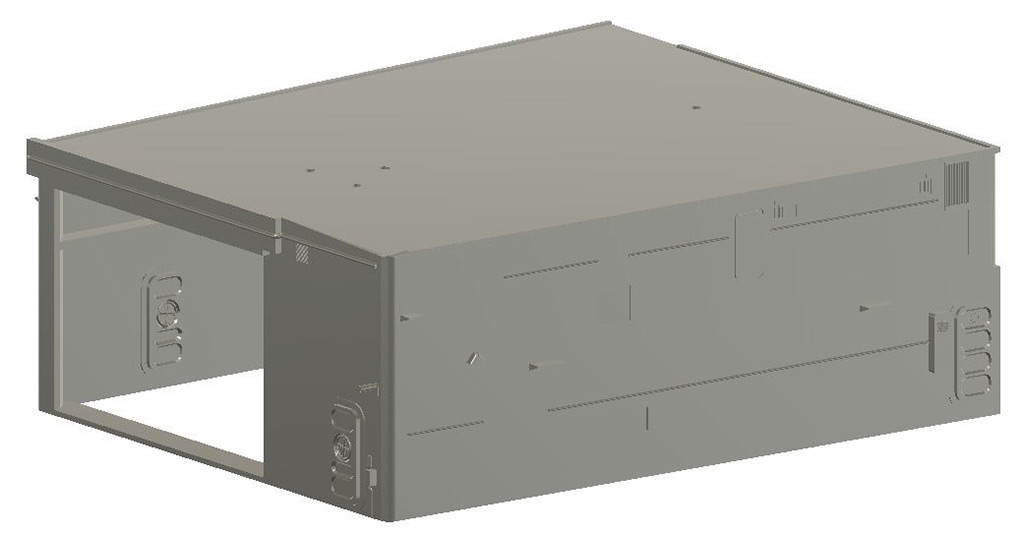
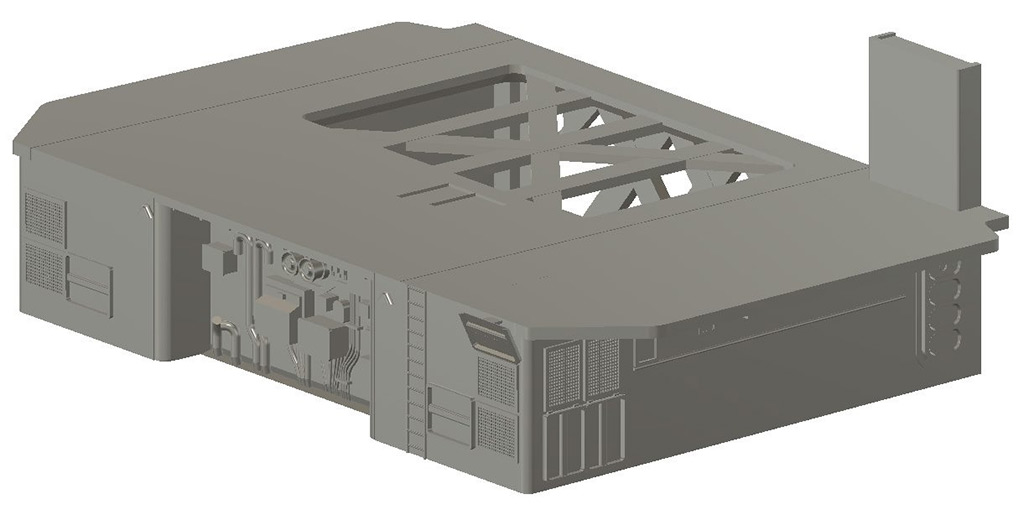
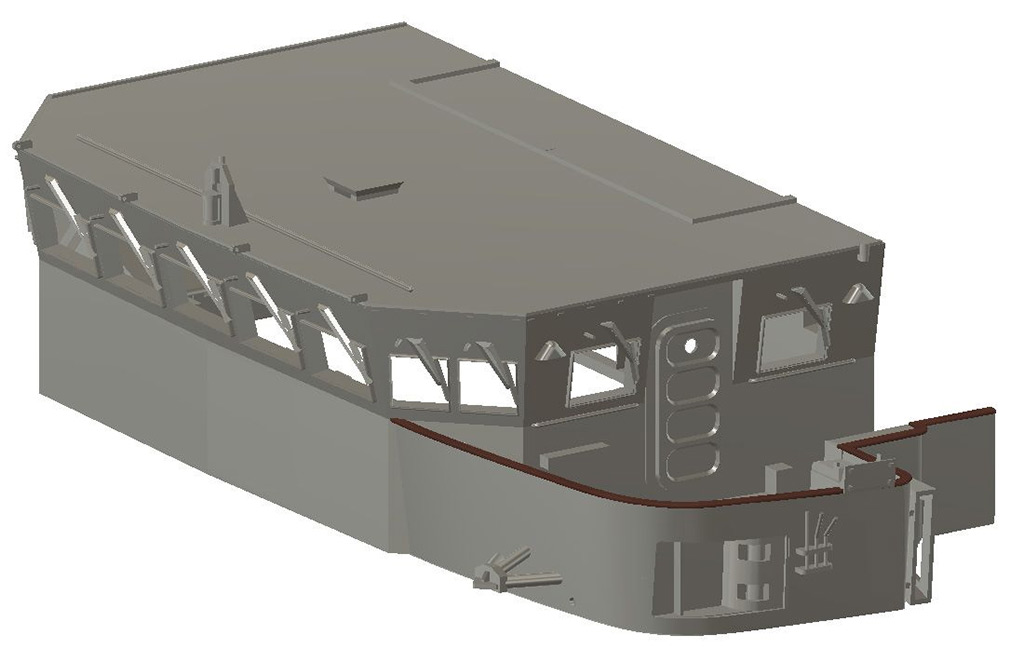
So, the most ambitious bit of design so far. Complete bridge and port bridge wing (no need to do starboard, it's a mirror image so I just print it mirrored). Hardest part here was finding reference photos - thankfully a couple of Facebook groups came up trumps.
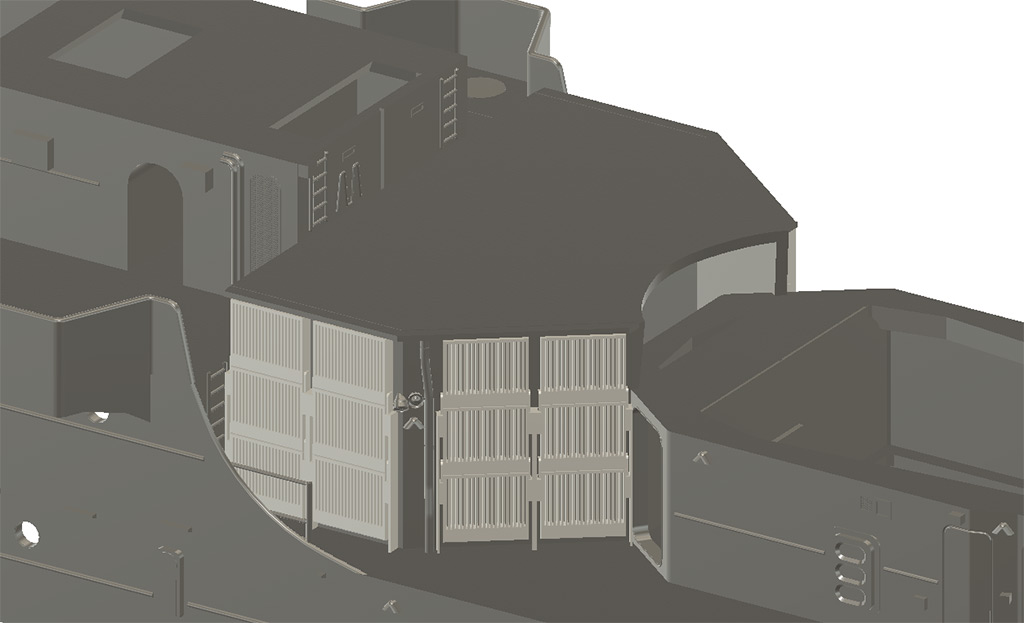
Despite there being little chance of seeing much through those windows I did some basic interior shapes and some roof detail. Just because.
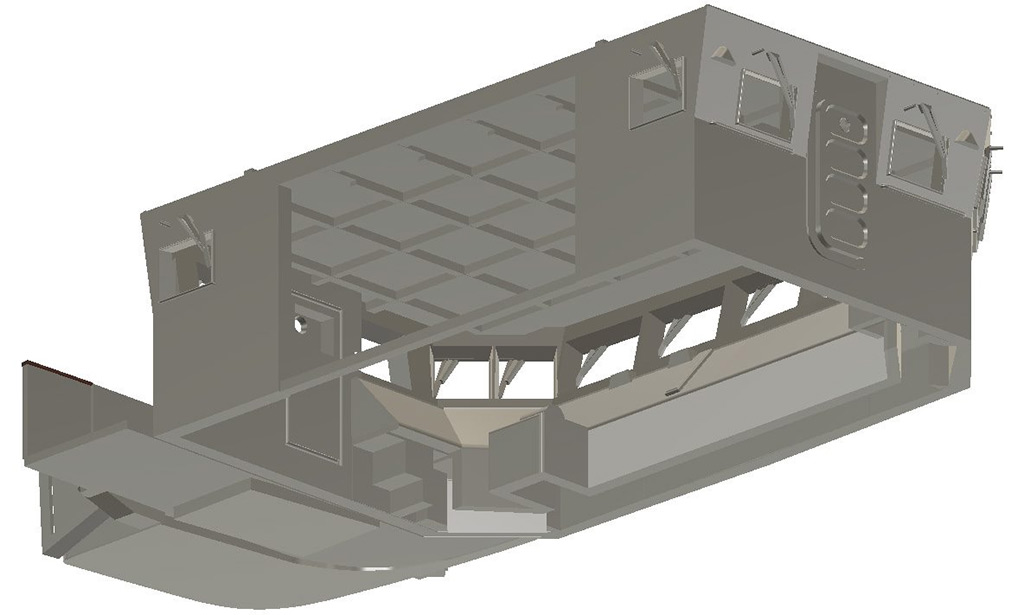
I've left the windows open and will figure out how to glaze them later. A couple of test prints gave me the right angle to park the windscreen wipers at so that they would print without needing to be separate bits.
However...

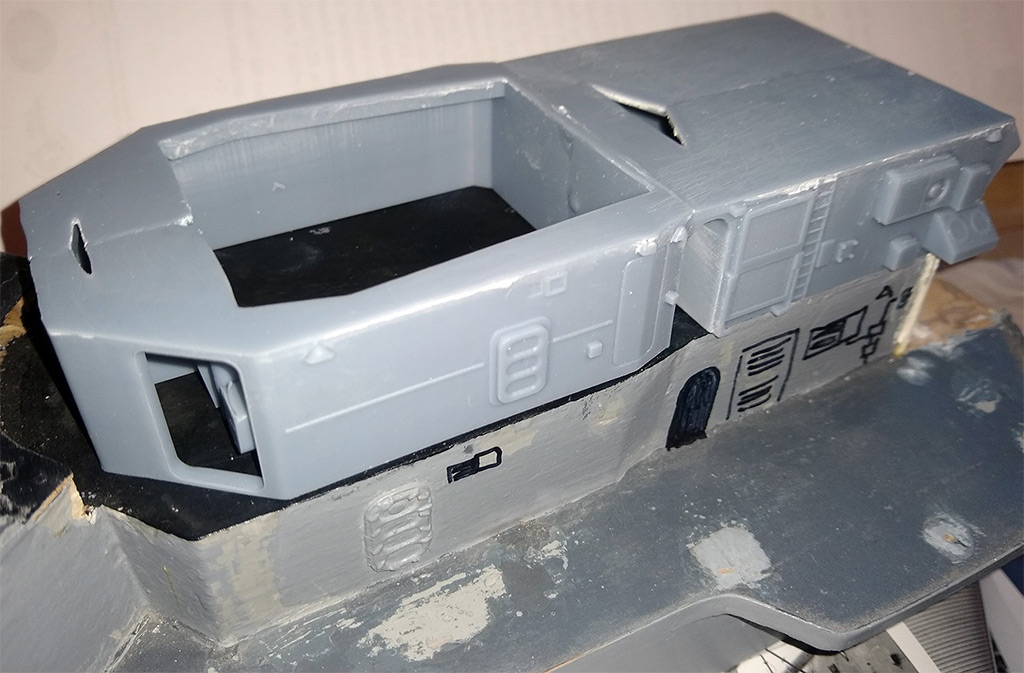
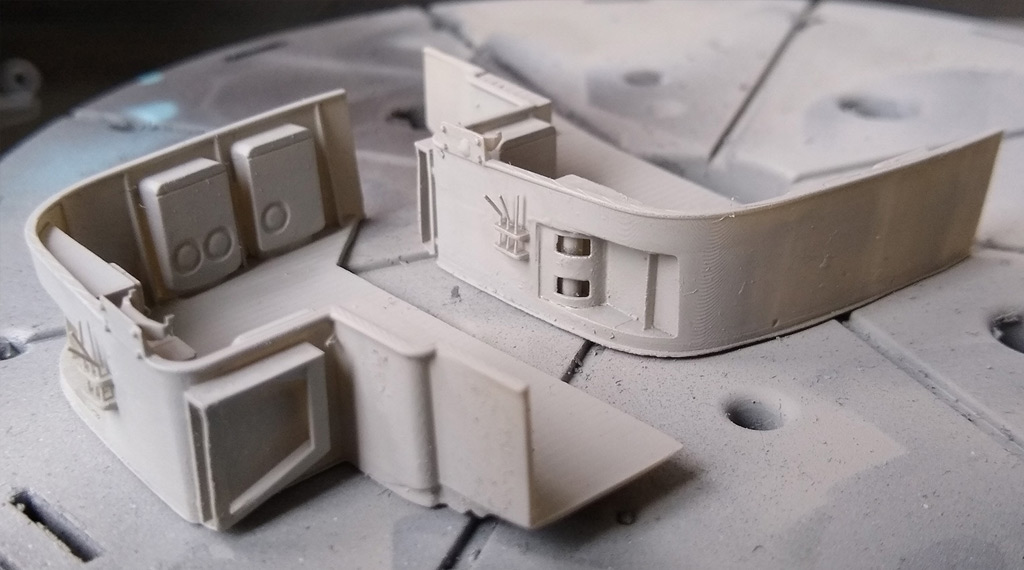
Some oddities when printed.
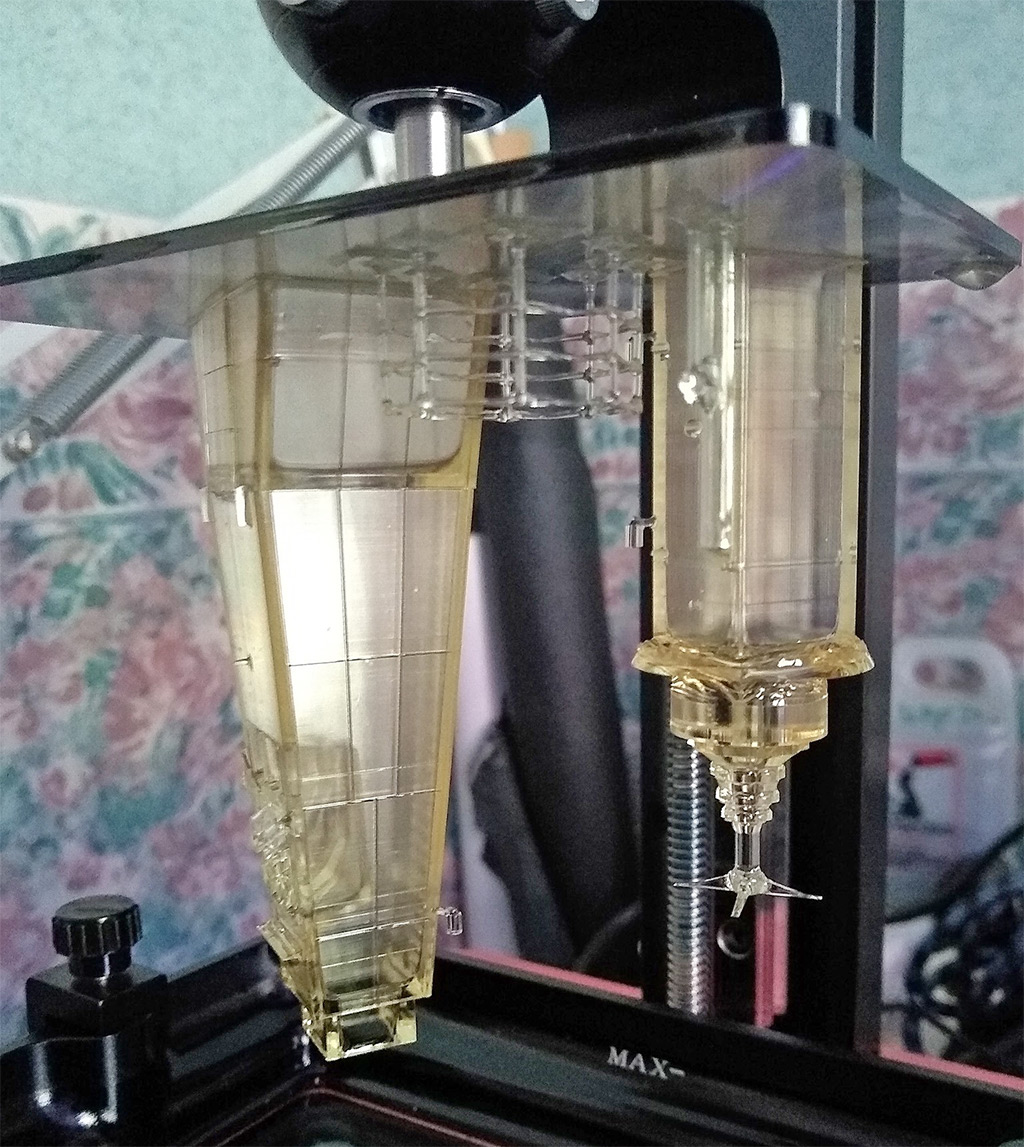
As with previous parts, I'd designed this to print from the ground up, i.e. the roof was the last bit to get done. The roof top, however, has lost some detail, namely the railing running from port to starboard behind the nav light stand. There's an odd 'step' just below roof level that isn't in the 3D model either. Also if you look closely at the bottom edges, there are some holes where no resin has been cured at all.
This is a problem with the Mars 2 Pro; it uses a grid of LED lights as a light source to cure the resin, and the plastic grid guide results in a cold spots where insufficient light gets through. Elegoo will provide a replacement grid and LED board if you contact their support, but it involves dismantling the entire printer to fit it and doesn't entirely cure the problem; I've since fitted my 'fixed' grid and while I no longer get holes in cold spots, you can still sometimes see indications of the grid pattern on large flat surfaces. A gentle sanding sorts it most of the time but there are types of printing - such as curved transparent lithos - you simply cannot therefore print nicely on this machine.
...more concerning though, is the recurrence of the weird piling up of resin in the roof interior:

It looks like uncured resin has collected and the roof has a sagged and melted look as a result. It took me some time after this to figure out what is going on. As the bridge was printed from the bottom up, it had nice solid walls and then the printer laid down a very very thin (0.02mm) layer of resin for the first lattice of roof reinforcement. That gets cured, then the print head moves up to peel the layer off the exposure sheet. It's not fully cured, so it's pretty flexible, and flaps like a sheet of paper in a breeze, being unsupported in the middle. When the print head moves back down to start the next layer, that flexible layer now flaps in the opposite direction, then a new layer is cured... with the previous layer not fully back in place. So over time this results in liquid resin trapped between ever wavier cured layers. Not good. The lesson is not to allow horizontal flat surfaces suddenly come into play as a design moves through the printing process.
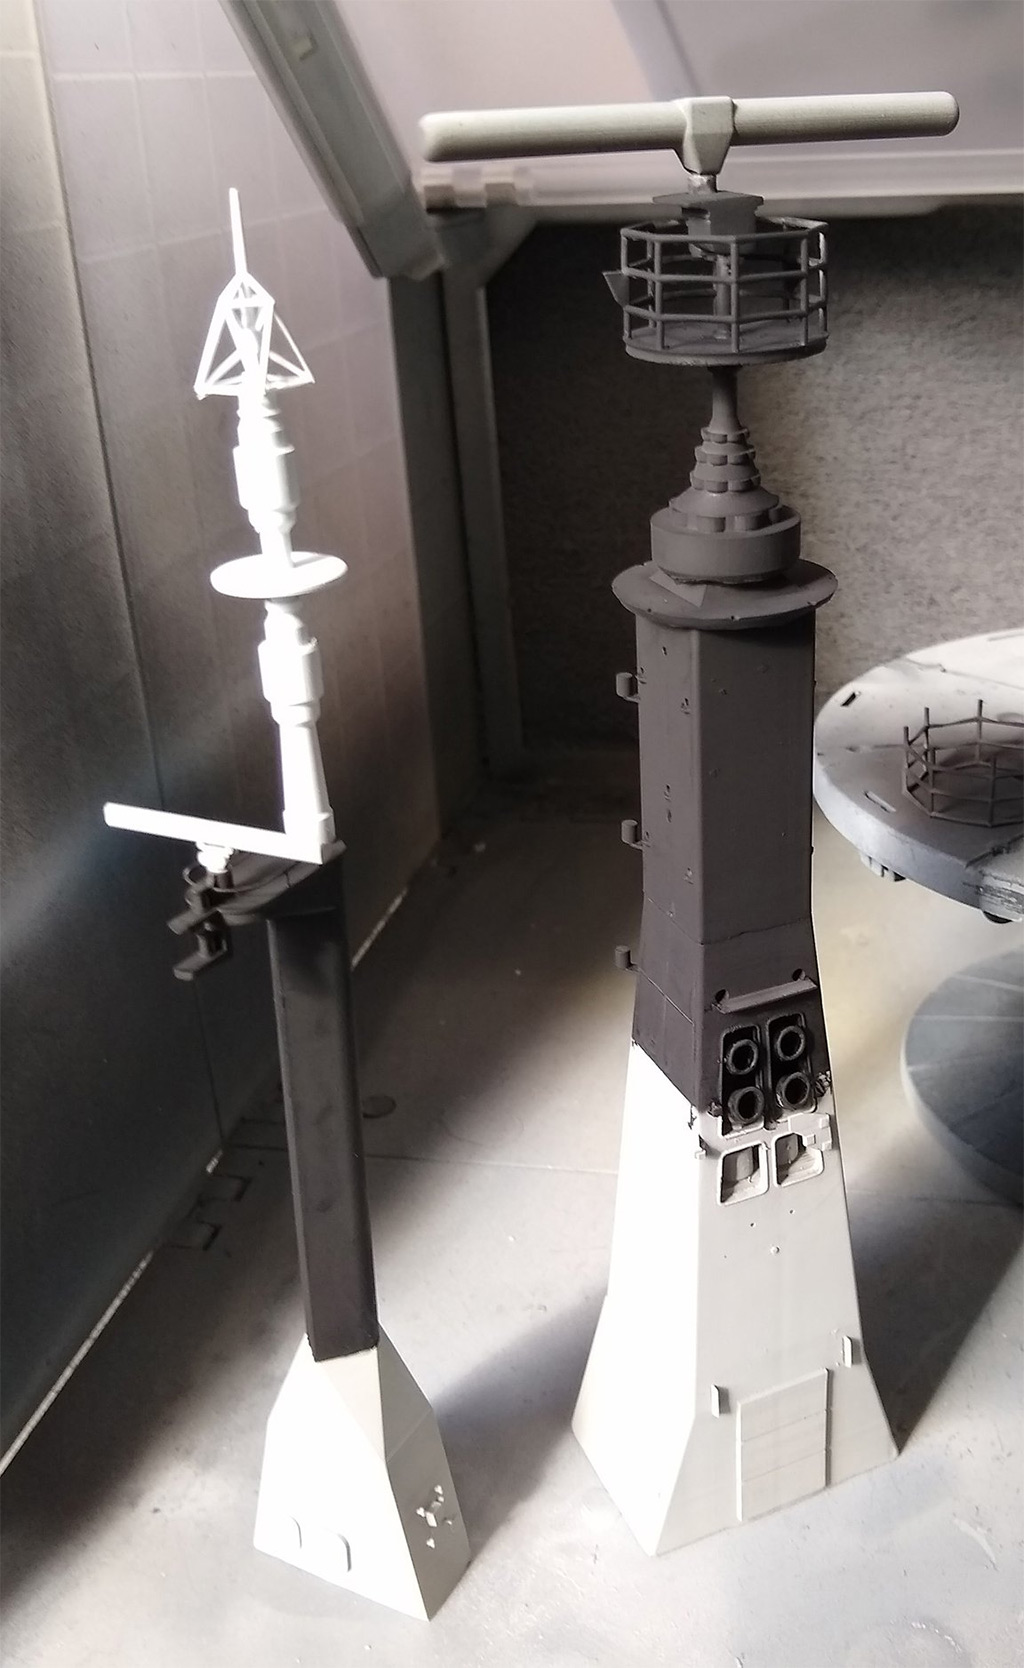
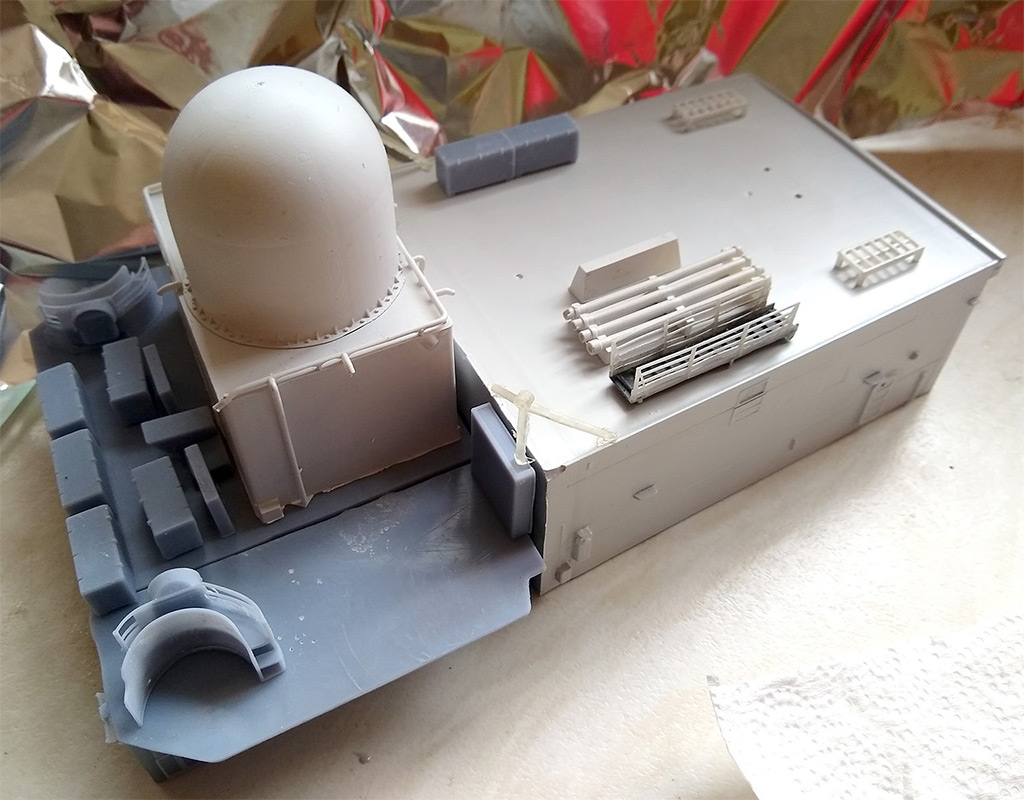
Bridge wings - these worked better, though I'm not too happy with the contours underneath them and how they'll fit against the existing superstructure. Amazed that the little pipes on the outside faces printed OK, though they're incredibly fragile!