One day by chance I found on the Internet an animation video called Oceanmaker and that corresponds to a short film where a girl tried to get a cloud to make rain possible in an apocalyptic future where the sea did not exist and there were a large number of ships abandoned, including an aircraft carrier.
That girl fought against other people who were trying to capture the cloud to get the water and she ends up sacrificing herself by crashing into one of the planes and in this way she managed to make the cloud produce rain for everyone.
This video is made by Mighty Coconut (https://www.mightycoconut.com/about) whose executive producer is Lucas Martell. I got in touch with them and I have told them about this project that we are going to carry out.
From the video I was immediately struck by the aircraft carrier but also the submarine, which presented a very elaborate scene with various buildings, trucks, wind turbines and structures. It reminded me a lot of the construction of the IJN Amagi by Marijn Van Gils.
I really liked that scene and that's why I thought about doing it. A few months ago I contacted Marijn (Thanks for his advice) asking him about various things such as structures and trucks.
For the realization he had initially thought of the Uss Virginia or the Yassen. Finally I bought the Delta III (Tula) submarine from Zveda at 1/350 but it was too long for the diorama, so after continuing to look for something as similar as the Hms Vanguard, I chose the French Navy submarine L`Triomphant from Hobby Boss in 1/350. It seems the most suitable for having a similar shape with the deep rudders on the sail.
It does not have the same shape astern, but I think it is a nice ship to build. In the real model it is 138 meters long, 12.5 wide and 10.6 deep with 12,685 tons of displacement. Her armament consists of 16 cells for M-45 or M51 missiles and 4 torpedo tubes.
The construction will also be done with more elements than those in the figure, trying to represent the submarine with wear and rust, as well as several other elements such as constructions, trucks, figures and some cranes that have been acquired in L Arsenal. All other elements will be made to scracht.
The general layout of the diorama will be the same as in the video and approximately this:
I liked doing this project, but there are things in which I don't have as much experience or knowledge as some friends of mine who form the Association of Celtic Modelmakers (AMCE) here in Galicia. That is why I proposed this realization to them and among several colleagues we are going to contribute our knowledge and skills to carry it out.
We have started and we will be completing this post so that you can see the realization and, of course, your opinions are welcome.
On workbench:
Uss Fletcher DDG-992 1/350
Uss Lexington 1/700
Russian SSBN Borei Class - K-550 Alexander Nevskiy
and more, more, more
Unfortunately I can't see the images, but probably that's due to my current internet connection.
I'm looking forward to seeing the layout once I get that sorted!
We have already made some advances in this project and we will try to show you the building process of this interesting model.
The model of the submarine L�Triomphant by Hobby Boss is simple to build and its construction does not present too many difficulties. There is no major issue in the union of the hull other than sanding some remains of the injection process.
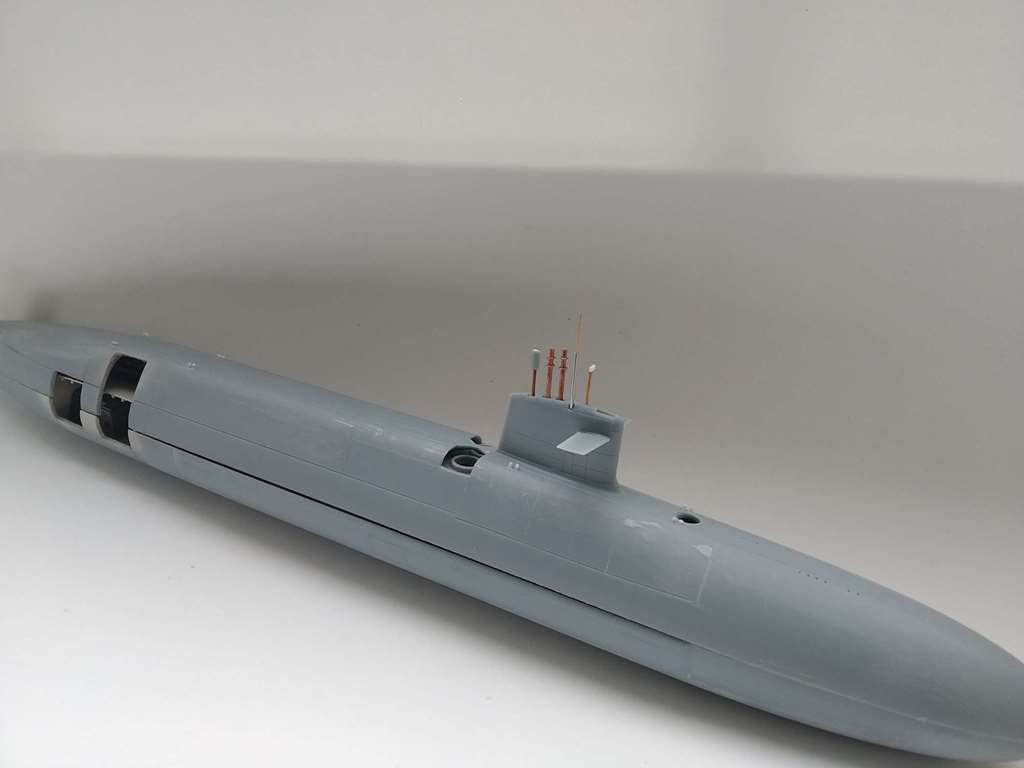
This is a first look of this submarine, that shows beautiful lines.
I have looked for information of the L�Triomphant to establish the internal disposition of the submarine, that it is basically the same in every ship of this class. The disposition of the launch silos is somewhat different in some of the units; in some of them they were built in two groups of eight, separated by a space reserved for equipment, while other submarines carried all the silos in a single section. Next is the space for the nuclear reactor and then the propulsion machinery equipment.
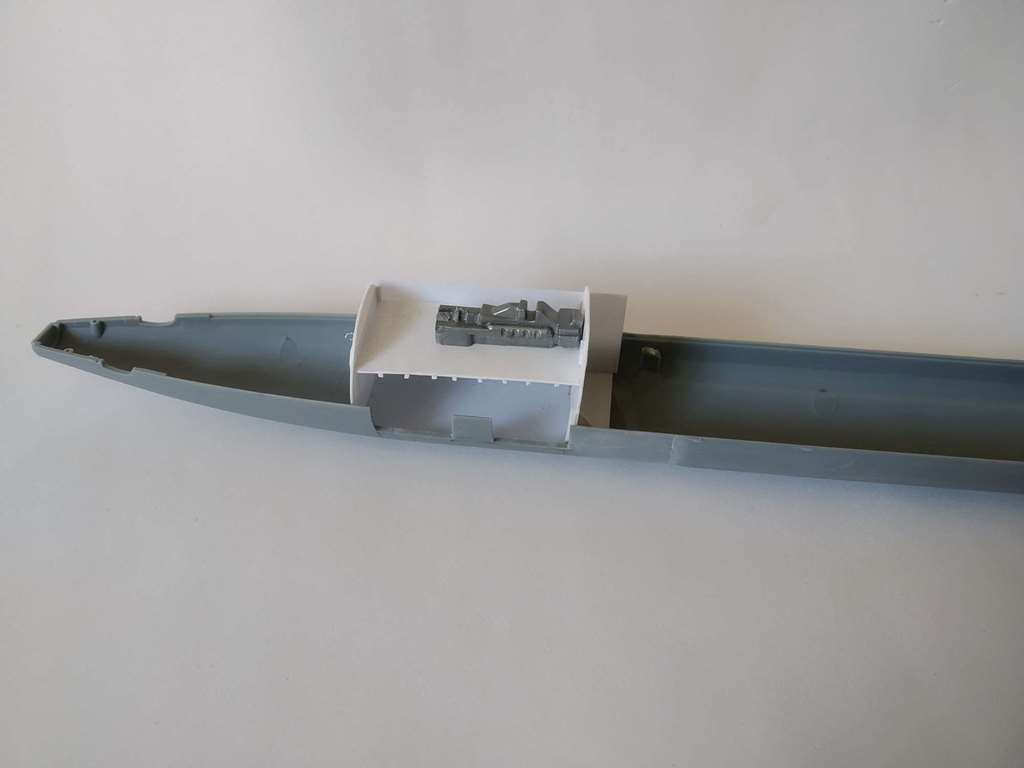
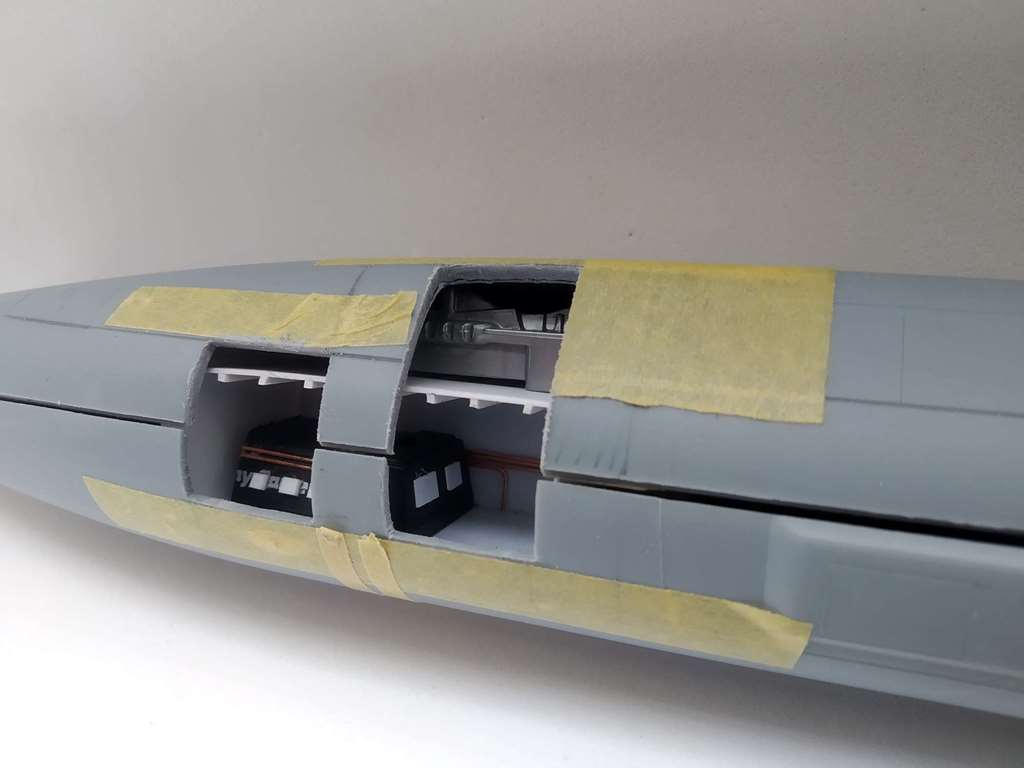
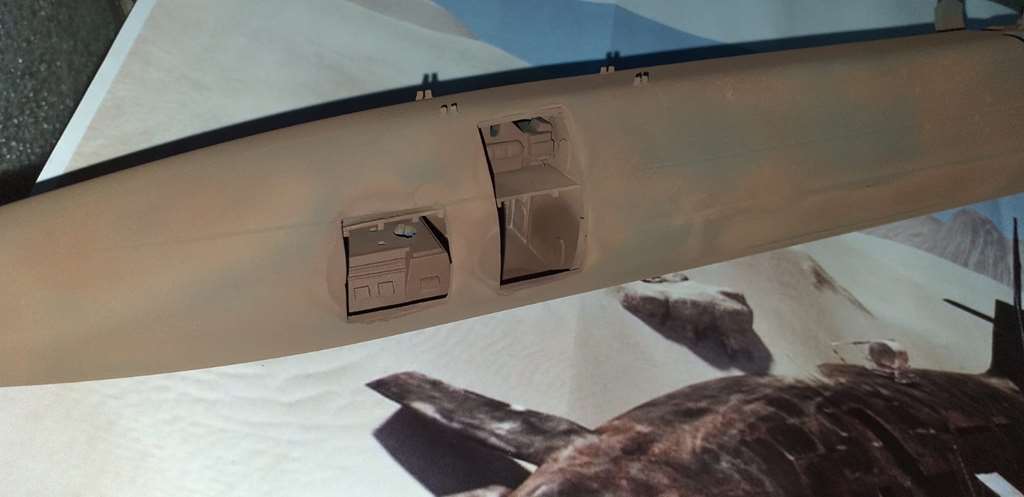
I had to be careful when I opened the hatches in the hull according to the diorama, which seem to correspond to the machine rooms. There are two openings, the one fore being larger than the one aft. The opening process itself was easy with a simple multitool, with a bit more complicated sanding of the edges afterwards.
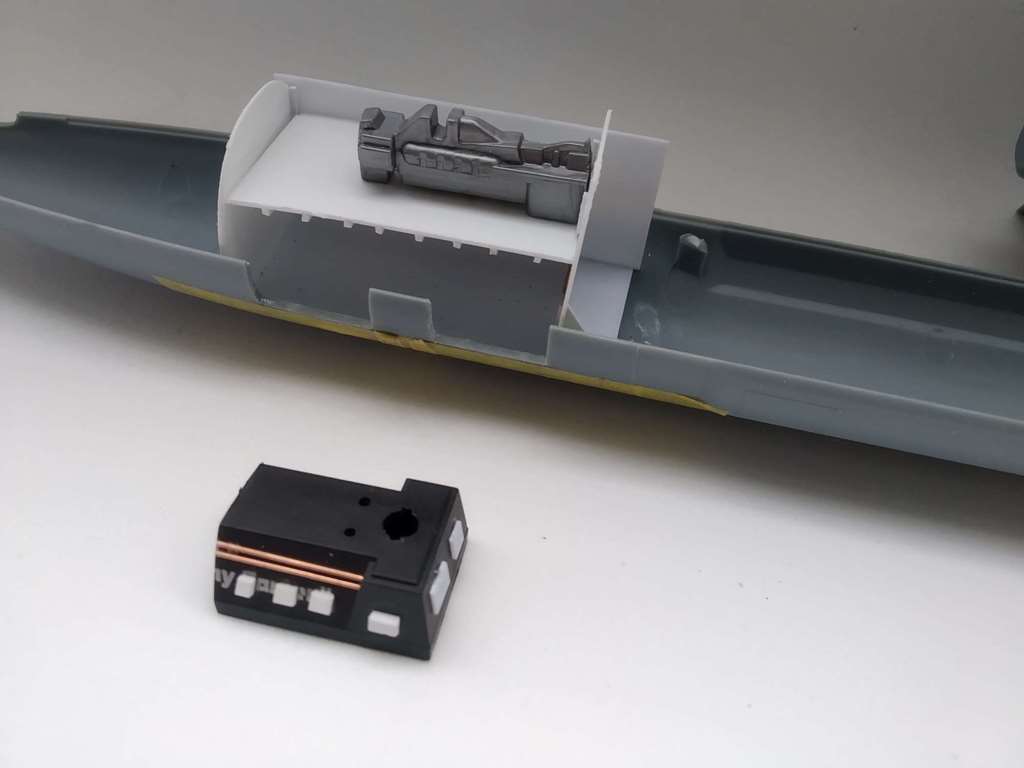
The diorama shows virtually nothing of the inside areas, but we wanted to represent a minimum of them at least. This has required to make a small compartment with plastic sheet and to build two bulkheads that have been detailed with several doors and copper wire to reproduce the piping.
The upper part of this opening required giving the ceiling another look, and to solve this problem without adding more plastic, I simply added a piece of sandpaper to it.
A piece of another kit has been placed on the first of the covers to give it an appearance of machinery that later in the elaboration of the diorama will be completed with more wiring details.
As for the second deck, I have thought advisable to install some elements of machinery as if they were parts of a turbine. It does not have to be excessively detailed, and to achieve this I have used the base of a submarine to which several pieces of plastic sheet and wire were attached to give it a certain detail level that I will improve in the next steps.
As a further detailing of the submarine, the sail has been prepared by replacing all the antennas and periscopes with elements of copper and steel wire that at the same time will strengthen it somehow.
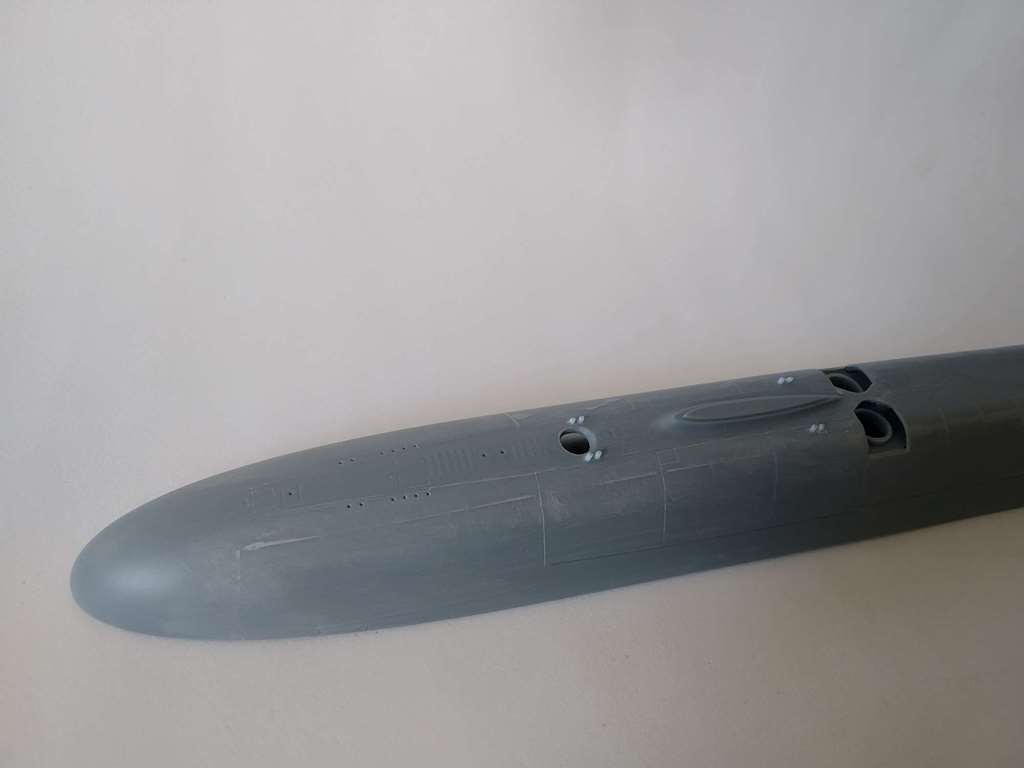
I wanted to give the hull some details as well, and the bollards have been drilled to show them unfolded. One of the forward hatches has also been opened and will be shown in open position. The hull has been sanded in several areas to delete several imperfections.
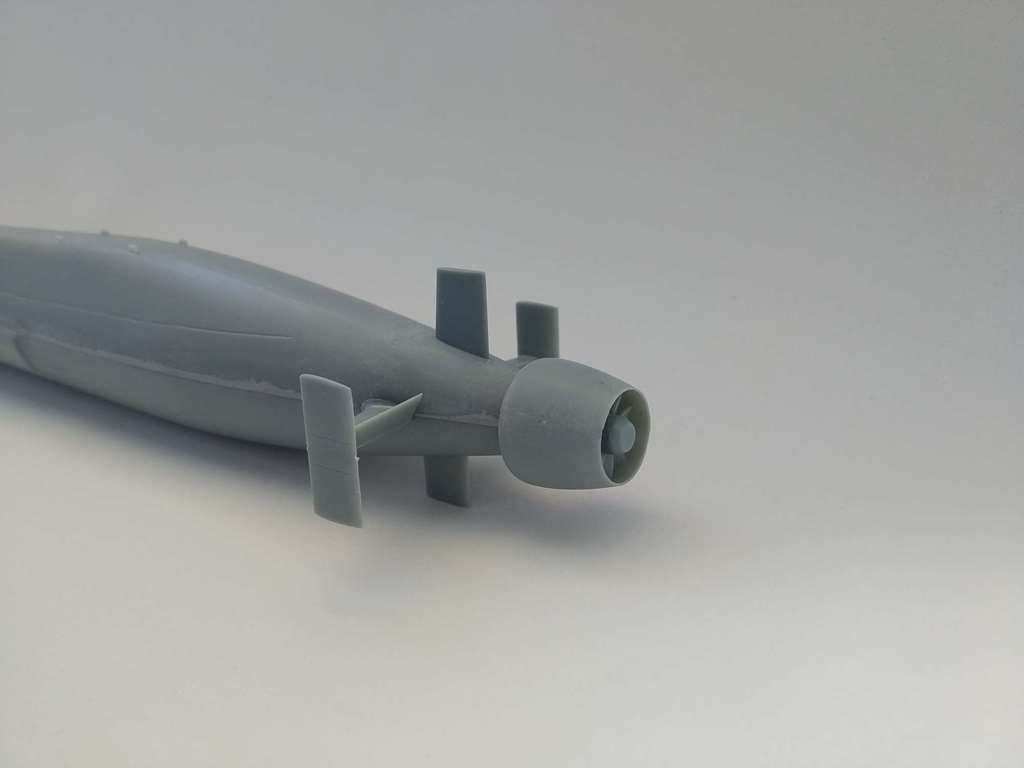
The propeller is not a major issue and neither is the missiles sanding. I preferred not to use the photo-etched propeller because the one in the kit is well detailed.
A primer was given to the inside before closing the hull because it would be impossible to apply it afterwards, and there would defects in the paint too.
The hull seams needed only a good sanding after closing the gaps. This part does not correspond to the waterline and care has been taken to leave the hull well finished. The bow hatch, made with plastic sheet, has also been added. The rudders were also set in place, although they were later removed to go on working with the hull.
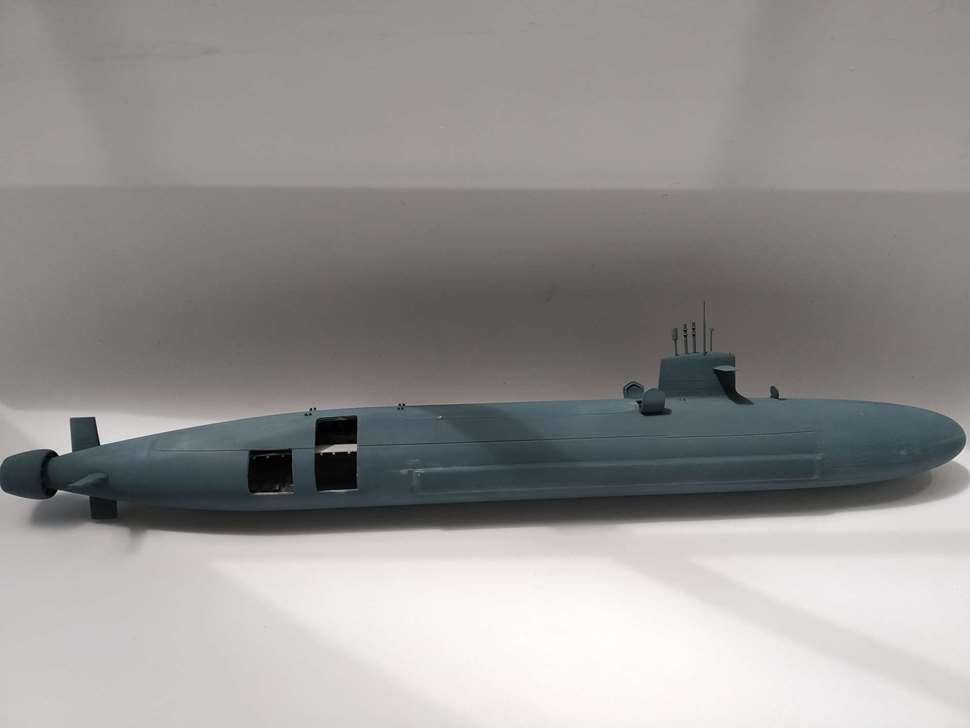
And this is what this submarine looks like at the moment, before starting the priming.
That's all for now.
(Willie collaborates with us for a better translation.)
On workbench:
Uss Fletcher DDG-992 1/350
Uss Lexington 1/700
Russian SSBN Borei Class - K-550 Alexander Nevskiy
and more, more, more
I saw the video some time ago, and was also struck by some of the fantastic imagery. Your project is inspired! I am looking forward to following your progress; and the finished diorama!
A few more previews of this project. Thanks for your comments and interest.
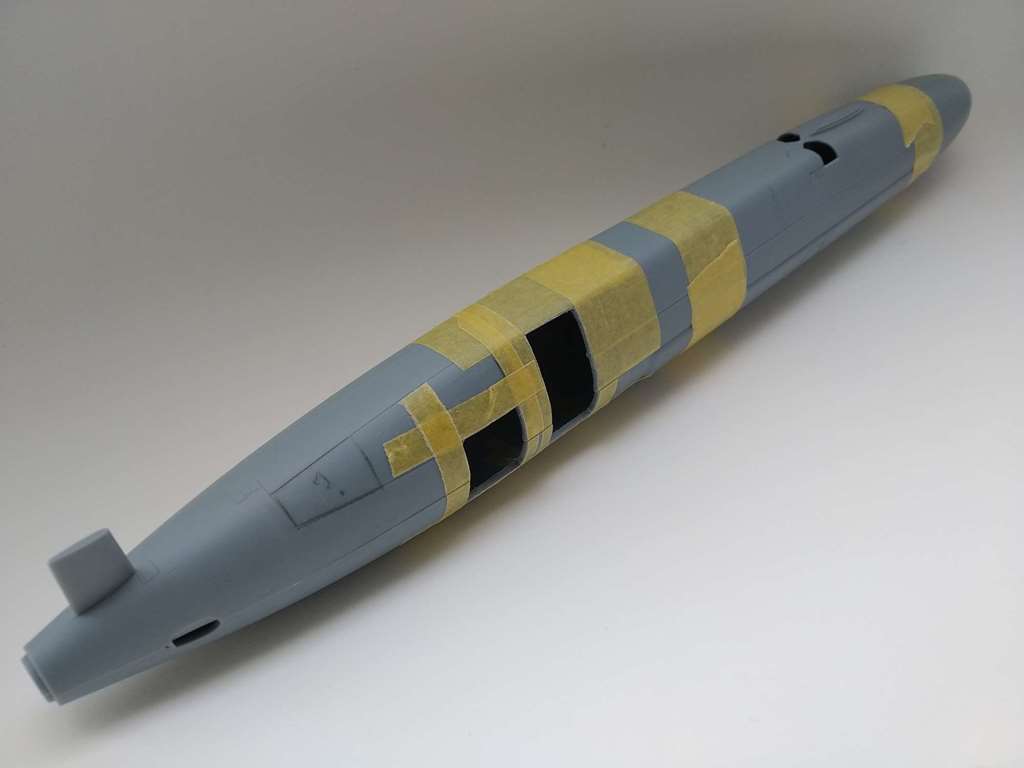
As I said before, this submarine has very interesting and defined lines, other than its size that is very suitable for the diorama we want to build.
In several photographs of French Navy submarines in dry dock, we have observed a general bluish tone under the general black one, so before starting with effects, a general primer has been given using a dark bluish colour in Humbrol 96.
This finish allowed us to make several corrections in the construction that were not appreciated too well and that were mended by sanding the model with different types of sandpaper.
We have started with the process of wearing down and rusting the submarine hull. This requires quite an elaborate work that is not complete but that is already almost done. The holes previously opened in the hull have followed the same process, although some details will be added later on.
The basis of the work is to consider that an element that is exposed to the elements in oxidation retains little original colour. In this case, we have started with a base coat of Tamiya XF-64 Red Brown.
Shades in Tamiya XF-69 Nato Black were also added, highlighting several parts of the hull without saturating it. Accordingly, several rinses were made to the XF-64 and some orange spots were added as well. This was followed by a general wash and outline in sienna, tan and black oil, accentuating with a sponge the chips in the black areas, using Vallejo English Red and a dry brush.
Finally, a new general wash has been done with tan and black sienna oil, in addition to outlining several areas, also in black.
The model is not completely finished, lacking a further refining of the tones that will be added as soon as the final basis is ready with the correct colours, so that the model can be displayed more properly.
That's all for now. Regards.
(Willie collaborates with us for a better translation.)
On workbench:
Uss Fletcher DDG-992 1/350
Uss Lexington 1/700
Russian SSBN Borei Class - K-550 Alexander Nevskiy
and more, more, more
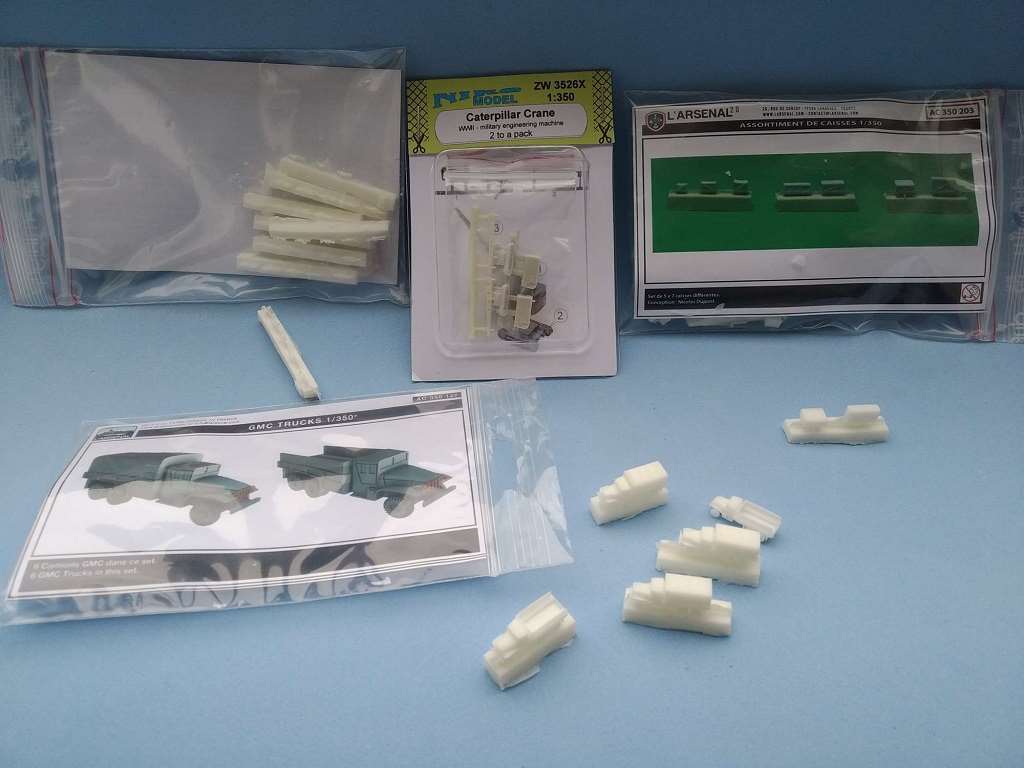
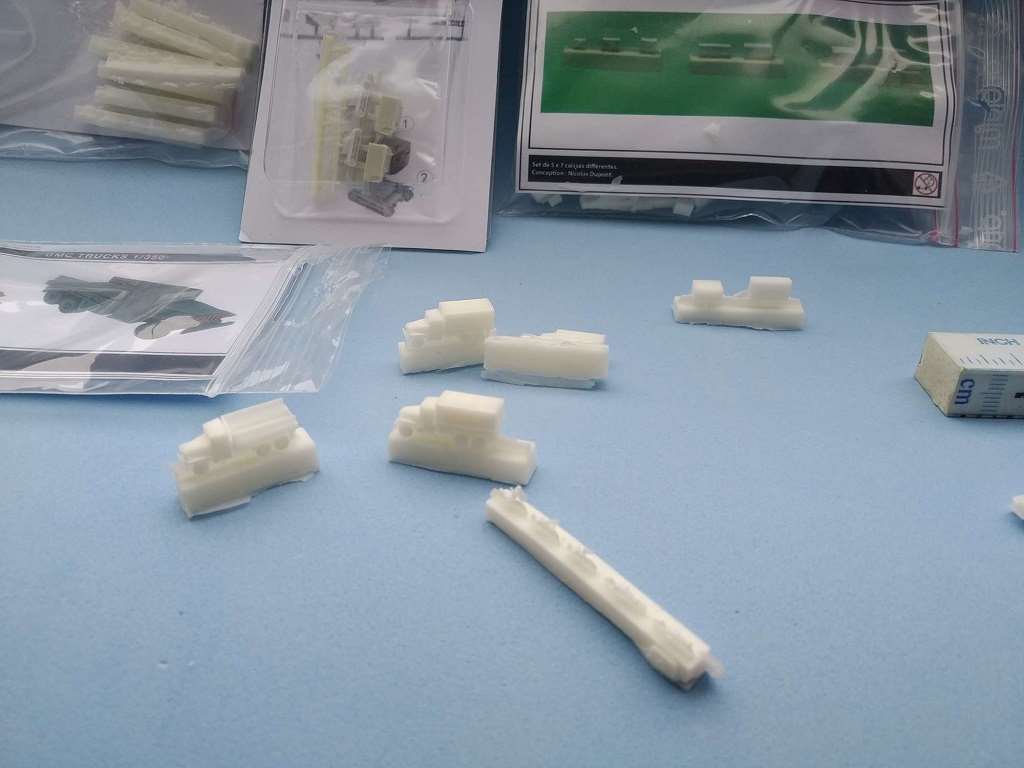
Just a few previews of this diorama with several vehicles that are being prepared.
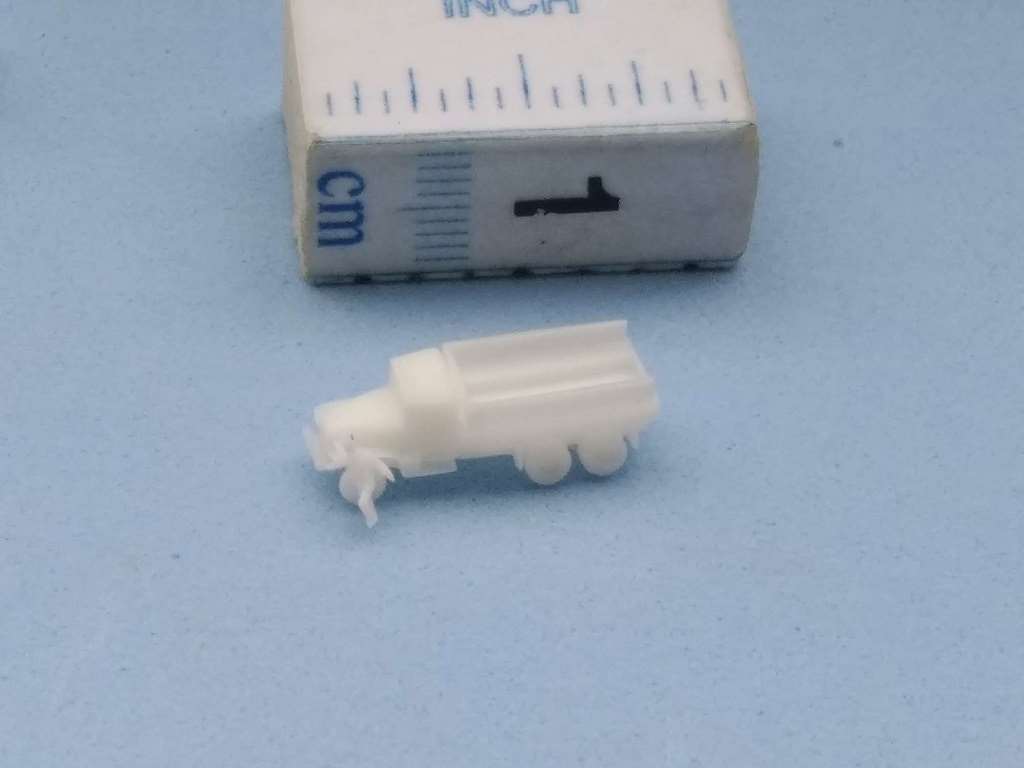
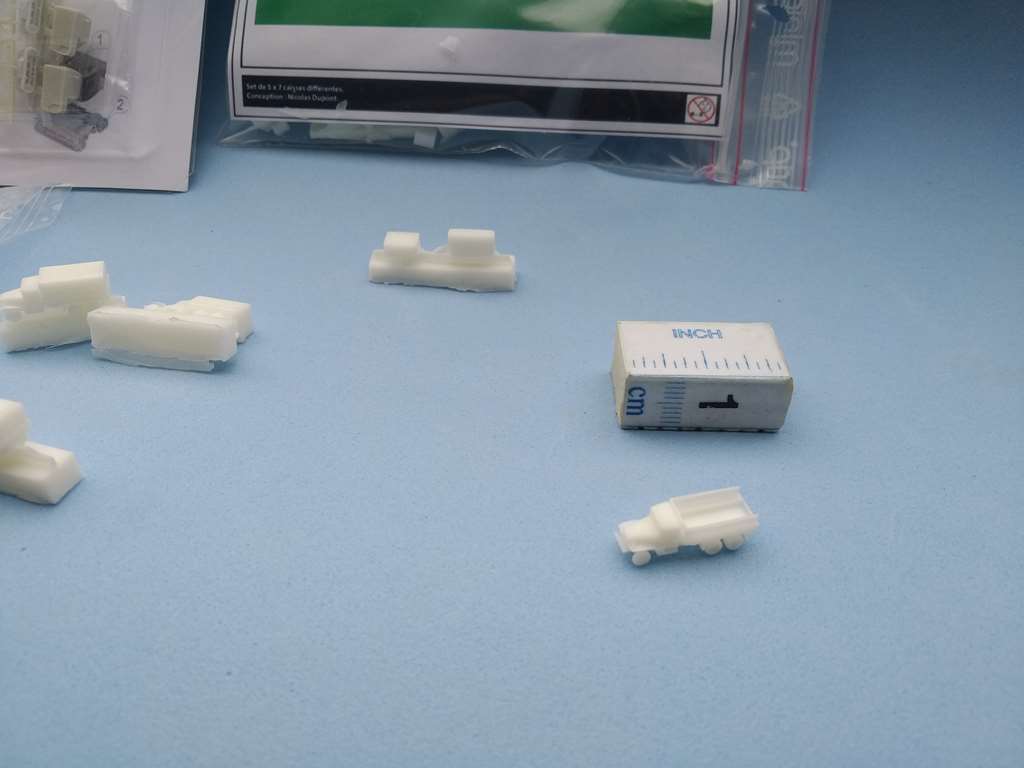
I have purchased a set of trucks from L�Arsenal GMC, reference AC350127. There are six trucks, three without a cover and another three with it, along with a small PE set.
They are made with great detail and although they are not exactly those of the diorama they will fit in it without further problem.
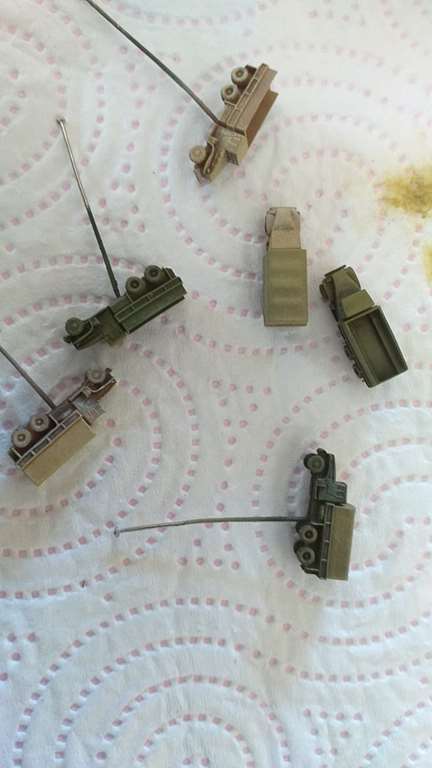
The painting of the trucks is apparently simple but has required several steps to get a good finish.
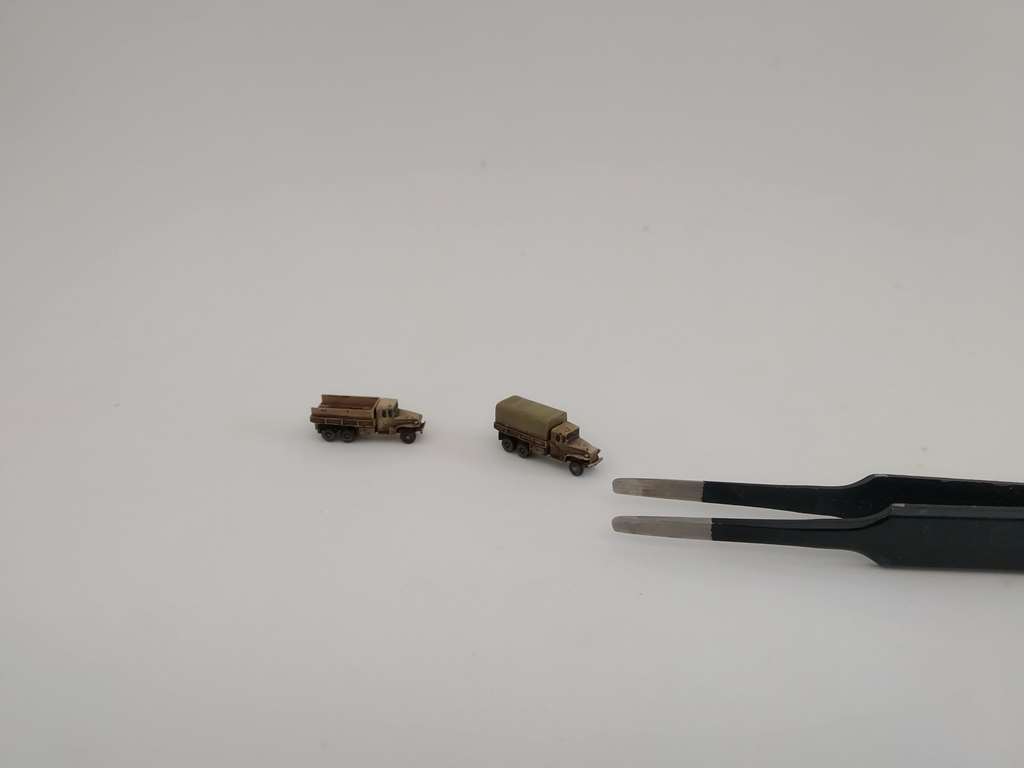
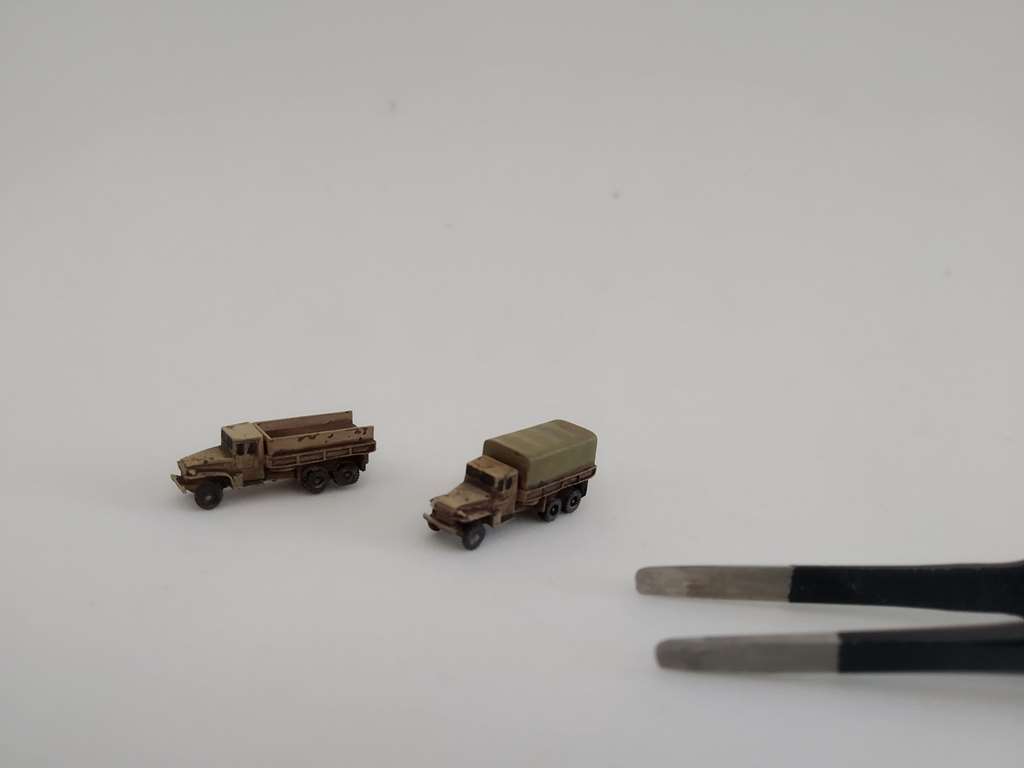
For the greens, I have used Nato Green and Sand Buff from Tamiya (XF57), in addition to Khaki for the tarps.
Subsequently, the details have been outlined with black and Toasted Sienna oil and finally a dry brush with Vallejo Stone Yellow.
For the trucks with Khaki color, Desert Sand from Vallejo has been used, also using a dry brush in white in addition to oils, and finishing the process with several chips using brown watercolors.
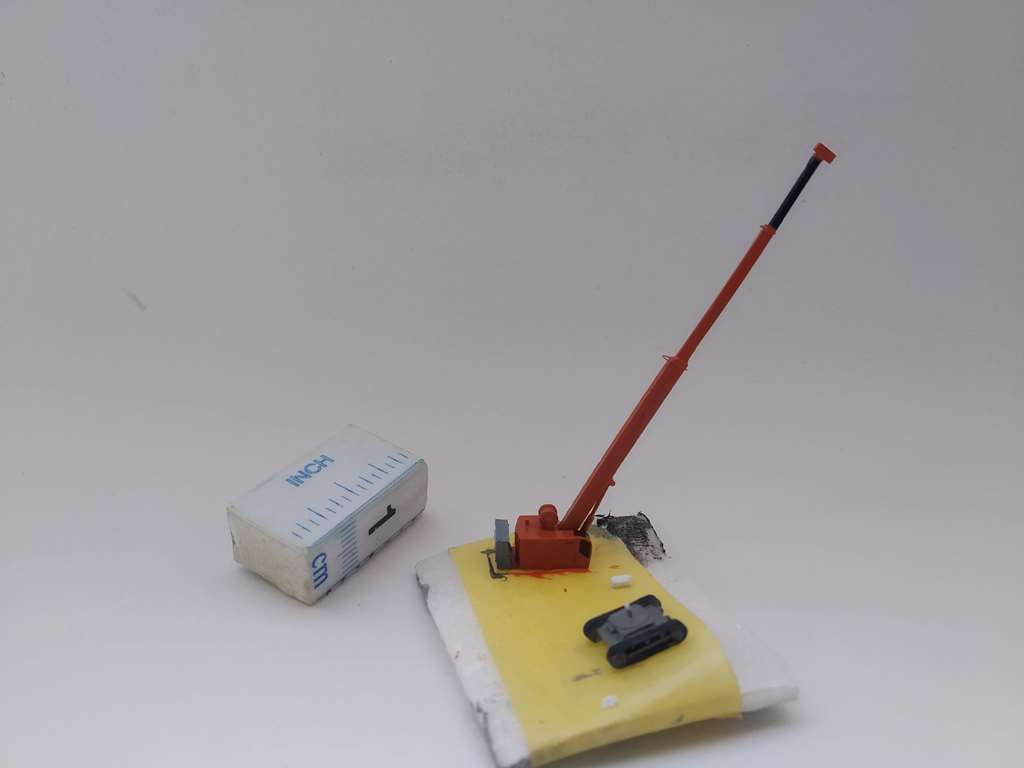
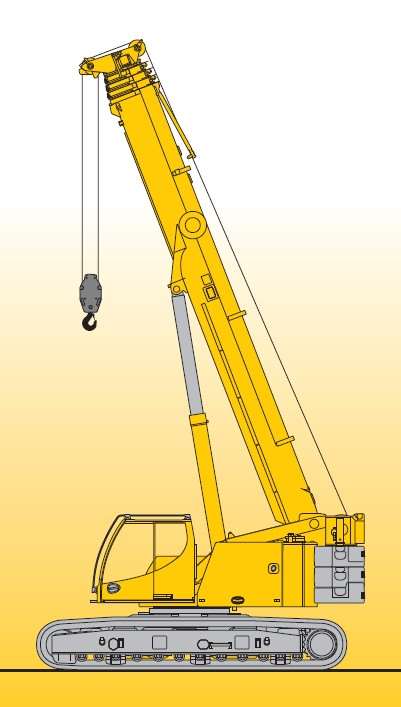
No crane is represented in the diorama, but I am considering to place one in a scene as while removing one of the submarine's missiles. I have a Niko model that corresponds to a caterpillar model.
However, the boom of the crane is too small in height, so I have replaced it following a telescopic loading boom model to which we have added two guides for the cable and a cable roller, the hydraulic arm that lifts the boom and various loads that compensate for the weight lifted by the crane.
For painting we have applied a grey primer, using an orange Humbrol color afterwards.
The next process is easy, using a yellow dry brush and adding toasted sienna oil. However, although it is not bad, I will place it in a secondary scene since I have made another crane on crawler support, as a more suitable model for the load it is supposed to lift.
This is the model that I have finished; the next one we will described later.
So that�s all for for the moment, and best regards.
(Willie collaborates with us for a better translation)
On workbench:
Uss Fletcher DDG-992 1/350
Uss Lexington 1/700
Russian SSBN Borei Class - K-550 Alexander Nevskiy
and more, more, more
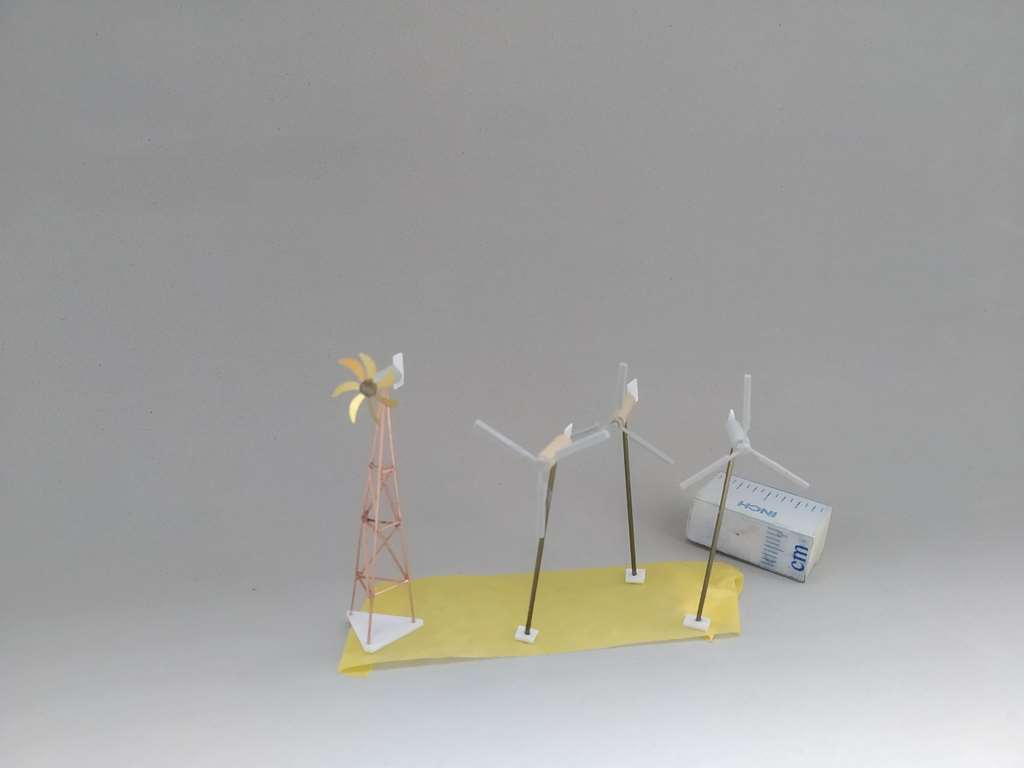
Among the elements of this diorama there are 9 wind generators of different models which seem to consist of a simple propeller placed on a structure.
I have assumed that the purpose of these wind turbines is to provide power and if I made exactly the model it would not have that purpose, hence the small variations on these models.
I started making a triangular structure with copper wire supported by a base that will be buried in the sand. The building process is relatively simple using small drops of CA on the framework.
This offers a solid structure in which I have placed a small piece of sprue with the suitable diameter as to allow to use as blades the PE ones of a submarine prop.
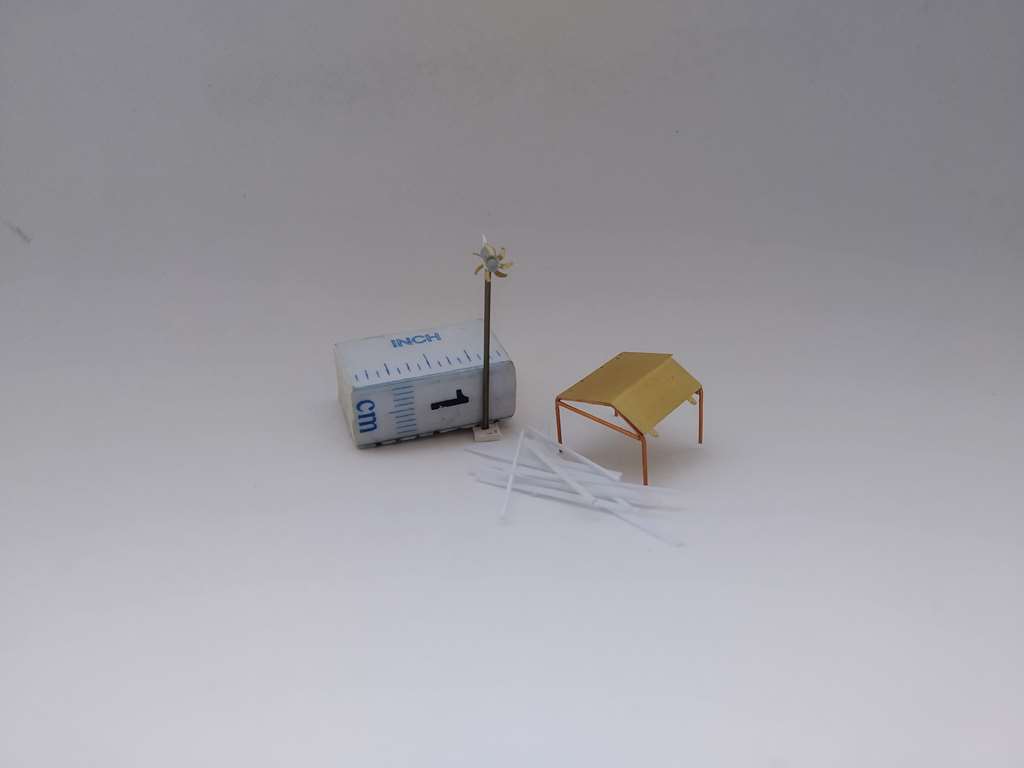
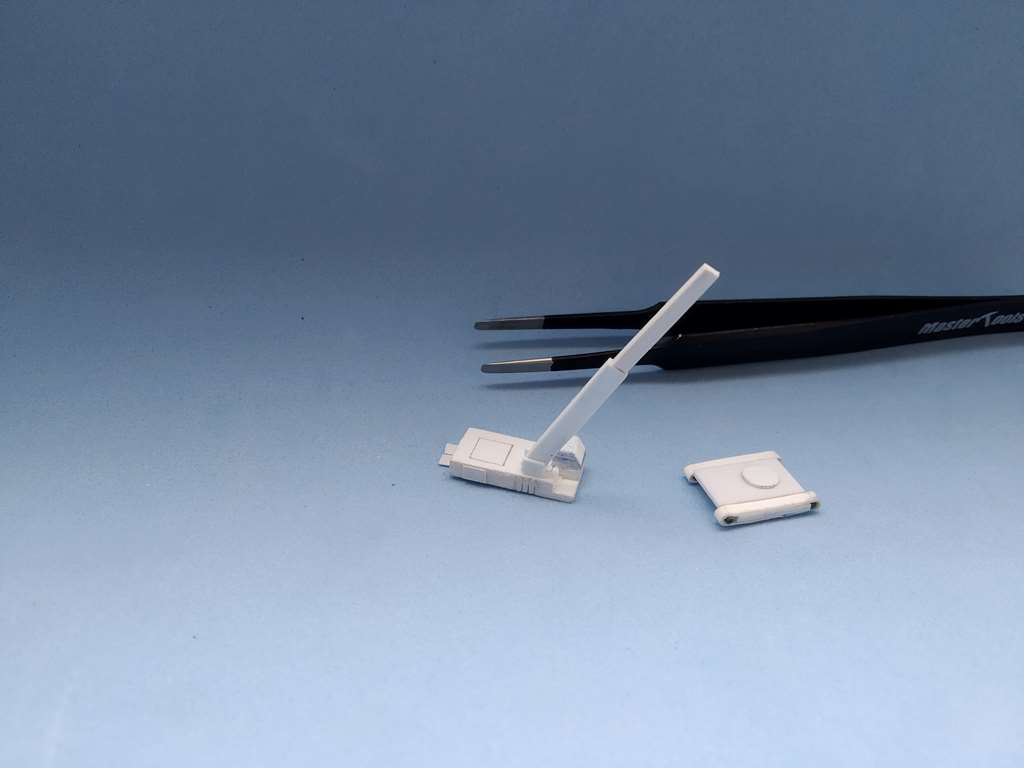
Another one of the generators was made with a four-sided structure, also made with copper wire, on which I have placed a piece of sprue along with four screens made of styrene strips.
There are other ones that I have made on a central rod that supports a piece of sprue and with another leftover PE as well as a sheet of styrene that functions as a wind rudder.
Here you can see it along with two provisional building prototypes.
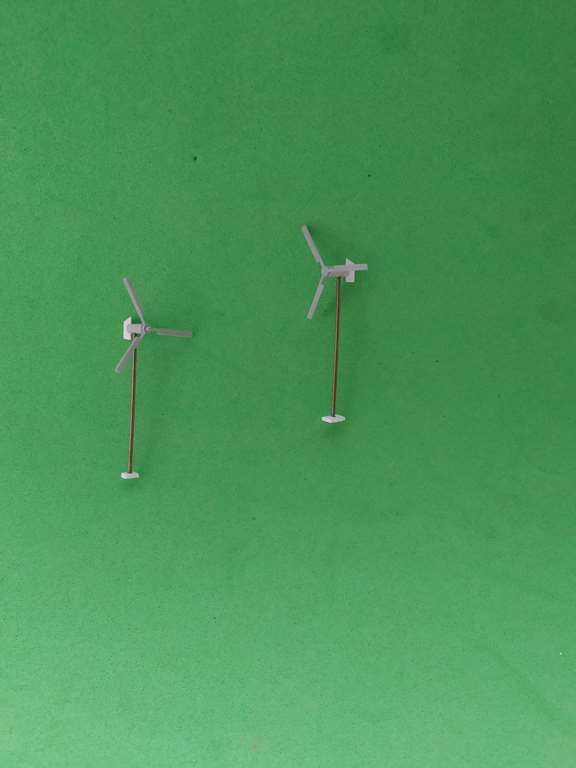
Some other ones have also been made following the same sprue-on-a-rod system, but I have placed the rotors of several 1/700 scale helicopters that I consider to be the correct ones for these wind generators.
With some more photo-etched and props leftovers, I have completed the generators that will be refined further on with the corresponding wiring.
Finally, the scaffolding that appears aft of the submarine has also been made with copper wire of different thickness together with styrene strips.
And that�s all for now. More updates to come.
(Willie collaborates with us for a better translation)
On workbench:
Uss Fletcher DDG-992 1/350
Uss Lexington 1/700
Russian SSBN Borei Class - K-550 Alexander Nevskiy
and more, more, more
After this lapse of time I have made some progress in all the elements of the diorama, adapting the different constructions that I had already made and addeing some new ones.
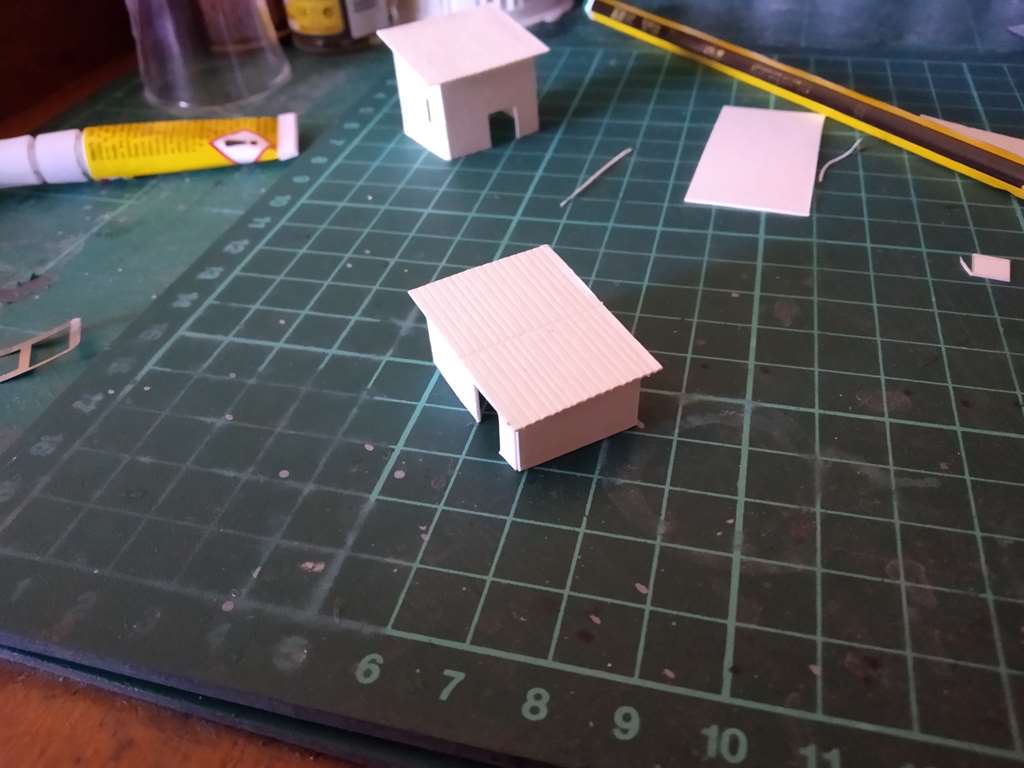
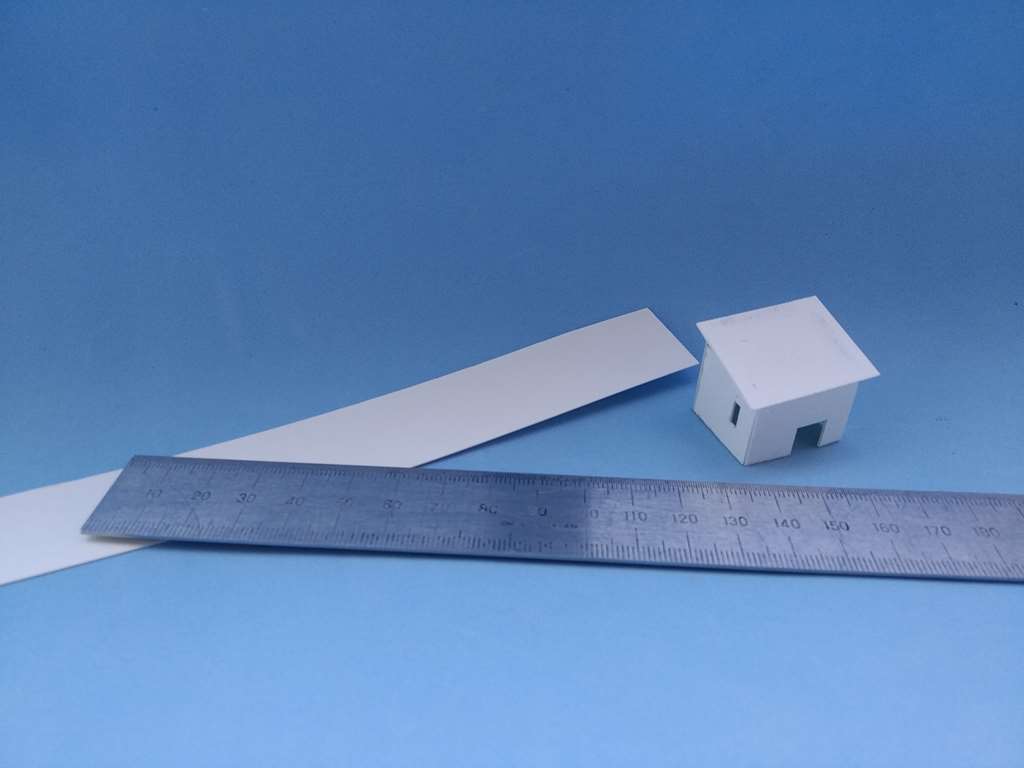
The buildings to be displayed in the diorama are varied and I have made an attempt to represent them at least in their basic shape.
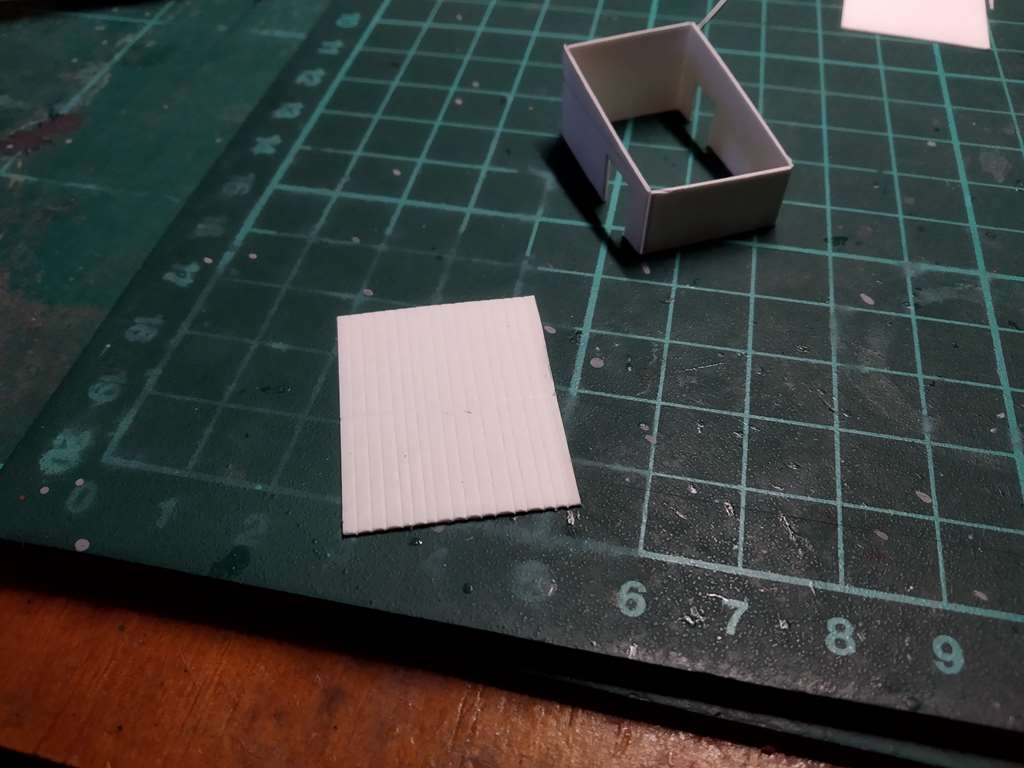
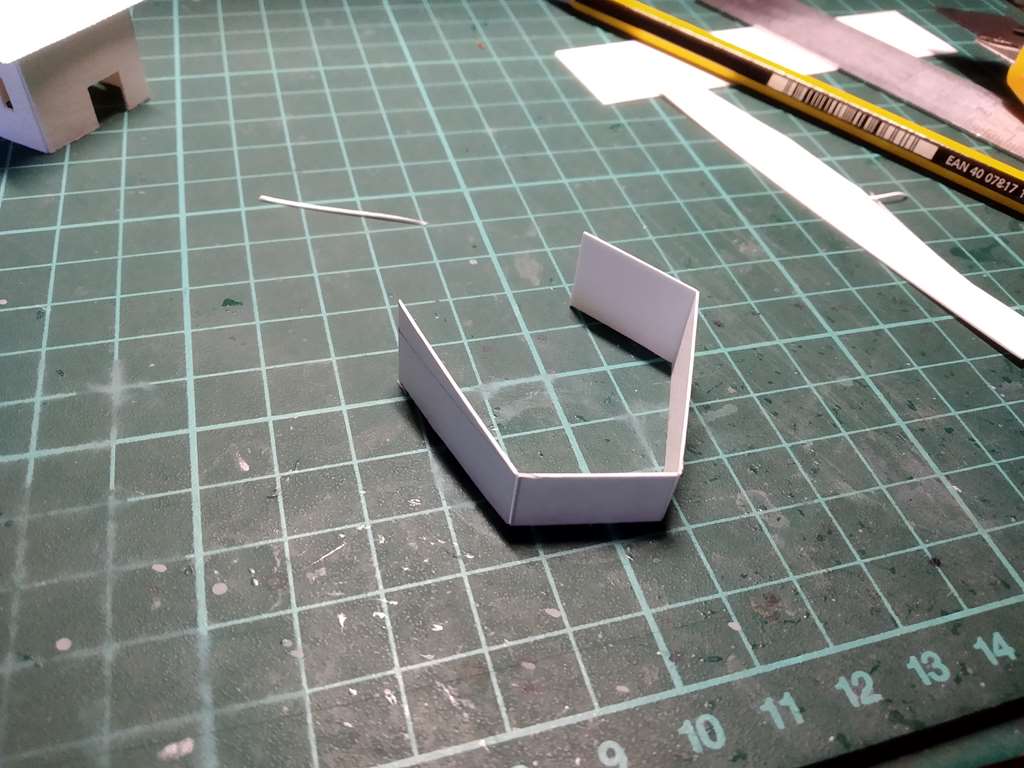
To make them, I have used thick cardboard with a simple structure preparing doors and windows.
The process means drawing the entire contour of the building with the shape of the roofs in such a way that its later assembly is therefore easy. The roofs are also made from the same cardboard by etching stripes with a scriber to give it the appearance of a sheet metal roof.
I have arranged several boxes also from L'Arsenal in 1/350 as well, and through the processing with various shades I have finished them in a natural wood color and also in a flat grey.
I had previously modified a Niko Models crane that was a WWII model
I have added some counterweights to the rear and modified the loading boom too. However, it seemed small for the intended purpose of raising a missile that can weigh 25 tons, so I was searching existing models until I found one that seemed to suit my model best.
I preferred to make a model from scracht, using plasticard in different thicknesses along with the same cardboard that I use for the constructions, adding small pieces of photo-etched parts for grills and some wire sections for the exhaust.
The final result is this more appropriate one, that once paint and aging effects have been applied will fit well into the diorama as you will see later, without applying the cables yet.
Step by step I have been preparing other small elements of the diorama such as tubes, platforms and windmills, which have been given --using several colors, basically Tamiya and pigments-- the same paint treatment as the submarine to display an aged looking .
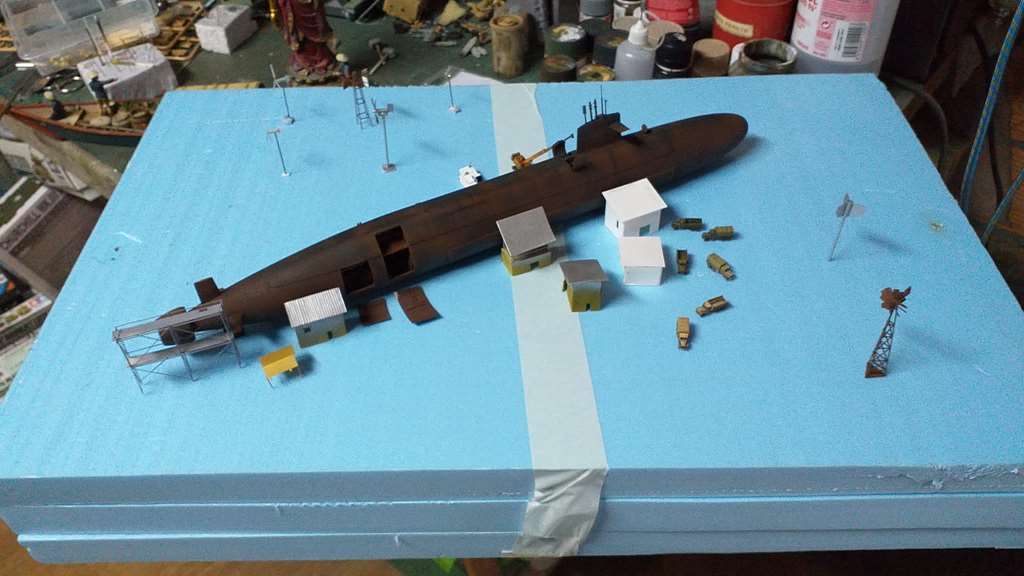
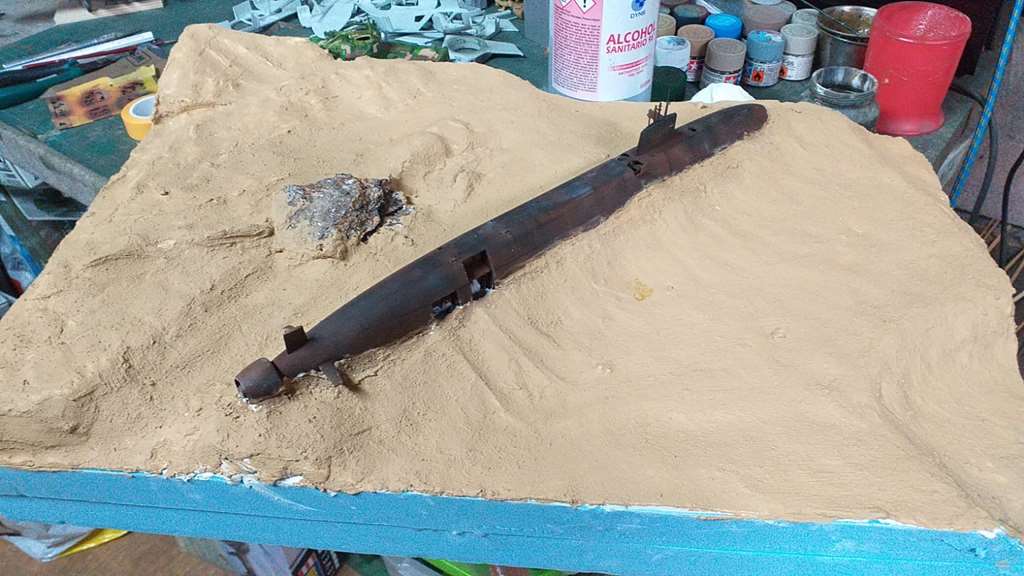
Well, here we come to the composition part of the diorama that is made on porex in initial dimensions of 50 x 50 cm, but that I later reduced for a better layout.
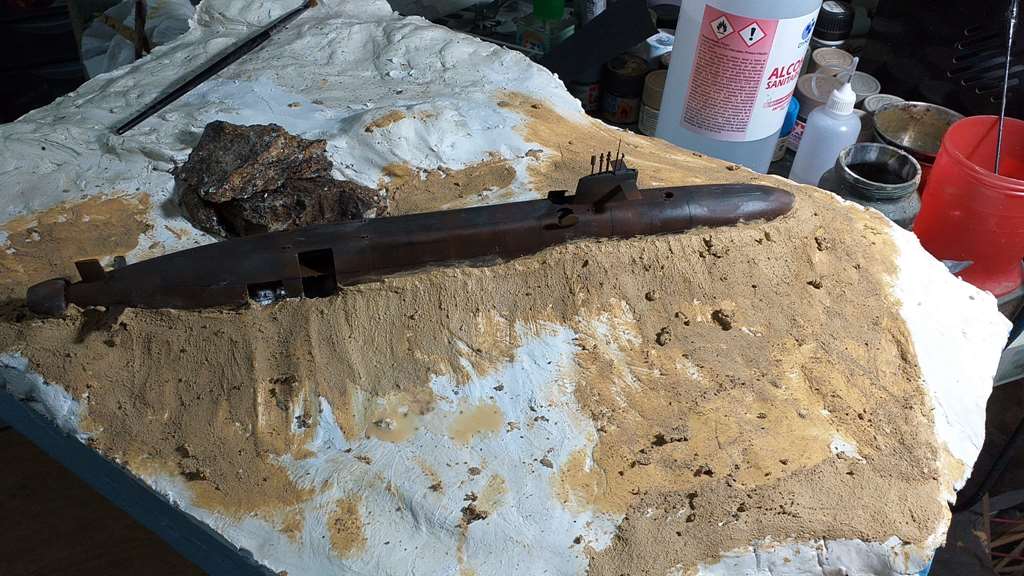
The process is made using an initial composition with the same basic form of the diorama, to which I added a natural rock painted in gray and XF59. The ground has been adapted so that there is a suitable level close to the missile area to allow the crane to work. The paints used to highlight lights and shadows are Tamiya for the most part, as well as some Mig pigments with beach sand and African dust colors.
In this series of photographs the development and adaptation of the terrain is better appreciated.
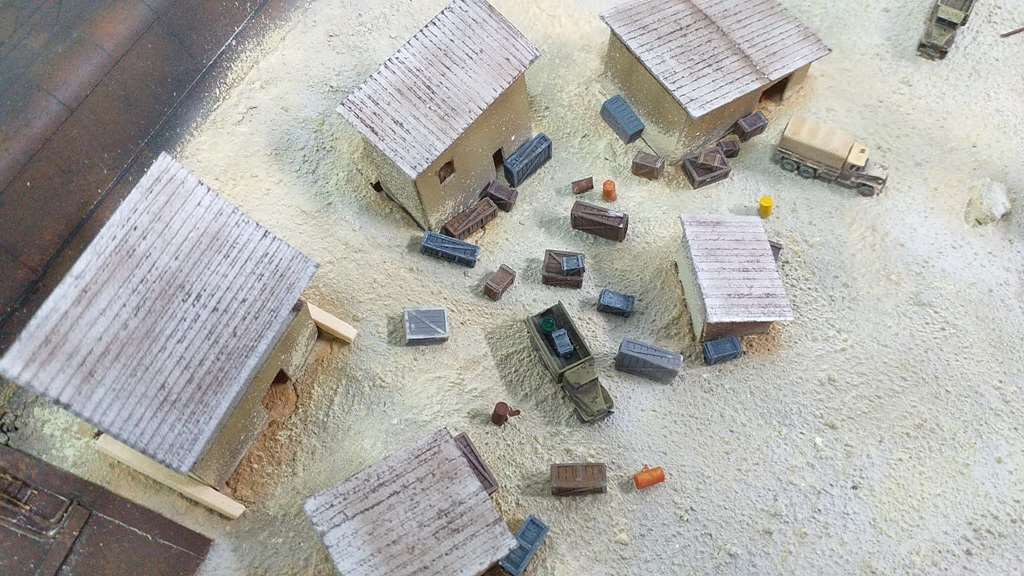
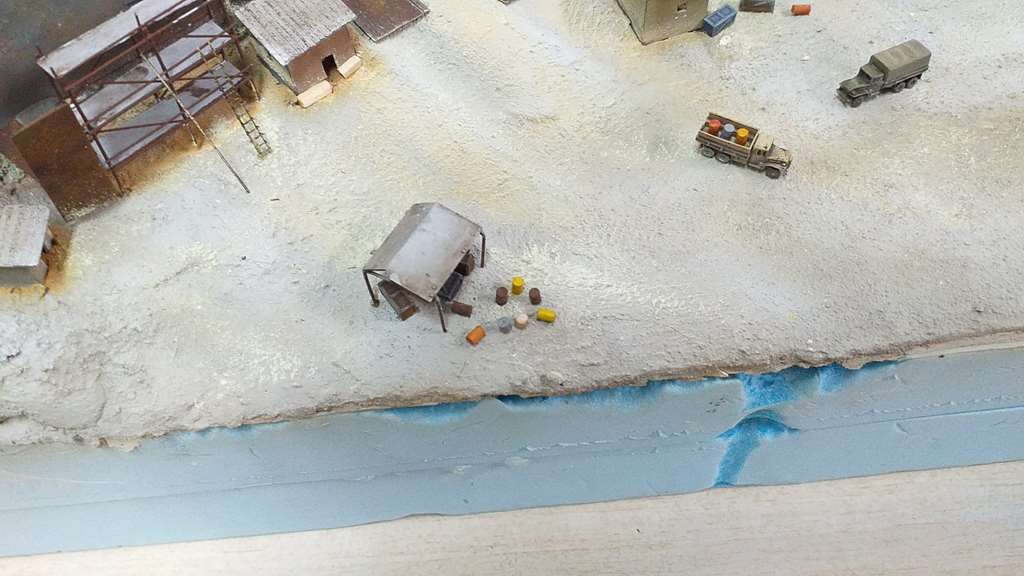
As soon as I had arranged the general presentation part of the diorama, I began to integrate the different elements, i.e., trucks, boxes, buildings, all of them with the application of base colors and different washes and pigments. I have added several barrels made with sprue sections, and some more will be added, along with pallets and several other elements.
I will set in place in this way the first crane that I made, next to one of the mills, showing a worn out appearance.
The submarine is set in place although it will be completed with other small details of nearby junk next to the holes that were opened in the hull. Here I have given the same aging treatment to the machinery inside, and these elements will be completed with other small details afterwards.
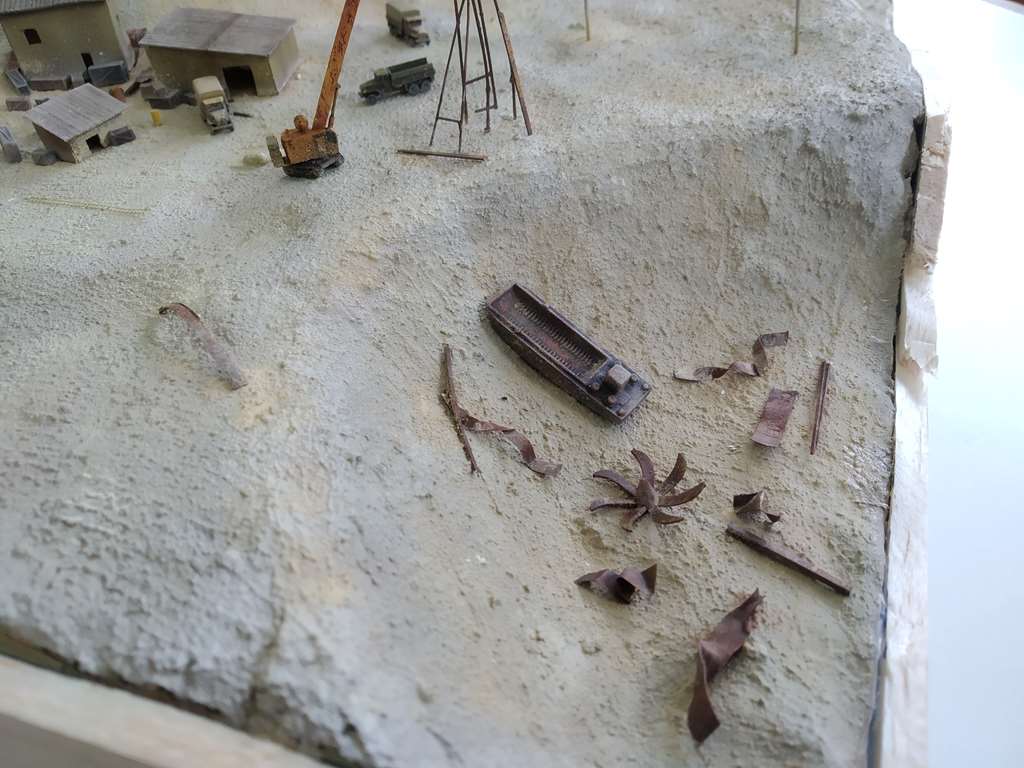
In one of the holes that seemed to be somehow empty I have placed a small junkyard made with a left over barge from another kit, propellers and some other bent and twisted PE parts. I am going to add some other small details, but I think that the overall effect is already acceptable.
Here you are a composition of the diorama from another point of view, with the new crane already set in place.
I am confident that I can finish the diorama pretty soon, after finishing the otherwise small, never ending details.
Best regards.
Kometa
Willie collaborates with us for a better translation)
On workbench:
Uss Fletcher DDG-992 1/350
Uss Lexington 1/700
Russian SSBN Borei Class - K-550 Alexander Nevskiy
and more, more, more