Page 7 of 10
Re: 1/200 Arizona to Pennsylvania Conversion
Posted: Fri Oct 14, 2016 4:31 pm
by Goodwood
Mgunns wrote:Hi Jeff:
Thanks for checking in. We have moved into the house in AZ now and have begun the arduous task of unpacking. The Arizona took a hit to the lattice yards. I am going to remove them both from the foretop and start over. So Pennsylvania remains on hold for the foreseeable future until I get my model room set up and get the Arizona fixed. On the plus side, I have my vents from Model Monkey, extra rafts, three inch guns and am ready to continue to march. I haven't unpacked the Pennsy yet, but; I think I got it packed pretty good so there should be no damage to any of the sub assemblies. I hope to be back in business and posting by the end of November at the latest.
Until that time
Glad to hear there'll be more progress relatively soon, as this was an enjoyable build to follow (as are your others). Wouldn't it be interesting if you got to start back up on November 10th?

Re: 1/200 Arizona to Pennsylvania Conversion
Posted: Fri Oct 14, 2016 4:43 pm
by Mgunns
That's the plan!

Re: 1/200 Arizona to Pennsylvania Conversion
Posted: Thu Dec 22, 2016 2:53 pm
by Mgunns
Okay: I have the Arizona repaired and back in it's case.
The house is now in order and I am back on the Pennsy Project. I had to make repairs to the superstructure due to damage from either heat, mishandling or product failure. When I painted the superstructure and stack, both 3D printed products, I used MEK as a thinner for the Tamiya acrylic which went on really nice. I packed it for moving in July and didn't open it until early October. During that time it sat in a warehouse in Phoenix. I don't know if it was climate controled or not, but; when I finally unpacked it, it looked like the photo's below. There was/is a crystal like coating on most of the surfaces on both the superstructure and the stack. In addition to that the yards had pulled away from the foretop. I had used Gator Glue to attach them, but as good of a cement for PE, it doesn't seem to have the strength to withstand any type of tension as witnessed by the pulling away of the yards. What a mess.
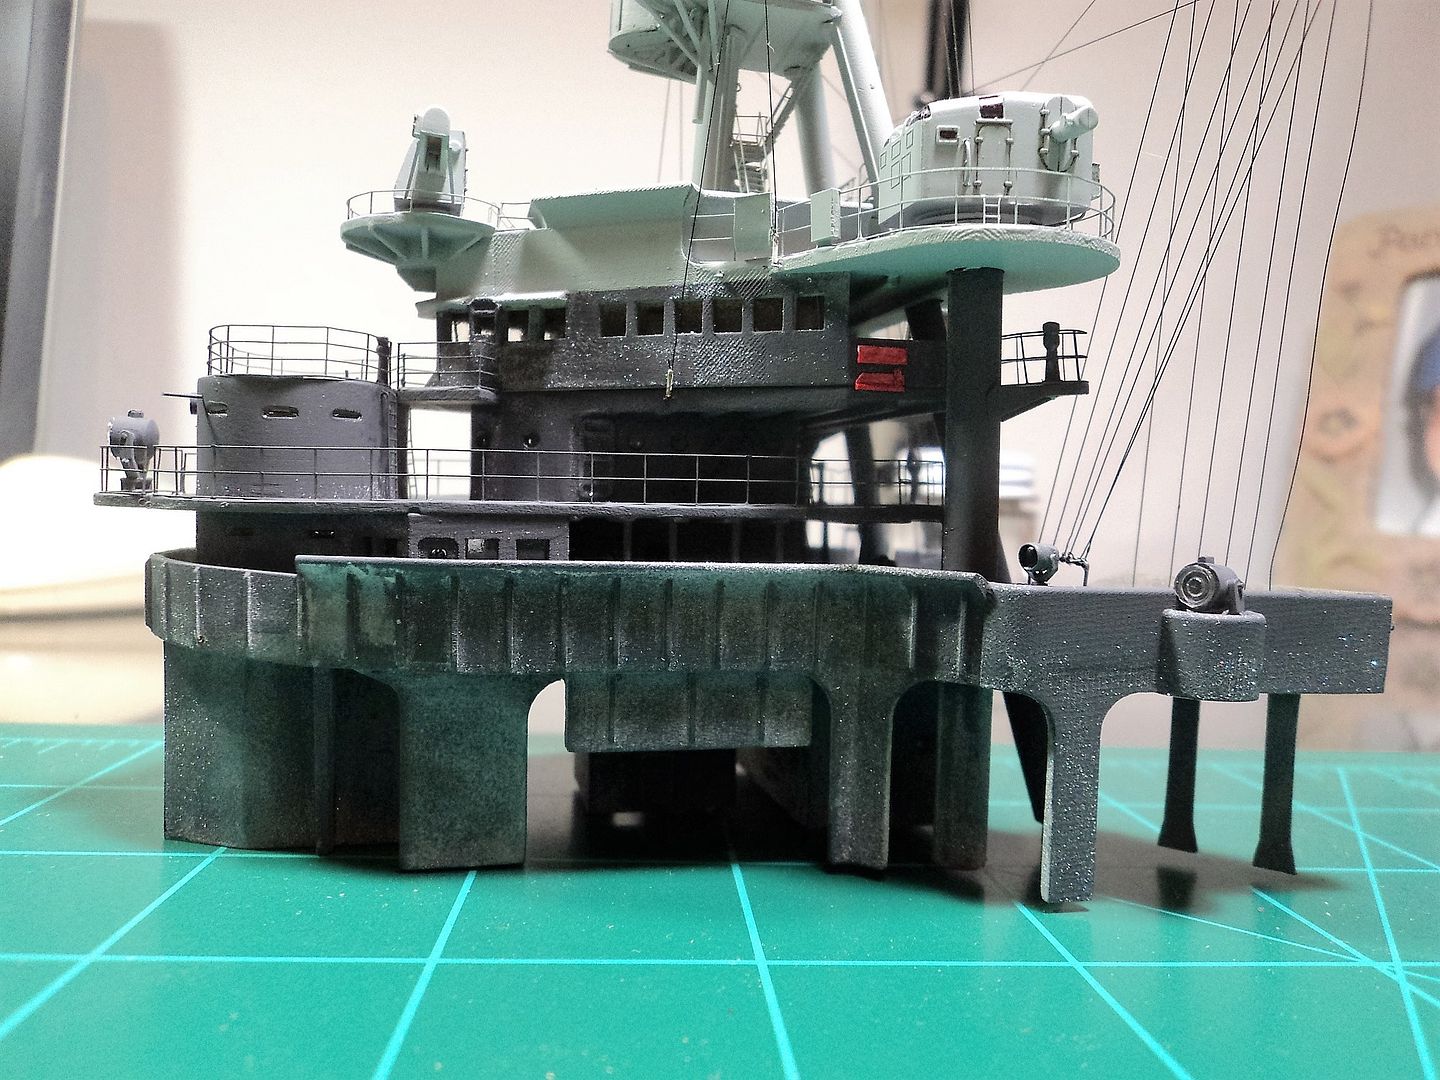
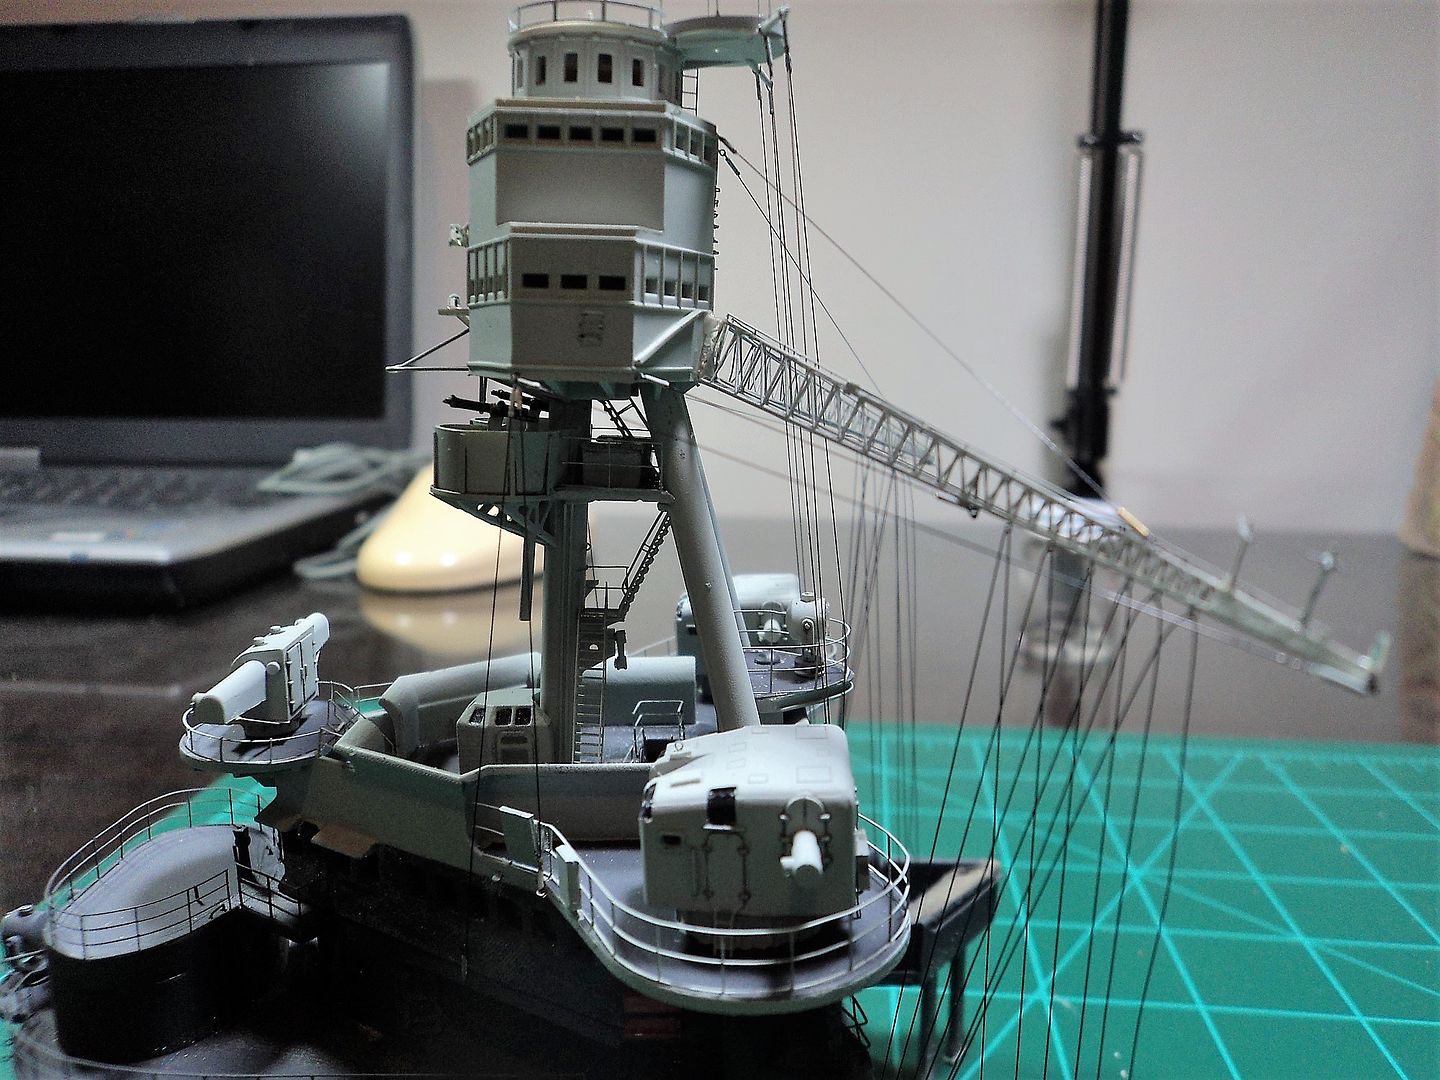
So, I cut all the rigging off and cleaned up the glue off the fore top and began the process of reattaching and rigging the yards. Instead of using the Model Kasten black stretch thread I used "tan" Ezline, it has the "desired" affect, if nothing else it is visible; however, prior to that I had to deal with the crystal like substance. Using a soft paint brush I managed to brush most of it off. I then went over the major areas with a brush dampened with Lacquer thinner and managed to clean up a lot of that way as well. Hard to reach areas I repainted with paint thinned with lacquer thinner. Most of these were on the underside and other areas not visible like internal structures. I did the same for the stack.
Once I completed that task, I tried to determine where I had left off back in June and started to pick up the project from thence.
I worked on the aircraft handling crane and aft catapult last night. I will post pictures as I make progress.
It is good to be back on the project, hard to believe I started this over a year ago!
Stay tuned for more Pennsy fun!
Re: 1/200 Arizona to Pennsylvania Conversion
Posted: Thu Dec 22, 2016 5:43 pm
by Mgunns
Okay, here are some pics of the once again completed superstructure:
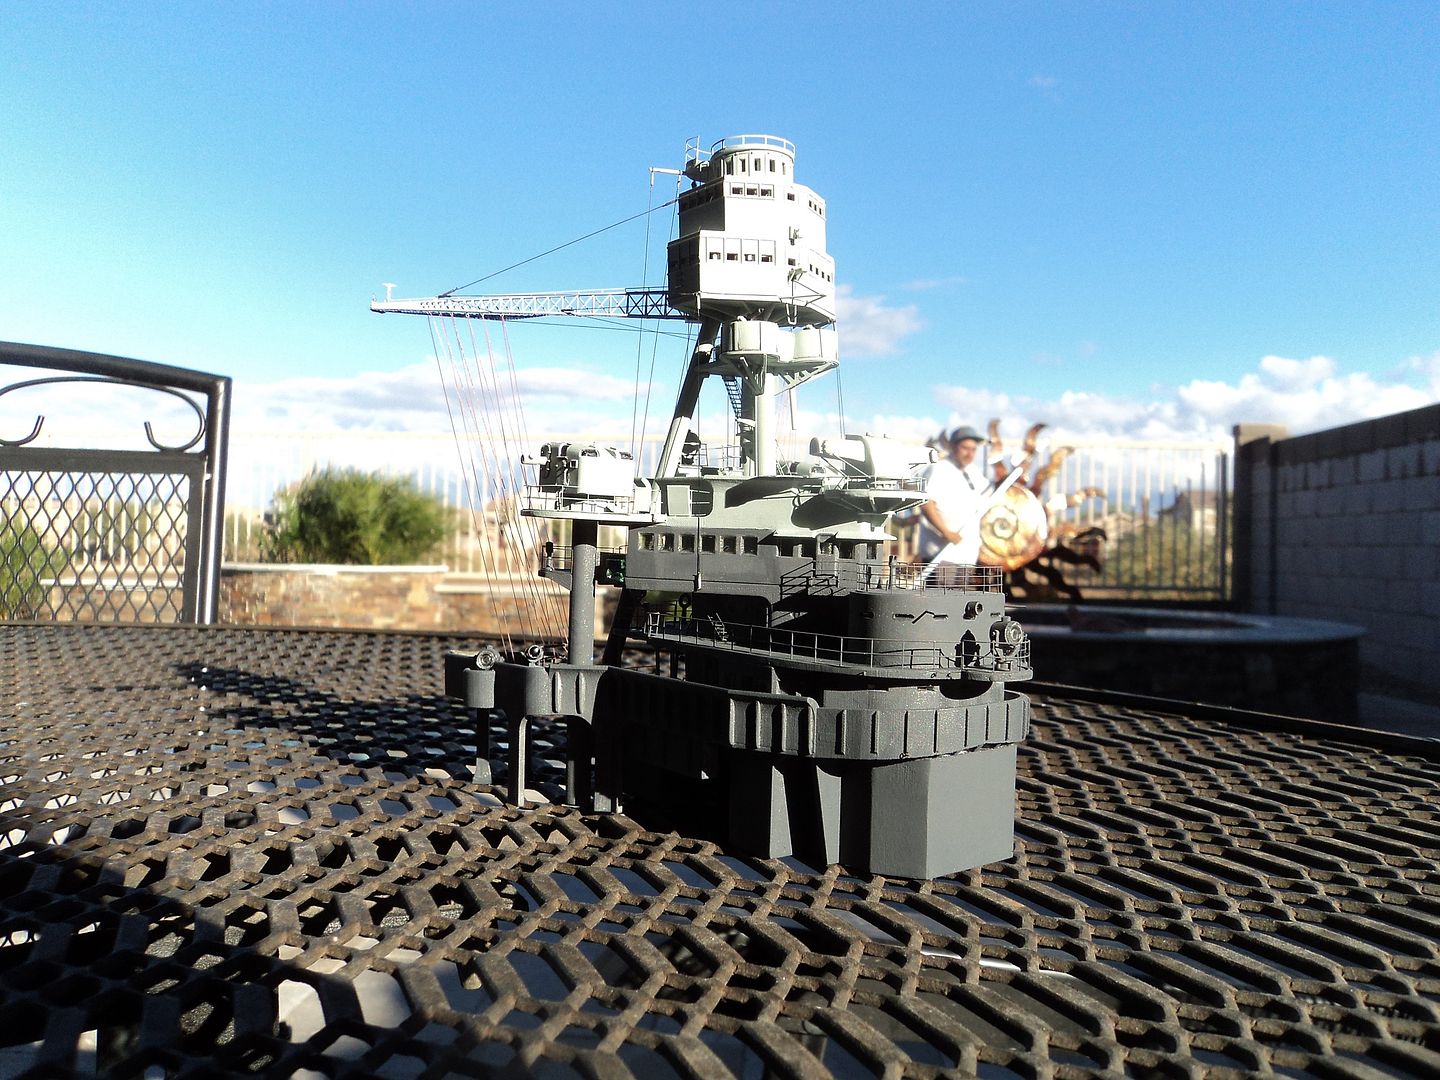
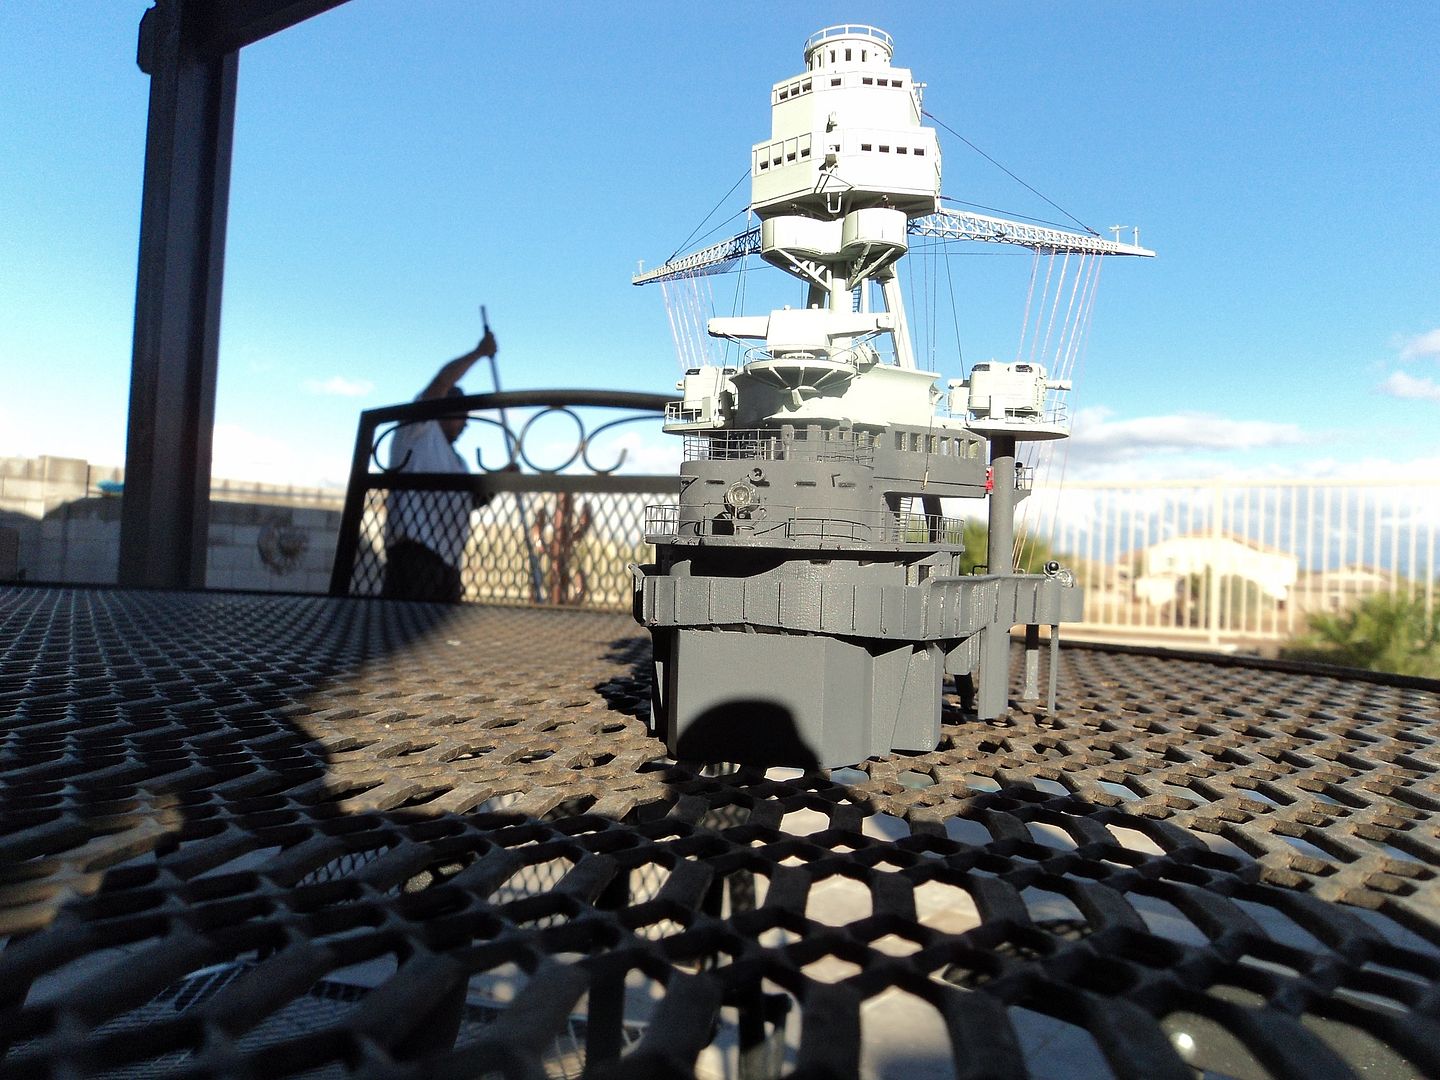
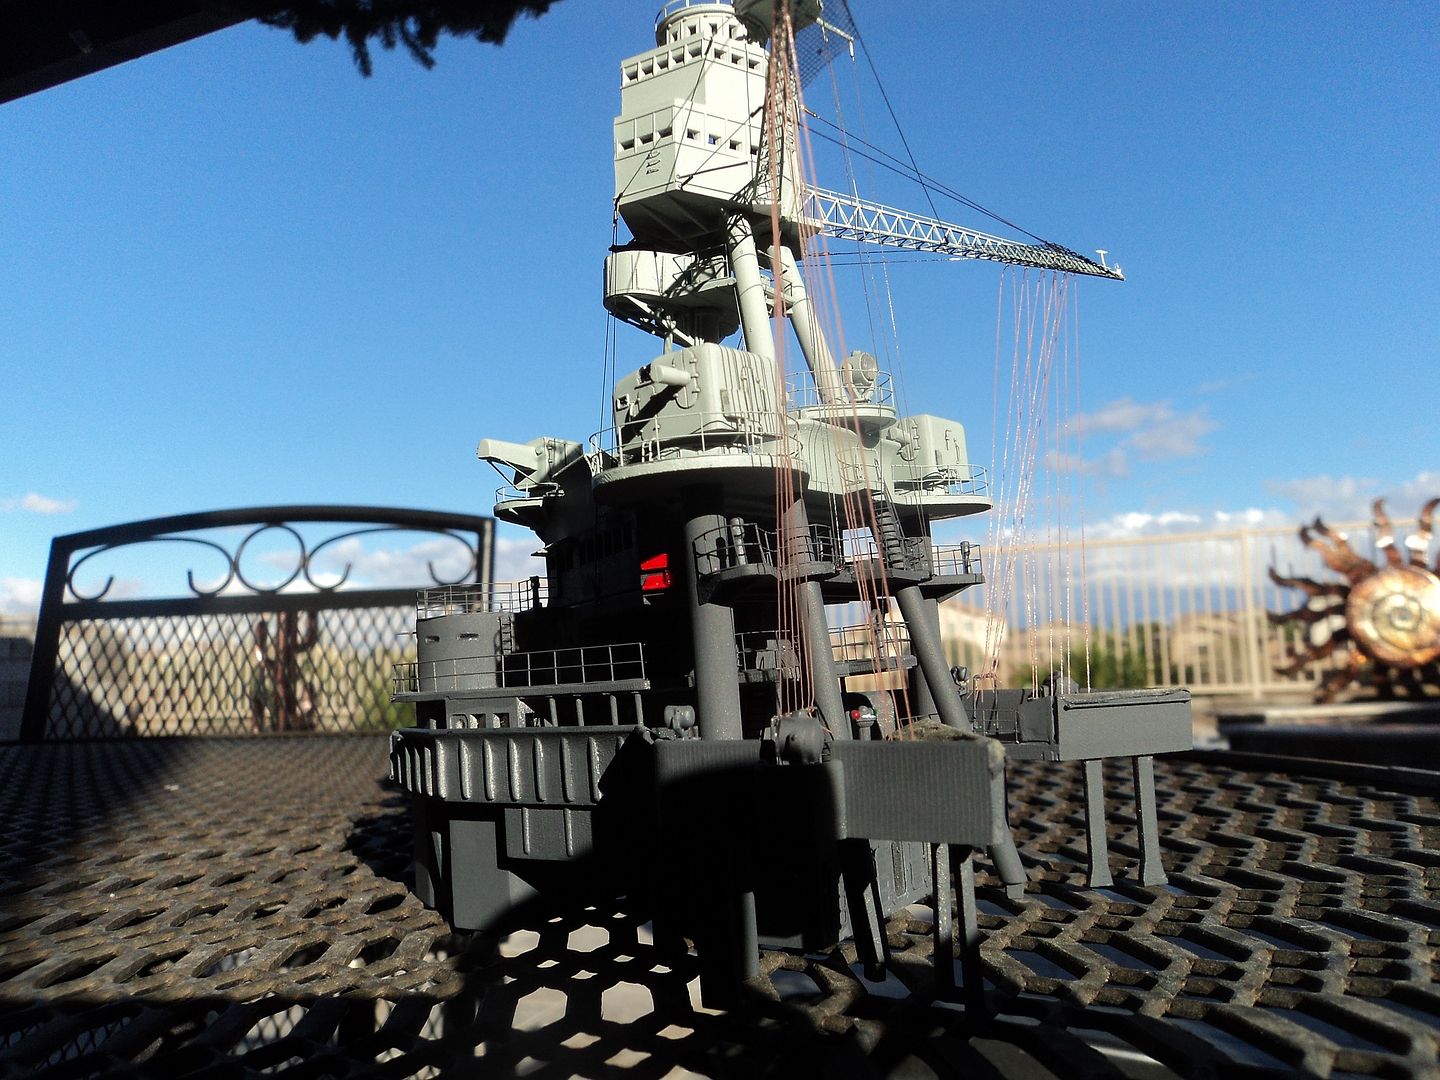
You can see the "tan" EZ line. I think it looks okay, but I'm not sure I like it, nor am I going to re-do it. I did put the netting in the yards using fine sheet brass netting. I have to go over it again, as I can see in the sunlight some areas that are still showing the crystal like substance. Overall I am pleased with it and I am ready to move on.
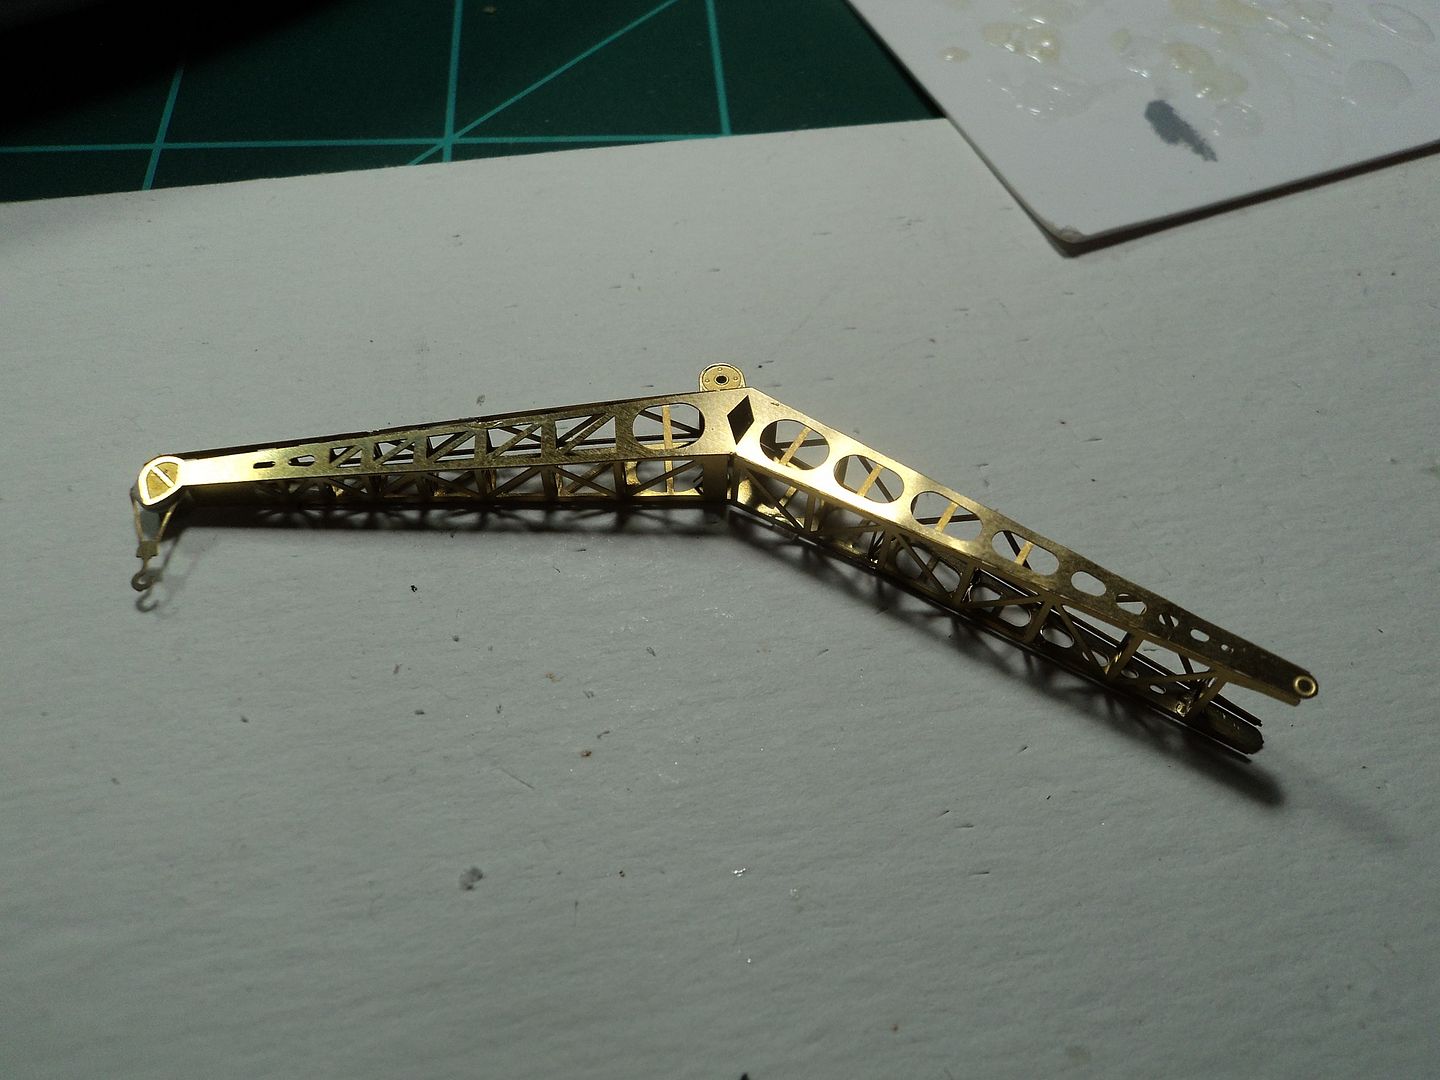
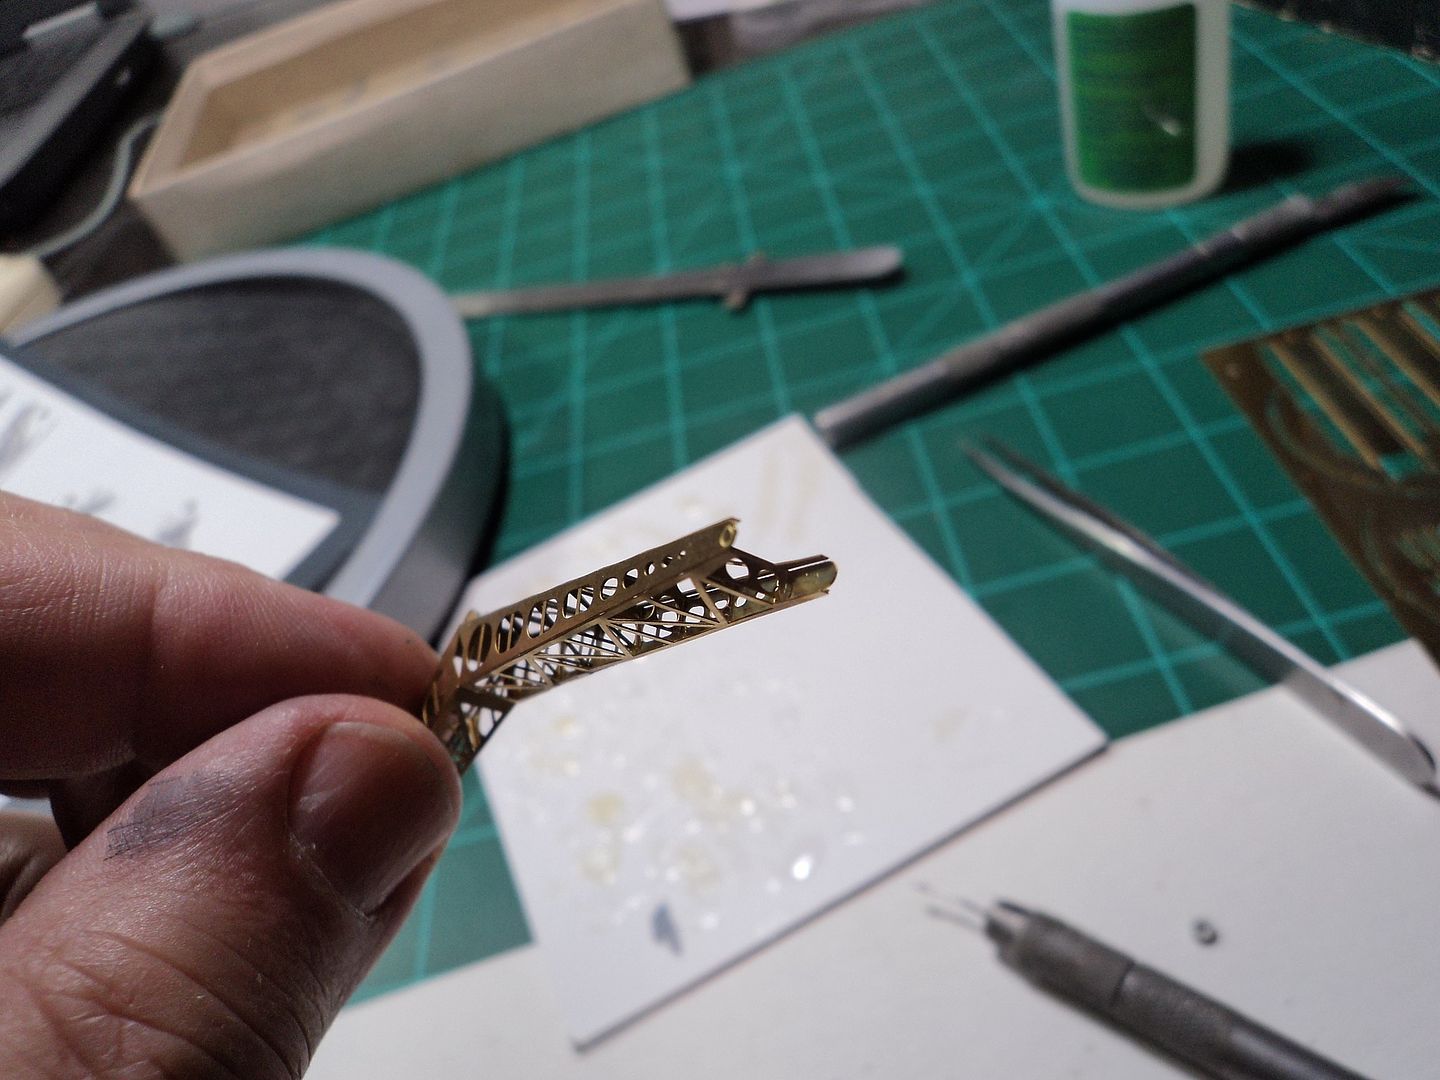
Here is a preliminary of the aircraft crane.
Thanks for stopping by. I will be showing more progress as I make it.
Re: 1/200 Arizona to Pennsylvania Conversion
Posted: Thu Dec 22, 2016 9:07 pm
by Dan K
Looks great.
Re: 1/200 Arizona to Pennsylvania Conversion
Posted: Fri Dec 23, 2016 8:38 am
by MartinJQuinn
The superstructure is very impressive, both the size and work you've done to it.
Re: 1/200 Arizona to Pennsylvania Conversion
Posted: Fri Dec 23, 2016 10:23 am
by BB62vet
Mark,
Glad that PENNSY is back in the "yard" and construction is underway. Looks good, so far. Will be esp. interested in how you do the after a/c crane.
Hank
Re: 1/200 Arizona to Pennsylvania Conversion
Posted: Fri Dec 23, 2016 12:32 pm
by Mgunns
Hi guys:
Thanks for your comments and scoping out the "build." I will be posting more pics as I progress with some measurable progress. A/C crane, aft catapult and vents coming up next.
Stay tuned.
Re: 1/200 Arizona to Pennsylvania Conversion
Posted: Sun Dec 25, 2016 3:29 pm
by Mgunns
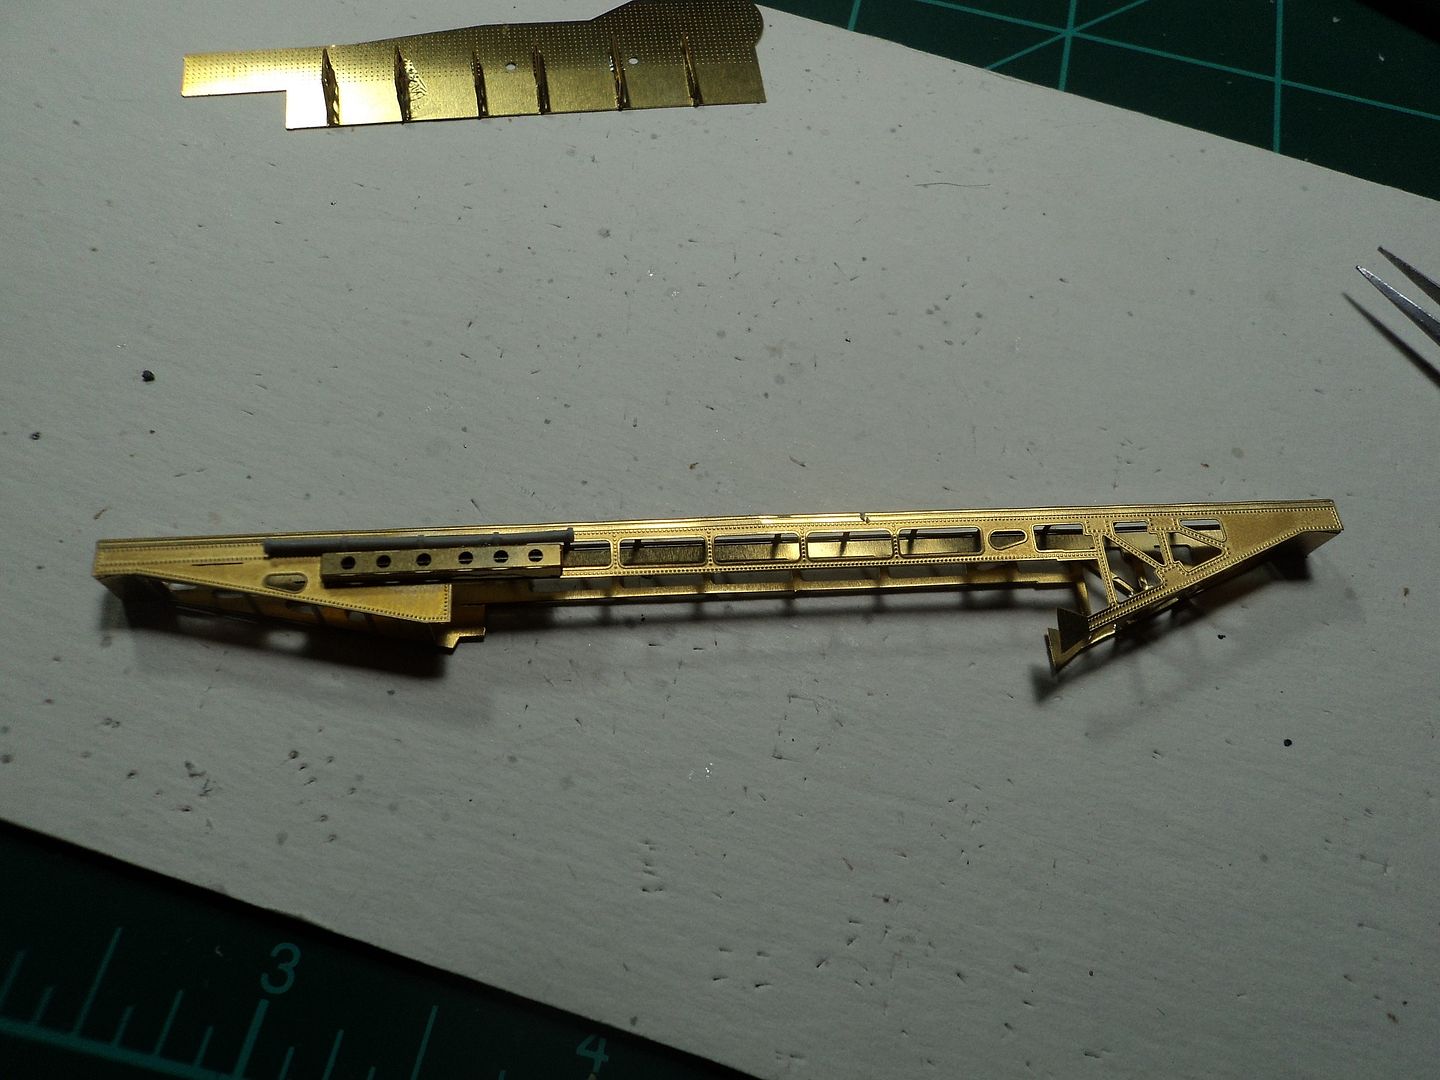
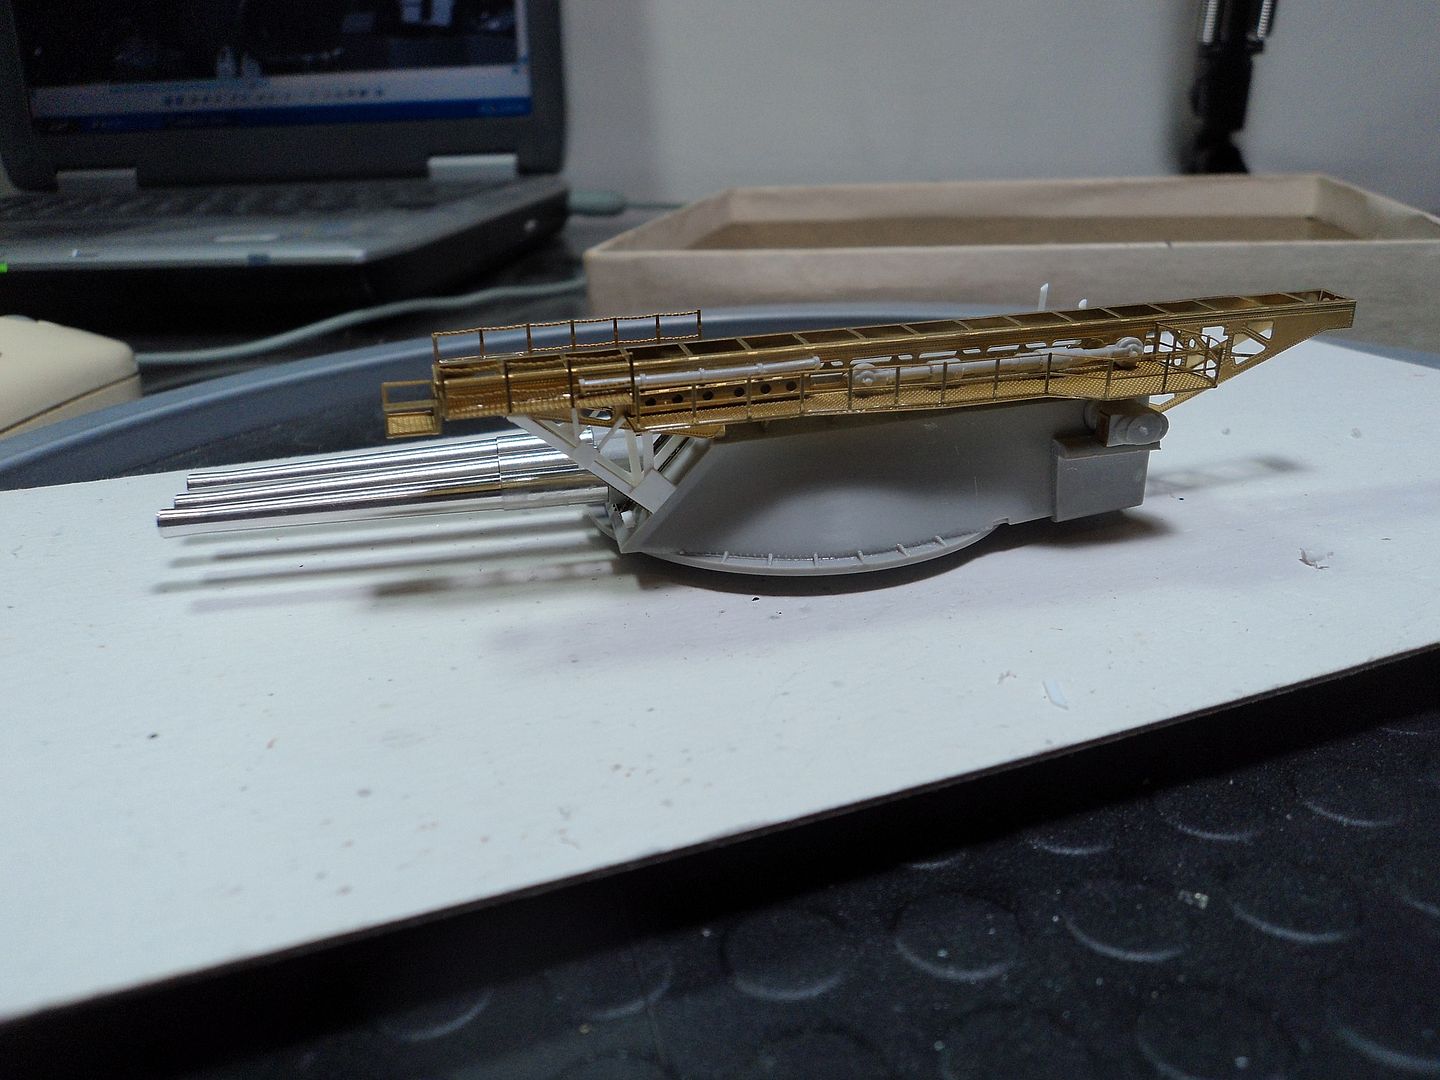
Okay, I have been working on the aircraft handling crane and the aft catapult. For the crane I used a combination of kit and MKI parts. I used all of the pieces for the crane to include the internal bracing. I should have taken in progress pictures as it was it went pretty well, I used Testors Canopy glue to cement them in place. Once set I closed it up. It was a bit tricky but I managed.
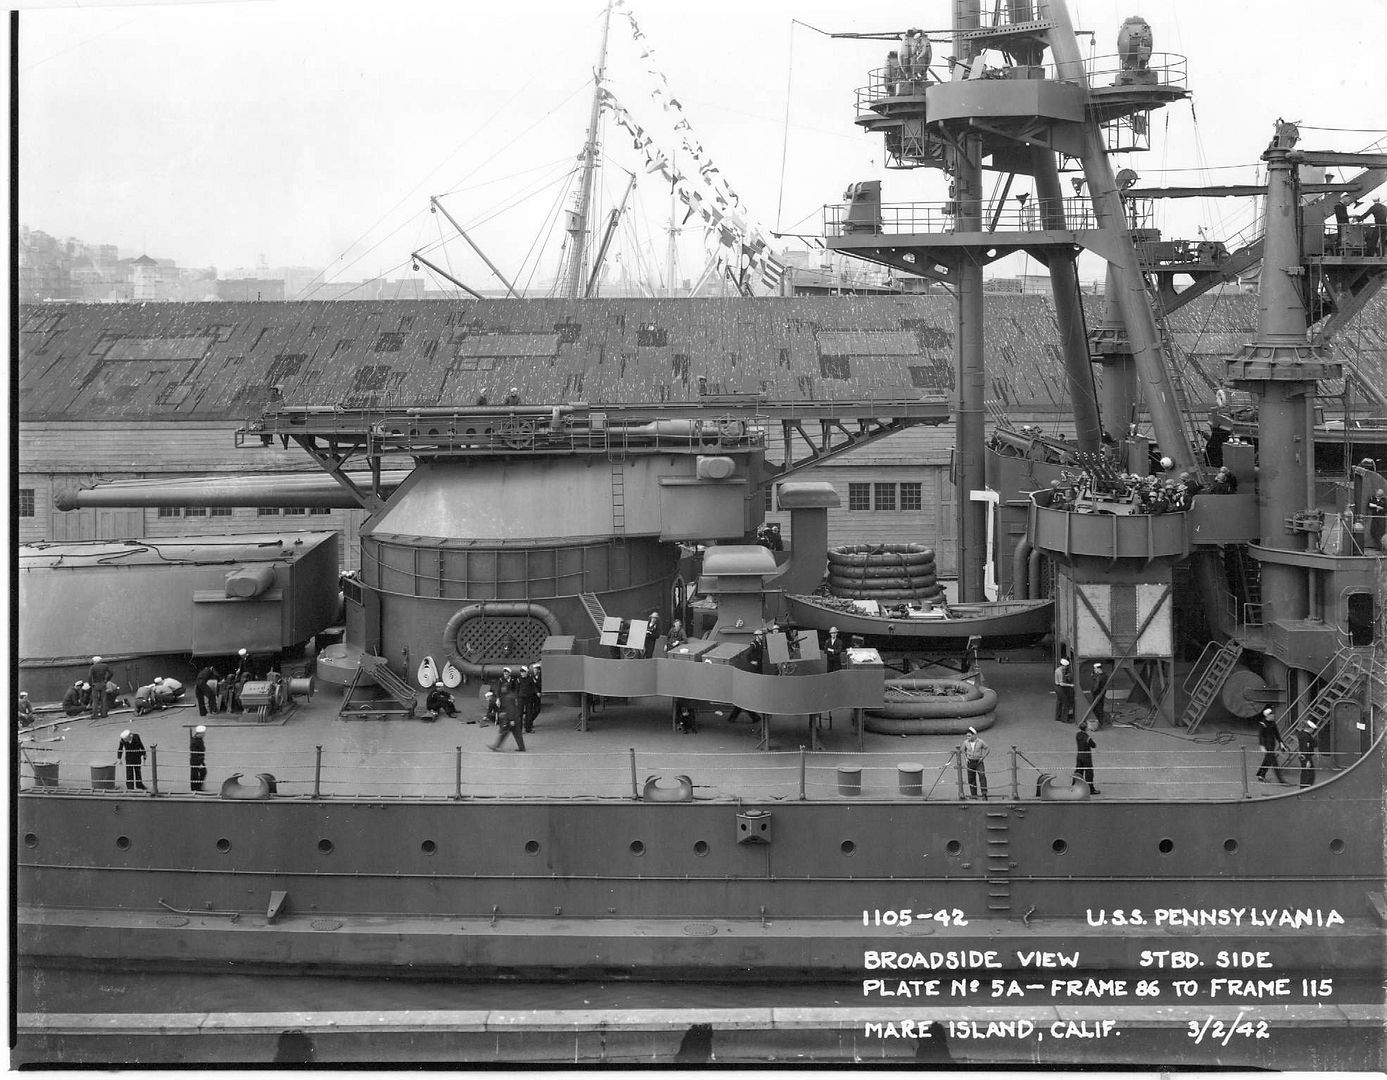
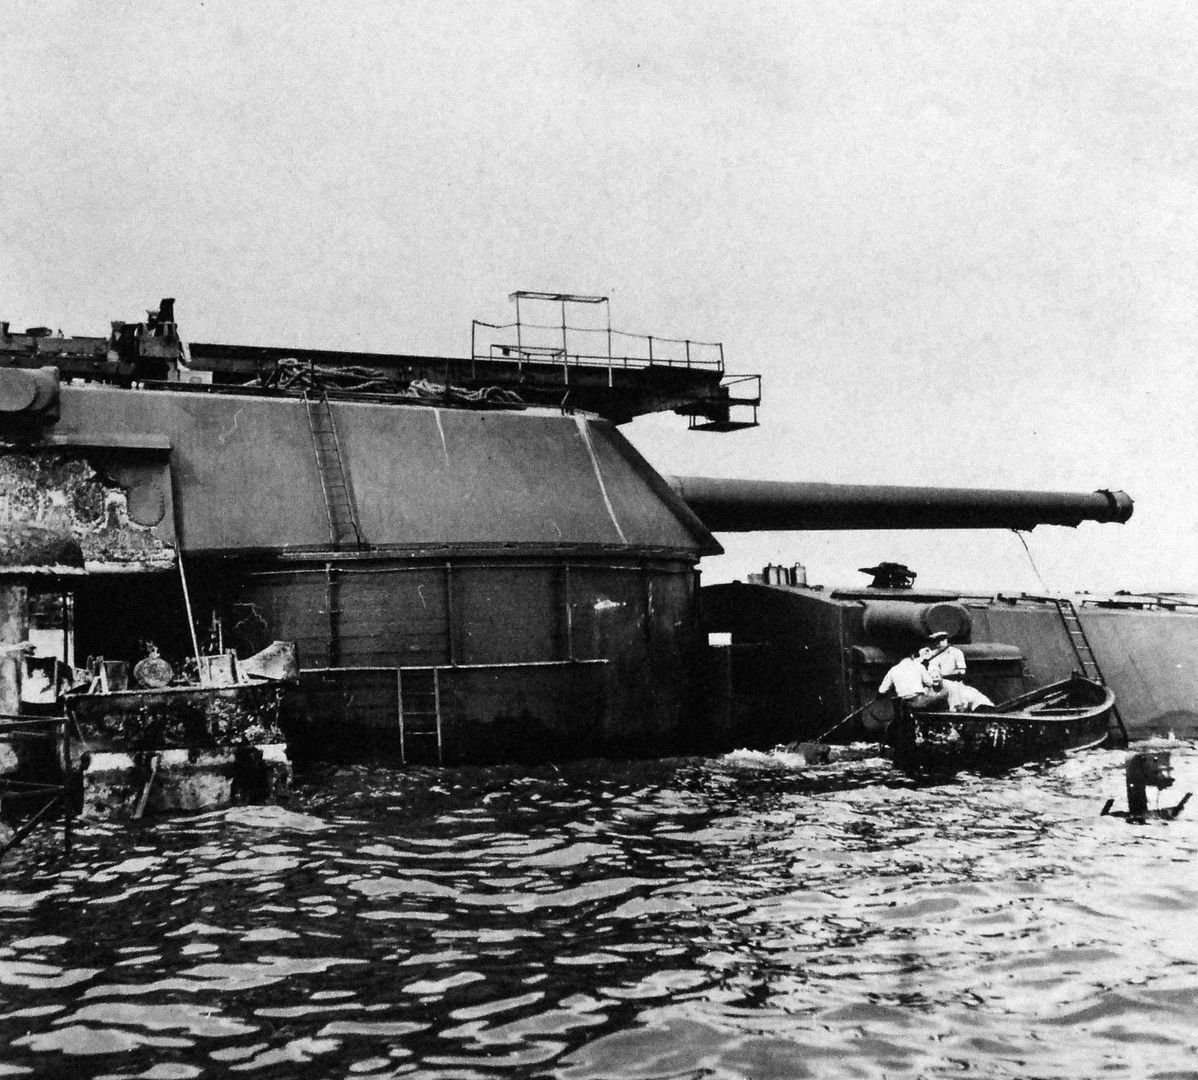
Upon further examination of the Pennsy crane, I realized that it had a third pulley on the crane portion:
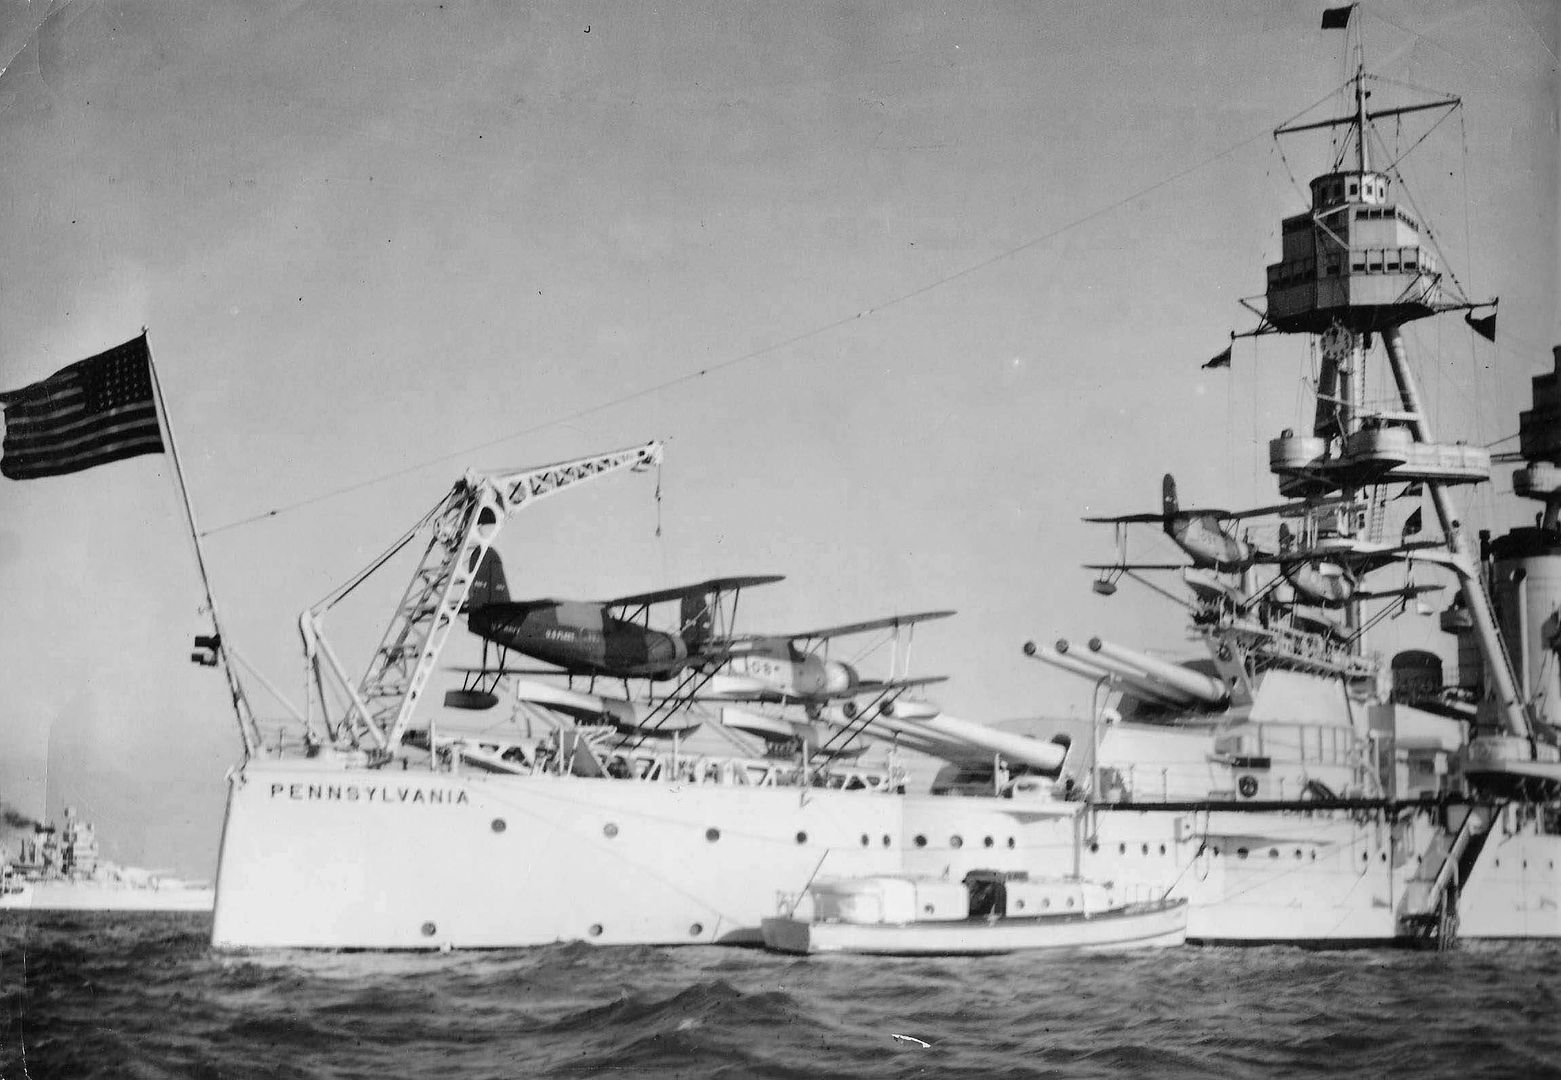
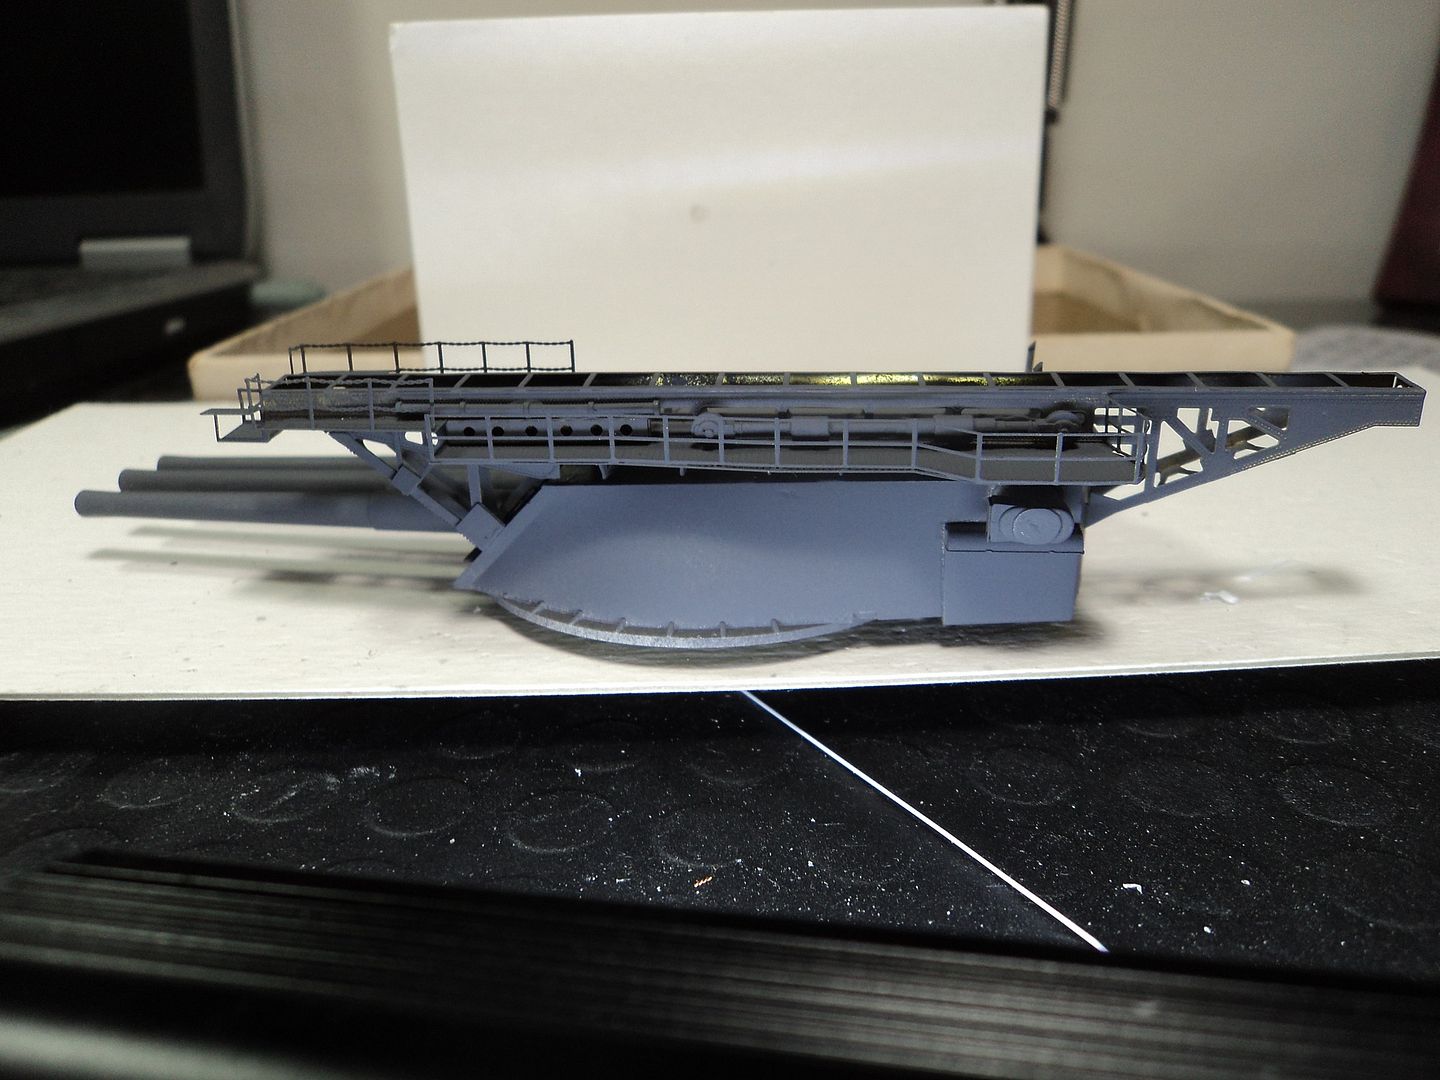
There is a better photo of it at Mare Island, but; for some reason I can't download it. Suffice it to say, the crane hadn't changed from the above photo taken in the thirties to the one at Mare Island taken in March 1942, so it can be assumed that the same crane in the configuration was present in 1941. So I added some details using some parts off the MKI Set, Eduard, Bob's Buckles for the eyelets an tube, some rod and Model Kasten stretch line.
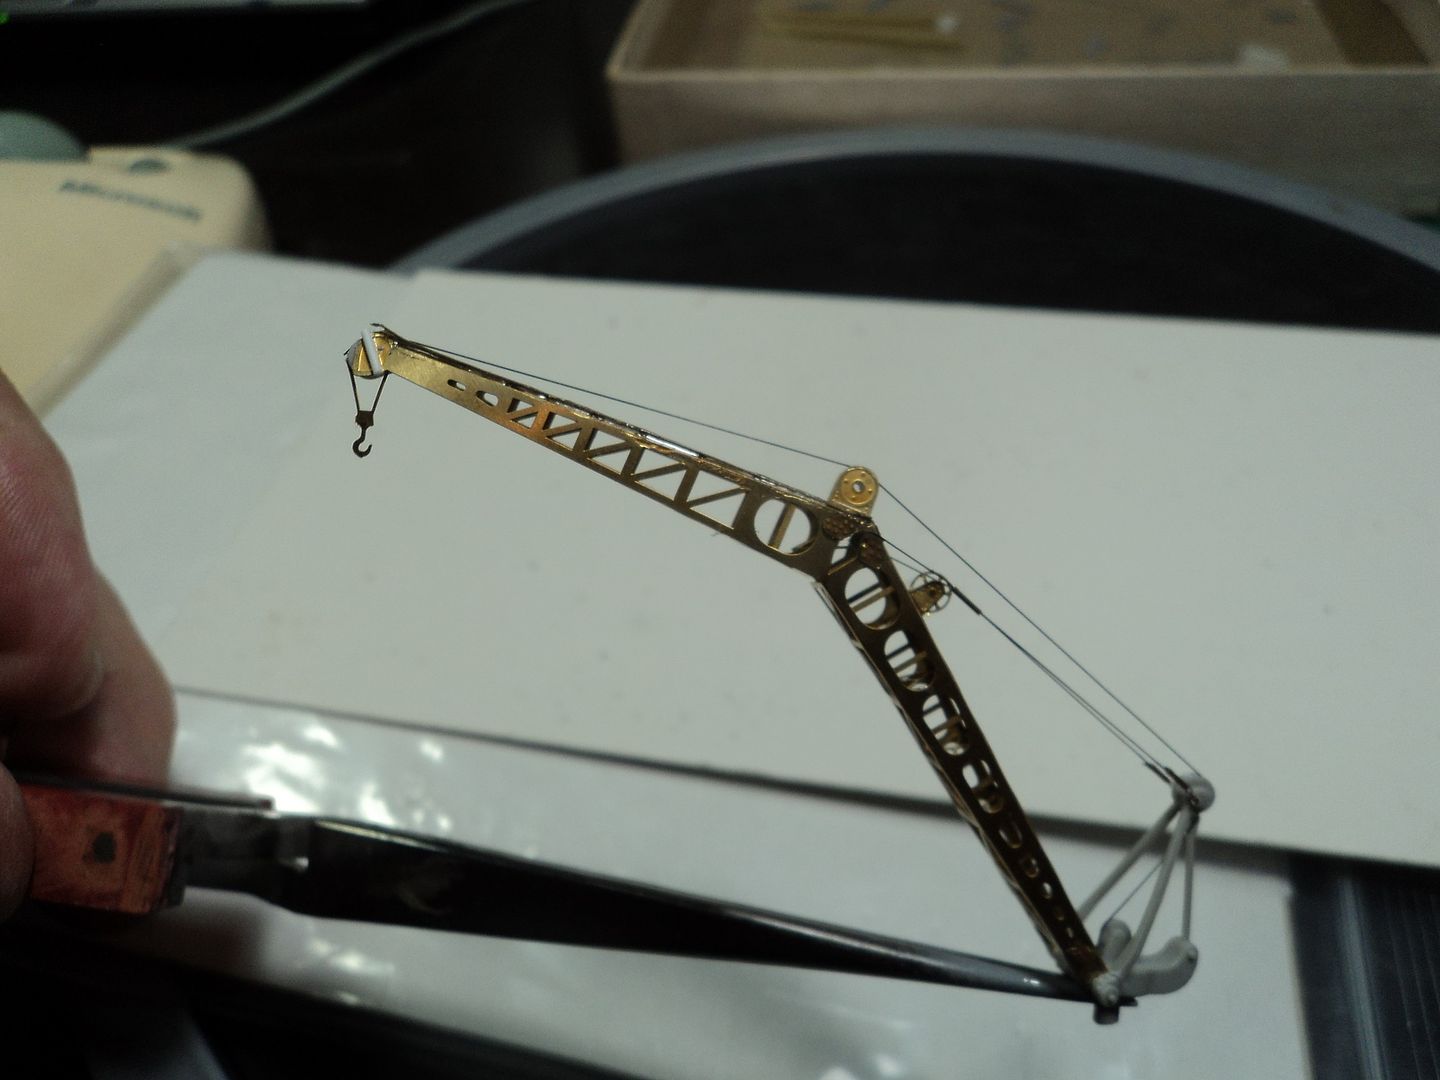
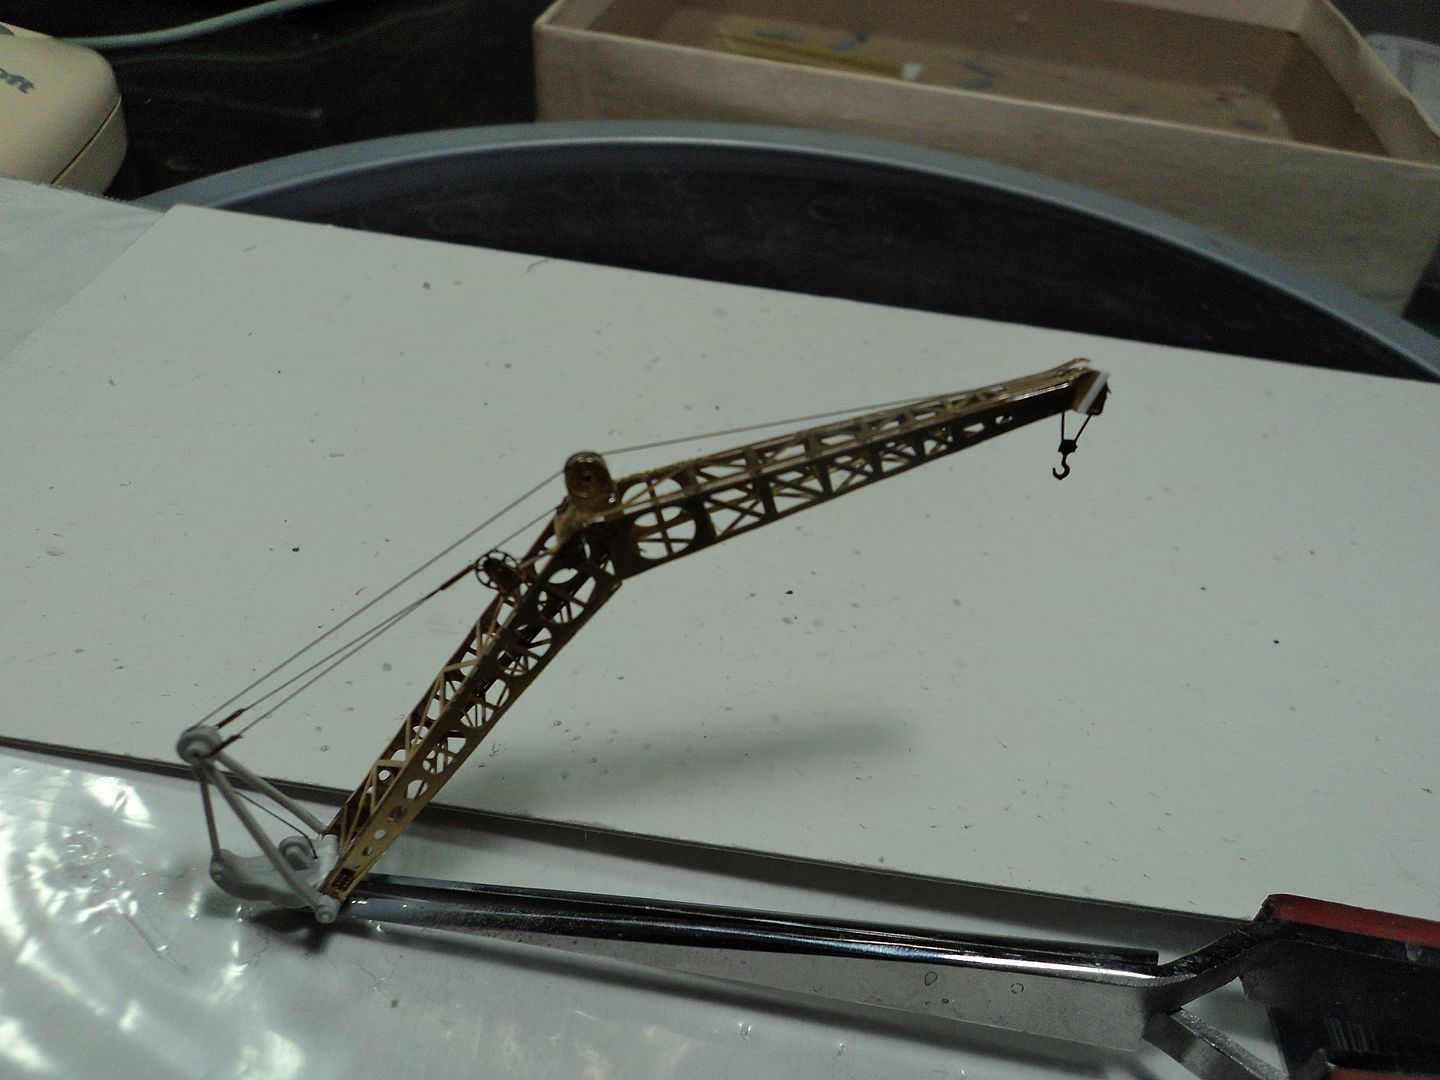
The Eduard sheet for the cranes offers gusset material which I used on this one.
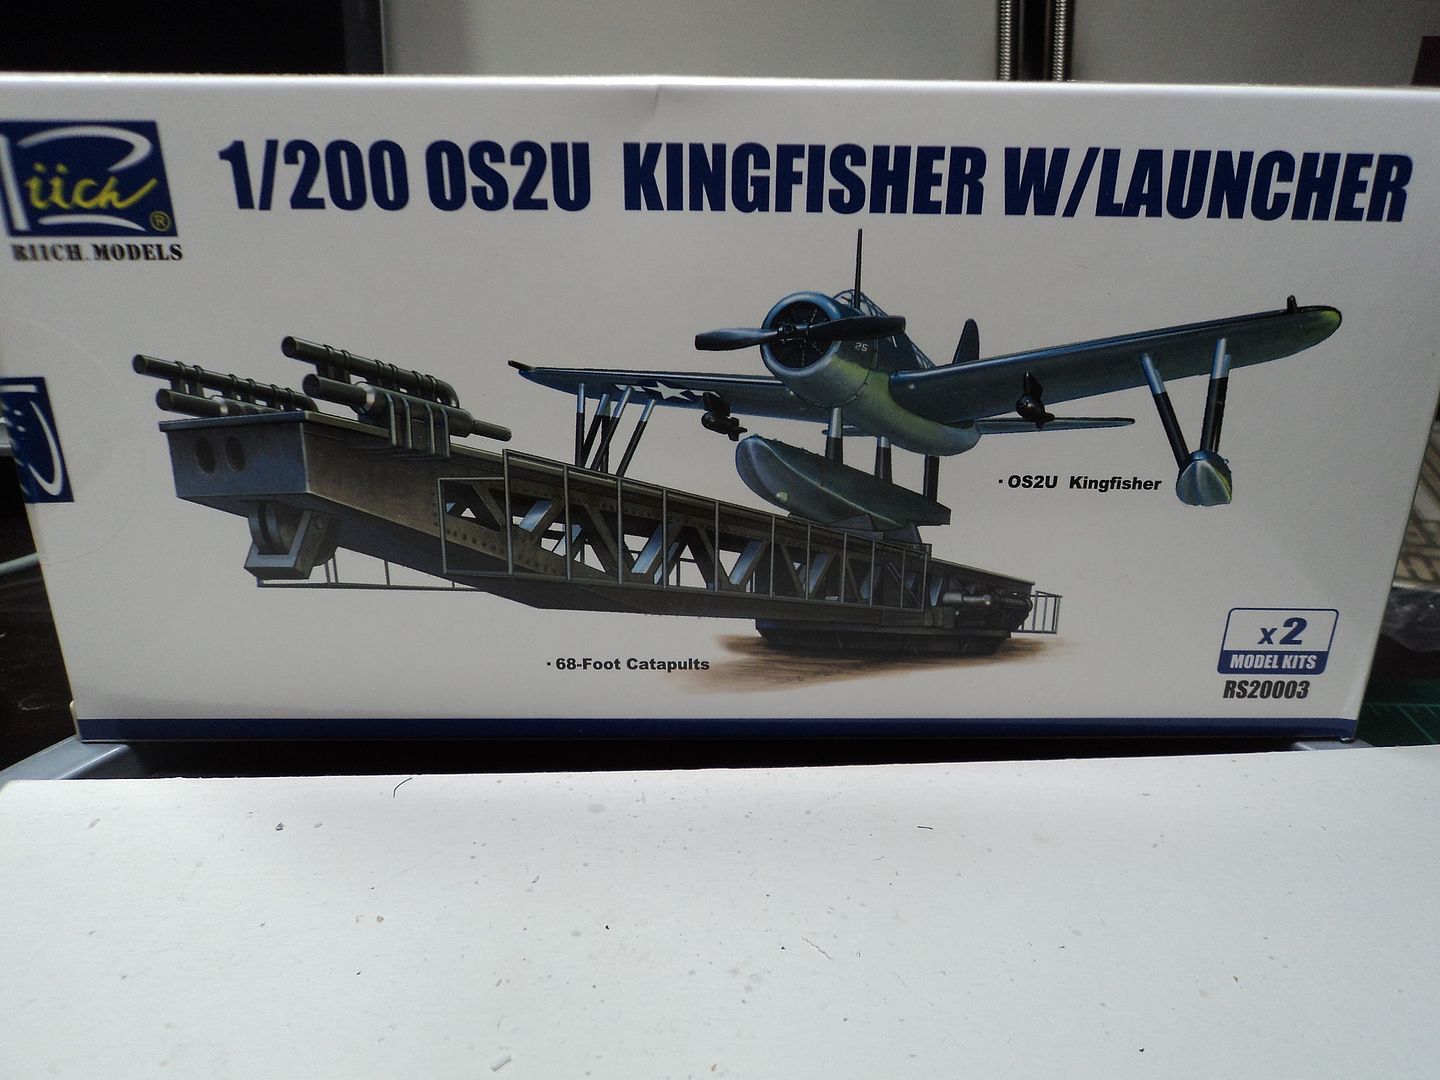
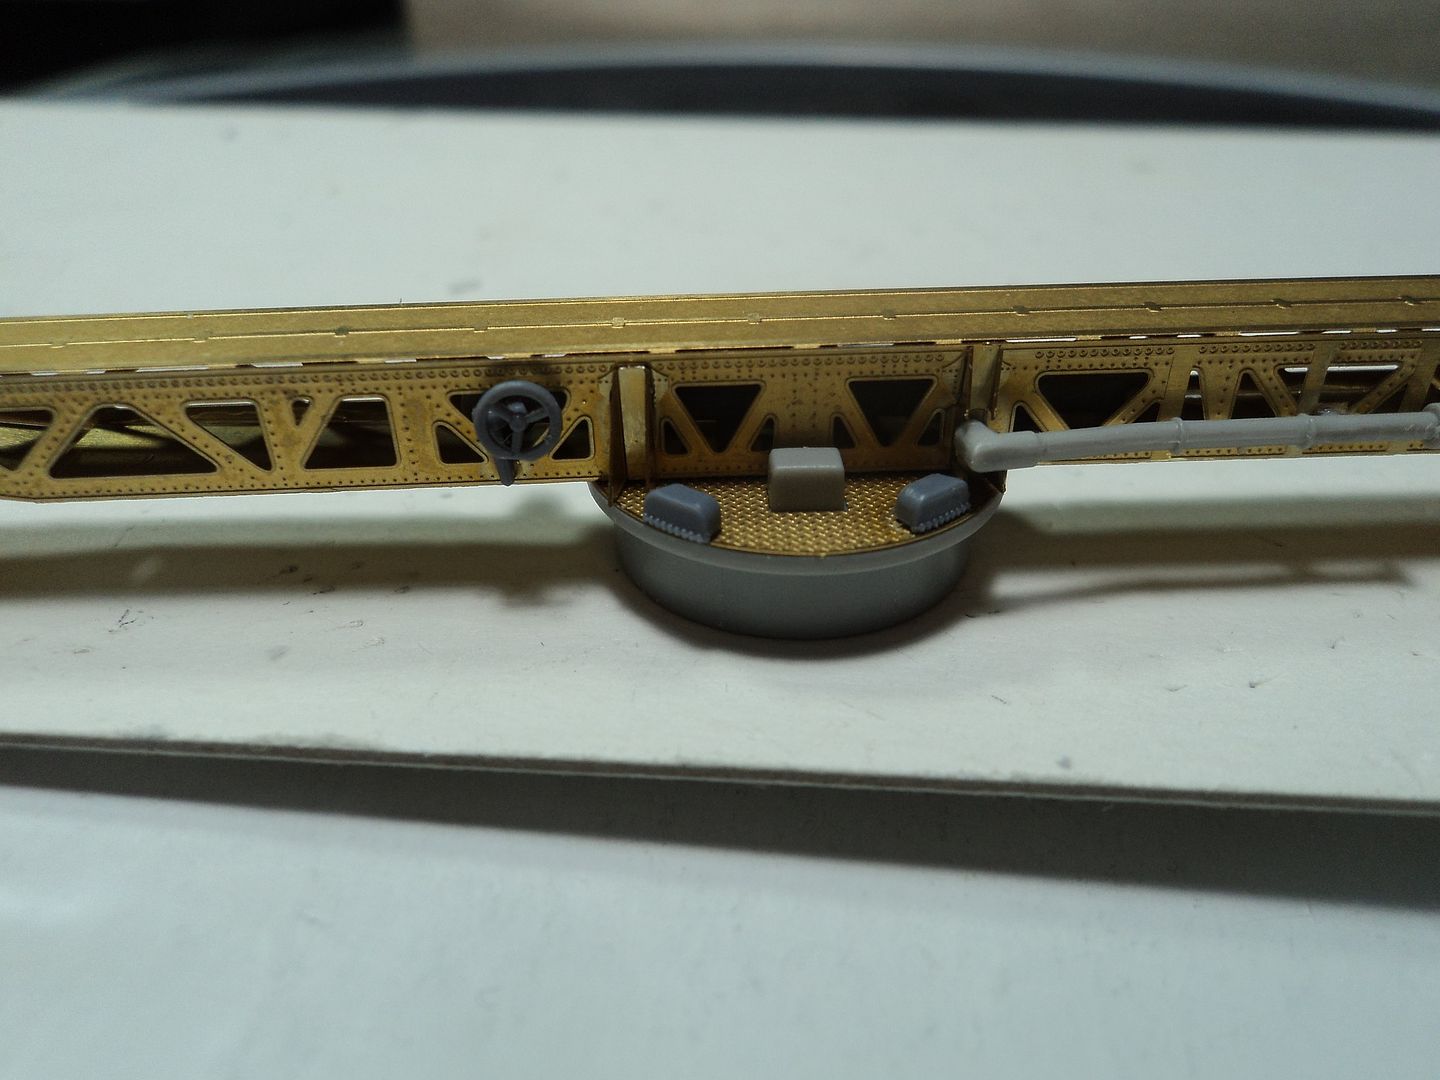
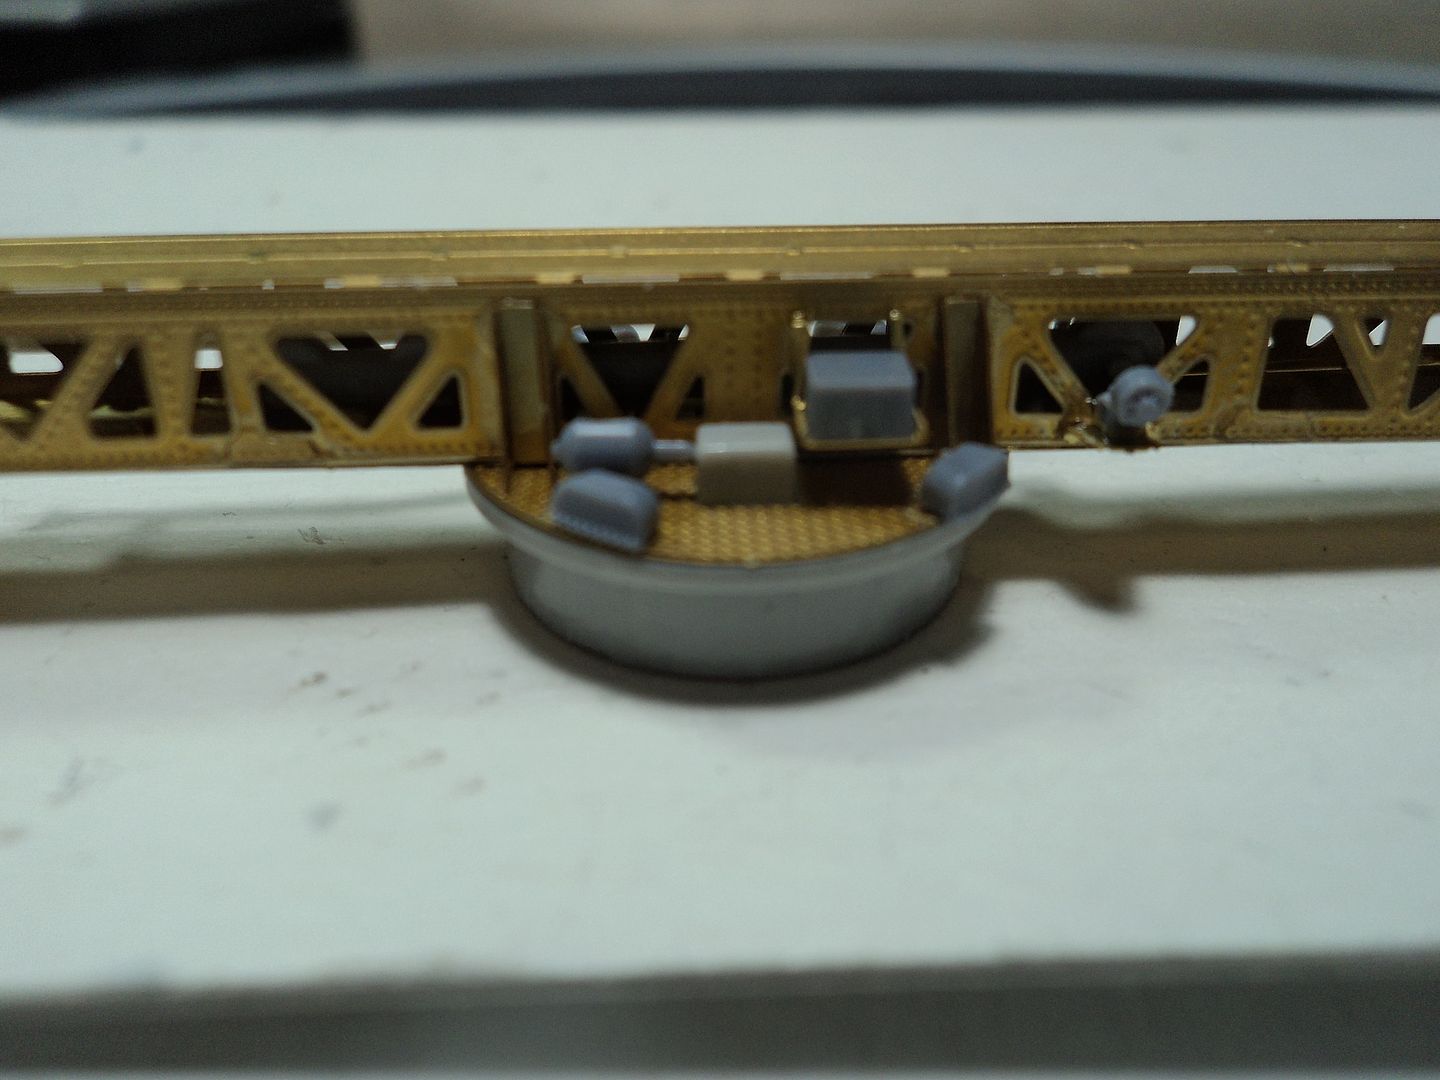
I then went on to the aft catapult. Again I used kit parts for the base, MKI for the PE and parts off the RICCI 1/200 Kingfisher set for the motor machinery on the turntable.
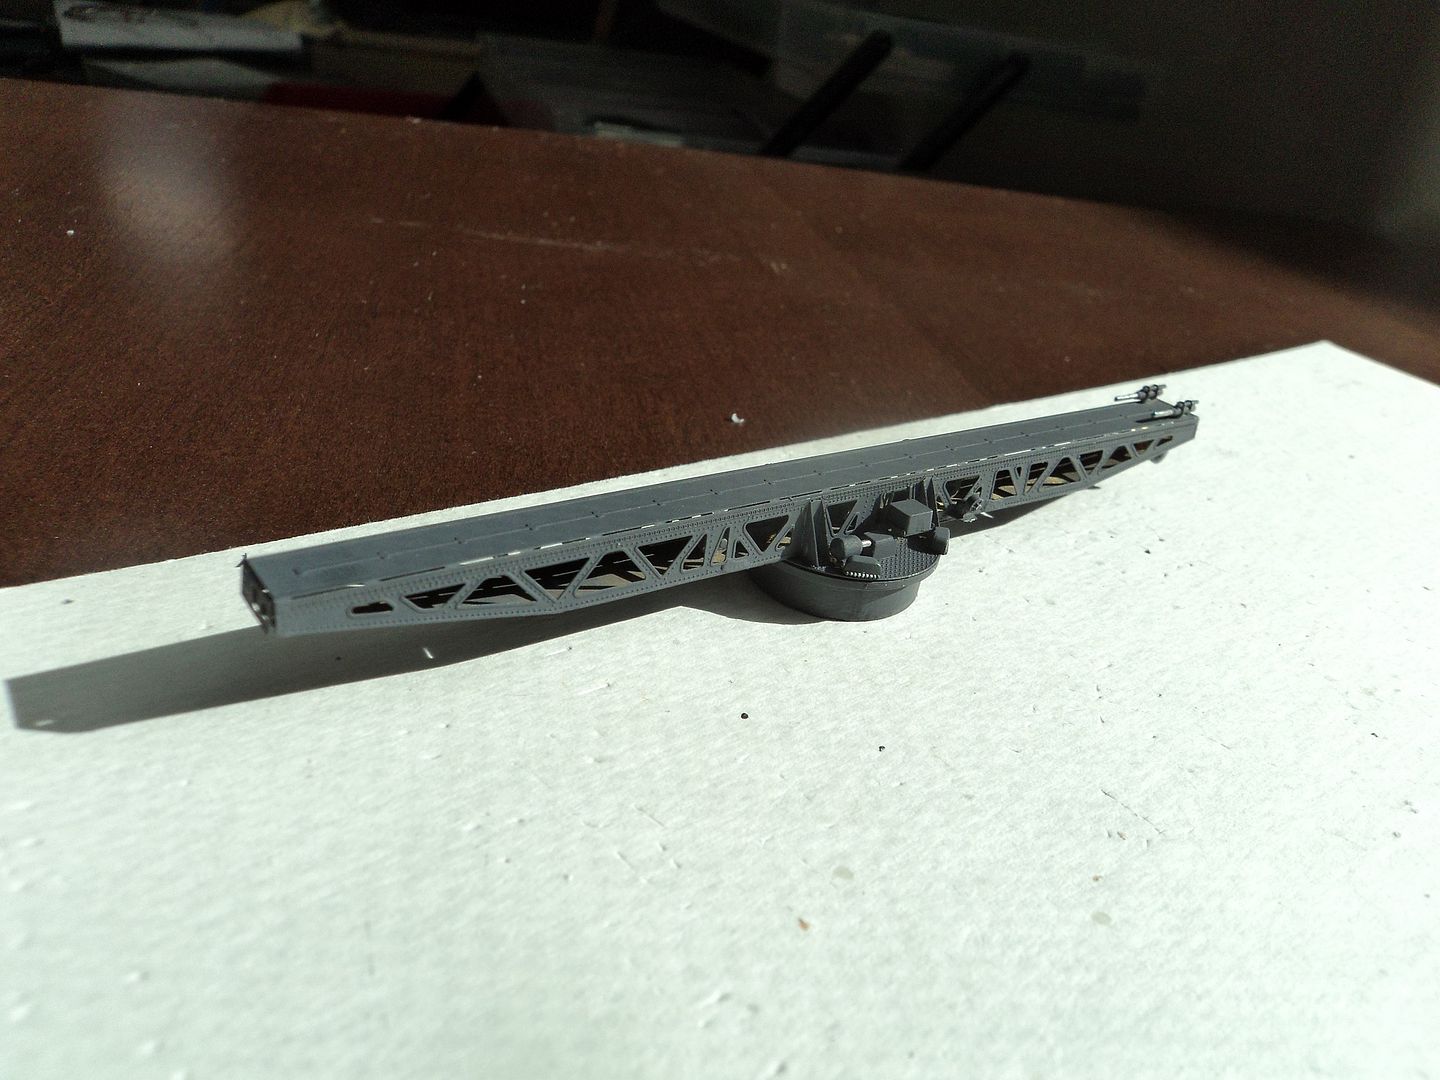
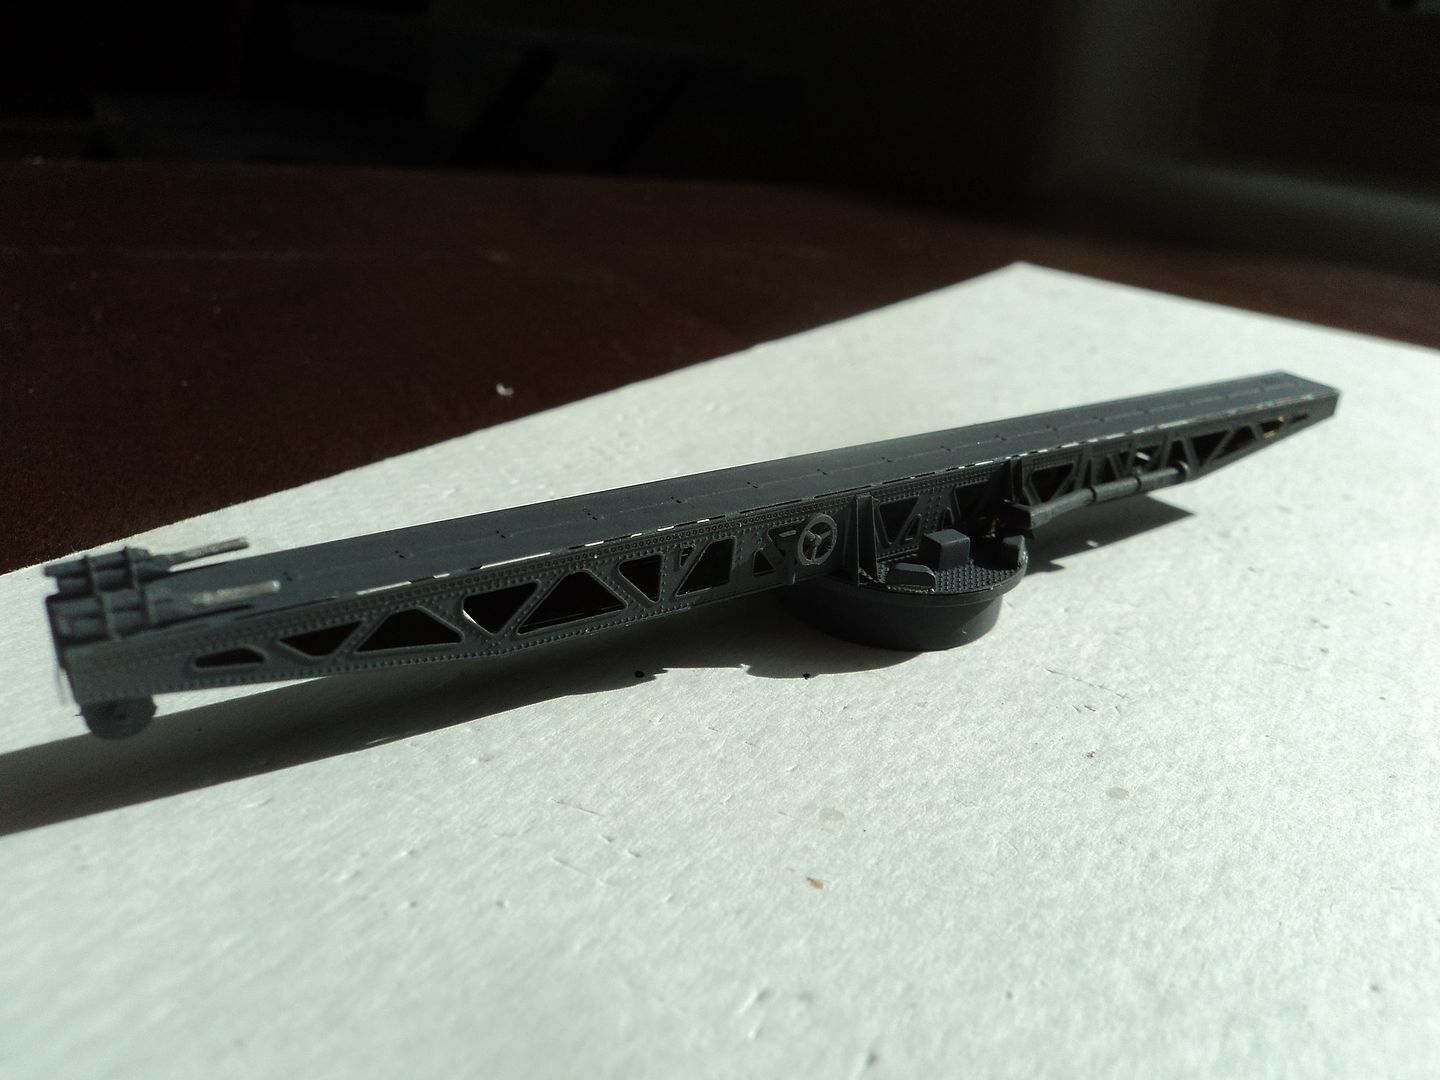
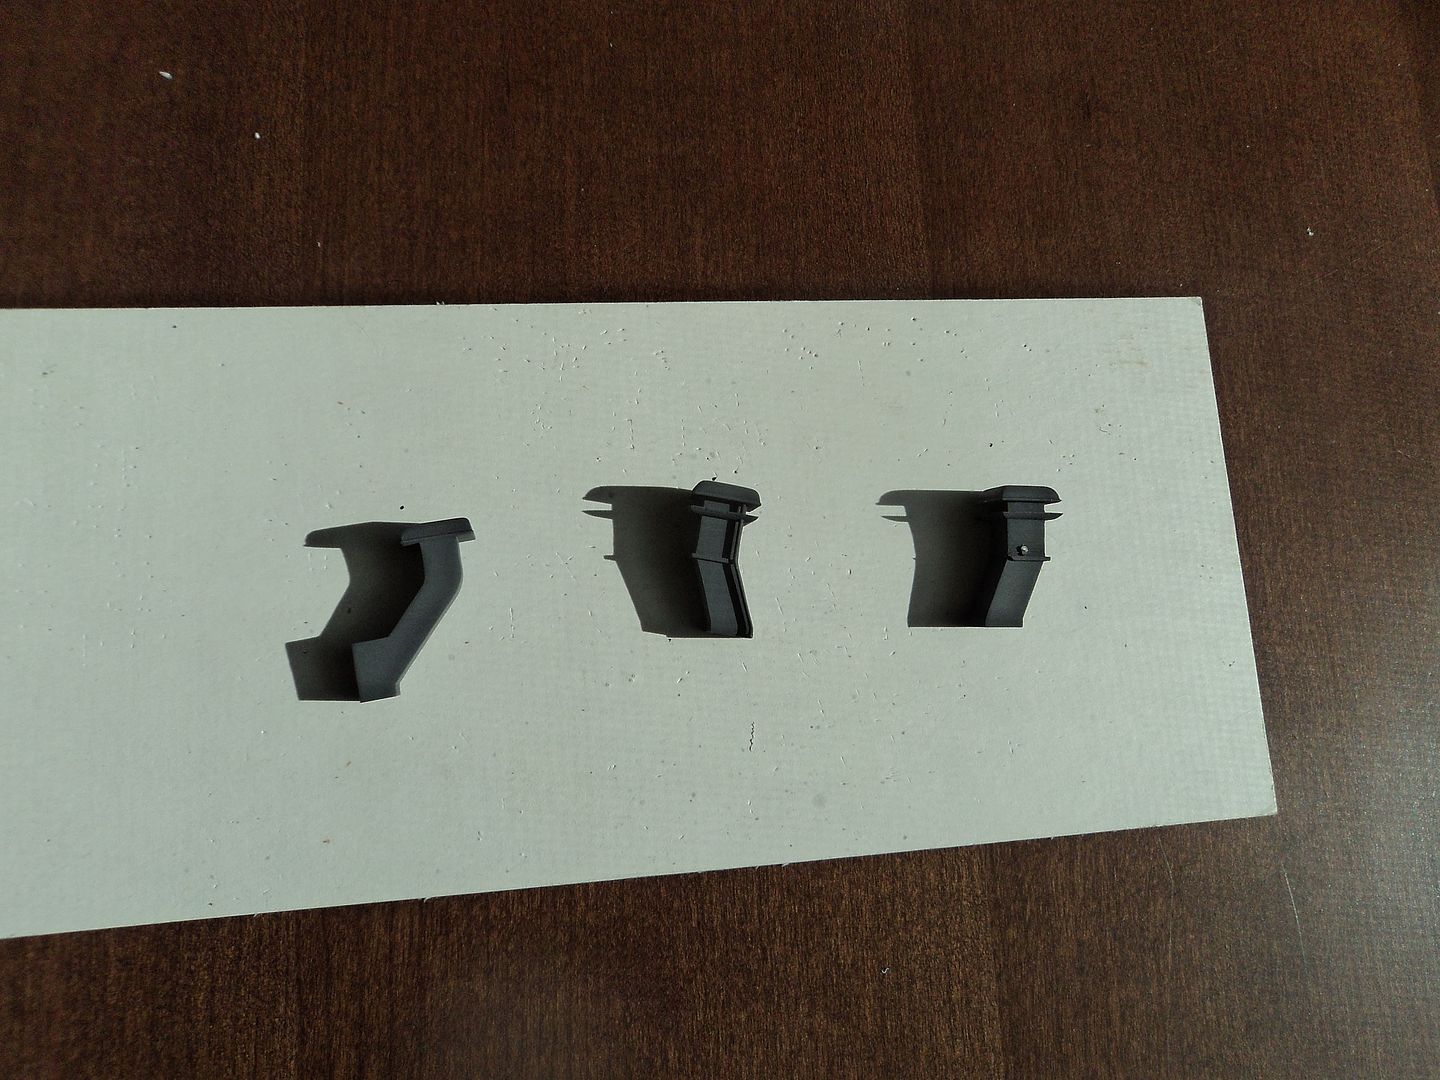
I then went on to the Vents. The vents are the Model Monkey via Shapeways vents for the Pennsylvania. They are totally different than the Arizona ones as provided in the AZ kit. Thanks to Steve "Model Monkey" Larsen, I was saved the process of scratchbuilding the vents.
There are three behind the turret and after following a vigorous sanding, washing and sun bathing, I painted them. They will definitely add interest to this portion of the model once fixed.
I hope you all had a Great Christmas and look forward to a productive 2017.
Thanks for stopping by.
Re: 1/200 Arizona to Pennsylvania Conversion
Posted: Wed Dec 28, 2016 11:51 am
by Channell
Moving and scale models just don't mix... good to see the damage was reversible though and I'm looking forward to seeing more progress on this very cool project!

Re: 1/200 Arizona to Pennsylvania Conversion
Posted: Wed Dec 28, 2016 4:45 pm
by Mgunns
Hi Jason: Right you are about moving and models and I know that you have experienced that as your recent move resulted in some damaged models. I managed to make the repairs and move on the construction of the project.
I started on the #3 Turret and Cat. I am using the MKI set for the 1/200 Arizona and things were going along smoothly.
I was getting ready to fix it to the turret when I was scoping out some photo's of the #3 turret and cat and noticed it was different than Arizona's.

There is a lot more bracing on the turret glacis plate. So, using spare PE, Plastruct and Evergreen strip, I replicated the bracing.
Once painted, it turned out pretty decent.
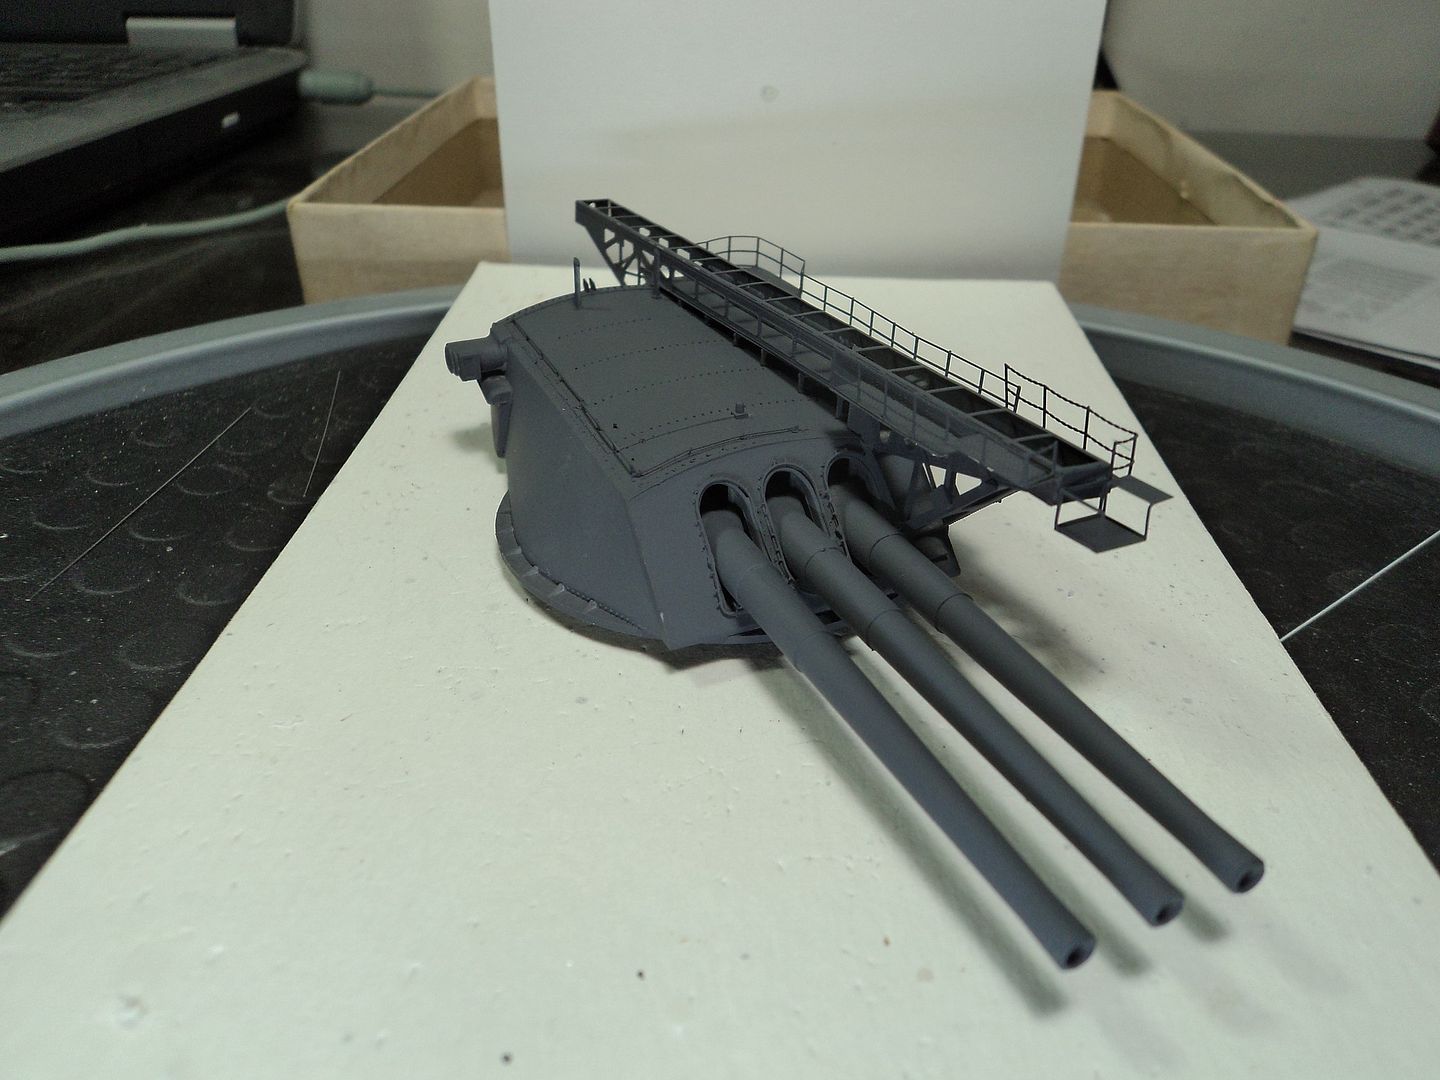
Some other differences on the turrets for Pennsylvania vice Arizona is the lack of access panels on the turret vents.
Below you can see the access panels on the vent on Arizona,
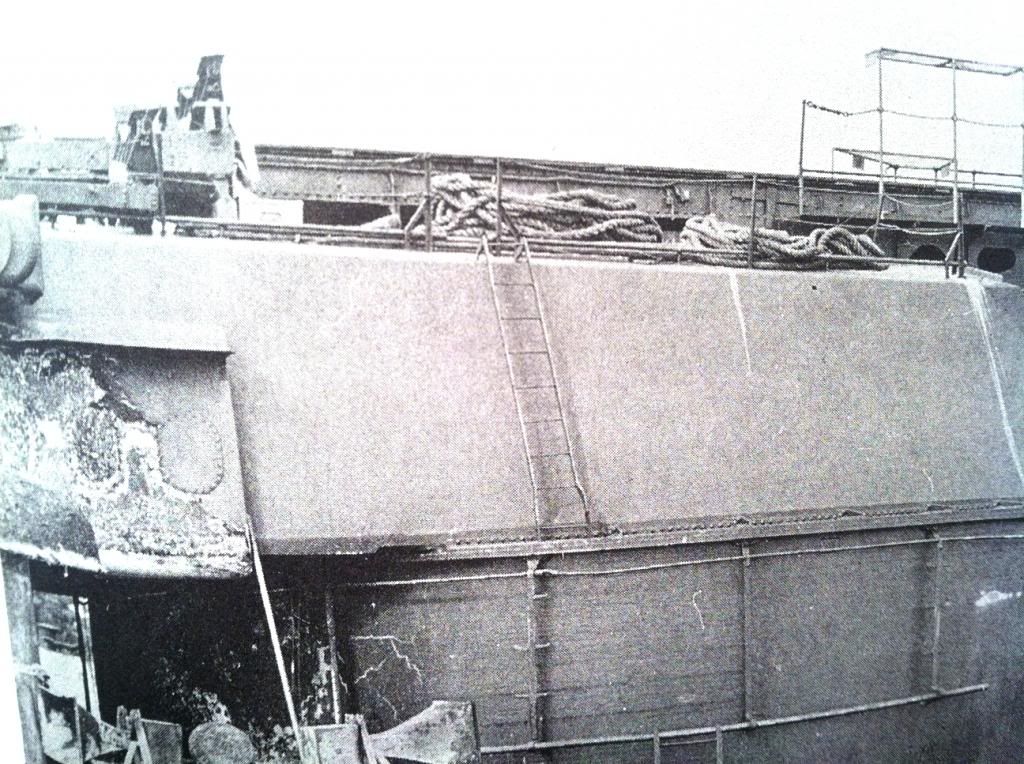
Clearly, Pennsylvania didn't have these.
Another difference is from all the photo's I could make out, Pennsylvania didn't have the chain railing around the turret top like AZ did either.
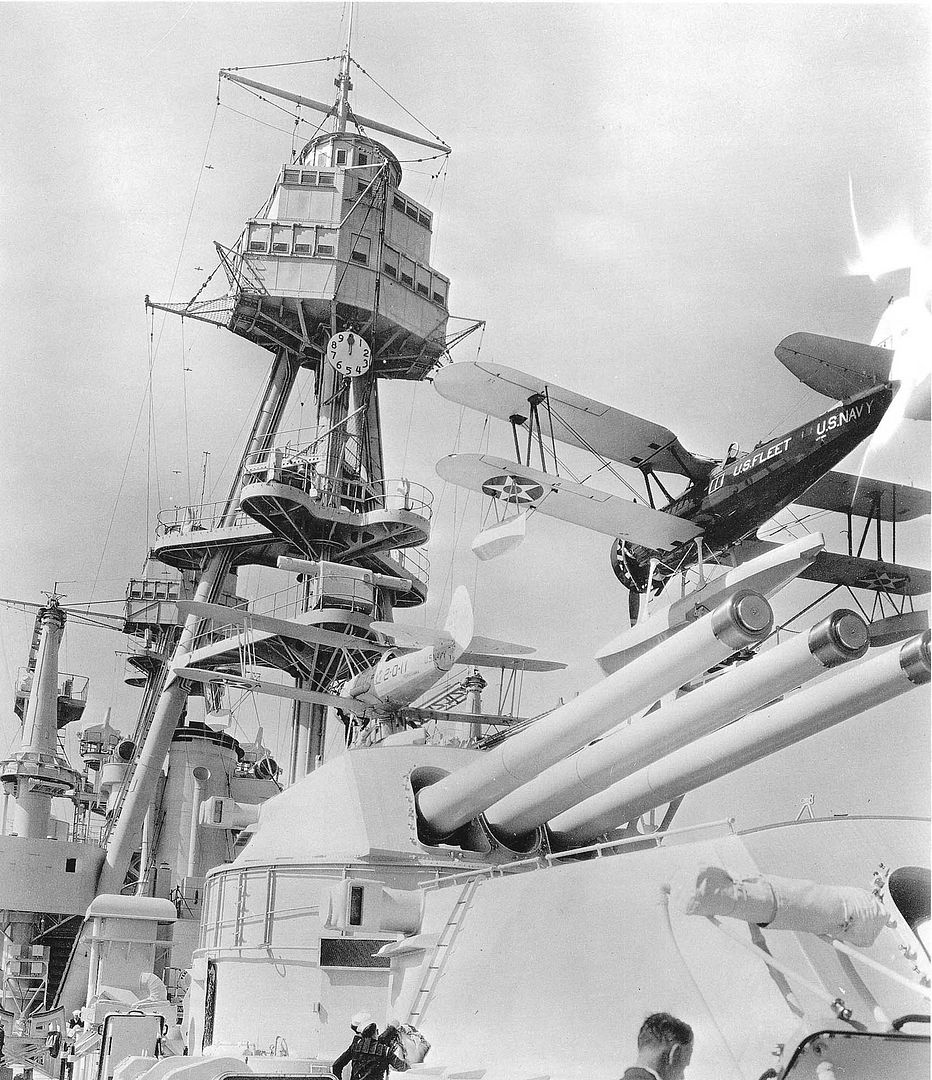
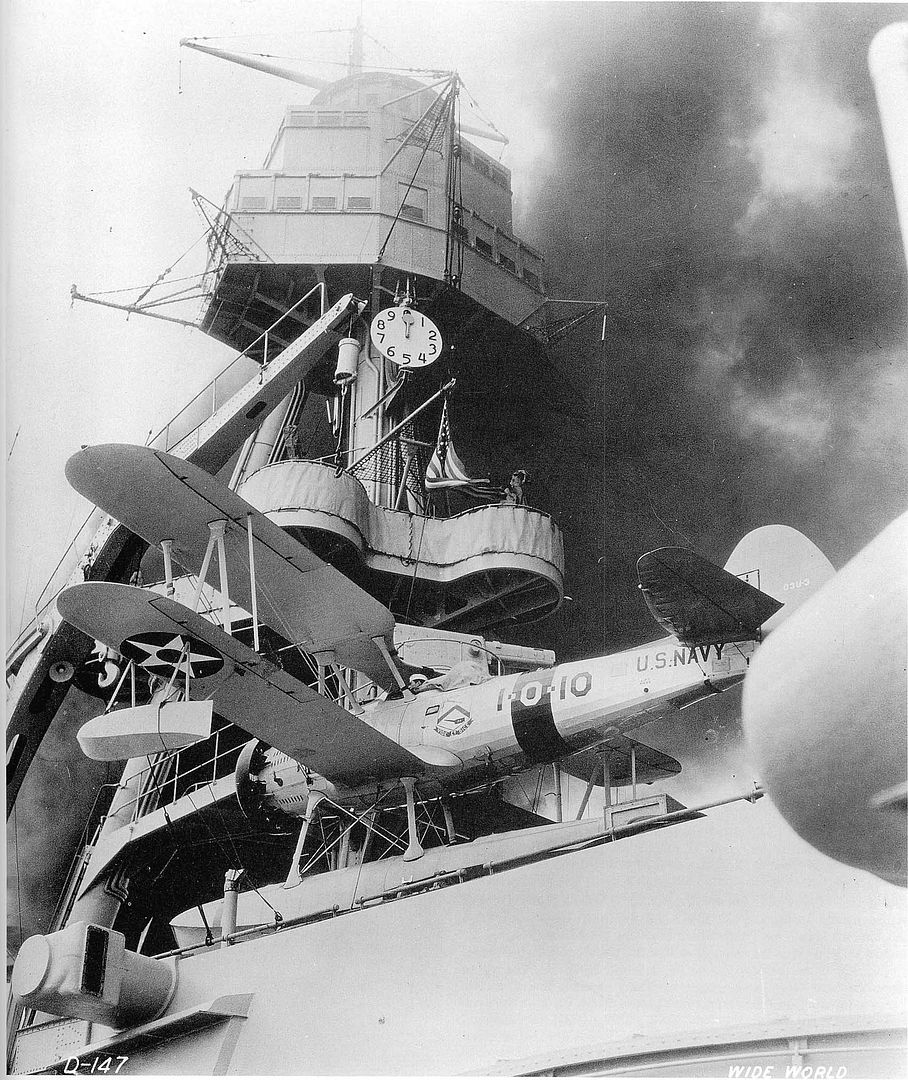
You can also see the lack of a ladder on the port side of the turret. So, I went ahead and just used the low grab rail type railing. I also added the periscopes and some other small details.
Now on to the other three turrets.
Thanks for stopping by and checking it out.
Re: 1/200 Arizona to Pennsylvania Conversion
Posted: Wed Dec 28, 2016 5:54 pm
by Jeff Sharp
Hi Mark,
Good stuff. Glad to see you are back at it.
As far as the railing on top of turret #3 goes, she did have it up there on occasion.
Re: 1/200 Arizona to Pennsylvania Conversion
Posted: Wed Dec 28, 2016 6:59 pm
by Mgunns
Jeff Sharp wrote:Hi Mark,
Good stuff. Glad to see you are back at it.
As far as the railing on top of turret #3 goes, she did have it up there on occasion.
DRAT!

I will have to rethink this one.
Thanks for checking in Jeff and scoping it out.
Re: 1/200 Arizona to Pennsylvania Conversion
Posted: Wed Dec 28, 2016 8:53 pm
by tegunn
Mark,
Good to see you back at it. Yes railing on number three. Here's your picture(AZ) you just posted..
Re: 1/200 Arizona to Pennsylvania Conversion
Posted: Wed Dec 28, 2016 8:56 pm
by tegunn
Mark,
The work is looking excellent! Really clean work...keep it up! No caps allowed when building!

Re: 1/200 Arizona to Pennsylvania Conversion
Posted: Thu Dec 29, 2016 2:29 pm
by Mgunns
Hi Randy:
Thanks for checking out the progress or lack thereof. No caps, no caps! I am wondering if that railing wasn't put up during different periods. For instance, maintenance on the catapult, aircraft, turret or something like that. As you can see I posted photo's of it not employed as well. Still undecided as to what I want to do.
Working on #1 and #2 Turrets.
Until that time
Re: 1/200 Arizona to Pennsylvania Conversion
Posted: Thu Dec 29, 2016 11:51 pm
by tegunn
Yes I believe it was removable. The aft/stern main deck railing was folded down for catapult operations as well.
Re: 1/200 Arizona to Pennsylvania Conversion
Posted: Tue Jan 10, 2017 11:50 am
by hondaman117
Looking good Mark!
I've seen a few threads talking about the crystal buildup on 3D printed parts, but your pictures show the problem well. Luckily it looks like it wasn't too hard to fix.
The stern catapult looks great! I like the added detail you got from using parts off the other kit. The turret catapult looks great as well, just shows another spot of how different the sisters were.
I just put the first coat of primer on my Arizona last night to see if the hull seam needed more work, and it does. However, I ran out of Tamiya primer and don't have a place in Yuma to get more. I'll try to grab some next week when I'm in the valley, might stop by Hobby Depot and finally pick some paint as well! I found a Vallejo color I like, do you remember if they carry them? I'm going the 5S route on her, so hopefully I can find an acrylic that is close if they don't carry Vallejo.
Keep up the good work!
Re: 1/200 Arizona to Pennsylvania Conversion
Posted: Tue Jan 10, 2017 12:14 pm
by Mgunns
Thanks Nelson for stopping by and scoping out the progress. I do believe that Hobby Depot does carry the Vallejo paints. He has a good selection of Humbrol as well. If you are in town, let's try to get together. I work weekends but; I get off at 5:00 on Saturday and 4:00 on Sunday. Either day works for me.
More work on the Kingfishers and then I will post some pics. It is then on to the hull.
Until that time
Re: 1/200 Arizona to Pennsylvania Conversion
Posted: Tue Jan 10, 2017 7:24 pm
by Mgunns
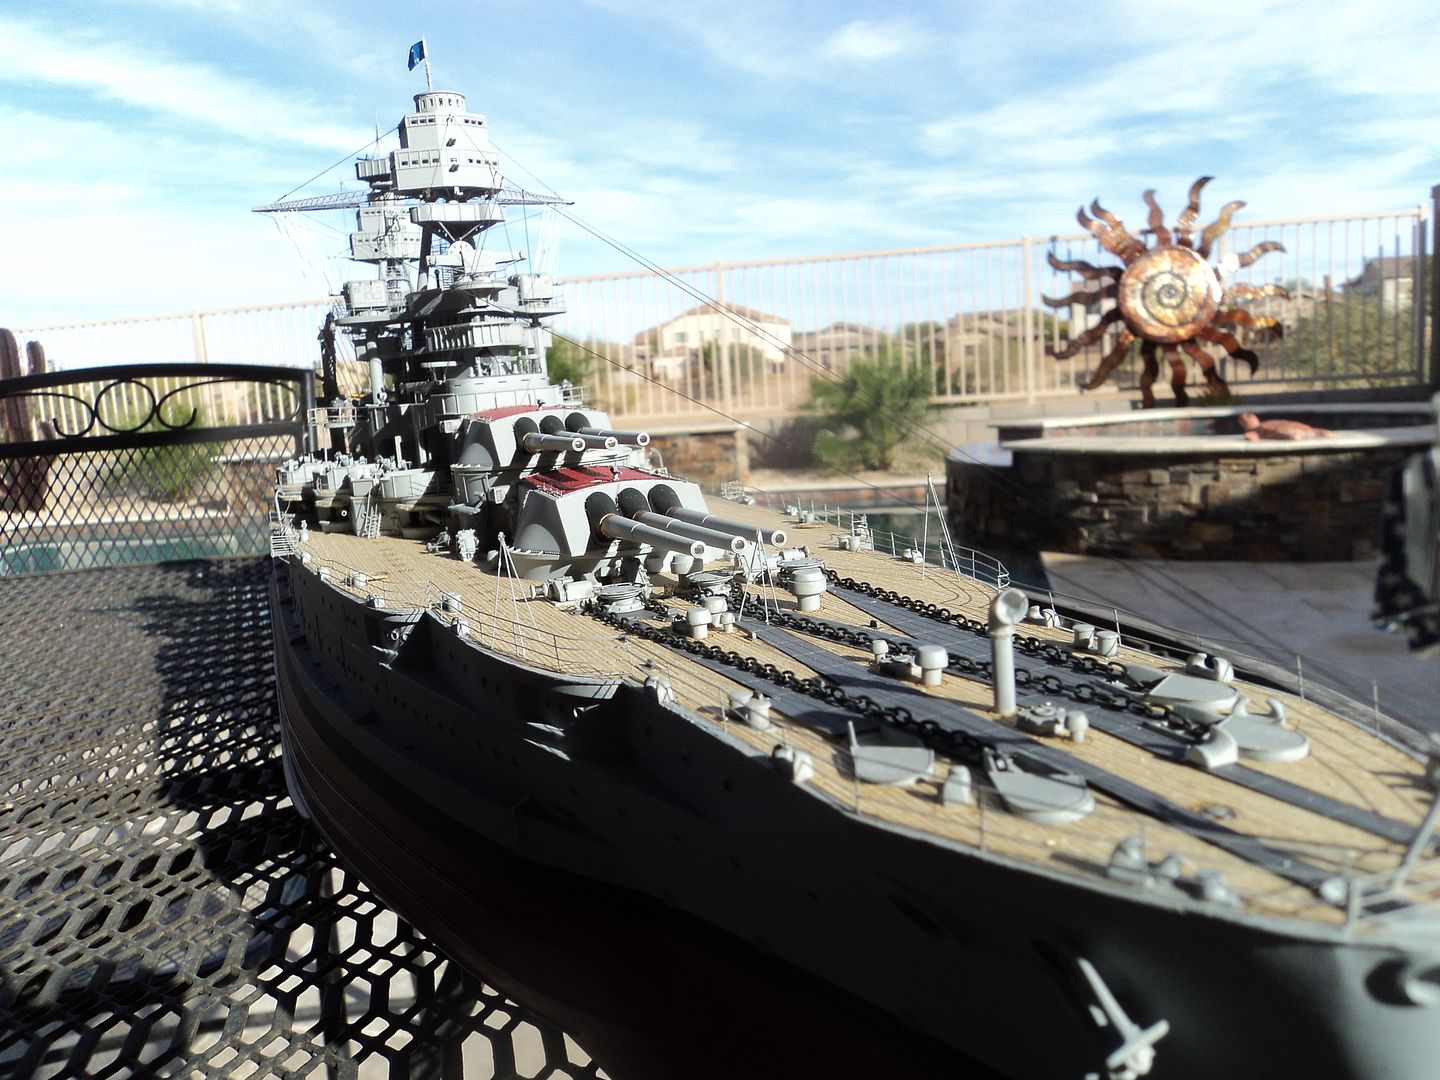
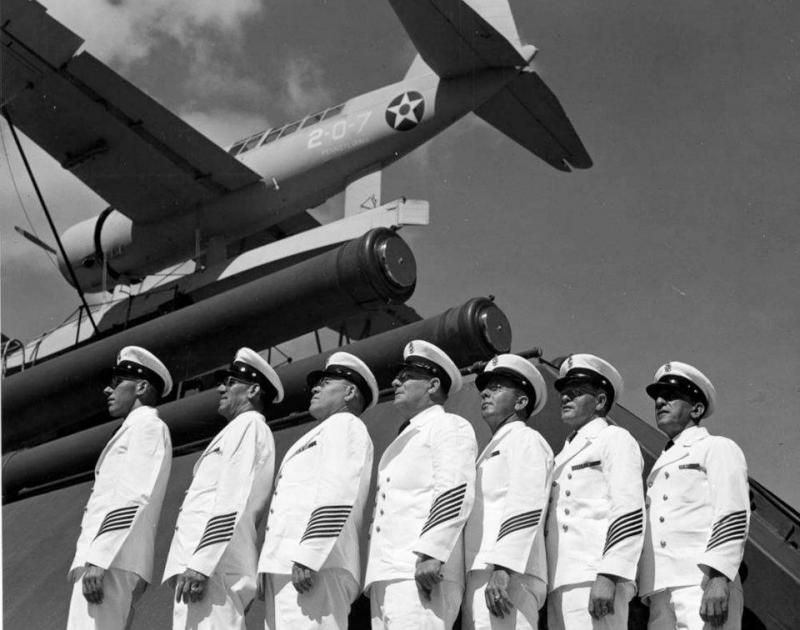
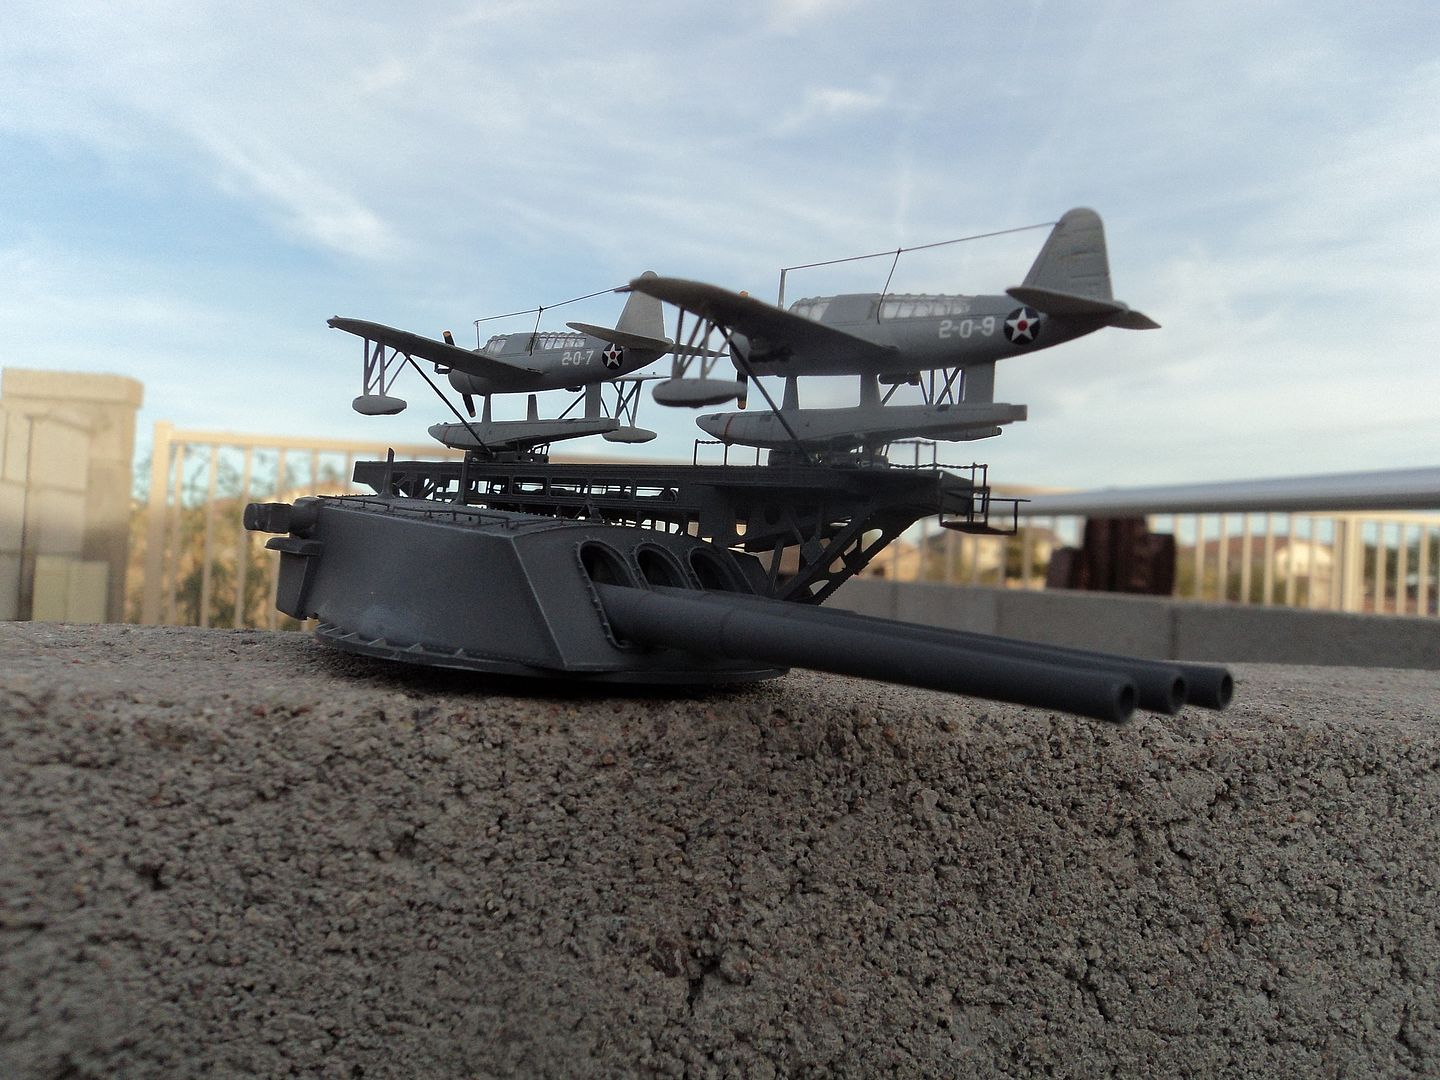
Okay folks, another update. I have spent the last week or so on turrets and Kingfishers. I decided to go with the overall late prewar grey scheme as seen in the image below.
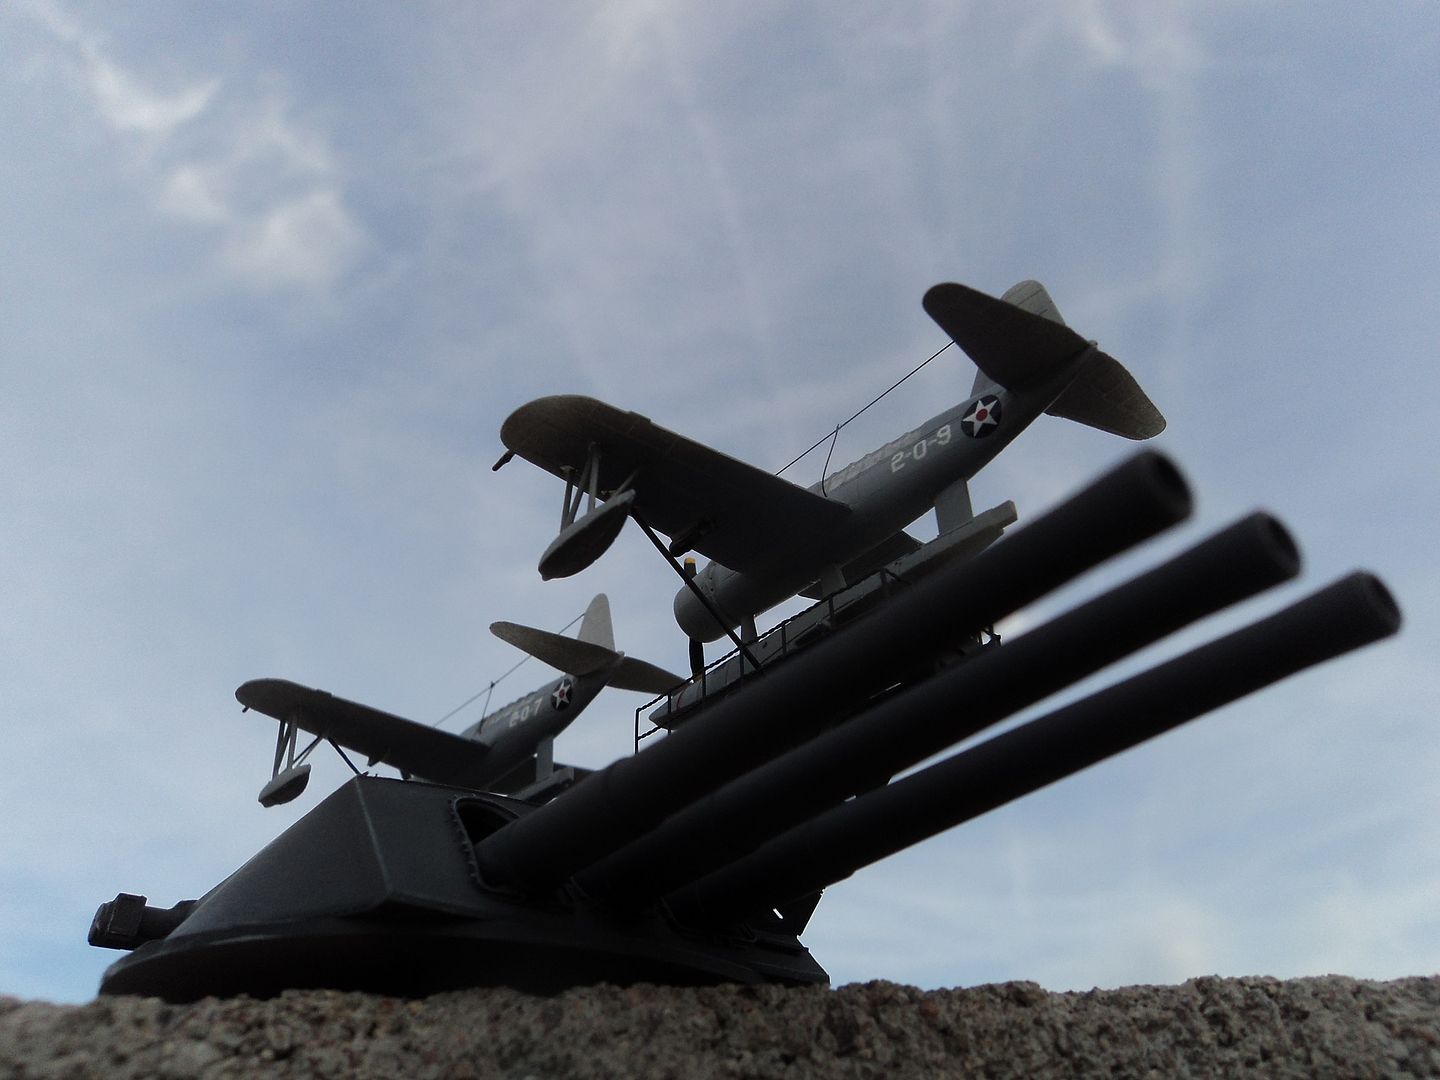
For paint I used Testors Model Master Light Ghost Gray and for decals I used the Gold Medal Models WWII 1/350 Aircraft markings and some of the markings out of the RICCI Kingfisher kitset.
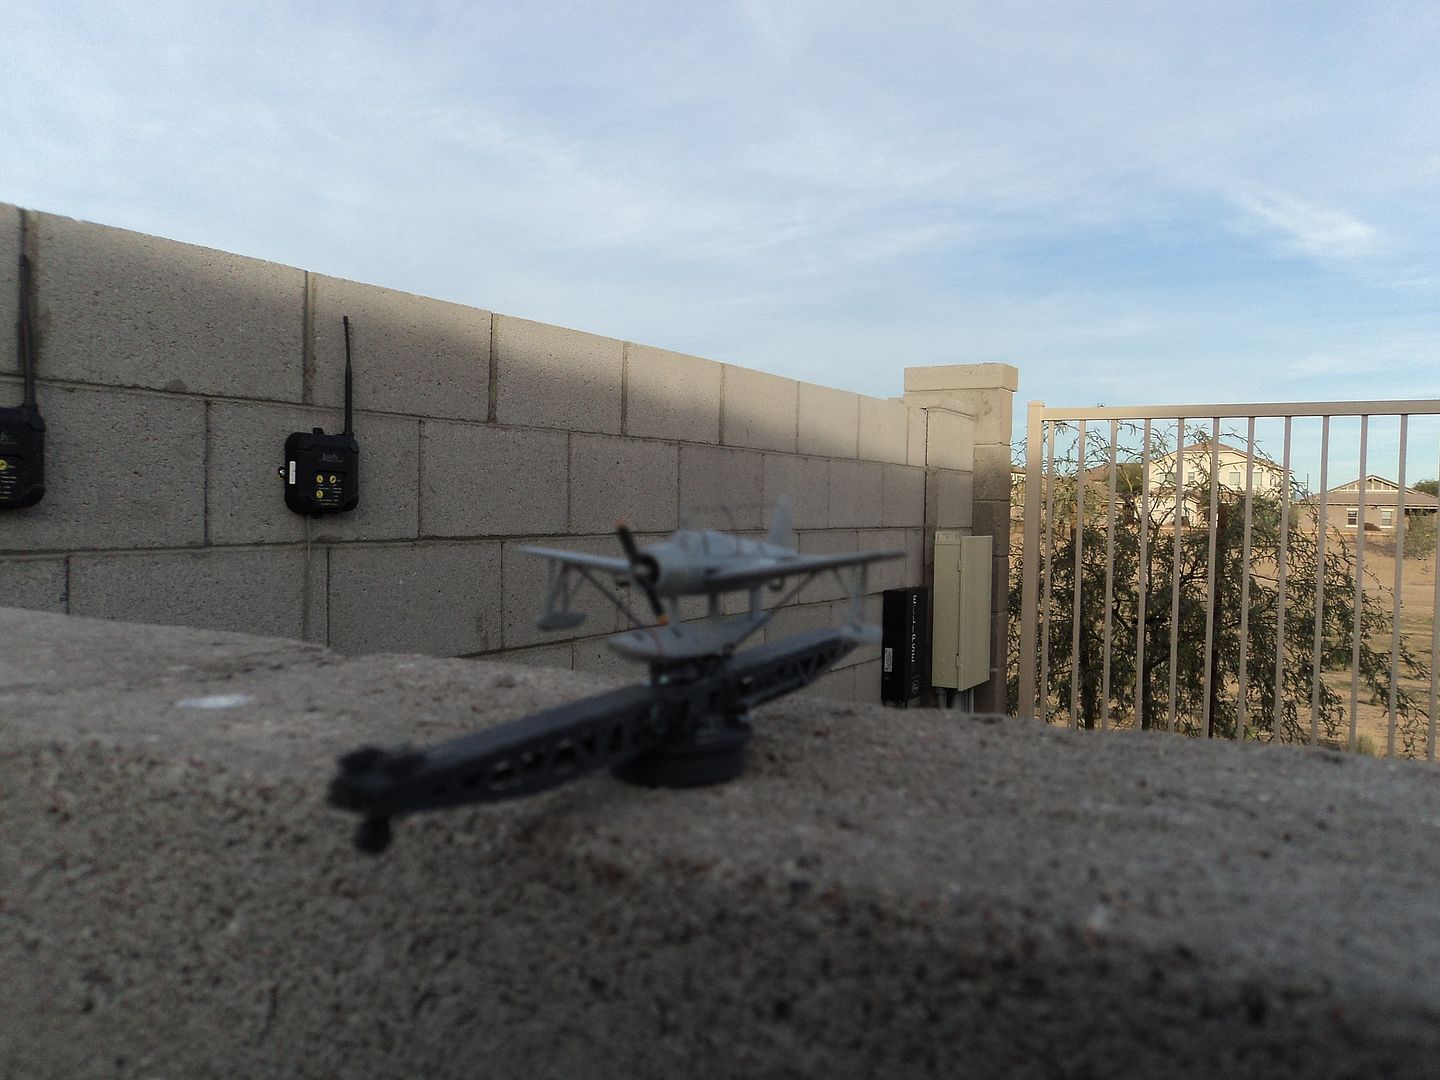
A few more images. The camera really captures the flaws. I wasn't going to add the radio antenna, but after scoping out some of the builds that have it, I had to give it a go. From normal viewing it looks pretty decent.
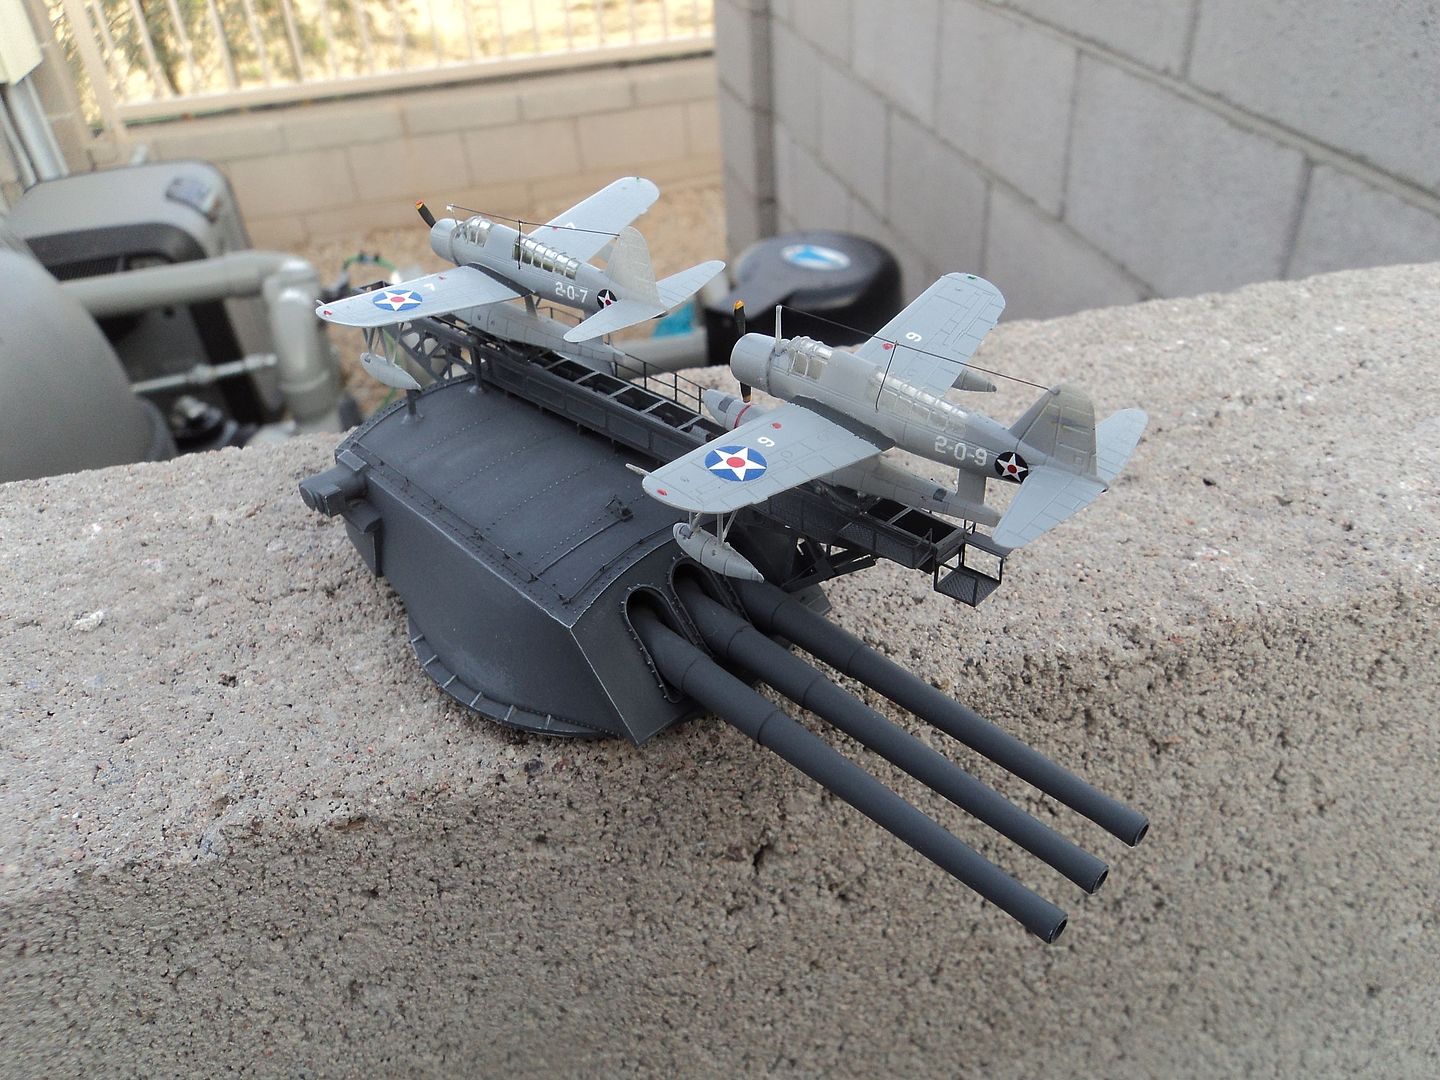
The Stern Catapult. After this image was taken I realized that it would never fit with the crane installed so I had to move the Kingfisher.
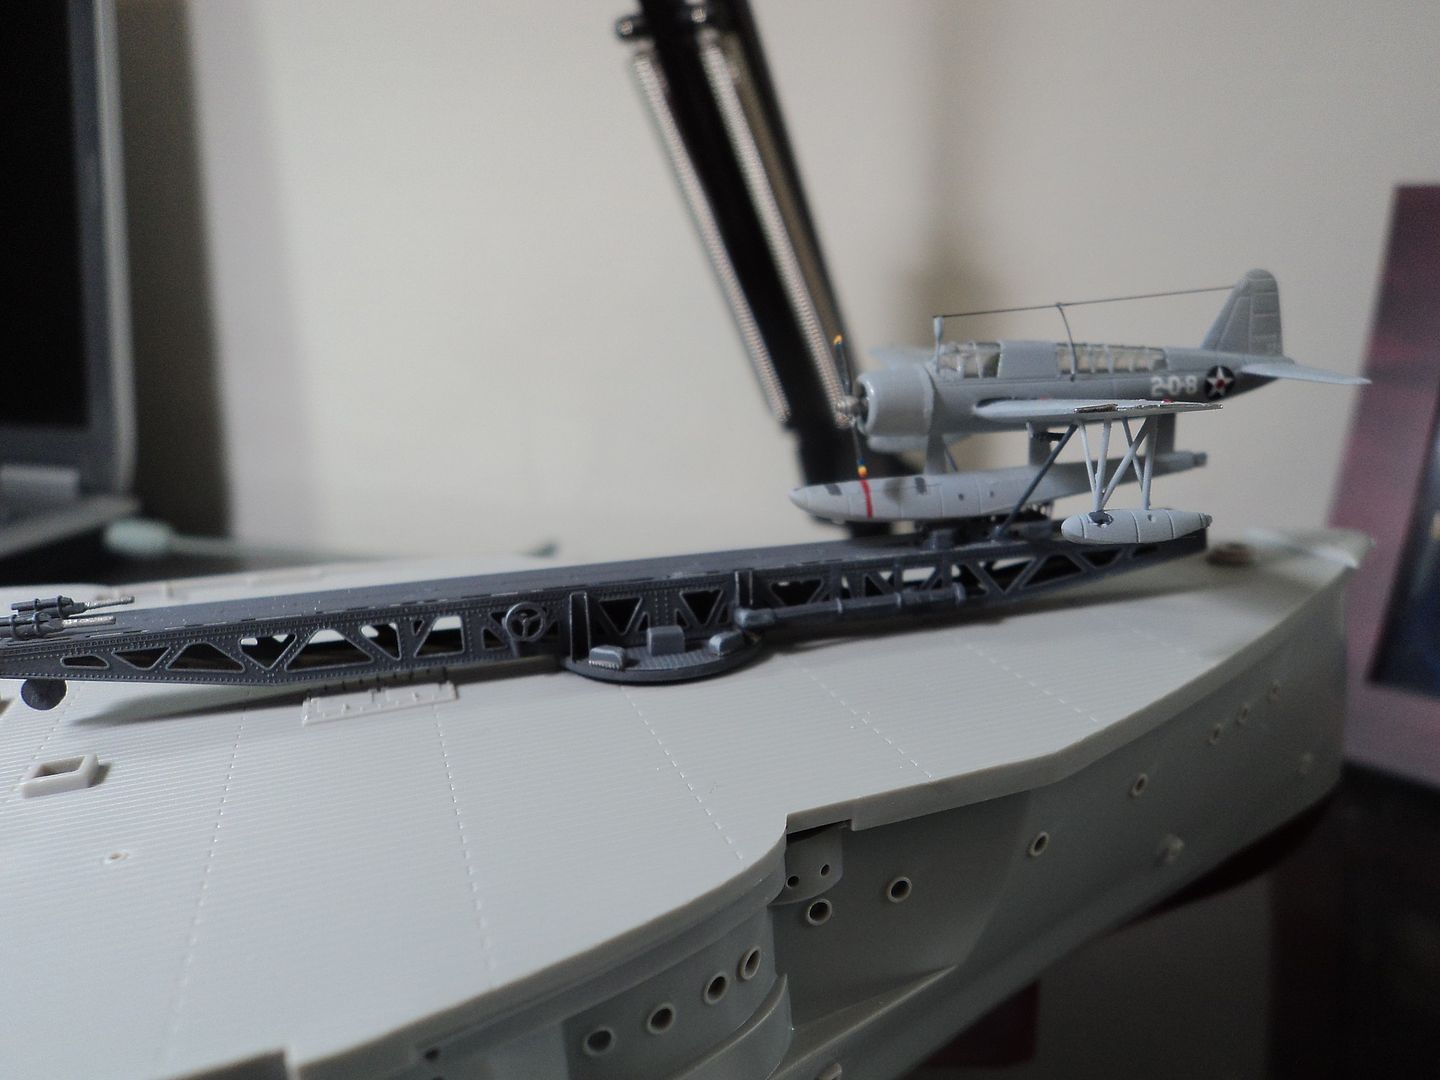
At this point, I am pretty much done with all of the major subassemblies. I am now going to move on to the hull and try and figure out how to best represent the unique aft torpedo blister angle into the hull, add the fuel line and stations, hull plating etc.
Thanks for looking in.


