Page 8 of 18
Re: 3D printing
Posted: Tue Mar 01, 2022 10:58 am
by BB62vet
Phil,
Nice results!!! In 1/96 scale you've been able to add a few details that in smaller scales would be extremely difficult, if not impossible to produce - i.e. the waveguide etc. I've actually got that drawn up for my DD-566 project on the main mast 2D CAD files but whether or not I can get them into 3D will be a challenge.
I believe Tom & I both experienced the sagging and also distorted handrails that came out of our first efforts. I took his 133 scale Mk. 37, scaled up to 144, made some modifications for my use and this save a whole lot of time in the long run. My Mk. 25 RADAR & base ring are also separate parts. Here is a photo of my last version prior to painting:
Here is Tom's version in 144 scale (left) next to mine:
His is primed and made of Rapid Black resin while mine is raw printed in Matte Gray resin - at the time I printed this I had not tried the Rapid Black resin - I've since been doing all my small detailed parts in that resin as it gives much higher detail results.
Getting a successful print w/o holes on my Mk. 25 RADAR dish was a challenge, as well. Finally succeeded in that attempt but it is conical throughout - at that scale/size those kind of variances can't be seen in any case.
I found that manually supporting the director base worked out much better than letting Chitu do that - the orientation I can't recall now, but I think I had my last edition at either a 15 or 30 deg. angle.
Good job - excellent results!!
Hank
Re: 3D printing
Posted: Tue Mar 01, 2022 1:13 pm
by Fliger747
Phil:
Nice job on the MK 37!, Mine was done in 1:192 for Missouri and Alaska, none of my larger models (mostly 1:120) use this unit. A lot is possible in larger scales, but for me a model that has an overall length of 4-5' is as large is convenient and is also likely to get finished. Really large models often turn out to be overambitious and either never get completed or take sometimes longer than the ship had a career.
The free DSM tool that Hank and I use has some great but limited capabilities. It is not good or easy use for such items as your cupola cover or the bloomers on the rangefinder horns. It is good in being able to accurately and intentionally design the interior and wall thicknesses as well as reinforcing beams and whatnot. When I designed my "armored vehicles" this was quite important in avoiding distortions in the printing process.
As to bottom printing? A lot of supports helps but you still get a crap surface. Designing a surface that allows some truing by sanding seems to be a satisfactory workaround. Again a heresy, but I printed the ARL bow main deck ramp right on the platen with excellent results. The version with supports was a disaster.
Keep up the good work! Tom
Re: 3D printing
Posted: Wed Mar 02, 2022 12:27 am
by DrPR
I think I will give the director shell another try, placing it at an angle to the X and Z planes so none of the foot/hand rails will be parallel to the printing platform or plastic film. This will reduce the cross section in each slice and perhaps avoid the distortion between the mounting brackets on the shell.
However, I think I will plan on using brass wire for anything smaller than 0.5 mm or 0.020 inch. Even though some of the 0.125 mm pieces print, they are extremely fragile.
I have reprinted the barbette - with supports on the bottom every 0.1 inch/2.5 mm - and the bottom surface (actually the top of the barbette) came out very smooth - but will need a bit of sanding to remove bit that broke off of the supports. But all of the circular hand/railings around the barbette sagged a lot. The ladder rungs up the sides (0.125 mm/0.006 inch) printed mostly, but several broke off when I was (gently) washing the parts in alcohol, and other got knocked off in handling. They are far too fragile!
The water washdown piping (0.25 mm/0.010 inch) printed mostly, but a few parts broke off in handling. Amazingly, the four extremely thin parts of the washdown nozzle printed OK!
All of these things are too fragile and need to be replaced with wire. On an early version of the barbette I tried to put 0.015" diameter holes for the ladder rungs but they filled in and didn't wash clean.
Looks like the only solution is to get a small milling machine to drill all these 0.010" and 0.0135" (#80) holes for the wires to mount in. But I have no place to put a milling machine (and other shop tools like a lathe, band saw, etc.) so I must first build a work space in my garage. But before that I must build a storage shed behind the garage to move all the stuff (lawn mower, garden tools, junk) in the garage into to make space for a work bench. It may be another year before I can drill all those holes!
Phil
PS: Here is another question. What glues do you use with the resin prints? I need to glue the antenna dish onto the antenna support. And then the "spider" must be glued to the top of the director shell.
Re: 3D printing
Posted: Wed Mar 02, 2022 1:18 am
by Fliger747
Phil:
For rungs I printed a jig to space the holes, which when taped to the surface worked well, I have had good results with printed on rungs and rails at .30 mm. Hand drilling worked OK. Sometimes thin vertical ladders and rails just need to dry, at least with the resin I use, and they shrink back straight from being a bit flaccid. I just use CA such as the Gorilla or various Locktites. I wonder if a little lingering surface goopiness inhibits glue and paint? I think the rinse is pretty important.
A .5 mm rail should be dynamite strong? here is a lot of product development involved in these 3D parts. I am getting better at getting a first run result, but often there are several versions!
Good luck! Tom
Re: 3D printing
Posted: Wed Mar 02, 2022 3:17 am
by wefalck
Hand-drilling 0.3 mm holes into resin is not an issue. I use an Archimedes-jeweller's drill for that. Just don't use carbide drills, if you want to stay happy, they are unsuitable for hand-drilling. The partly filled holes from the printing process would be good starters for the hand-drilling.
I was wondering, why you insist on printing these gun-turrets as a whole. I can understand the logic of having a single unit, but obviously the empty space inside causes problems. Couldn't they be broken down into panels? OK, the rounded corners could be an issue, but there may convenient weld-seams to hide seams from the assembly. Or, couldn't one print a webbing inside, sort of permanent supports, but leaving it open at two places to allow the resin to drain out?
Re: 3D printing
Posted: Wed Mar 02, 2022 9:33 am
by BB62vet
Phil,
I don't understand at all why you should have any problems working in 1/96 scale with printing hand grabs, esp. at the diameter you are making them. Tom is working in 1/133 and 1/120 scales and I'm working in 1/144 scale and we're both able to consistently print hand grabs that come out excellent. Here is a shot of my typical grab with an OD of 0.2mm with inserting pin of 0.13mm dia. -
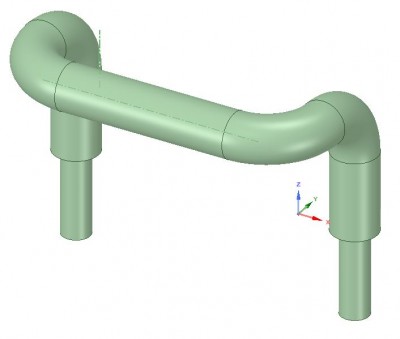
- 0.2mm dia. Hand Rung in 1/144 scale
I came up with this design well over a year ago and use it on just about anything that needs them. (I use the smaller dia. pin more for locating purposes than anything else. On my LSM/R project I scaled this part up and actually drilled holes in the stern for locating correctly. That is where the pins came into play) At 1/144 scale the rungs are located 2.12mm apart (12" apart in reality) and as such look like this:
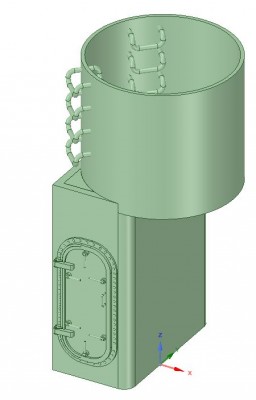
- Mk. 51 GFCS Tub in 1/144 scale
Handling these parts is a bit tricky, but I've not lost any of these rungs in well over a year due to my own ineptness. Small arms return fire and counterbattery near hits non withstanding

My handling problems have mainly to do with handrails and open positioned bulkhead doors - I see NO need to go back to using wire or drilling holes to manually place items such as this - it just takes some patience and learning how small or thin to make the part. Again, Tom & I have seen good results at the smaller scales - 1/96 scale should not be a problem. I've also found that printing stanchions & handrails as one unit works well with a thin lip at the bottom of the stanchions to hold everything together once it's ready for installation. I always check my plans & photos to make sure that the location has the raised deck lip on that particular item before adding. As You have mentioned before, many of the stanchions were welded to both the deck and deck lip on the inboard side of the deckhouse. This would not be the case for stanchions welded on the outside of the bulkhead.
In regard to printing gun MOUNTS and turrets as single parts there is no issue with that - comparing the Model Monkey 5in/38 sgl mounts that I purchased a long time ago for my STODDARD project (1/144 scale) to the Revell kit parts is a no-brainer - why print parts separately if you don't need to? MM has some really good 3D parts available, and these mounts are all printed IN DETAIL as one part with a separate barrel. I think there is WAY too much overthinking into all this stuff, and it only makes the process unnecessarily difficult. Keep the design as simple as possible while incorporating the details you want to see. Once again - this is a TRIAL & ERROR stage of development. So far, I've found that deckhouses can be printed as a single part or depending on size, divided into equal halves with either tabs or pins/holes for proper assembly alignment.
As for drilling resin parts - that can be tricky and disastrous! I start with a very small dia. bit at high speed and then gradually increase the dia. of the bit until I reach the intended hole diameter. While a jeweler's bit may be the best choice, I simply use my std. machinist drill bits and make sure the drill speed is appropriate. I don't manually drill holes in this type of material.
Hope this is helpful!
Hank
11:10 - edited to correct "inboard side"
Re: 3D printing
Posted: Wed Mar 02, 2022 1:26 pm
by Fliger747
Well at least everyone has an opinion! The archenemies type jewelers drills sound good, I have been using what appear to be a standard twist drill in a hand device. The main issue seems to be resin wanting to clog the bits, which can be easily withdrawn and relieved. I have had what I consider good luck with printing items such as 5" twin mounts and MK 37 directors, with a separate barrel. The ability to print the hand grabs and ladders directly on is a great advantage and looks better in 1:192 than any separate wire of PE. This should be much easier in 1:100 and above. For the APA and LSM I printed a great number of vehicles and tanks ranging from the M36 and M4 to jeeps with trailers and 75 mm Pack Howitzers. I considered these quite successful and in the case of jeeps and howitzers, printing the wheels separately was advantageous.
Perhaps a change in resin? I have had good luck with the rails etc using the rapid black water based resin for small items.
Cheers: Tom
Re: 3D printing
Posted: Wed Mar 02, 2022 2:54 pm
by Iceman 29
The black resin scatters less Uv at the edge of the layer, it would seem logical that the parts is a superior definition in this case.
I'll try this, thanks buddies!
Re: 3D printing
Posted: Wed Mar 02, 2022 3:32 pm
by DrPR
Thanks to all. I appreciate your advice.
I guess I didn't make my concerns clear. I am printing things as small as 0.005" or 0.127 mm. But these things are extremely fragile and break off with even the slightest touch.
However, even though the 1" (1:1) ladder rungs print OK at 0.0104" or 0.26mm (1:96) some always seem to break off when the parts are being raised from the film. In some cases one end will still be attached and the other hanging loose. I just printed 40 of these and two failed. Likewise half of the 0.012" water washdown pipes printed and half didn't print completely. That isn't good enough.
I will try the rapid black resin. It probably won't transmit as much light through the layers and cause things to be oversized vertically. And I will try printing at an angle to reduce the surface area that has to be released from the plastic film. If this works I will be happy. But if the results aren't any better I will use wire. It will be far less fragile than the printed resin.
It's not a case of not being able to print something, but I am trying to stick to an accurate scale. For example, a 1" (1:1) ladder rung would be 0.176 mm at 1:144 scale. Hank is happy with 0.2 mm (113%) and that is OK. And at 1:144 I think this is a good compromise between appearance and practicality. But they definitely look oversized to me.
****
In the Cleveland class the superstructure sides were made from 3/8" steel, and that comes out to 0.0039" at 1:96. There is a 3/8" thick 3" high coaming around all superstructure weather decks to prevent water from splashing over the sides onto the decks below. Drains were fitted into the coamings every so often to channel water into down pipes that terminated about a foot above the deck below. I have been thinking about how to reproduce these 3" high comaings for years now. I intend to build the superstructure from 1/16" thick styrene sheet (McMaster-Carr sells 4' x 8' sheets for a fraction of what hobby companies sell it for). But the actual superstructure sides will be made from 0.004" brass sheet. (also from McMaster-Carr)
There is another reason for using this method. The 12" air ports (portholes to lubbers) have a ring of rivets around them. I plan to make a tool to punch a hole for the port and emboss the rivets around it. A piece of glass microscope slide cover will fit into a printed mold inside the port, complete with the "X" structure found on the closed port covers.
And I am considering how to make dozens of water and air tight doors and hatches to accurate scale. Again the handles were 1" diameter (1:1) and many of the surfaces were 1/4" or 3/8" sheet. I will try printing these, but I have designed a tool to stamp them from 0.003" brass shim stock and emboss the features. There were about a dozen different types of doors and hatches on the OK City.
On the cruiser some hand rail stanchions were welded to the deck inside the coamings, and these will fit into holes int he deck (probably 1/16" styrene). But many were welded to the outside surface, descending 3" below the deck level. I'll use resistance soldering to attach the brass stanchions to the deck house sides.
I will use 0.008" and 0.010" brass wire for all of the cables on the exterior of the deck houses, and these may also be attached with resistance soldering.
Again, so you will understand what I am trying to achieve, I am aiming for exact scale and I will use whatever materials I think are best for achieving this.
Phil
Re: 3D printing
Posted: Wed Mar 02, 2022 8:03 pm
by BB62vet
Phil,
Got it! I wish you luck as any model is going to have obvious material thicknesses different than their real-life counterpart, if for no other reason than structural integrity. But Hey - if you're able to achieve material Nirvana on this, my hat's off to you!!!
I do think you'll see better results (crisper details) with the Rapid Black type of resin than you are getting with your current product. I've been able to achieve quite amazing results from 3D printing that 2 years ago I would have thought impossible given my lack of knowledge/understanding, etc. of this medium. And using the low-end printers and software to boot - who'd have thunk, right??
Keep in mind that using the RB resin - when your part is finished and you look at it, you'll see much of it being translucent rather than a solid color; just the way that this resin prints. I was quite amazed after my first print run - but, once you've gotten to the primer stage, it looks no different than gray, green, or brown resins.
Hank
Re: 3D printing
Posted: Wed Mar 02, 2022 9:31 pm
by Fliger747
Ah scales! Volume increases with the cube of the increase in the scale (1:48 being larger). For time immemorial many have considered 1:48 being the smallest scale that one can essentially replicate reality. A 1:48 model rail has 4x the cross section and the model 8x the volume. Fragility and resolution come into play. A 1:48 cruiser, you should be able to ride inside? For example some excellent work is done in HO scale, but much more realistic is possible O scale and even more in 1:1, which sort of limits us to maybe a wherry.
Even we plebeians are making progress in smaller scales over what we might have done a few years ago. So have a thrash at it!
Somewhere philosophy creeps into this.
Cheers: Tom
Re: 3D printing
Posted: Thu Mar 03, 2022 3:16 am
by wefalck
Indeed, building in 1:1 allows you to replicate a lot more detail

What has often puzzled my is that even when you scale something down to the correct material thicknesses and dimensions, model or parts thereoff tend to look more chunky than in larger scales ...
Re: 3D printing
Posted: Thu Mar 03, 2022 2:20 pm
by Fliger747
A M-4 Sherman and M-36 Tank Destroyer. These printed with separate turrets and interiors designed to produce a smooth distortion free exterior. To get bottoms and tracks to print "OK" the chassis were inclined at about 15 deg. These were printed in both 1:120 for APA and 1:133 for LSM.
Tom
Re: 3D printing
Posted: Thu Mar 03, 2022 10:12 pm
by Fliger747
The LSM project, sitting on the sidelines for a but, but with a load of invasion vehicles and some deck crew. The hull originally made from .20 thou Aircraft Aluminum circa 1963? Many printed parts added in more recent times. I don't think I could have constructed the vehicles and certainly not the figures by traditional methods.
Tom
Re: 3D printing
Posted: Fri Mar 04, 2022 11:04 am
by NukeMM
I'm about to plunge into 3D printing and I was wondering if there is a place where one can download STL files of ship equipment and structural parts like chocks and bitts and water tight doors, portholes, fire hoses, etc .
Re: 3D printing
Posted: Fri Mar 04, 2022 11:22 am
by NukeMM
DrPR wrote:What type saluting gun it that? It is quite different from the 40 mm saluting guns we had on the cruiser.
saluting gun 23 June 2016 3 1024 C.jpg
Phil
I've been looking for a suitable facsimile of these in my parts box in 1/350 for my three AVP flagships.


Re: 3D printing
Posted: Fri Mar 04, 2022 4:29 pm
by Fliger747
Some items such as bitt's and chocks are relatively easy to design and a good first project. Hank and I use a free 3D design program called Design Spark Mechanical. It's very good for some things but not items such as boat hulls as are the surface design programs. The big advantage of 3D printing is you can design items specifically correct for your project.
Good Luck! Tom
Re: 3D printing
Posted: Sat Mar 05, 2022 4:43 pm
by Fliger747
I titled this photo as PAK 75, but of course it's not a "Panzer Ab Kanon", but instead the versatile 75 mm Pack Howitzer. So named as it could be broken down into components and carried on Pack Mules! Also towable by a jeep or even carried in a DUKW.
It's printed in three pieces, carriage and tires. The tires print extremely well horizontally but not so much vertically mounted on the carriage. This also proved true of the jeeps, the tires printed much better separately from the Jeep Chassis.
I don't think that using covential means that I could make the tires with the tread lugs and holes in the wheels. Perhaps the cghassis could be done with PE, though I think this is better. Printed with a water based "Phrozen" Rapid Black Resin, which Prefer for detail. Living in a sub arctic climate where the indoor humidity is around 2%, dust is really unsolvable.
Re: 3D printing
Posted: Sat Mar 05, 2022 6:28 pm
by NavyShooter
Here's the background project I'm working on - a 1/87 and 1/96 scale Liberty Ship.
I've got about 200 hours of printing left on the bigger one. 140 hours on the smaller one.
Re: 3D printing
Posted: Sun Mar 06, 2022 2:04 am
by Iceman 29
When you perfectly master 3D drawing, here 3DSMax, 3D printing (Mono X), and painting, you get the exceptional things that my friend Bernard HUC makes:
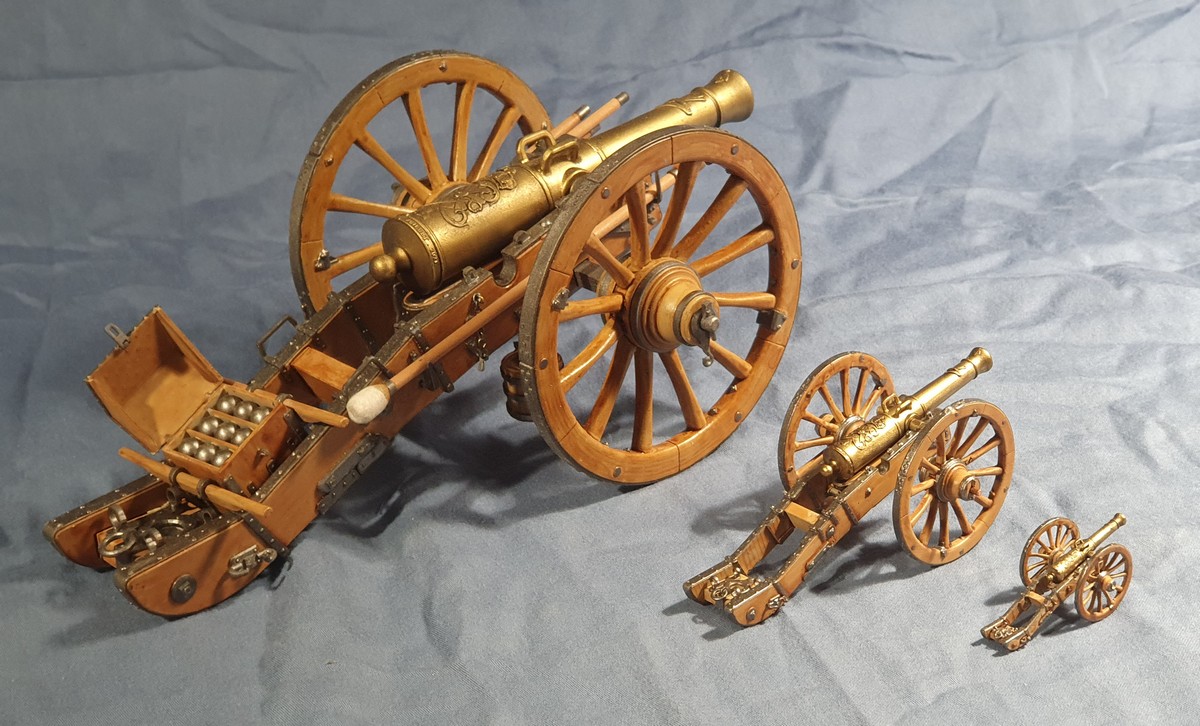
"Some pictures of the guns already presented in different scales.
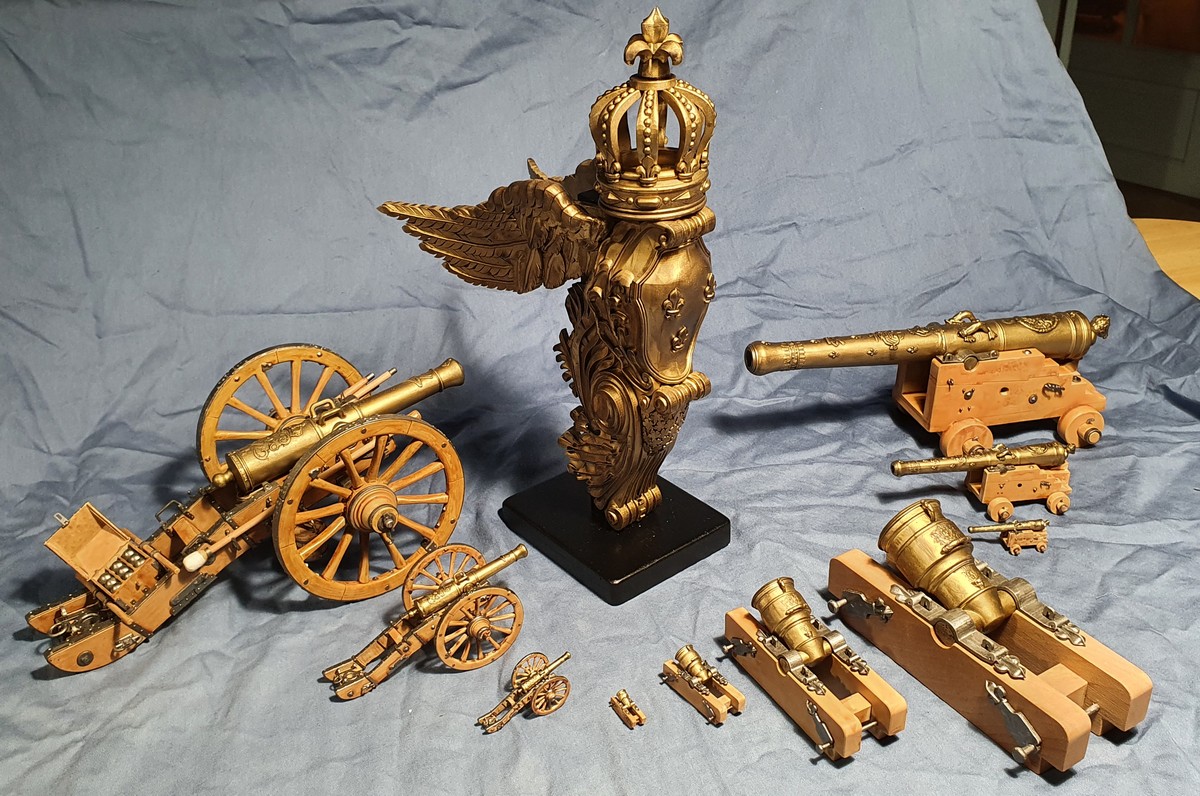
The Gribeauval 12 in 1/16, 1/36 and 1/80 scale:
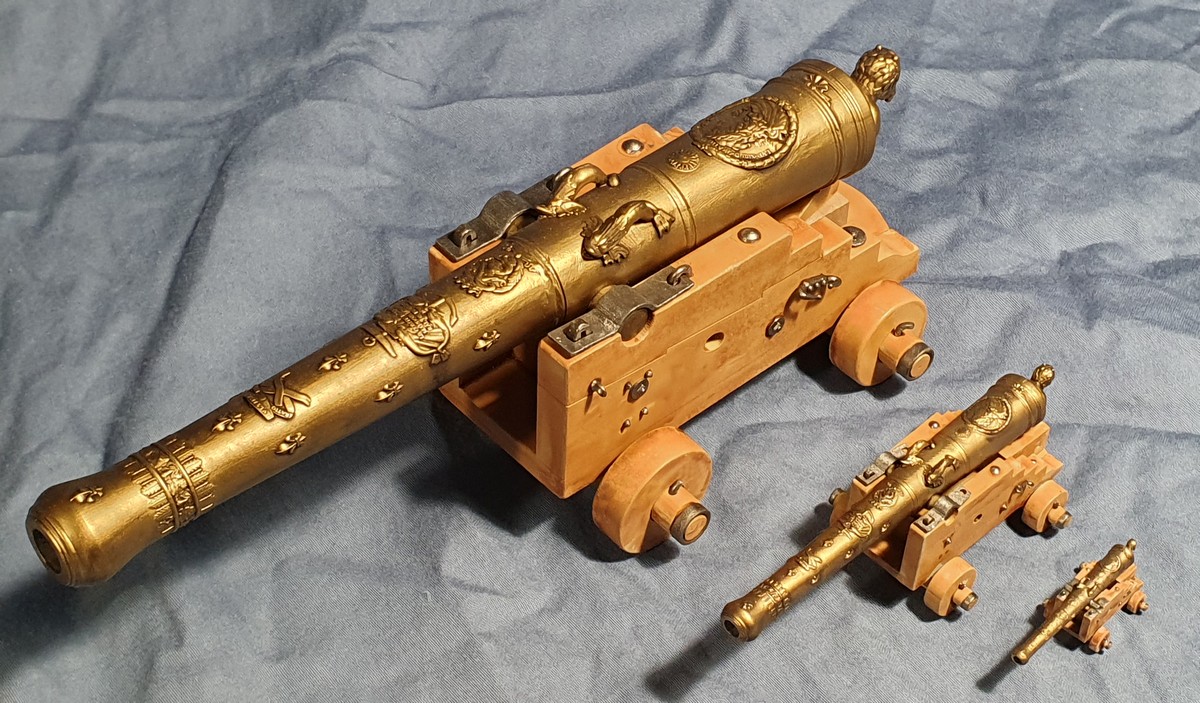
French ship ��Soleil Royal�� gun ditto:
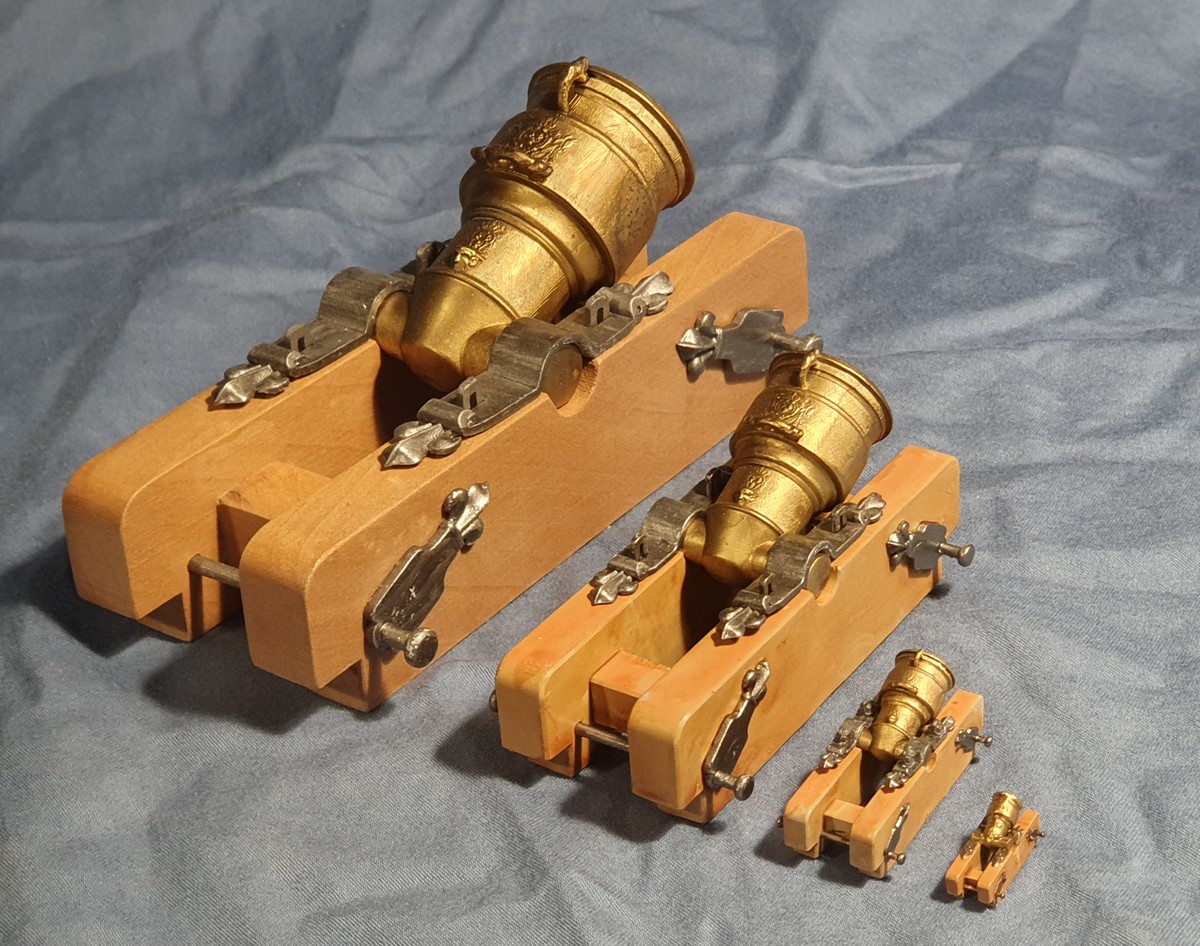
The 8-inch mortar at 1/10, 1/16, 1/36 and 1/80:
All together with, in the middle, the figurehead of the Marseilles Trade in 1/10:
A small detail on the 1/80 Gribeauval gun. The rings used for the iron levers measure 1mm outside diameter and 0.12mm of wire.
I can't believe it myself. I bestially printed in 1/80 without modifying anything of the 3D model and some details like these rings came out. It's amazing.

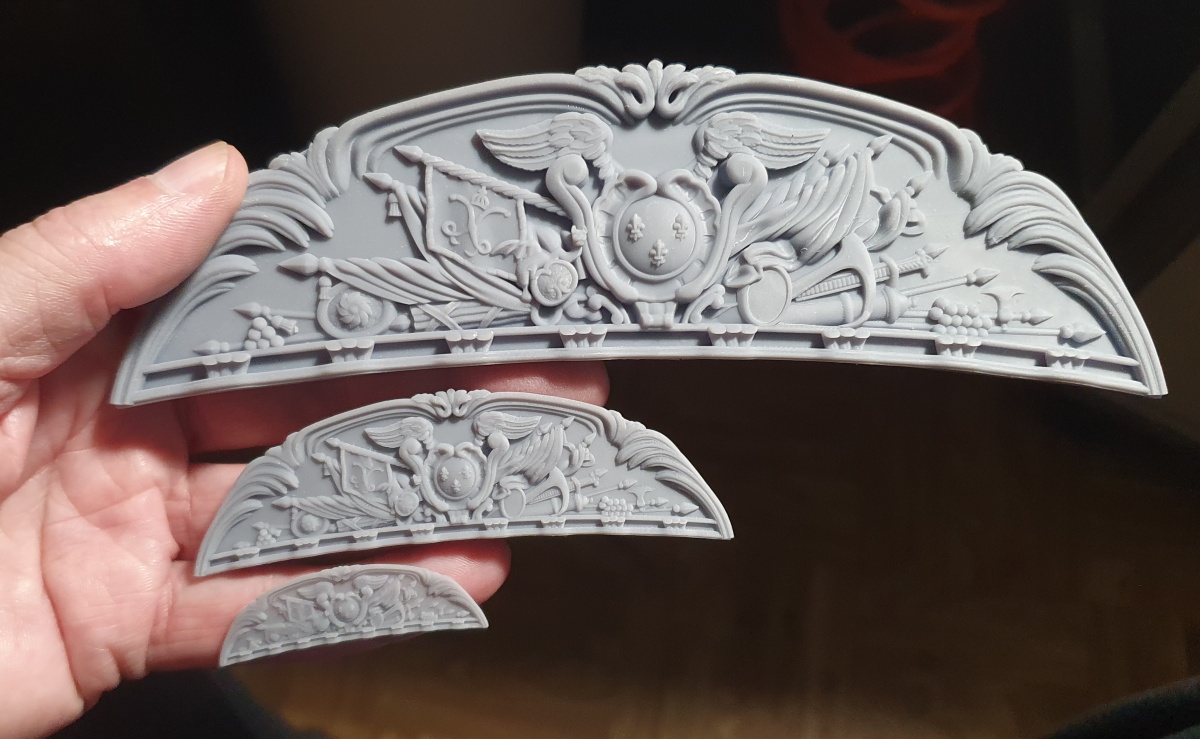
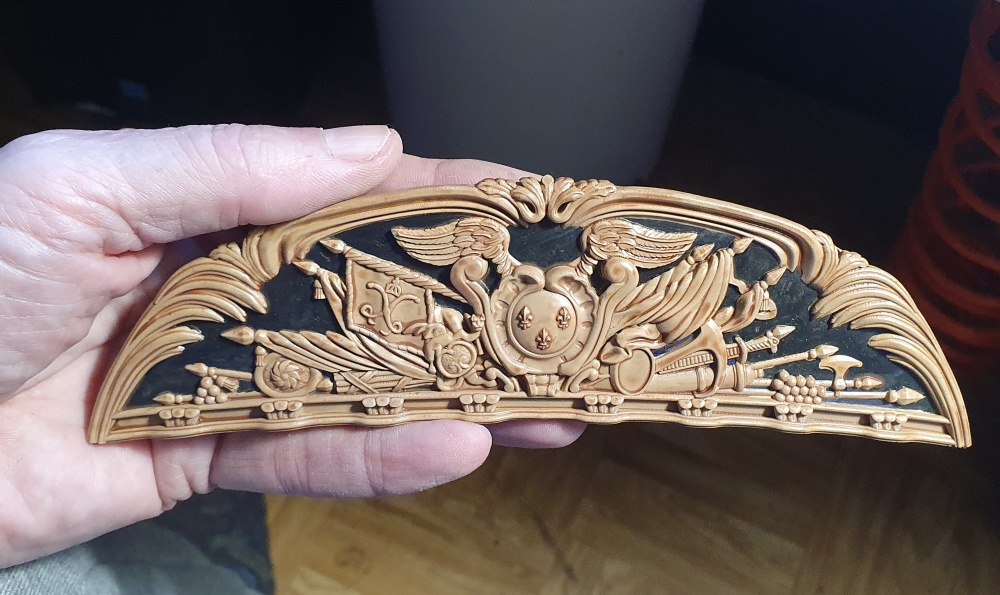
I was inspired by the back painting of French ship ��La D�daigneuse�� in the Rochefort Museum, France.
Bernard.��