Ironclad USS Chickasaw, 1/200 scale, from CAD model

Moderators: BB62vet, MartinJQuinn, JIM BAUMANN, Jon, Dan K

Roscoe
Posts: 296
Joined: Thu Jul 07, 2011 5:12 pm

Re: Ironclad USS Chickasaw, 1/200 scale, from CAD model

Post by Roscoe »

Nice work Devin!
So how did the two halves mate up once the hull was dry and unclamped? Was there any gaps between the deck and hull halves?
I'm really surprised those longerons warped that much, especially on the vertical axis like that. You didn't test float it in the bathtub did you? :big_grin:

-Dean
User avatar
Devin
Posts: 2497
Joined: Mon Jan 10, 2005 10:46 am
Location: Hoboken, NJ
Contact:

Re: Ironclad USS Chickasaw, 1/200 scale, from CAD model

Post by Devin »

Dean, The hulls fit perfectly flush. Only a little pressure between the two will be required for a tight bond. The one consideration for the future is maybe some sort of locator mark so that it's really evident how the two line-up. I'll be able to eyeball it, but it would be something nice to have.

There is that gap at the very stern where the lower hull is straight across and doesn't curve up to meet the upper hull. A little filler and sanding will resolve that, though.

I'll start making templates and cutting the leftover ply for plating today. There's more than enough to sheet the kit. And while I didn't use the bathtub to soak the wood, I must have gone a little overboard!
We like our history sanitized and theme-parked and self-congratulatory, not bloody and angry and unflattering. - Jonathan Yardley
Roscoe
Posts: 296
Joined: Thu Jul 07, 2011 5:12 pm

Re: Ironclad USS Chickasaw, 1/200 scale, from CAD model

Post by Roscoe »

Devin wrote: The one consideration for the future is maybe some sort of locator mark so that it's really evident how the two line-up. I'll be able to eyeball it, but it would be something nice to have.
That's what the extra long tabs on the top of the hull longerons are for, they slip into the bottom deck sheeting slots to align the two halves, I thought I noted that on the assembly print. All the slots in the sheeting line up with tabs on the frames and longerons to align the sheeting, even the curved parts of the sheeting, when bent into place should line up with a tap on a frame and/or longeron.

-Dean
User avatar
Devin
Posts: 2497
Joined: Mon Jan 10, 2005 10:46 am
Location: Hoboken, NJ
Contact:

Re: Ironclad USS Chickasaw, 1/200 scale, from CAD model

Post by Devin »

Okay, now that I look at it, they are there, they just got rounded off during construction and clamping. They barely protrude, but they're there.
We like our history sanitized and theme-parked and self-congratulatory, not bloody and angry and unflattering. - Jonathan Yardley
Roscoe
Posts: 296
Joined: Thu Jul 07, 2011 5:12 pm

Re: Ironclad USS Chickasaw, 1/200 scale, from CAD model

Post by Roscoe »

Whew, here I thought I forgot to put them on the cut files. :big_grin:

Now that I checked, I did remember to note them on the assembly drawing. Damn old age. :heh:

-Dean
Attachments
Deck and hull halves.jpg
User avatar
Devin
Posts: 2497
Joined: Mon Jan 10, 2005 10:46 am
Location: Hoboken, NJ
Contact:

Re: Ironclad USS Chickasaw, 1/200 scale, from CAD model

Post by Devin »

One of the more interesting and enjoyable, and often frustrating, parts of trying something new is figuring out exactly how to do it. Since I�ve got Chickasaw framed up, Dean and I have discussed it and I realized that I do not need to sheet the open structures. The model was designed to have the voids filled and then detailed. This is possibly a hold-over strategy from when we were going to have this cut out of styrene (neither of us can remember at this point!) and it would have worked well with that approach, but for plywood it doesn�t. I need a layer of styrene to work with for scribing, detailing, etc. Therefore, I�m going ahead with filling the open structures and I have ordered some .005 and .010 thick styrene from Evergreen to use for sheeting; that�s as thin as they make it.

So I need to test how to best fill the openings. My initial thoughts were expanding foam. A quick Google search of R/C and other modeling sites returned phrases like �exploded the rib assembly� and �still expanding after two weeks!� and talked me out of that real quick. Below are some of my test pieces that I built from scrap to do some experiments:

On the left is an angle filled with Elmer's Carpenter's Wood Filler. On the right is a test section filled with Aves Apoxie Sculpt. Test sanding revealed that the wood filler is the best for this application. I LOVE Aves and it works well here, but for the sheer volume I have to fill, it'd be too expensive.

Image

Along the sides of the hull there are very narrow but long and deep openings. This is a test piece that I filled with maybe 1/4" thick wood filler. It dried fine and looked good, but after sanding it started to crack and move about in the opening. I need something else to back fill these spaces before I apply the wood filler.

Image

One issue with the wood filler is thickness and how long it takes to cure, and the cracking issue shown in the other photo. Here's the bow of Chickasaw. On the right I've cut scrap ply and filled in the spaces as much as possible, leaving room for the filler; the hull on the left has yet to be done in this photo. I need to do something like this with the voids along the sides of the hull, but haven't figured out what to do it with yet. I'm going to hit the hardware store over lunch and see if there's a two-part wood putty that'll fill the bill (and voids) but not cost as much as Aves Apoxie Sculpt.

Image
We like our history sanitized and theme-parked and self-congratulatory, not bloody and angry and unflattering. - Jonathan Yardley
Roscoe
Posts: 296
Joined: Thu Jul 07, 2011 5:12 pm

Re: Ironclad USS Chickasaw, 1/200 scale, from CAD model

Post by Roscoe »

Putting those scrap pieces in between the frames is kinda what I was talking about in our emails. But instead of sloping them down like in the pic, run them just below the frame tops, and on the side openings too. Actually, you can plug all the openings that way, at least it'll cut down on the filler. What do you think?
Or, since you talked about just using the body as a plug for a mold, like I mentioned in our emails, you could even use Styrofoam blocks to fill between the frames, sanded flush to the frame, then sheeted with styrene for the detailing. That should be sturdy enough and last long enough to cast your mold with. Just tossing out some ideas to help out.

-Dean
User avatar
Devin
Posts: 2497
Joined: Mon Jan 10, 2005 10:46 am
Location: Hoboken, NJ
Contact:

Re: Ironclad USS Chickasaw, 1/200 scale, from CAD model

Post by Devin »

I'm leaning towards the styrofoam for the majority of the filling, then wood filler. I need the wood filler or something like it for rigidity and to glue to. The problem with blanking off the side openings with the plywood is that the space gets progressively wider past the opening, so cutting to the exact size needed is difficult, and it'll be nearly impossible to get it fitted to the opening afterwards. If I'd had thought this through and blocked those off BEFORE adding the deck sheeting, it would have been a lot better. Live and learn.
We like our history sanitized and theme-parked and self-congratulatory, not bloody and angry and unflattering. - Jonathan Yardley
User avatar
Devin
Posts: 2497
Joined: Mon Jan 10, 2005 10:46 am
Location: Hoboken, NJ
Contact:

Re: Ironclad USS Chickasaw, 1/200 scale, from CAD model

Post by Devin »

So, no Styrofoam; I went with the scrap plywood and just made it work. Once the ribs were filled in as much as I could with scrap wood, I switched to epoxy putty, Aves Apoxie Sculpt to be precise. I used this at the extreme bow where shaping is crucial. Apoxie Sculpt works a lot like resin once set up, but a little more dense. It sands well, takes an edge like crazy (I�m convinced you could make a knife blade and get it razor sharp with this stuff), and is great for shaping and detailing. Once that was done, it was on to the wood putty.

Apoxie Sculpt applied, set, and sanded. There's a lot of open area at the bow with a lot of curve, so I needed something firm that I could shape easily, hence the Apoxie Sculpt. As always, I mixed too much, so I used the excess to further back-fill the hull.

Image

The next and top layer is made with Elmers Wood Filler. This sets up fairly fast - a couple of hours if put on thick - and then sands really easily (sometimes too easily) with 150 grit sandpaper in a sanding block.

Image

The bow after two applications of the wood filler and sanding; no major gaps left, everything shaped as it should be.. The laser cutting of the wood left black edges on the ribs, which were great for sanding reference.

Image

The hull has a complex three-axis curve as it moves downwards towards the stern, and downward from the centerline. At least four applications of putty and sanding gave me a really good shape. Small imperfections are not an issue, as the entire hull will be sheeted with styrene.

Image

I took delivery of styrene over the weekend, all the way down to .005?. Not much thicker than paper. It�s going to be fun figuring out what type of adhesive to attach this stuff with!
Last edited by Devin on Mon Aug 27, 2012 10:17 pm, edited 1 time in total.
We like our history sanitized and theme-parked and self-congratulatory, not bloody and angry and unflattering. - Jonathan Yardley
Dan K
Posts: 9037
Joined: Tue Jan 11, 2005 10:56 am
Location: New York City

Re: Ironclad USS Chickasaw, 1/200 scale, from CAD model

Post by Dan K »

I'll bet your workspace needed some serious dusting :smallsmile:
User avatar
Devin
Posts: 2497
Joined: Mon Jan 10, 2005 10:46 am
Location: Hoboken, NJ
Contact:

Re: Ironclad USS Chickasaw, 1/200 scale, from CAD model

Post by Devin »

Nope. Sanded over the bathroom sink.
We like our history sanitized and theme-parked and self-congratulatory, not bloody and angry and unflattering. - Jonathan Yardley
User avatar
LE BOSCO
Posts: 2261
Joined: Thu Aug 27, 2009 11:05 am
Location: Paris France

Re: Ironclad USS Chickasaw, 1/200 scale, from CAD model

Post by LE BOSCO »

HI Devin

Very original construction :thumbs_up_1: good luck for the mounting
best regards
Nicolas
Roscoe
Posts: 296
Joined: Thu Jul 07, 2011 5:12 pm

Re: Ironclad USS Chickasaw, 1/200 scale, from CAD model

Post by Roscoe »

That turned out really nice, excellent work!

The first time I sanded wood and filler, I did the same thing, over the sink. Then after having to clean up my mess, I learned to take it outside, much easier to cleanup. :big_grin:

What about Gorilla glue or epoxy for attaching the Styrene? Do a couple test pieces to see which works better.

-Dean
User avatar
Devin
Posts: 2497
Joined: Mon Jan 10, 2005 10:46 am
Location: Hoboken, NJ
Contact:

Re: Ironclad USS Chickasaw, 1/200 scale, from CAD model

Post by Devin »

I'd thought about the Gorilla Glue, but you tend to have to keep it clamped for a couple of hours before it sets. On the curved runs that would be problematic. Gorilla Glue makes their own Super Glue that has a rubber component; maybe that would give a strong bond with a little flex. A good epoxy would work, too, but I tend to get messy with that.

As you suggested, I'll make up a couple of test pieces and see what works best. I need to decide on the thickness of styrene to use at the same time. I have .005", .010" and .015" Evergreen sheet. .005" would be the obvious choice as it would bulk things up the least, but that stuff is so thin I'm not sure if I could scribe it without cutting clean through on the first pass!
We like our history sanitized and theme-parked and self-congratulatory, not bloody and angry and unflattering. - Jonathan Yardley
Roscoe
Posts: 296
Joined: Thu Jul 07, 2011 5:12 pm

Re: Ironclad USS Chickasaw, 1/200 scale, from CAD model

Post by Roscoe »

If you use the .015" Styrene you can scribe it deeper, which would show up better on the molded parts. Plus it gives you a little extra material for any sanding you may do, it'll be easier to remove material than it would be to add at that point. Just something to think about.

-Dean
User avatar
Devin
Posts: 2497
Joined: Mon Jan 10, 2005 10:46 am
Location: Hoboken, NJ
Contact:

Re: Ironclad USS Chickasaw, 1/200 scale, from CAD model

Post by Devin »

Good point. There will be sanding needed at various points, especially where the flat deck transitions to the slopes forward and aft.

I was thinking this would be a perfect application for vacuum-forming. I'm not going to get into building the frames for it though.
We like our history sanitized and theme-parked and self-congratulatory, not bloody and angry and unflattering. - Jonathan Yardley
Roscoe
Posts: 296
Joined: Thu Jul 07, 2011 5:12 pm

Re: Ironclad USS Chickasaw, 1/200 scale, from CAD model

Post by Roscoe »

Vacuum-forming is a really good idea, but you would have to exaggerate the plate groove details to make up for the plastic thickness, or they would get washed out. I like the idea though. Actually, you could probably just use the laser cut frame kit as the internal support for the vacuum-formed shell.

-Dean
User avatar
Devin
Posts: 2497
Joined: Mon Jan 10, 2005 10:46 am
Location: Hoboken, NJ
Contact:

Re: Ironclad USS Chickasaw, 1/200 scale, from CAD model

Post by Devin »

Dean, the vacuum forming idea is intriguing. I'd have to build an entire system to even test the theory, though, so maybe another project.

Update: Little slow on the build lately. Work got busy, came down with a cold, and my writing has taken an uptick lately as I work on some novel edits. Another delay came from spending time in testing glues with styrene sheeting and the plywood/putty surface. Gorilla Glue, surprisingly, didn�t work at all. Plastic pulled off like it had been stuck on with Scotch tape. The Gorilla Super Glue Impact-Tough (formulated with rubber particles for elasticity), worked the trick, though, and it holding like nobody�s business. Progress photos below. I hope to have everything sheeted and ready to prime and scribe within a week or so.

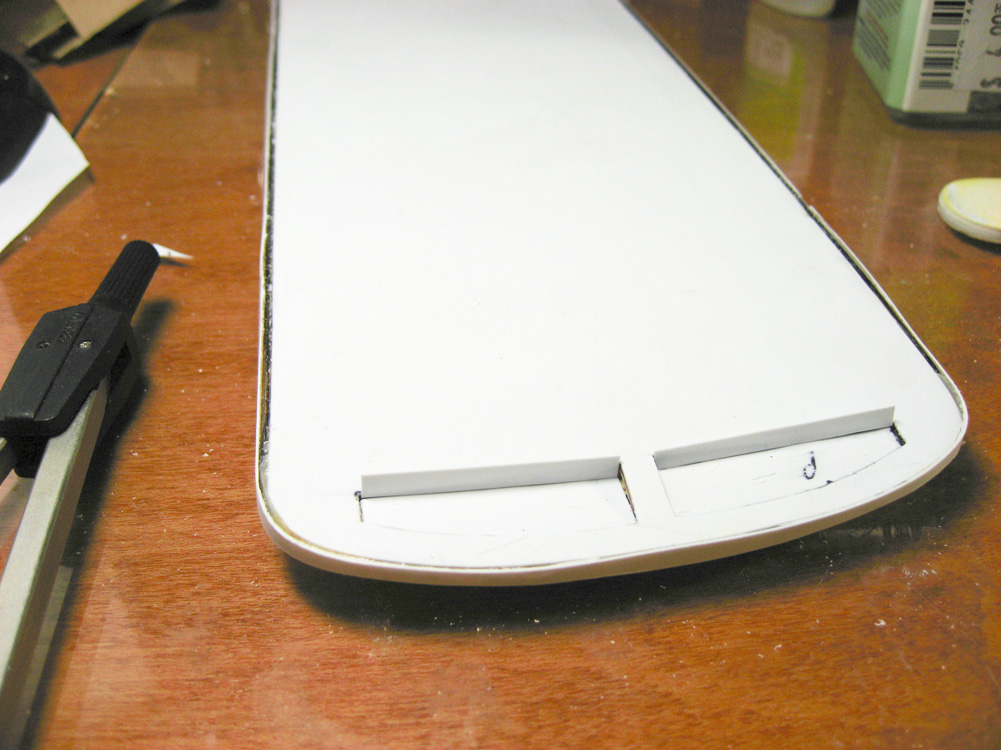
The instructions have an actual-size print of all of the parts in the kit. I printed the hull bottom out and used it as a template to cut the styrene for the sheeting. The cutouts are for the propeller wells.

Image

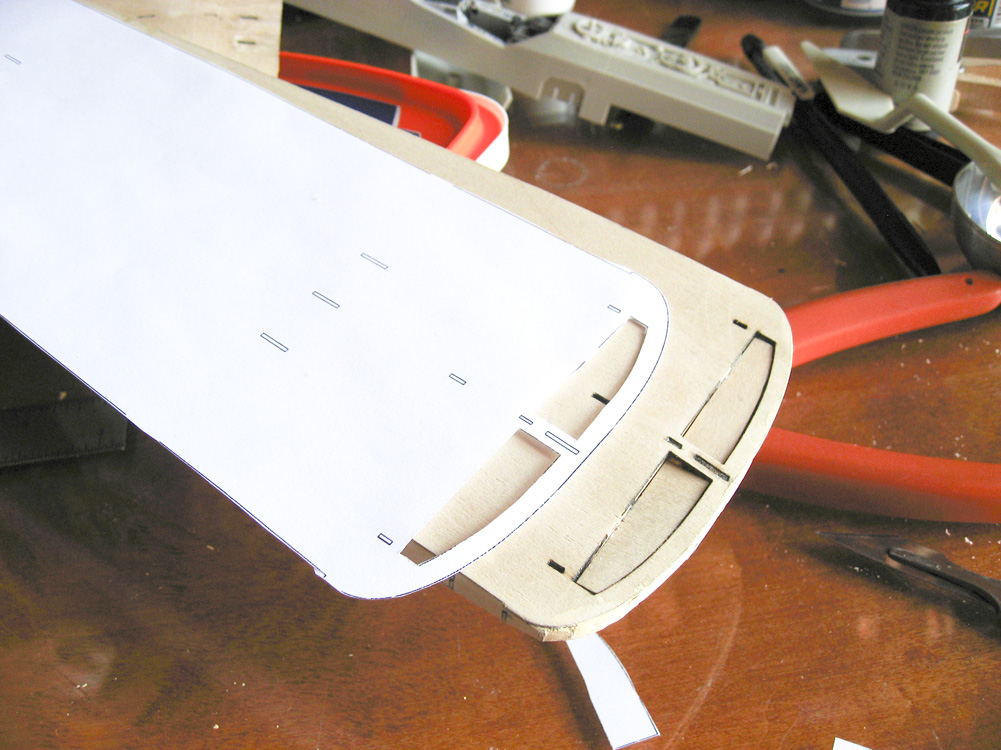
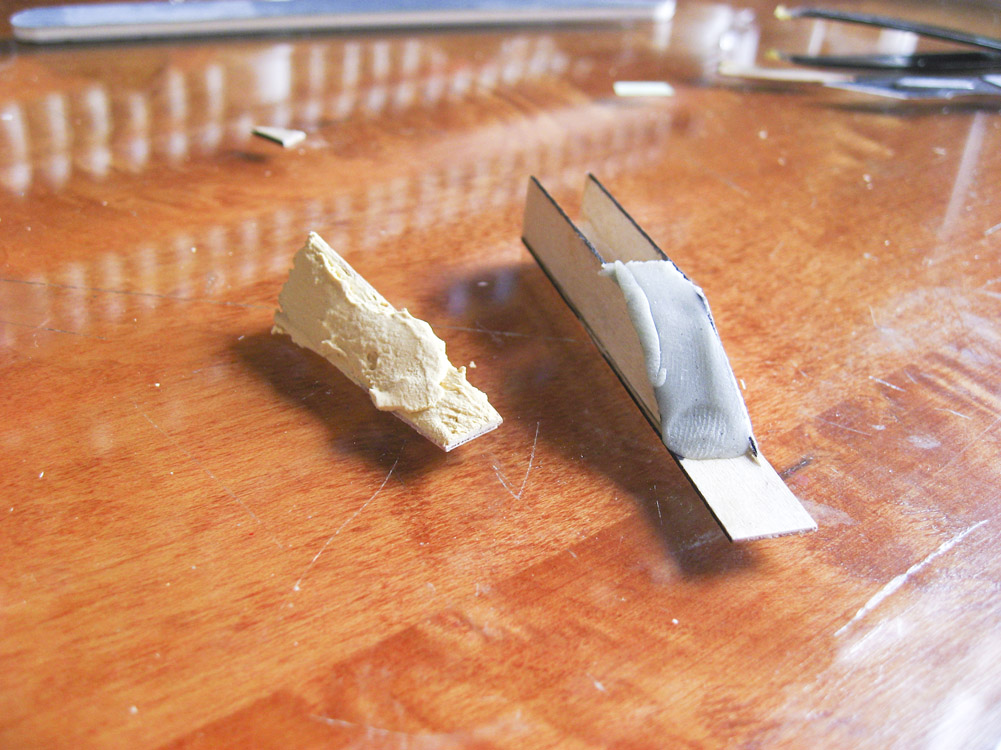
The prop wells are tricky in that the hull sheeting has to be cut out, and then the insert has to be cut as well, sanded to shape, and glued in.

Image

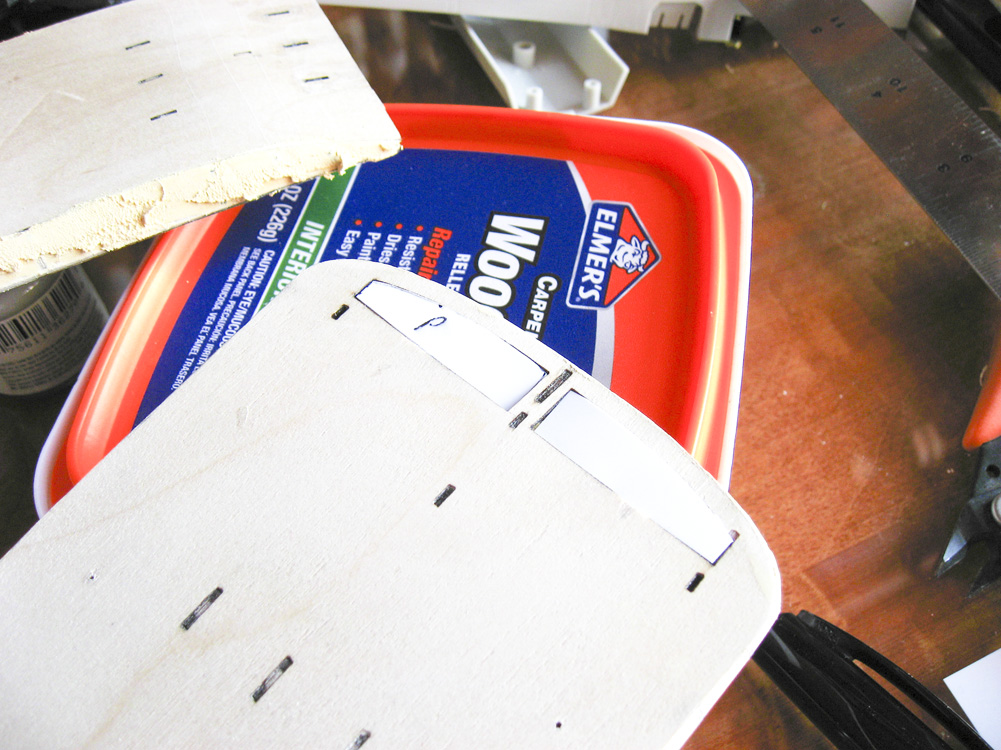
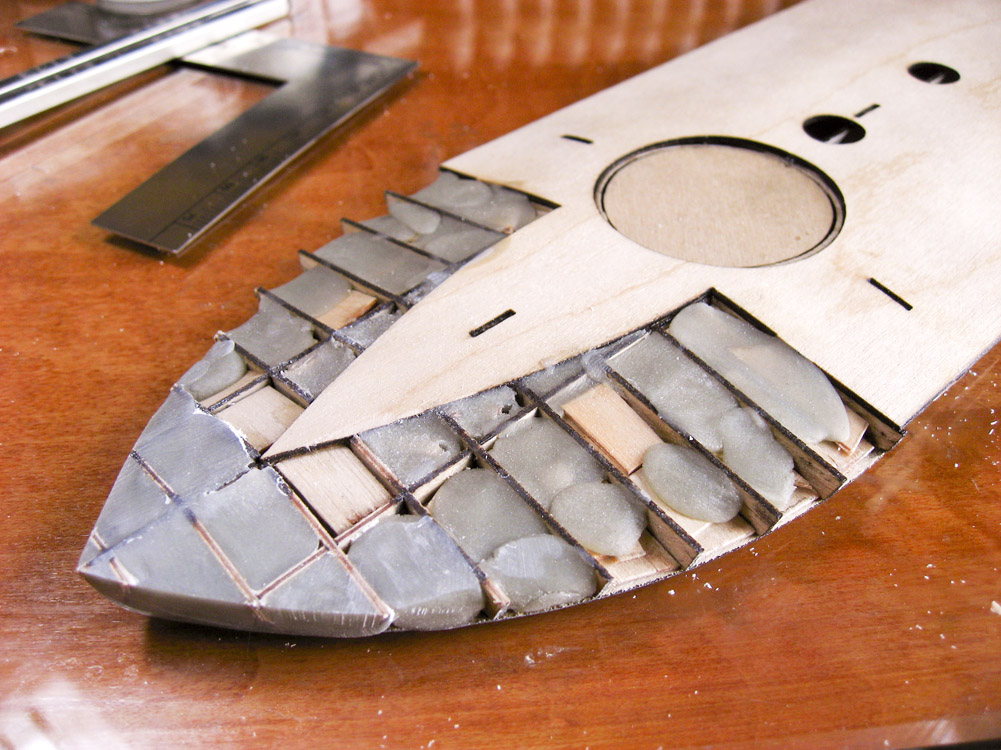
For sheeting the hull sides I use my tape cheat: run a strip of tape along the hull, cut it along the hull lines with a little extra room, stick the tape on styrene, then cut. On a nearly flat sided hull like this it isn't nearly as impressive of a trick, but it did help where the bow rises up.

Image

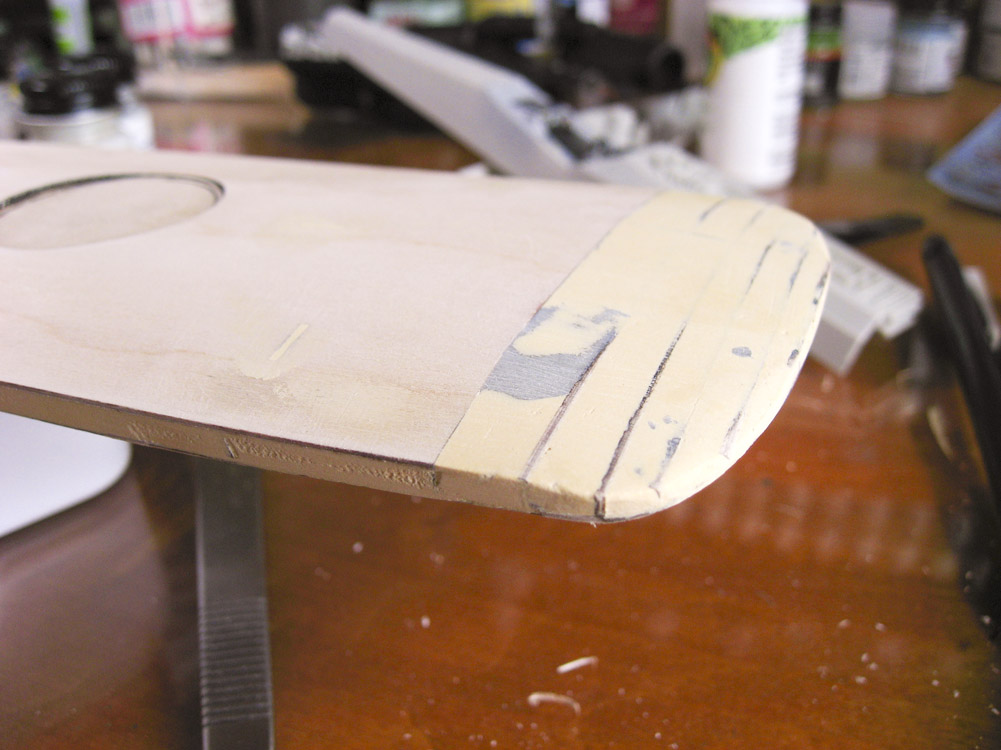
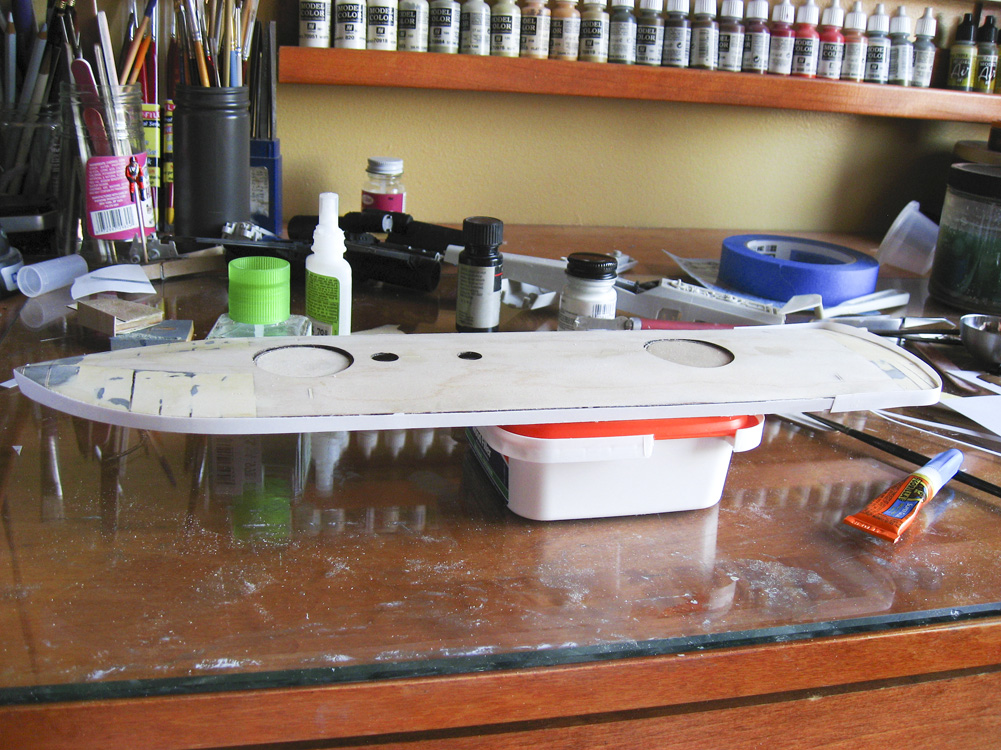
The styrene along the forward part of the hull has been glued in, then cut and sanded to shape. The after hull has the styrene glued on, but not yet cut and sanded.

Image

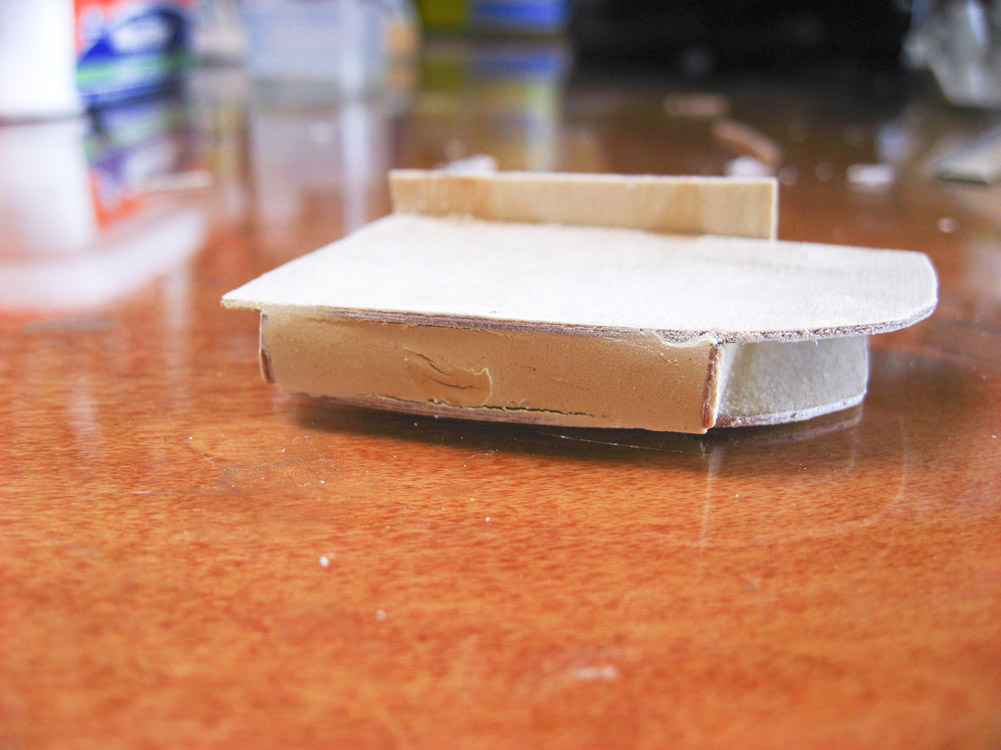
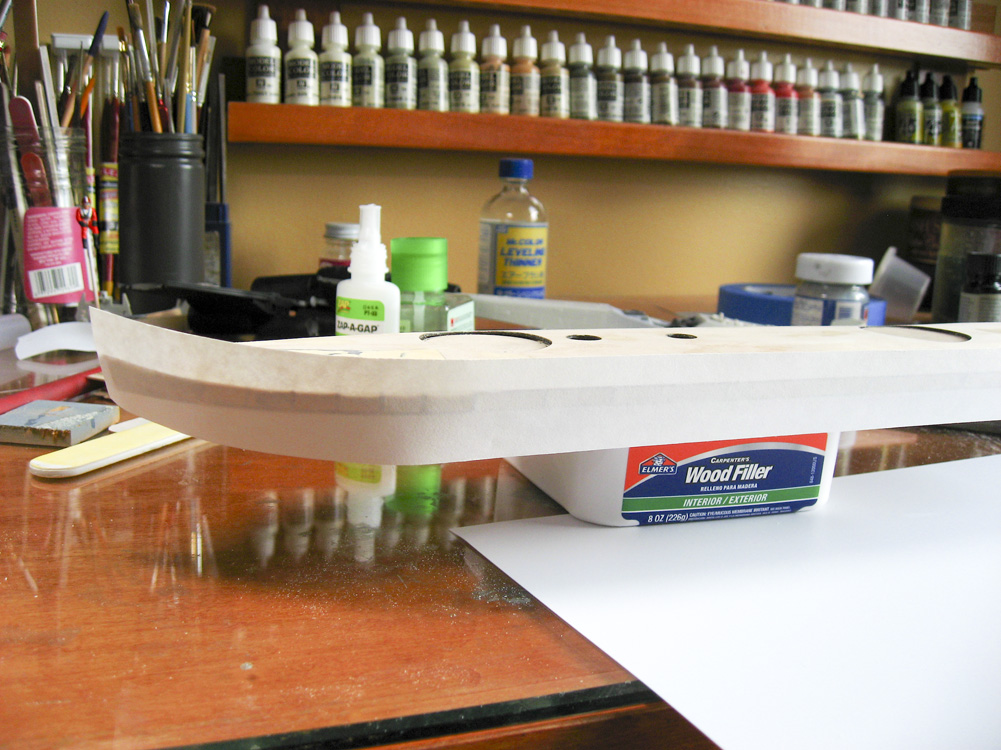
More work on the prop well inserts. The sides of the wells have been sheeted, just waiting for it to dry to flush-sand them. Note the seam along the sides between the hull side and bottom sheeting. I goofed. I'll fill the gap with Aves putty and flush sand it all at the same time.

Image
We like our history sanitized and theme-parked and self-congratulatory, not bloody and angry and unflattering. - Jonathan Yardley
Roscoe
Posts: 296
Joined: Thu Jul 07, 2011 5:12 pm

Re: Ironclad USS Chickasaw, 1/200 scale, from CAD model

Post by Roscoe »

I meant to ask you how well the Gorilla Super Glue was holding up, but I can see it's working out just fine. Nice!
And with that styrene sheeting on the sides, you can't even tell there was supposed to be side covers on there. :big_grin:

I'm curious, it looks like your going to sheet the bottom of the deck half too, any particular reason why?

-Dean
User avatar
Devin
Posts: 2497
Joined: Mon Jan 10, 2005 10:46 am
Location: Hoboken, NJ
Contact:

Re: Ironclad USS Chickasaw, 1/200 scale, from CAD model

Post by Devin »

Dean,

Actually, the side covers are on there. I initially sheeted the side with plastic, and without the wood side panels in, the shape of the hull was all wonky. So I ripped it off, glued on the wooden sides, smoothed them in with putty, then sheeted them with styrene. That's why the gap is there along the sides, because I'd sheeted the bottom of the assembly before I figured that out!

I'm sheeting the bottom of the upper hull as it has to be sealed off somehow so that the wood grain doesn't show in casting, and it's a lot less work to do it this way than filling and sanding with shellac or primer. I covered the entire surface as that's easier than first attaching the lower hull and then cutting curved pieces to cover the perimeter.

-Devin
We like our history sanitized and theme-parked and self-congratulatory, not bloody and angry and unflattering. - Jonathan Yardley
Post Reply

Return to “Works in Progress”