Page 3 of 3
Re: 1/700 Zhemchug
Posted: Wed Apr 10, 2013 2:34 pm
by JIM BAUMANN
The flags are made of paper from a used shop till receipt (!!) which has a nice hard surface finish....
( I leave them on a window sill for a couple of weeks so as to check which are UV resistant --
very important--some cheap till receipt paper can go yellow.... )
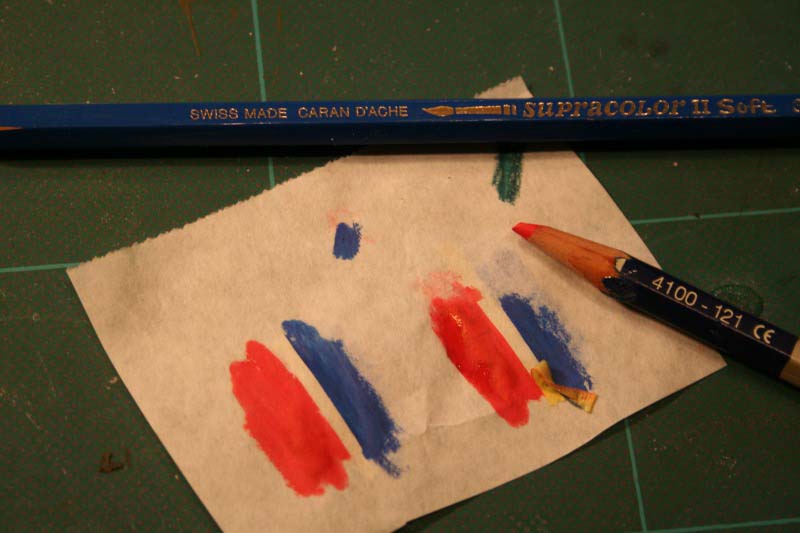
I then use a fine blue ballpoint pen to make a series of crosses of the correct angles
I then hold the paper onto the window and trace the crosses thru from the other side.
Cut flags to chosen size- the blue cross is a constant irrespective of size
-(failure rate at cutting is high

) ... I make a lot of blue crosses....

I then sandwich the flag inside tissue paper
( so as to soften the radius of the creases and also absorb any excess biro ink)
and crumple the flag extensively using very fine pointed tweezers--angling the creases to reflect the weight of the flag and also the angle of the flag-staff in lightish breeze...
( have a look here also at my 1/350 French flags )
quoted from my Bouvet build article page 4
These ensigns were made on thin waxed paper, the white was masked with Tamiya tape--suitably de-tacked so as not to lift the surface of the paper and then coloured with artist water-soluble coloured pencils. When dry the flags were sandwiched in thin tissue paper and the brutal crumpling began.... After four failed attempts the result was to my liking--an Ensign stirred by about 10-15 knots of breeze..
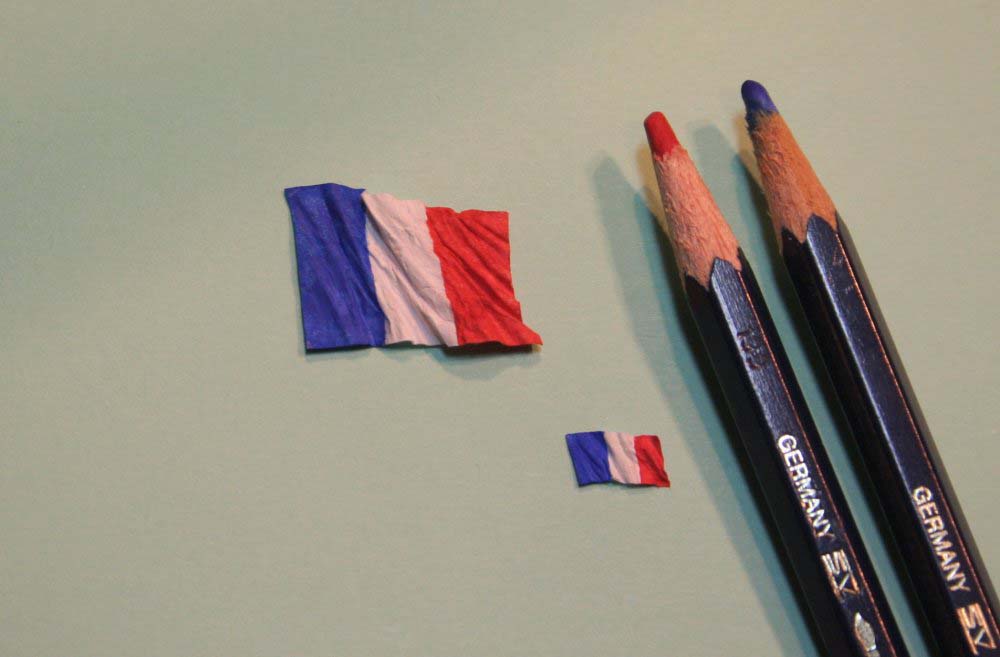
( have a look here also at my 1/700 French flags )

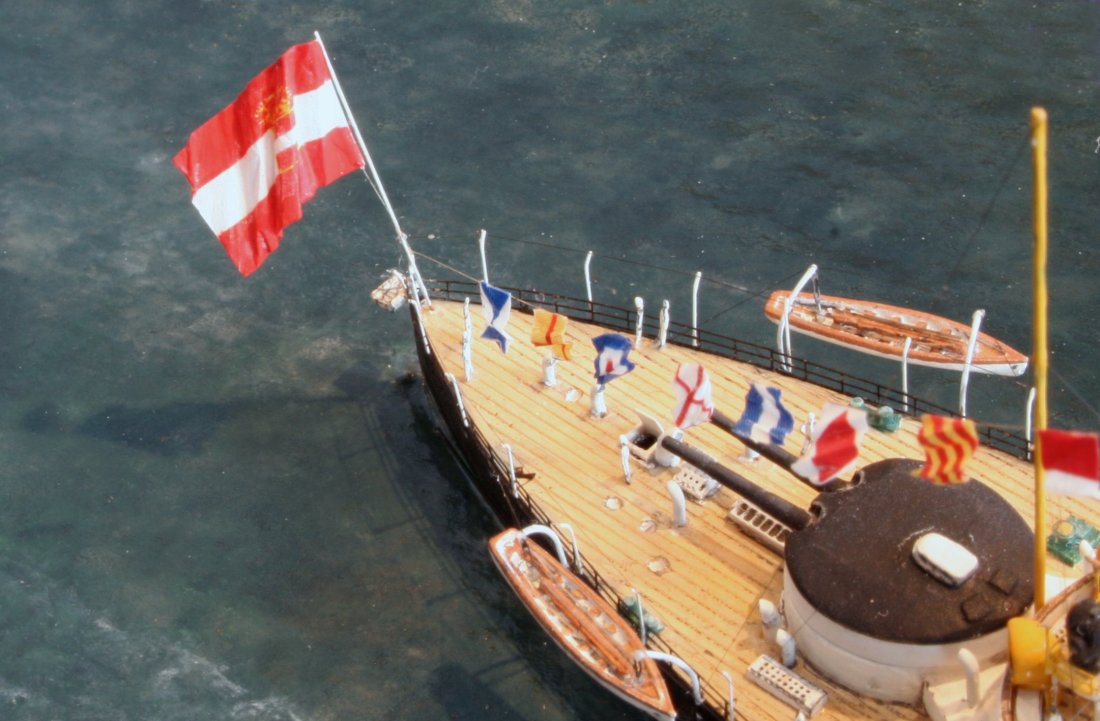
and 1/700 Austro-Hungarian flags
see more here:
http://www.modelwarships.com/reviews/sh ... index.html
Hope it helps
JIM B
Re: 1/700 Zhemchug
Posted: Wed Apr 10, 2013 2:51 pm
by PetrolGator
Wow, thank you, Jim. You have provided more information than I could have possibly hoped for! I'm going to try something like this on my (second attempt) to fully rig my King George V this evening. I ended up setting a portion of the rigging on fire trying to heat tighten it... wife is highly sensitive to incense so I tried to do it from a distance with a light...

Re: 1/700 Zhemchug
Posted: Sat Apr 13, 2013 8:43 am
by JIM BAUMANN
...>> wife is highly sensitive to incense ....<
You need to try and source a low-odour smoke source--( that is tricky! )
or better-- do your rigging in a closed room whilst using a carbon air filter
and leave it running for a while after you have left the room upon completion of the rigging
example
http://www.amazon.co.uk/Bionaire-BAP924 ... B003UA1830
or even a carbon air scrubber.
they work well-- I used one in my office back when I still smoked cigarettes....
that way you will get perfect models and a happy wife...
alternatively a hot wax tool( like a small soldering iron)
( Frank Spahr's preferred tool)
http://www.sculpt.com/catalog_98/steelt ... xTools.htm
( some people do use soldering irons--but I think they are clunky--try and get a small low 12 volt cordless soldering iron if you go down that route...
HTH
Jim Baumann
Re: 1/700 Zhemchug
Posted: Sat Apr 13, 2013 9:19 am
by Frank Spahr
Hi all,
Jim asked me to explain what I use for tightening rigging. Being a dentist, I learned some basics of prosthetics technique in dental school, so I am comfortable with some of the tools used there.
I use a small and cheap spirit burner, which should be easily available, plus a dental waxing instrument, a clone of the classic gold-colored PK Thomas #1 or the green #2 (Mr Thomas was a pioneer in dental technology in developing a systematic approach to replicating the occlusal surfaces of teeth, and a set of five color-coded instruments bearing his name was among the first stuff we had to buy in dental school)
An affordable clone of this instrument should be available.

The image shows the spirits burner plus the #1 instrument, and a Le Cron modeling knife, plus some casting wax I used as a filler in past years.
Heating the waxing instrument with the spirits burner gives me a controllable heat source that can only get colder the longer I handle it, so I�m more comfortable with it than a tool that contantly emits heat.
My poor results in contrast to Jim�s mastery of the subject do prove that success is more in the skills than in the tools, though ...
Kind regards and best of luck from
Frank
Re: 1/700 Zhemchug
Posted: Sun Apr 14, 2013 4:31 am
by modellmariner
Hi, Jim, this is a very interesting building report from you again. The model looks very successful.

J�rg
Re: 1/700 Zhemchug
Posted: Sun Apr 14, 2013 2:06 pm
by Chlo� Plattner
Thank you Jim for this lecture in how flags could be done properly.
This very helpful
@ Frank, I totally agree it is not a question of tools or material you use, if you leave me the most expensive tools or materials I will never reach Jims rigging mastership.

Sometimes I suspect he has some well trained spiders hidden in his modelling dungeon
and leaves us poor fellows fiddling arround with all these lights and heated things burning our riggings.

Anyway this Zhemchug is again a Masterpiece, my depest respect Jim

Re: 1/700 Zhemchug
Posted: Mon Apr 15, 2013 10:41 am
by Tom L.
Absolutely fantastic Jim! A real feast for the eyes! (As always!)
An interesting comparison between Jim's complete mastery and OOB can be made
here.
I added a
partial level of fender wale from stretched sprue, opened up a solid cast compass platform and made anchor beds and a confused shield at the bow, but there's not much else scratched or modified. Those solid-block funnels and ventilators are just...well.
Congratulations on another stunner, Mr. Baumann; a perfect "ebony" to your Novik's "ivory".
Re: 1/700 Zhemchug
Posted: Wed Apr 17, 2013 3:44 pm
by JIM BAUMANN
Thank you gentlemen for your encouragement!
@ peter!-- am watching with envy your Koreeitz!
@ Tom L-- it was actually your model that spurred my interest in that class of ship...
first came Novik ... and then Zhemchug--all your faultTom !
Cheers
JIM B
Re: 1/700 Zhemchug
Posted: Thu Apr 18, 2013 12:38 pm
by Captain pugwash
Well that last lot on the flags/rigging has been very Interesting.
Thanks for sharing this with us Jim

Re: 1/700 Zhemchug
Posted: Wed Apr 24, 2013 11:46 am
by JIM BAUMANN
Just found this excellent photo-
-which whilst being a different mooring buoy
does fortunately coincide with the line arrangements on my model!
Phew!! ( though it does show clearly that I need to increase the size of my bow-crest!!
She will appear in the gallery in due course
JB
