Page 45 of 72

Re: HMS Victory and Le Redoutable at Trafalgar (1/300)

Posted: Thu Nov 03, 2022 2:36 am
by marijn van gils
Many thanks guys! :smallsmile: :cool_2: :smallsmile:

For me, shading and highlighting is probably the most important painting step for any project. It gives definition to the model, making it look more 3D and less like a toy, and sharpens everything up. Even if I would paint a vehicle completely 'factory-fresh', I would still shade and highlight it.

EJFoeth wrote:I really like those small black lines running so very parallel... :thumbs_up_1:
Thanks for noticing Evert-Jan! ;)
Those do take a fair amount of work. I rarely get the lines painted like that right away; instead they need a lot of correcting with a clean brush, redoing, correcting again, etc.
Re: HMS Victory and Le Redoutable at Trafalgar (1/300)

Posted: Sun Nov 20, 2022 2:47 pm
by marijn van gils
Meanwhile, I have been painting planking effect.

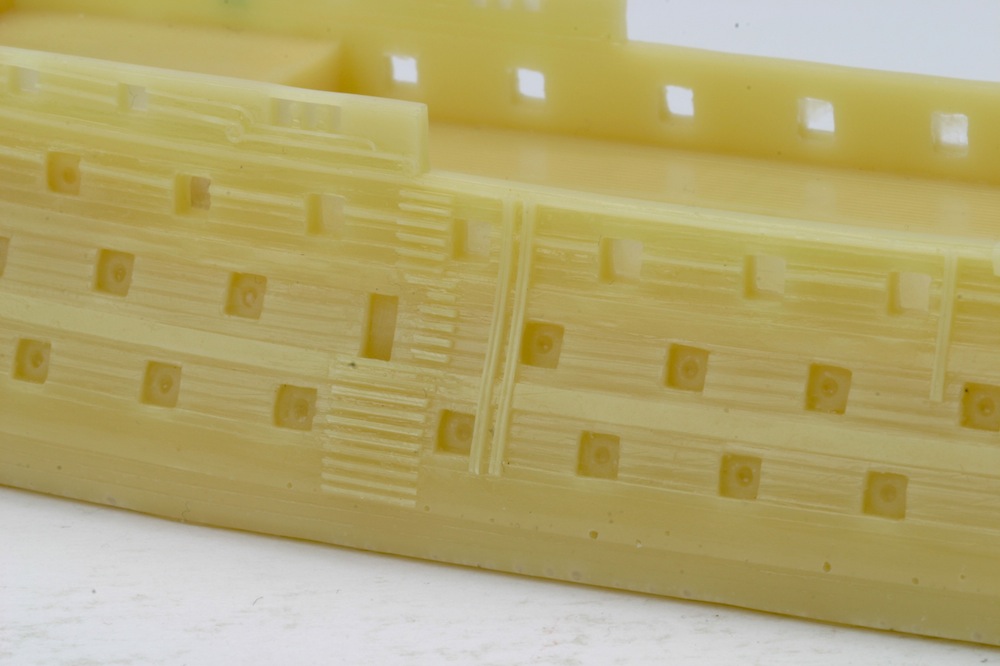
The Rod Langton kit has planks inscribed between the whales. But to my taste, the grooves look a bit overscale, most planks are too wide when comparing with the original, and there is nothing on the whales:
Image

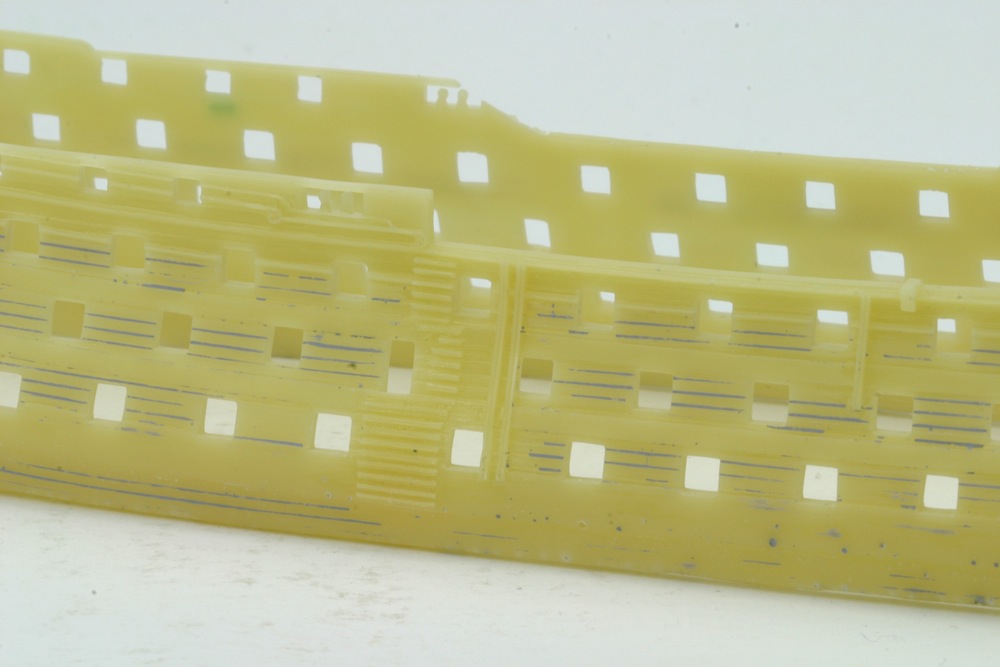
So I filled the grooves, way back in the beginning of this project:
Image

And again after priming:
Image

The result: a nice smooth base to paint a much more subtle planking effect on:
Image

I painted the �grooves� between the planks with oil paint, thinned with white spirit. The technique is the same as the shadows:
- paint each line as precisely as possible,
- and, since that is rarely precise enough, adjust with a clean brush moistened with White Spirit. Oil paint is very flexible for this, because you can work it around for quite some time.

On the yellow areas, I painted the plank detail with dark brown; and on the black areas I painted it with a light dust tone. Why? Because these contrast best with the colours underneath.
I varied the lines a lot by varying the consistency of the paint. And I didn�t try to paint every plank everywhere.
I also shaded the battle damage while I had the brush in hand.
Image

Next, I added some �3D-effect� by adding some dark shadows above the white lines on the black areas, and some light highlights below the dark lines on the yellow areas. Note that I only did this here and there to keep the effect subtle.
I also highlighted the battle damage.
Image

I followed the planking pattern of the real thing (or at least according to the Victory AOTS by McKay) as much as possible. The �anchor-stock� plank pattern on the two lower whales was fun to paint! :smallsmile:

Even though the above photos are very much enlarged, the technique behind the effect may not be very visible. So here you have a really extreme close-up in which I hope you can distinguish shadow and highlight lines better:
Image

In such a close-up, the effect may look exaggerated, but I hope it looks ok when seen life-size.
Without planking:
Image

With planking:
Image

I think this is a pretty effective way of adding detail to flat areas that don�t have any. It can also applied in exactly the same way to simulate plating on steel ships.
The only disadvantage is that it is pretty time-consuming. I only finished this side, I�m still working on the port side!

Re: HMS Victory and Le Redoutable at Trafalgar (1/300)

Posted: Sun Nov 20, 2022 3:52 pm
by ModelMonkey
That looks so good.

Re: HMS Victory and Le Redoutable at Trafalgar (1/300)

Posted: Sun Nov 20, 2022 4:00 pm
by wefalck
That's an excellent painting-job :thumbs_up_1: Really like the effect!

One thing puzzles me, however, why you chose a darker colour for the exposed wood? Even older wood, when you break it, looks quite fresh inside, particularly, when it had been protected by layers of paint.

Re: HMS Victory and Le Redoutable at Trafalgar (1/300)

Posted: Mon Nov 21, 2022 6:58 am
by pascalemod
I dunno. How is this even possible by a human? Who is this "marijn van gils" all spelled in small letters... ?

The planking effect is sublime. And all done by hand? Or did you use a masking tape to guide your hand a bit? This is quite amazing, and I think the "here and there" effect is most accurate, really works.

Re: HMS Victory and Le Redoutable at Trafalgar (1/300)

Posted: Mon Nov 21, 2022 7:03 am
by marijn van gils
Many thanks guys! :smallsmile: :smallsmile: :smallsmile:

wefalck wrote:One thing puzzles me, however, why you chose a darker colour for the exposed wood? Even older wood, when you break it, looks quite fresh inside, particularly, when it had been protected by layers of paint.
The reason is an artistic one: visibility. ;)
If I would give them a light oak colour, they would not contrast to the light yellow areas and become nearly invisible. That would take the general 'battle'-feel of the general scene down a notch...

Re: HMS Victory and Le Redoutable at Trafalgar (1/300)

Posted: Mon Nov 21, 2022 7:39 am
by wefalck
Artistic license - fair enough :thumbs_up_1:

Re: HMS Victory and Le Redoutable at Trafalgar (1/300)

Posted: Thu Nov 24, 2022 12:26 pm
by Maarten Sch�nfeld
Victory in sight! :big_grin:

Re: HMS Victory and Le Redoutable at Trafalgar (1/300)

Posted: Tue Dec 06, 2022 7:25 am
by Joe Simon
Fantastic work!

Re: HMS Victory and Le Redoutable at Trafalgar (1/300)

Posted: Wed Dec 21, 2022 6:41 am
by marijn van gils
Thanks guys! :smallsmile: :smallsmile: :smallsmile:


Meanwhile, I finished the port side too, and the inside of the forecastle and quarterdeck bulwarks:
Image

And the stern received some �planking� too:
Image

I also added some smaller nicks and dings everywhere (compare with the photos in my last post). They are only painted on, creating the illusion of depth with a little shadow and highlight. I also added some subtle dirt streaks from the edges of the rigolls etc.
Image

The finished starboard side (in a photo that is already larger than the real thing):
Image

You may have noticed in the previous photos that I finally painted the figurehead too:
Image

I also painted a star on the end of the cathead:
Image

This finishes the painting of the outer hull, with the exception of one big area� ;)

Re: HMS Victory and Le Redoutable at Trafalgar (1/300)

Posted: Wed Dec 21, 2022 6:57 am
by dafi
Wonderful!!!

"I also painted a star on the end of the cathead: " Love this detail ;-)

XXXDAn

Re: HMS Victory and Le Redoutable at Trafalgar (1/300)

Posted: Wed Dec 21, 2022 7:30 am
by wefalck
Compared to my own paintwork ... excellent fine detail !

Re: HMS Victory and Le Redoutable at Trafalgar (1/300)

Posted: Wed Dec 21, 2022 8:03 am
by Dan K
Wow. Just beautiful work.

Re: HMS Victory and Le Redoutable at Trafalgar (1/300)

Posted: Wed Dec 21, 2022 9:26 am
by bwross11
I have been watching this project with much interest. Your work sir is absolutely stunning!

Truly inspiring.

Re: HMS Victory and Le Redoutable at Trafalgar (1/300)

Posted: Wed Dec 21, 2022 12:47 pm
by marijn van gils
Many thanks guys! Very much appreciated! :smallsmile: :cool_2: :smallsmile:

dafi wrote:Wonderful!!!

"I also painted a star on the end of the cathead: " Love this detail ;-)

XXXDAn
4
I thought you would like it, as I based it on info I found here: https://www.segelschiffsmodellbau.com/t ... iffen.html :big_grin:

Re: HMS Victory and Le Redoutable at Trafalgar (1/300)

Posted: Wed Dec 21, 2022 1:19 pm
by SG1
C'est merveilleuse !!!! Beyond excellence. The painting of the damaged wood works, you achieved an amazing result! the same applies to the black painted areas. Well done! On standby for the next update

Re: HMS Victory and Le Redoutable at Trafalgar (1/300)

Posted: Sat Jan 14, 2023 11:10 am
by marijn van gils
Thank you very much! :smallsmile: :cool_2: :smallsmile:


And here is the next update! :big_grin:

The one thing still left on the outside of the hull, was the copper plating under the waterline.
This is a nice tale of things not always going as planned�

I chose to avoid airbrushing metallic paint, instead starting from a mid-dark brown. In hindsight, this was a mistake!
Image

I mottled a couple of green shades over this, by applying thinned green paint (Humbrol) on a wetted surface (mineral spirits), and �blending� it around with a wetted clean brush.
Image

Next, I added some more of the same paint, but this time I stippled it on with small pieces of sponge:
Image

Now, I only had to add some copper into this.
But I couldn�t make it look like the copper was the base material, with dirt and corrosion on top. Instead, it looked just like what it was: copper paint on top of green and brown, rather than the other way around.
I wish I had photographed it, but believe me it looked terrible! :Mad_6: :Mad_5:

Re: HMS Victory and Le Redoutable at Trafalgar (1/300)

Posted: Sat Jan 14, 2023 11:11 am
by marijn van gils
So back to start, and this time properly.
I hand painted a solid coat of copper. I used Lefranc & Bourgeois copper �guilding liquid� from the art supply store. It has a fine pigment, brush paints well, and is pretty resistant to subsequent weathering.
Rather than risking painting the copper too high up, or masking and pulling paint of the model, I just left a thin green border. That will blend into the corrosion effect later on.
Image

With a couple of (dark) brown shades, I added a first dirt/corrosion layer. Again thinning the paint quite a lot, and �mottling� the paint around with a moistened clean brush.
Image

After drying, I repeated this with a couple of green shades, but applying most near the waterline.
Image

Next, I added some more greens with the sponge technique:
Image

Now, I painted the demarcation of the copper plates with almost black (black with a little dark brown) paint.
I �faded� the effect (well, just gradually painted less of it :big_grin: ) towards the bottom. This will be under semi-transparent resin, and the deeper in it the less the hull will be visible.
I painted the top rows bolder than the planking above the waterline, to clearly distinguish both.
Image

Finally, I took a couple of green colours again, and hand-painted (parts of) individual plates with a fine brush. The goal was to �separate� individual plates here and there.
And that was it!
Image

Except for the copper, I used Humbrol paints exclusively. Normally, I would have preferred oils for painting the lines, and maybe for the green corrosion (because oils remain workable/correctable longer). But since most of this surface may be in contact with epoxy resin later on, I chose a more resistant paint.

Of course, I had to (more or less) follow the pattern of the plating on the real thing.
Especially at the bows:
Image

� and at the stern:
Image

And that concluded the painting of the outside of Victory�s hull! :smallsmile: :smallsmile: :smallsmile:
Image

Image

Re: HMS Victory and Le Redoutable at Trafalgar (1/300)

Posted: Sat Jan 14, 2023 4:00 pm
by JIM BAUMANN
Top Notch work :thumbs_up_1: :thumbs_up_1:

-- a lot of very fine work and a mile stone reached thereby-- bravo !


I must also say...--I was very impressed with the regularity of the hand-painted plate-wok

did you use a tape/pencilled guideline for the horizontals? a longitudinal template?

whatever--impressive !! :thumbs_up_1:

but this is I think exceptionally well ( genius!) done...below
52626461829_e67cdeb403_o.jpg

Re: HMS Victory and Le Redoutable at Trafalgar (1/300)

Posted: Sat Jan 14, 2023 5:55 pm
by Devin
Stunning work. If I hadn't seen the step-by-step, I'd swear those copper plates are individually molded.

Your ability to paint straight lines is amazing. I'm starting oil work on my 1/700 Enterprise CV-6, and I can't paint lines that straight when I'm just outlining pipes!