Page 1 of 2
By the Deep 17
Posted: Sat Mar 30, 2013 7:21 pm
by dafi
As a small Easter surprise, a small project I am working on to try out some things, just to see ...
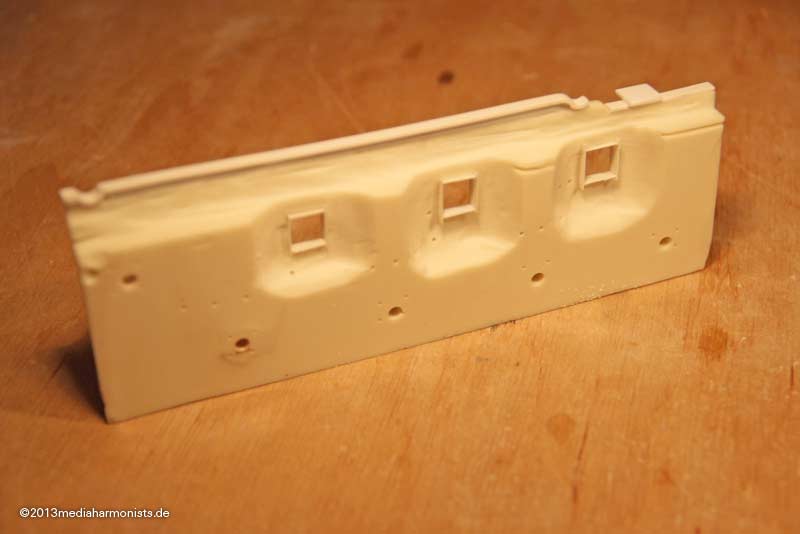
Small flash back: From my first casting trials, i had left a piece of formed resin ...
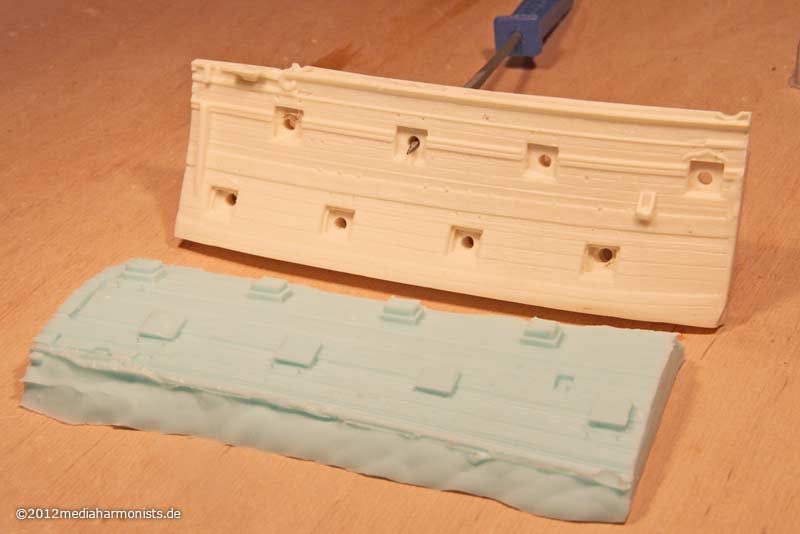
... and it was saying "Hy" to me all the time

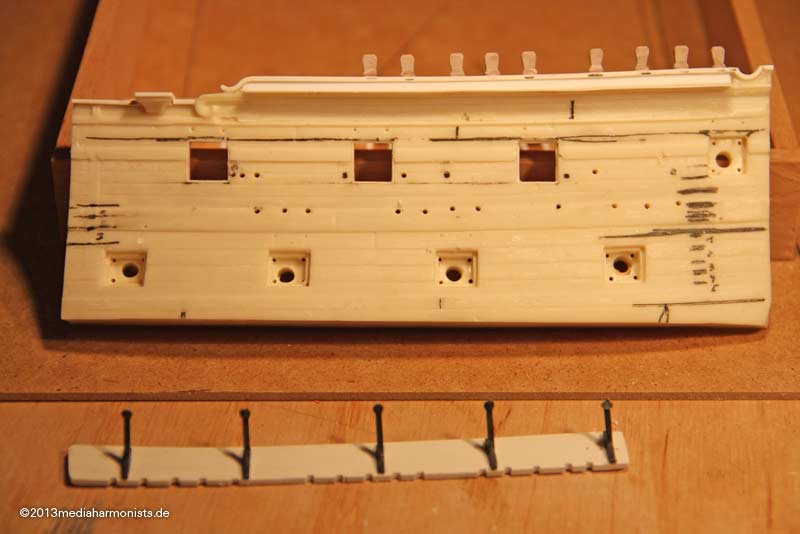
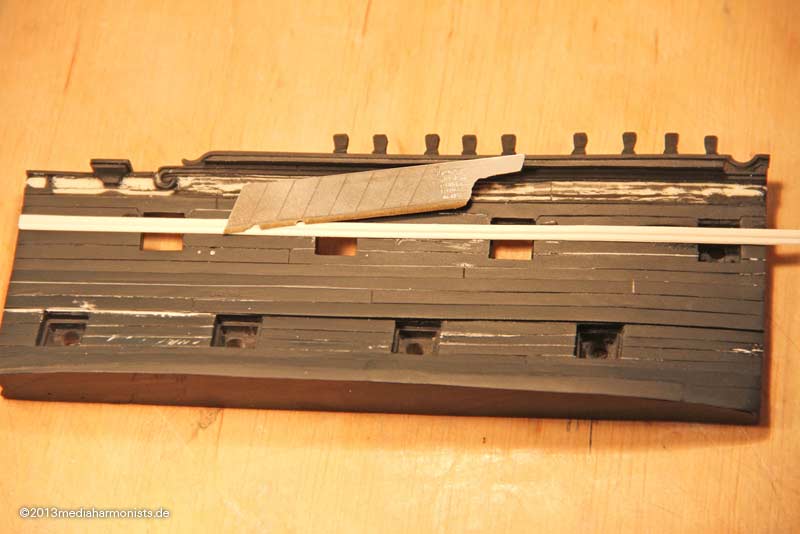
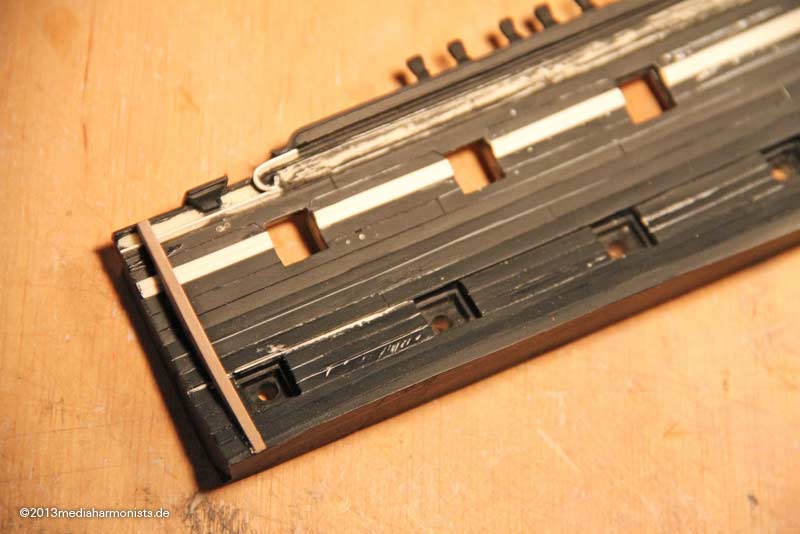
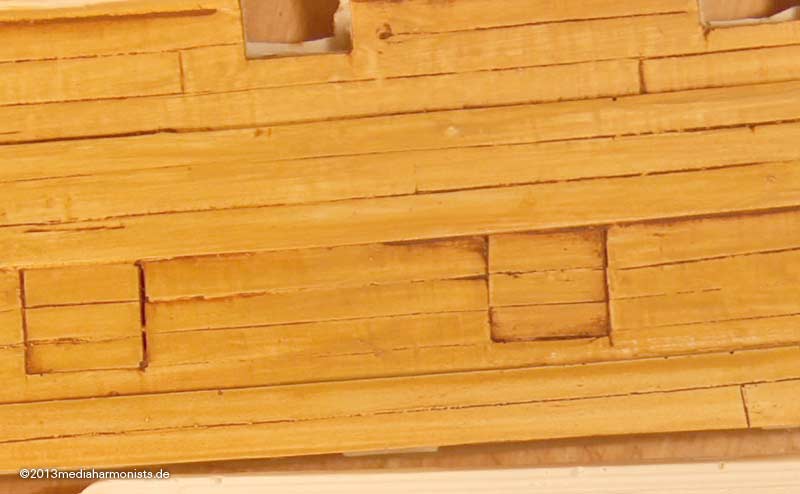
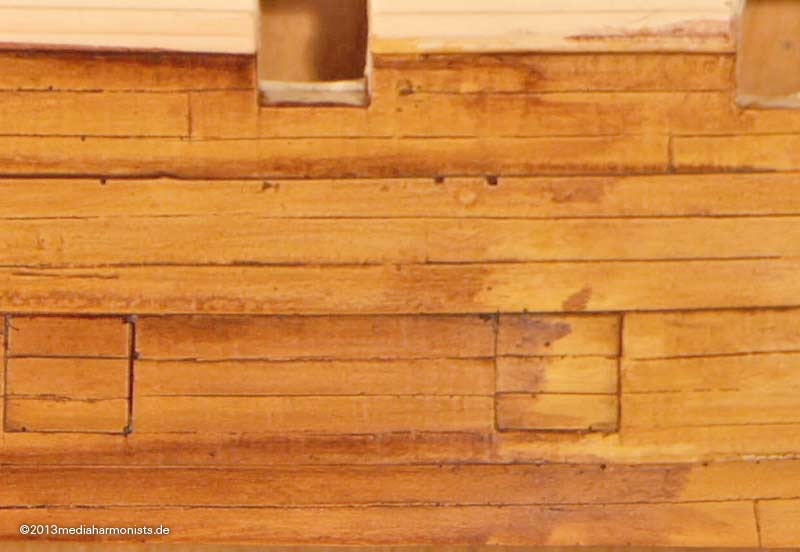
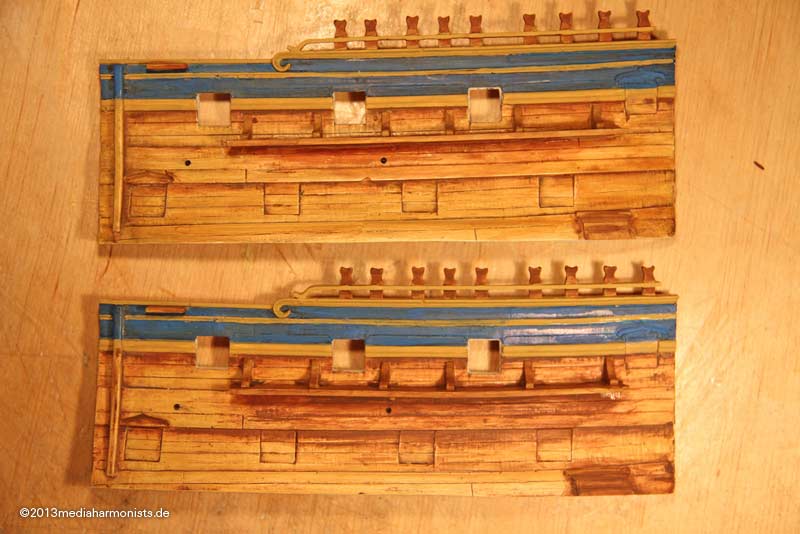
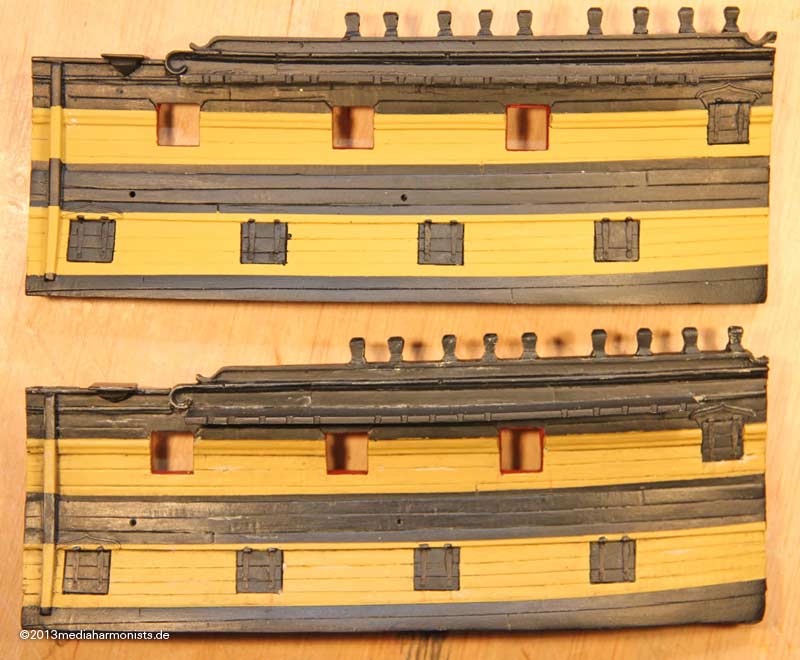
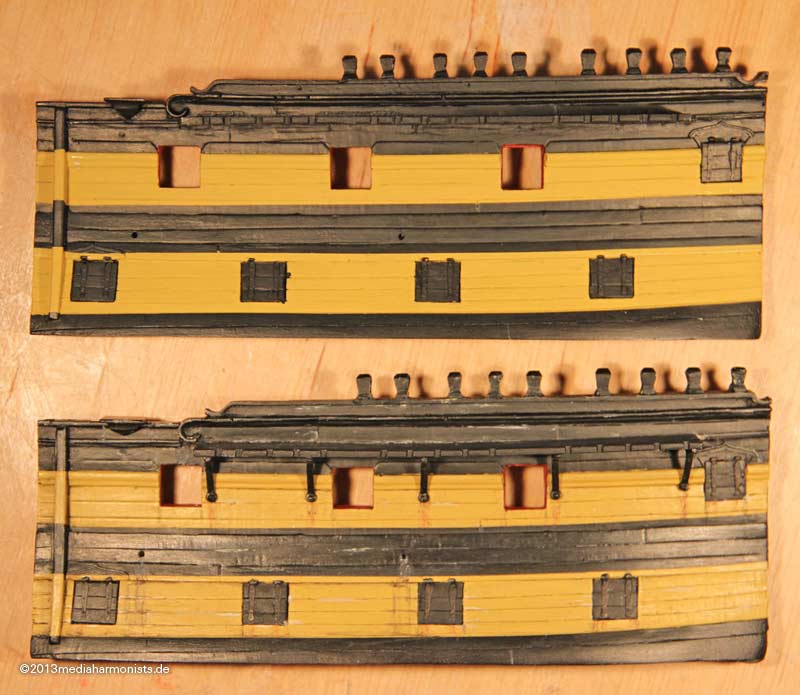
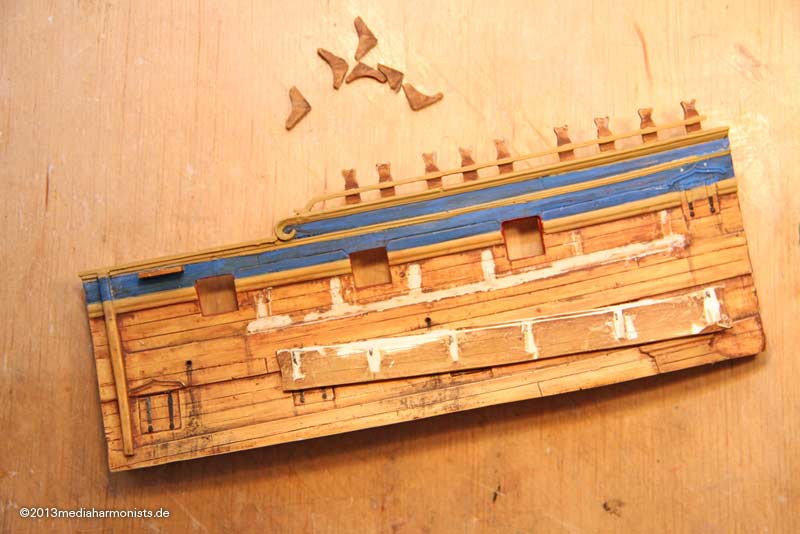
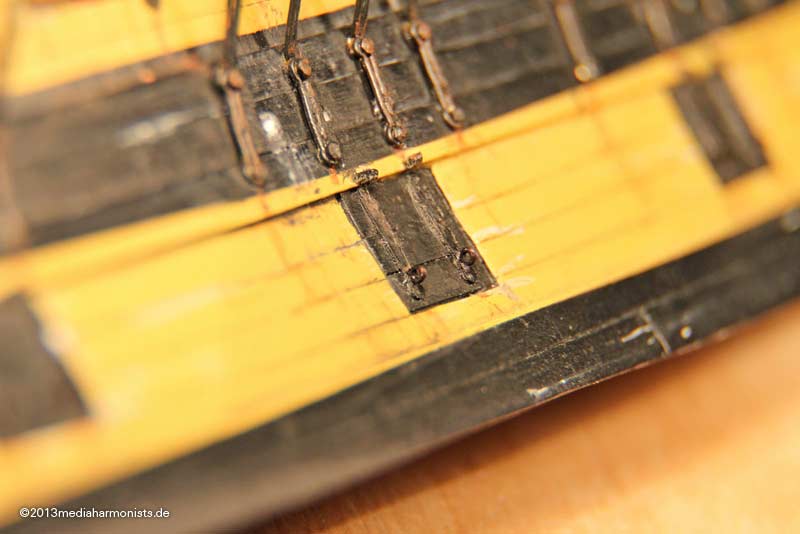
First the standards: out the scaler and eliminating the "wood"-grains ...
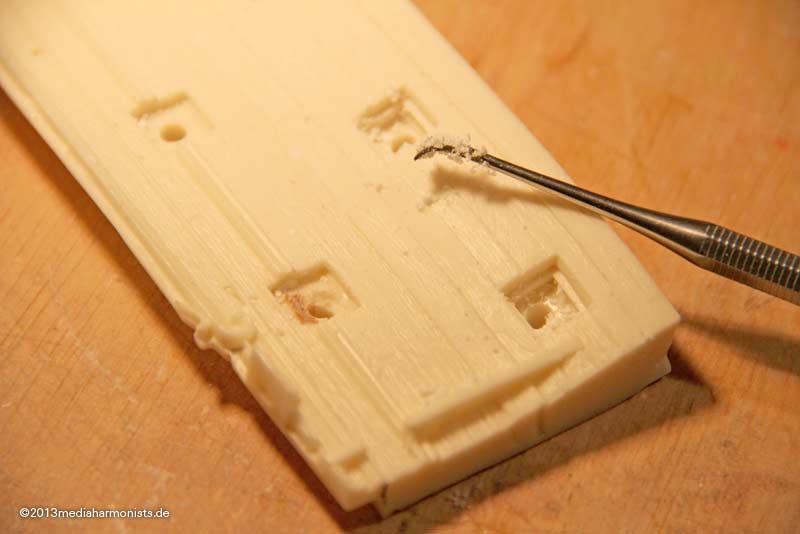
.... thinning the backsides ...
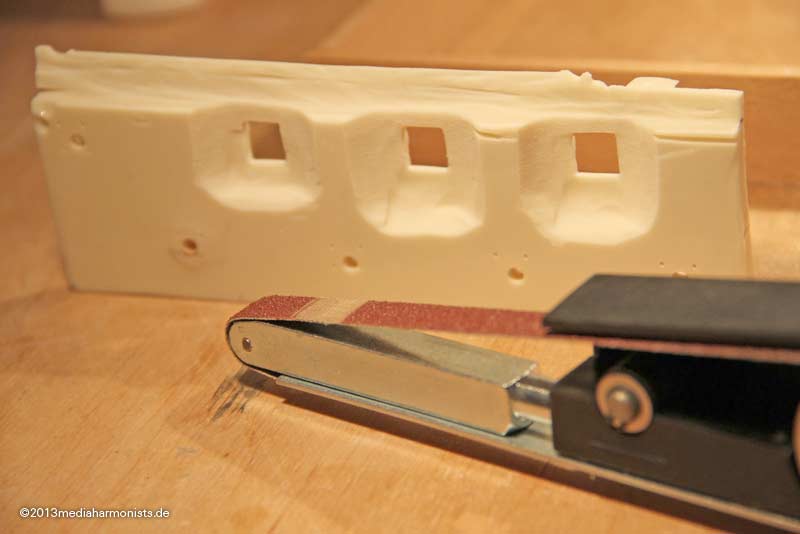
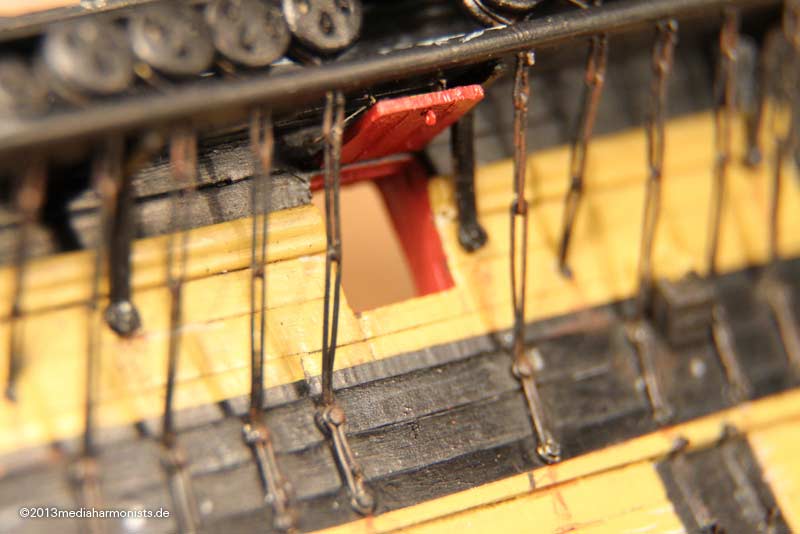
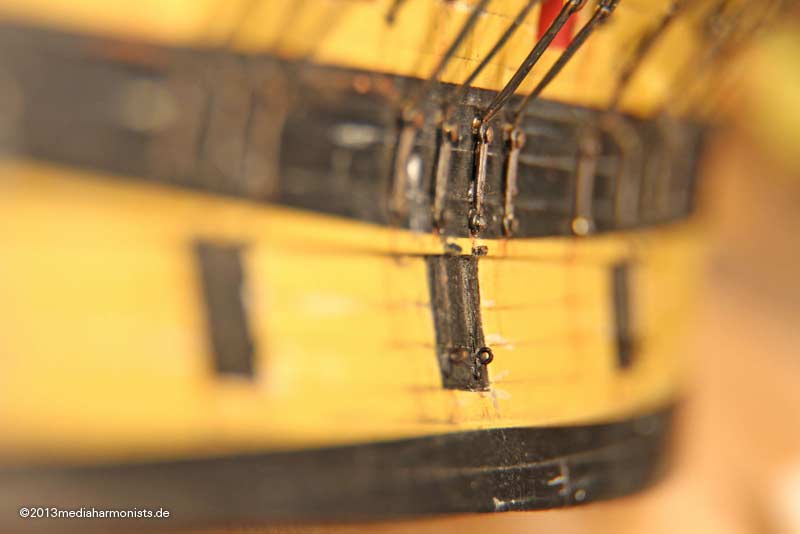
... redoing the ports (middle) ...
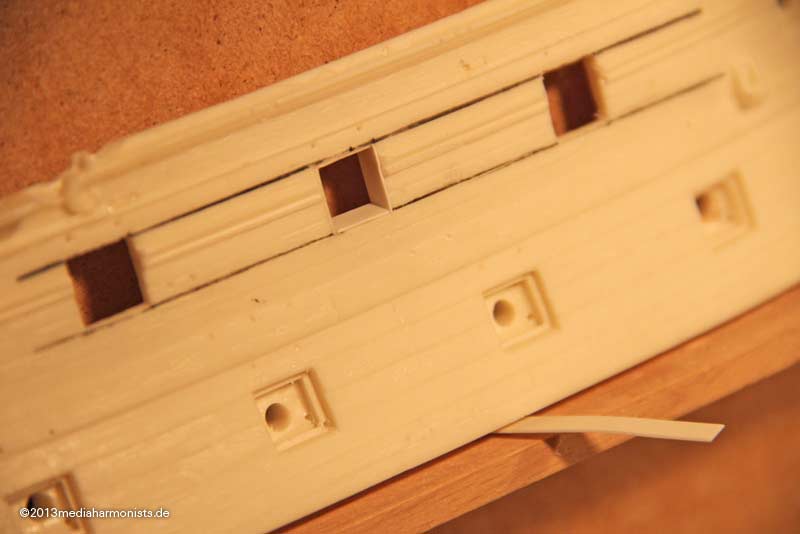
... nicely to be seen from the back.
Fixed on the display by a screw ...
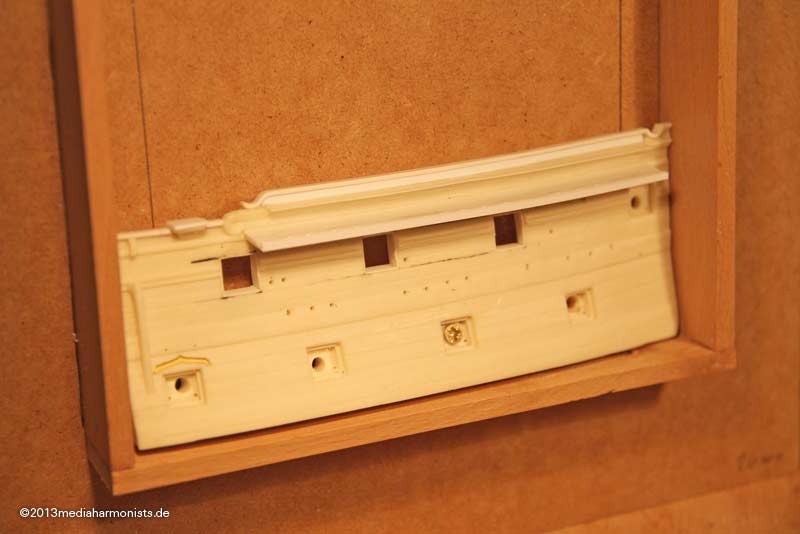
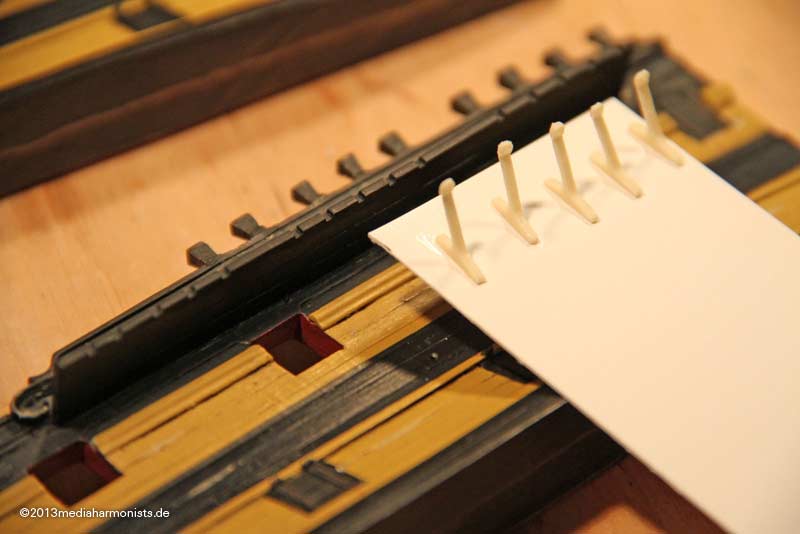
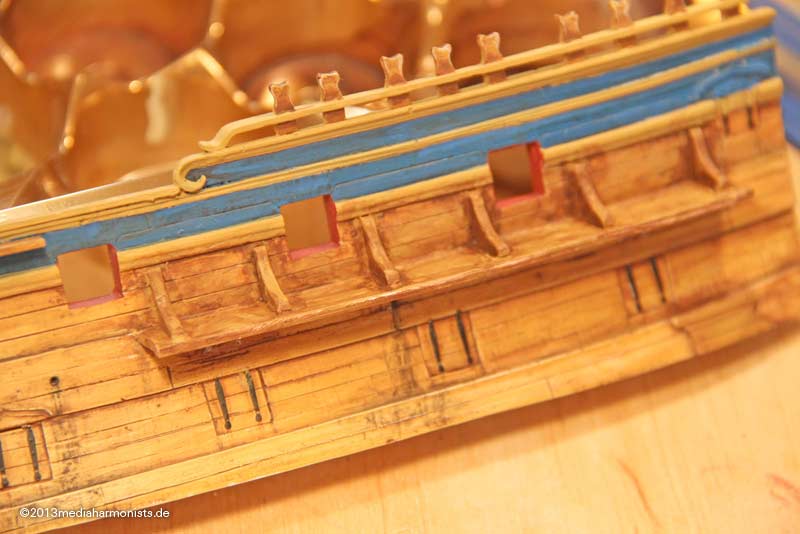
... etch parts and new rails fitted ...
... and pictures we know from my Victory build like carving tiomberheads ...
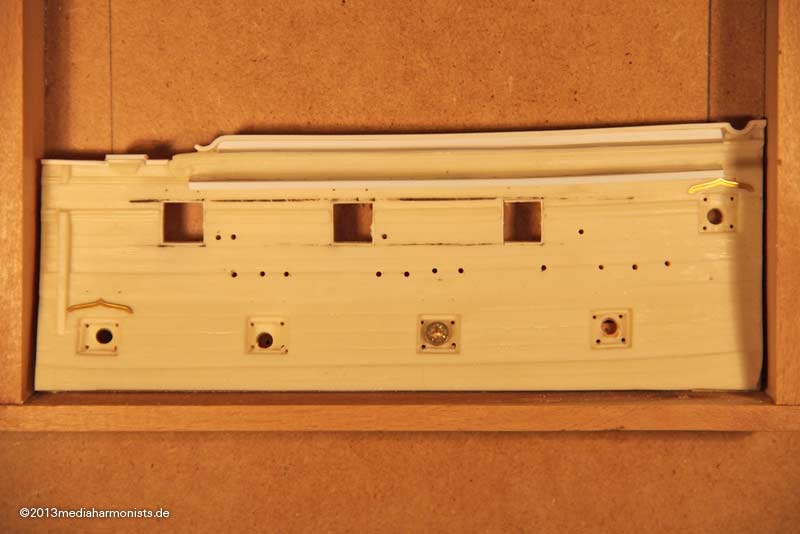
... filling the badly drilled dead eyes ...
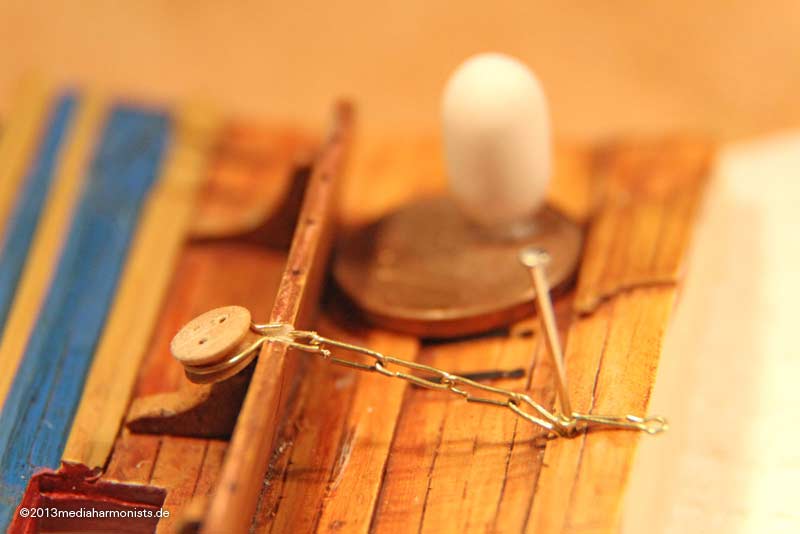
... making the chainplates ...
... the channel ...
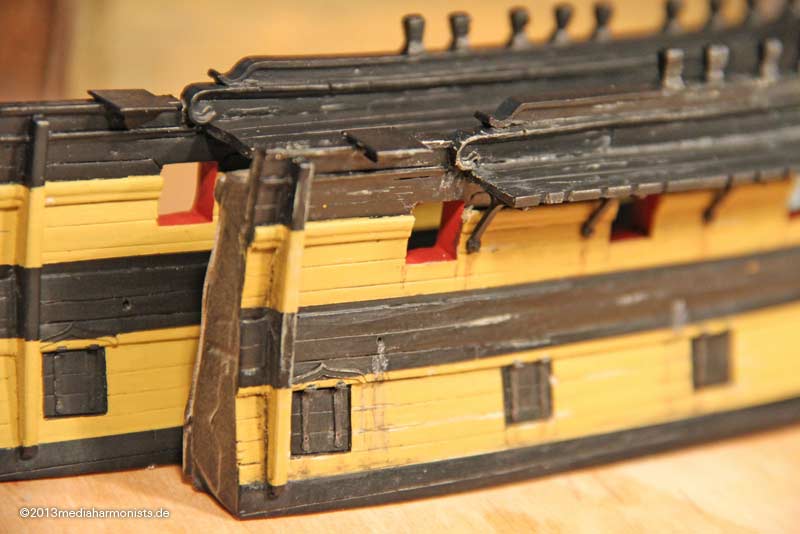
... new profiles and the first blow bigger of the project: the hull got new planks of better dimensions ...
... and a tad of color to see what I am doing.
Happy Easter, Daniel
Re: By the Deep 17
Posted: Mon Apr 01, 2013 6:53 am
by dafi
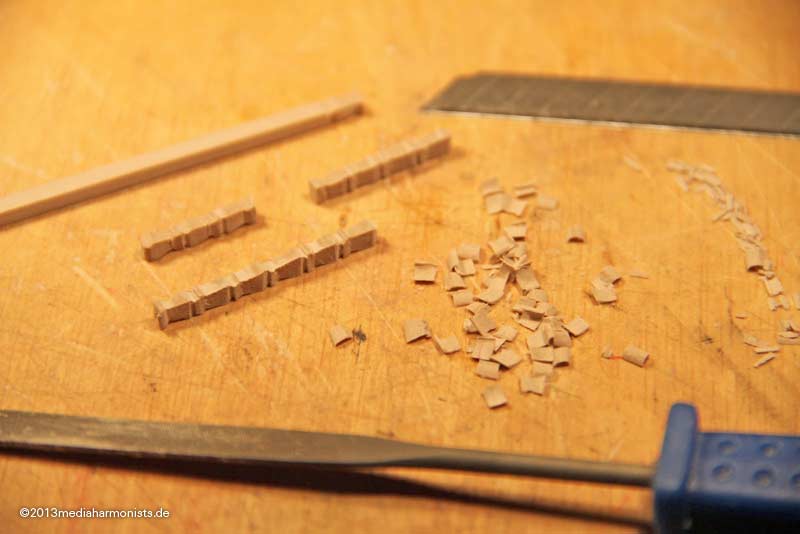
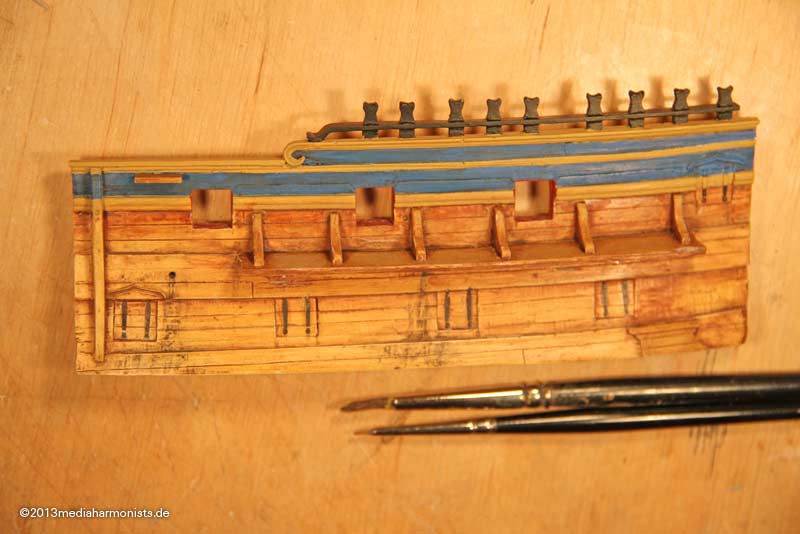
Next step duplicating the parts:
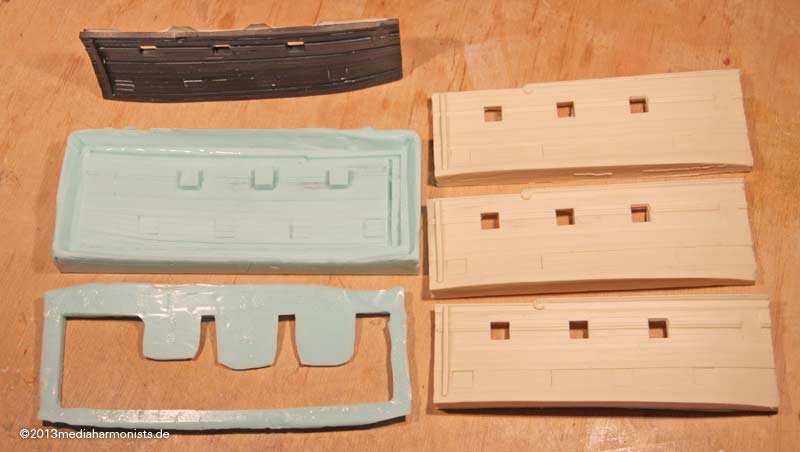
And then some white priming and then the part I was most looking for - The color trials:
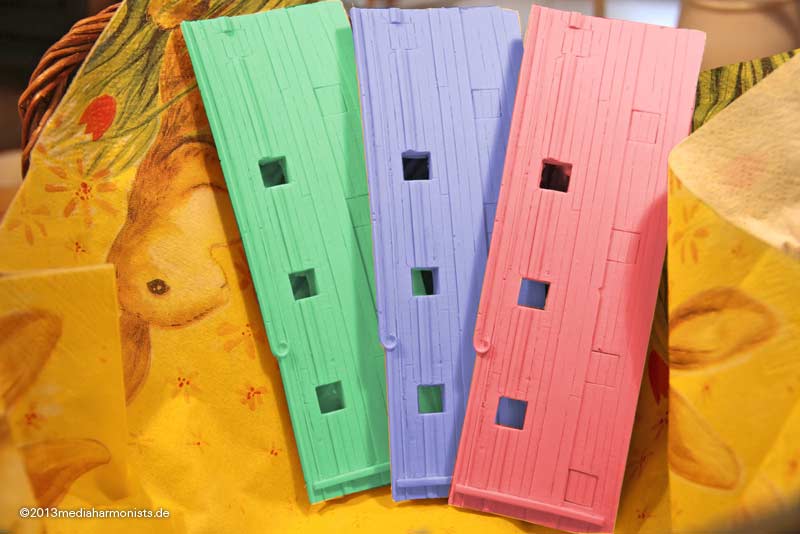
And this would give a nice first of April Easter nest
...hihihihihi...
XXXDAn
Re: By the Deep 17
Posted: Mon Apr 01, 2013 10:16 am
by Channell
Admiral Lord Nelson is turning in his grave.

Looks like fun though!!
Re: By the Deep 17
Posted: Sat Apr 06, 2013 7:32 am
by dafi
if you believe, you could escape of that one so easily, you could be wrong.
Do not forget, model making is a serious business

As said before, some color tests were to be done on a casein base ...
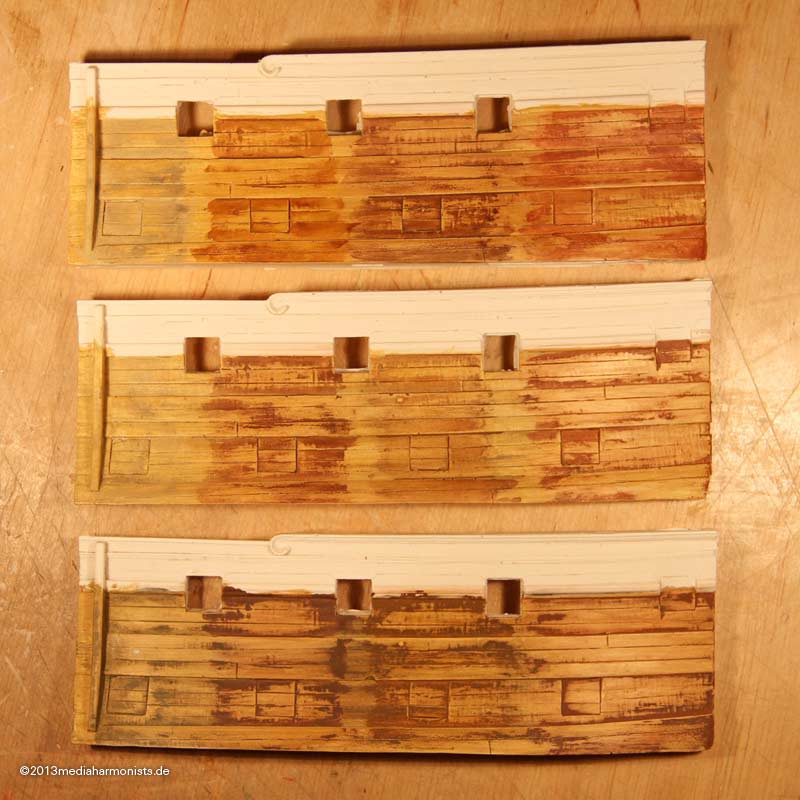
... looking spectacular, but far too fooked up
The good thing on the casein paint is, take a wet cloth and just wipe and redo .-)
The most difficuklt task for me: waaaaaaaaaaaaiiiiiiiiitiiiiing until the paint gets dry enough ...
more trials with the casein paint ...

... and oil paint diluted with original Zippo lighter fuel.
And it looks much different now.
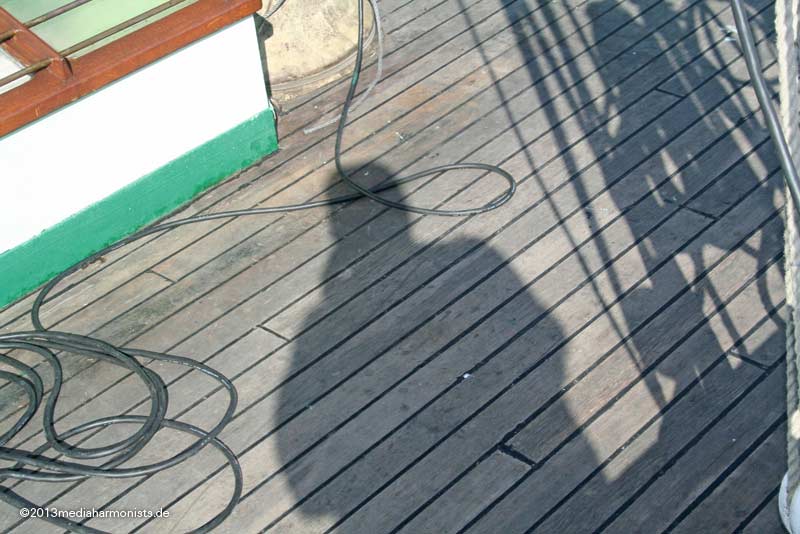
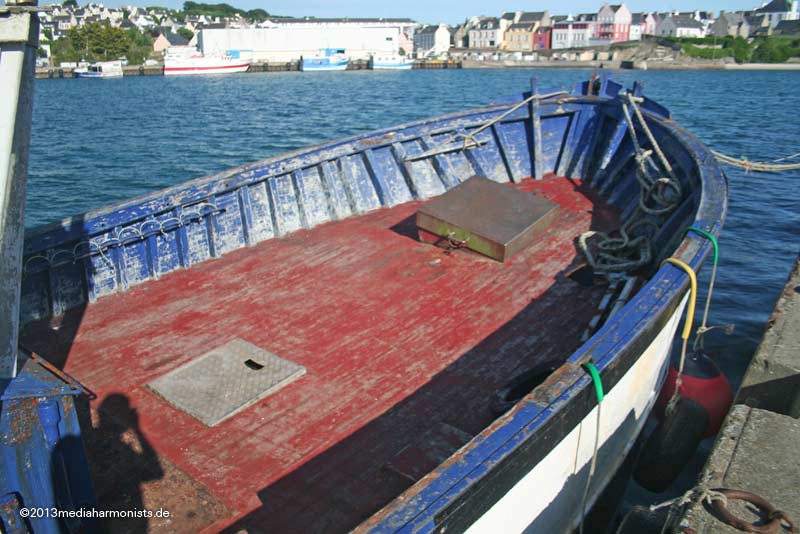
After this I was researching more about the aging of ships. Unsually we tend to display the ships in a freshly build and painted state. Some bold versions show the ships in quite "wrecked" appearances. But I do believe, that most of their life, the ships were somewhere in between.
This made me have a closer look. I chose the following 3 ships, as I knew, that there is quite good documentation in the web.
First the Neptune in Genove (Google pictures: Neptune/ship/genova), light wooden hull
http://www.flickriver.com/photos/jarmi7d/5044918333/
http://www.flickriver.com/photos/peer_gynt/7655543406/
http://www.wanderingoverland.com/?p=855
http://photo.remgo.com/galeone-neptune/
http://www.flickr.com/photos/peer_gynt/8033111211/
http://en.wikipedia.org/wiki/File:Genov ... CF7741.JPG
http://en.wikipedia.org/wiki/File:Genov ... CF7743.JPG
http://en.wikipedia.org/wiki/Neptune_(galleon)
Funny to compare the freshly painted version with the neglected one. Nice to see the better condition in protected areas like underneath the channels. Exposed areas like underneath the cathead look much more tattered. Was this also on seagoing ships that extreme or is this more of a harboring effect? But also ships spent long times in harbor do to waiting, winter sleep or being in ordinary.
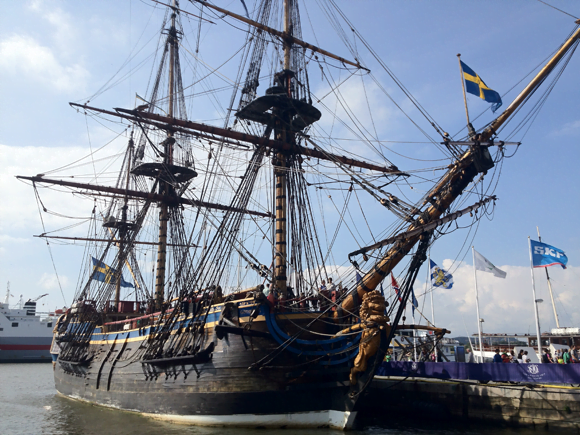
And the Gotheburg (Google: Gotheburg, ship), dark wooden hull
http://www.flickr.com/photos/maskofchina/311861497/
http://www.lemback.com/the-swedish-ship-gotheborg/
http://viktordonovan.blogspot.de/2011/0 ... nburg.html
http://www.lifeinnorway.net/wp-content/ ... borg13.png
http://foto.arcor-online.net/palb/alben ... 666630.jpg
By the dark hull, the effects are not as visible like on the neptune. Funny to see the fresh scratch marks on the whales in some of the pictures
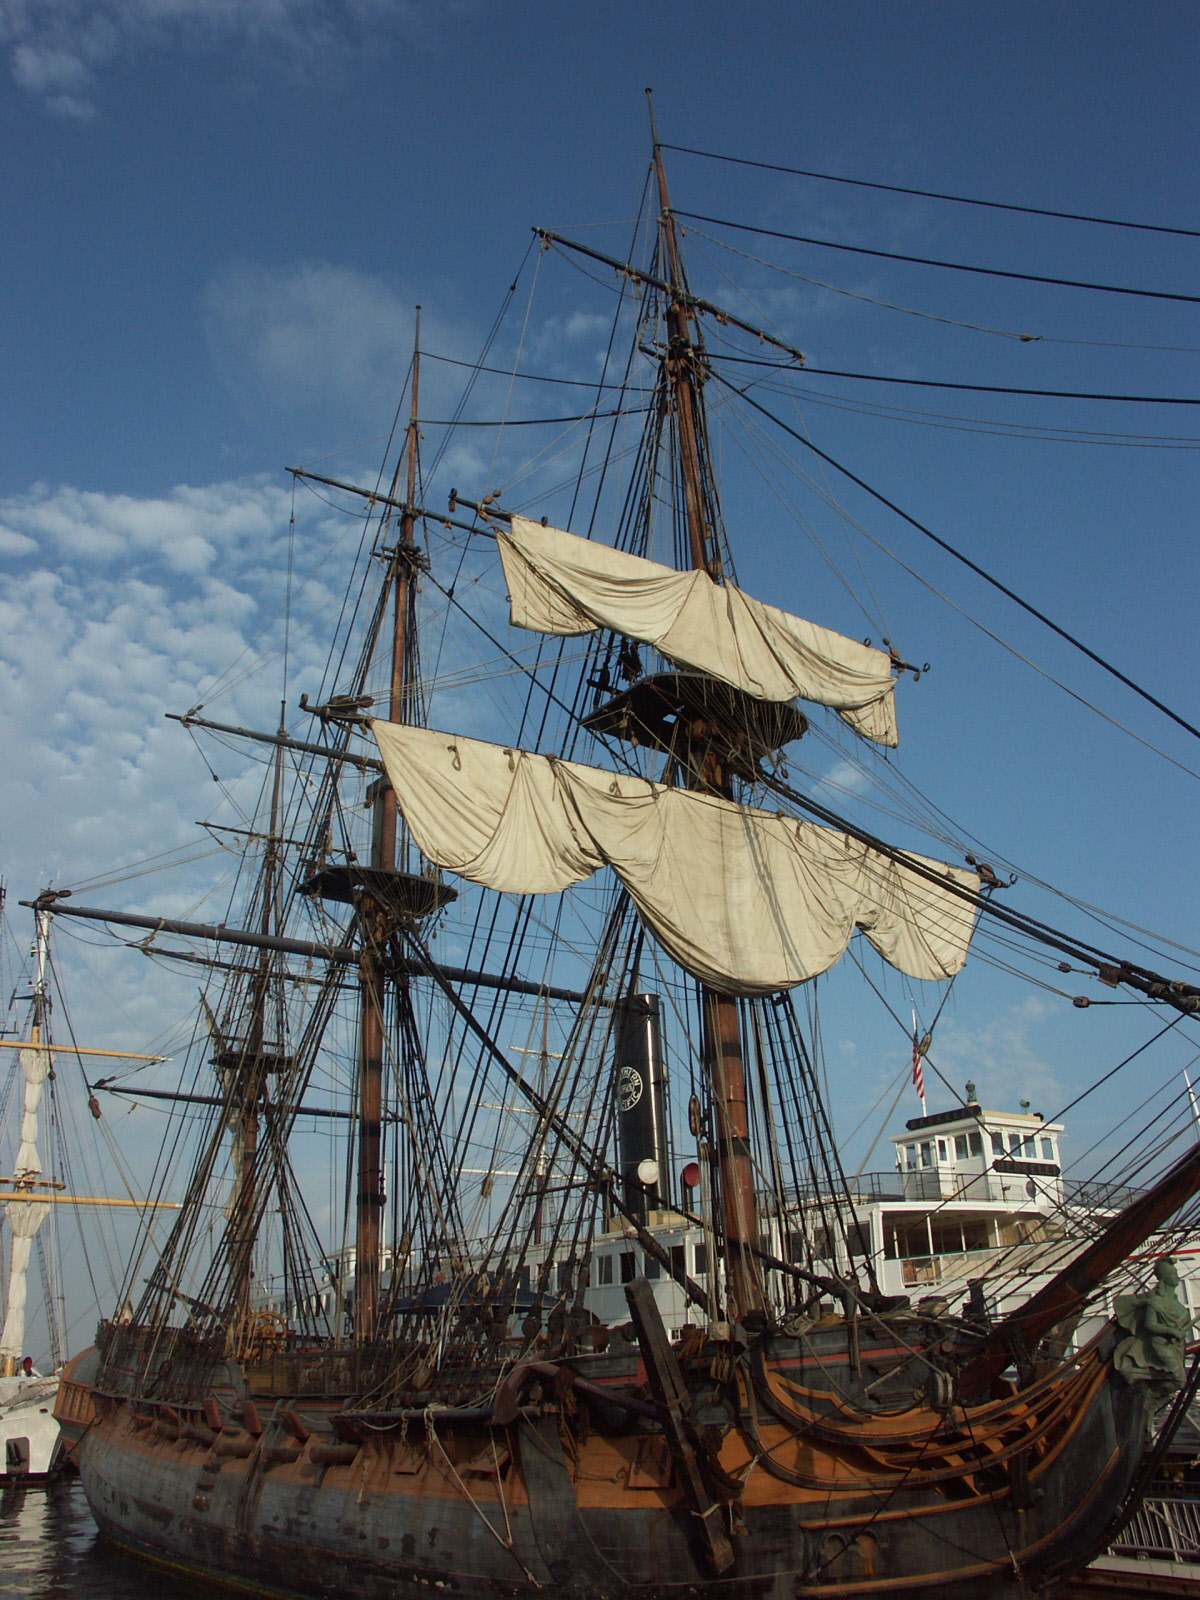
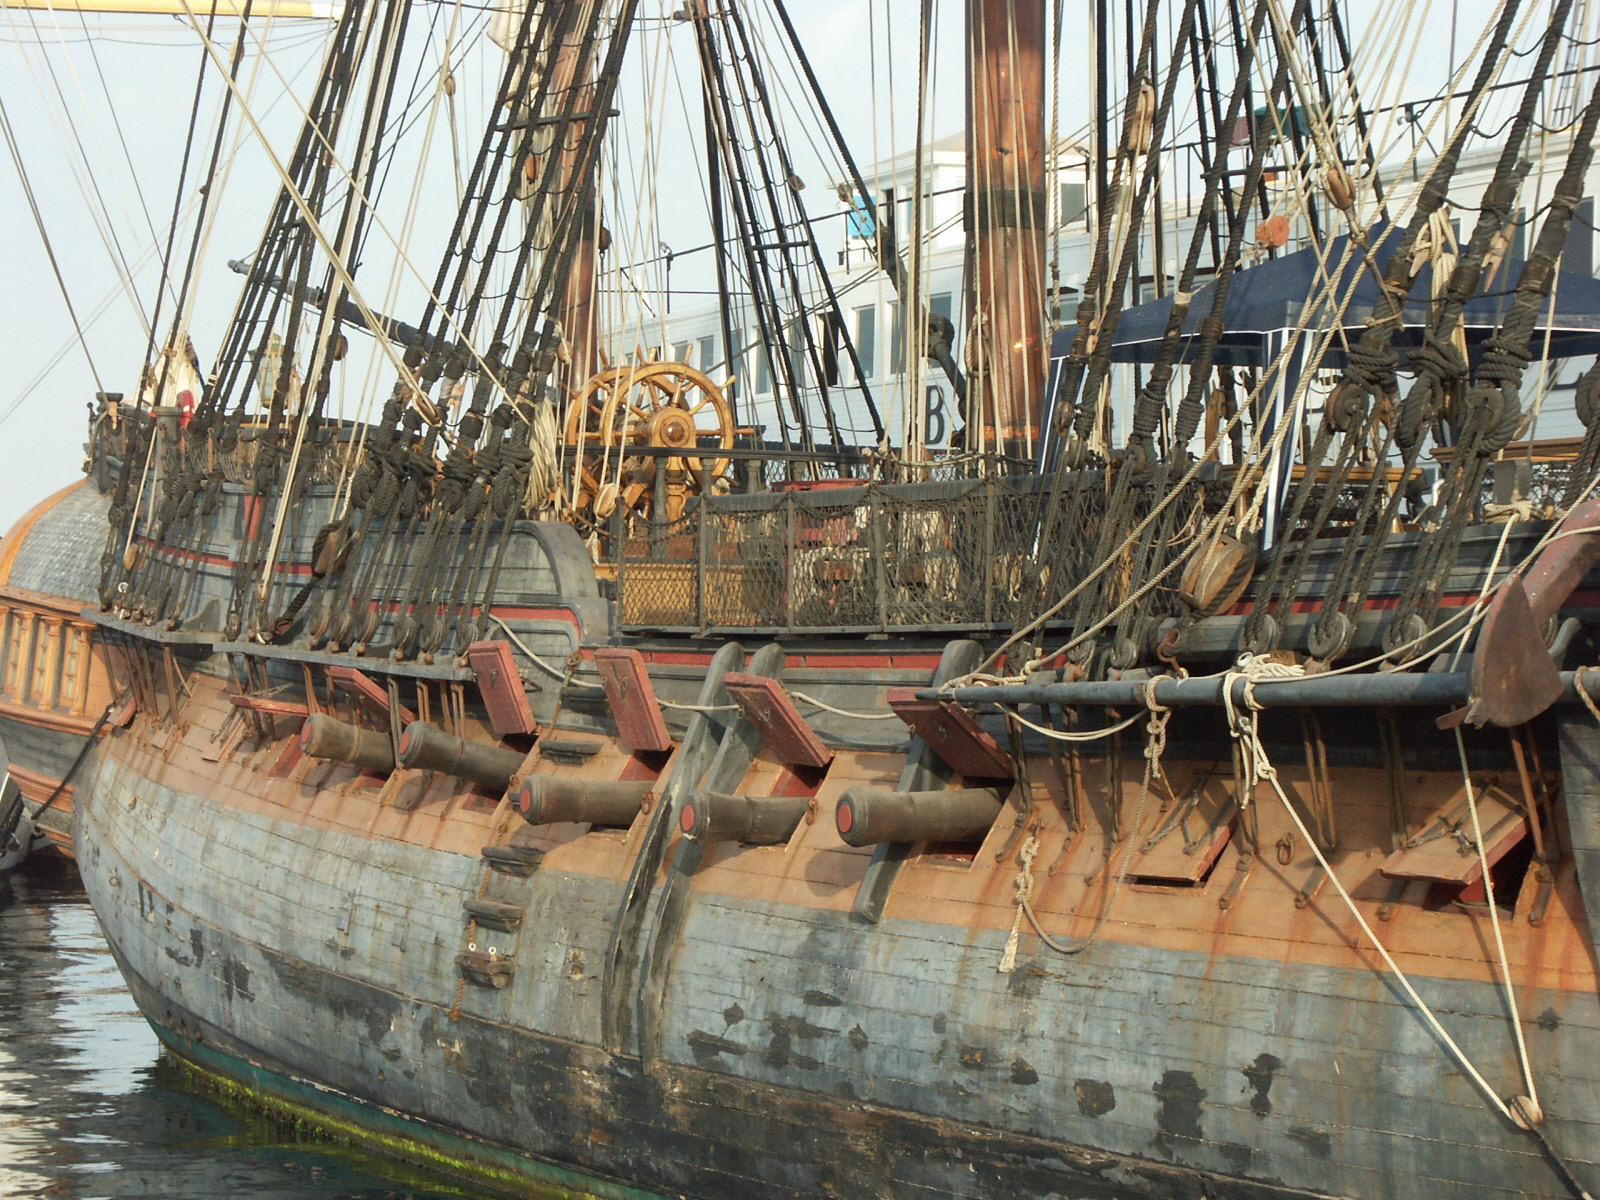
Then theHMS Surprise (Google: surprise, rose, san diego), painted hull
http://www.panoramio.com/photo_explorer ... er=2074768
http://www.flickr.com/photos/arejay/165878016/
http://photos.lomara.org/index.php/came ... o/100_0825
http://www.flickr.com/photos/seaveyfami ... /lightbox/
HMSSurpriseQtrbow800.jpg
and my favorites:
http://xpda.com/junkmail/junk163/pict9071.jpg
http://xpda.com/junkmail/junk163/pict9072.jpg
Also here by the degradation of the paint, one can exactly tell which year the picture was taken
The difference in between the fresh and the tattered is amazing.
Nice to see bleaching, rust, chipped color, algae on the waterline, patches and so
Also do not forget: Ships were build over some period, where the wood was alraedy exposed. So even a brand new ship usually was unlikely to show fresh wood in larger areas. But therefor repaired areas would stick out. On the other side I have never seen the patchwork on deckplanks like often shown in plastic models.
Amicalement, Daniel
Re: By the Deep 17
Posted: Sat Apr 06, 2013 1:34 pm
by JIM BAUMANN
amazing--!!!
just like you neeed another project to distract your from the quest for perfection on your HMS Victory....
quite cool mate!

JB

Re: By the Deep 17
Posted: Mon Apr 08, 2013 8:52 am
by dafi
Thank you Jim
And now the weekend�s results...
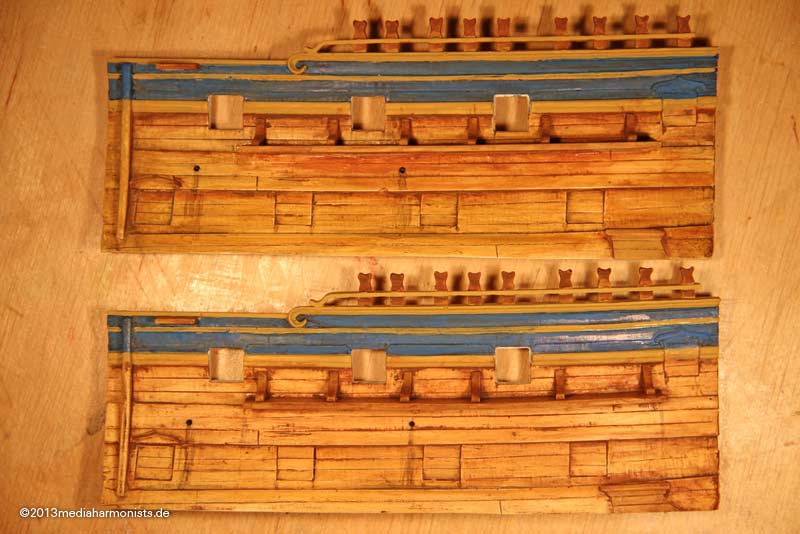
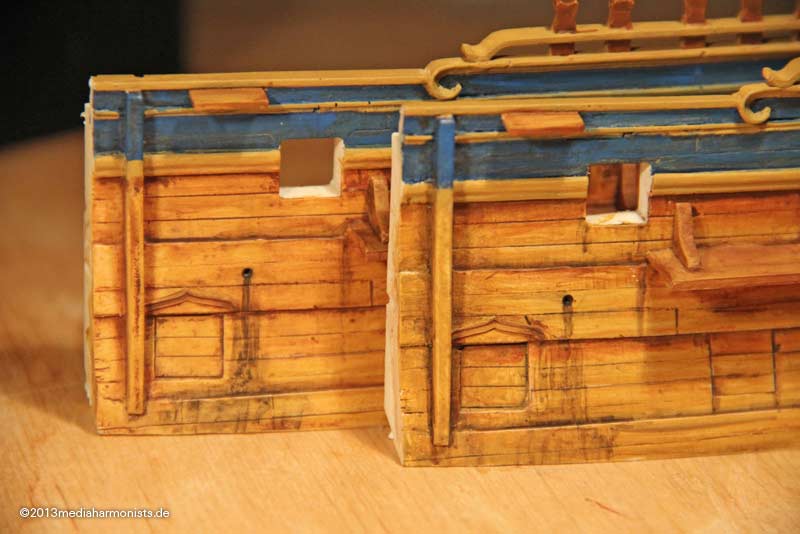
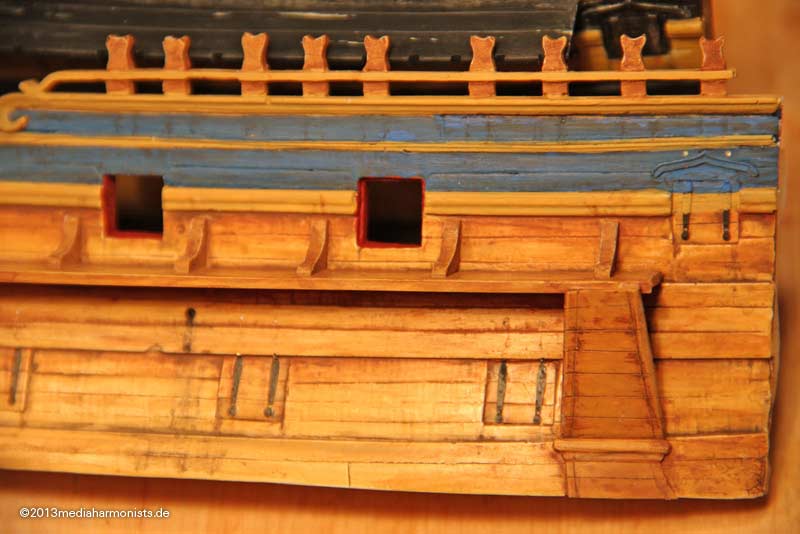
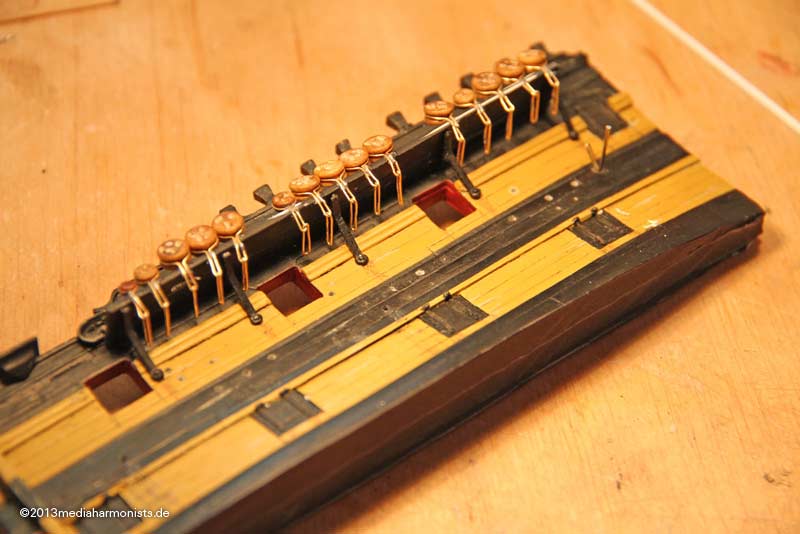
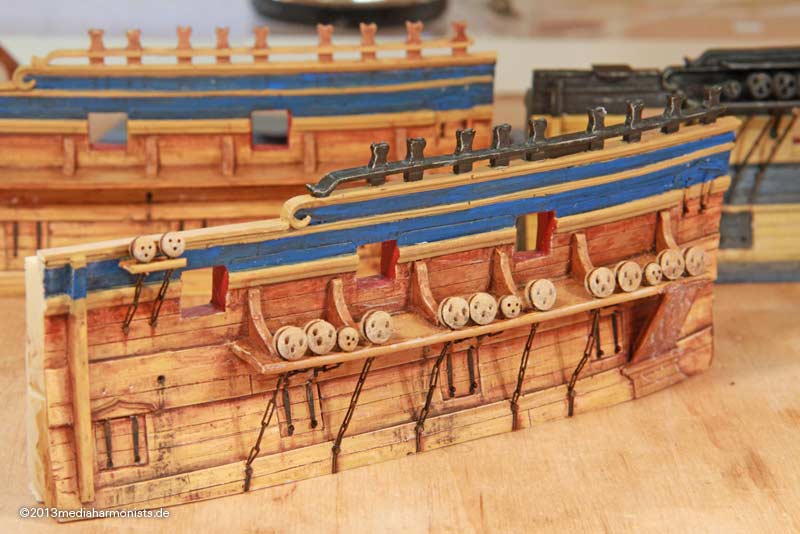
Two new hull pieces of the 1805 version and the applied parts...
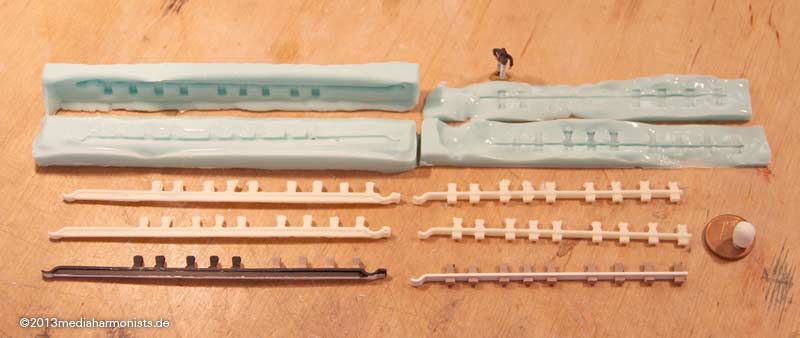
... first the origials, then the copies and with the molds.
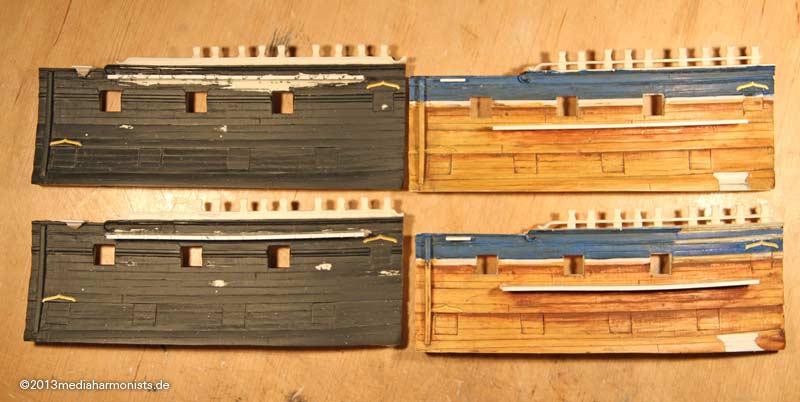
Nice to ee the differences in the colors, position of the channels, the anchor protections and the timberheads.
Gr��le, Daniel
Re: By the Deep 17
Posted: Mon Apr 15, 2013 5:43 am
by dafi
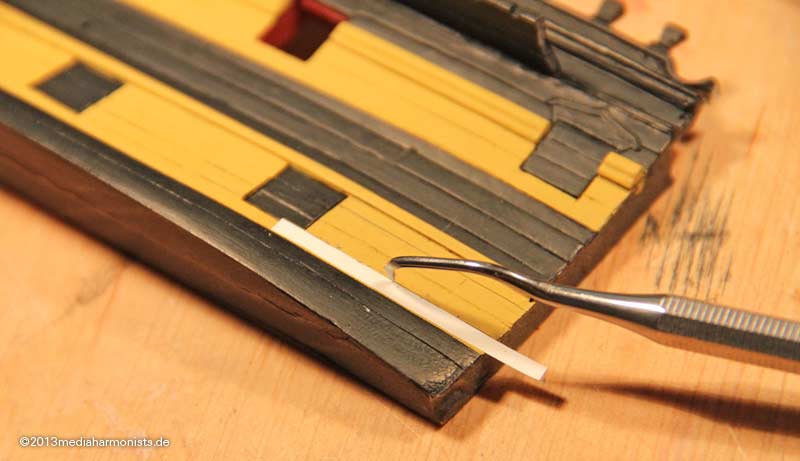
Slowly things are starting to get messy
This state still was too fooked, even though already twice reduced. The casein paint is easily to be gradually removed by wet brush, or if far too much by a wet cloth. Here the collection of paints, large brush, the inlay of a sweets box for mixing ...
... here taking off the paint with brush, pipe cleaner and Q-Tipp, afterwards more paint in different shades, allow extremely weeeeeeeeeel drying and taking the exceed of if necessary.
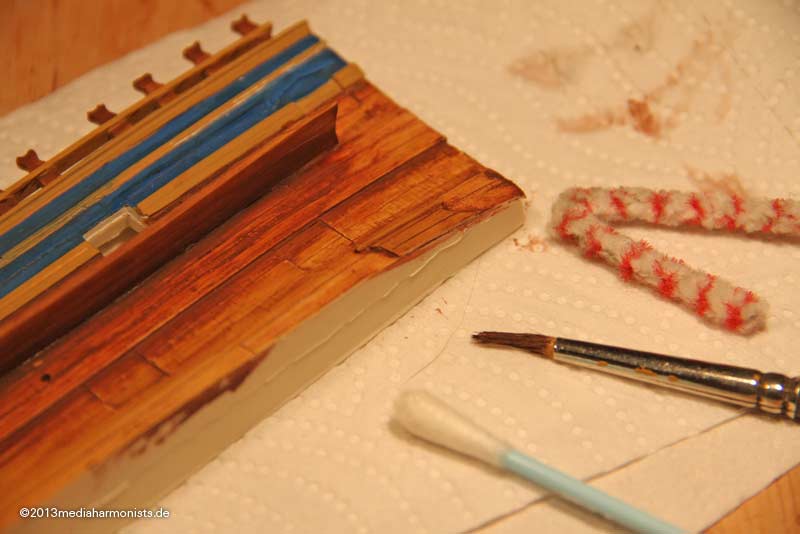
Funnily both samples are coming closer together.
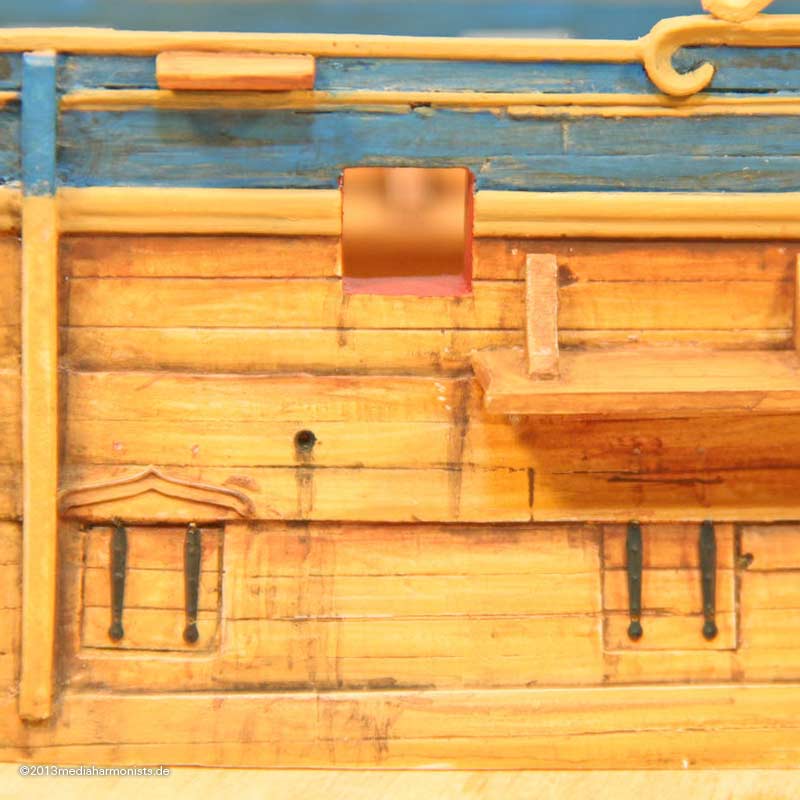
Made the marks of the scuppers, the black not only being dirt but also the often seen black rot of the surface and gaps if wood is continuously confronted with wet dirt.

And both trials in comparission.
And finally the hinges added and integrated with some shades.
All the best, Daniel
Re: By the Deep 17
Posted: Wed Apr 17, 2013 3:30 pm
by dafi
So a little bit of basic work.
The aim is to explore how a hull could have been looking before the wasp-lines came up. So it should be "paid bright with rosin". Contemporary pictures and models show a light/bright color. If I understand well, it could still have been a bit transparent. In german wikipedia rosin is mentioned to be used for painting violins.
Also the sources give rosin diluted with turpetine. Both products are result from distilling resin from special pine trees. Does that mean, that some color was still aded to get the bright look?
http://en.wikipedia.org/wiki/Turpentine
http://en.wikipedia.org/wiki/Rosin
Some contemporary models:
http://collections.rmg.co.uk/mediaLib/6 ... /large.jpg
http://collections.rmg.co.uk/mediaLib/5 ... /large.jpg
Some contemporary paintings
http://collections.rmg.co.uk/mediaLib/4 ... /large.jpg
http://collectionsonline.nmsi.ac.uk/det ... &t=objects
http://collectionsonline.nmsi.ac.uk/det ... &t=objects
Here some pictures that Blue Ensign was showing in another thread, thank you!
http://www.bbc.co.uk/arts/yourpaintings ... cks-173292
http://www.bbc.co.uk/arts/yourpaintings ... now-173093
http://www.bbc.co.uk/arts/yourpaintings ... eze-173091
http://www.lanefineart.com/component/vi ... pl/70.html
http://www.bbc.co.uk/arts/yourpaintings ... sea-173289
Concerning the black marks on the Scuppers. I do not se them in first place as dirt, but much more this kind of nasty black mold, like it happens to get if does not air the shower regularly. The ship was not wet the whole time, harbors, nice weather or calms. The water coming out was for sure not too clean and once this stuff is there it is difficult to get rid off.
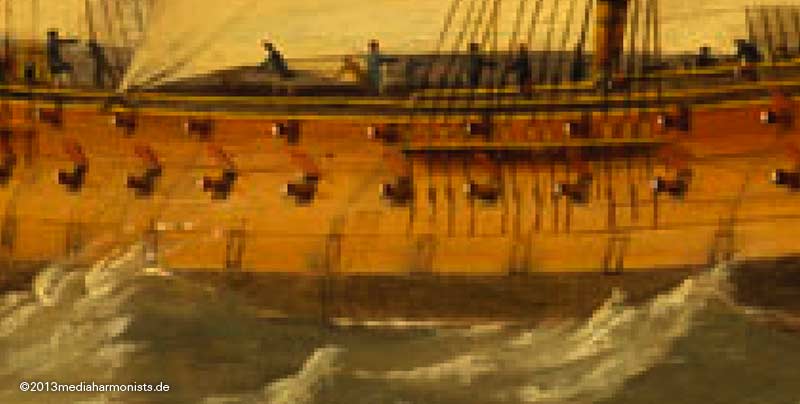
Interestingly, the paining of the Victory by Monamie Swaine shows some darker vertical lines exactly in the distance the scuppers were. Also the colors were a guideline for may trials. This picture is a bit darker to better show the lines.
Back to the pictures of the Neptune: Link # 1 shows the fresh paint, #2 already paler, #3 worse and #5 really fooked. The end is completely pale wood or the black mold growing over the completely hull.
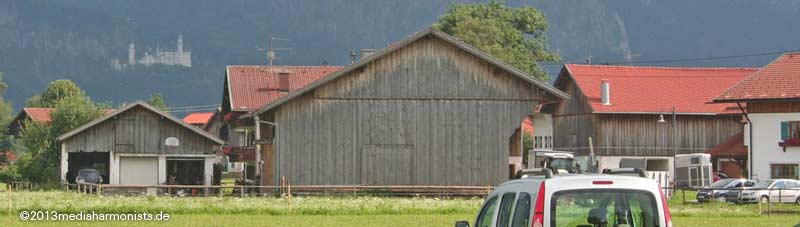
Here some more pictures of different woods and paints. But the results are quite common. The paint in a good condition in protected areas and less good in exposed ones. All corners, nails and edges left marks on the wood.

Here the deck was painted at one time. In protected areas it is still to be sen.
Hier hatte das Deck mal einen Schutz erhalten, der in den gesch�tzten Bereichen noch erkennbar ist
After a long period, the color becomes more uniform.
And here some old paint with rust ...

Gr��le, Daniel
Re: By the Deep 17
Posted: Mon Apr 22, 2013 5:44 am
by dafi
Here we go again ...
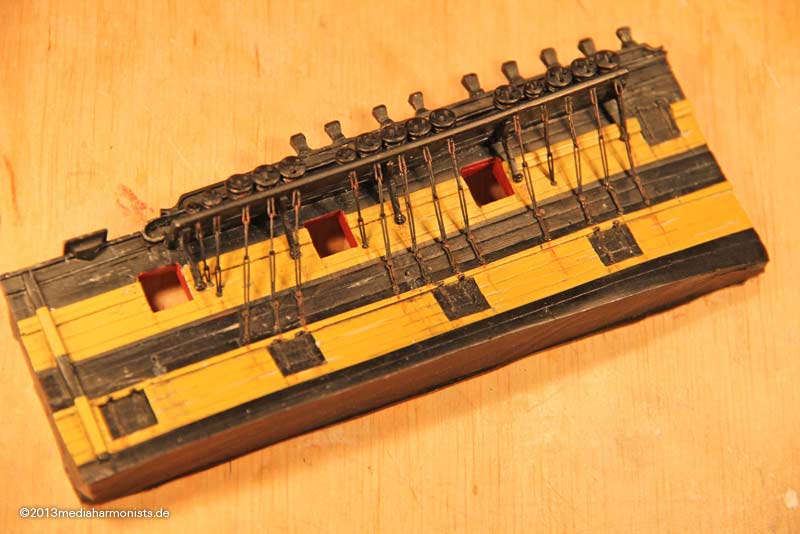
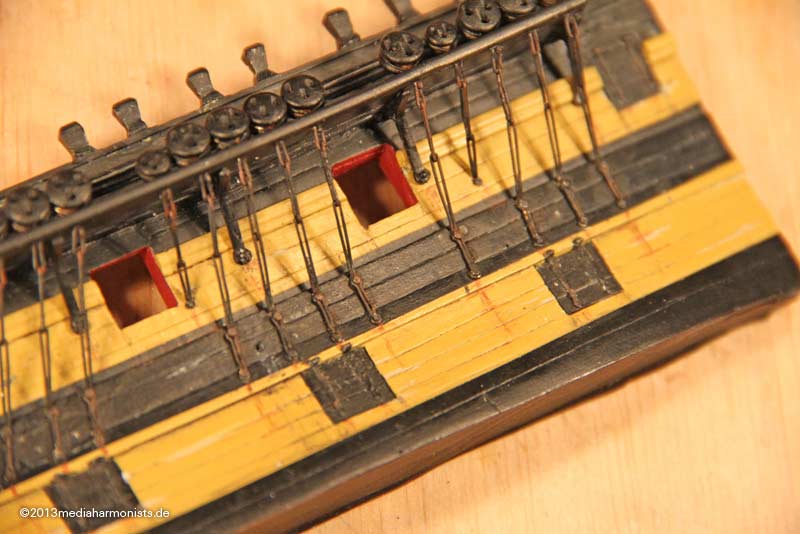
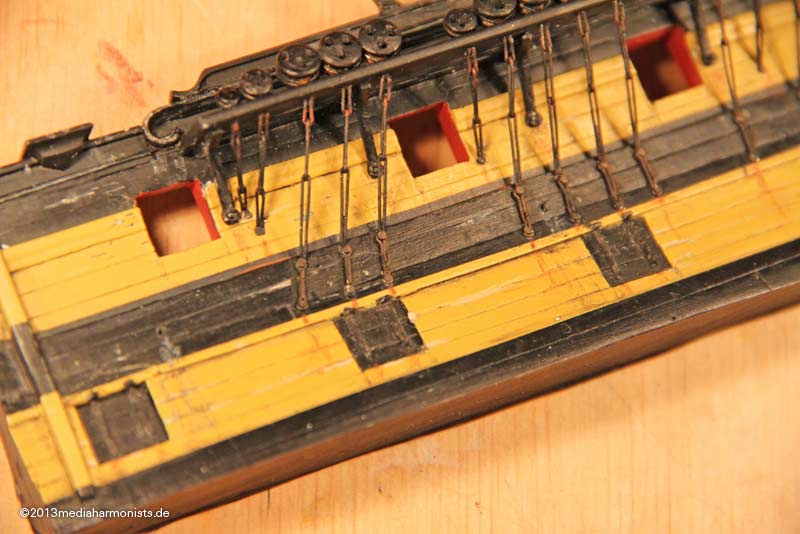
The chainwhales/ancor protection fitted ...
... and remembered the wasp-twins. So painted, redrawn the grooves, guide is the plastic stripe from a labeling machine ...
... and treated the bottom one with a diluted blach ink to enhance structures. The top is the usual clean version
Casted new iron brackets ...
... and made more mess.
Then added some rust, some scupper delicacies, some rust from all the iron work and some chipped color as nicely to be seen on todays Vic.
Cheers, Daniel
Re: By the Deep 17
Posted: Thu Apr 25, 2013 2:46 pm
by dafi
So what would be a dafithread without Dafinism?
Already I wondered that nobody did moan, as I did not bolt the channel
onto the gunwale but on
top of it instead ?!?
...
...
... so dafi does what dafi knows best ...
...
DESTRUCTION!!! ...
Positively seen, this gave a nice test, if the technic is dafiproof - If I mange to cover up the damages caused by this little action, I am on the right way
So fixed the channels on the right hight ...

... coverd the holes with the basic color, first layers with three different shades of brown ...
... and drying washing of, adding more and it goes the right direction
Close enough to the original version, so I am quite happy
XXXDAn
Re: By the Deep 17
Posted: Wed May 01, 2013 4:10 pm
by dafi
Sooooooo after some time finally managed to do some new bricotage ...
... fitted the deadeyes ...
... used the revolutionairy Double-Twin-Super-Drive-Technology for grinding the needle heads ...
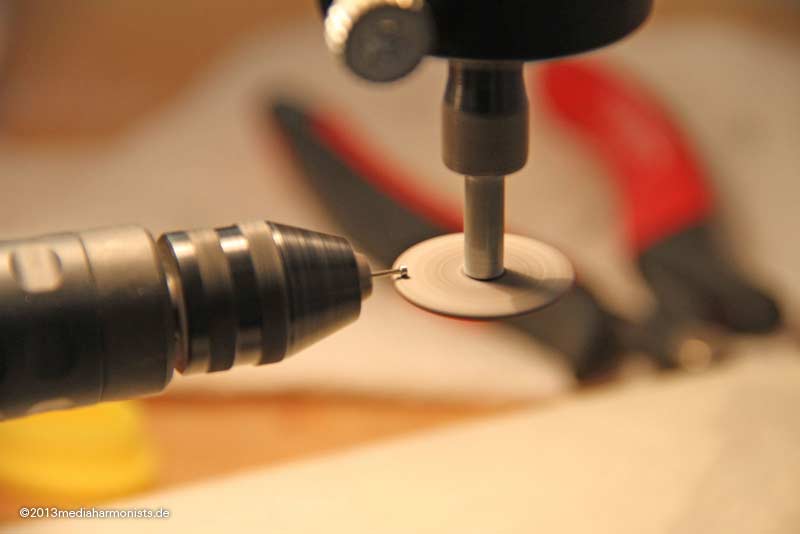
... put the batten ...
... and it looks even neater than the bits on my Vic
Too take this back added some paint and rust ...
... and tomorrow once the paint is well dried, I can take it back a tad and do the finetuning
Lieber Gru�, Daniel
Re: By the Deep 17
Posted: Sat May 04, 2013 2:08 am
by dafi
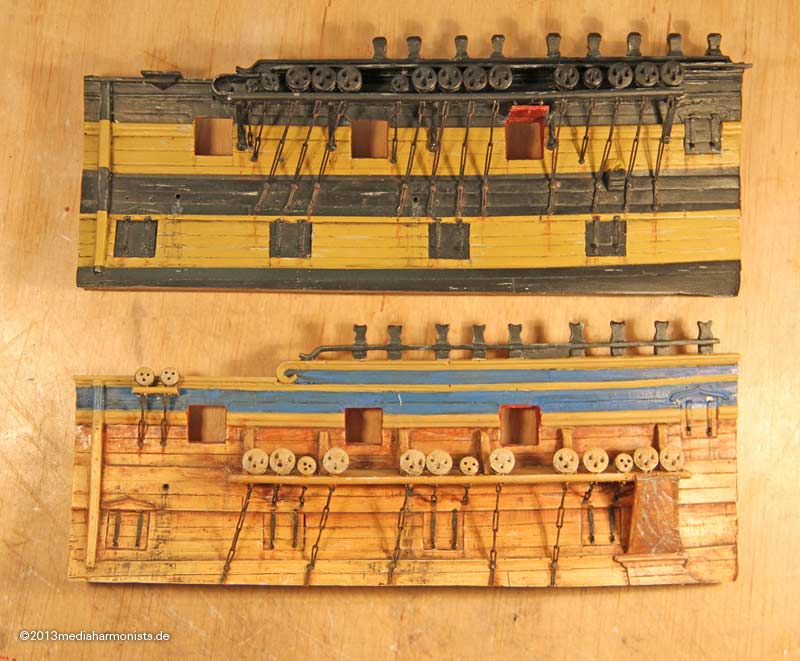
Here both versions side by side, same ship, only 40 years of difference in between ...
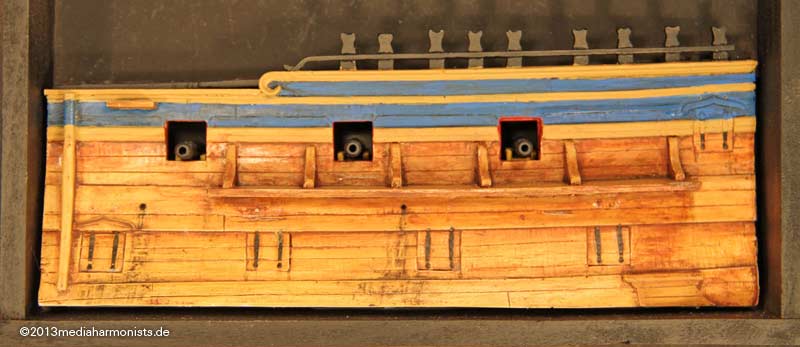
... fascinating, as a good friend of mine would say
Got the gun carriages messed and gave a brownisch oil coat to the barrels as some of the ingredients - rust and tar - suggest ...
... and the tompions plain without color, sticking out and not todays fancy thread in the middle, as the artifacts in NMM and museums suggest. Just one try with a line that goes around, but it does not look to convincing.
The shoe for the anchor was fixed in the appropriate place and that is the thing for the moment
Cheers, Daniel
Re: By the Deep 17
Posted: Sat May 04, 2013 3:35 am
by JIM BAUMANN
.....fascinating, as a good friend of mine would say....
so that is today's complete UNDER-statement!!!!!!!
Truly stunning dedication
I like the twin plane grinder!!!
JB
Re: By the Deep 17
Posted: Sun May 05, 2013 3:30 am
by Chlo� Plattner
Hi Daniel,
I am deeply impressed of your colouring studies and of course the results.

Very encouraging and simply stunning.
with best regards
Peter
Re: By the Deep 17
Posted: Sun May 05, 2013 7:04 am
by LE BOSCO
hello Daniel
as always, it is a pleasure to see your Productions
it's really very original
cheers
Nicolas
Re: By the Deep 17
Posted: Mon May 06, 2013 8:30 am
by dafi
Thank you Sirs, my pleasure
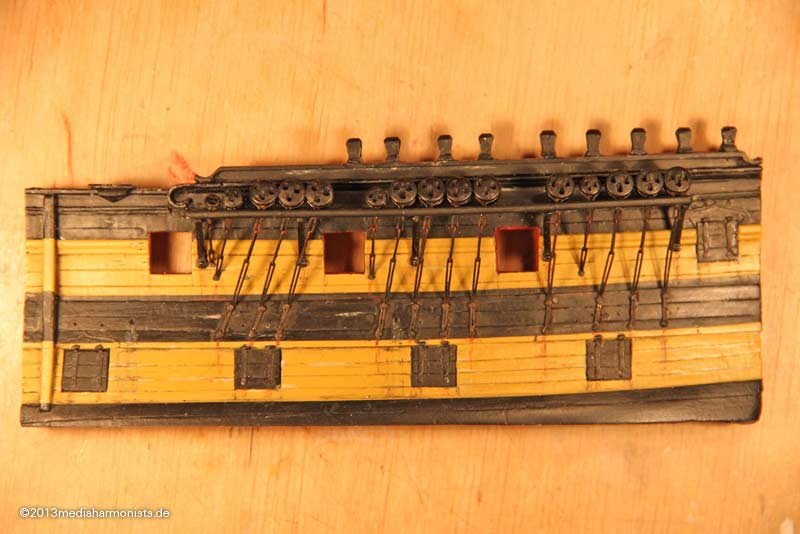
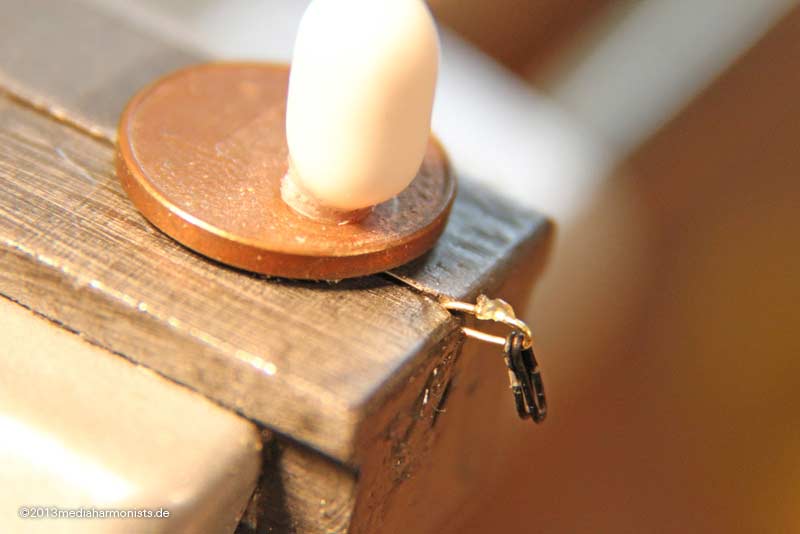
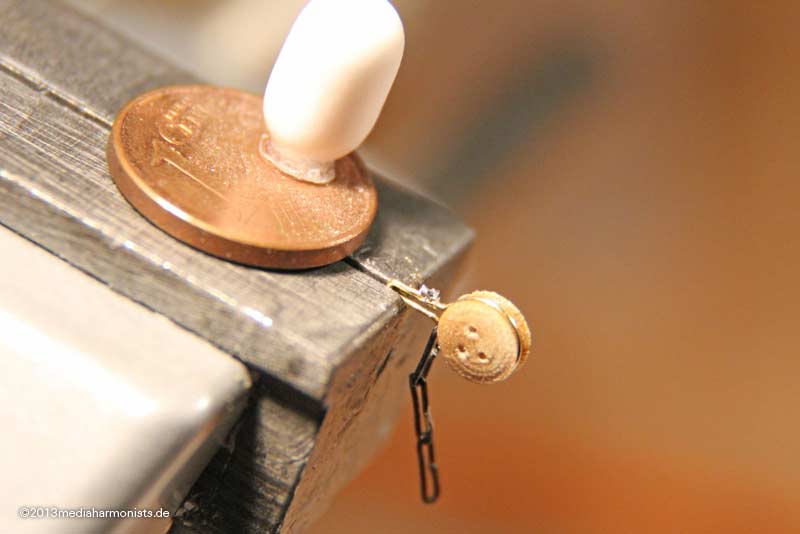
... and the weekend show, some quantum leaps - means very small and little
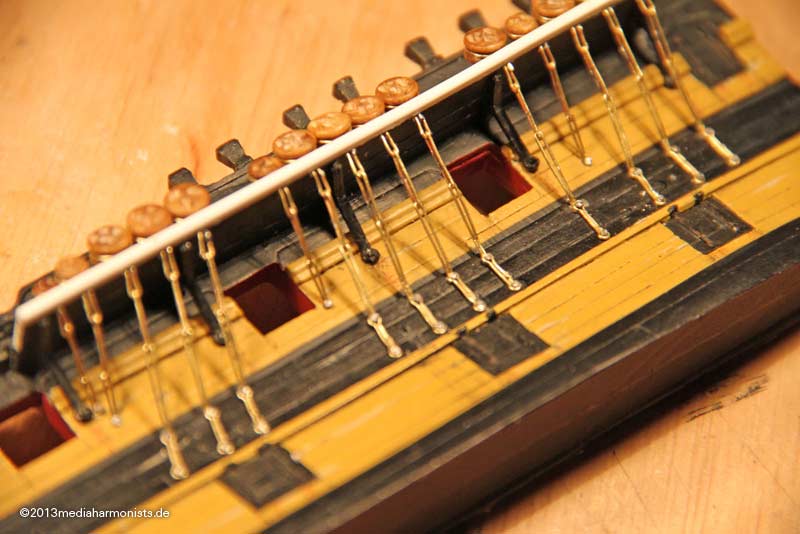
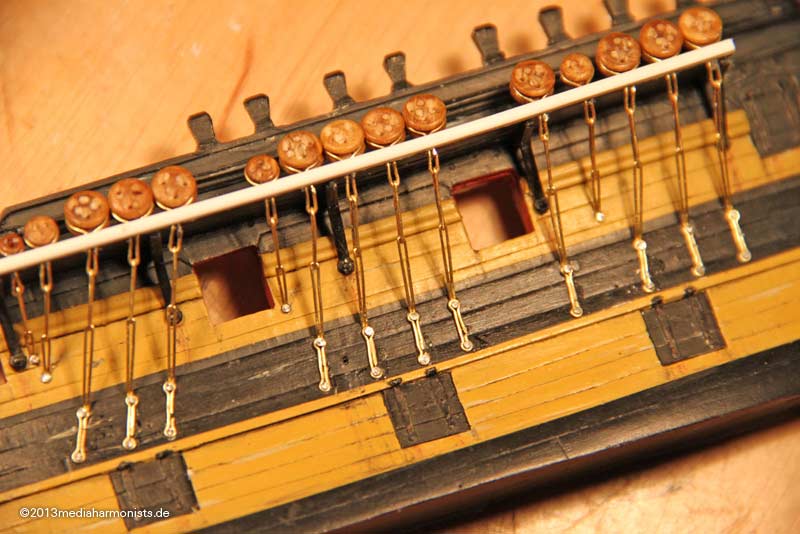
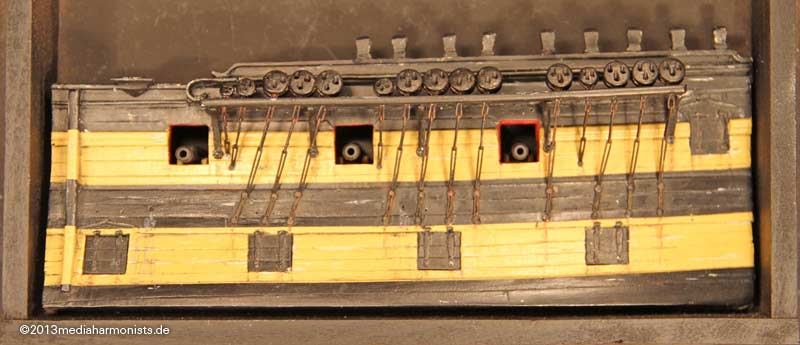
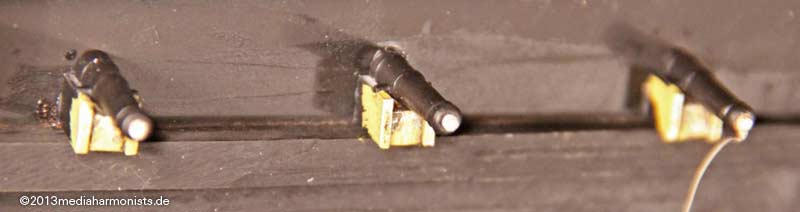
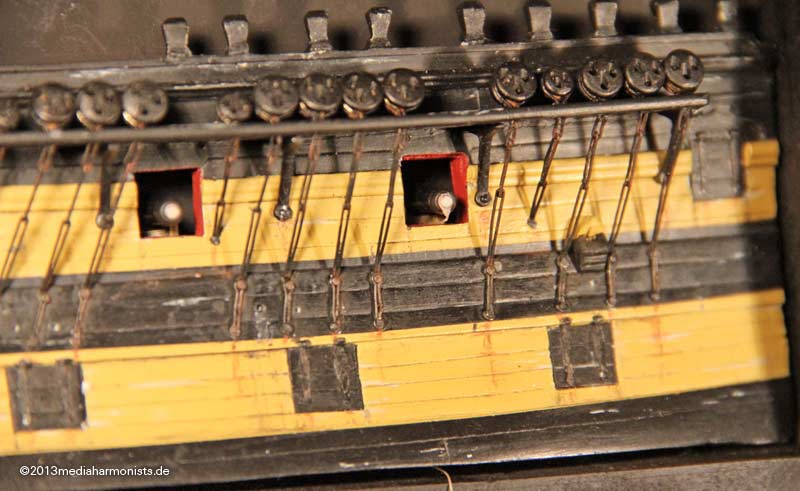
fitted the last lid ...
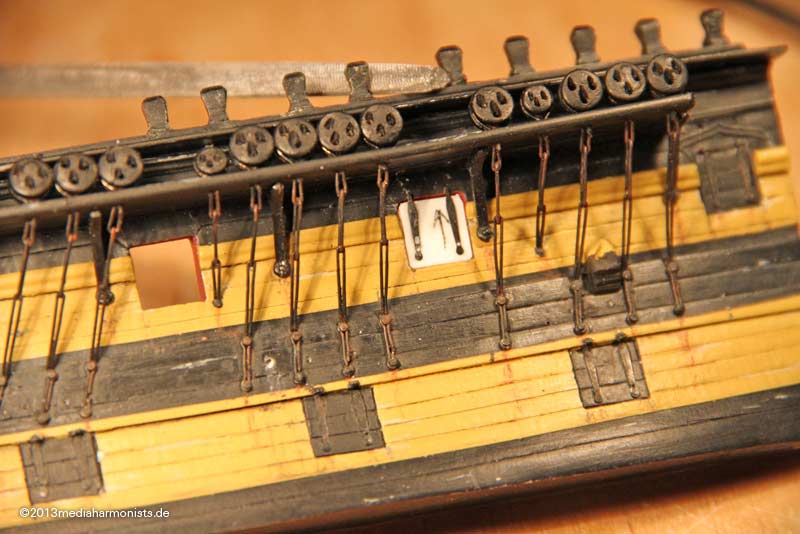
... and fitted with lanyards.
The holes in the brass fittings were deepend into the plastic by means of a hot needle ...

... so the brass is not damaged like with a drill and the deep is automatically fixed by the cones of the needle tip and the size of the hole in the fitting ...
... and it looks like this.
Gr��le, Daniel
Re: By the Deep 17
Posted: Mon May 06, 2013 8:38 am
by sgtryan13
Absolutely beautiful! That being said, I am now certain that you are in fact insane, and should be institutionalized for this amount of detailing!
Re: By the Deep 17
Posted: Sat May 18, 2013 2:28 pm
by dafi
Thanks and guess from where I am witing
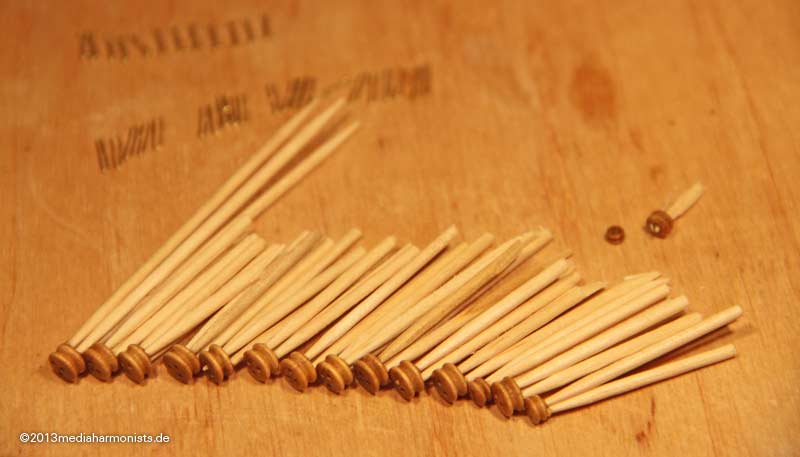
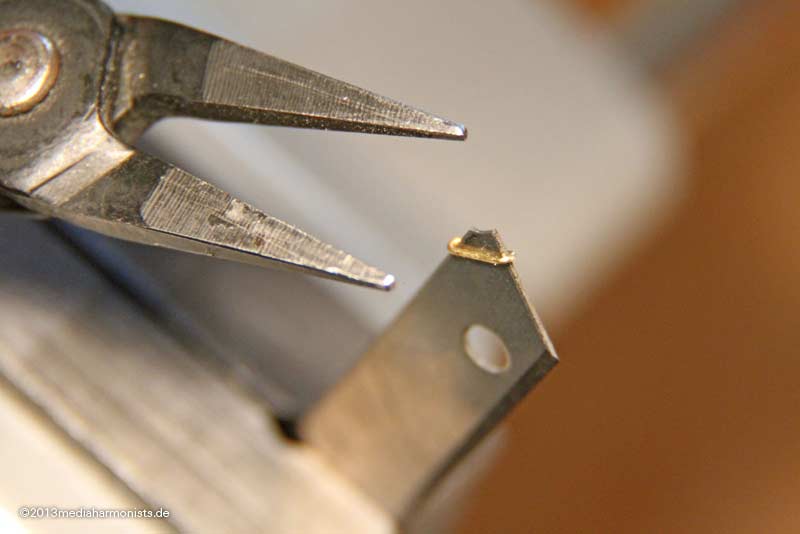
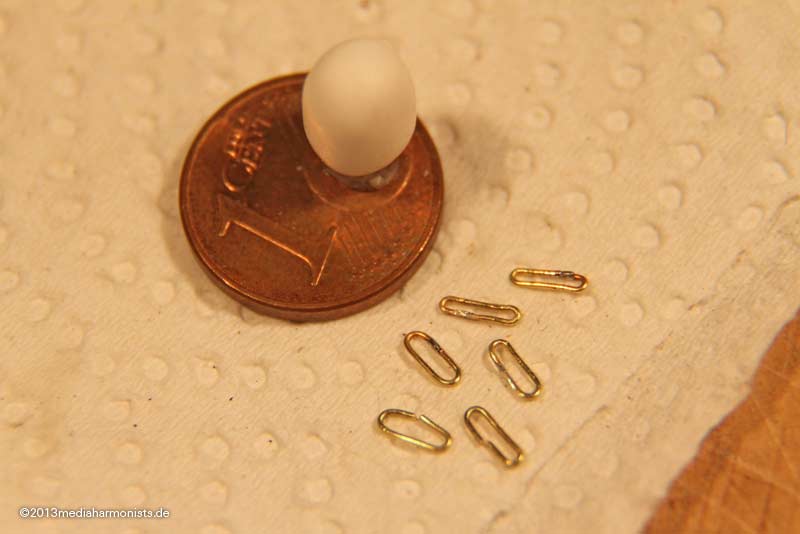
And more tempting as the 1803 chain irons are the 1765 ones: same length but two pieces more!
Testing the lengths, carefully remembering that the outer ones are longer.
... homeopathic doses of solder ...
... degreased the wire, first soldering the single rings, then joining them on the central part, the flux with the solder embedded, small touch with the hot iron ...
... and the same game with the dead eye and the triple pack ...
... adjusting over the edge of a blade ...
... and comparison: bottom as cut, then solderd and on top adjusted. Inside length 4 mm
Re: By the Deep 17
Posted: Sat May 18, 2013 2:32 pm
by dafi
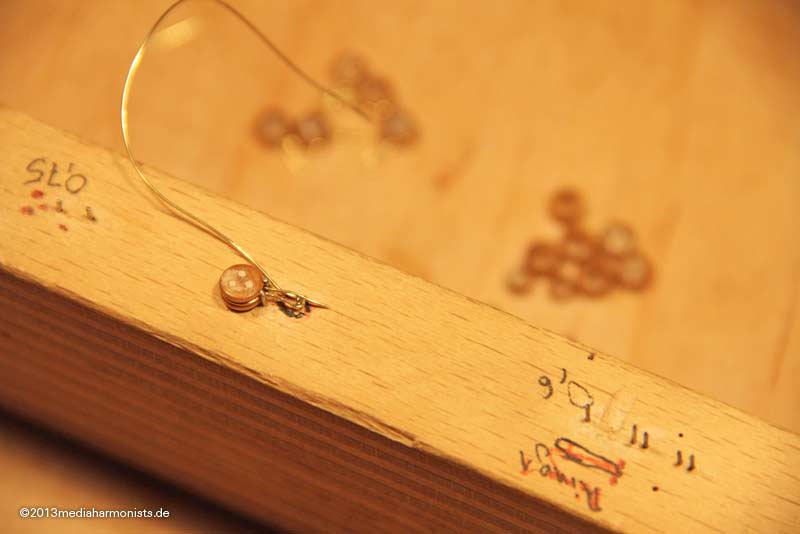
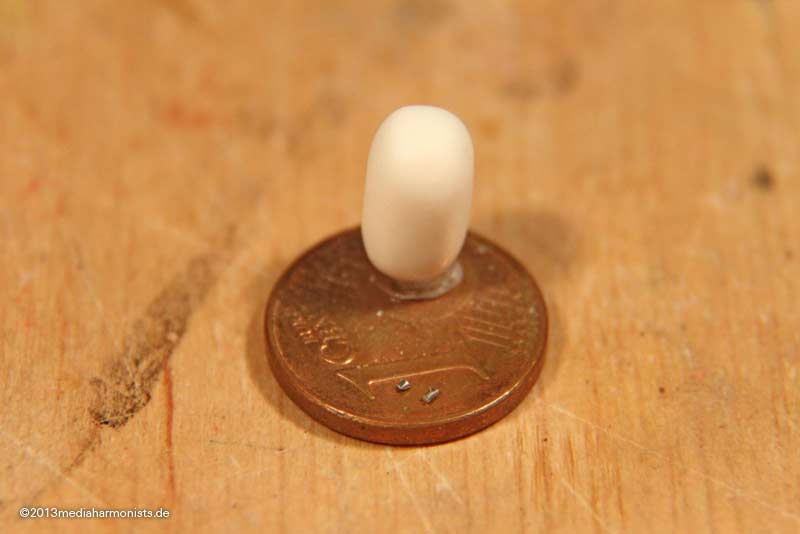
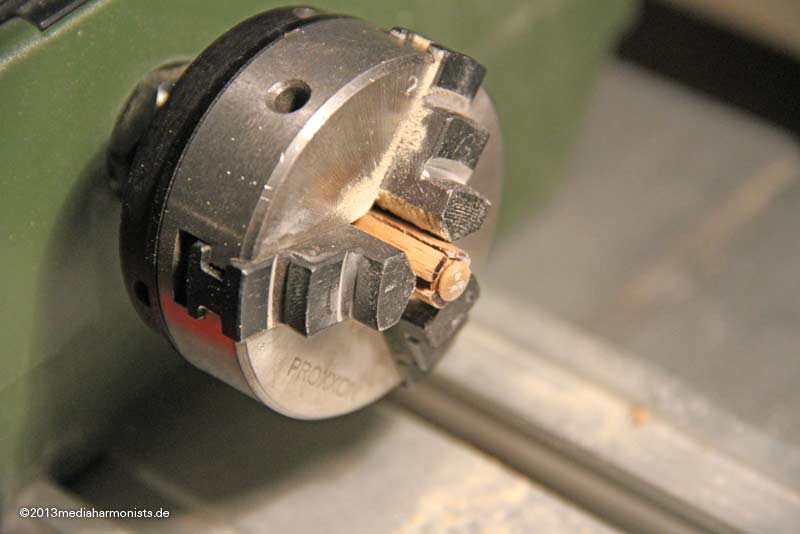
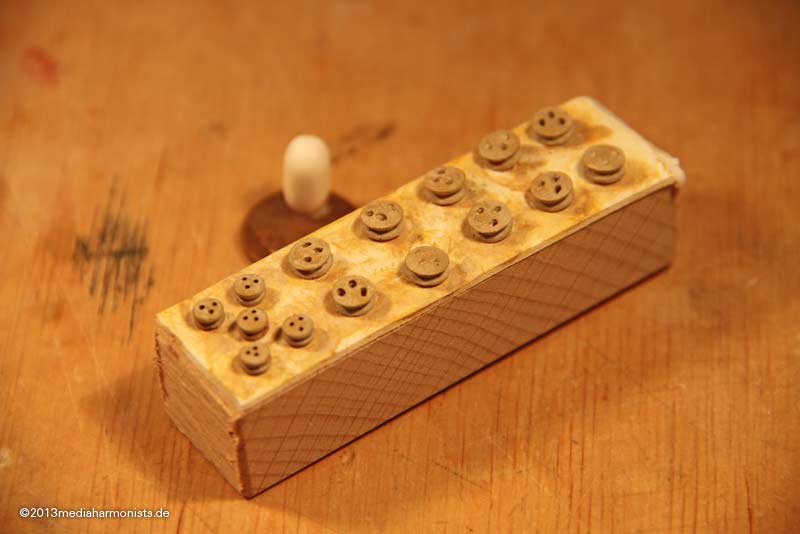
A small jack done for thinning the deadeyes ...
... and painting them with casein paint to give a better to scale wood appearance than the original wood ...
... put on place ...

... and painted and rusted.
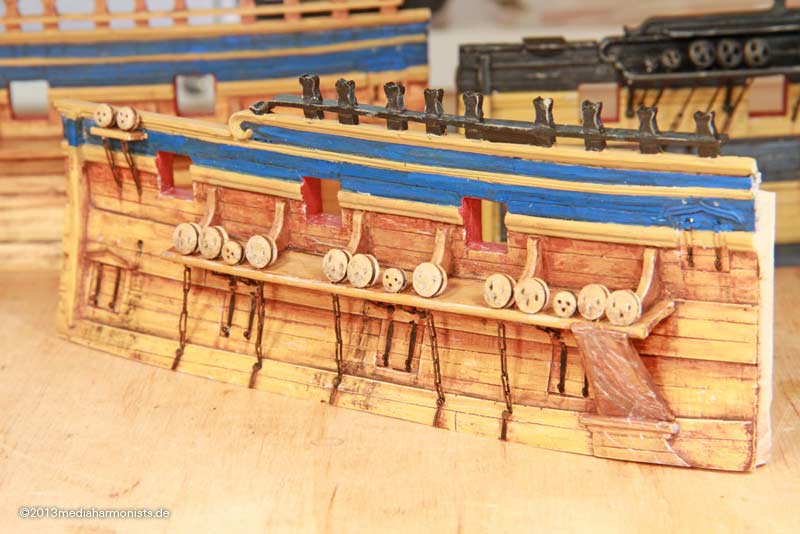
And here the comparison: twice the same ship, just at different times
Cheers, Daniel
Re: By the Deep 17
Posted: Sat May 18, 2013 2:56 pm
by Chlo� Plattner
Hi Daniel,
I truly love your artistic approach to modelling. Fantastic work! Your studies are more than helpfull.
Where did you get your Kasein colours if I may ask?
Cheers Peter