1/200 Arizona to Pennsylvania Conversion
Posted: Sun Jan 31, 2016 2:21 pm
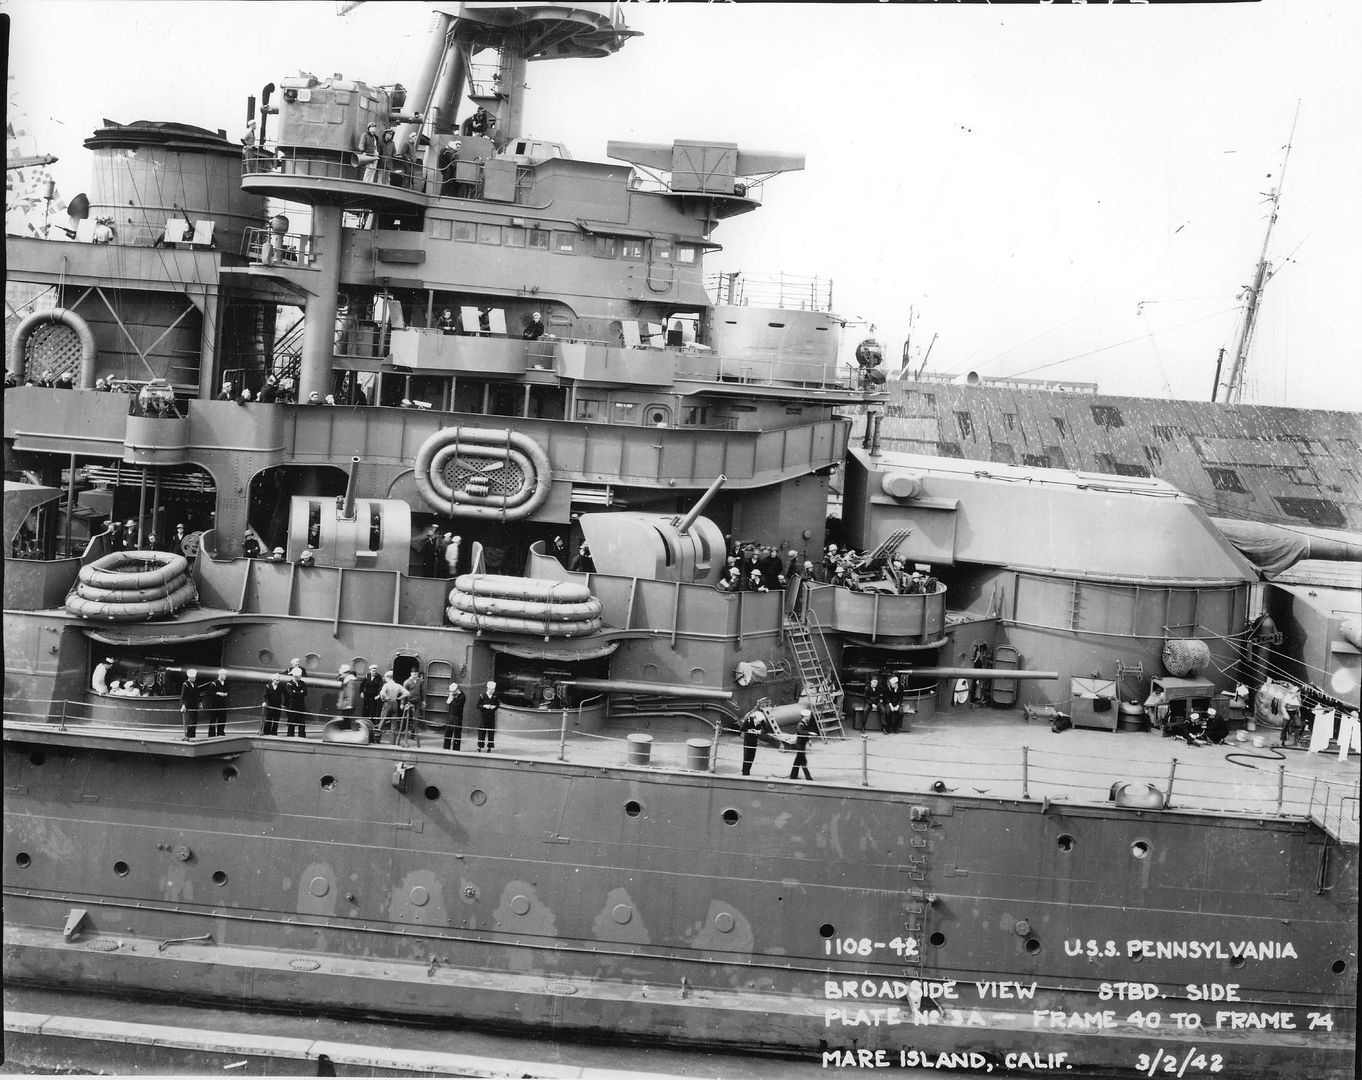
Okay, I had been pondering doing this for some time. I have always been interested in the Arizona's less famous sister ship, USS Pennsylvania, BB38. I won't go into history or details as there is an abundance of it on the internet. Sufficient though is that being sister ships, someone noted they weren't identical twins. I knew what the differences were, but not sure how to go about modeling them as references and good photo's were hard to come by, apparently the Arizona got all the attention. Enter Model Monkey (Steve Larsen) and Shapeways. Now, the modeler has at least a starting point for converting the Trumpeter 1/200 Arizona into a respectable looking Pennsylvania. As I began to research the Pennsy, I noted that there were actually more differences than similarities, superstructure notwithstanding. My build will try to highlight those major differences. I am not sure at this point how far I want to go with creating the differences, because as the build progresses I will highlight these differences and may have to leave them as the kit intended them to be. I am not a skilled scratchbuilder nor do I possess the patience or the draftsmanship to enter that realm. Another modeler here on the forum succinctly stated: "representation, not duplication." As this is a model, will strive within my skillset to best represent the Pennsylvania as it appeared during the time frame of August - December 1941. So; let's get started.
To begin with, the obvious. I used the Trumpeter 1/200 kit of the USS Arizona, warts and all. Having built the Arizona, when I was finished after a little over a years work, I came to the: "Now what?" I answered that with the Pennsylvania. I then ordered the Model Monkey 1/200 Pennsylvania 1941 Superstructure:
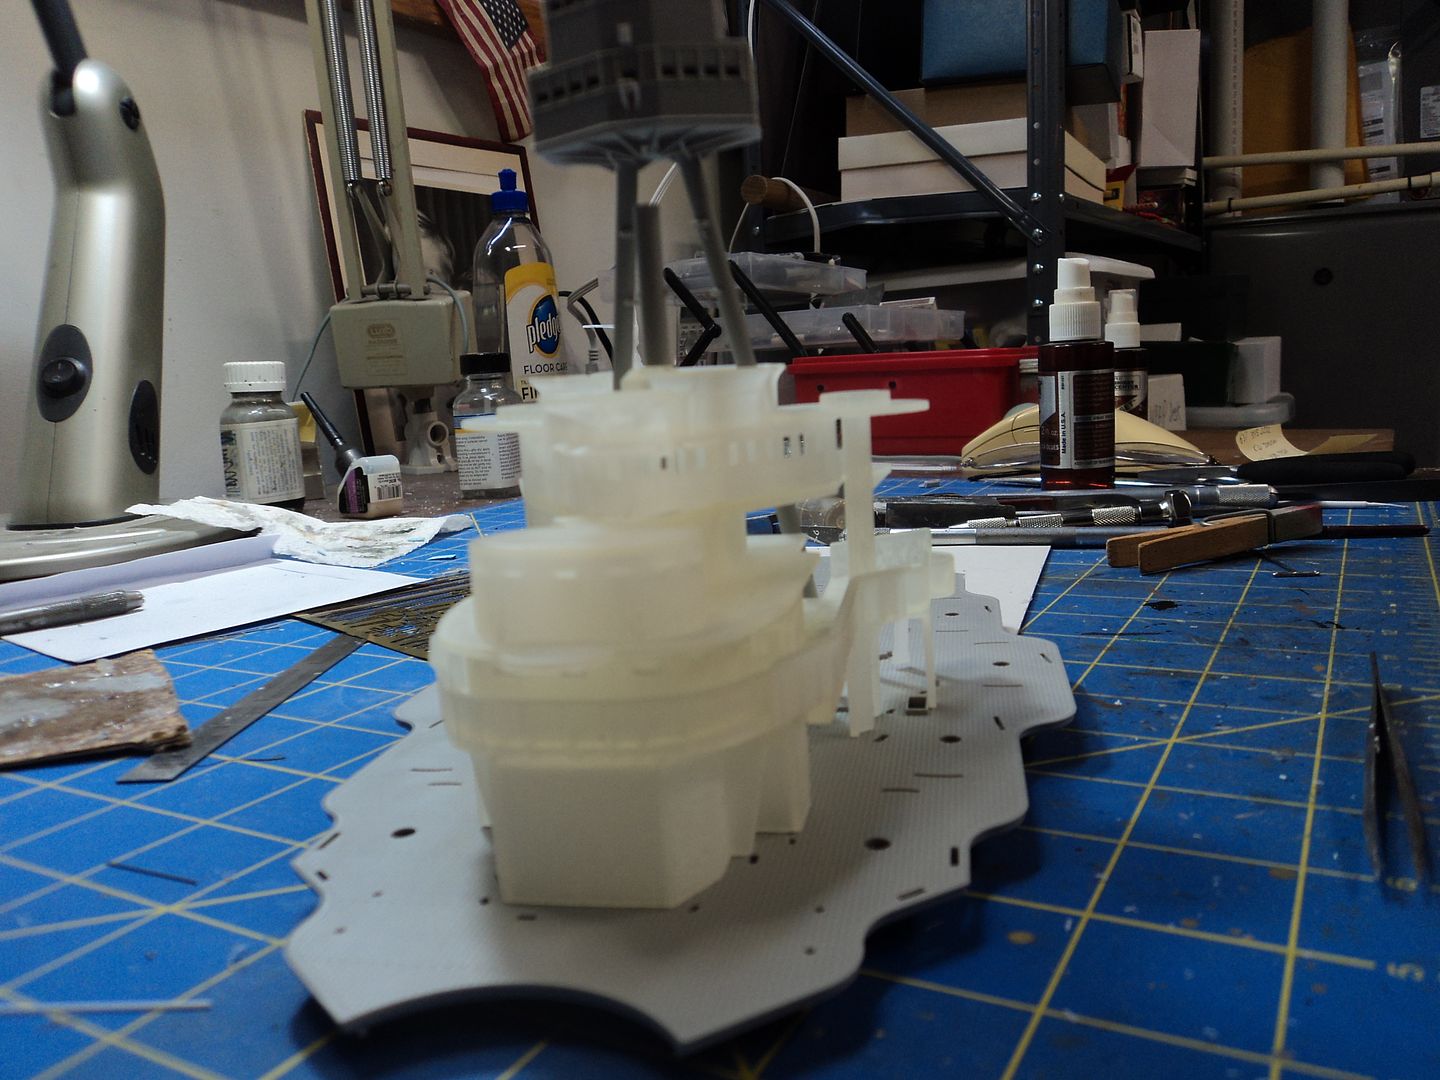
It arrived in good order. I sanded it down per the guidance and began to drill holes for the fittings that needed to go on, searchlights, signal lamps, pelorus', binnacle, directors etc.
I also set it on the superstructure deck and inserted the main legs of the foremast for fitment. As you can see, it fits pretty good.
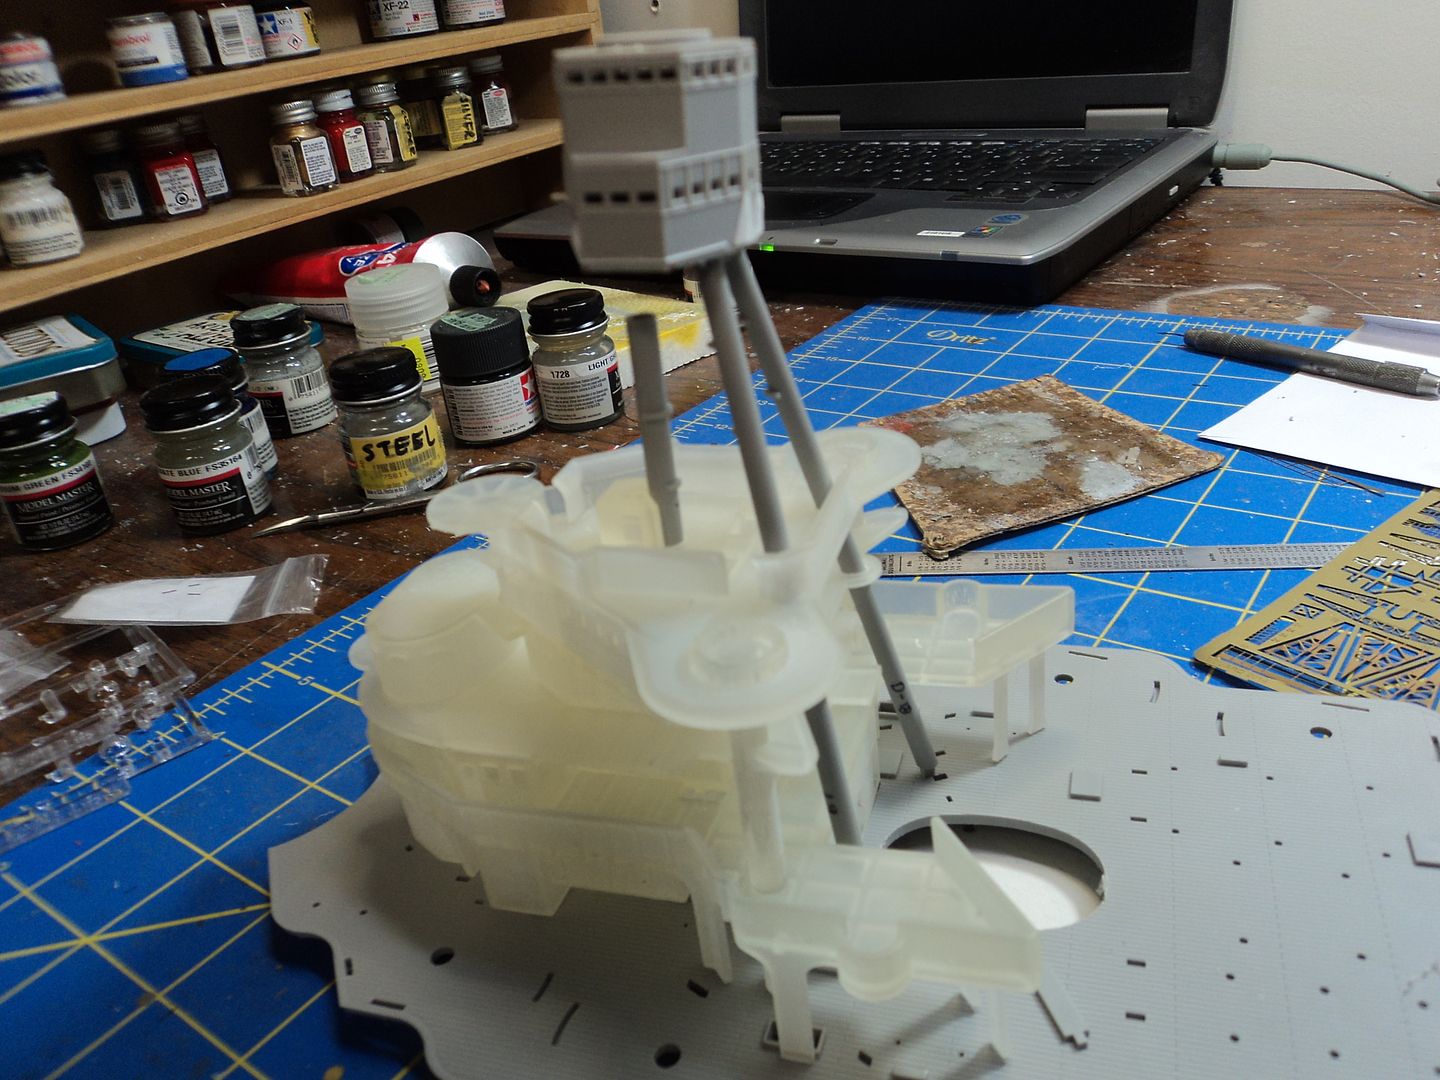
The doorways and portholes are open for the modeler to choose how he wants to present the doors and portholes.
After reviewing the Mare Island photo's I began adding details like the flag bags, the halyard "tying off stanchion" drilling holes for the fittings, adding doors, ladders and companionway railings.
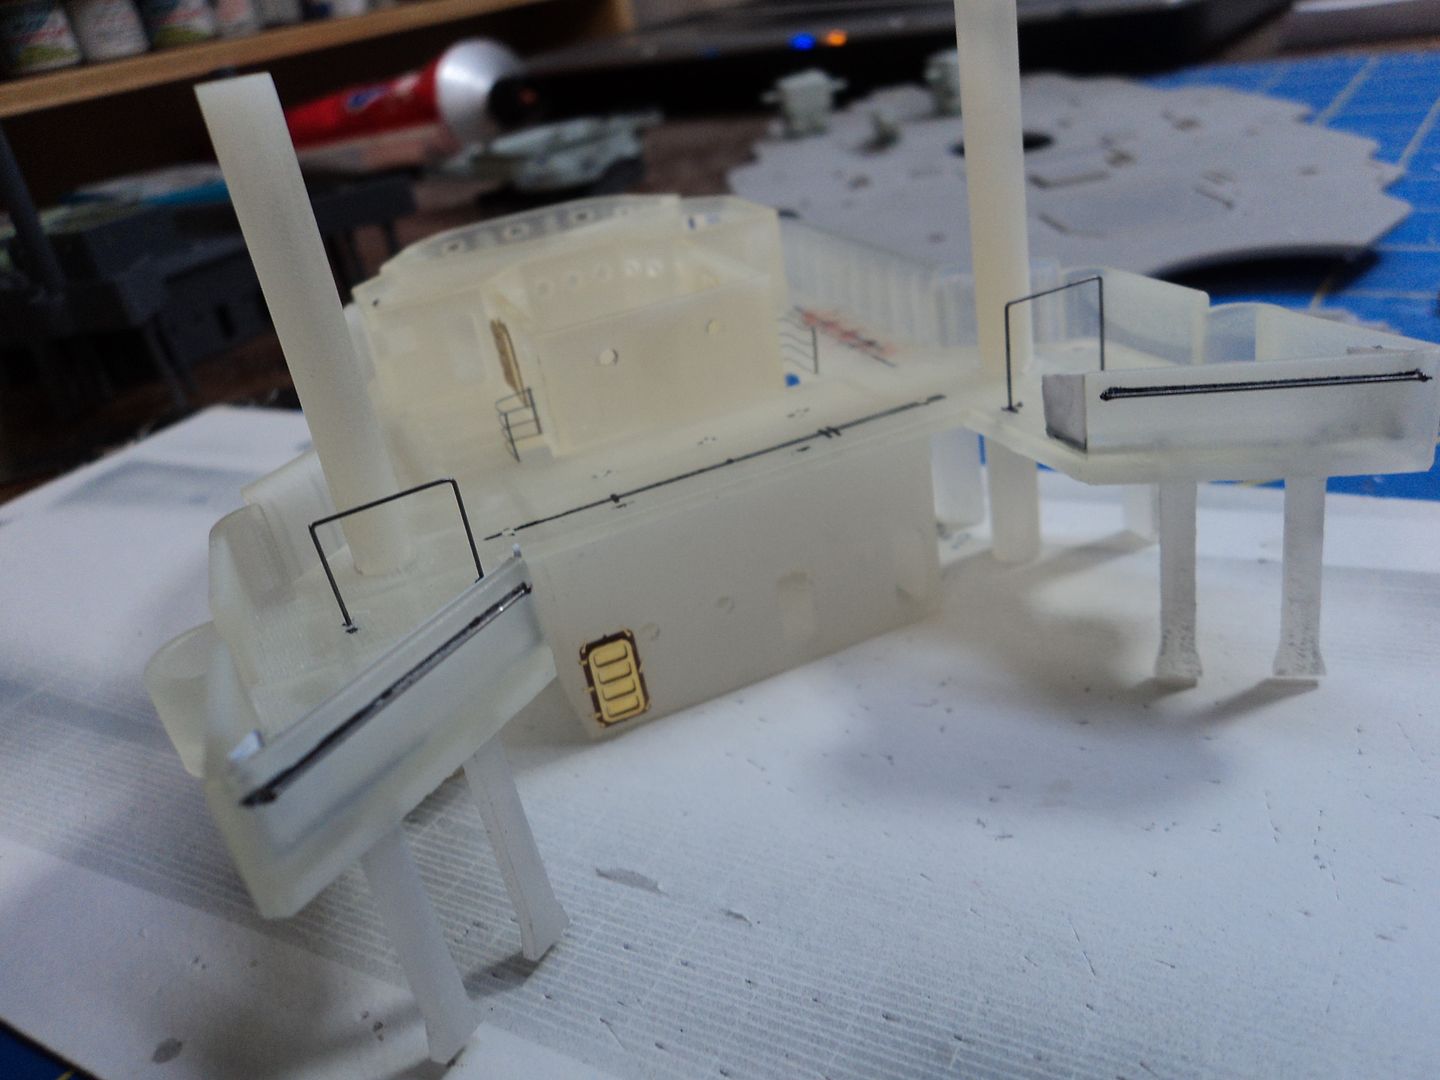
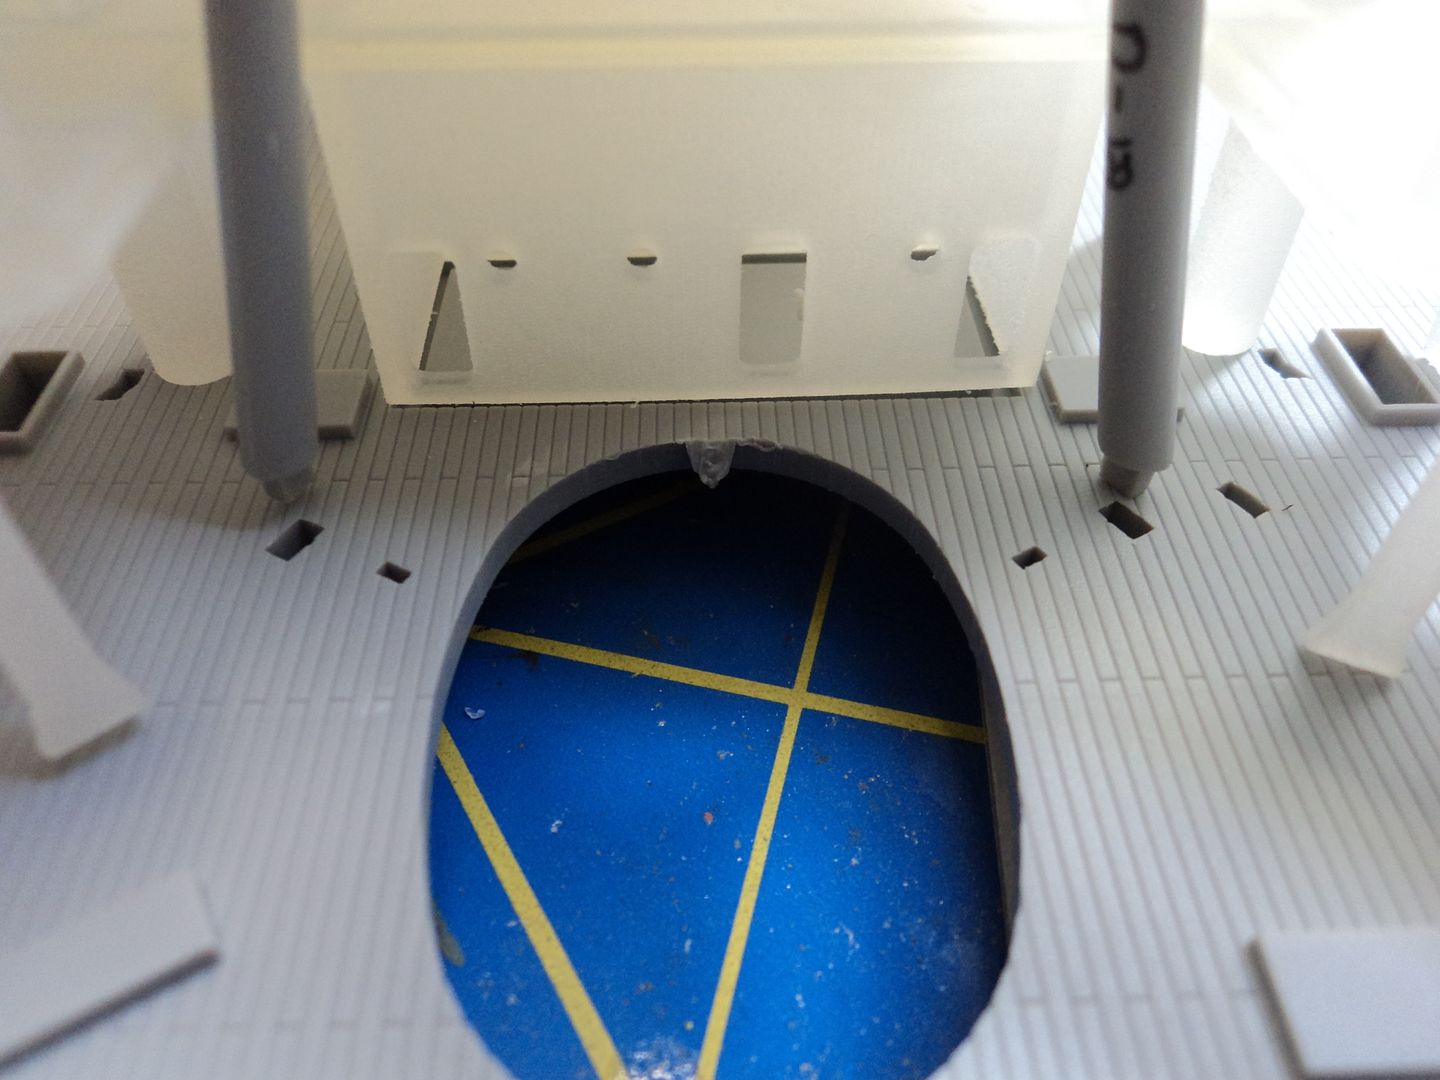
One of the more noteworthy ID Keys to BB38 is the abundance of pillars or stanchions. To properly place these I drilled holes through the signal deck. What is nice with this 3D printed superstructure is that Steve included the underdeck supports. I drilled these out prior to painting as the material is transluscent you can see the supports allowing the modeler to properly mark off the stanchion locations with a sharpie, which is precisely what I did. You can see these marks along the sides. I will mention here that this is my second superstructure bottom as I knocked the original one off my bench and it broke. I immediately went into panic mode and asked Steve if he could send or make just the bottom, which he did. Once I had overcome this panic attack, I fixed the broken one and used it as a test and fit bed. I found out that by not painting it right away, I could correctly mark off the stanchion drilling points. An expensive lesson learned. Here too you can see the railing for the flag bag canvas and the halyard attaching structure. These were made by eyeballing the photo's of the ship at Mare Island.
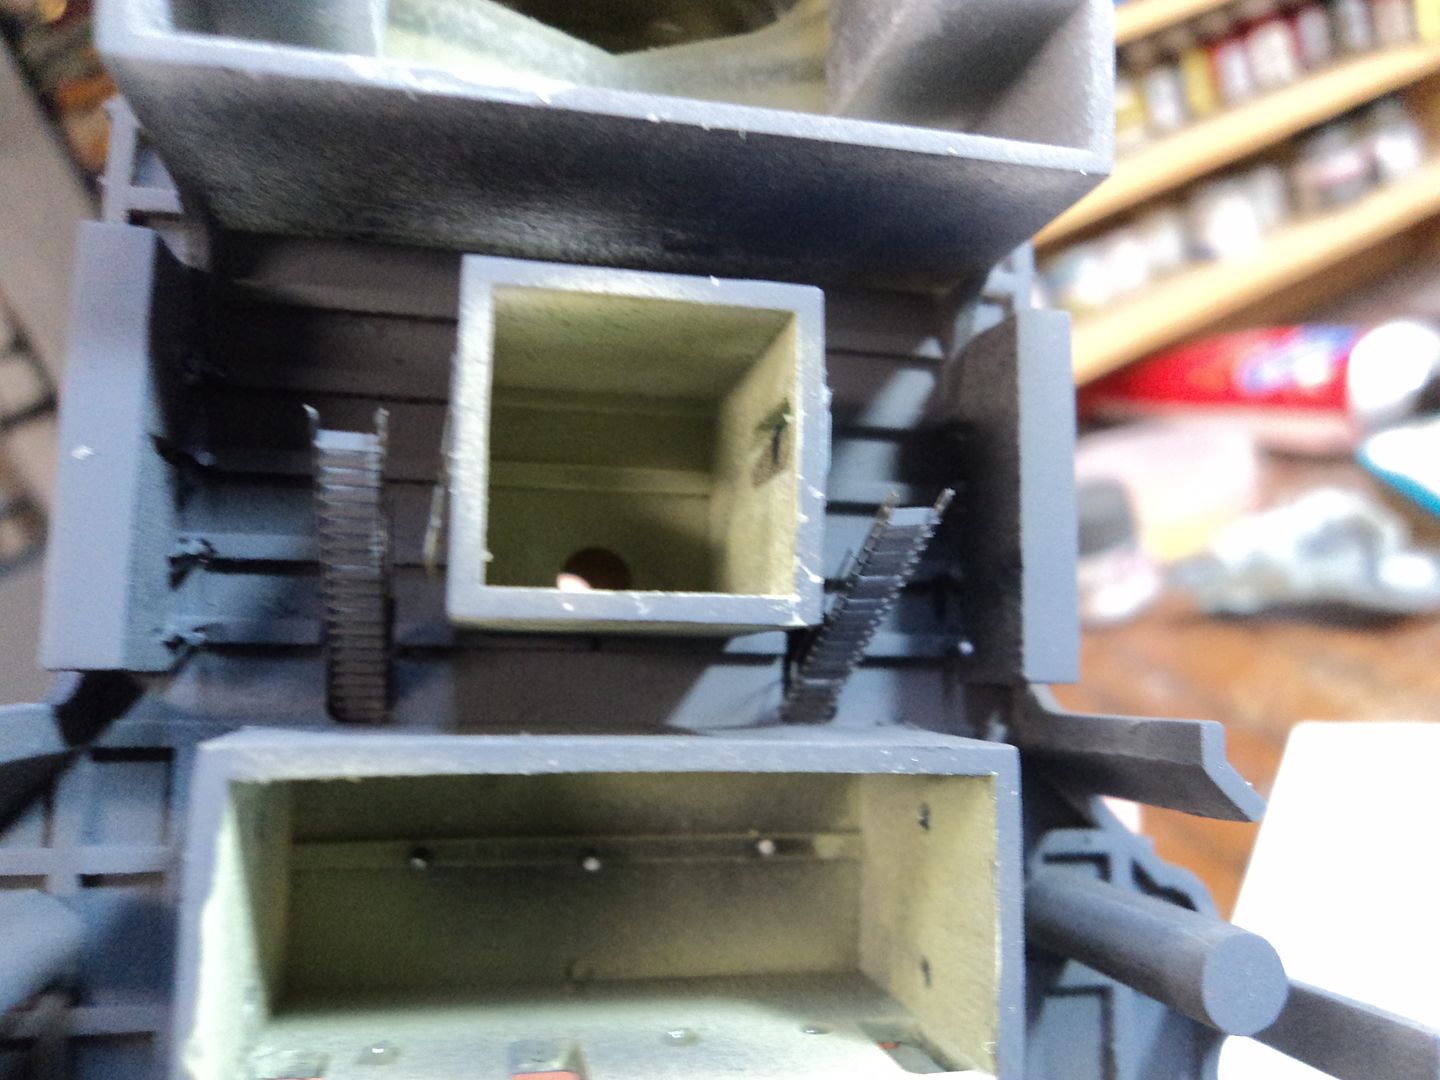
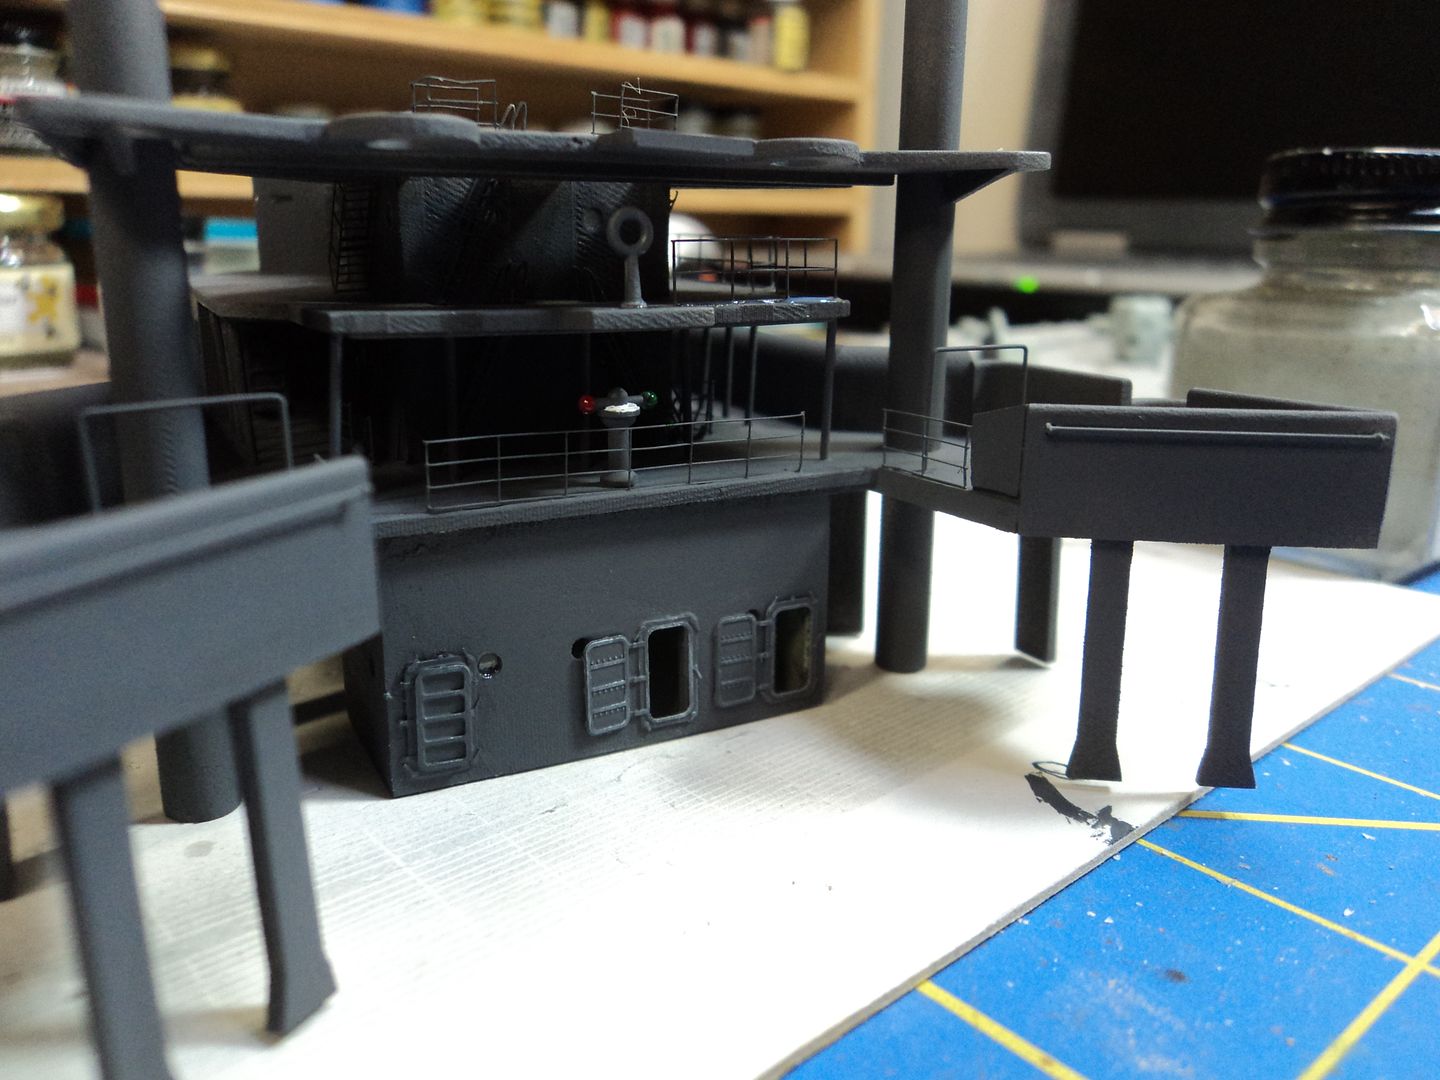
This next photo is the underside after painting. You can see the ladders and the compartment. After I placed the doors and the ladders I noticed that the ladders interfered with the doors, oh well. I also painted the interior Tamiya XF21. When I was on board ship as a Marine, I noticed that some of the compartments were painted a light pea green, so I opted for that for all the interior spaces, I think below decks they would have been white. You can also see the holes for the stanchions.
As the Pennsylvania was in Measure 1 5-D, I painted the surfaces Tamiya XF-24 Dark Grey. It is a close match to the Snyder and Short paint chip set that I have. A side note about painting. Steve recommends using Acrylics for the 3D printed parts. I use Tamiya Acrylics thinned with Methyl Ethyl Ketone, (MEK) and yes I use a respirator. There was no adverse affect to the material and the paint dried quickly with good sticking properties. I experimented with Testors Model Master Enamels, painted over the Tamiya paint, figuring the Tamiya paint would act as a barrier. It took days for the Testors paint to dry. I would not recommend using Enamels per Steve's guidance.
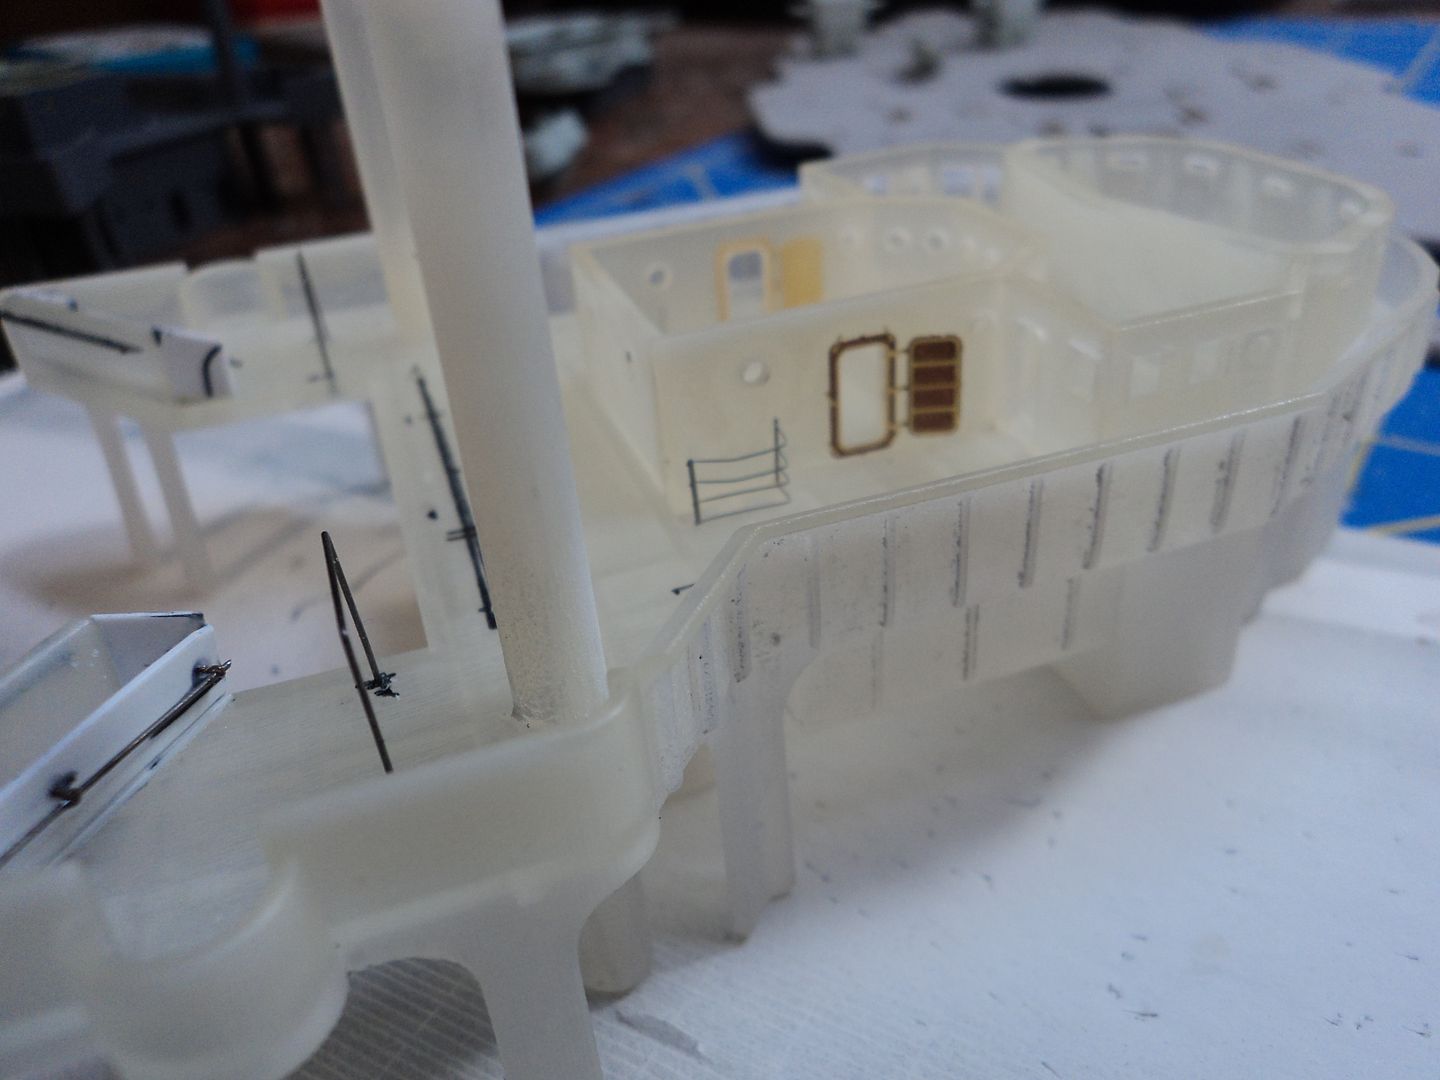
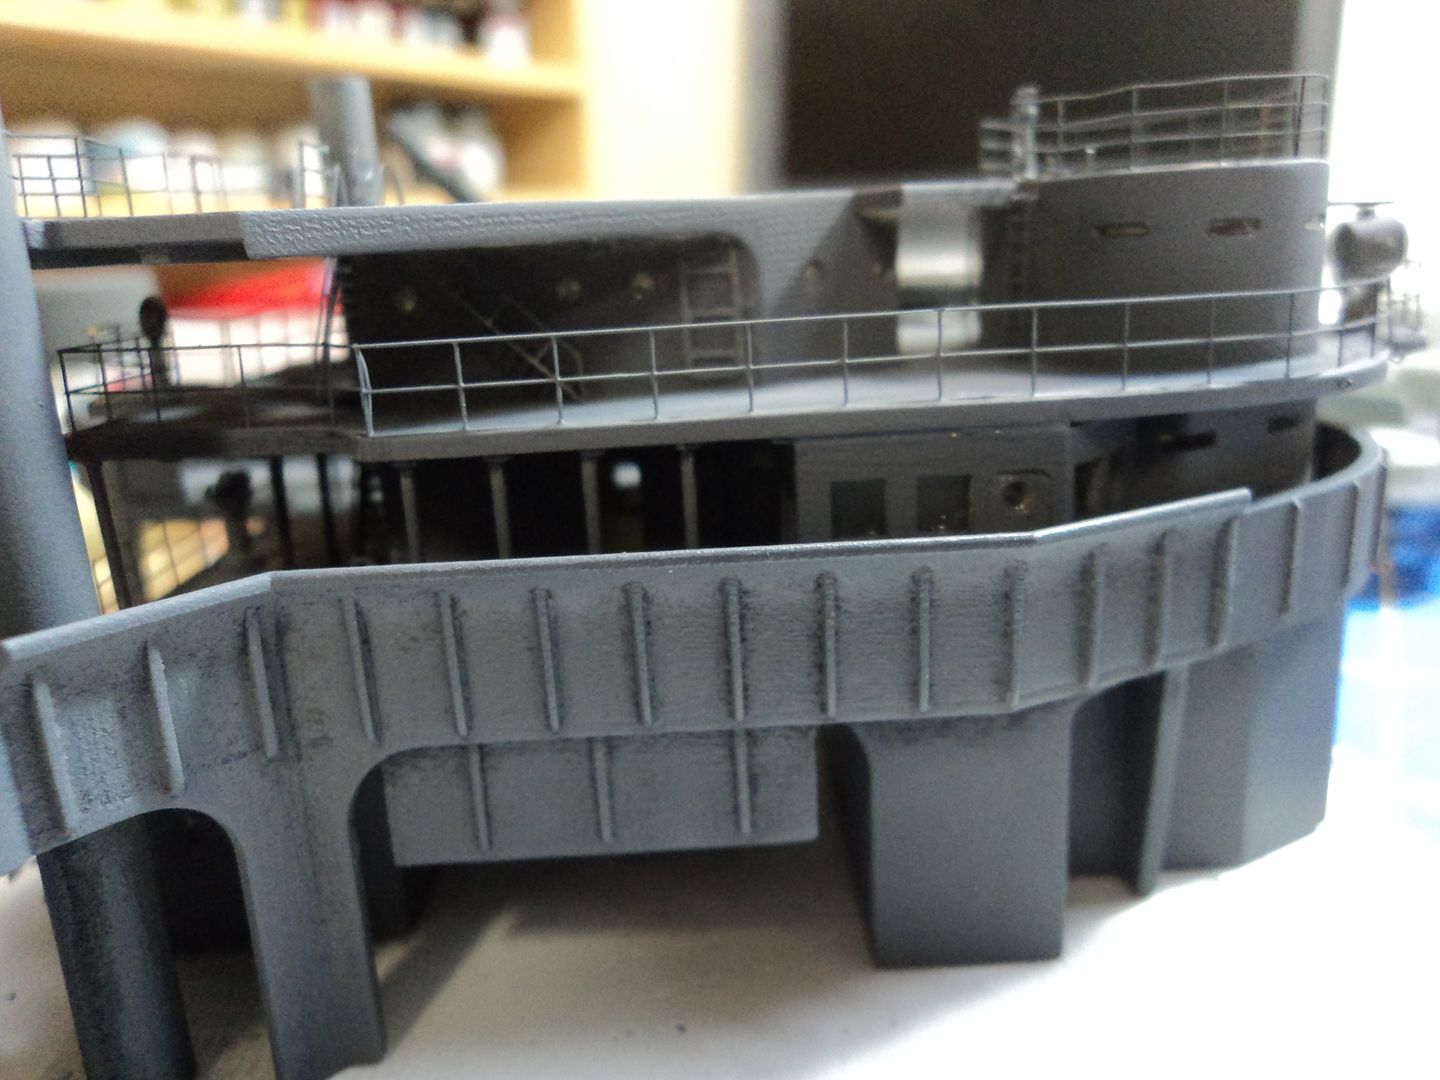
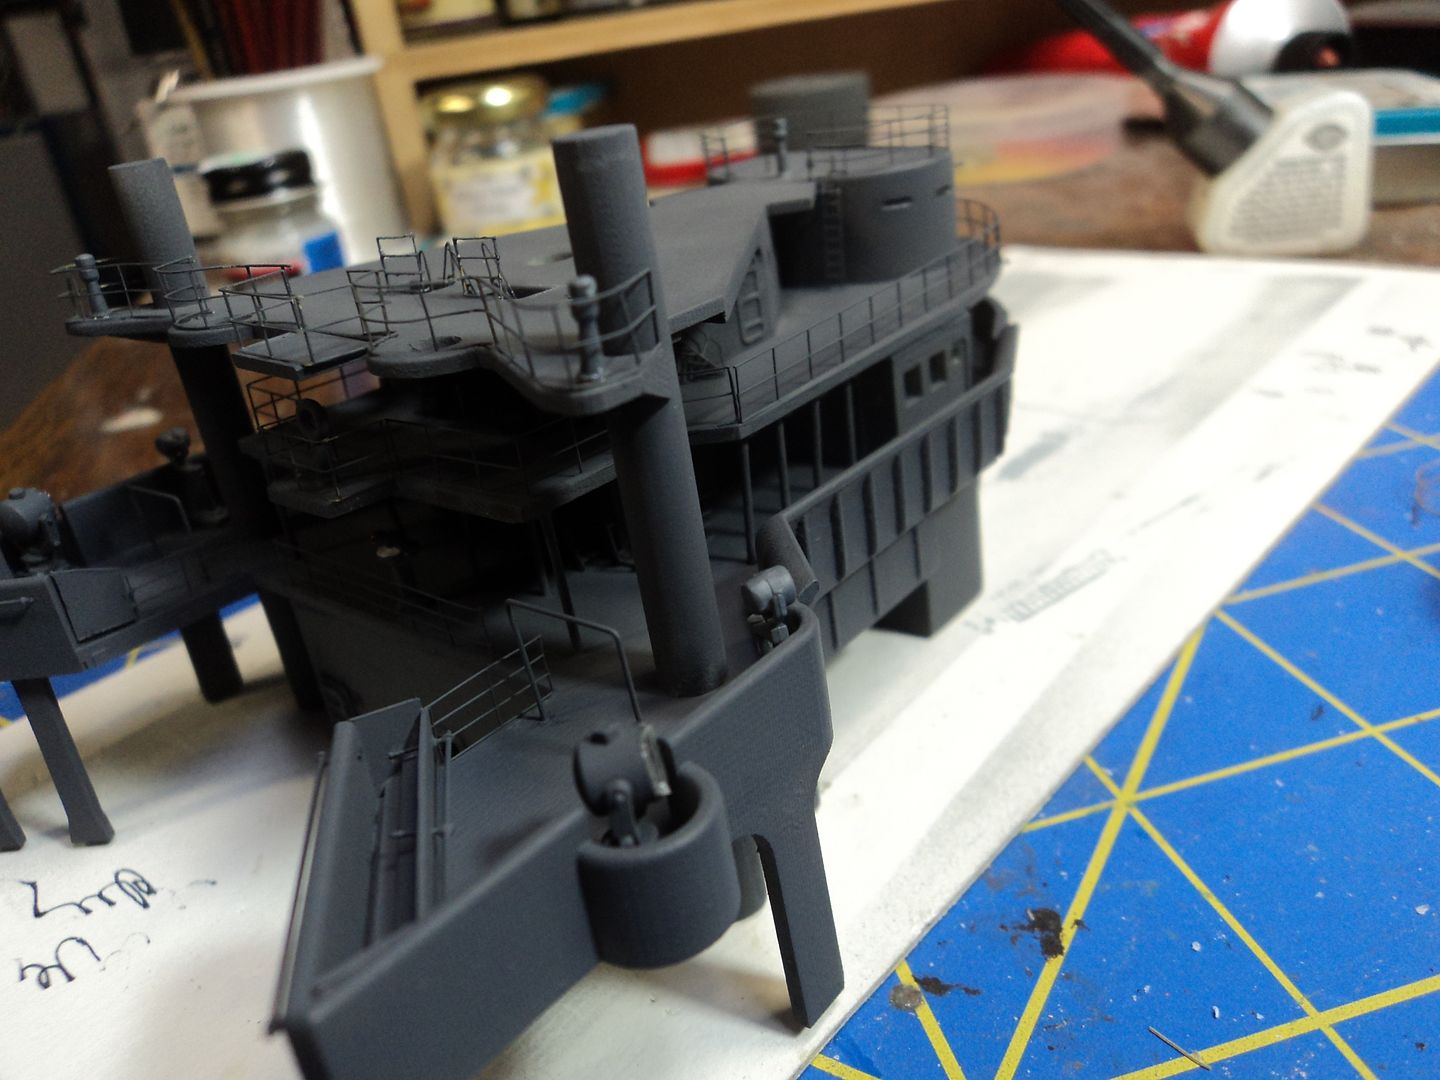
The below picture shows the superstructure signal bridge and command bridge pieces assembled and painted. I spent a lot of time scoping out pictures to ensure proper placement of rigging attachment points, ladders, rungs etc.
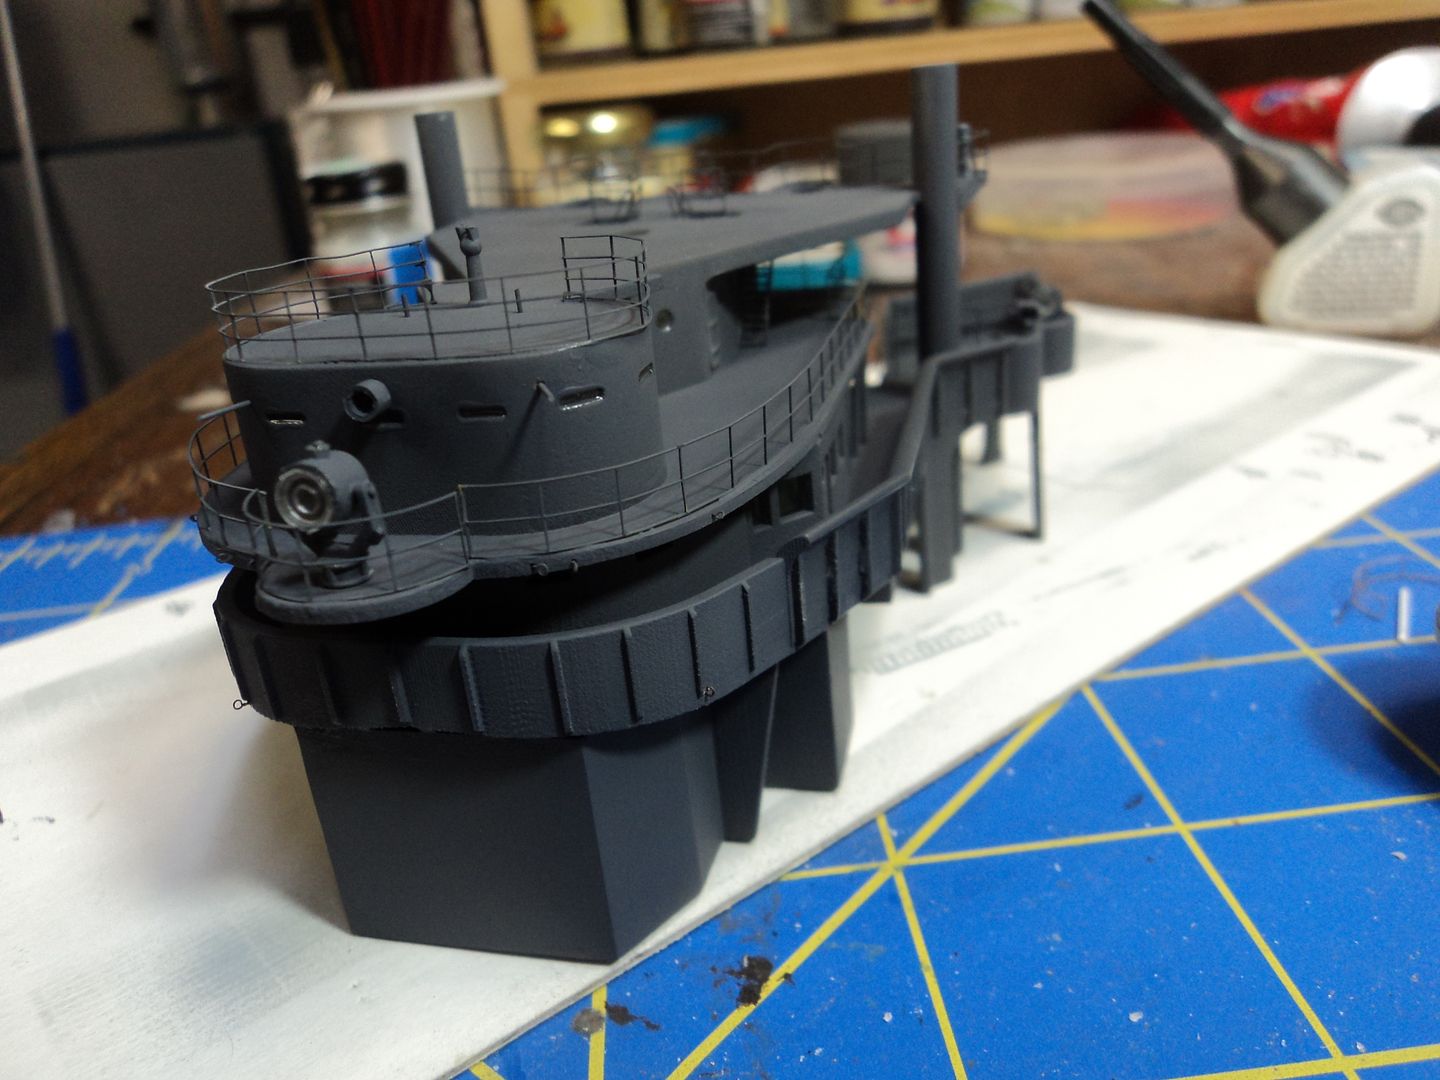
Once I had all the holes drilled for the stanchions/pillars, I pushed them through the underside and using super glue, glued them in place securing them to the overhead and applying a drop in the hole where the plastic went through. Once set, i cut off the plastic from the underside. I used Bob's Buckles eyelets for rigging attachment points. I drilled holes into the deck side and inserted the eyelet per the reference. There seemed to be a loudspeaker located at the front of the citadel, I found a piece of rounded plastic in a scrap pile and used it for the loudspeaker. The railing is from the kit. Doors are from the Eduard Superstruture set for the Arizona. All the PE so far is either from the kit or the Eduard set.
After scoping out more photo's of the ship at Mare Island, I realized there was a searchlight platform on the air defense level, where that little structure is located between the mast legs. There is also a deck below it with a railing and a ladder going to the next level down, so I had to add some decks. I took artistic license as there were none shown on the Chesley drawing and photo's were unclear.
In the next installment, I will list my references, paints and aftermarket accessories that I used as well to assist the modeler who wants to do this conversion.
Until that time
To begin with, the obvious. I used the Trumpeter 1/200 kit of the USS Arizona, warts and all. Having built the Arizona, when I was finished after a little over a years work, I came to the: "Now what?" I answered that with the Pennsylvania. I then ordered the Model Monkey 1/200 Pennsylvania 1941 Superstructure:

It arrived in good order. I sanded it down per the guidance and began to drill holes for the fittings that needed to go on, searchlights, signal lamps, pelorus', binnacle, directors etc.
I also set it on the superstructure deck and inserted the main legs of the foremast for fitment. As you can see, it fits pretty good.

The doorways and portholes are open for the modeler to choose how he wants to present the doors and portholes.

After reviewing the Mare Island photo's I began adding details like the flag bags, the halyard "tying off stanchion" drilling holes for the fittings, adding doors, ladders and companionway railings.


One of the more noteworthy ID Keys to BB38 is the abundance of pillars or stanchions. To properly place these I drilled holes through the signal deck. What is nice with this 3D printed superstructure is that Steve included the underdeck supports. I drilled these out prior to painting as the material is transluscent you can see the supports allowing the modeler to properly mark off the stanchion locations with a sharpie, which is precisely what I did. You can see these marks along the sides. I will mention here that this is my second superstructure bottom as I knocked the original one off my bench and it broke. I immediately went into panic mode and asked Steve if he could send or make just the bottom, which he did. Once I had overcome this panic attack, I fixed the broken one and used it as a test and fit bed. I found out that by not painting it right away, I could correctly mark off the stanchion drilling points. An expensive lesson learned. Here too you can see the railing for the flag bag canvas and the halyard attaching structure. These were made by eyeballing the photo's of the ship at Mare Island.

This next photo is the underside after painting. You can see the ladders and the compartment. After I placed the doors and the ladders I noticed that the ladders interfered with the doors, oh well. I also painted the interior Tamiya XF21. When I was on board ship as a Marine, I noticed that some of the compartments were painted a light pea green, so I opted for that for all the interior spaces, I think below decks they would have been white. You can also see the holes for the stanchions.

As the Pennsylvania was in Measure 1 5-D, I painted the surfaces Tamiya XF-24 Dark Grey. It is a close match to the Snyder and Short paint chip set that I have. A side note about painting. Steve recommends using Acrylics for the 3D printed parts. I use Tamiya Acrylics thinned with Methyl Ethyl Ketone, (MEK) and yes I use a respirator. There was no adverse affect to the material and the paint dried quickly with good sticking properties. I experimented with Testors Model Master Enamels, painted over the Tamiya paint, figuring the Tamiya paint would act as a barrier. It took days for the Testors paint to dry. I would not recommend using Enamels per Steve's guidance.
The below picture shows the superstructure signal bridge and command bridge pieces assembled and painted. I spent a lot of time scoping out pictures to ensure proper placement of rigging attachment points, ladders, rungs etc.


Once I had all the holes drilled for the stanchions/pillars, I pushed them through the underside and using super glue, glued them in place securing them to the overhead and applying a drop in the hole where the plastic went through. Once set, i cut off the plastic from the underside. I used Bob's Buckles eyelets for rigging attachment points. I drilled holes into the deck side and inserted the eyelet per the reference. There seemed to be a loudspeaker located at the front of the citadel, I found a piece of rounded plastic in a scrap pile and used it for the loudspeaker. The railing is from the kit. Doors are from the Eduard Superstruture set for the Arizona. All the PE so far is either from the kit or the Eduard set.

After scoping out more photo's of the ship at Mare Island, I realized there was a searchlight platform on the air defense level, where that little structure is located between the mast legs. There is also a deck below it with a railing and a ladder going to the next level down, so I had to add some decks. I took artistic license as there were none shown on the Chesley drawing and photo's were unclear.

In the next installment, I will list my references, paints and aftermarket accessories that I used as well to assist the modeler who wants to do this conversion.
Until that time


