Page 1 of 9
Planking the decks of a 1/350 Bismarck
Posted: Mon Jul 16, 2007 12:16 pm
by MartinJQuinn
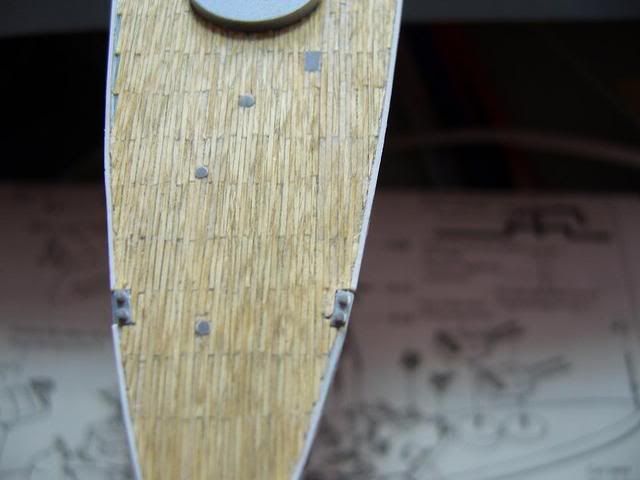
Amongst the zillion other projects I'm dabbling in, I've started on this bit of madness as well - planking the deck of the Tamiya 1/350 Bismarck with real wood. I only plan to plank the main deck, and use the WEM photo-etch superstructure decks for everything above the main deck. The margin planking is 1x3 planks (HO scale), while the deck is 1x2, cut to 1cm lengths.
To date, I've got most of the margin planking (which runs along the bulkheads and deck edge) down. I've also started laying some plank on the main deck, just to see how it looked. I'll finish the margin planking before I go any further with the main deck.
I figure this should keep me busy during lunch for the foreseeable future!
Posted: Mon Jul 16, 2007 1:25 pm
by Jason M.
VERY time consuming but will be TOTALLY worth the effort when your done. You have officially inspired me sir.
Posted: Mon Jul 16, 2007 2:04 pm
by Dino Carancini
Good luck Martin, take your time, and some drink to relax, while fixing all those pieces

Posted: Mon Jul 16, 2007 5:19 pm
by DeadByCheese
It is more time consuming to use 1 cm lengths, but I suggest 2cm. It looks way cleaner to use 2cm in my opinion.
I also find it easier to say, not make a long planked row all across the ship, but stay in one area. My Yamato has some errors but will certainly be nice when finished. good luck

This took me 6 weeks and I took this shot with a webcam about a minute ago. There are some errors if you can tell. I have ripped up alot of planks. This was done with a ruler and hobby knife.


Posted: Tue Jul 17, 2007 9:54 am
by MartinJQuinn
DeadByCheese wrote:It is more time consuming to use 1 cm lengths, but I suggest 2cm. It looks way cleaner to use 2cm in my opinion.
You are the 2nd person to suggest 2cm, thanks.
Posted: Tue Jul 17, 2007 10:48 am
by DeadByCheese
You will probaly come out with a better ship at the end because I have never used photoetch besides railings.
Posted: Tue Jul 17, 2007 2:58 pm
by johndon
Question for you Martin - were you able to remove the moulded in details from the deck in such as way as you cna use them again or are you going to have to rebuild them from scratch?
John
Posted: Tue Jul 17, 2007 9:08 pm
by MartinJQuinn
johndon wrote:Question for you Martin - were you able to remove the moulded in details from the deck in such as way as you cna use them again or are you going to have to rebuild them from scratch?
John
I'm going to have to rebuild them - I carved them off with a flat blade.
Posted: Tue Jul 17, 2007 11:22 pm
by Gerarddm
Martin, you GO, boy!
Posted: Wed Jul 18, 2007 12:25 am
by J. Soca
Looking Good
Posted: Wed Jul 18, 2007 9:17 am
by Miguel
Posted: Wed Jul 18, 2007 4:55 pm
by Spunk-Y
Looks real good, is there somewhere a How to guide to do this? would love to have a real wooden deck on my future 1/350 New Jersey (maybe after I finish my 1/350 Gettysburg)
Posted: Wed Jul 18, 2007 8:34 pm
by MartinJQuinn
Spunk-Y wrote:Looks real good, is there somewhere a How to guide to do this? would love to have a real wooden deck on my future 1/350 New Jersey (maybe after I finish my 1/350 Gettysburg)
I'm using
this as a guide. It's from the now defunct Model Fleet site and was written by Dan Van Gartzen,
Posted: Fri Jul 20, 2007 2:11 pm
by JD2870
That looks fantastic, I admire your patients. I had been contemplating attempting wood planking on one of the smaller projects I have yet to tackle (1:350 Emden or Varyag). Of course, as it turns out they make laser cut wood decks for those two. I know the second I start planking my Tirpitz they will have put out a deck for that as well.
Posted: Sat Jul 21, 2007 10:49 am
by DeadByCheese
Is that 1/700 or 1/350
Posted: Sat Jul 21, 2007 1:46 pm
by Gerarddm
One further note: if you are going through all the pain of doing a real wooden deck, then by all means try to do it the way a real ship would, and include nibbing strakes. These are the planks which follow the deck outline, and are indented to allow the deck planks to die into them. To just run the deck planks out to the edge of the deck and taper them to a point is technically inaccurate.
Posted: Sat Sep 15, 2007 11:36 pm
by MartinJQuinn
Gerarddm wrote:To just run the deck planks out to the edge of the deck and taper them to a point is technically inaccurate.
Yes, but since I don't want to completely loose my mind, I won't be doing that!!
A few progress pictures...


I used up all the planks I had pre-cut....time to get the chopper out!
Posted: Sun Sep 16, 2007 12:32 am
by angeleyes
it looks better than the real thing!!.However on that scale i would just replace the whole plastic deck pieces with one-piece of wood which then i ll sand down , and scribe.I do that in some models in 1/700 and it is less time consuming than individually place planks on the deck, and you dont have to worry too much of going out of line as you built up .The only thing is you got to be careful when you glue all the superstructure on it so it is aligned properly, and generally speaking you will need to glue everything back on it (all the small vends, gun tubs etc).
Posted: Sun Sep 16, 2007 8:36 am
by DeadByCheese
What brand of planks are you using?
Posted: Sun Sep 16, 2007 10:18 am
by Yamato1701
Wow! incredible work. Of course now I am pullng my hair out thinking how long my Mushashi project is gonna last once I am done with North Carolina