by Kometa » Sun May 08, 2022 4:31 pm
Hello again
After this lapse of time I have made some progress in all the elements of the diorama, adapting the different constructions that I had already made and addeing some new ones.
The buildings to be displayed in the diorama are varied and I have made an attempt to represent them at least in their basic shape.
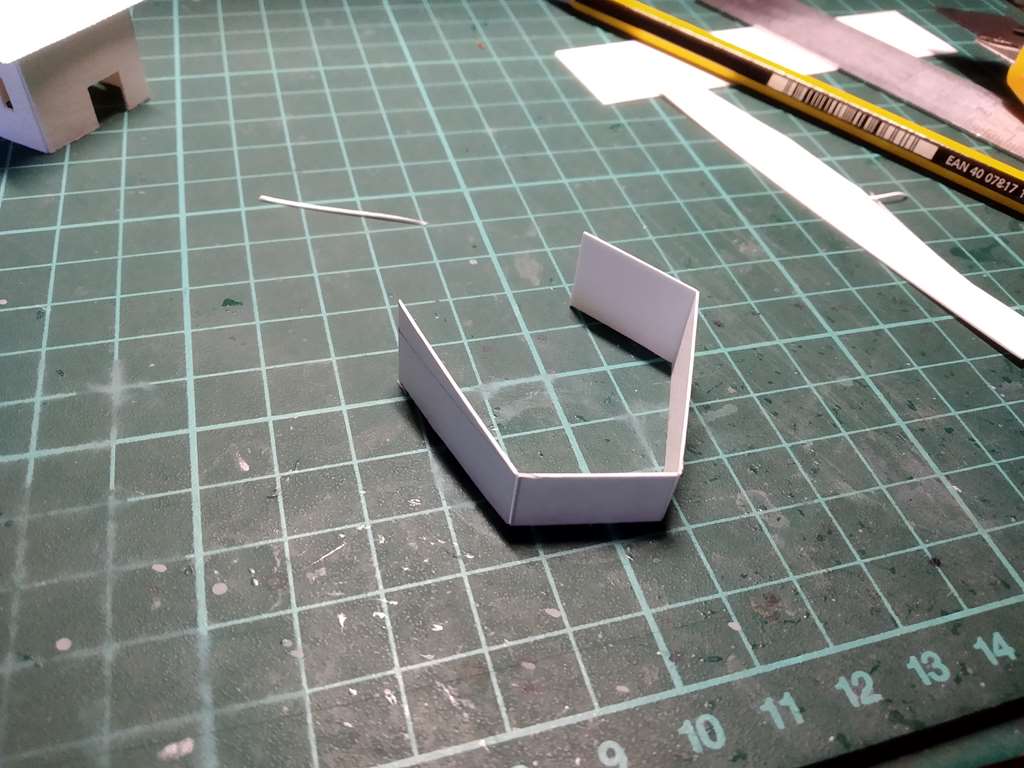
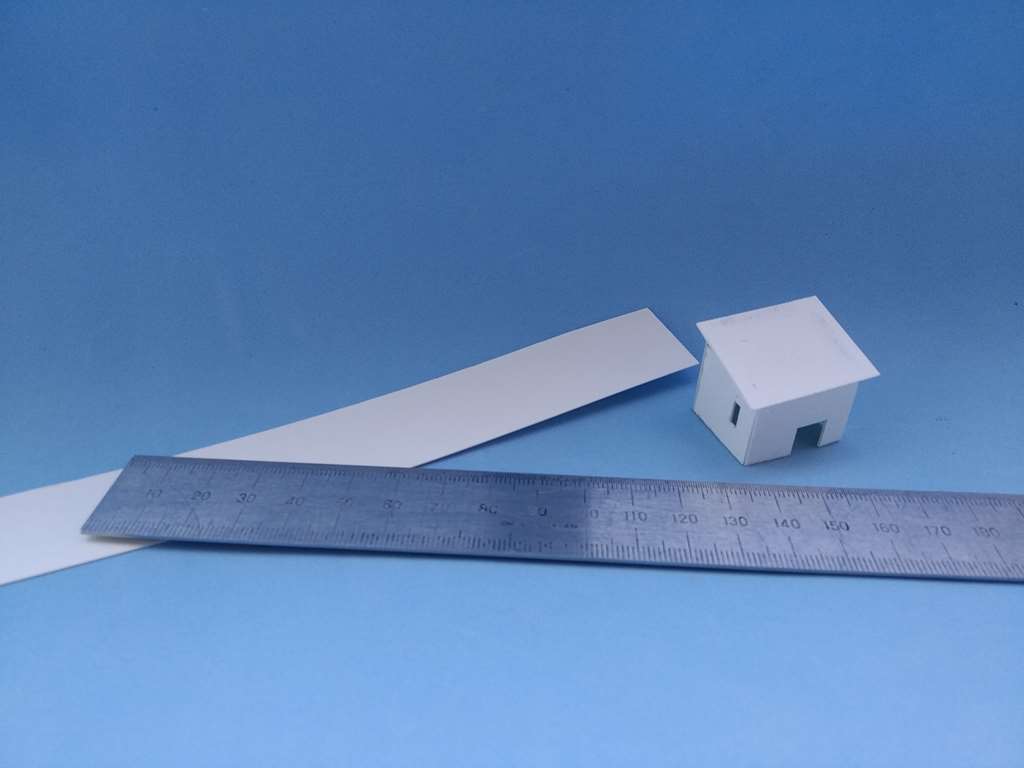
To make them, I have used thick cardboard with a simple structure preparing doors and windows.
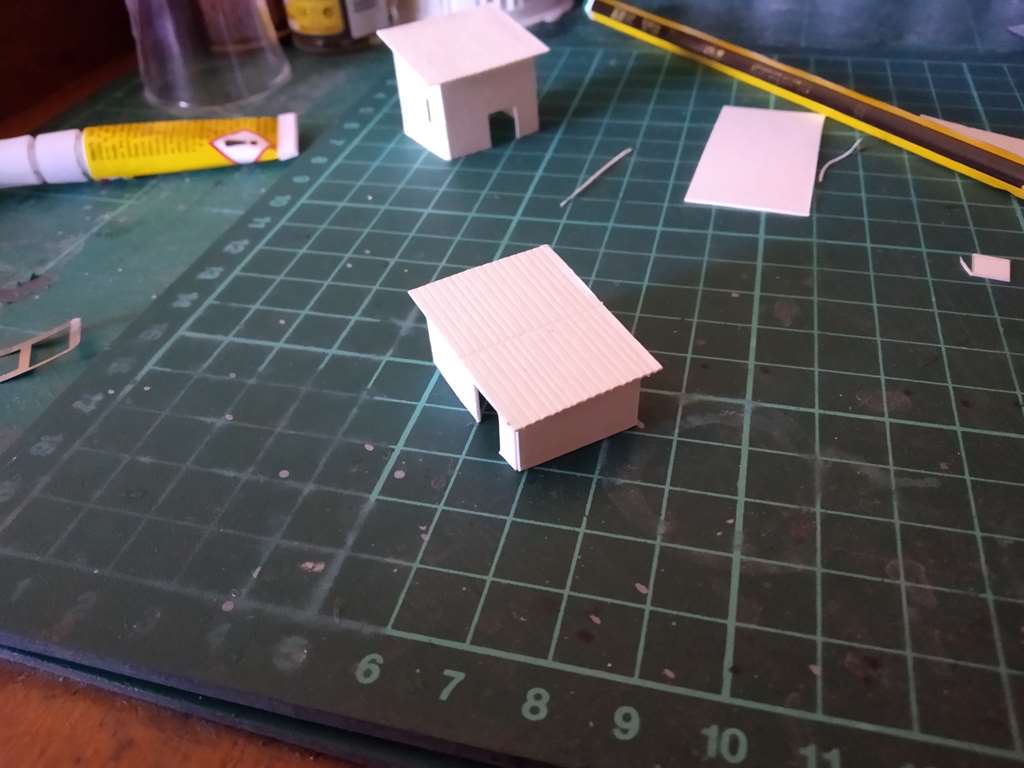
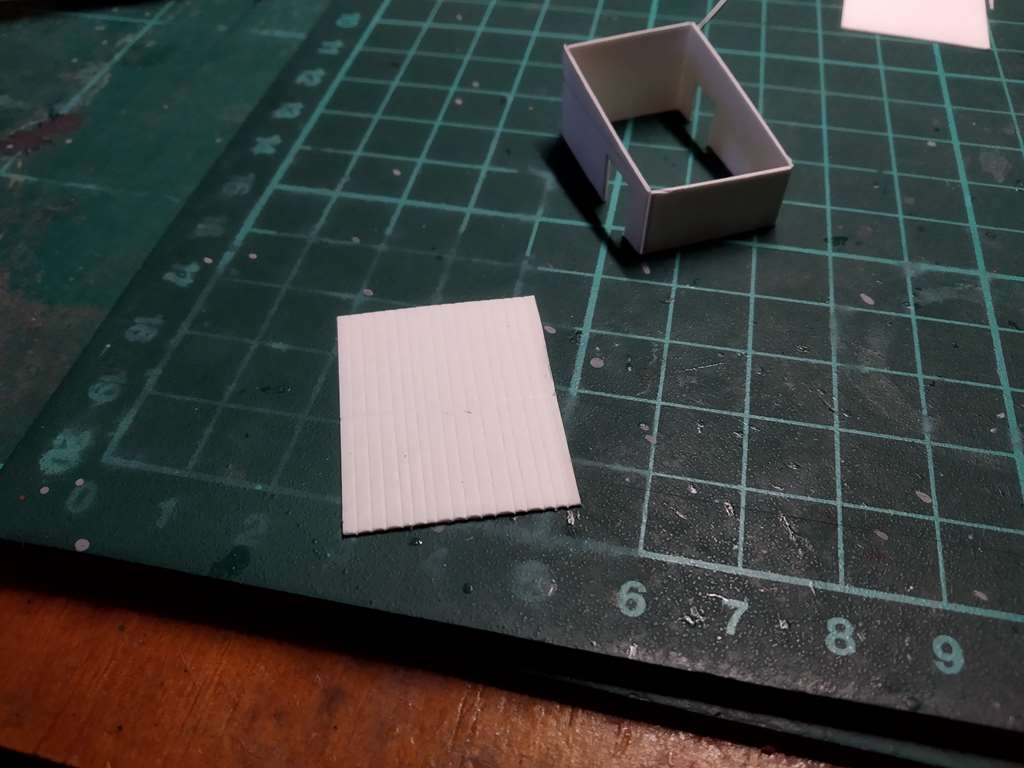
The process means drawing the entire contour of the building with the shape of the roofs in such a way that its later assembly is therefore easy. The roofs are also made from the same cardboard by etching stripes with a scriber to give it the appearance of a sheet metal roof.

I have arranged several boxes also from L'Arsenal in 1/350 as well, and through the processing with various shades I have finished them in a natural wood color and also in a flat grey.

I had previously modified a Niko Models crane that was a WWII model
I have added some counterweights to the rear and modified the loading boom too. However, it seemed small for the intended purpose of raising a missile that can weigh 25 tons, so I was searching existing models until I found one that seemed to suit my model best.
I preferred to make a model from scracht, using plasticard in different thicknesses along with the same cardboard that I use for the constructions, adding small pieces of photo-etched parts for grills and some wire sections for the exhaust.

The final result is this more appropriate one, that once paint and aging effects have been applied will fit well into the diorama as you will see later, without applying the cables yet.

Step by step I have been preparing other small elements of the diorama such as tubes, platforms and windmills, which have been given --using several colors, basically Tamiya and pigments-- the same paint treatment as the submarine to display an aged looking .


Well, here we come to the composition part of the diorama that is made on porex in initial dimensions of 50 x 50 cm, but that I later reduced for a better layout.
The process is made using an initial composition with the same basic form of the diorama, to which I added a natural rock painted in gray and XF59. The ground has been adapted so that there is a suitable level close to the missile area to allow the crane to work. The paints used to highlight lights and shadows are Tamiya for the most part, as well as some Mig pigments with beach sand and African dust colors.
In this series of photographs the development and adaptation of the terrain is better appreciated.


As soon as I had arranged the general presentation part of the diorama, I began to integrate the different elements, i.e., trucks, boxes, buildings, all of them with the application of base colors and different washes and pigments. I have added several barrels made with sprue sections, and some more will be added, along with pallets and several other elements.

I will set in place in this way the first crane that I made, next to one of the mills, showing a worn out appearance.

The submarine is set in place although it will be completed with other small details of nearby junk next to the holes that were opened in the hull. Here I have given the same aging treatment to the machinery inside, and these elements will be completed with other small details afterwards.

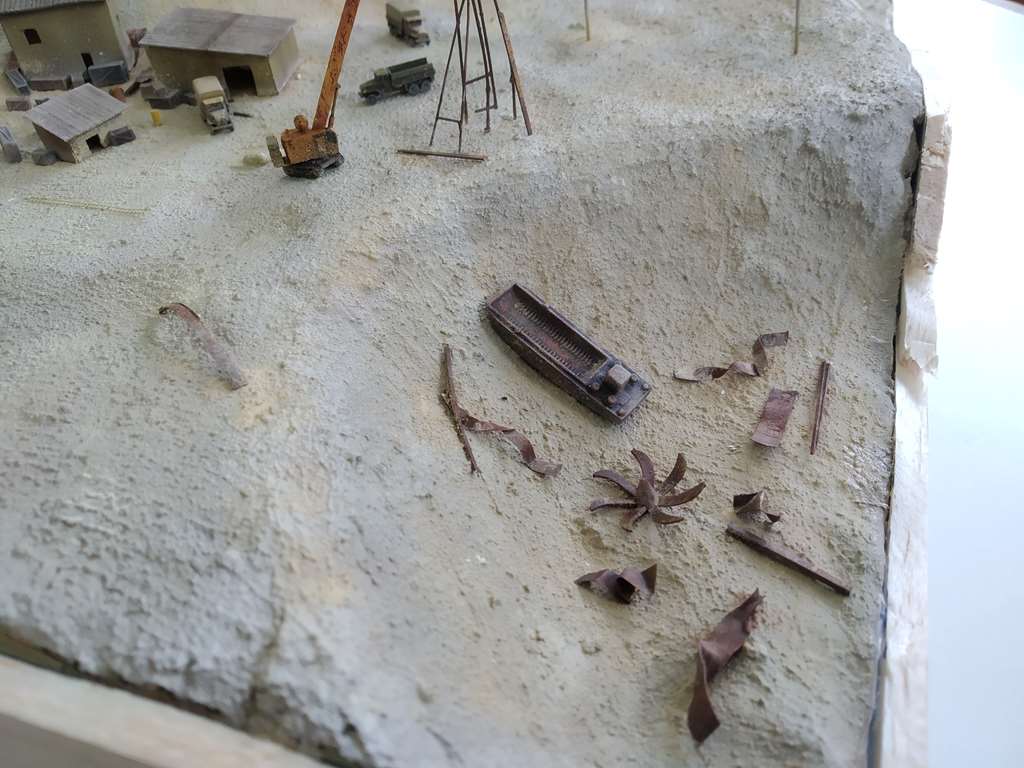
In one of the holes that seemed to be somehow empty I have placed a small junkyard made with a left over barge from another kit, propellers and some other bent and twisted PE parts. I am going to add some other small details, but I think that the overall effect is already acceptable.

Here you are a composition of the diorama from another point of view, with the new crane already set in place.

I am confident that I can finish the diorama pretty soon, after finishing the otherwise small, never ending details.
Best regards.
Kometa
Willie collaborates with us for a better translation)
[size=150]
Hello again
After this lapse of time I have made some progress in all the elements of the diorama, adapting the different constructions that I had already made and addeing some new ones.
The buildings to be displayed in the diorama are varied and I have made an attempt to represent them at least in their basic shape.
To make them, I have used thick cardboard with a simple structure preparing doors and windows.
[img]http://www.u-modelismo.com/subirimagenes/users/kometa/Oceanmaker/OC87.jpg[/img]
[img]http://www.u-modelismo.com/subirimagenes/users/kometa/Oceanmaker/OC88.jpg[/img]
The process means drawing the entire contour of the building with the shape of the roofs in such a way that its later assembly is therefore easy. The roofs are also made from the same cardboard by etching stripes with a scriber to give it the appearance of a sheet metal roof.
[img]http://www.u-modelismo.com/subirimagenes/users/kometa/Oceanmaker/OC89.jpg[/img]
[img]http://www.u-modelismo.com/subirimagenes/users/kometa/Oceanmaker/OC90.jpg[/img]
[img]http://www.u-modelismo.com/subirimagenes/users/kometa/Oceanmaker/OC91.jpg[/img]
I have arranged several boxes also from L'Arsenal in 1/350 as well, and through the processing with various shades I have finished them in a natural wood color and also in a flat grey.
[img]http://www.u-modelismo.com/subirimagenes/users/kometa/Oceanmaker/OC92.jpg[/img]
I had previously modified a Niko Models crane that was a WWII model
[img]http://www.u-modelismo.com/subirimagenes/users/kometa/Oceanmaker/OC68.jpg[/img]
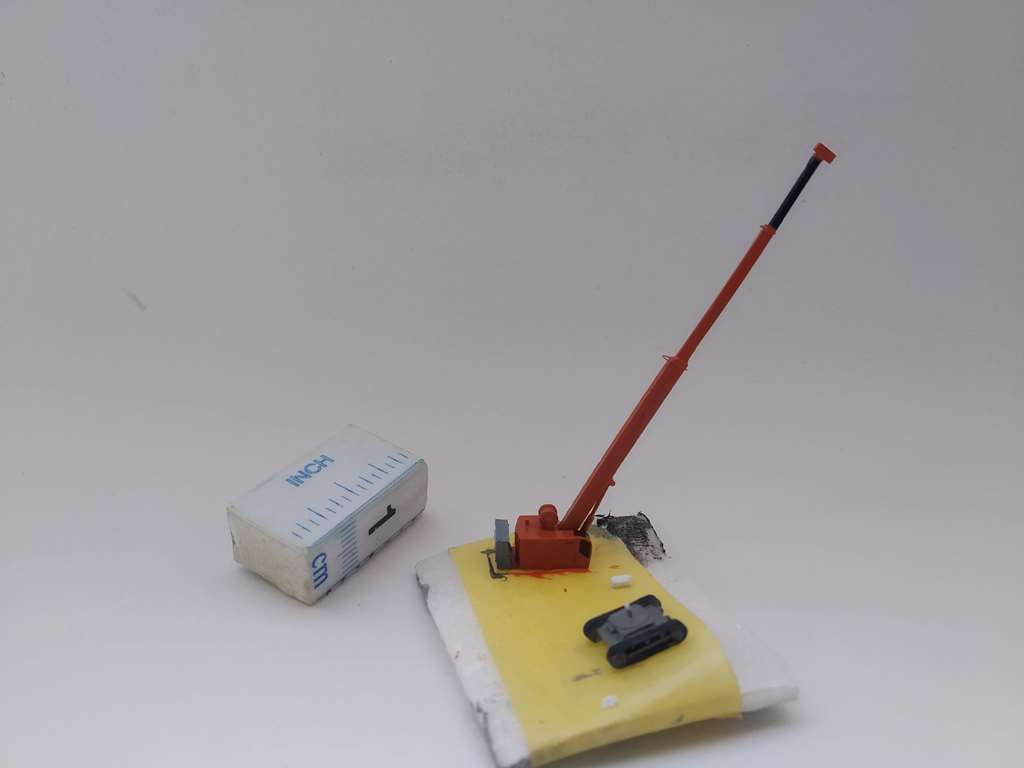
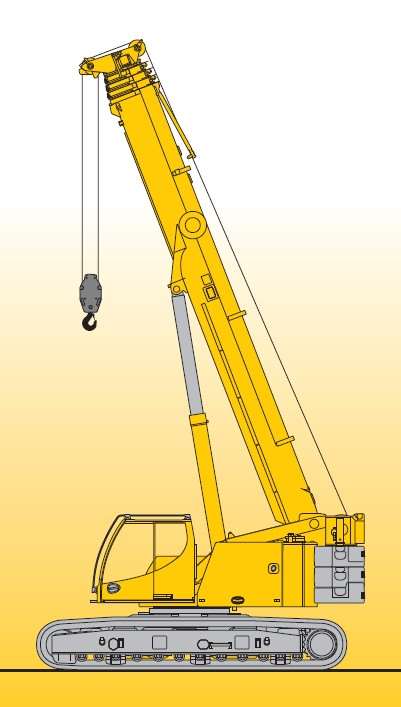
I have added some counterweights to the rear and modified the loading boom too. However, it seemed small for the intended purpose of raising a missile that can weigh 25 tons, so I was searching existing models until I found one that seemed to suit my model best.
[img]http://www.u-modelismo.com/subirimagenes/users/kometa/Oceanmaker/OC93.jpg[/img]
I preferred to make a model from scracht, using plasticard in different thicknesses along with the same cardboard that I use for the constructions, adding small pieces of photo-etched parts for grills and some wire sections for the exhaust.
[img]http://www.u-modelismo.com/subirimagenes/users/kometa/Oceanmaker/OC94.jpg[/img]
[img]http://www.u-modelismo.com/subirimagenes/users/kometa/Oceanmaker/OC95.jpg[/img]
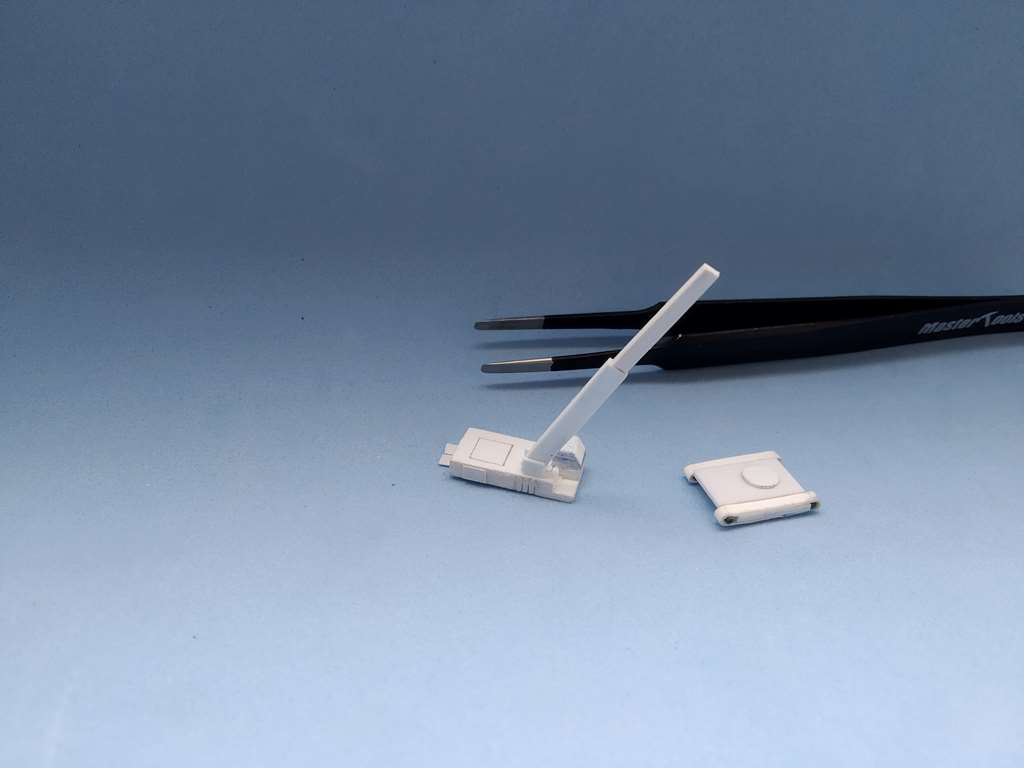
The final result is this more appropriate one, that once paint and aging effects have been applied will fit well into the diorama as you will see later, without applying the cables yet.
[img]http://www.u-modelismo.com/subirimagenes/users/kometa/Oceanmaker/OC96.jpg[/img]
Step by step I have been preparing other small elements of the diorama such as tubes, platforms and windmills, which have been given --using several colors, basically Tamiya and pigments-- the same paint treatment as the submarine to display an aged looking .
[img]http://www.u-modelismo.com/subirimagenes/users/kometa/Oceanmaker/OC97.jpg[/img]
[img]http://www.u-modelismo.com/subirimagenes/users/kometa/Oceanmaker/OC98.jpg[/img]
[img]http://www.u-modelismo.com/subirimagenes/users/kometa/Oceanmaker/OC99.jpg[/img]
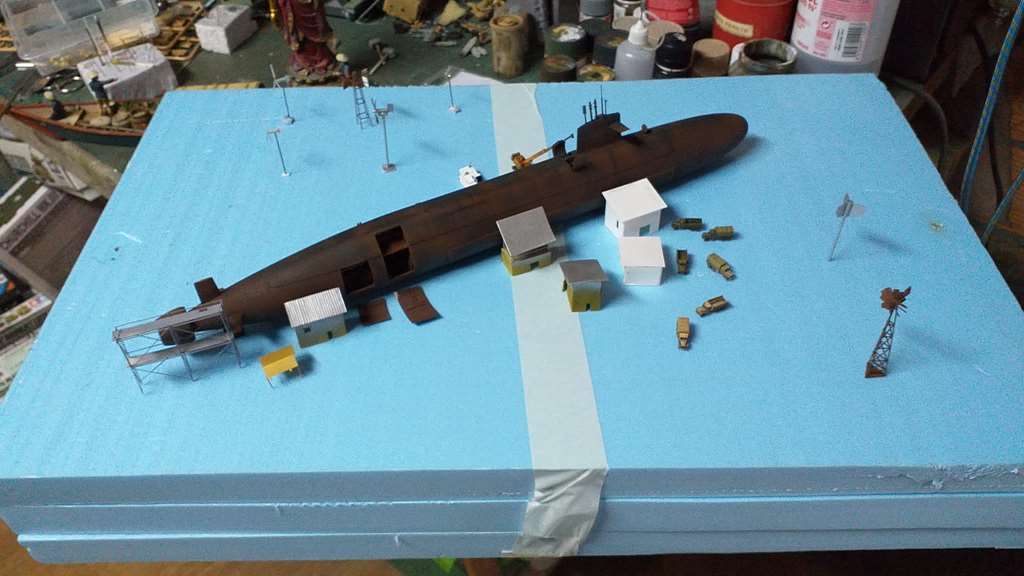
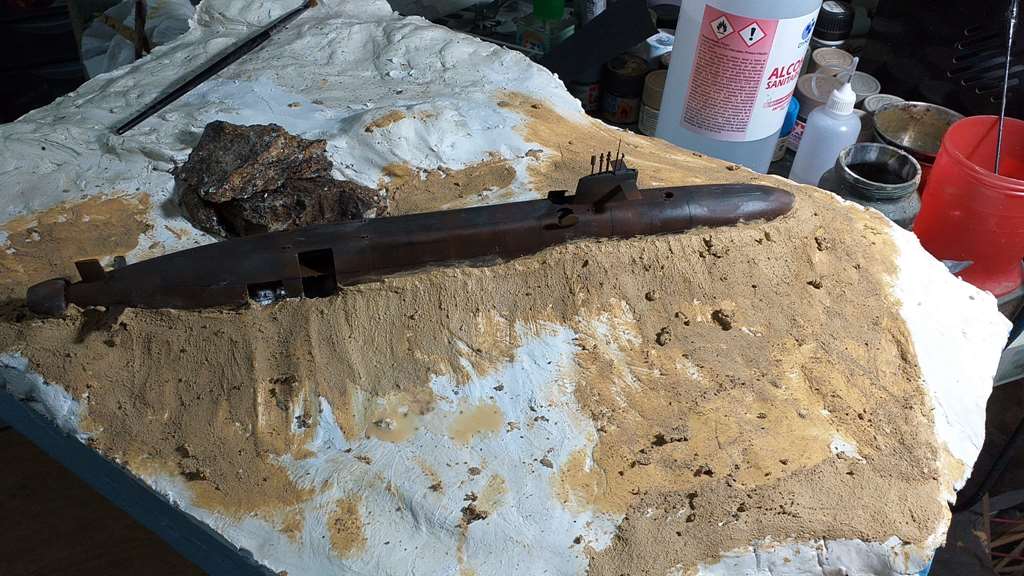
Well, here we come to the composition part of the diorama that is made on porex in initial dimensions of 50 x 50 cm, but that I later reduced for a better layout.
[img]http://www.u-modelismo.com/subirimagenes/users/kometa/Oceanmaker/OC100.jpg[/img]
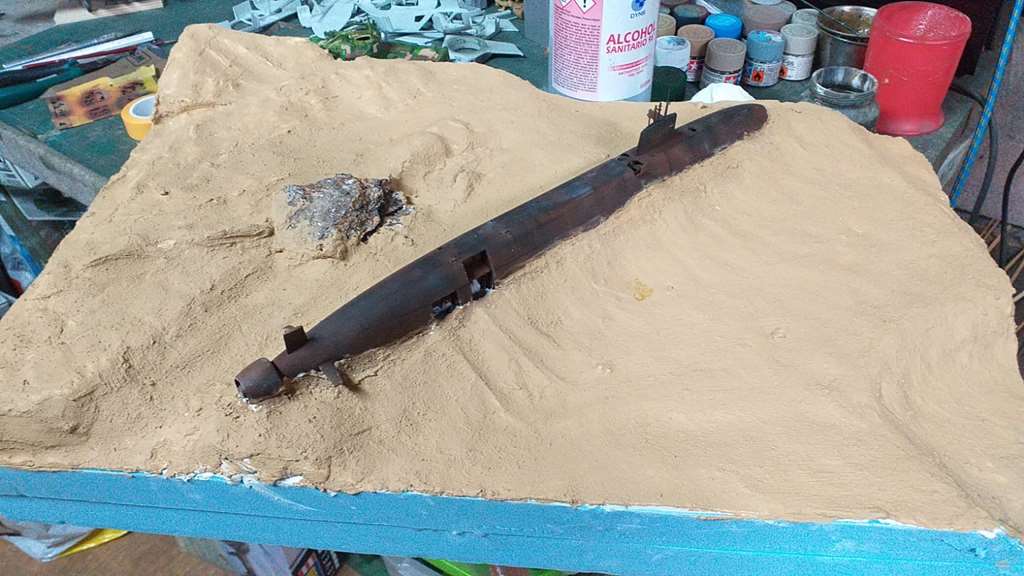
The process is made using an initial composition with the same basic form of the diorama, to which I added a natural rock painted in gray and XF59. The ground has been adapted so that there is a suitable level close to the missile area to allow the crane to work. The paints used to highlight lights and shadows are Tamiya for the most part, as well as some Mig pigments with beach sand and African dust colors.
In this series of photographs the development and adaptation of the terrain is better appreciated.
[img]http://www.u-modelismo.com/subirimagenes/users/kometa/Oceanmaker/OC101.jpg[/img]
[img]http://www.u-modelismo.com/subirimagenes/users/kometa/Oceanmaker/OC102.jpg[/img]
[img]http://www.u-modelismo.com/subirimagenes/users/kometa/Oceanmaker/OC103.jpg[/img]
[img]http://www.u-modelismo.com/subirimagenes/users/kometa/Oceanmaker/OC104.jpg[/img]
[img]http://www.u-modelismo.com/subirimagenes/users/kometa/Oceanmaker/OC105.jpg[/img]
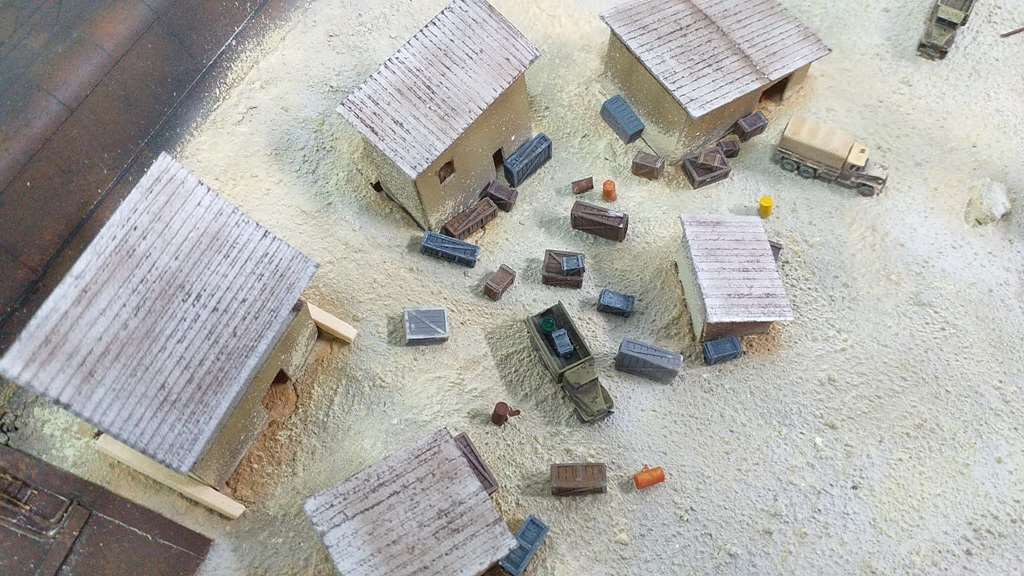
As soon as I had arranged the general presentation part of the diorama, I began to integrate the different elements, i.e., trucks, boxes, buildings, all of them with the application of base colors and different washes and pigments. I have added several barrels made with sprue sections, and some more will be added, along with pallets and several other elements.
[img]http://www.u-modelismo.com/subirimagenes/users/kometa/Oceanmaker/OC107.jpg[/img]
[img]http://www.u-modelismo.com/subirimagenes/users/kometa/Oceanmaker/OC108.jpg[/img]
[img]http://www.u-modelismo.com/subirimagenes/users/kometa/Oceanmaker/OC110.jpg[/img]
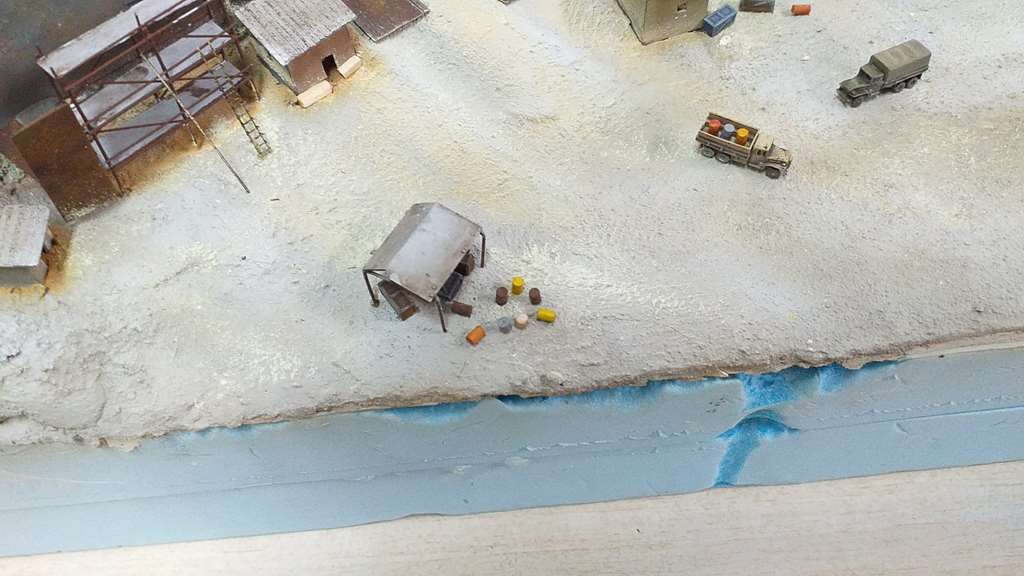
I will set in place in this way the first crane that I made, next to one of the mills, showing a worn out appearance.
[img]http://www.u-modelismo.com/subirimagenes/users/kometa/Oceanmaker/OC109.jpg[/img]
The submarine is set in place although it will be completed with other small details of nearby junk next to the holes that were opened in the hull. Here I have given the same aging treatment to the machinery inside, and these elements will be completed with other small details afterwards.
[img]http://www.u-modelismo.com/subirimagenes/users/kometa/Oceanmaker/OC111.jpg[/img]
In one of the holes that seemed to be somehow empty I have placed a small junkyard made with a left over barge from another kit, propellers and some other bent and twisted PE parts. I am going to add some other small details, but I think that the overall effect is already acceptable.
[img]http://www.u-modelismo.com/subirimagenes/users/kometa/Oceanmaker/OC112.jpg[/img]
[img]http://www.u-modelismo.com/subirimagenes/users/kometa/Oceanmaker/OC113.jpg[/img]
Here you are a composition of the diorama from another point of view, with the new crane already set in place.
[img]http://www.u-modelismo.com/subirimagenes/users/kometa/Oceanmaker/OC114.jpg[/img]
I am confident that I can finish the diorama pretty soon, after finishing the otherwise small, never ending details.
Best regards.[/size]
Kometa
Willie collaborates with us for a better translation)