To HMS Victory and beyond

Moderators: BB62vet, MartinJQuinn, JIM BAUMANN, Jon, Dan K

User avatar
dafi
Posts: 996
Joined: Mon Mar 12, 2012 11:13 am
Location: Ludwigsburg/Germany
Contact:

Re: To HMS Victory and beyond

Post by dafi »

A completely different construction project that I've been sneaking around for a long time: I finally got to work on the main yard.

Image

All fittings were better articulated ...

Image

... the lunettes for the stun�sail spars come from my etched parts set ...

Image

... and as always: The colour makes the difference :-)

Image

According to Lee, in wartime the rope hangers were replaced by a chain. I think 1803 to 1805 might count as wartime.

Image

I still made the chain hanger the right length and added a shackle to make it easy to hook and unhook the yard.

Image

And only in the sideways position you can really see what a big hulk it was :-0

Image

Our little dreamy midshipman has also returned to his favourite spot.

Image

XXXDAn
To Victory and beyond ...
viewtopic.php?f=59&t=99050&start=60

See also our german forum for the age of Sail and History:
http://www.segelschiffsmodellbau.com
User avatar
dafi
Posts: 996
Joined: Mon Mar 12, 2012 11:13 am
Location: Ludwigsburg/Germany
Contact:

Re: To HMS Victory and beyond

Post by dafi »

Somehow I always like screwing myself. Like when I enthusiastically ordered the crew to the heads for their relief. I had simply put aside all the heads gear :-0

Image

So I put the sling for the gammoning over the bowsprit and threaded all the lashings with the 50 cm long and still quite balky rope through the crew like this ...

Image

... so that no one felt inconvenienced in their businesses or even knocked off their thrones.

Image

Somehow I actually managed without any accidents. Afterwards, I had brushed the gammoning minimally with white paint to match the colour of the rest of the appearance.

Image

When I looked at the lower edge of the gammoning, I noticed the hawse pipes. I had already had the pleasure of looking at an original of the St. George in Thorsminde. These were made of lead with a nice bead around the outside.

Image

It took me a few attempts to find the right material for it.

Image

I ended up with 0.4 mm copper wire, which was hammered flat to lose the wire character.

Image

Fitted, glued on ...

Image

... and painted.

Image

XXXDAn
To Victory and beyond ...
viewtopic.php?f=59&t=99050&start=60

See also our german forum for the age of Sail and History:
http://www.segelschiffsmodellbau.com
Dan K
Posts: 9037
Joined: Tue Jan 11, 2005 10:56 am
Location: New York City

Re: To HMS Victory and beyond

Post by Dan K »

Amazing work.
SG1
Posts: 400
Joined: Mon Apr 17, 2017 2:43 am
Contact:

Re: To HMS Victory and beyond

Post by SG1 »

I agree. And good-harted for your decision to allow crew-relief :big_grin:
User avatar
dafi
Posts: 996
Joined: Mon Mar 12, 2012 11:13 am
Location: Ludwigsburg/Germany
Contact:

Re: To HMS Victory and beyond

Post by dafi »

Thank you Sirs!

When I was working on the main yard, I noticed that I was missing good jeer blocks. So I programmed and printed some right away. And the hearts for the stays and the head gear also came with them.

Image

And since that went so well, the other special blocks were also added, here the shoulder and sheet blocks.

Image

In the past, I had made the thimbles from pierced and drawn sprue at great effort. Printed is quicker and cleaner and above all more true to size.

Image

Then the moment of truth: Binding the thimbles, here the 1.75 mm size:
Apply a drop of superglue with an applicator to the back of the thimble in the groove ...

Image

... and hook the rope into the groove at the back of the thimble and pull it forward.

Image

Then I pressed the rope together at the front with some glue using tweezers and pinned the thread for the splice imitation at the desired distance from the thimble and fixed it with slow super glue.

Image

Then knot the two ends alternately at the top and bottom, always moving the knots in the direction of the thimble until the gap was closed. Then the final knot was secured with glue and cut off the excess lengths.

Image

With the pointed tweezers it goes really fast.

Image

Using an almost dry brush, brush on some black paint to cover up any light glue residue.

Image

Then cut open one of the hooks from my etched parts set at the eye, bent it open and inserted it, ...

Image

... bent shut and that's it. Here are the patterns for 2 mm, 1.75 mm and 1.5 mm.

Image


They are also used in a not entirely uncritical place, the bumkin shrouds.
It is difficult here to produce the right lengths so that it fits on both sides and also looks the same.

Image

Here, the shoulder block for the foresail's tack is tied in.

Image

This is then the set.

Image

And this is how it looks in place.

Image

Image

Image

Image

XXXDAn
To Victory and beyond ...
viewtopic.php?f=59&t=99050&start=60

See also our german forum for the age of Sail and History:
http://www.segelschiffsmodellbau.com
User avatar
dafi
Posts: 996
Joined: Mon Mar 12, 2012 11:13 am
Location: Ludwigsburg/Germany
Contact:

Re: To HMS Victory and beyond

Post by dafi »

And the adventure continued.

Many attempts were made to dress the thin ropes: first rope wrapped in the classic way, various diameter combinations, resulting in extremely high workload, extremely high rejects, when bending around the blocks the tapes broke open and above all: it looked like crap somehow ...

I also wrapped the thinnest wire with copper thread and blackened it, the same result, but it looked even crappier.

After many attempts, I decided to use an imitation with 3 layers of white glue and black paint for the dressing of the thin ropes.

Image

Then it was on to the impressive head gear. First comes the collar for the bobstay, then starboard and then port shroud and in front of that the stays of the foremast. Three of these rows of cleats have to be filled.

The hearts were tied into the stays using the same binding principle as the thimbles.

Image

I still had to feel my way around the first one ...

Image

... and the next ones went very quickly :-)

Image

The tying of the collars was again a good fiddling job, because the tying does not slip or even out. You just have to get it right from the start.

Image

Image

But when I thought that was fiddling, open-heart surgery was performed, even though these hearts were closed: The tying of the lanyards into the hearts. Because the hearts only have one big opening with 4 grooves and no separate holes, you have to secure the rope with glue after each new loop so that the lanyard doesn't jump out of the groove again.

But once you've done that, the sight is just sharp :-)

Image

Image

Image

Image

Image

Image

Image

This was the first of the 3 collars, two more to go :-)


XXXDAn
To Victory and beyond ...
viewtopic.php?f=59&t=99050&start=60

See also our german forum for the age of Sail and History:
http://www.segelschiffsmodellbau.com
ModelMonkey
Model Monkey
Model Monkey
Posts: 4096
Joined: Sat Aug 20, 2005 9:27 pm
Location: USA
Contact:

Re: To HMS Victory and beyond

Post by ModelMonkey »

That looks so good.
Have fun, Monkey around. TM

-Steve L.

Complete catalog: - https://www.model-monkey.com/
Follow Model Monkey™ on Facebook: - https://www.facebook.com/modelmonkeybookandhobby
User avatar
dafi
Posts: 996
Joined: Mon Mar 12, 2012 11:13 am
Location: Ludwigsburg/Germany
Contact:

Re: To HMS Victory and beyond

Post by dafi »

Thank you Steve!

XXXDAn
To Victory and beyond ...
viewtopic.php?f=59&t=99050&start=60

See also our german forum for the age of Sail and History:
http://www.segelschiffsmodellbau.com
User avatar
Martocticvs
Posts: 239
Joined: Tue Jan 26, 2016 7:59 am
Contact:

Re: To HMS Victory and beyond

Post by Martocticvs »

Continuously phenomenal work!
europapete
Posts: 156
Joined: Thu Jan 05, 2017 8:39 pm

Re: To HMS Victory and beyond

Post by europapete »

Coming along very nicely Dan, well done. Each update is a learning experience. Are you going to leave the gaps in the decks so people can see all the exceptional internal detail ? Regards, Pete.
europapete
Posts: 156
Joined: Thu Jan 05, 2017 8:39 pm

Re: To HMS Victory and beyond

Post by europapete »

Well, just got caught up with the printing out, and Volume 2 is full. Time to start Vol 3. (4"/10cm binders)
User avatar
dafi
Posts: 996
Joined: Mon Mar 12, 2012 11:13 am
Location: Ludwigsburg/Germany
Contact:

Re: To HMS Victory and beyond

Post by dafi »

Hello Pete, thank you :-)

Good to know for you: Get another 27 binders - you will still need them ;-)

Good to know for me: If ever I loose my documentation, I know where to get a backup :-)

All the best, have fun modelling, DAniel
Last edited by dafi on Mon Sep 04, 2023 3:06 am, edited 1 time in total.
To Victory and beyond ...
viewtopic.php?f=59&t=99050&start=60

See also our german forum for the age of Sail and History:
http://www.segelschiffsmodellbau.com
User avatar
dafi
Posts: 996
Joined: Mon Mar 12, 2012 11:13 am
Location: Ludwigsburg/Germany
Contact:

Re: To HMS Victory and beyond

Post by dafi »

The second collar conglomerate was quickly done, the third - the foremost one - bobstay was exciting again. There are 2 versions here.

First, in white yarn, a temporary test version like the one McKay shows in his book. The doubled stay goes down to the cutwater, is tied together there and then goes left and right to the hull.

Image

It used to be shown like this on the Vic in P. I assume this is how the pulling force is distributed better among other stable components.

Image

Alternatively, there is also the variant where the 3 stays on top of each other all go to the cutwater. During the last renovation the Vic in P. was also converted in this way.

Image

The attachment points of the bobstays at the top of the bowsprit are well documented. Only the attachment to the cutwater is not. In later years, only the variant with the 3 superimposed holes was found, also due to the feedback from @Morgan, who knows the Vic around 1803 best, I tend towards this solution, which I also prefer, as it was last shown on the Vic in P.

See more of the discussion here:
https://modelshipworld.com/topic/35115- ... nt=1003053

So the white test stay was cut off and the third hole drilled. The heart is tied into the stay in such a way that one leg ends exactly under the binding and the other is more than twice as long.

Image

Then I threaded the stay through the hole, averaged out the length and glued it to the top of the heart just below the other end and then put the binding over the intersection.

Then I put the binding at the bottom of the stay, so that I can even out the length of the two legs if one side is a bit loose.

Image

Afterwards, as usual, I replaced the white tackle at the top with the final lanyard, which has become quite fast work by now :-)

Image

And here are a few more views of the collar conglomerate. Now the forestay and the preventer forestay are missing, each sitting in front of the two inner collar rings.

Image

Image

Image

Image

Image

Image

XXXDAn
To Victory and beyond ...
viewtopic.php?f=59&t=99050&start=60

See also our german forum for the age of Sail and History:
http://www.segelschiffsmodellbau.com
User avatar
dafi
Posts: 996
Joined: Mon Mar 12, 2012 11:13 am
Location: Ludwigsburg/Germany
Contact:

Re: To HMS Victory and beyond

Post by dafi »

A little project in between, the Vic's fire buckets on the railing of the cabin deck.

Image

Image

And since the good pieces are made of leather and not metal, I gave them a little deformation as a little dafinistic touch.

Image

XXXDAn
To Victory and beyond ...
viewtopic.php?f=59&t=99050&start=60

See also our german forum for the age of Sail and History:
http://www.segelschiffsmodellbau.com
User avatar
dafi
Posts: 996
Joined: Mon Mar 12, 2012 11:13 am
Location: Ludwigsburg/Germany
Contact:

Re: To HMS Victory and beyond

Post by dafi »

As always, first check whether plans show really can be. You should. Really.

Image

Somehow it seemed strange to me that the jeers block had a double strop at the top and a single strop underneath the binding.

What to do with the two unused ends? No use, or not much use. So I looked in other literature and, lo and behold, everywhere a double strop is shown at the bottom. Makes sense.

So I tore off the wrong strop and glued on the double strop with the right lengths, in one groove the rope for the two shorter legs, in the other the rope for the two long ones.

Image

Image

Then made the seizing that holds all 4 ends together.

Image

Then tied in the eyes for the shorter legs.

Image

And then the ones for the long legs.

Image

And suddenly ...

Image

... the model parts come to life ;-)

Image

XXXDAn
To Victory and beyond ...
viewtopic.php?f=59&t=99050&start=60

See also our german forum for the age of Sail and History:
http://www.segelschiffsmodellbau.com
User avatar
dafi
Posts: 996
Joined: Mon Mar 12, 2012 11:13 am
Location: Ludwigsburg/Germany
Contact:

Re: To HMS Victory and beyond

Post by dafi »

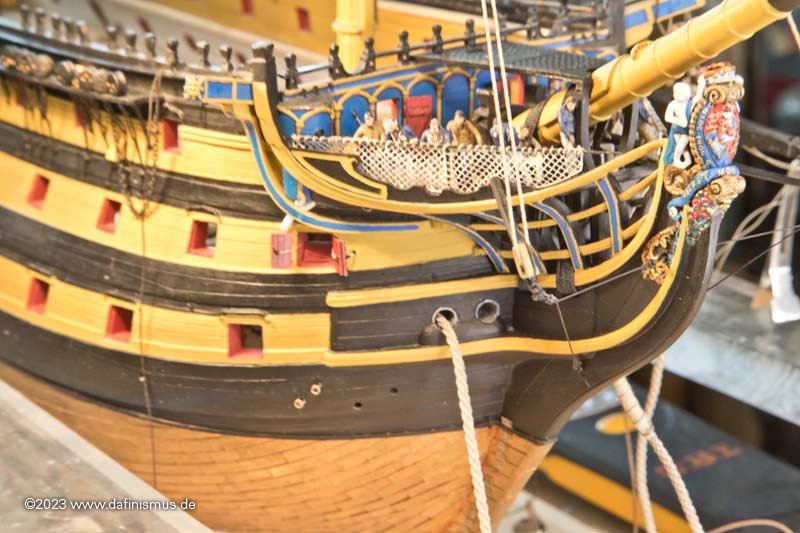
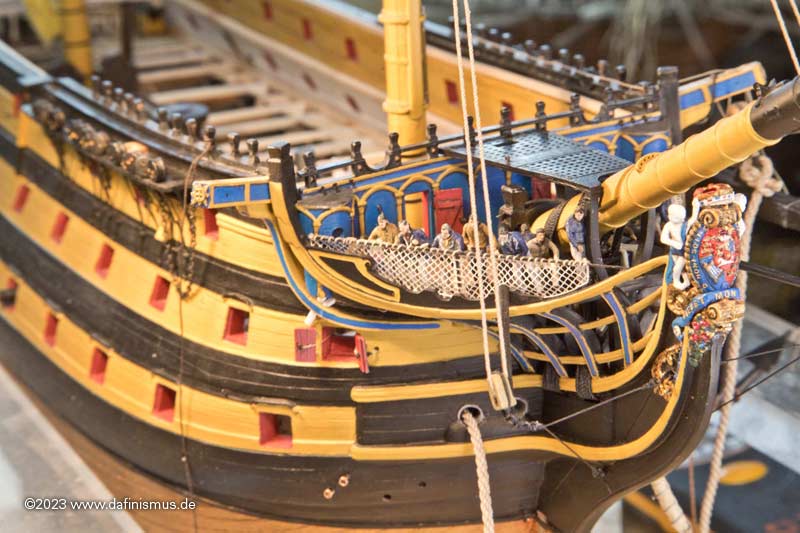
Firstly, I'm stupid and secondly, I need glasses ...

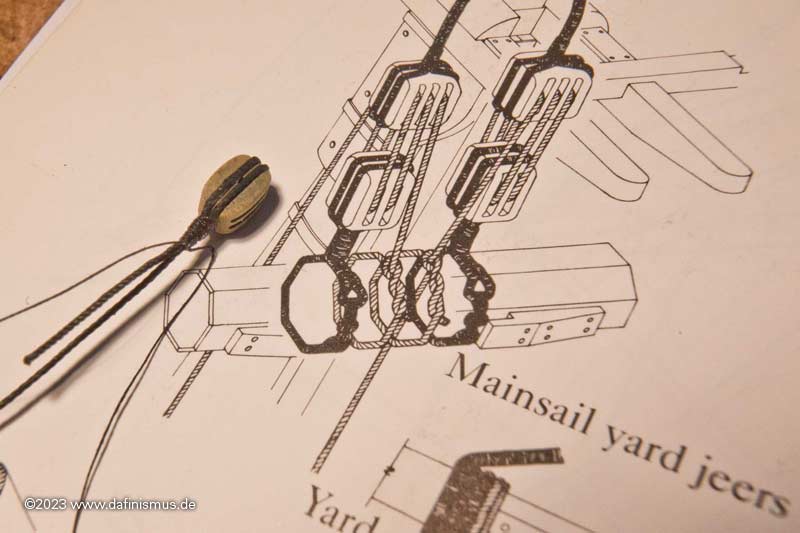
Thanks to the many tips from modelling friends, I know that I had misinterpreted McKay's drawing. Of course it is correct :-)

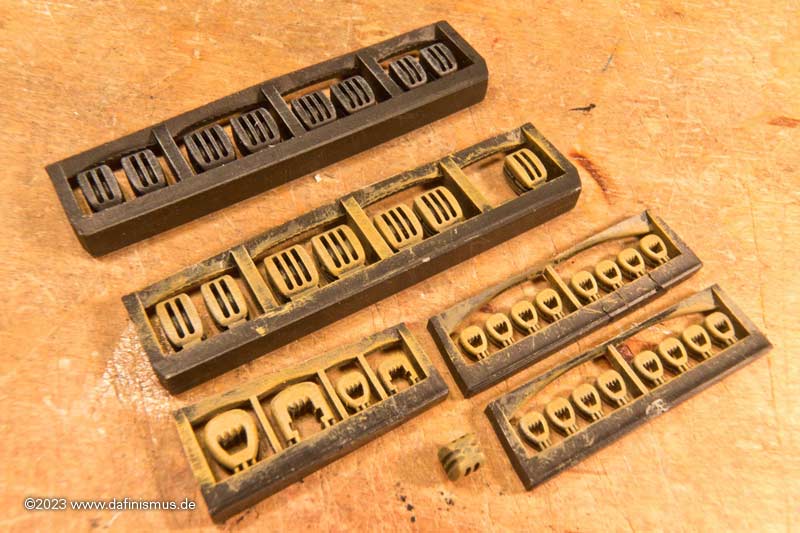
So here comes another demolition.

Image

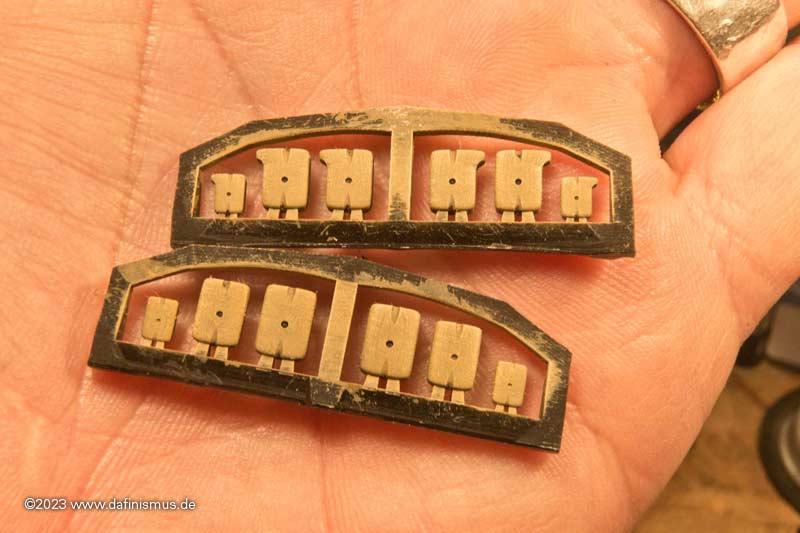
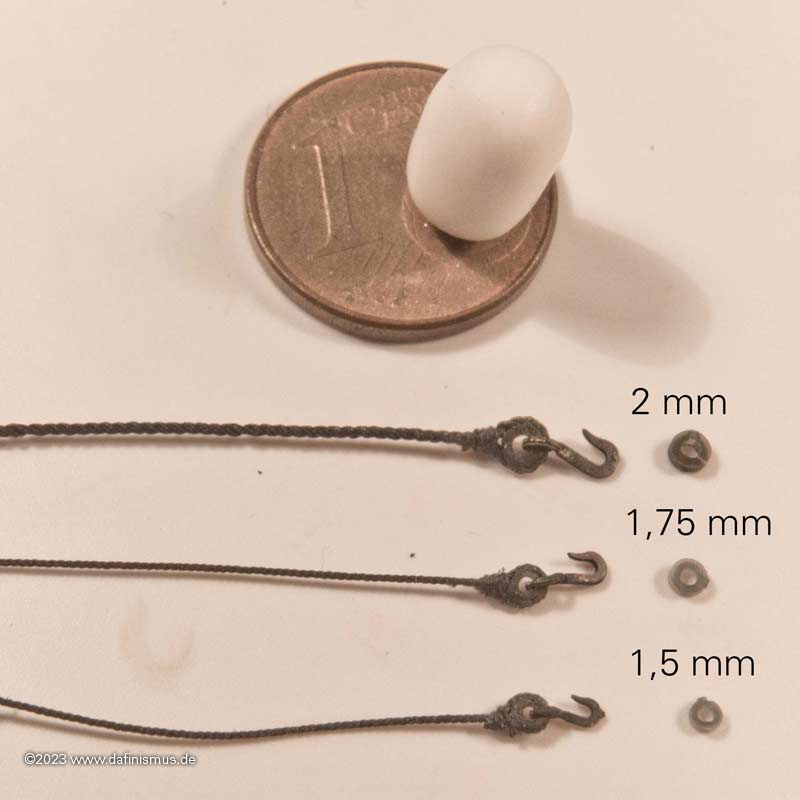
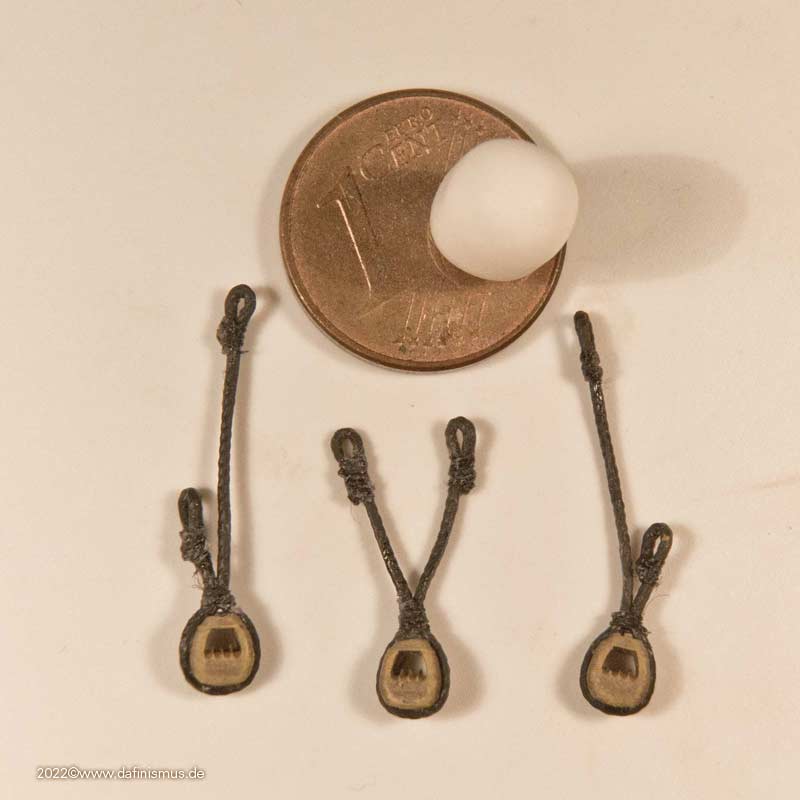
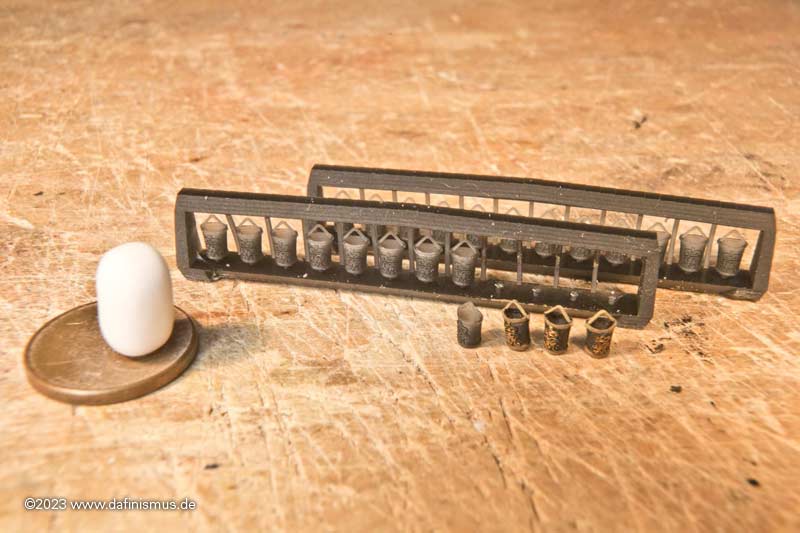
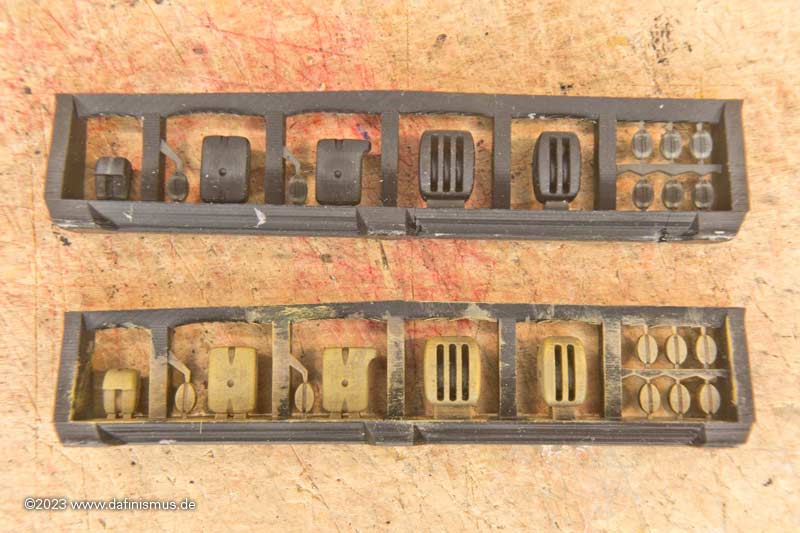
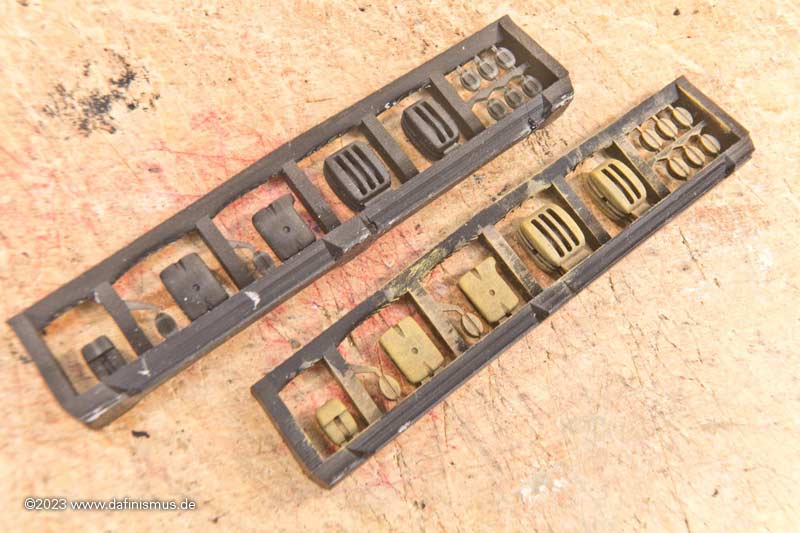
In the meantime, I no longer print the blocks sorted by type but by yard. There are still some blocks missing, but 2 of these sets contain everything for the main yard.

Image

Image

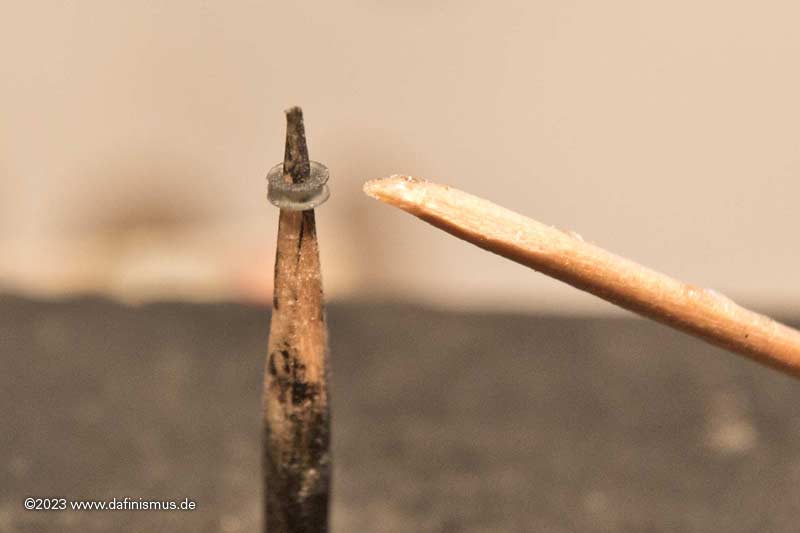
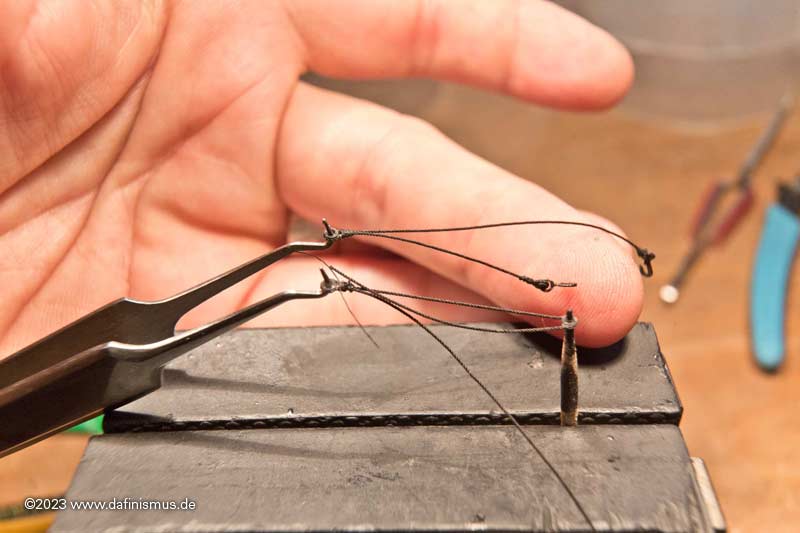
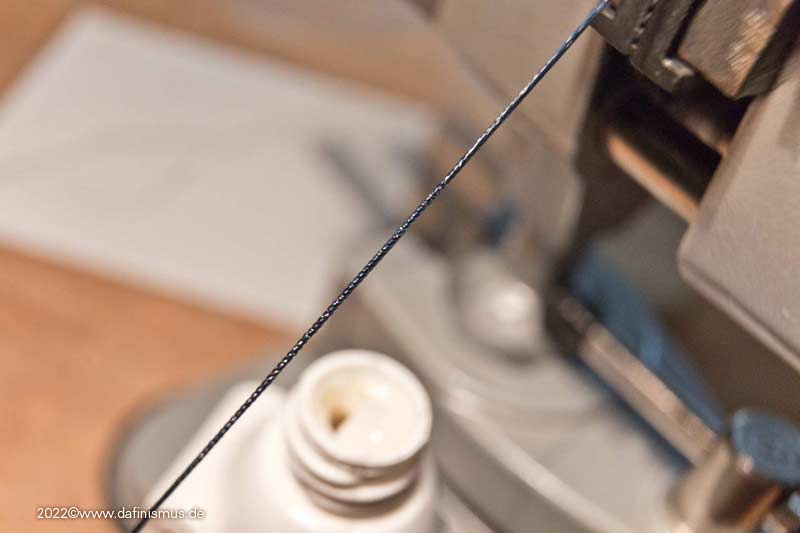
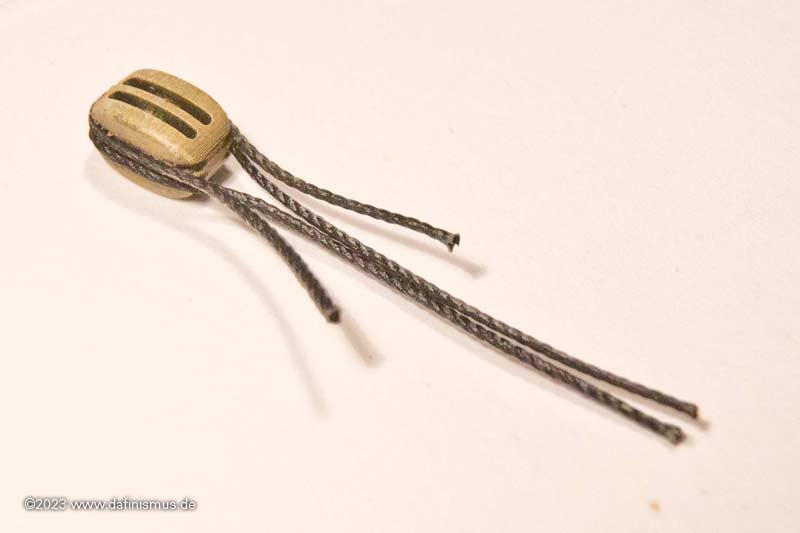
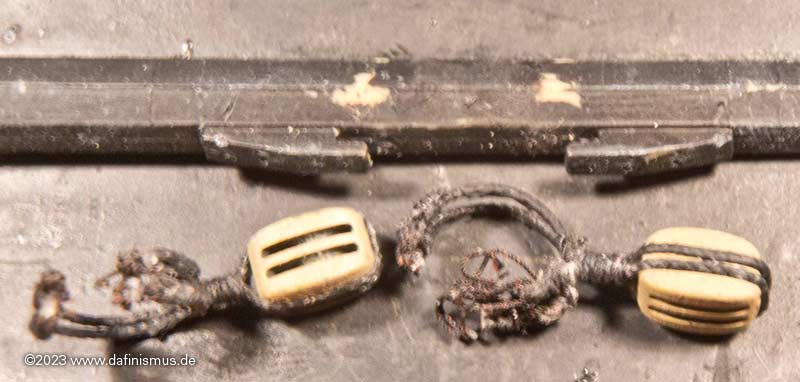
Slowly it is routine and goes quickly by hand, glueing one rope into the groove of the block ...

Image

... then the second one into the other, so that the short ends are diagonally opposite each other.

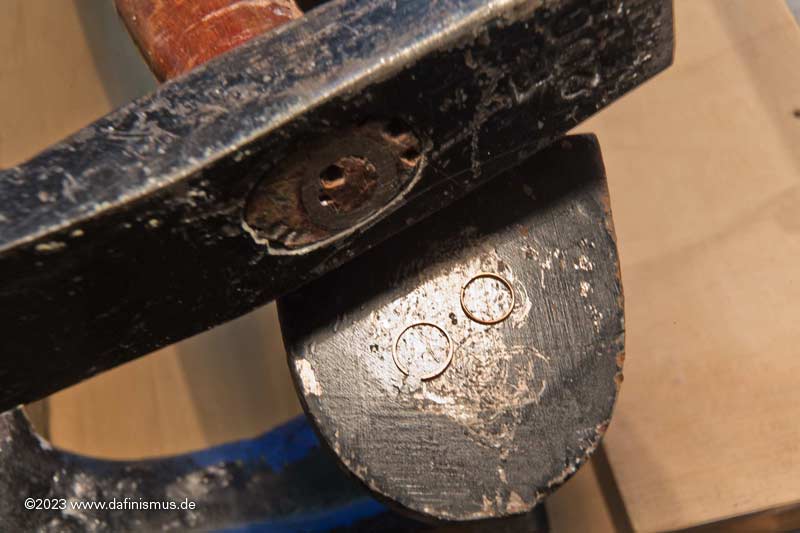
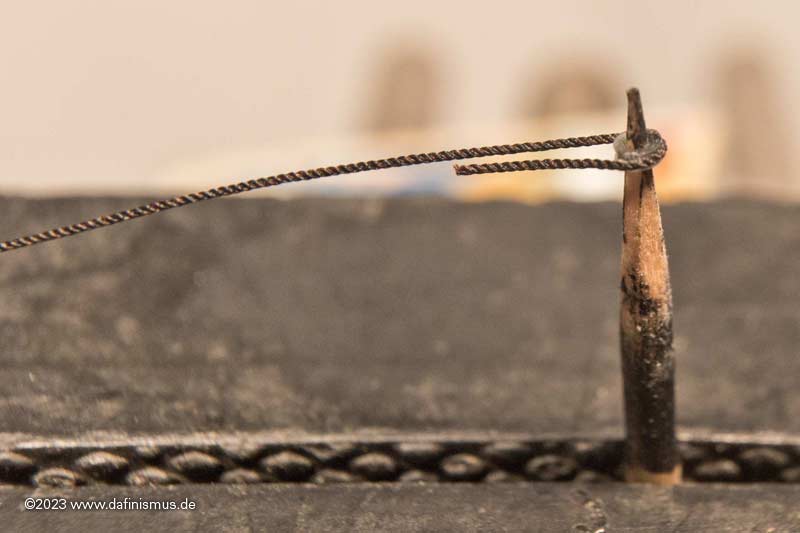
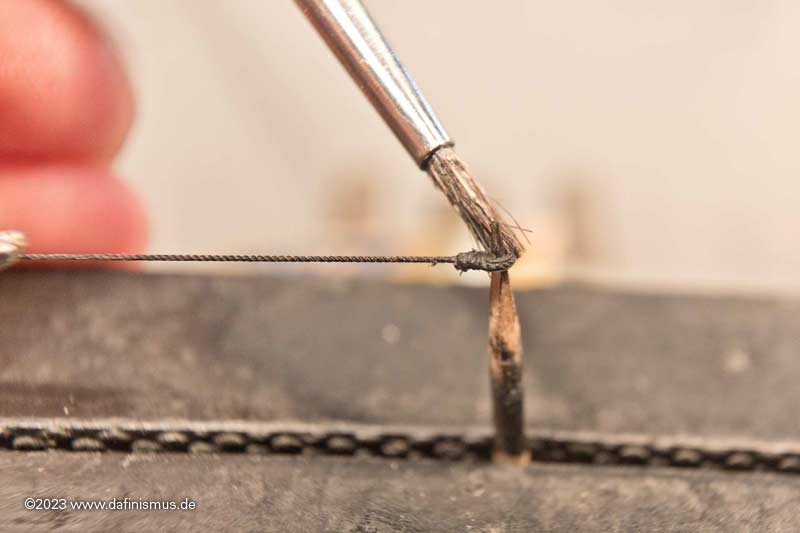
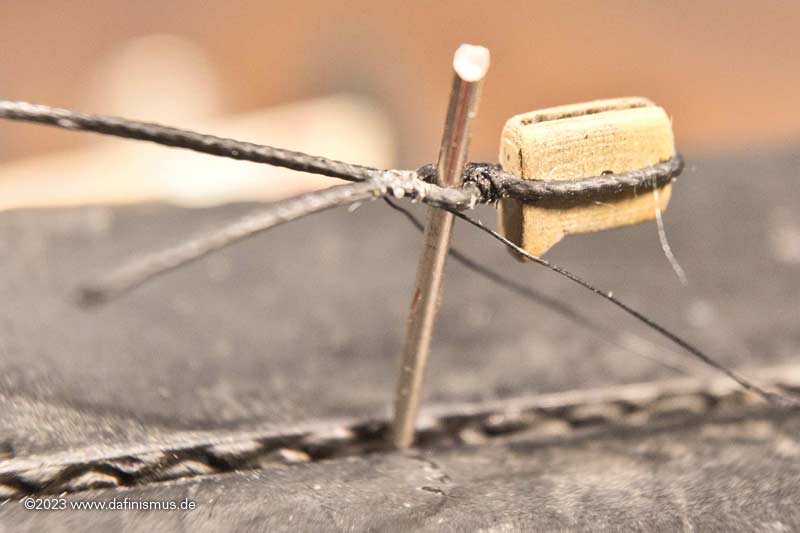
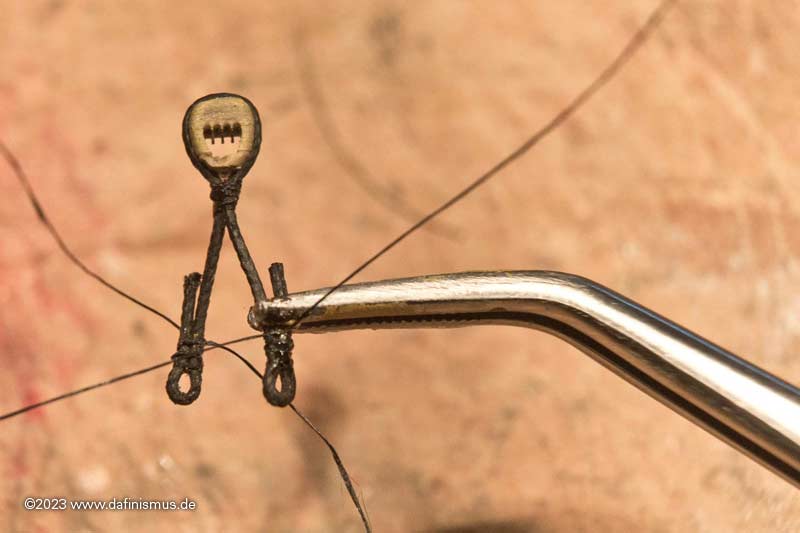
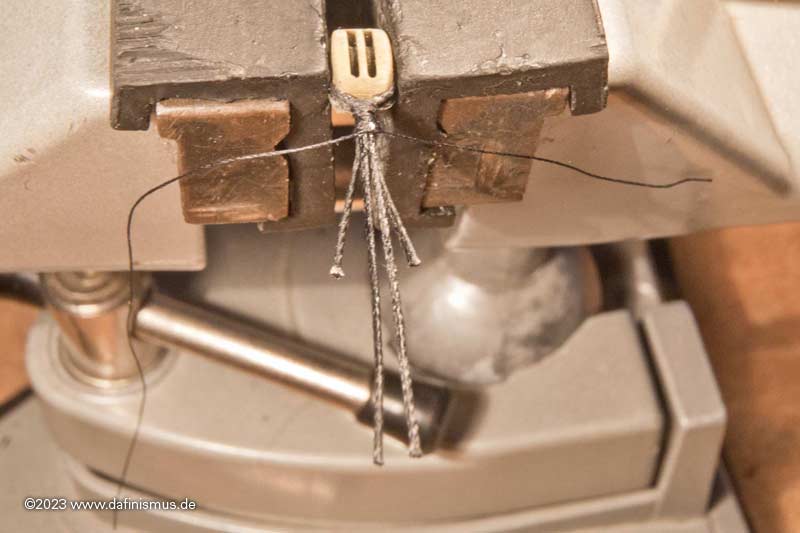
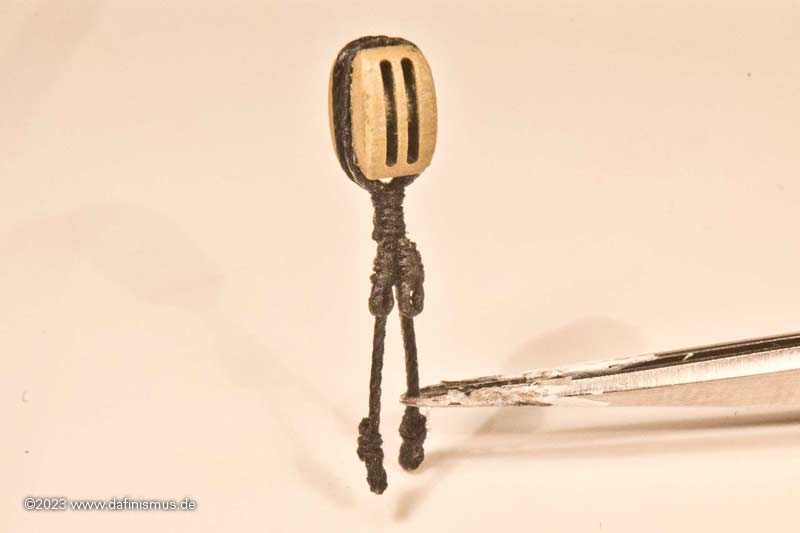
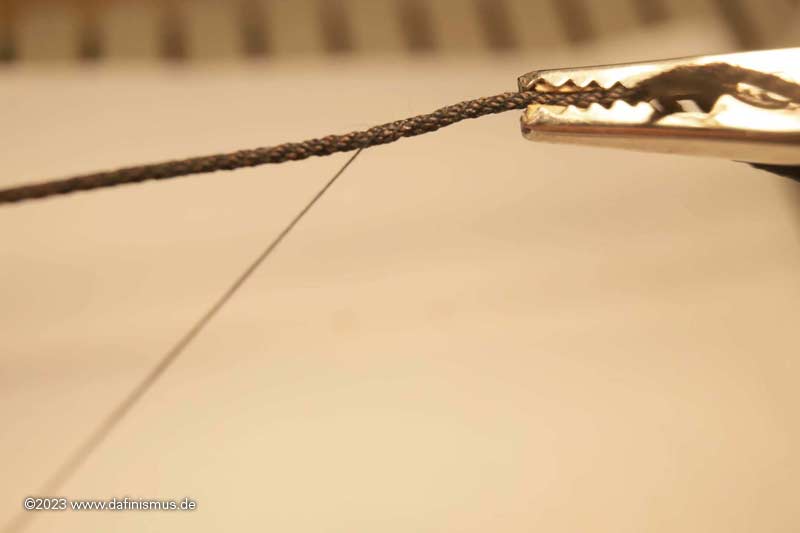
Then the whole thing into the holding device, a drop of superglue in the middle and press them together vertically ...

Image

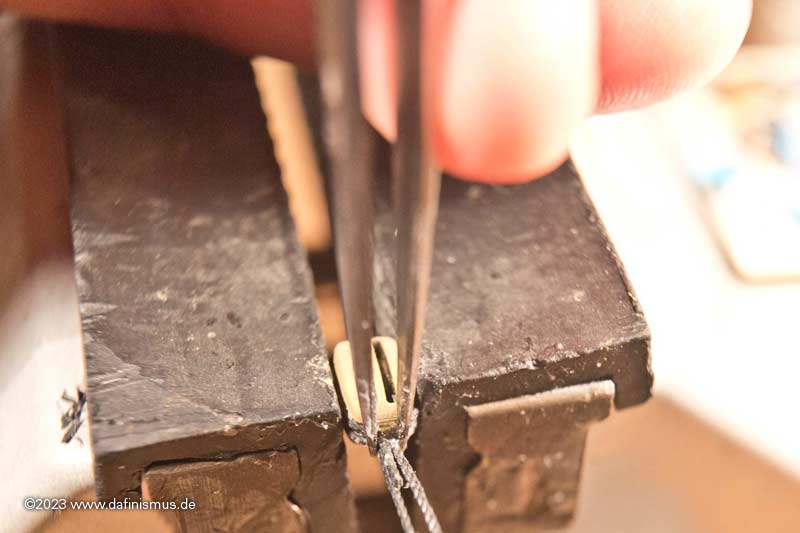
... and horizontally with a pair of strong tweezers.

Image

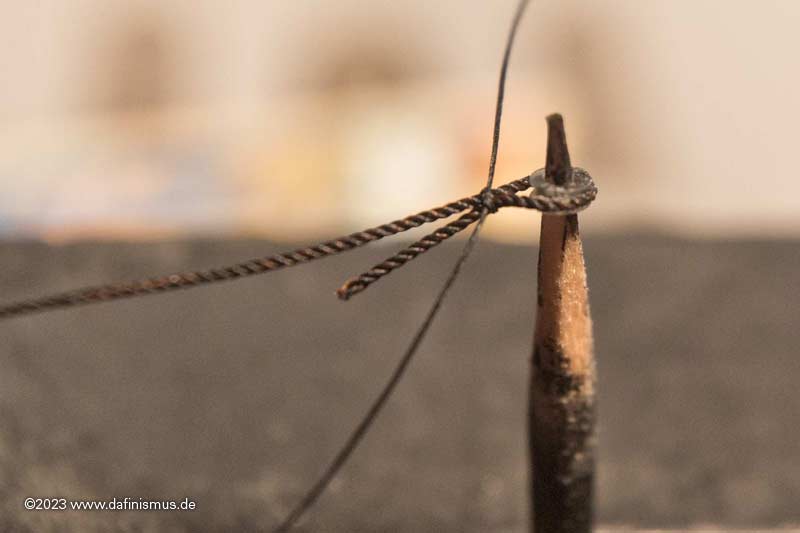
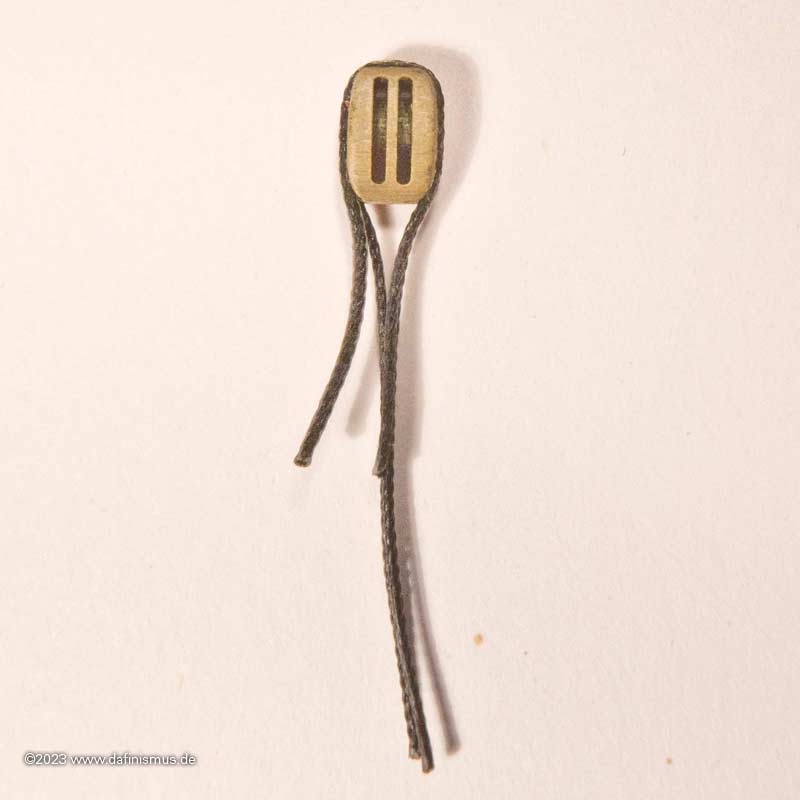
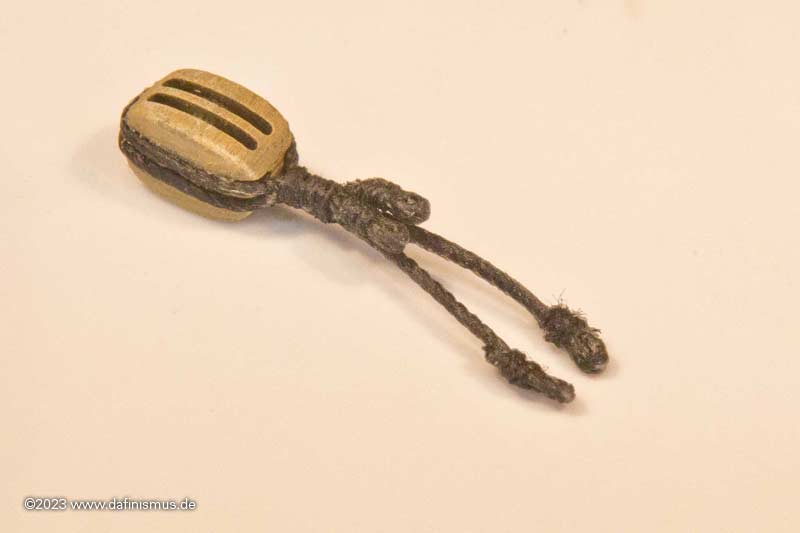
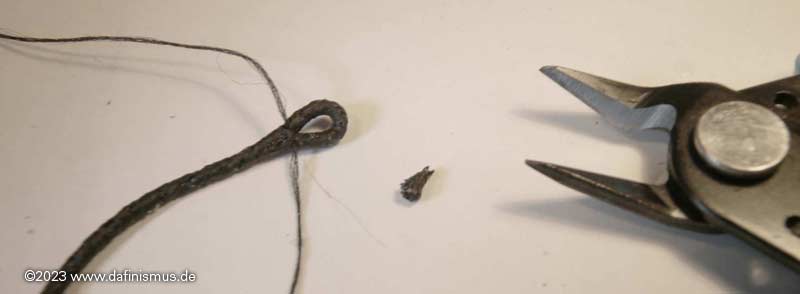
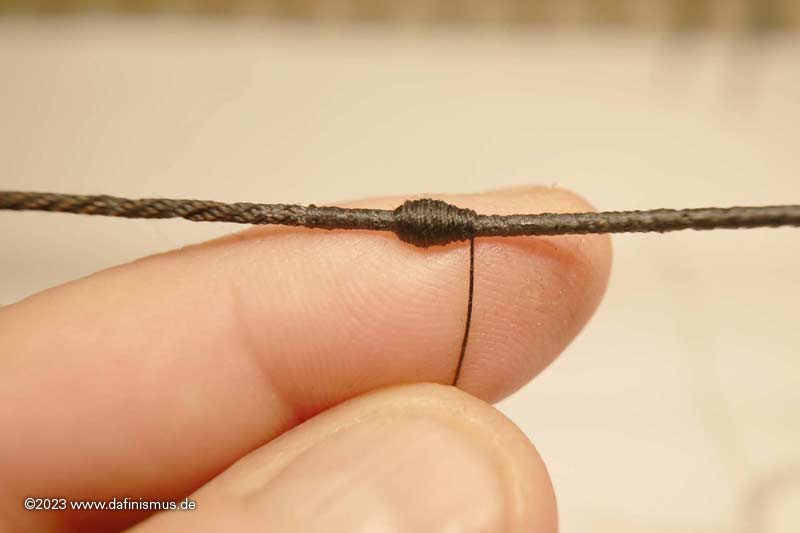
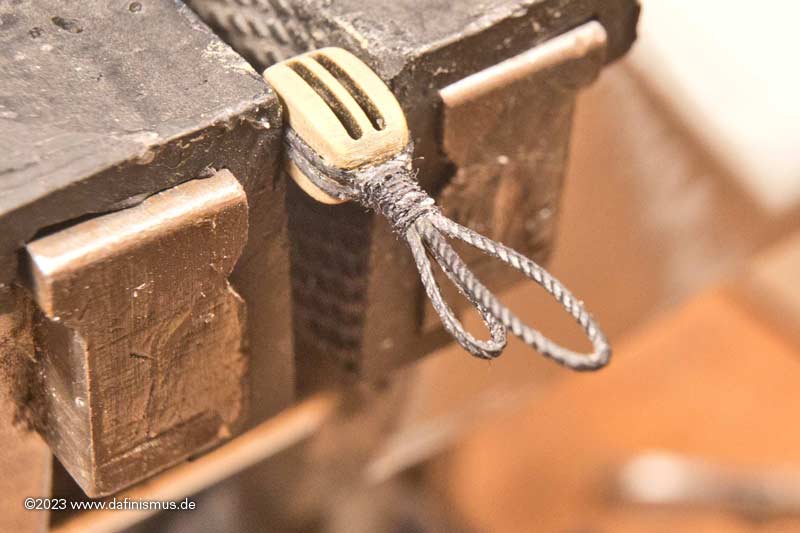
Then tie a safety knot close to the block.

Image

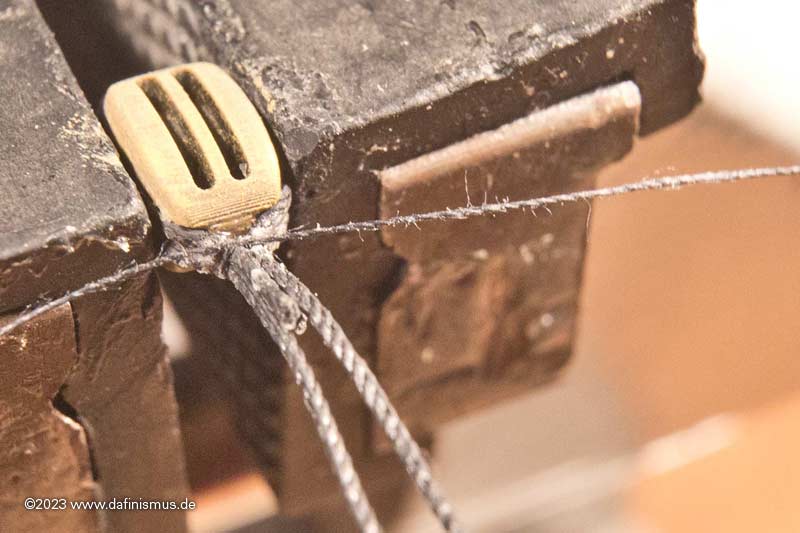
Then cut the short ends as short as possible.

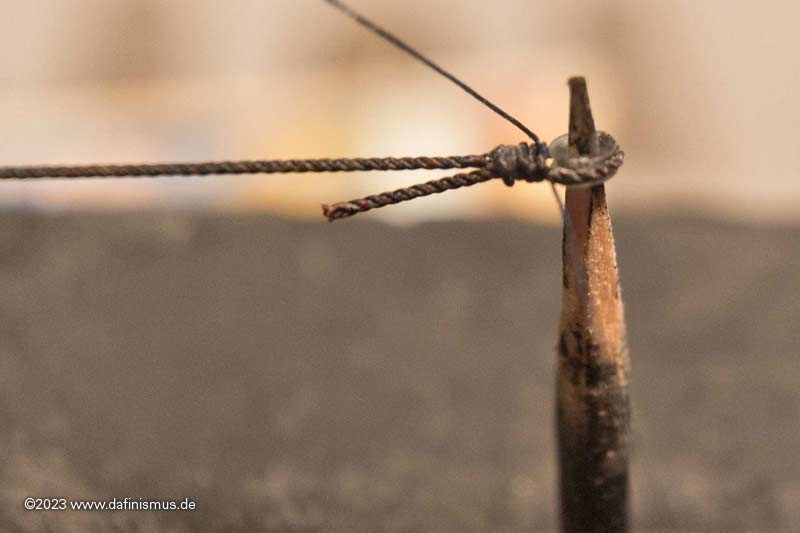
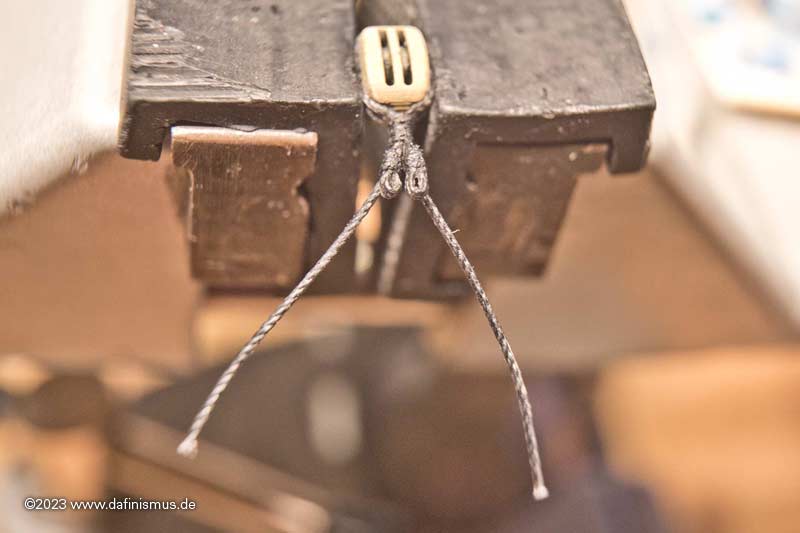
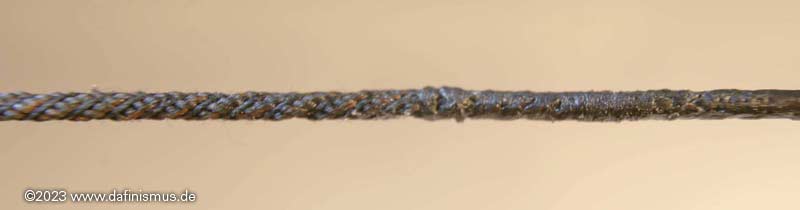
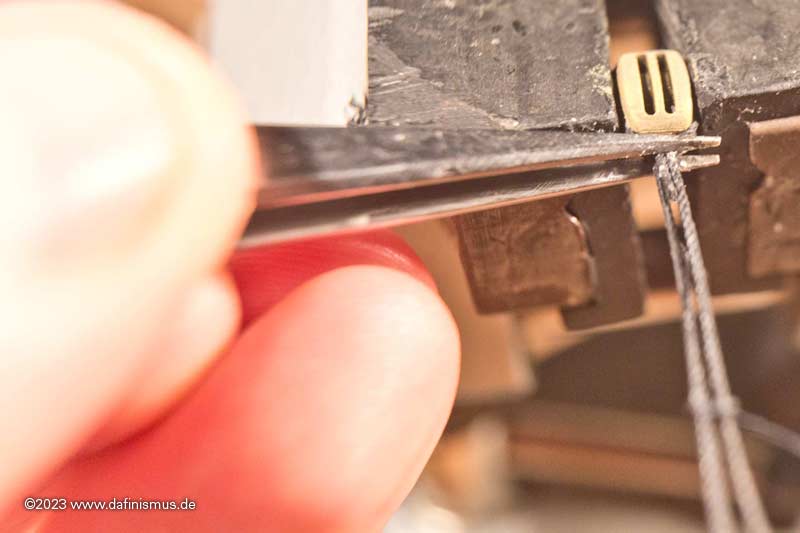
Then set the averaged length for the short loop, bring the rope to length, and fix it with a drop of glue and press it together again with the tweezers.

Image

Check length.

Image

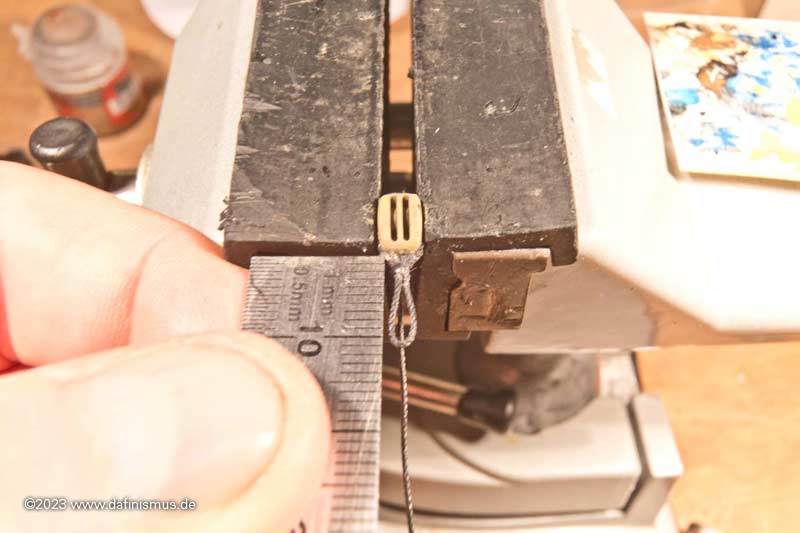
Adjust long loop and do the same.

Image

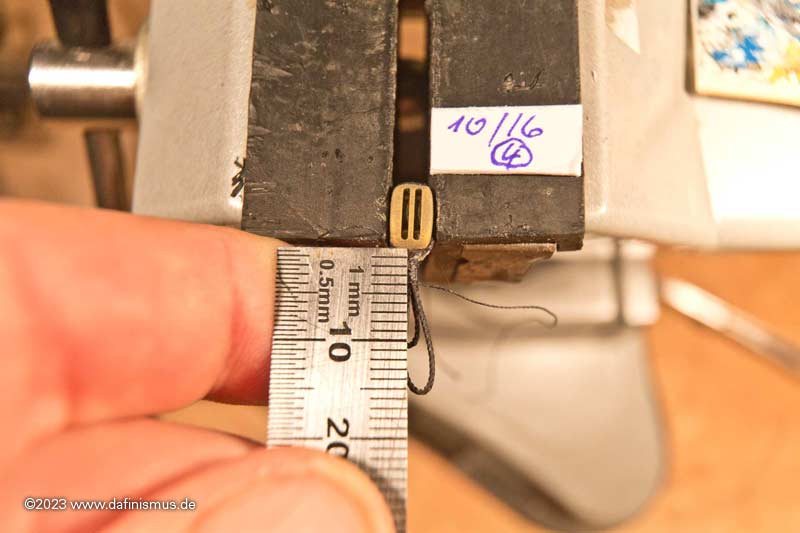
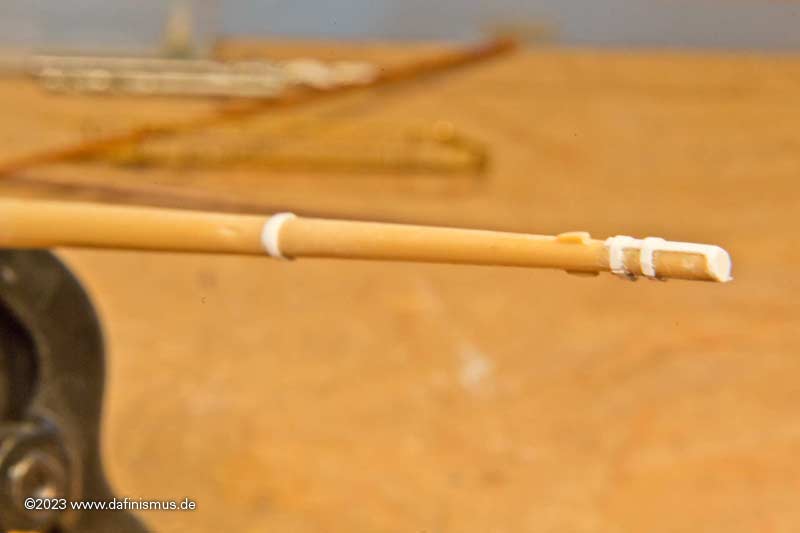
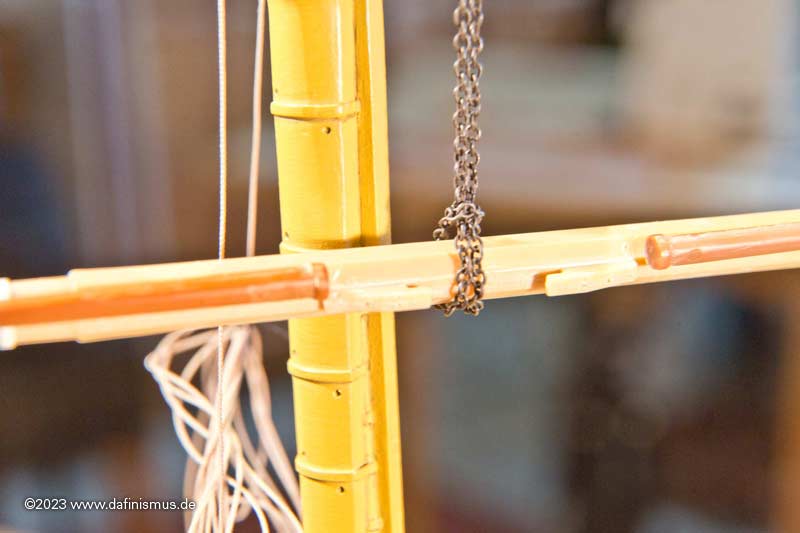
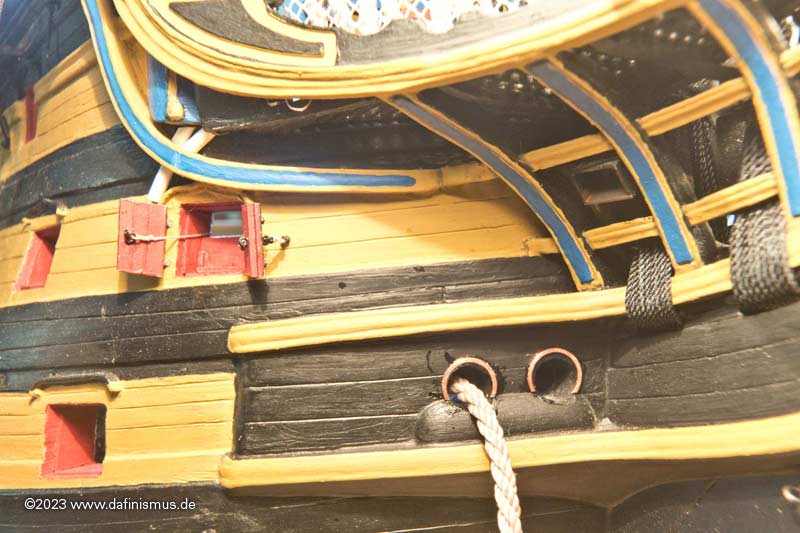
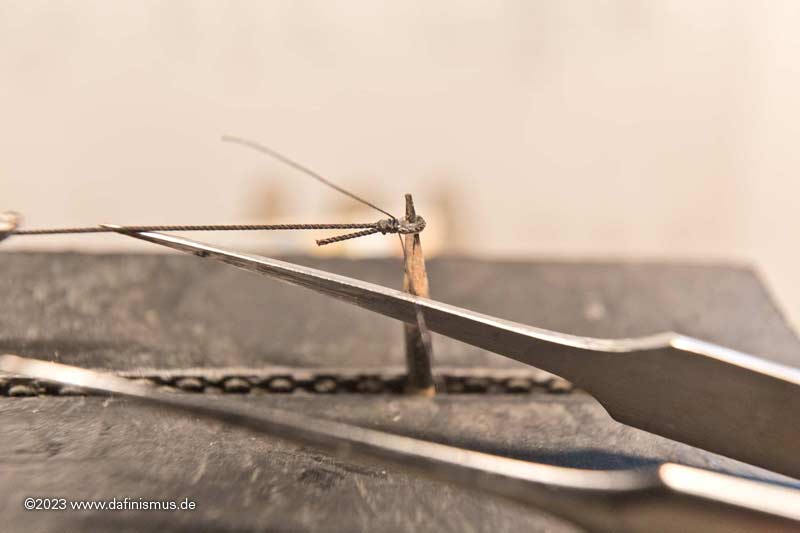
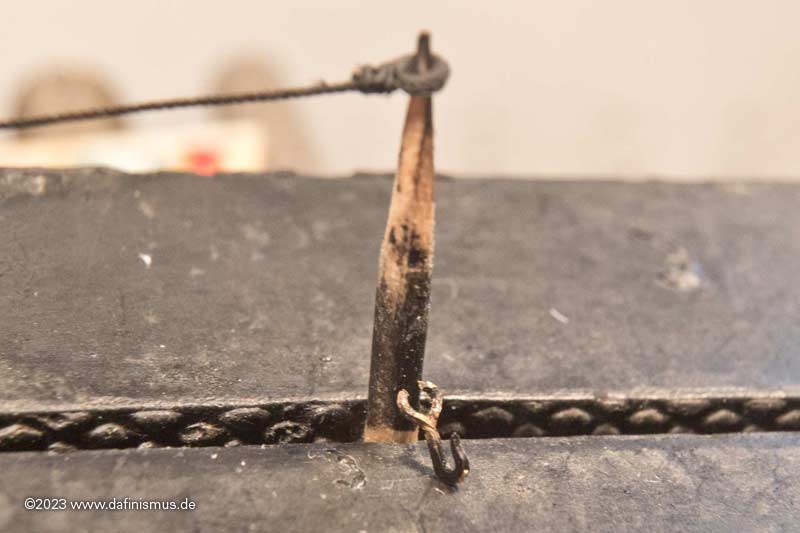
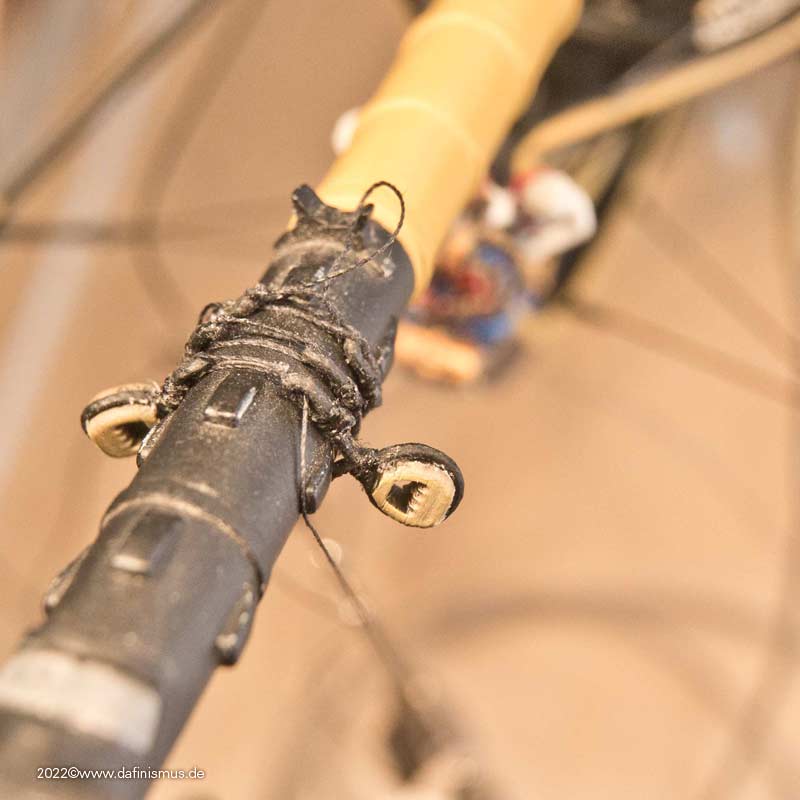
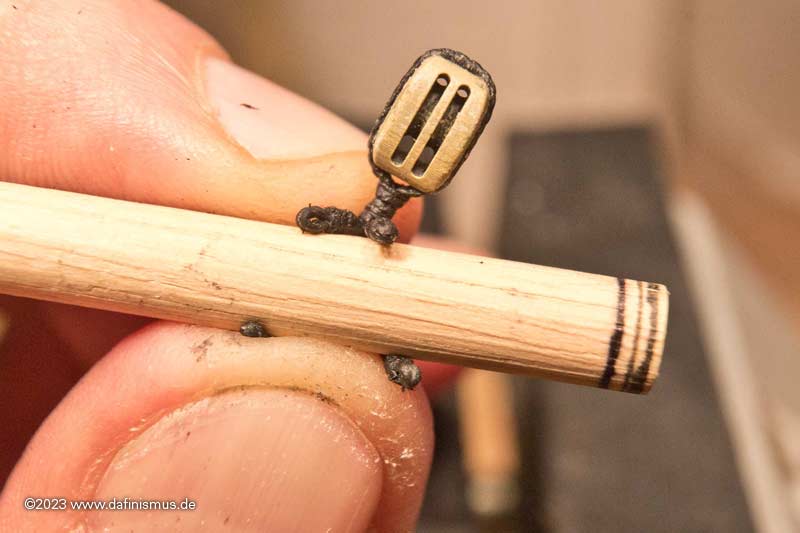
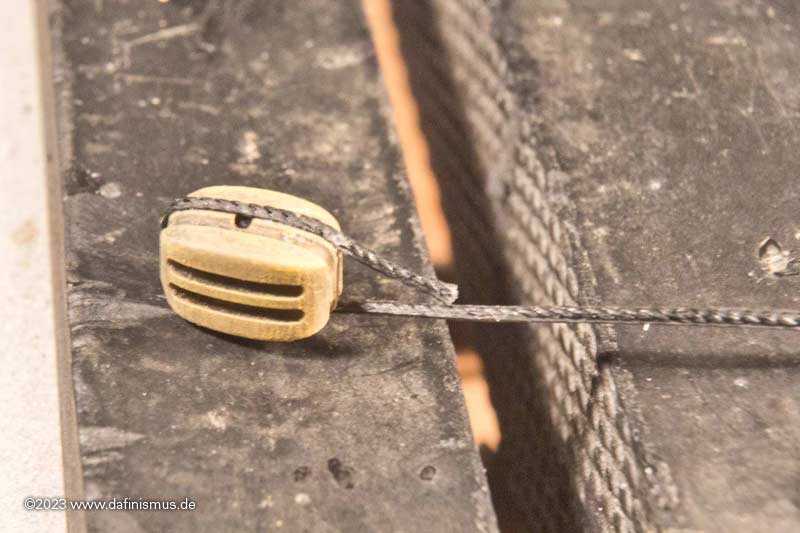
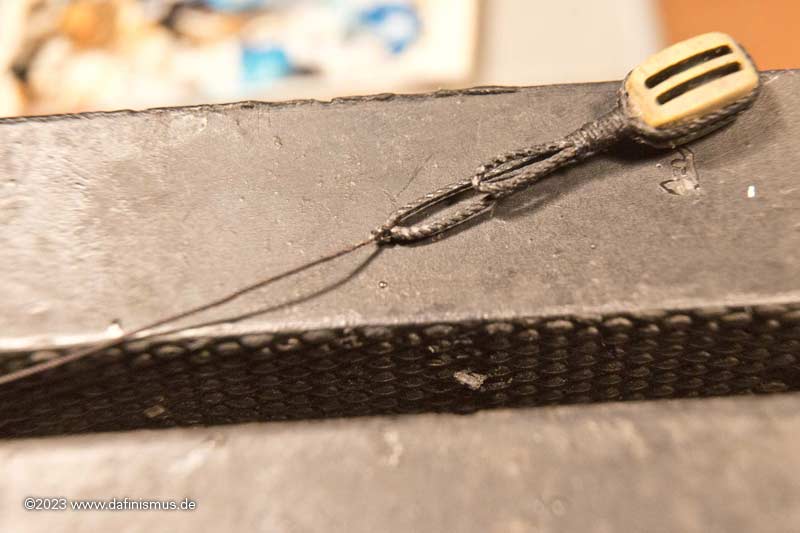
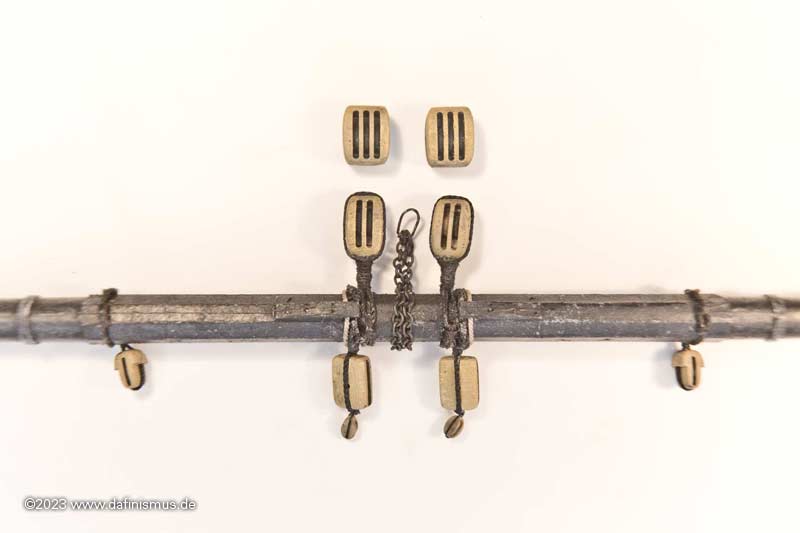
Then the whole thing should already be stable enough to make a trial fit at the place of use - here it is fitting.

Image

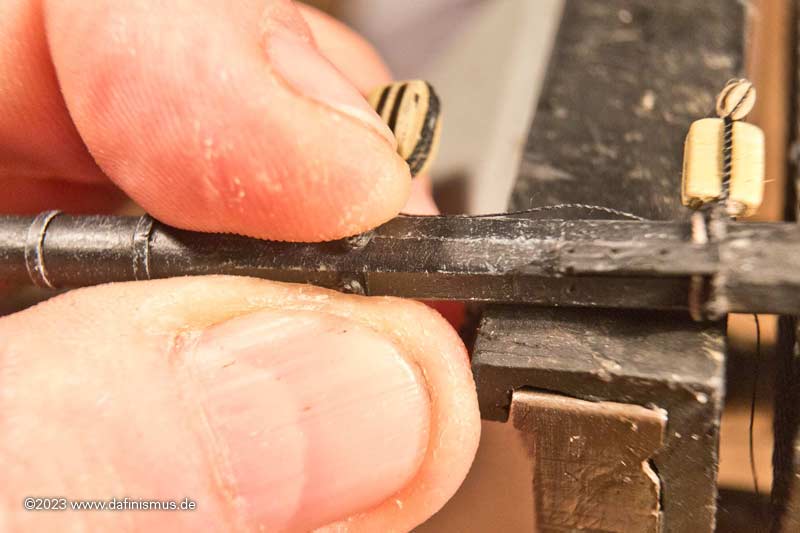
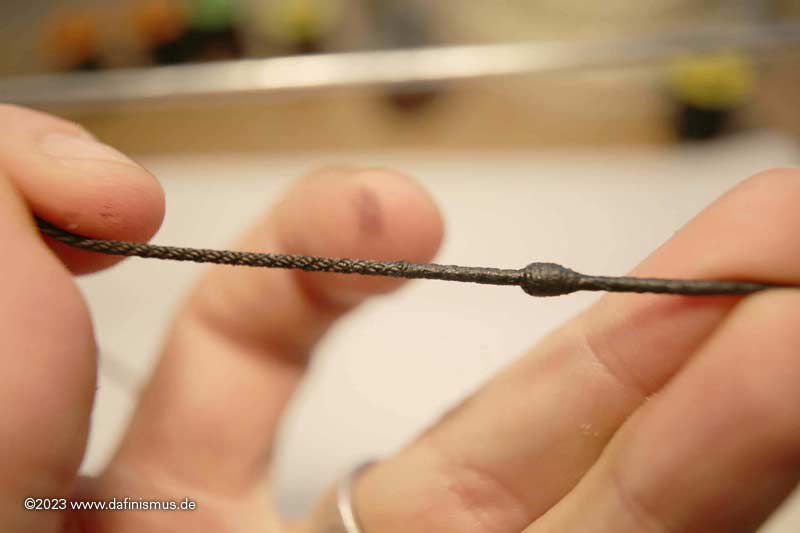
Then, with the specified distance of 4 mm from the block, set a knot with long enough ends for the binding and then line up normal knots close together alternately at the top and bottom all the way up to the block. It's quick and, unlike the standard wrapping, nothing slips out of place.

Image

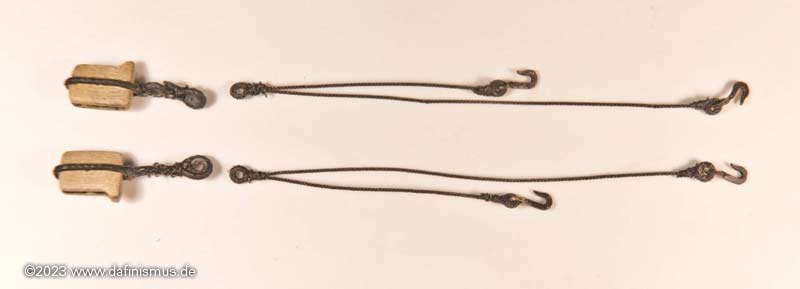
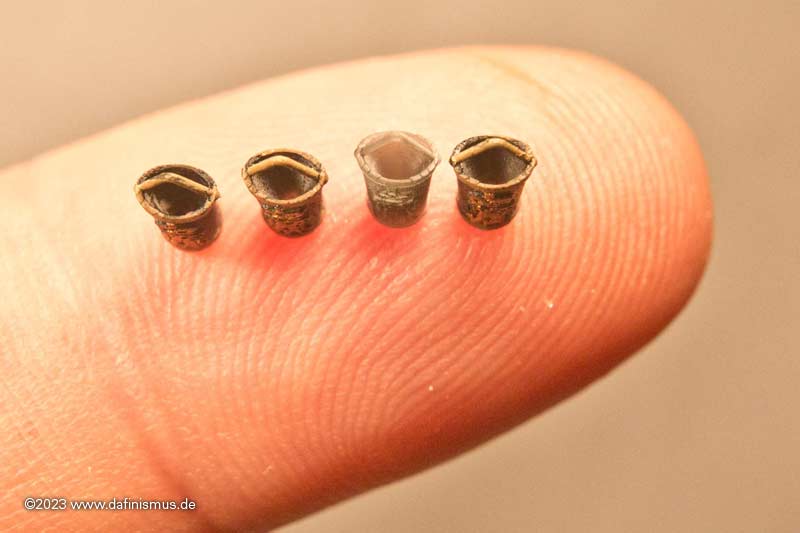
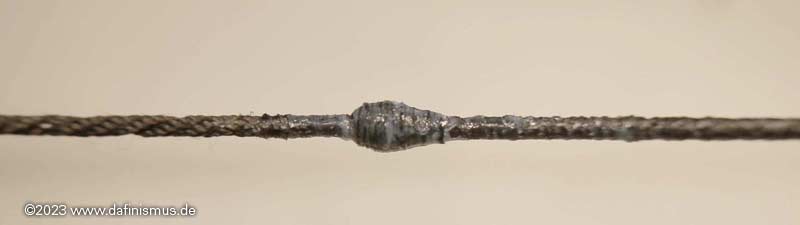
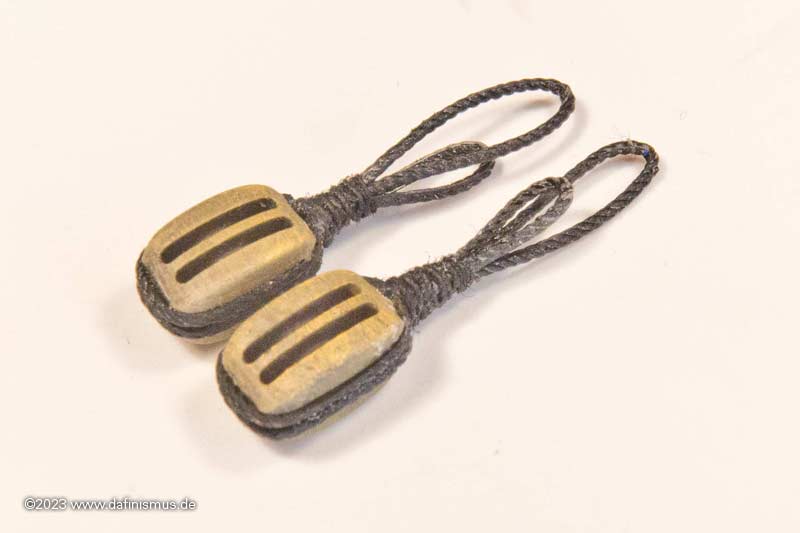
Add a little paint to defuse the white glue spots ...

Image

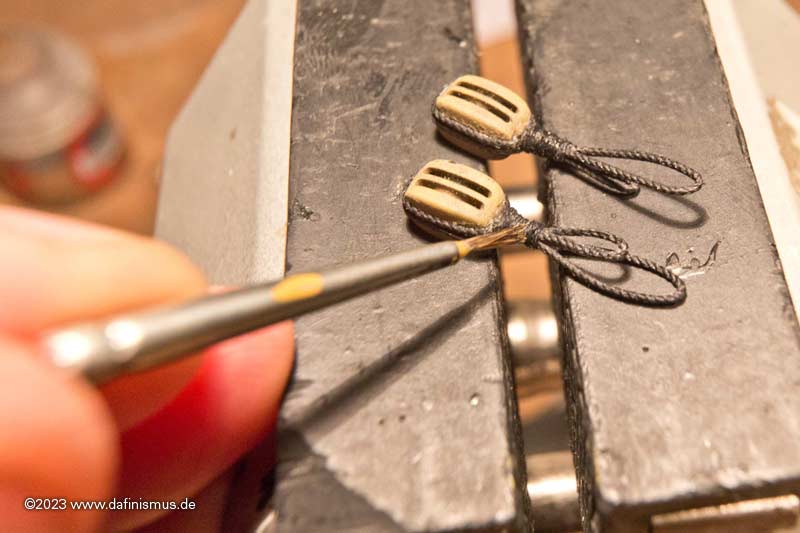
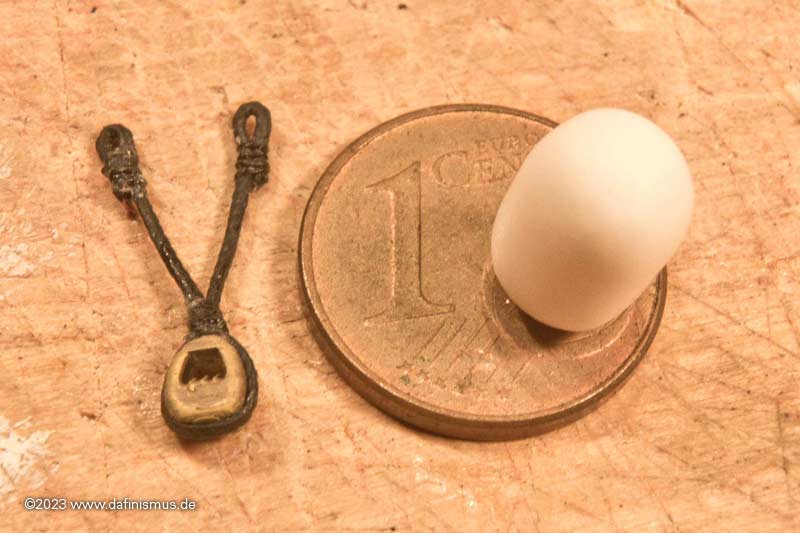
... and two neat block strops are ready.

Image

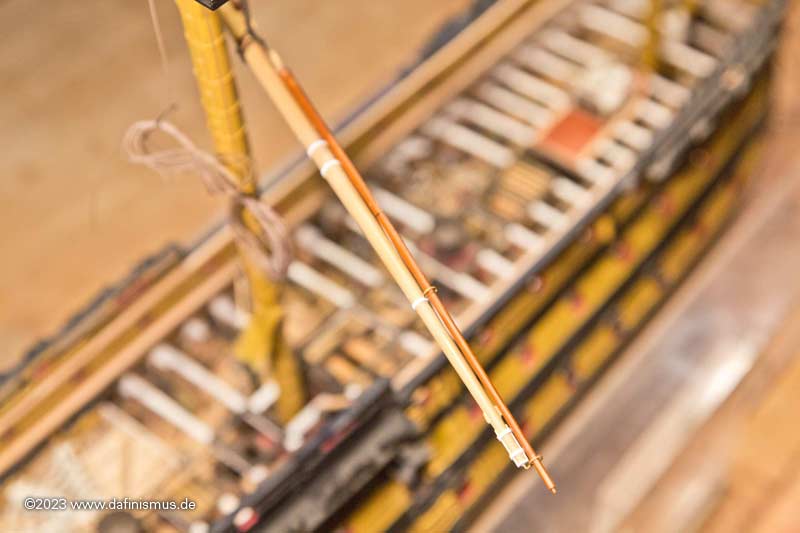
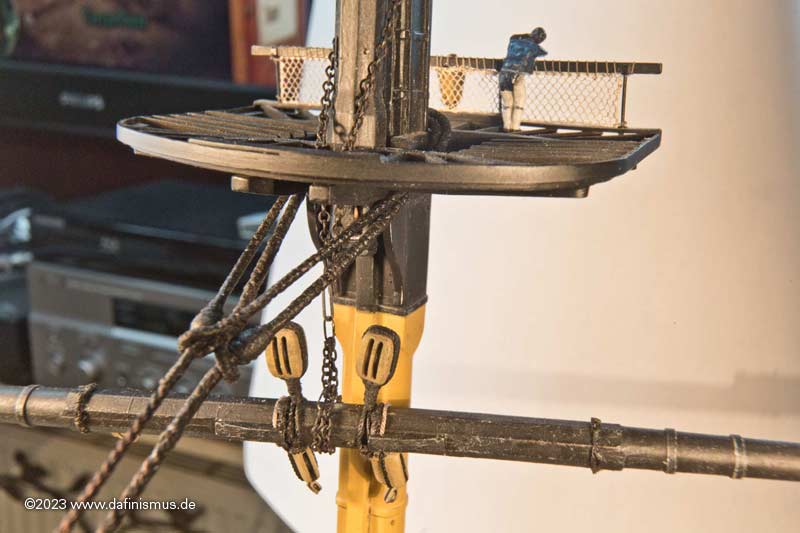
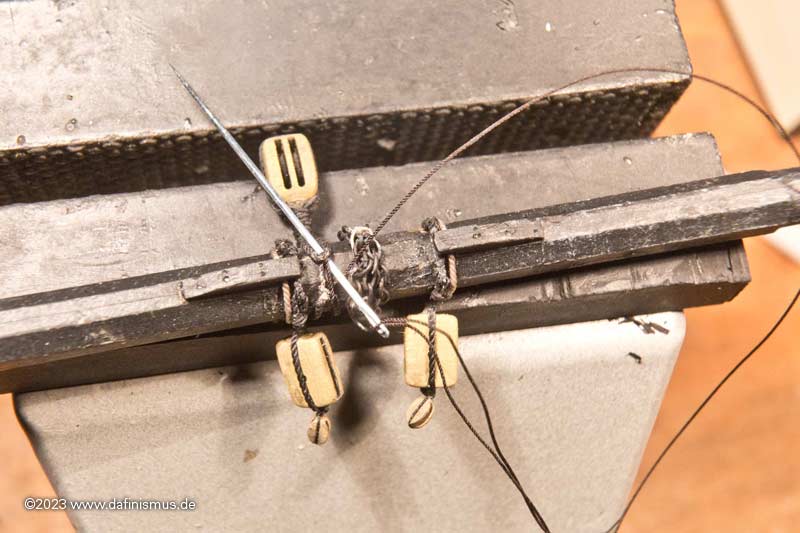
Still tying up the lanyard ...

Image

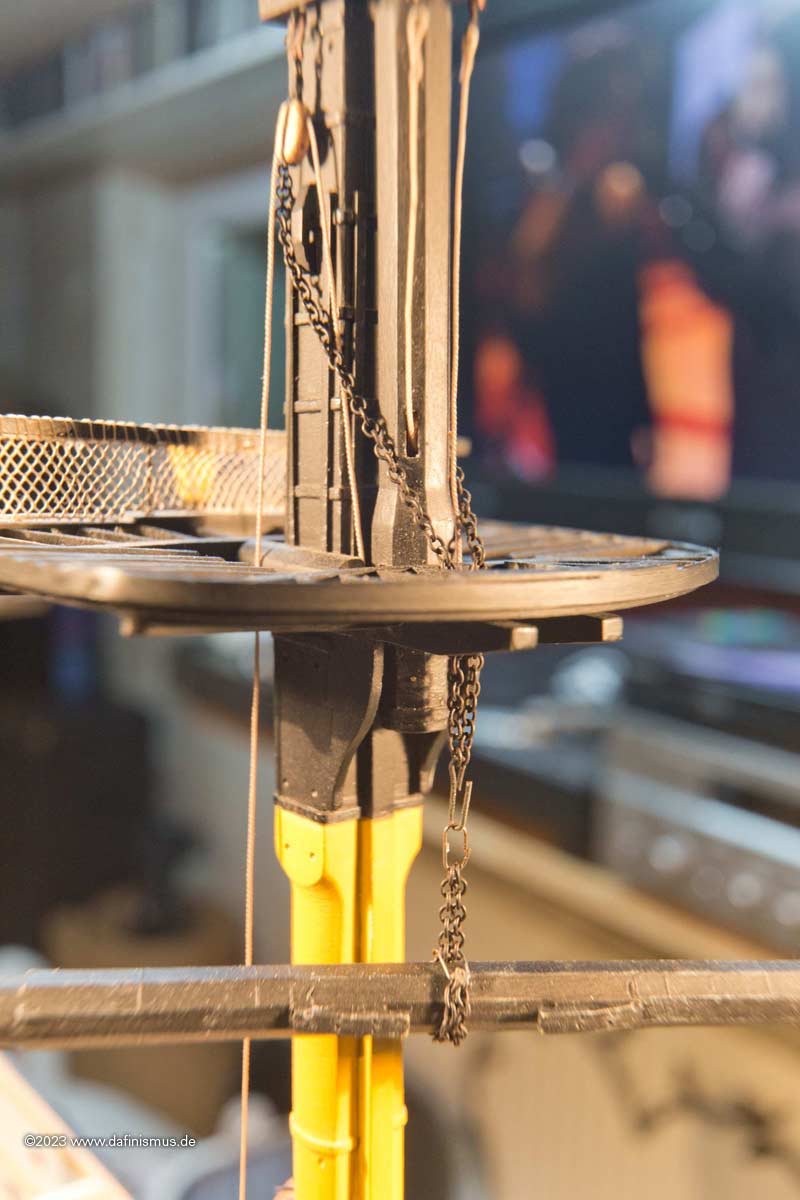
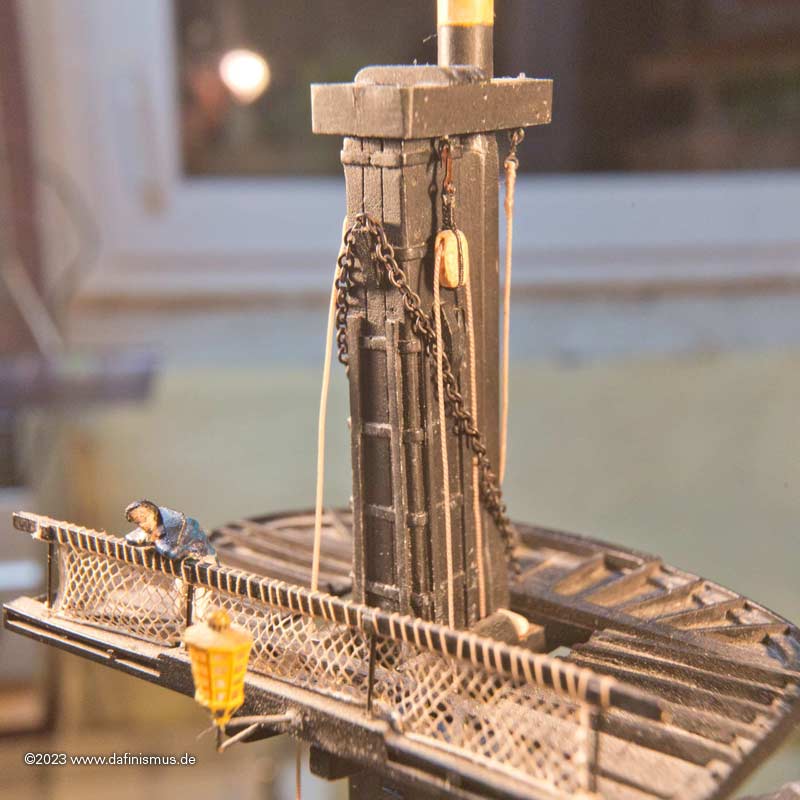
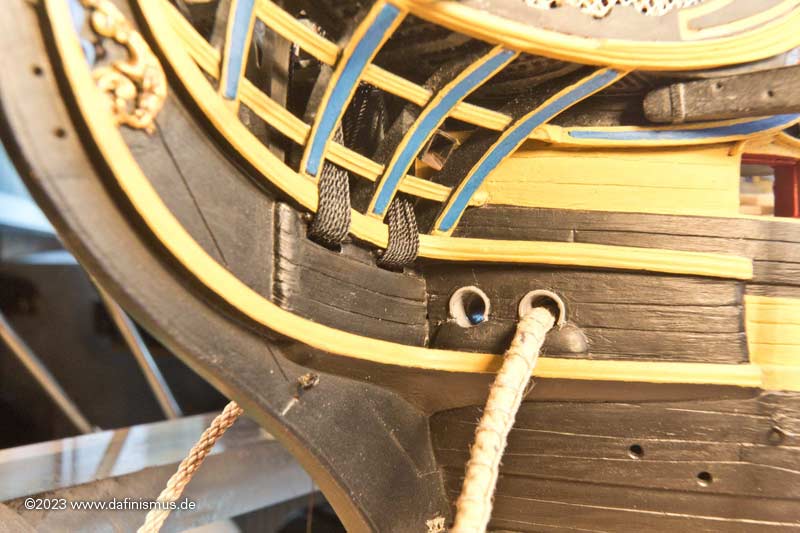
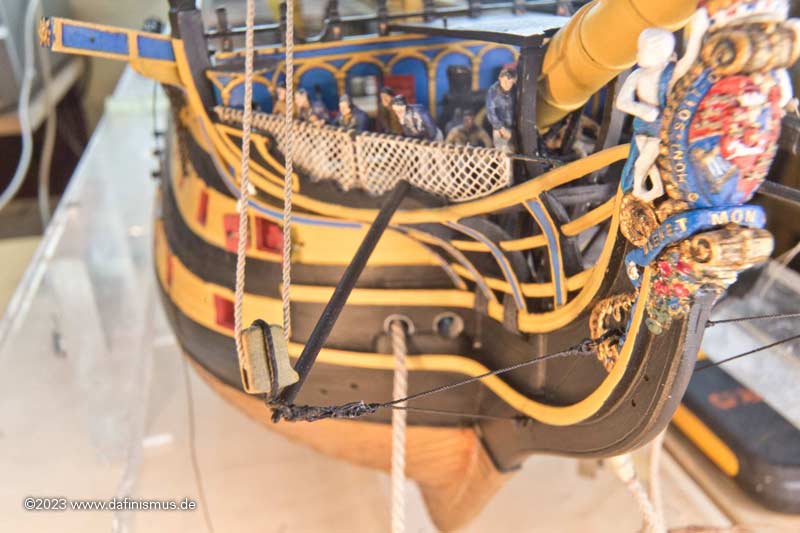
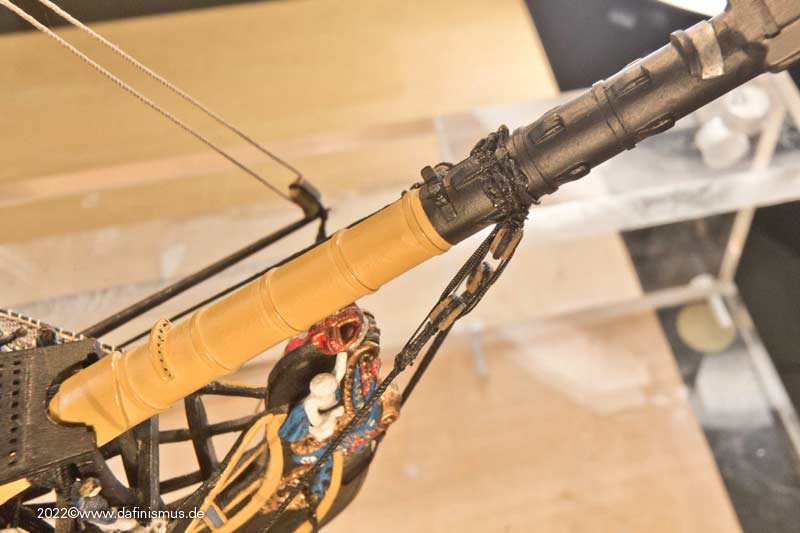
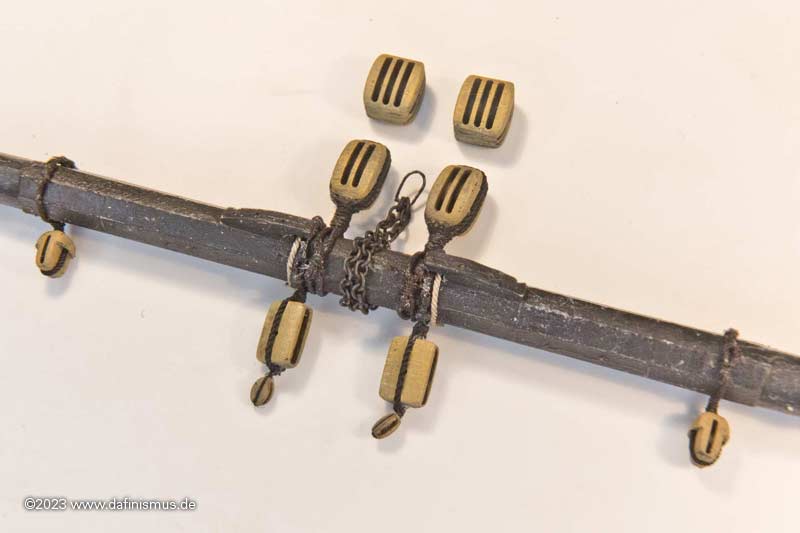
... set the whole thing in place and sew in the lashing with a needle. The inner lying sheet block had already found its way to the yard :-)

Image

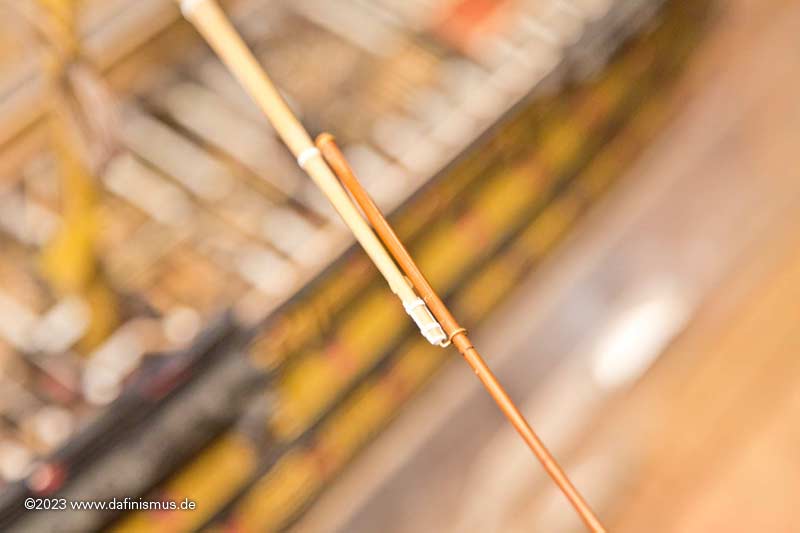
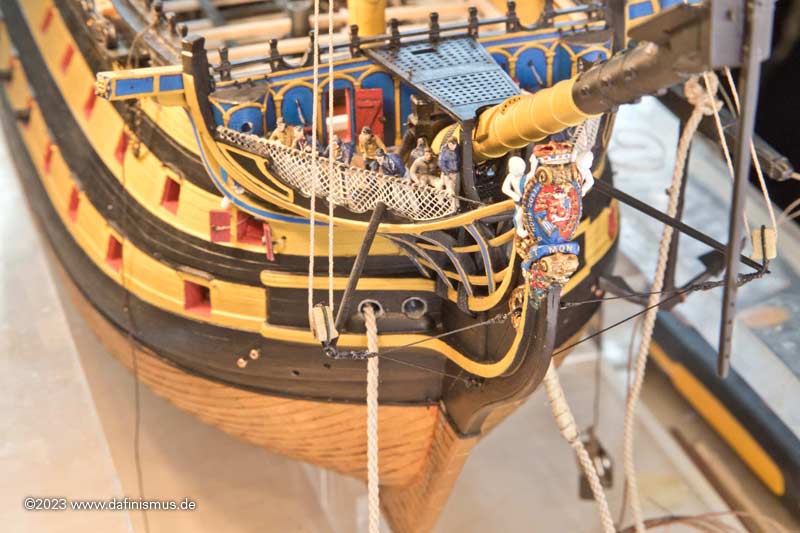
After that, it was the turn of the clew garnet blocks.

Image

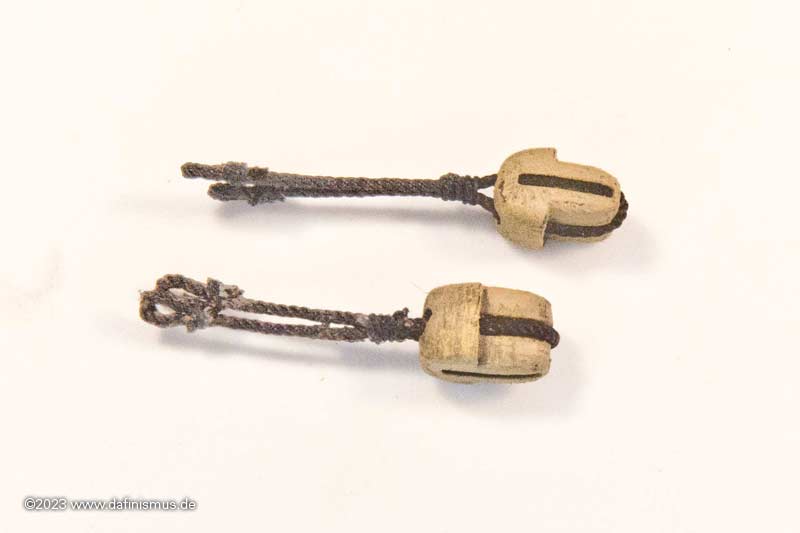
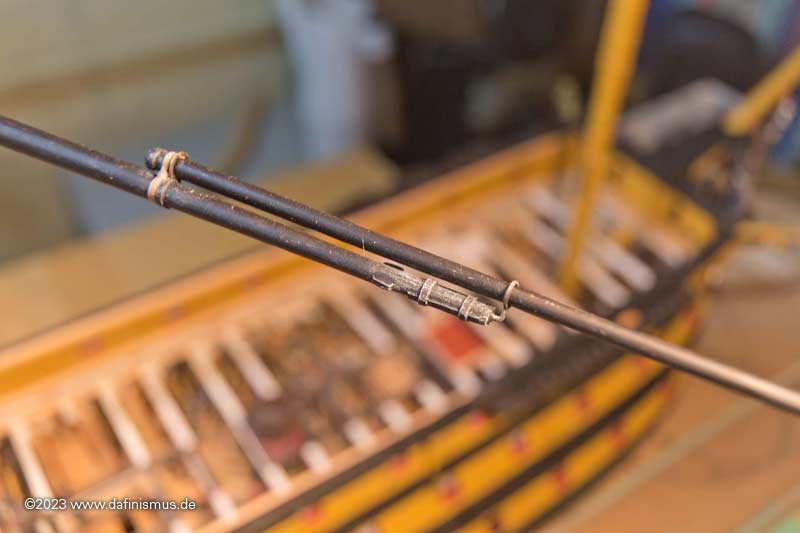
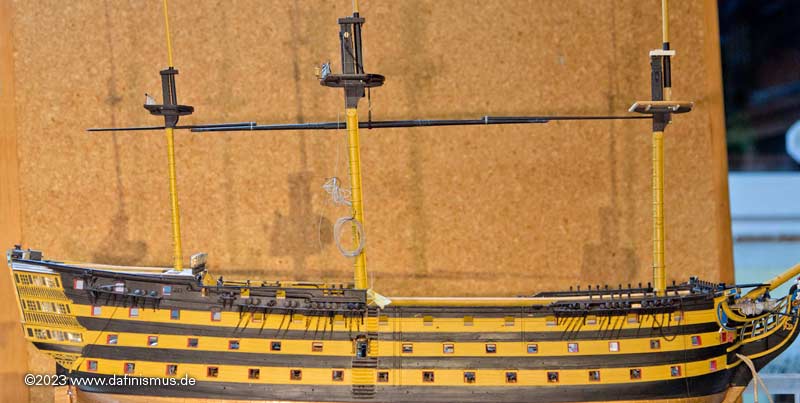
And then one can recoice :-)

Image

Image

Image

Hopefully it fits this time :-)

XXXDAn
To Victory and beyond ...
viewtopic.php?f=59&t=99050&start=60

See also our german forum for the age of Sail and History:
http://www.segelschiffsmodellbau.com
marijn van gils
Posts: 2686
Joined: Tue Feb 06, 2007 10:24 am
Location: Belgium

Re: To HMS Victory and beyond

Post by marijn van gils »

Wonderful work Daniel, as always! :thumbs_up_1: :thumbs_up_1: :thumbs_up_1:

My rigging won't be nearly this detailed, but these posts are excellent reference material for me nonetheless! ;)
europapete
Posts: 156
Joined: Thu Jan 05, 2017 8:39 pm

Re: To HMS Victory and beyond

Post by europapete »

Oh, come on Marijn, you can do it!
OK on the hard copy backup Dan. I have a full size shipping container reserved just for you.
Quick question for us lesser mortals, would you consider making your 3D rigging fittings available for sale on an as needed basis? All I have is the kit crap and the wood set from HiSModel. Your finer details would be AWESOME! Regards, Pete
(Fire buckets too!)
As for 3D printing, I think it is the future of this hobby and fantastic creations will be common place. I just don't have the computer skills to do it. The mechanical side, dealing with the physical printer and solving/correcting issues with the mechanical side of things....no problem! I have been a Porsche technician for 40 years, so I have the technology to fudge up anything! lololol Computers...errrr....not so good. I am old school.
User avatar
dafi
Posts: 996
Joined: Mon Mar 12, 2012 11:13 am
Location: Ludwigsburg/Germany
Contact:

Re: To HMS Victory and beyond

Post by dafi »

Hello Pete,

deal with the container :rolf_3:

Yes the blocks will be available soon as a package :-)

All the best, DAniel
To Victory and beyond ...
viewtopic.php?f=59&t=99050&start=60

See also our german forum for the age of Sail and History:
http://www.segelschiffsmodellbau.com
User avatar
dafi
Posts: 996
Joined: Mon Mar 12, 2012 11:13 am
Location: Ludwigsburg/Germany
Contact:

Re: To HMS Victory and beyond

Post by dafi »

The big sailing ship exhibition in Amsterdam is getting closer, I'm already looking forward to it. I'm going there this weekend and on Saturday my little one will be able to present herself and her bee stripes at the Naval Museum in Amsterdam. Maybe one or the other can come to visit at short notice, I think it will be bombastic. This special location, almost 130 running metres of exhibit tables with over 250 sailing ship models. WOW!

Time to stay? No, time for the stays.

The pictures of the Invincible wreck beautifully show that the mainstay and forestay and associated preventer stays were dressed differently. The main and forestay were wormed along their entire length. Only in the area of the mouse and the masthead was it was served. The preventer stays weres also fully served in the area of the mouse and masthead, but not wormed along its length.

It's not often that you find mice with hearts, so I don't want to deprive you ;-)

Image

Image

Pictures of the Invincible 1745-websites.

So it was off to the serving machine, first worming the stays.

Image

You can see that the cable - which consists of several beaten ropes - now looks much rounder and more even.

Image

I used the serving machine also for serving itself. For this I took 3/0 fly fishing yarn, it fluffs up just like tooth floss, so you can easily overlap windings. After that I used white glue to smooth surface more and some black paint for the surface appearance. Here a picture of the seam between wormed and served.

Image

For the eye, I cut the cable diagonally and glued it on, and dressed the glued area with fly fishing thread. It is quite stabe like this.

Image

And then came the mouse. First wound ...

Image

... then glued ...

Image

... and then homogenised with black.

Image

And at the place it looks like this.

Image

Classically, one mouse on the left, one on the right.

The shrouds still belong under the stay, but I haven't got that far yet. That's why I'll just take the stays off again and put them on top as soon as I'm ready.

XXXDAn
To Victory and beyond ...
viewtopic.php?f=59&t=99050&start=60

See also our german forum for the age of Sail and History:
http://www.segelschiffsmodellbau.com
Post Reply

Return to “Works in Progress”