What makes you think he's talking about a wooden hangar deck below the elevator and not the wooden deck of the elevator itself in a lowered position?FFG-7 wrote:what makes you think the elevators have a wood floor at the hanger deck level & not a pit without a wood floor? check Sheet 11 - Second Deck of the plans in this link. CV-17 USS Bunker Hill Booklet of General Plans (1946) https://archive.org/details/cv17bogp1946
CV-9 Essex and CV-19 Hancock
Moderators: BB62vet, MartinJQuinn, JIM BAUMANN, Jon, Dan K
-
Timmy C

- Posts: 12461
- Joined: Mon Jan 10, 2005 6:00 pm
- Location: Ottawa, Canada
Re: CV-9 Essex and CV-19 Hancock
De quoi s'agit-il?
-
FFG-7
- Posts: 721
- Joined: Wed Mar 13, 2024 9:45 am
Re: CV-9 Essex and CV-19 Hancock
not from what I am reading & picture from his post but time will tell if correct or not.
-
StevenVD
- Posts: 626
- Joined: Fri Dec 27, 2013 6:32 pm
Re: CV-9 Essex and CV-19 Hancock
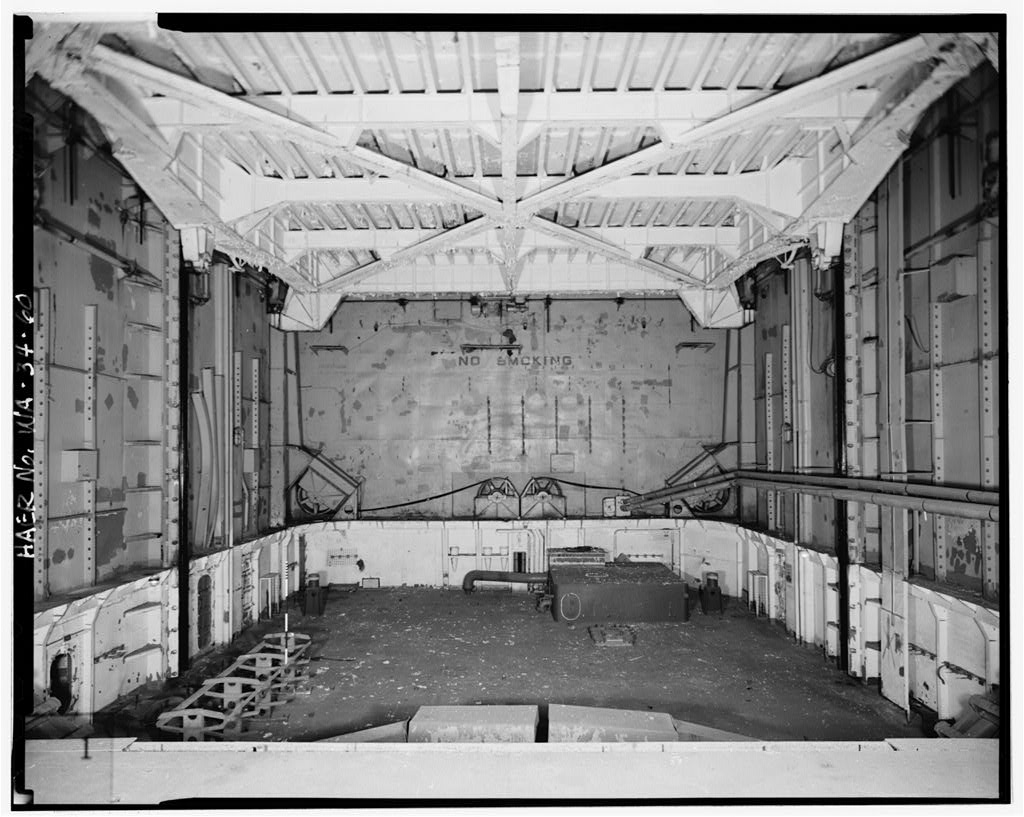
If it's about the front elevator, there's a picture of that somewhere on Navsource and I do know there's a pit and some mechanisms in there. That would all be visible missing through the hatches nearby, so for me closing up the deck and covering up the mismatch would be out of the question.
https://www.navsource.org/archives/02/0212afa.jpg
https://www.navsource.org/archives/02/0212afa.jpg
-
StevenVD
- Posts: 626
- Joined: Fri Dec 27, 2013 6:32 pm
Re: CV-9 Essex and CV-19 Hancock
This time only the PE will take up this update.

There is a lot of deck PE and railing, so I decided to pre-paint it.

Best to use a spray can, it's better to degrease and it gives a uniform layer of primer.

I intend to keep the railings in this grey color.

Deck PE is then covered with the Vallejo equivalent of Ocean Grey 5O. I guess it had to be deck blue but I wanted some contrast.

Hancock has the simplest Pe configuration with only 5 barriers on the rear deck.


The expansion joint needs to be cut where the catapult is crossing over. Also check the repaired bulkhead at the hangar front

The circumference of the deck is to be cut away after applying, causing me to sometimes stab the galleries.

The barriers are not cut out out of the deck, to avoid lasering crossovers with the deck planking I suppose. But they're a pain to trace and remove from the deck.

I should have first done the barriers and then the expansion joint here.

Now the joint is moved to the front for 2 deck planks, allowing for the barrier to fit in.

Essex has more of everything, having the capability to have landings over the bow.


Now Essex still needs the deck circumference and my scratched rear elevator edge.
There is a lot of deck PE and railing, so I decided to pre-paint it.
Best to use a spray can, it's better to degrease and it gives a uniform layer of primer.
I intend to keep the railings in this grey color.
Deck PE is then covered with the Vallejo equivalent of Ocean Grey 5O. I guess it had to be deck blue but I wanted some contrast.
Hancock has the simplest Pe configuration with only 5 barriers on the rear deck.
The expansion joint needs to be cut where the catapult is crossing over. Also check the repaired bulkhead at the hangar front
The circumference of the deck is to be cut away after applying, causing me to sometimes stab the galleries.
The barriers are not cut out out of the deck, to avoid lasering crossovers with the deck planking I suppose. But they're a pain to trace and remove from the deck.
I should have first done the barriers and then the expansion joint here.
Now the joint is moved to the front for 2 deck planks, allowing for the barrier to fit in.
Essex has more of everything, having the capability to have landings over the bow.
Now Essex still needs the deck circumference and my scratched rear elevator edge.
-
StevenVD
- Posts: 626
- Joined: Fri Dec 27, 2013 6:32 pm
Re: CV-9 Essex and CV-19 Hancock
On the fret for the Hancock PE gutter, a placement error in the part numbers has resulted in a slightly deformed part. No great deal, but combined with the useless aft elevator edge this deserves mentioning. But I don't know if Pontos is still reading like some years ago?

I also had to remove a small part of the Trumpeter deck edge inside the 2nd elevator. This would not be noticed if you place the elevator flush to the deck, but I chose different in both models and now that strip remained unplanked. I decided to saw it out of the deck and try not to damage the safety railing PE part in the Pontos deck. The reference pic shows Boxer.

I approached this PE part maximally without touching.

Only a bit of sanding and Essex was corrected.

The sawing part in Hancock went well.

But the ship's compartmented bulkheads do not always lign out with each other. Apparently the hull did not go the same direction as the wood deck, and again there was an overhanging corner.

The simplest solution was to cover this up and repaint.

I cut a new 3rd elevator edge part to replace the deformed Pontos part. My last attempt didn't fit perfectly. The nw part rests on the elevator and is currently primed grey.

After retouching the chipped PE parts I was in the process of marking the deck.

It seemed that Essex kept these markings after the overhaul in 1944, so I was just going to use that Pontos masking set. It's a bit of a puzzle, none of the masking parts are indicated. Compare with the drawing and find out yourself where the 8 different strips go. Some small lines of at least 3 stripes were not cut.

The centerline mask needed to be measured laterally. At this point I knew that I would atleast have considerable damage to the painted PE parts on the deck. My primer wasn't doing its job.

I tried to avoid overspraying on the wooden deck, but I used Vallejo Model paint thinned with water and this turned out very thin.

So the unpacking went partly as expected, losing most of the blue paint on the PE, but there was lots of bleeding of the thin paint under the tape. This will take some effort to restore and I might need to make these parts of the deck more weathered to blend it with the blue deck doping. There is one positive point in this, I didn't find any deck striping on Hancock. I'll only use the hull number mask because it is visible as a trace on some deck pictures.


I also had to remove a small part of the Trumpeter deck edge inside the 2nd elevator. This would not be noticed if you place the elevator flush to the deck, but I chose different in both models and now that strip remained unplanked. I decided to saw it out of the deck and try not to damage the safety railing PE part in the Pontos deck. The reference pic shows Boxer.
I approached this PE part maximally without touching.
Only a bit of sanding and Essex was corrected.
The sawing part in Hancock went well.
But the ship's compartmented bulkheads do not always lign out with each other. Apparently the hull did not go the same direction as the wood deck, and again there was an overhanging corner.
The simplest solution was to cover this up and repaint.
I cut a new 3rd elevator edge part to replace the deformed Pontos part. My last attempt didn't fit perfectly. The nw part rests on the elevator and is currently primed grey.
After retouching the chipped PE parts I was in the process of marking the deck.
It seemed that Essex kept these markings after the overhaul in 1944, so I was just going to use that Pontos masking set. It's a bit of a puzzle, none of the masking parts are indicated. Compare with the drawing and find out yourself where the 8 different strips go. Some small lines of at least 3 stripes were not cut.
The centerline mask needed to be measured laterally. At this point I knew that I would atleast have considerable damage to the painted PE parts on the deck. My primer wasn't doing its job.
I tried to avoid overspraying on the wooden deck, but I used Vallejo Model paint thinned with water and this turned out very thin.
So the unpacking went partly as expected, losing most of the blue paint on the PE, but there was lots of bleeding of the thin paint under the tape. This will take some effort to restore and I might need to make these parts of the deck more weathered to blend it with the blue deck doping. There is one positive point in this, I didn't find any deck striping on Hancock. I'll only use the hull number mask because it is visible as a trace on some deck pictures.
-
StevenVD
- Posts: 626
- Joined: Fri Dec 27, 2013 6:32 pm
Re: CV-9 Essex and CV-19 Hancock
Since I bought a new airbrush I also wanted a double holder, the old one is still useful.


For H&S it clamps down on the brush a bit so you wouldn't knock it off. I wonder if an AK brush is skinnier.

With Lifecolor Deck Blue and a piece of cardboard the bleeding of the paint is corrected.

Then, with some light sand, the weathering got even better than before.

compare Essex with marking and Hancock a bit austere. I could improve that too.


The same paint was used like the corrections above. Again the catapult primer failed.

Then the essex deck PE was repainted with some deck masking.


The deck PE repainted.

On Essex I presume there were foot markers, because they can be found on the island structure too. I can't recreate that because it changes to black over the Light Grey, but I wanted it on the deck:

There are two problems. You have to apply the deck striping perfectly straight to be able to trace it with the footing dry-decals. I hadn't, so I had to move the decalpaper with the striping. This is not too conspicuous. Also, if you would be able to decipher all numbers, you would notice that on two locations the number is repeated. They found it necessary to repeat the last number in a new row of decals, in stead of marking that location with a differnt sign. Therefore I only noticed this at the last line for the bow. So 50 per cent of my footing numbering is wrong and can not be corrected like an ordinary decal would. In two instances the number fell on a PE part and this caused again a paint chip to be torn off. I didn't want to do this on Hancock, that didn't even have a centerline striping.

At the front elevator I had to clip a piece of dry-decal.

The deck Blue camo on the islands had to be painted on with a brush.

Then these parts could be fixed.

A new team of gunners is added to the project.


The print plates are very flexible and warped a bit, with no consequences for the quality. Strangely, four figures were only printed above the waist. I'll try to complete these.


One set covers three marshmellow sticks.

Lots of print supports need to be removed. I mioght need some barrels later on.

The Ion figures are supported on thicker blocks that never warp and have a lot less fixtures.

They are a bit smaller than the Tori gunners, but these will mostly feature on another deck level..
For H&S it clamps down on the brush a bit so you wouldn't knock it off. I wonder if an AK brush is skinnier.
With Lifecolor Deck Blue and a piece of cardboard the bleeding of the paint is corrected.
Then, with some light sand, the weathering got even better than before.
compare Essex with marking and Hancock a bit austere. I could improve that too.
Hancock once sported the hull number in black, but it was scrubbed off when she was mobilized. The number remained visible for a while. The change in the director slot from my caption happened later and Trumpeter did mold it shut, but I still wanted this number because I got a masking for that.Note the flight deck was cut away just aft of the port catapult, to provide an unobstructed view for a third Mark 37 director that would have been mounted on the former hangar-deck catapult sponson. Only Ticonderoga and Hancock actually had the cut, and it was later eliminated as BuAer considered the cut "a serious hazard to aircraft taking off."
The same paint was used like the corrections above. Again the catapult primer failed.
Then the essex deck PE was repainted with some deck masking.
The deck PE repainted.
On Essex I presume there were foot markers, because they can be found on the island structure too. I can't recreate that because it changes to black over the Light Grey, but I wanted it on the deck:
There are two problems. You have to apply the deck striping perfectly straight to be able to trace it with the footing dry-decals. I hadn't, so I had to move the decalpaper with the striping. This is not too conspicuous. Also, if you would be able to decipher all numbers, you would notice that on two locations the number is repeated. They found it necessary to repeat the last number in a new row of decals, in stead of marking that location with a differnt sign. Therefore I only noticed this at the last line for the bow. So 50 per cent of my footing numbering is wrong and can not be corrected like an ordinary decal would. In two instances the number fell on a PE part and this caused again a paint chip to be torn off. I didn't want to do this on Hancock, that didn't even have a centerline striping.
At the front elevator I had to clip a piece of dry-decal.
The deck Blue camo on the islands had to be painted on with a brush.
Then these parts could be fixed.
A new team of gunners is added to the project.
The print plates are very flexible and warped a bit, with no consequences for the quality. Strangely, four figures were only printed above the waist. I'll try to complete these.
One set covers three marshmellow sticks.
Lots of print supports need to be removed. I mioght need some barrels later on.
The Ion figures are supported on thicker blocks that never warp and have a lot less fixtures.
They are a bit smaller than the Tori gunners, but these will mostly feature on another deck level..
-
StevenVD
- Posts: 626
- Joined: Fri Dec 27, 2013 6:32 pm
Re: CV-9 Essex and CV-19 Hancock
An update about the ship's crew.

A few days I haven't done anything but clipping these figures off the printing block and glueing them to sticks.

The Ion figures are easy to clip with only a few supports.

This should be about 500. I decided to keep one pack of Tori gunners for some later projects.

The inside pair of 5-inch gun platforms was reversed to have the ladders to the right side. Therefore these guns were also reversed. This was possible without visible damage.

All railings are assembled. In the Pontos Essex set, some large parts are not used, I presume these are useful for another ship of the class.

The fit is good, I only made an error to the island base catwalks. This can't be corrected without major damage (tearing a long section of well glued catwalk off the deck edge) so it remains 3mm misplaced. But another change can be made.

This is the 1942 Essex port hangar catapult sponson. I had even improved the upper surface of it, so it was perfectly flat.

Then I noticed in this 1944 picture that it was not flat at all. It suddenly resembled the Hancock sponson, being longer to house two Bofors quad guns.

The post-kamikaze pictures take away any doubt that the sponson was totally rebuilt.

In the Hancock kit I found a second sponson top with different director locations. Probably this was needed in the Ticonderoga kit, but now I apparently don't need any director towers. Maybe the Bofors guns have radars at this date? Adding the guns also means to remove the 4 floater net baskets to get an optimal arc of fire.

The old sponson is removed for a second time.

The Pontos replacements for the front bridge Bofors position can be redressed for two halves on this sponson. I should have done that on Hancock too, actually.

The old sponson and some Evergreen parts are used to build the base.

The pictures don't show the extent of any ammo clips inside the shielding, so this is a guess.

Then it's made to fit to the hull.


The seam was later filled with putty.

Like on Hancock the fuel lines are now externally mounted.

The deck is made flush with the hangar.

My choice for five out of six elevators down was made without calculating the necessity of about 70cm of safety railing. Strangely there is none in the Pontos set, so I found one useful bit of catwalk that gave enough railing for the deck edge elevators.

This L'Arsenal extra set had enough two-bar railing for Essex' front elevator.

On Hancock this will have to be provided out of the two-bar railing.
A few days I haven't done anything but clipping these figures off the printing block and glueing them to sticks.
The Ion figures are easy to clip with only a few supports.
This should be about 500. I decided to keep one pack of Tori gunners for some later projects.
The inside pair of 5-inch gun platforms was reversed to have the ladders to the right side. Therefore these guns were also reversed. This was possible without visible damage.
All railings are assembled. In the Pontos Essex set, some large parts are not used, I presume these are useful for another ship of the class.
The fit is good, I only made an error to the island base catwalks. This can't be corrected without major damage (tearing a long section of well glued catwalk off the deck edge) so it remains 3mm misplaced. But another change can be made.
This is the 1942 Essex port hangar catapult sponson. I had even improved the upper surface of it, so it was perfectly flat.
Then I noticed in this 1944 picture that it was not flat at all. It suddenly resembled the Hancock sponson, being longer to house two Bofors quad guns.
The post-kamikaze pictures take away any doubt that the sponson was totally rebuilt.
In the Hancock kit I found a second sponson top with different director locations. Probably this was needed in the Ticonderoga kit, but now I apparently don't need any director towers. Maybe the Bofors guns have radars at this date? Adding the guns also means to remove the 4 floater net baskets to get an optimal arc of fire.
The old sponson is removed for a second time.
The Pontos replacements for the front bridge Bofors position can be redressed for two halves on this sponson. I should have done that on Hancock too, actually.
The old sponson and some Evergreen parts are used to build the base.
The pictures don't show the extent of any ammo clips inside the shielding, so this is a guess.
Then it's made to fit to the hull.
The seam was later filled with putty.
Like on Hancock the fuel lines are now externally mounted.
The deck is made flush with the hangar.
My choice for five out of six elevators down was made without calculating the necessity of about 70cm of safety railing. Strangely there is none in the Pontos set, so I found one useful bit of catwalk that gave enough railing for the deck edge elevators.
This L'Arsenal extra set had enough two-bar railing for Essex' front elevator.
On Hancock this will have to be provided out of the two-bar railing.
-
StevenVD
- Posts: 626
- Joined: Fri Dec 27, 2013 6:32 pm
Re: CV-9 Essex and CV-19 Hancock
In this update the corrections after painting are continued. Also, the safety railing problem is tackled.

I decided to shape the railing in the form of the elevators, painting and then applying it to avoid any masking.

The Essex deck above the front port single 5 inch guns is thinned to safeguard elevation and rotation. 8mm distance is needed, but in Essex this appeared to be less.

To remove the partly cut plastic it is rolled with pincers as a pilchard box cover. Then the ceiling is milled.


The other 5 inch galleries appeared ok so I did not repeat this dangerous action.

Then I stumbled upon an even greater problem about Hancock's port flight deck edge shape. Part of it is described in the Essex thread on this forum (viewtopic.php?f=46&t=4802&p=1017263&hil ... 0#p1017263). Trumpeter simply used the Essex flight deck with the cutout for the Bofors gun filled in, while the reference pictures show a complete different situation. Not only the cutout remains during 1944 but also the protrusion after that is moved backward and has a larger cutout in the deck. This was also the case for Ticonderoga. The expansion seam was further back too. The cutouts I could make but I wouldn't touch the seam to preserve the wood deck.


The first cutout is removed and a PE ladder put aside.

This is the area to be removed for the second cutout. The 20mm gallery will be placed further back.

Any sawing error will destroy either the wooden deck or the PE deck edges.

So I unglued the PE edge and bent it sideways with a pencil. The plastic cutting went well.

After one hour, what was removed from the catwalks is reconstructed around the gap. The gallery is moved, prolonged and repainted.

Pictures of the new safety railings.

Some pieces of L'arsenal railing can be used out of the fret with some bending.


In others I needed to clip the middle bar. This did leave some burrs, but any milling would deform the railing.

One of the double 5-inch guns needs to be repainted, the other are now on Hancock. Also the AA-guns are all painted the right camo color and can be painted gun metal now. I made 7 new directors.
I decided to shape the railing in the form of the elevators, painting and then applying it to avoid any masking.
The Essex deck above the front port single 5 inch guns is thinned to safeguard elevation and rotation. 8mm distance is needed, but in Essex this appeared to be less.
To remove the partly cut plastic it is rolled with pincers as a pilchard box cover. Then the ceiling is milled.
The other 5 inch galleries appeared ok so I did not repeat this dangerous action.
Then I stumbled upon an even greater problem about Hancock's port flight deck edge shape. Part of it is described in the Essex thread on this forum (viewtopic.php?f=46&t=4802&p=1017263&hil ... 0#p1017263). Trumpeter simply used the Essex flight deck with the cutout for the Bofors gun filled in, while the reference pictures show a complete different situation. Not only the cutout remains during 1944 but also the protrusion after that is moved backward and has a larger cutout in the deck. This was also the case for Ticonderoga. The expansion seam was further back too. The cutouts I could make but I wouldn't touch the seam to preserve the wood deck.
The first cutout is removed and a PE ladder put aside.
This is the area to be removed for the second cutout. The 20mm gallery will be placed further back.
Any sawing error will destroy either the wooden deck or the PE deck edges.
So I unglued the PE edge and bent it sideways with a pencil. The plastic cutting went well.
After one hour, what was removed from the catwalks is reconstructed around the gap. The gallery is moved, prolonged and repainted.
Pictures of the new safety railings.
Some pieces of L'arsenal railing can be used out of the fret with some bending.
In others I needed to clip the middle bar. This did leave some burrs, but any milling would deform the railing.
One of the double 5-inch guns needs to be repainted, the other are now on Hancock. Also the AA-guns are all painted the right camo color and can be painted gun metal now. I made 7 new directors.
-
StevenVD
- Posts: 626
- Joined: Fri Dec 27, 2013 6:32 pm
Re: CV-9 Essex and CV-19 Hancock

First the figures were primered in blue and brown. I had to switch one of the blue to brown and I still find some aircrew on the blue.

Vallejo transparent blue is washed over the blue ones.

On the sand brown ones is used dark brown.

All barrels were painted in gunmetal using a paper mask for the splintershields.

If the resin gun bases are used, all plastic supports should be removed. I left those that are wider than my guns.


I did have enough guns for both ships, though I had to switch some grey ones to black. Now I have about 15 spare adapted 20mm guns and only some normal ones. Only one Bofors installation remains.

Some of the locations on the island galleries were hard to reach and cram a gun into. Also the reference pics showed that there were actually less guns in the front gallery. I removed some later on.
-
StevenVD
- Posts: 626
- Joined: Fri Dec 27, 2013 6:32 pm
Re: CV-9 Essex and CV-19 Hancock
One upgrade to unpack was still left, the torpedoes from Master. I apparently ordered early ones, but this shouldn't be a problem for 1944 as the later improvements like the air-resistance head and the tailprotection were only getting mainstream in fall 1944.

Master tells you to bend all the propellers one way, but the second screw should be contra-rotating so I bent half of them in the other direction.

I found out that the early tailfins are way easier than those for the late torpedoes I did for the Princeton project.

I built all carts I had available, so there are some empty ones. No problem with the number of Avengers present, they already loaded some in the now closed bomb bays.

They are lined up for a dry-fit.

I even had a spare late torpedo left because Princeton had only nine Avengers. This meant that I could use a spare tail improvement on an early torpedo and thus get two late ones on one carrier. There were also some spare propellers.

Again it was near impossible to use the tail improvements as they are not fitting over the fins. This always causes the body to be excentric. Under the left- and right-turning screws you see the WEM tractor bodies. These should be tricycles, but I preferred Clarktors so I went into scratchmode.

One sprue I got was useful to get some volume in the PE wheels.

To standardize the thickness, some sanding was needed.

I cut out the grilles for the engine and found some Evergreen for the front wheels.

I temporarily lost a wheel, but this brass one is now exchanged for the refound one.

The wheelbays are made from parts of PE fret.

To bend them all the same, they are lined up in the hold&fold.

Then a styrene part is placed as a jig under the second fold.

These can now be used.

I did lower the front fenders and placed the steering wheels on the bonnet.

A whole lot of extras from WEM to complete your carrier.

The forklifts each need a styrene core. Lots of bomb carts are now available, but I don't have any bombs yet.

These torpedo trailers still need some extra detail.
Master tells you to bend all the propellers one way, but the second screw should be contra-rotating so I bent half of them in the other direction.
I found out that the early tailfins are way easier than those for the late torpedoes I did for the Princeton project.
I built all carts I had available, so there are some empty ones. No problem with the number of Avengers present, they already loaded some in the now closed bomb bays.
They are lined up for a dry-fit.
I even had a spare late torpedo left because Princeton had only nine Avengers. This meant that I could use a spare tail improvement on an early torpedo and thus get two late ones on one carrier. There were also some spare propellers.
Again it was near impossible to use the tail improvements as they are not fitting over the fins. This always causes the body to be excentric. Under the left- and right-turning screws you see the WEM tractor bodies. These should be tricycles, but I preferred Clarktors so I went into scratchmode.
One sprue I got was useful to get some volume in the PE wheels.
To standardize the thickness, some sanding was needed.
I cut out the grilles for the engine and found some Evergreen for the front wheels.
I temporarily lost a wheel, but this brass one is now exchanged for the refound one.
The wheelbays are made from parts of PE fret.
To bend them all the same, they are lined up in the hold&fold.
Then a styrene part is placed as a jig under the second fold.
These can now be used.
I did lower the front fenders and placed the steering wheels on the bonnet.
A whole lot of extras from WEM to complete your carrier.
The forklifts each need a styrene core. Lots of bomb carts are now available, but I don't have any bombs yet.
These torpedo trailers still need some extra detail.
-
SG1
- Posts: 413
- Joined: Mon Apr 17, 2017 2:43 am
- Contact:
Re: CV-9 Essex and CV-19 Hancock
Wow, excellent progress, a pleasure to see. Love those lifters/tractors and am very curious to see the torpedoes completed 
-
StevenVD
- Posts: 626
- Joined: Fri Dec 27, 2013 6:32 pm
Re: CV-9 Essex and CV-19 Hancock
Thanks, SG, with the current rate I think this can arrive in a week or so.

https://www.scalemates.com/newsfeed.php?thread=15288700
After a busy weekend at the IPMS Nationals where I won Best of Show for the USS Columbia, there was some time to make the dio base for the Essexes. I wouldn't want to make them mothballed or in repair, so I needed to keep them separate form each other. Both need a base with showcase 85x25x20 centimeters. The distance from masthead to wl is 15 centimeters and a 3 cm platform is incalculated.

2 planks with the external dimensions are sawn.

These are cornered in whitened pine profiles.

The platform will be contained in PVC L-profile.

These are sawn with a Dremel.

Ready to receive the ocean part.

One of the planks is a bit crooked, some adaptation is needed.

I got some box-shaped styropor package material left to make the base. That will leave a hollow space of 2 cm high inside.

These elements are cut to 11,3 cm.

With two rows of these side by side in the 23 cm base some space is left for a plaster topcoat.

That is applied here. A smooth preparation is made for AK water paste.

Hancock is posed on its base to adapt the plaster to the hull.

Now essex is on turn. I will still paint the boot line black, though it seems mostly submerged on the reference pictures.
https://www.scalemates.com/newsfeed.php?thread=15288700
After a busy weekend at the IPMS Nationals where I won Best of Show for the USS Columbia, there was some time to make the dio base for the Essexes. I wouldn't want to make them mothballed or in repair, so I needed to keep them separate form each other. Both need a base with showcase 85x25x20 centimeters. The distance from masthead to wl is 15 centimeters and a 3 cm platform is incalculated.
2 planks with the external dimensions are sawn.
These are cornered in whitened pine profiles.
The platform will be contained in PVC L-profile.
These are sawn with a Dremel.
Ready to receive the ocean part.
One of the planks is a bit crooked, some adaptation is needed.
I got some box-shaped styropor package material left to make the base. That will leave a hollow space of 2 cm high inside.
These elements are cut to 11,3 cm.
With two rows of these side by side in the 23 cm base some space is left for a plaster topcoat.
That is applied here. A smooth preparation is made for AK water paste.
Hancock is posed on its base to adapt the plaster to the hull.
Now essex is on turn. I will still paint the boot line black, though it seems mostly submerged on the reference pictures.
-
marijn van gils
- Posts: 2704
- Joined: Tue Feb 06, 2007 10:24 am
- Location: Belgium
Re: CV-9 Essex and CV-19 Hancock
Excellent progress again Steven!
And many congratulations on the BOS for Columbia! That's already the second one for that dio (at least that I know of)!
And many congratulations on the BOS for Columbia! That's already the second one for that dio (at least that I know of)!
-
StevenVD
- Posts: 626
- Joined: Fri Dec 27, 2013 6:32 pm
Re: CV-9 Essex and CV-19 Hancock
Almost right, Marijn, but you probably missed Hoboken. Thanks for the nice comment. Both hulls are now in the weathering process, the showcases are ordered too.
-
StevenVD
- Posts: 626
- Joined: Fri Dec 27, 2013 6:32 pm
Re: CV-9 Essex and CV-19 Hancock
Weathering is done with Tamiya gray and black washes for panellines and then Lifecolor liquid pigments. When this is done I'll do some paint damage.


-
ArizonaBB39
- Posts: 1321
- Joined: Sat Jan 08, 2005 7:29 pm
- Location: Tempe, Arizona
- Contact:
Re: CV-9 Essex and CV-19 Hancock
Looking good!
-
marijn van gils
- Posts: 2704
- Joined: Tue Feb 06, 2007 10:24 am
- Location: Belgium
Re: CV-9 Essex and CV-19 Hancock
Indeed, I didn't know about that one. Congratulations!StevenVD wrote:Almost right, Marijn, but you probably missed Hoboken.
-
StevenVD
- Posts: 626
- Joined: Fri Dec 27, 2013 6:32 pm
Re: CV-9 Essex and CV-19 Hancock
Thanks, Marijn. There it actually had a double prize. I always find it a great event, not in the least because it is sponsoring my next ship builds for a while now...

-
StevenVD
- Posts: 626
- Joined: Fri Dec 27, 2013 6:32 pm
Re: CV-9 Essex and CV-19 Hancock
Now the weathering of the hulls is completed. Here Essex, with decal on the bow. Not from the kit, but from the LST set. It had each number twice, so I used the 6 upside down for Essex. 1 and 9 were used on Hancock, closer to the waterline.


The kit nameplates were cleaned up, they are cast quite basic. I didn't want the backside to show 12 ejector marks, so I filled these up.

Then a lot of sanding happened.

A painting session left the plaques in gold (from a spray can), the torpedoes in Gunze USAF gray and the ship hulls were matt-coated.

After an attempt to fill in the backdrop with paint, I removed it and preferred to paint the letters in stead.

Now the hull could be fixed to the base. I decided to simply use the water product itself as glue. From the ABSD corrections I remembered that it bonds very well to wood. Plaster will be slightly less but should still hold the ship at this scale, even if it's only touching on the ship's outline.

I did use a remainder of water product form the last project, so that was a bit thicker and cured very fast.

So I applied another layer to that.

After this, some waves will be applied. First I want to check the discoloration. Some hours after these pics it still had a nice core of lighter blue around the ship.

The upstanding part of the plaster is also covered. Hancock is now waiting its turn.
The kit nameplates were cleaned up, they are cast quite basic. I didn't want the backside to show 12 ejector marks, so I filled these up.
Then a lot of sanding happened.
A painting session left the plaques in gold (from a spray can), the torpedoes in Gunze USAF gray and the ship hulls were matt-coated.
After an attempt to fill in the backdrop with paint, I removed it and preferred to paint the letters in stead.
Now the hull could be fixed to the base. I decided to simply use the water product itself as glue. From the ABSD corrections I remembered that it bonds very well to wood. Plaster will be slightly less but should still hold the ship at this scale, even if it's only touching on the ship's outline.
I did use a remainder of water product form the last project, so that was a bit thicker and cured very fast.
So I applied another layer to that.
After this, some waves will be applied. First I want to check the discoloration. Some hours after these pics it still had a nice core of lighter blue around the ship.
The upstanding part of the plaster is also covered. Hancock is now waiting its turn.
-
StevenVD
- Posts: 626
- Joined: Fri Dec 27, 2013 6:32 pm
Re: CV-9 Essex and CV-19 Hancock
Now Hancock is on turn for the Pacific blue.


Essex will steam faster than Hancock to launch some planes, it is placed furthest aft in the showcase. Therefore the wake is heavier.


I used this picture as a reference.

On the dio the waves are added. I might have added another base layer, but I wanted the light blue to surface between the waves.


I got some stark color changes now, I'll try to use the wake to remedy this.

This will be done with AK's Water Foam.

Hancock's bow wave continues for some centimeters and is then subdued.

The foam is used on the hull where the pacific blue is touching. If it is kind of dry-brushed it can be anti-aliased over the hard edge.

The wake was not prepared with the blue so it gets white splotches in stead.

The waves are subdued further when they leave the ship.


Now I can put Hancock's antenna pylons in the down position to ease the landing operations.


For variation Essex gets these in up position, as it also has the deck edge elevator like that.


I continued on the foam of Essex after that.

Hancock's name plate is drilled into the frame.

It should be fixed well, I remember Zuikaku lost it often.

I should now rig the antennas, with the deck still clean to facilitate the threading. I'm not pulling the wires taut, but any exaggeration would leave kinks.
Essex will steam faster than Hancock to launch some planes, it is placed furthest aft in the showcase. Therefore the wake is heavier.
I used this picture as a reference.
On the dio the waves are added. I might have added another base layer, but I wanted the light blue to surface between the waves.
I got some stark color changes now, I'll try to use the wake to remedy this.
This will be done with AK's Water Foam.
Hancock's bow wave continues for some centimeters and is then subdued.
The foam is used on the hull where the pacific blue is touching. If it is kind of dry-brushed it can be anti-aliased over the hard edge.
The wake was not prepared with the blue so it gets white splotches in stead.
The waves are subdued further when they leave the ship.
Now I can put Hancock's antenna pylons in the down position to ease the landing operations.
For variation Essex gets these in up position, as it also has the deck edge elevator like that.
I continued on the foam of Essex after that.
Hancock's name plate is drilled into the frame.
It should be fixed well, I remember Zuikaku lost it often.
I should now rig the antennas, with the deck still clean to facilitate the threading. I'm not pulling the wires taut, but any exaggeration would leave kinks.