Clinkered open boats in small scale (the examples below are in 1/160 or N-railway scale) can be a challenge. The processes described below are based on paper parts cut with a small and cheap 3W laser-cutter. If one has a stronger laser-cutter, the same method can be used with thicker cardboard or even styrene and may give even crisper results. There are even various laser-cut kits for such small boats in 1/72 on the market.
Actually, the construction methods described below are adaptations of the well-known plank-on-bulkhead (POB) and plank-on-frame (POF) methods.
Starting point, of course, are a set of suitable plans, line- and body-plan, plus ideally information on the actual construction, dimension of scantlings etc.
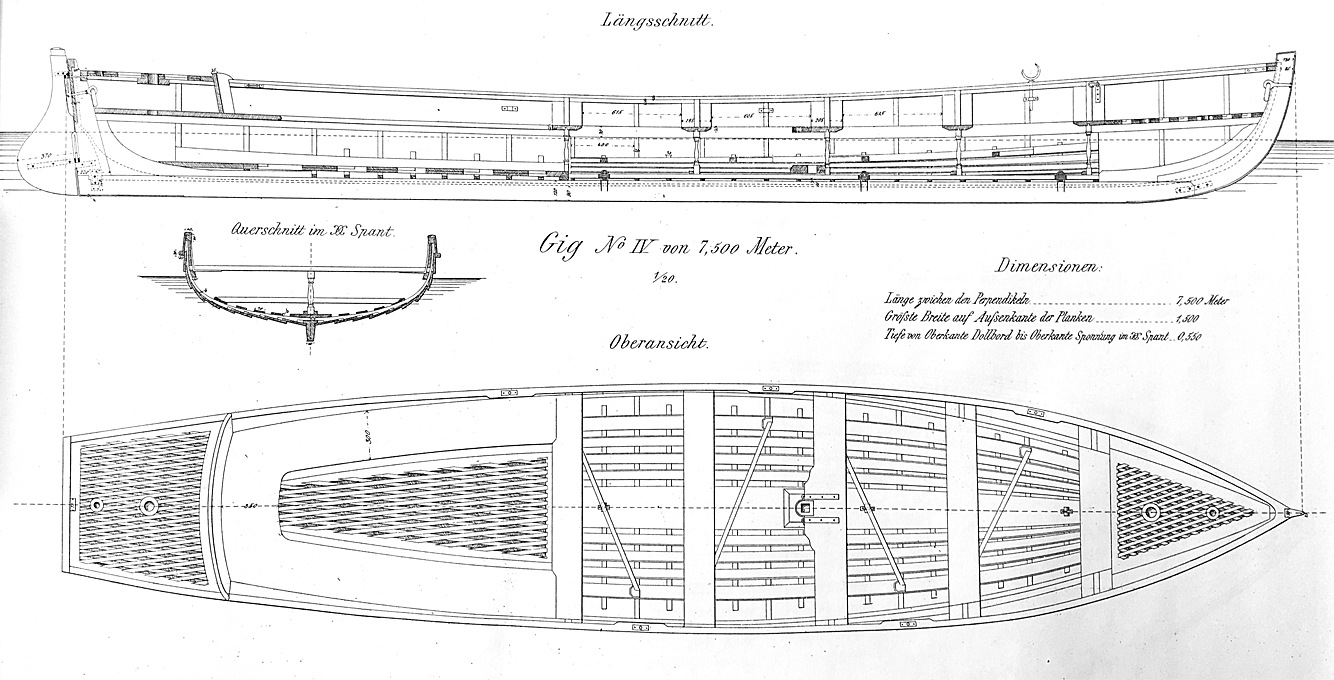
Example of a drawing for a gig from the early 1880s.
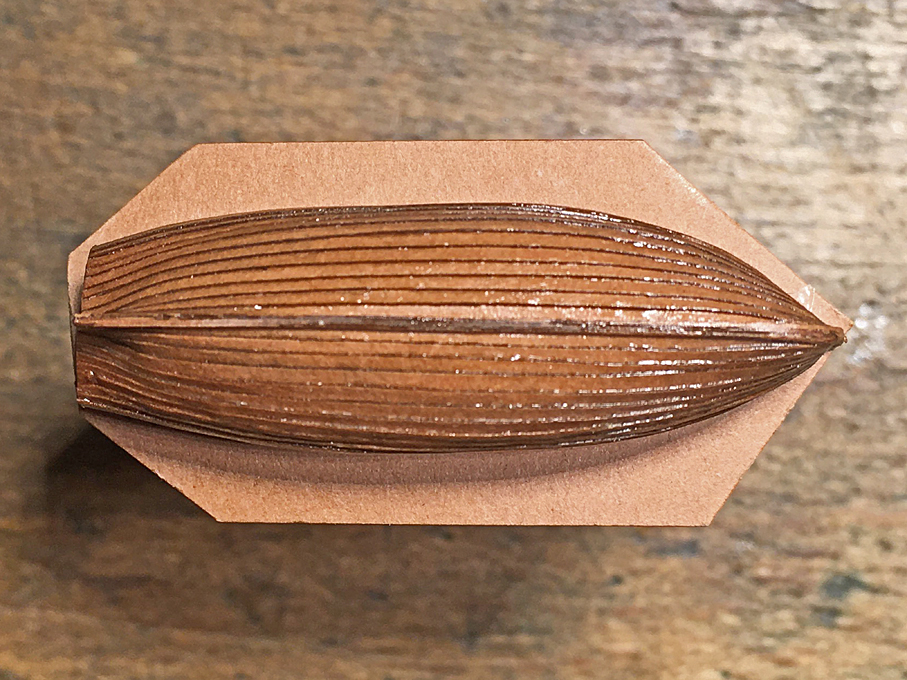
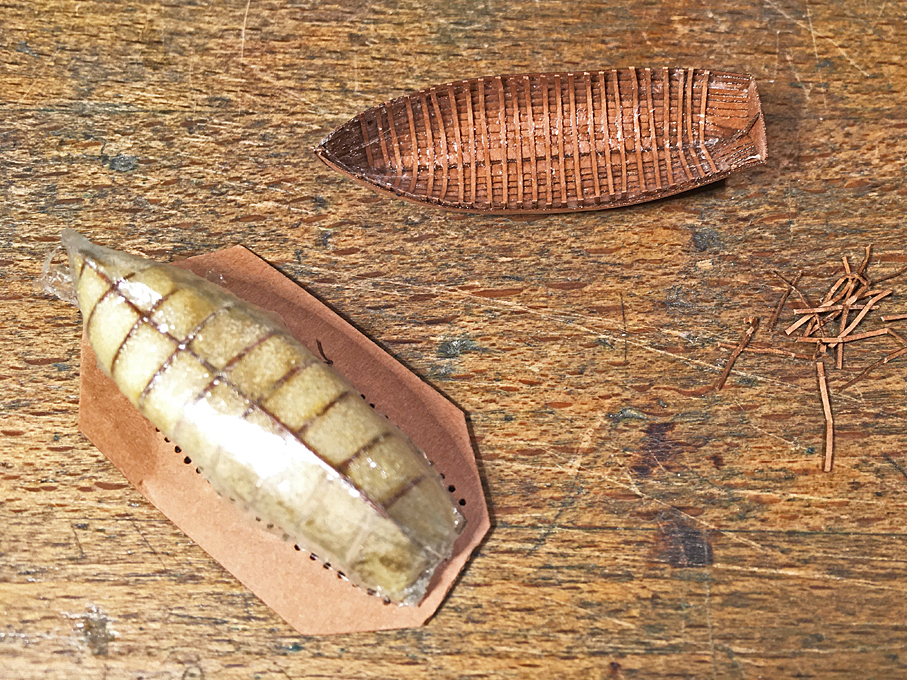
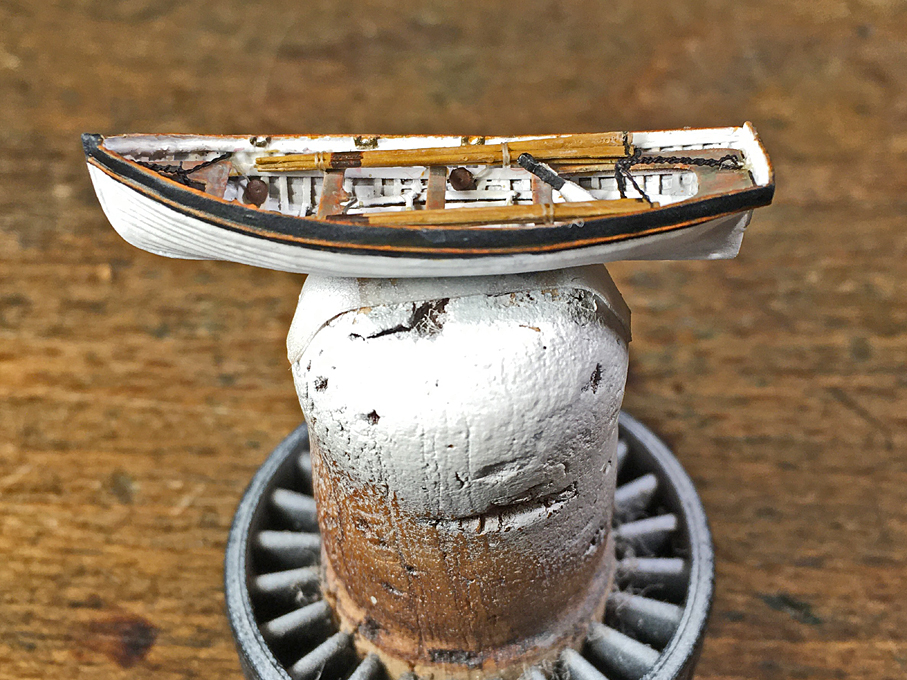
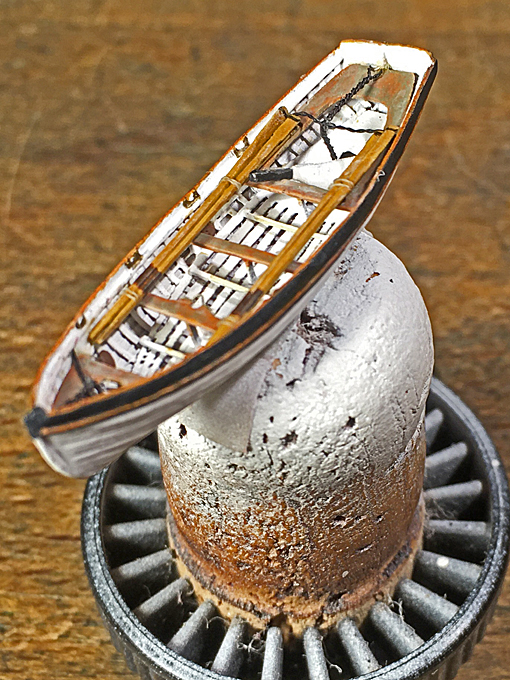
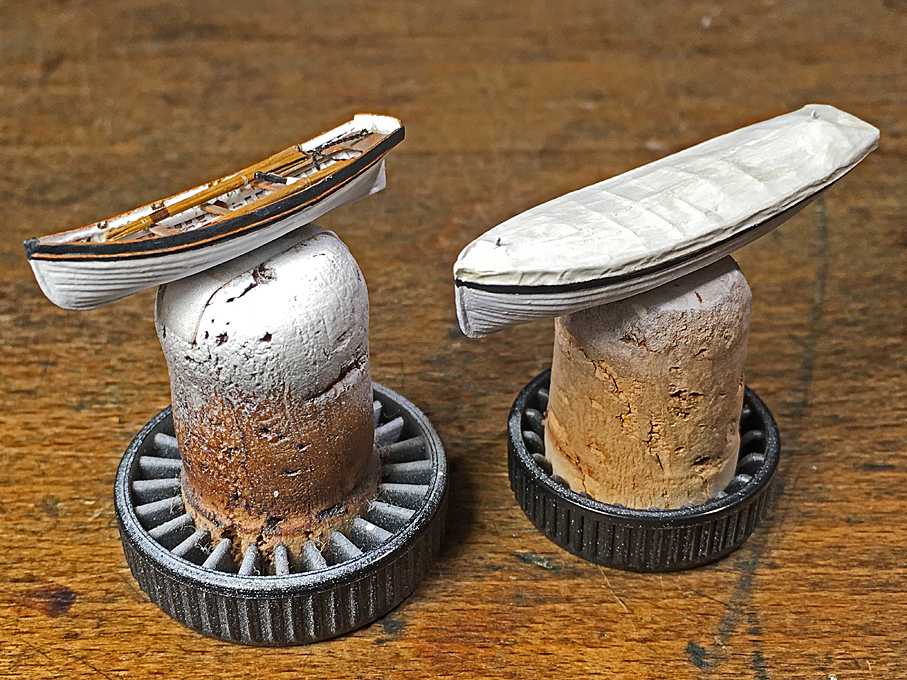
Two construction strategies are described one for boats covered with canvass, so that the interior structure is not visible and does not need to be modelled. The other example is for a plank-on-frame open boat model that shows all interior and construction details that one can possibly show at the chosen scale.
Plank-on-Bulkhead (POB) construction of open boats closed with a cover
Traditionally, one would carve a �plug� for the boat from a piece of wood, that is based on the dimensions inside the planking(!). Such a plug can be re-used in case another copy of the boat would be needed. Otherwise, one can plank directly on the plug.
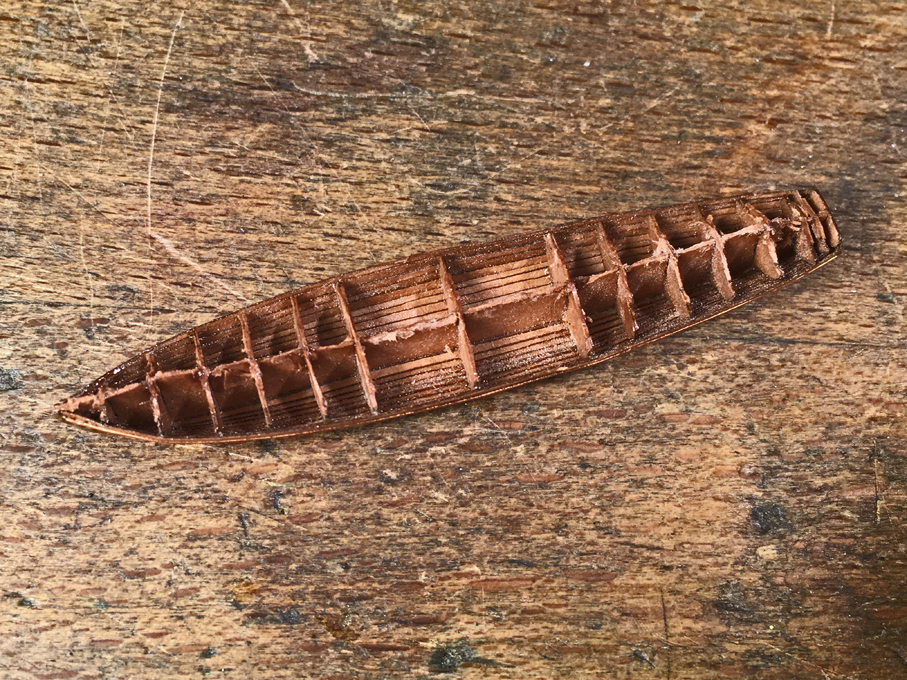
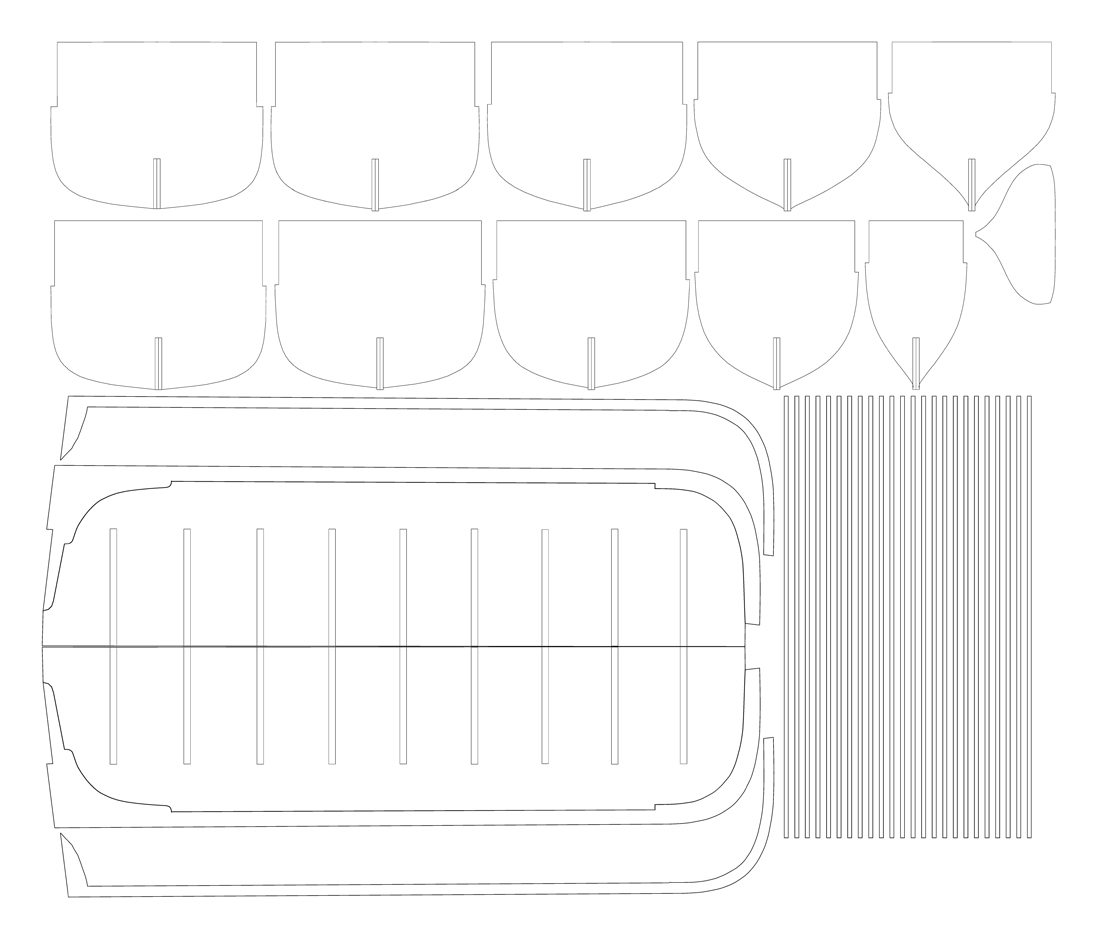
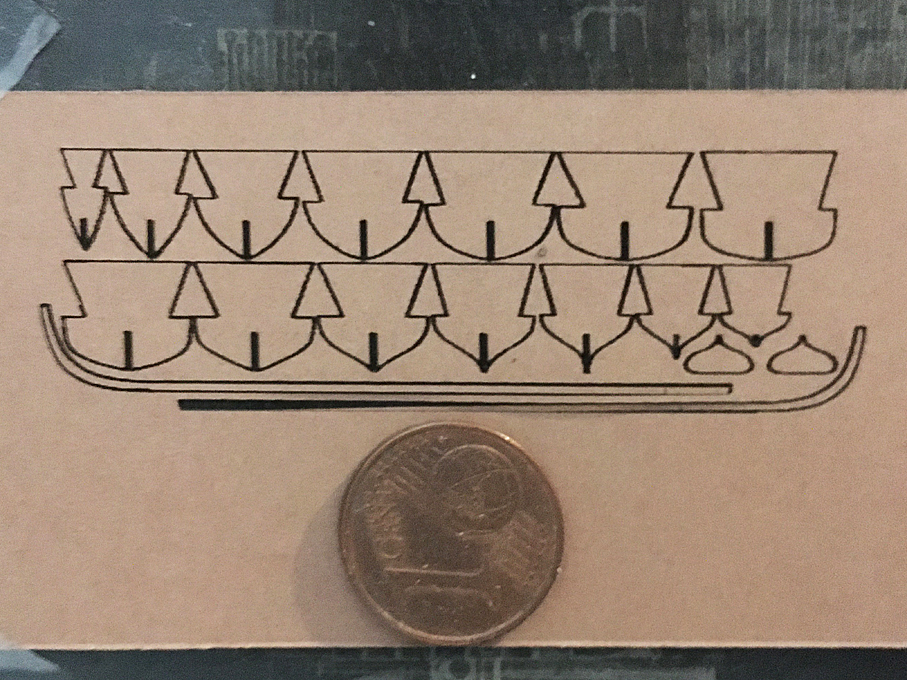
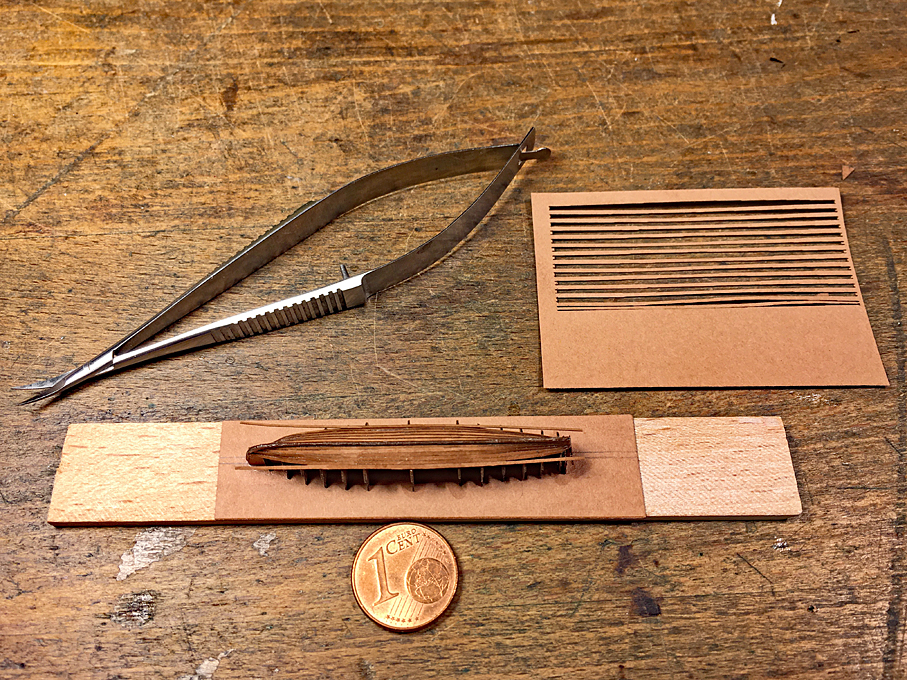
For the method proposed here, each individual framing stations from the body plan was redrawn as a bulkhead to be cut out with the laser-cutter. Additional material is left on the top, so that all bulkhead scan be glued to a building board arriving at the right height. As backbone, a longitudinal profile of the boat, inside the planking, is drawn. All pieces were slotted as it is common practice in POB construction. The slots were twice as wide as the paper, as all pieces were cut in double to be soaked and varnished together back-to-back with a view to increase their stiffness. In addition, two pieces that represent the outboard profile of the stem-post, keel, and stern-post were cut, plus two copies of the transom.
The bulkheads etc. were arranged on a drawing that controlled the laser-cutter.
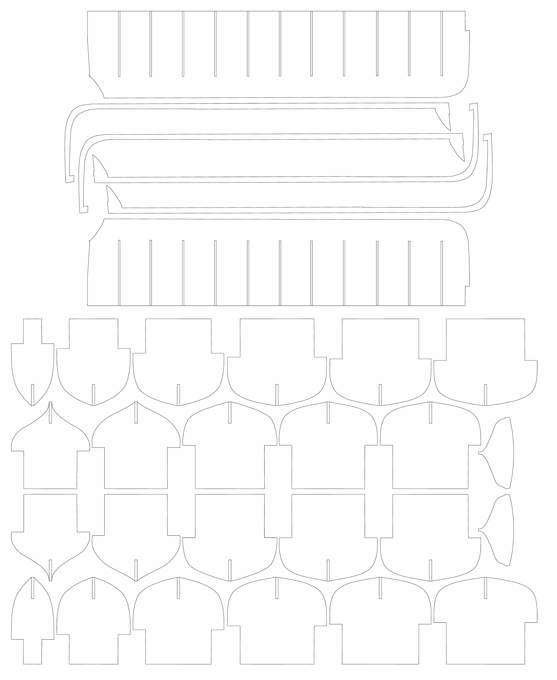
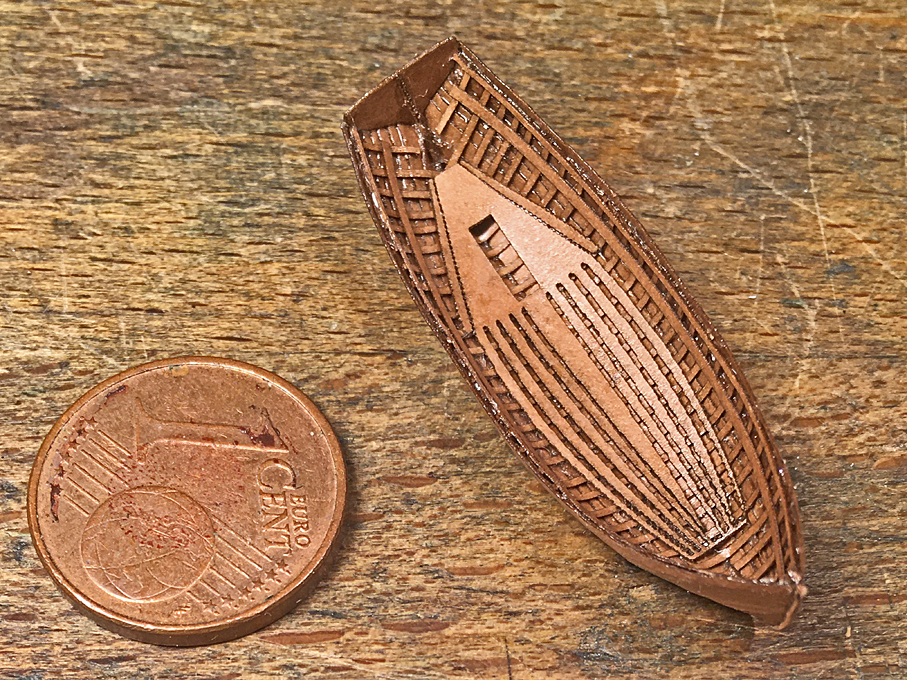
Template for laser-cutting the keel-pieces and the stem-keel-combinations for a cutter
The material used is so-called Canson-paper, which is around 0.12 mm thick and an unglued, but heavily rolled paper. Its surface thus is quite smooth. This kind of paper turned out to be the most suitable for cutting with the low-powered (3W) laser-cutter.
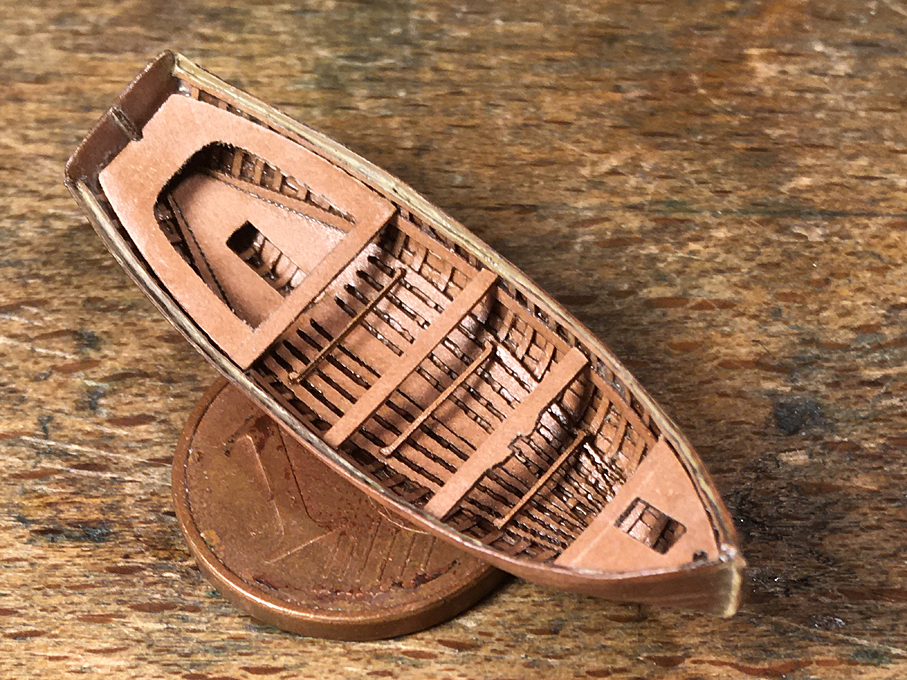
Laser-cut bulkheads and keel-pieces
The pieces then are assembled as is tradition for POB-construction and mounted onto a piece of Canson-paper for extra stiffness. The whole assembly is then mounted on a small piece of wood to ease handling.
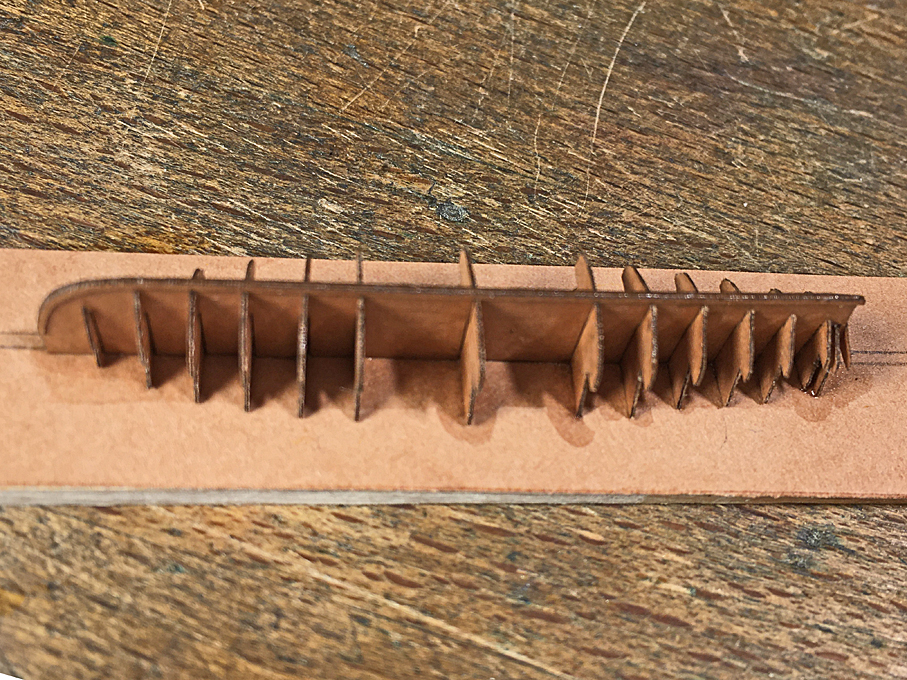
The assembled parts for the POB-construction
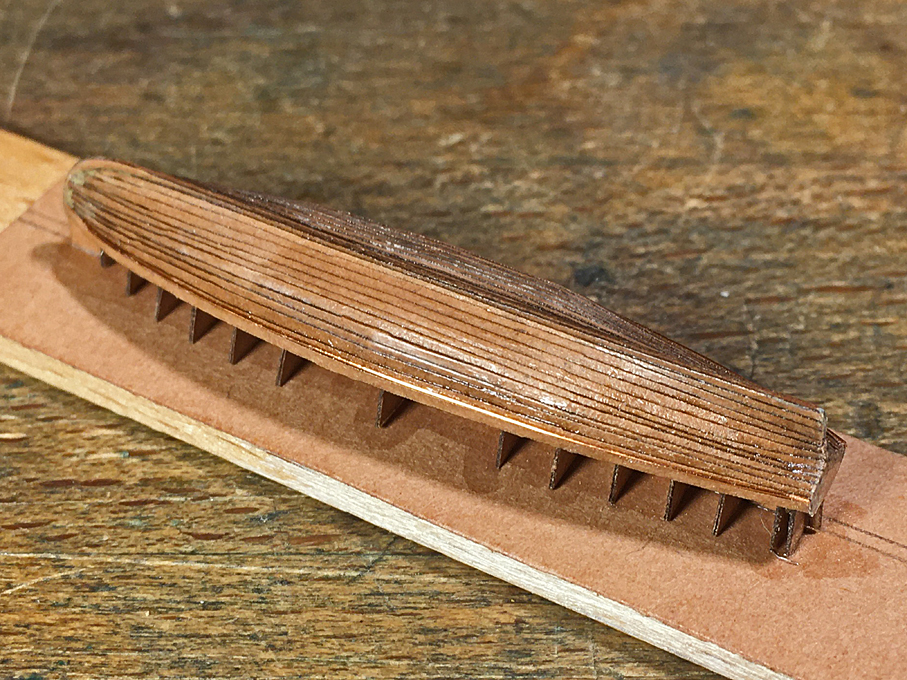
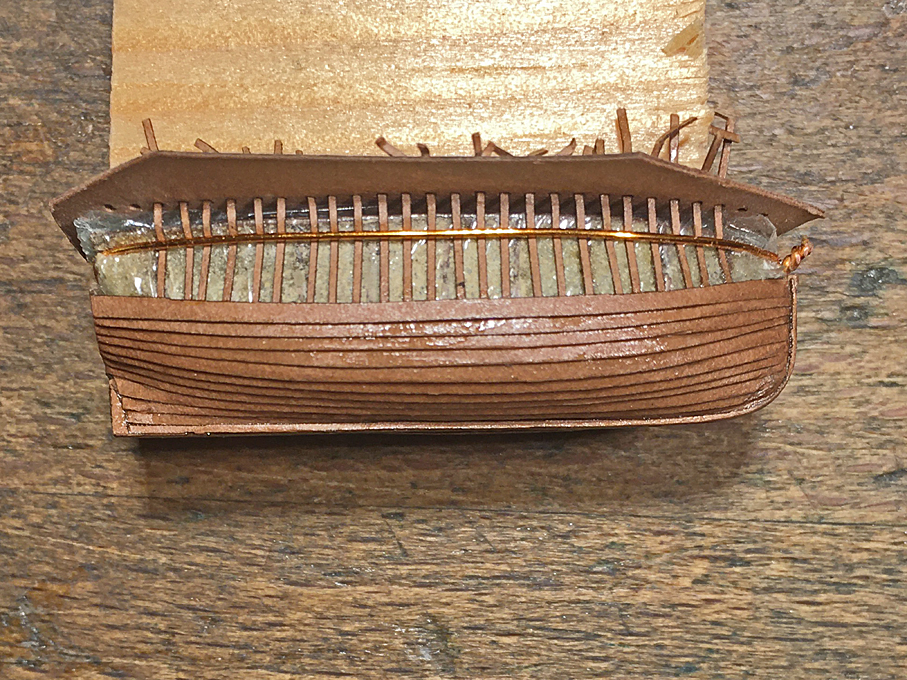
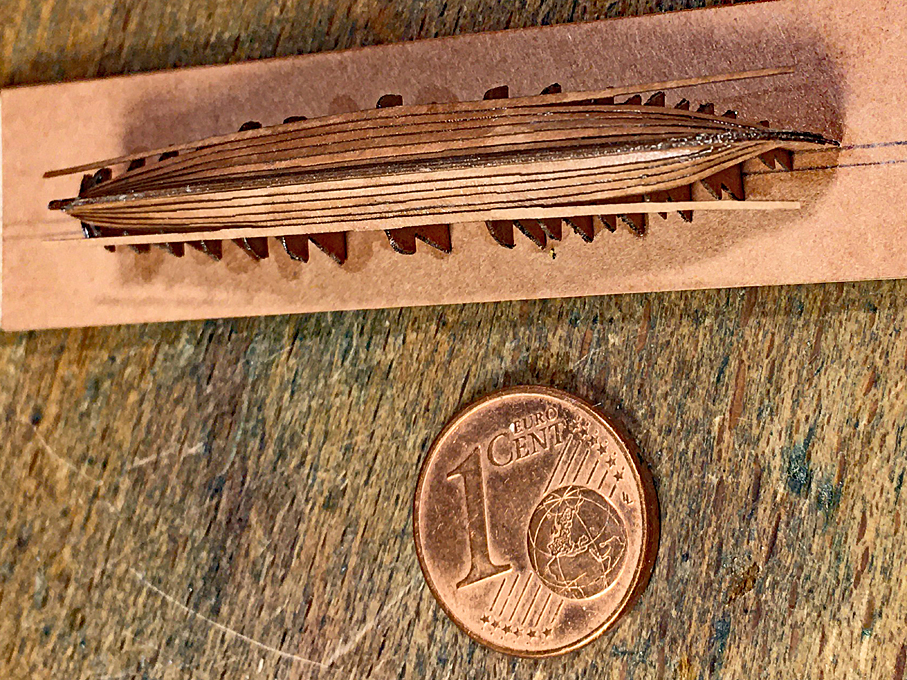
To increase the stiffness of the assembly (which in fact is already surprisingly robust), the spaces between the bulkheads are filled with a hard foam. I am using an acrylic resin foam, that is being produced by the manufacturers of Plexiglas, but any hard foam will do. The foam is sanded back to the profile of the bulkheads and then soaked in varnish. Imperfection can be corrected with automotive putty. This will give ample surface for the planking to attach to. Note that due to their thinness, the bulkheads do not need to be bevelled.
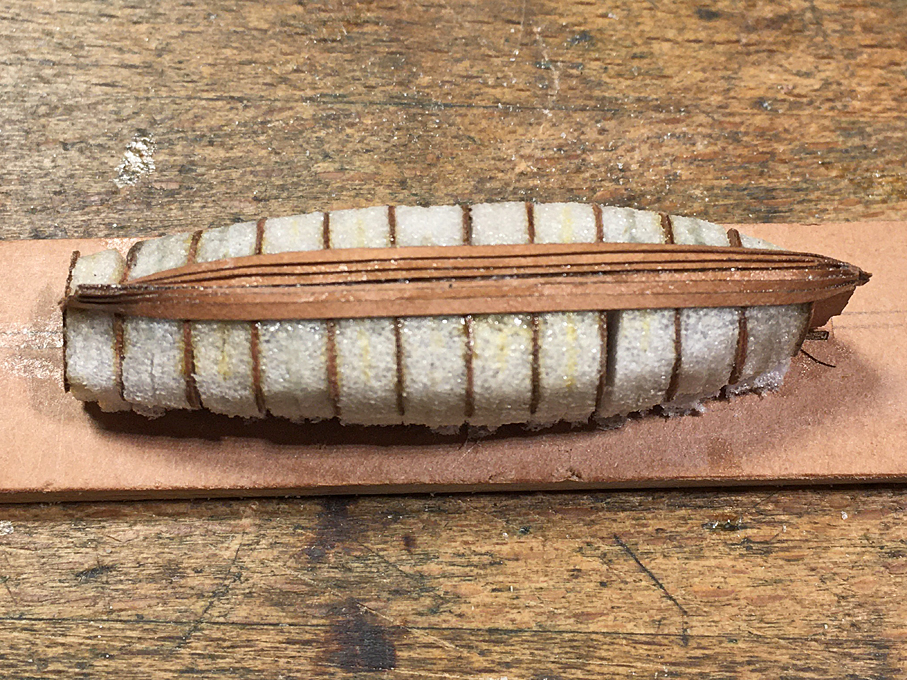
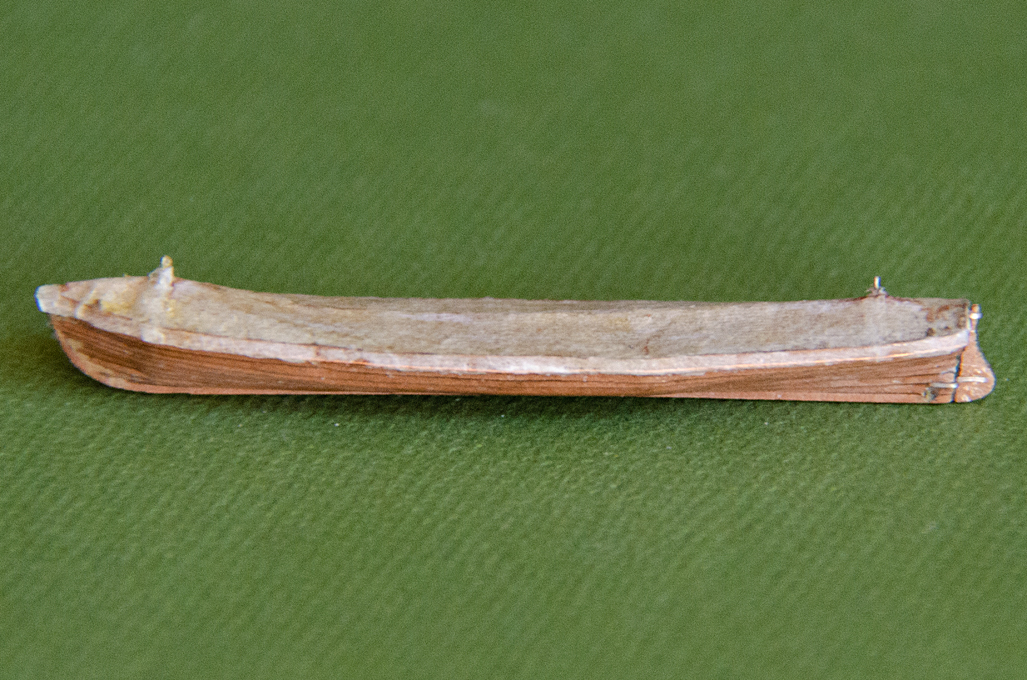
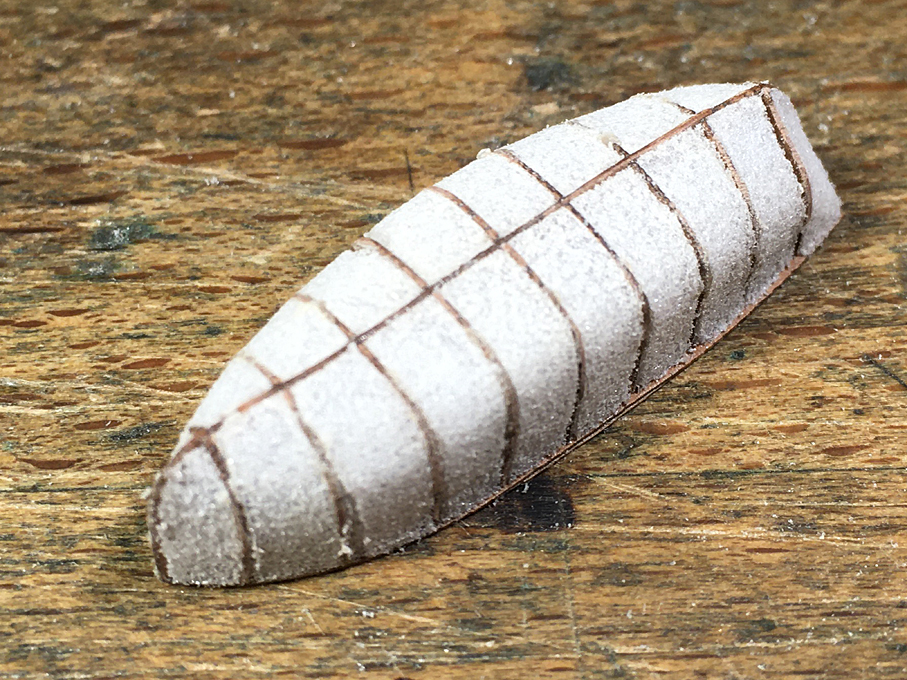
Foam-filled framework with three strakes on
The planks are laser-cut from the same paper. Tapering such planks by hand would be too much of a challenge and not quite feasible in paper, I think. However, my 2D-CAD program gives the length of the Bezier-curves used to draw the outline of the frames. So, one can simply take this length, divide it by the number of planks and add 50% for the clinker overlap in order to arrive at the plank width at each station. In reality that planks would overlap above and below only for about 25% of their width, but the extra width will not be seen on the completed model and gives extra leeway to accommodate small inaccuracies during construction. With this information somewhat too long planks were drawn with a few extras, as not all turn out well. A wider plank is provided for the garboard.
In theory, the planks should not only be tapered, but also curved in the plane, but I do not have a software to develop a full planking diagram. However, when wetted with varnish, the paper, unlike wood, can be relatively easily bent and shaped across the wide side of the plank.
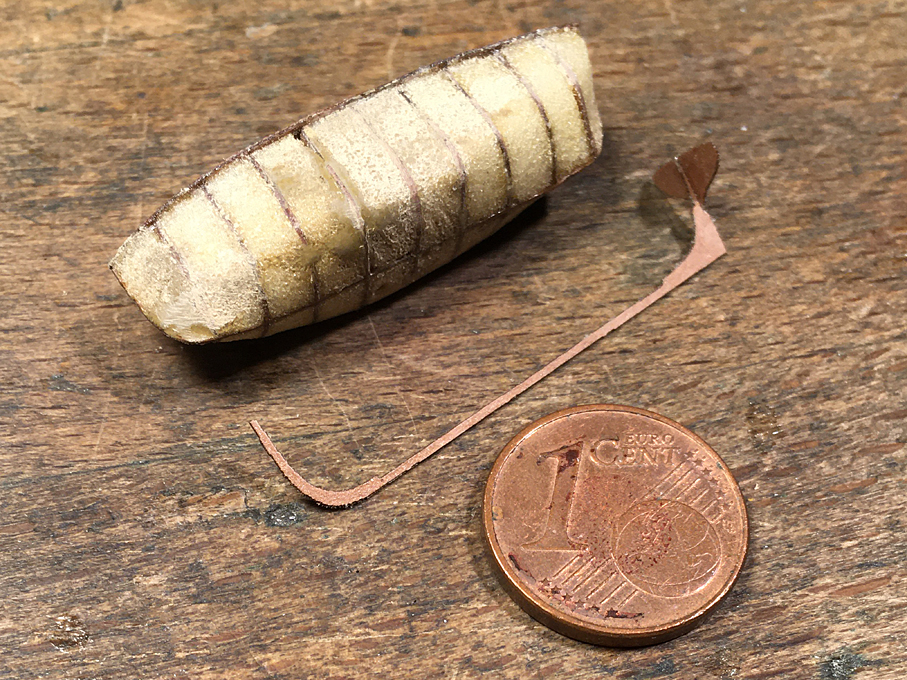
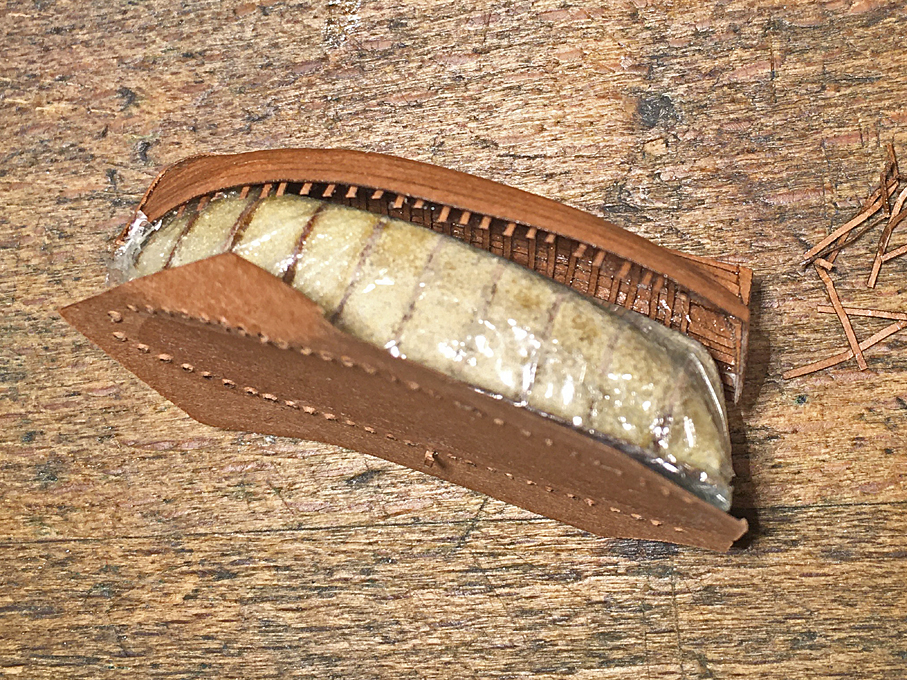
Materials and tools for planking
When laser-cutting the tapered planks, the curves are so shallow, that the �stepping� due to the 0.1 mm resolution of the cutter becomes quite pronounced. For this reason, the planks were drawn with a straight line on one side and the tapering curve only on the other. The straight edge will become the visible lower edge of the plank, while the stepped, curved side will disappear under the plank above.
When fitting the planks, the best way is to fix them in the middle first and then work towards the ends. As can be seen on some of the pictures, originally, I put the doubling of the stempost-keel piece in place before the planking in order form a rabbet against which the planks run. This turned out to be not very practical, as precise fitting is quite difficult with this material. Now I am drawing the backbone to the inside of the planking and add a false stempost-keel piece afterwards. This greatly facilitates the planking at the bow.
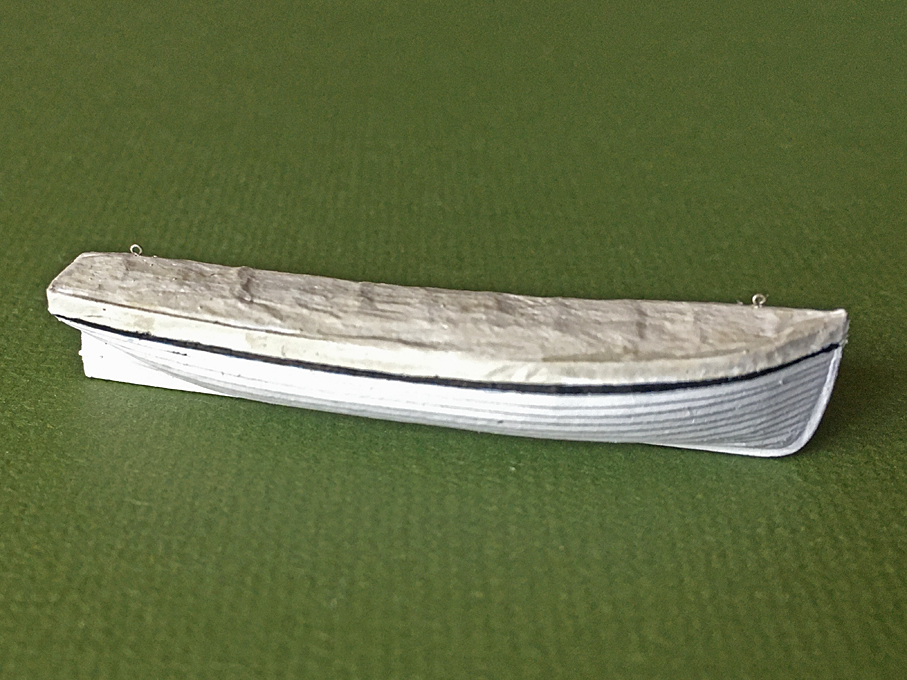
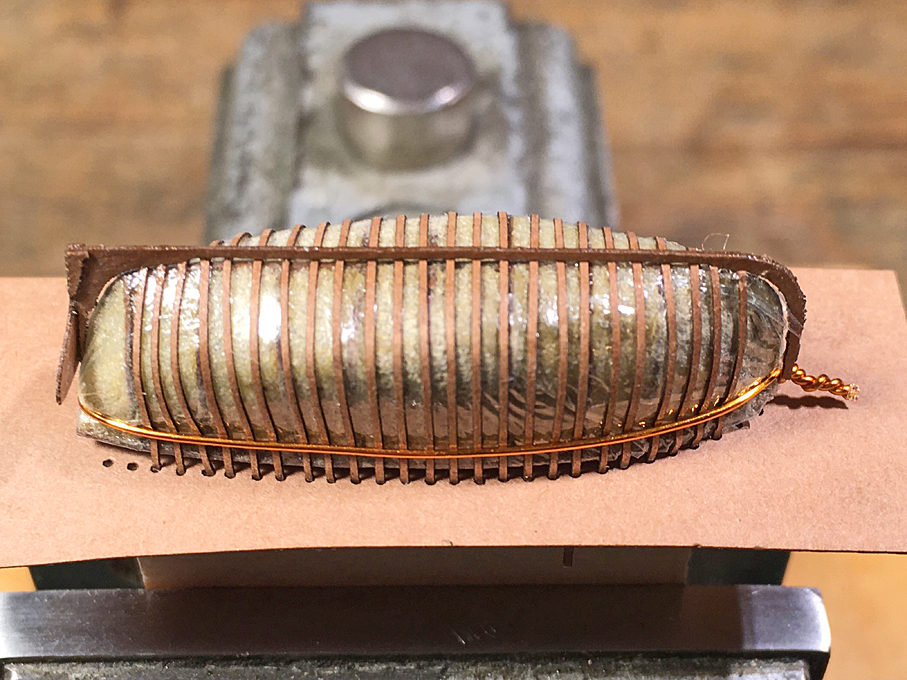
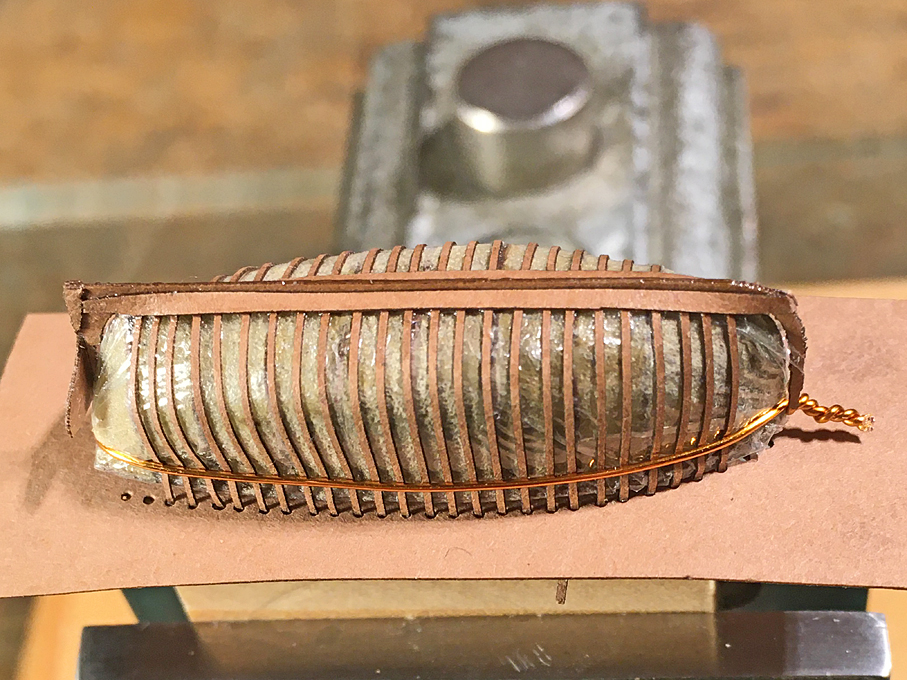
Planking progresses from the middle to the ends
All planks are cut flush to the interior backbone using a micro-scissors or cuticle scissors. When heavily soaked in varnish, the paper can be cautiously sanded. The soaking in fast-drying varnish has to be repeated after a few strokes with a diamond nail-file to prevent the paper from fraying.
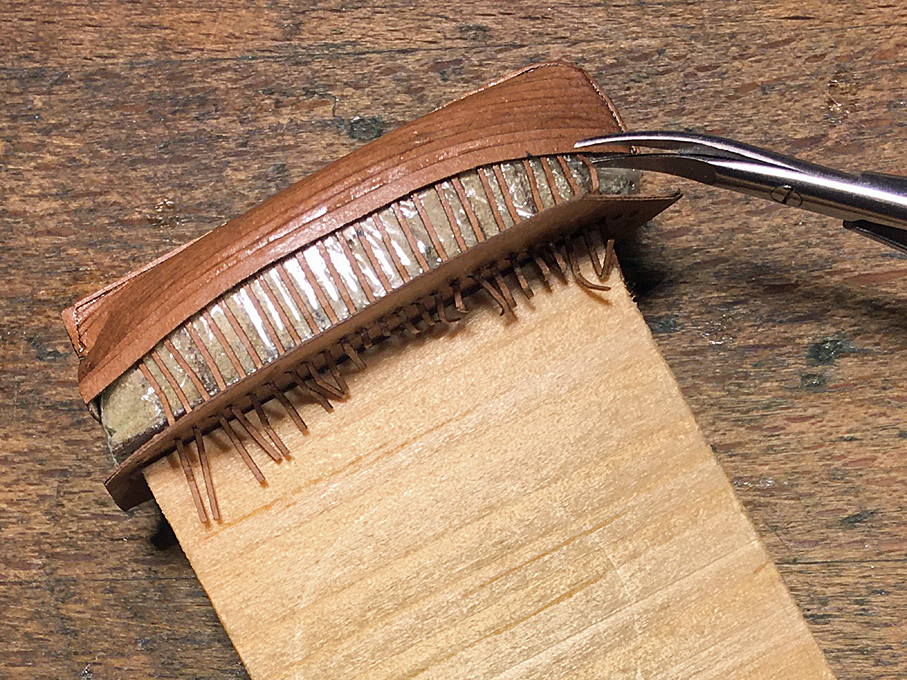
In clinker construction, at the bow, where it meets the stem-rabbet, the lower planks are thinned out by the width of the overlap and over a length of 1.5 to 2 plank widths or so. In this way the planks are flush at the rabbet. This is a feature, that at this scale is neigh impossible to reproduce, so one needs to cheat a bit again. Luckily, as long as the varnish is still wet, the paper can be squeezed and moulded. The thinning can also be simulated by squeezing the edge with flat pliers or splinter tweezers that have been ground flat at the end. While the varnish sets, the edges are squeezed tight using locking tweezers. The same thinning procedures is applied to where the planks touch the stern-post or the transom.
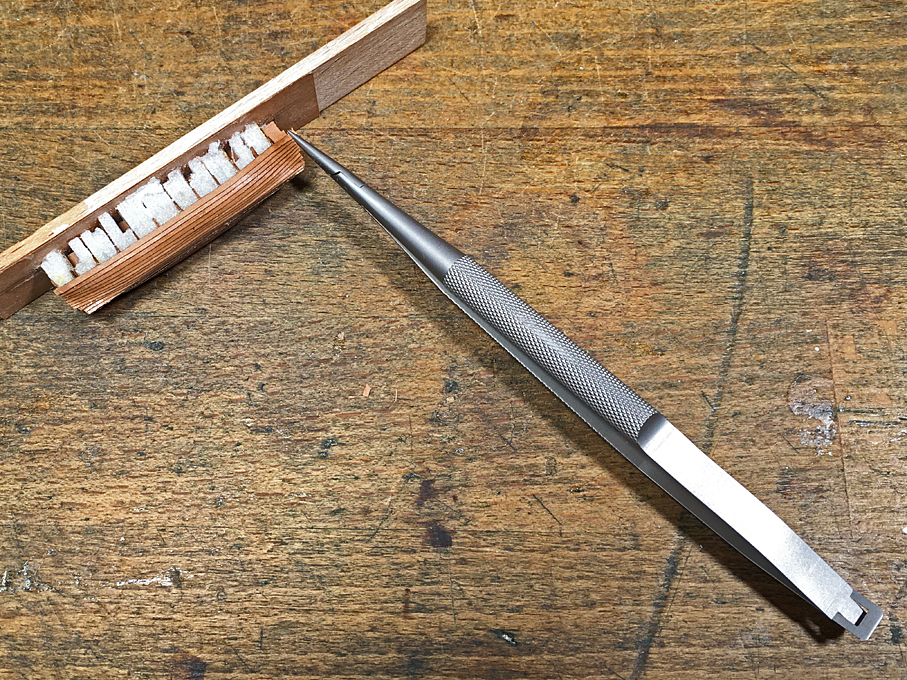
Clamping the planks tight at the bows
The planking is done mostly by eye, as it is difficult to mark out the planking run with sufficient precision on such a small workpiece. It is advisable to use an organic solvent-based varnish for the purpose. A drop of acetone softens the varnish and allows to make small corrections in the run of the planking.
To be continued �