1/350 USS Arizona DaLiGeJian Model

Moderators: BB62vet, MartinJQuinn, JIM BAUMANN, Jon, Dan K

Jeff Sharp
Posts: 1053
Joined: Mon Jan 07, 2008 10:15 pm

1/350 USS Arizona DaLiGeJian Model

Post by Jeff Sharp »

I have found my "long, cold winter" project for this year. 1/350 USS Arizona by DaLiGeJian Models.

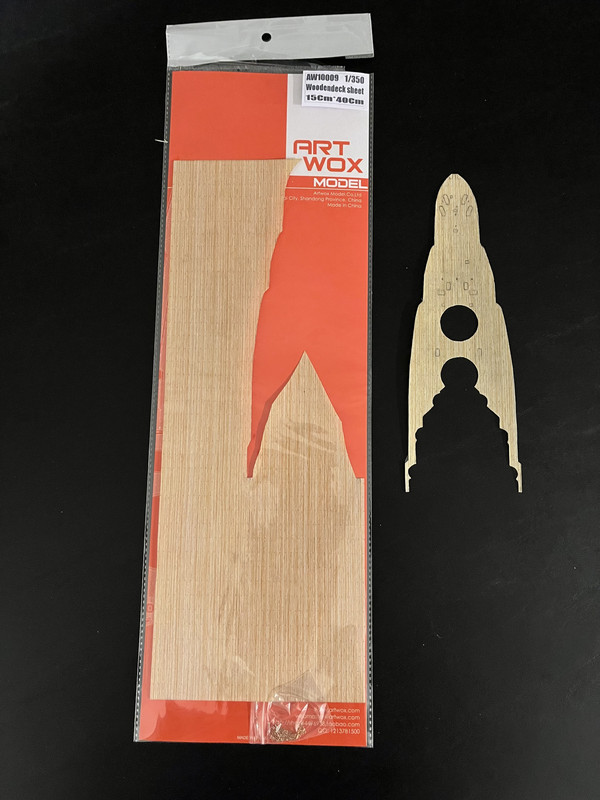
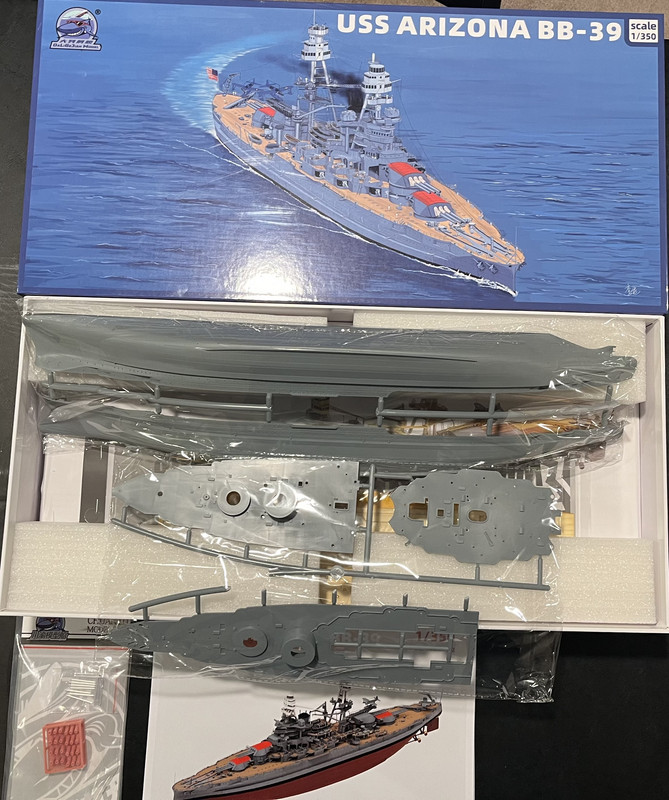
I have never heard of this company before and took a shot in the dark by purchasing this kit, not expecting much.
After careful inspection of this kit, I can truly say this is 'BY FAR" the best offering in any scale of USS Arizona!
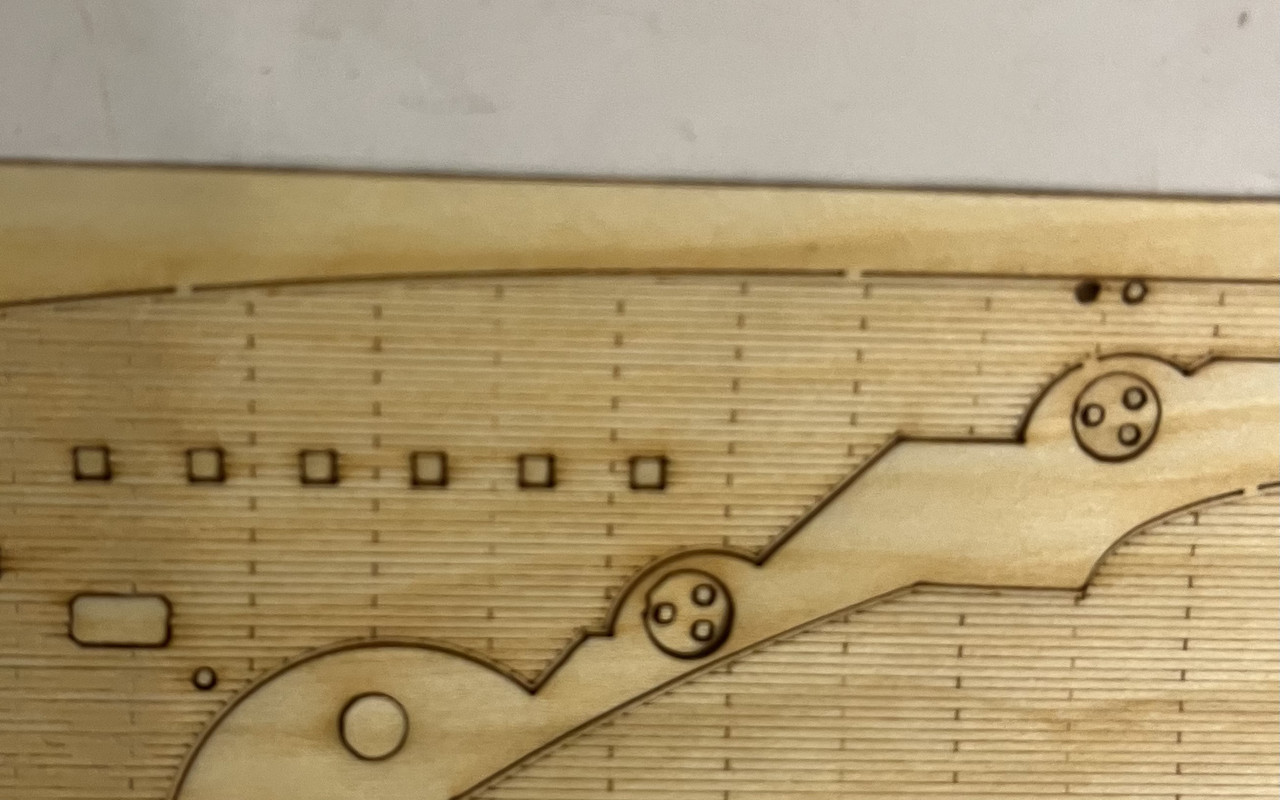
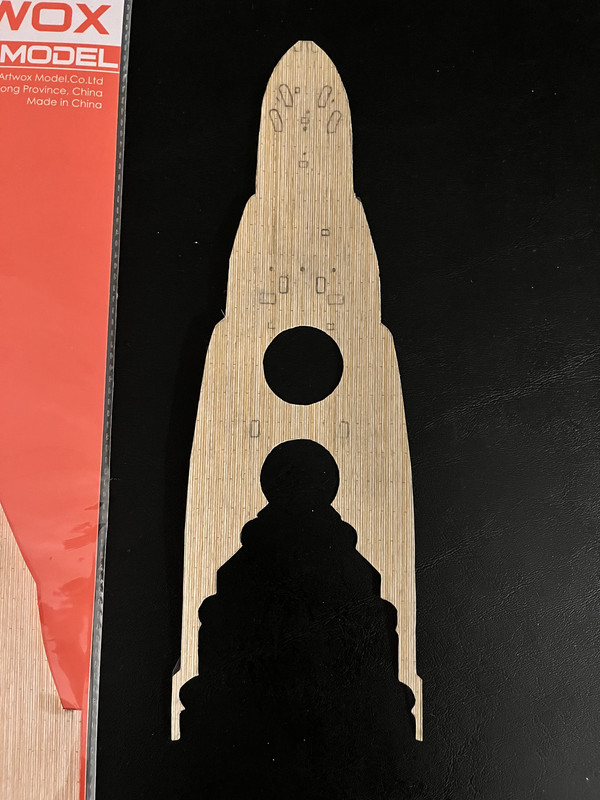
I am extremely pleased with what I'm seeing so far (albeit it's only an initial inspection). Someone really did their homework when they created this kit. The amount of added detail that is offered with this kit is amazing! It is quite exciting.

Image

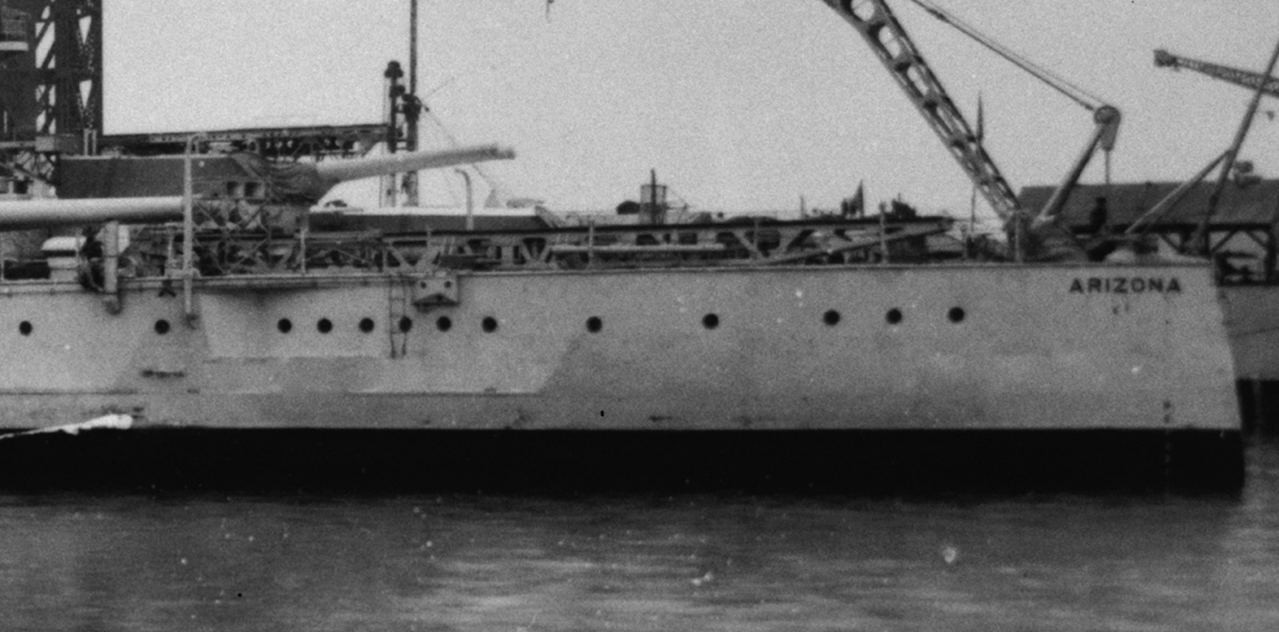
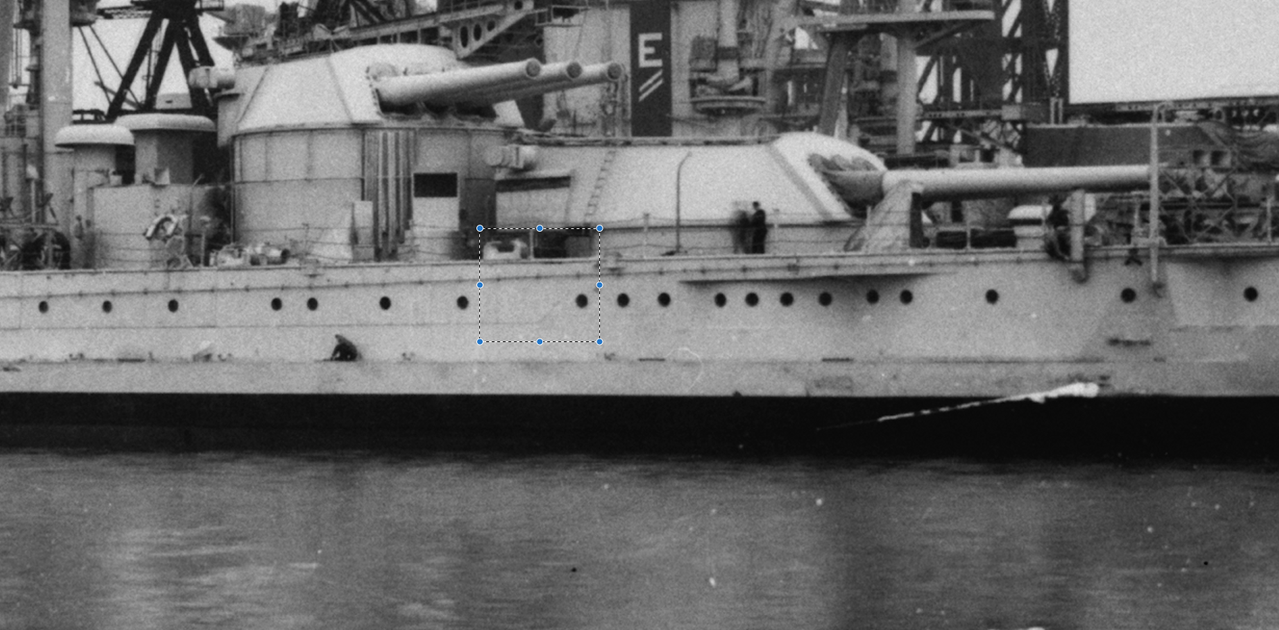
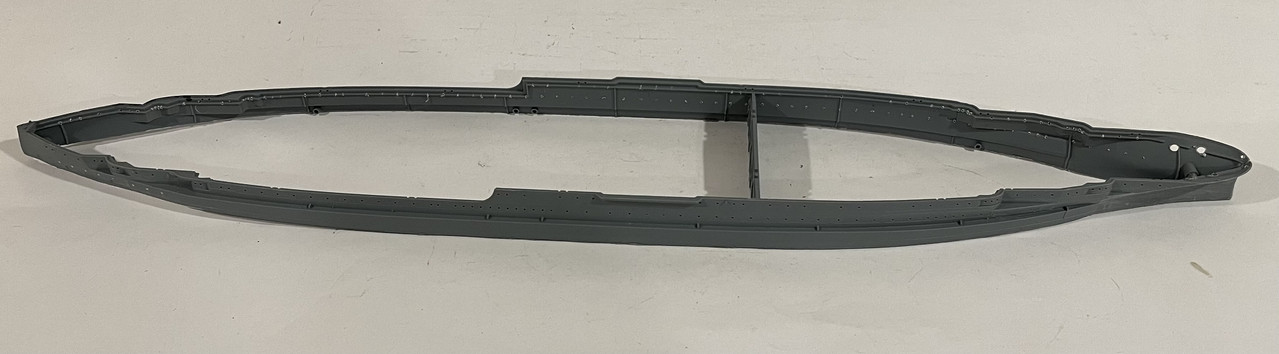
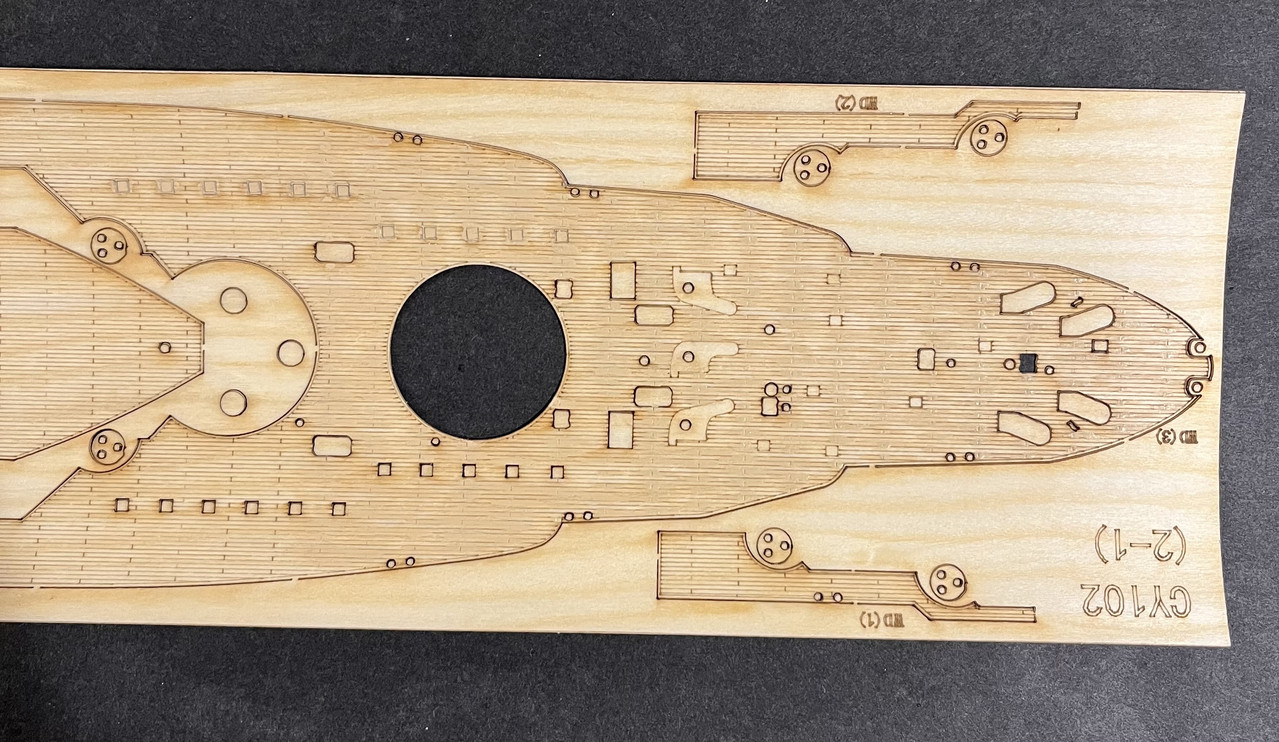
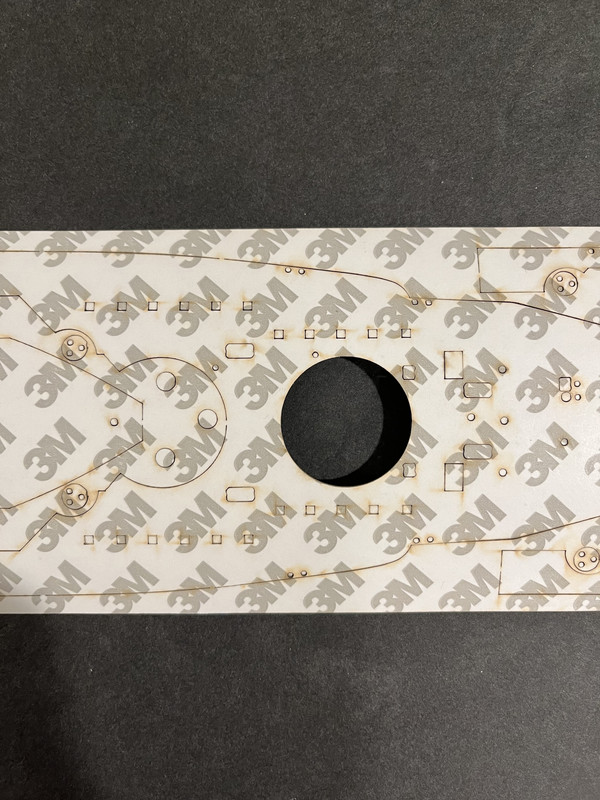
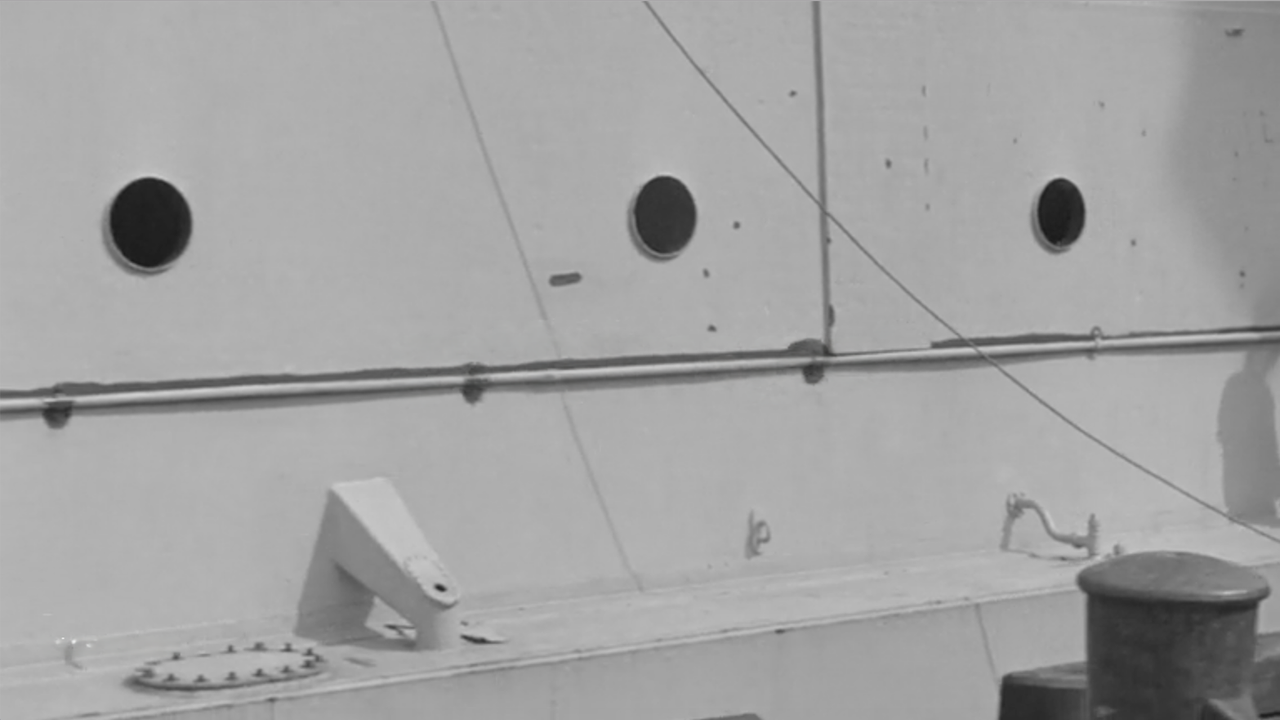
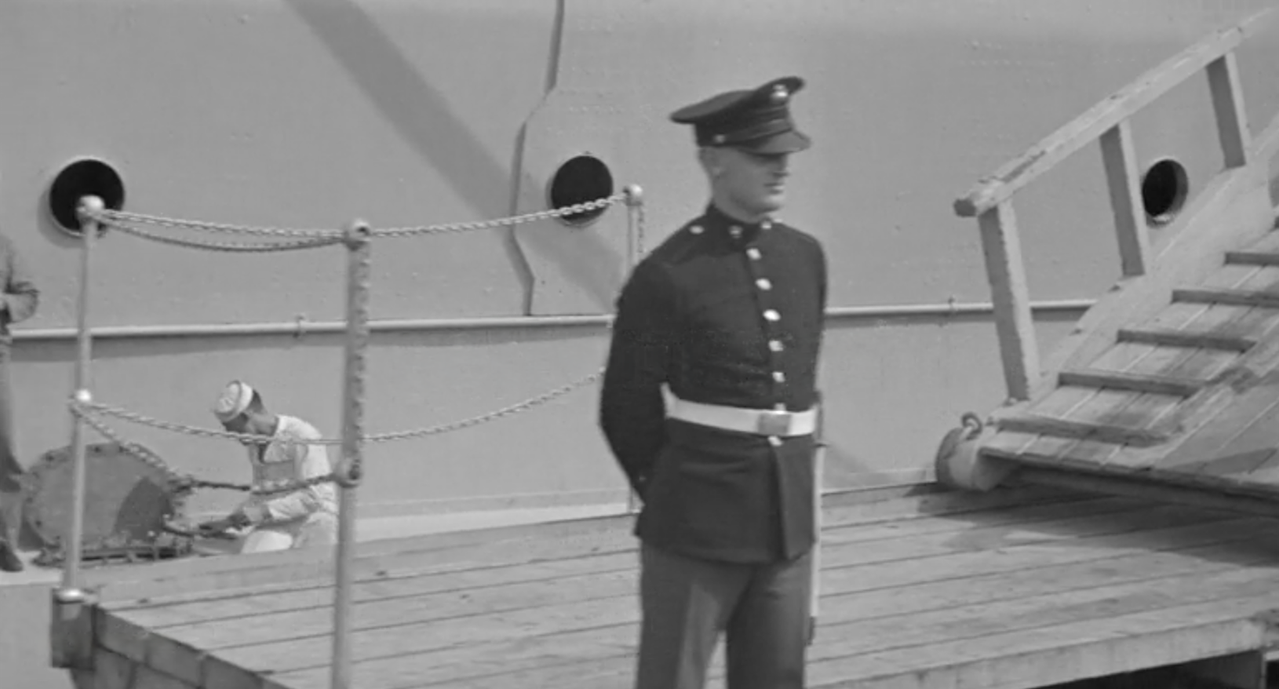
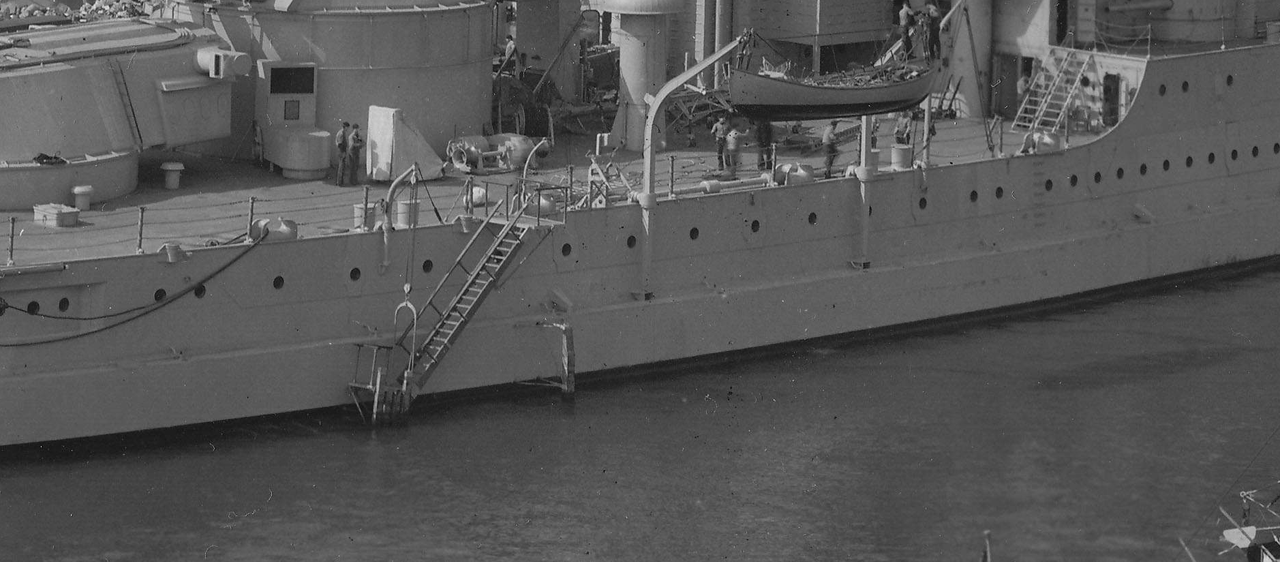
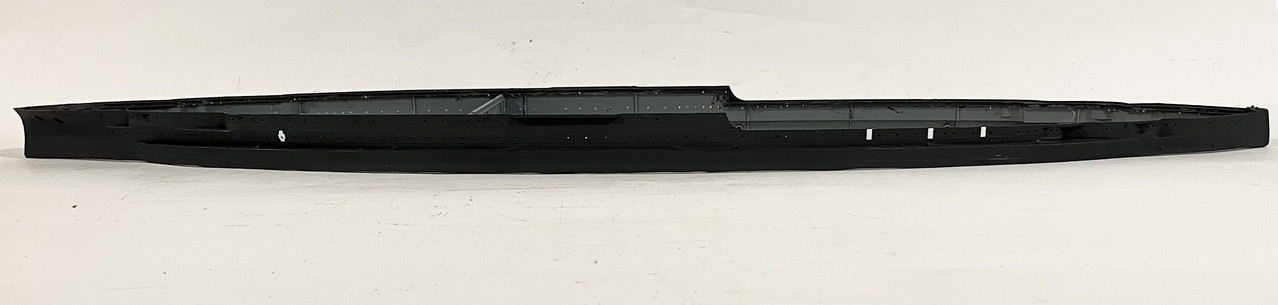
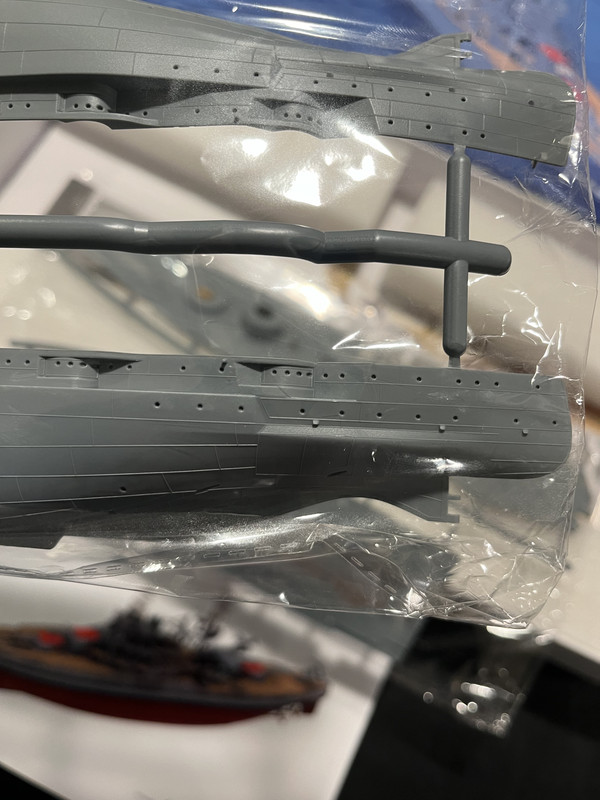
Looking over the hull, I'm please with the accurately placed detail, including the proper amount and locations of the portholes. There are some very minor details that are missing or slightly out of place, but they can very easily be corrected.
The hull is actually more accurate for a 1940 or earlier build than it is for a 1941 version.
In order to be more accurate for a 1941 version, all of the bottom portholes at the stern need to be eliminated. The biggest inaccuracy with the hull that I've noticed so far is the ridge just below those stern portholes. That ridge was not that large on the real ship.
Image

I can't wait to dive into this build. I'm trying to decide the best way to waterline her now.
Last edited by Jeff Sharp on Thu Nov 20, 2025 9:21 am, edited 2 times in total.
FFG-7
Posts: 694
Joined: Wed Mar 13, 2024 9:45 am

Re: 1/350 USS Arizona DaLiGeJian Model

Post by FFG-7 »

that is supposed to be the armor belt but overscaled.
Attachments
Sheet 15 - Armor Profile.jpg
Jeff Sharp
Posts: 1053
Joined: Mon Jan 07, 2008 10:15 pm

Re: 1/350 USS Arizona DaLiGeJian Model

Post by Jeff Sharp »

Here is a great look at the area in question.
Image

But maybe I'm mistaken on that ridge. This photo shows one is there.
Image

Notice however in both photos how smooth the hull is at the stern. There is a noticeable lack of hull plating detail. In fact, the hull plating detail terminates here in this photo.
Image
Last edited by Jeff Sharp on Wed Nov 19, 2025 8:59 pm, edited 2 times in total.
FFG-7
Posts: 694
Joined: Wed Mar 13, 2024 9:45 am

Re: 1/350 USS Arizona DaLiGeJian Model

Post by FFG-7 »

that is the top of the armor belt.
Jeff Sharp
Posts: 1053
Joined: Mon Jan 07, 2008 10:15 pm

Re: 1/350 USS Arizona DaLiGeJian Model

Post by Jeff Sharp »

Yeah, I see what you mean. Definitely slightly over scaled armor belt ridge.
Dan K
Posts: 9037
Joined: Tue Jan 11, 2005 10:56 am
Location: New York City

Re: 1/350 USS Arizona DaLiGeJian Model

Post by Dan K »

I'll be following....
Jeff Sharp
Posts: 1053
Joined: Mon Jan 07, 2008 10:15 pm

Re: 1/350 USS Arizona DaLiGeJian Model

Post by Jeff Sharp »

Dan K wrote: Thu Nov 20, 2025 8:31 am I'll be following....
Dan, this kit is super impressive! If only they would follow it up with a Big Five!
Dan K
Posts: 9037
Joined: Tue Jan 11, 2005 10:56 am
Location: New York City

Re: 1/350 USS Arizona DaLiGeJian Model

Post by Dan K »

These days, you just never know what to expect.
Jeff Sharp
Posts: 1053
Joined: Mon Jan 07, 2008 10:15 pm

Re: 1/350 USS Arizona DaLiGeJian Model

Post by Jeff Sharp »

The scary part is over! I water lined the Hull, filled in the lower portholes at the stern, drilled out all the other porthole and the Hawse holes.
I also sanded away all the hull plating detail from both the stern and the bow sections. There is a ton of detail to be added to the hull, but that is a task for much later in the build.

Image

Now the real work can begin. Not sure yet how I'm going to handle the laminate wood decking. I would like to use it, but the over exaggerated butt-ends and the cutout squares for the deck lights are a BIG bummer! Arizona didn’t have deck lights in 1941. She had them in the early 1930’s right after her modernization but it appears they were completely eliminated by 1936.

Image
Last edited by Jeff Sharp on Wed Dec 10, 2025 9:27 pm, edited 1 time in total.
FFG-7
Posts: 694
Joined: Wed Mar 13, 2024 9:45 am

Re: 1/350 USS Arizona DaLiGeJian Model

Post by FFG-7 »

can you actually feel the grooves of the planking, butt ends & the deck lights?
User avatar
Timmy C
Posts: 12437
Joined: Mon Jan 10, 2005 6:00 pm
Location: Ottawa, Canada

Re: 1/350 USS Arizona DaLiGeJian Model

Post by Timmy C »

Hmm, and you can't just paint the plastic deck either because there are no planks moulded into it, as it assumes you'd use the wooden laminate! Very annoying, and one of the downsides of make a kit that's "perfectly matched" to account for non-plastic parts.

Short of making a scratchbuilt deck from v-groove plastic card or a generic wood deck sheet, seems like the only path would be to paint over the unwanted skylights, being careful to mask everything else. At least for the buttends, you can drybrush or something less opaque to just tone it down without masking off every single bit of deck around them.
De quoi s'agit-il?
Jeff Sharp
Posts: 1053
Joined: Mon Jan 07, 2008 10:15 pm

Re: 1/350 USS Arizona DaLiGeJian Model

Post by Jeff Sharp »

Yeah, they make it so you have to use their laminate deck or scratch your own deck.
Here is my initial attempt to soften the butt-end using teak paint. The deck light cutouts are just that. They are cut out of the deck so when you peel the backing off the decking, those squares are empty holes. The blanks of the squares are not planked, so if I leave them in place, they still stick out like a sore thumb if I try to soften them with paint. The top row of squares in this photo have been painted over. UGH!
Image
FFG-7
Posts: 694
Joined: Wed Mar 13, 2024 9:45 am

Re: 1/350 USS Arizona DaLiGeJian Model

Post by FFG-7 »

where you going to paint/stain the deck or leave it natural? what does the back side look it or does it have adhesive on it?
Dan K
Posts: 9037
Joined: Tue Jan 11, 2005 10:56 am
Location: New York City

Re: 1/350 USS Arizona DaLiGeJian Model

Post by Dan K »

From here, it looks like a good job on eliminating the butt ends.
Jeff Sharp
Posts: 1053
Joined: Mon Jan 07, 2008 10:15 pm

Re: 1/350 USS Arizona DaLiGeJian Model

Post by Jeff Sharp »

Yeah, the backside has adhesive. Here's what the backing looks like. You can see the squares are burned through the paper.
Image

If I can find a matching scrap laminate deck, maybe I'll cut out the entire section of squares and try laying new decking down.
FFG-7
Posts: 694
Joined: Wed Mar 13, 2024 9:45 am

Re: 1/350 USS Arizona DaLiGeJian Model

Post by FFG-7 »

I was thinking of the same thing about a scrap piece of decking to replace the light strips.
User avatar
Timmy C
Posts: 12437
Joined: Mon Jan 10, 2005 6:00 pm
Location: Ottawa, Canada

Re: 1/350 USS Arizona DaLiGeJian Model

Post by Timmy C »

It may also make for a more convincing replacement if you cut out the entire "strip" of lights along the plank lines so you have one long rectangle to replace (perhaps even with the ends cut as steps to match existing buttends), rather than a series of individual squares that could be much harder to blend in with the rest of the deck.
De quoi s'agit-il?
User avatar
Timmy C
Posts: 12437
Joined: Mon Jan 10, 2005 6:00 pm
Location: Ottawa, Canada

Re: 1/350 USS Arizona DaLiGeJian Model

Post by Timmy C »

It may also make for a more convincing replacement if you cut out the entire "strip" of lights along the plank lines so you have one long rectangle to replace (perhaps even with the ends cut as steps to match existing buttends), rather than a series of individual squares that could be much harder to blend in with the rest of the deck.
Attachments
Screenshot 2025-11-23 182525.png
De quoi s'agit-il?
Jeff Sharp
Posts: 1053
Joined: Mon Jan 07, 2008 10:15 pm

Re: 1/350 USS Arizona DaLiGeJian Model

Post by Jeff Sharp »

As mentioned before, I am happy with the proper locations and groupings of the portholes on the hull. On the real ship, the location of the portholes were not simply mirror images port and starboard. Each side had very unique groupings of portholes. That being said, the long strip of hull plating that covered mainly the midsection of the ship where the majority of the portholes were, also had very unique detail per side. Along the long strip of plating, there were vertical braces every few feet along this plating. Sometimes these braces landed in-between portholes, and sometimes they landed right on a porthole.
The kit has a few issues on each side with regards to those vertical braces. The majority of the braces are there but for some reason a few were omitted and a few are the wrong shape. Not a big issue for those braces that are missing. They can be easily added with thin sheet styrene.
If a brace landed over a porthole however, the brace had a different shape. It flared out further around the porthole.
On the port side, there was only one location where this was the case. On the starboard side, there were six portholes that had vertical braces over them.
The kit totally missed putting a brace over the one porthole on the port side and did not get the correct shape on the ones on the starboard side.
Here is a pic of a brace that lands in-between portholes.
Image

and here is a pic of the one brace on the port side that goes over a porthole.
Image

This pic shows the location of the six portholes with braces on the starboard side.
Image

Here is my corrections on the port side. Four braces needed to be added to the kit. The flared out brace is at the bow of the ship.
Image

The starboard side requires a little more work. I need to add 4 braces and fix the shape of 3 braces.
Jeff Sharp
Posts: 1053
Joined: Mon Jan 07, 2008 10:15 pm

Re: 1/350 USS Arizona DaLiGeJian Model

Post by Jeff Sharp »

I've decided to not use the deck sheets that come with the kit. Instead, I am going to create my own deck using Artwox Models wooden deck sheets.
Here I've cut out the basic shape of the upper deck. Bye Bye deck lights!
I hope this turns out ok. Have to be pretty precise with my cuts! Unfortunately, just one of these Artwox sheets is not enough to cut out all three decks.

Image

Image
Post Reply

Return to “Works in Progress”